6 Garden Cottage Aesthetic Features That Create The Coziest Outdoor Retreat
You want a garden cottage nook that feels soft, dappled, and storybook beautiful. You hate that no matter how many cushions you buy, your outdoor corner still reads “patio furniture display” instead of “come curl up with tea and stay awhile.” Picture mottled sunlight on warm wood, crisp white linens against leafy greens, old-world stone, a table set for loaf-and-butter afternoons. The six ideas below solve that exact frustration by dialing in texture, light, and scale—so you can get a photogenic, deeply livable retreat in under 8 weekends and without blowing past a $3,500 cap per feature (most well under).
Expect specifics: real materials, real price ranges, and the kind of small design shifts that actually change how you use your outdoor space. These garden cottage aesthetic moves are Pinterest-ready and made for real life. If you’re into timeless charm with a little wildflower chaos, this is your sweet spot.
1. Weathered Stone Terrace With Dappled Shade And a Wicker Swing Bench
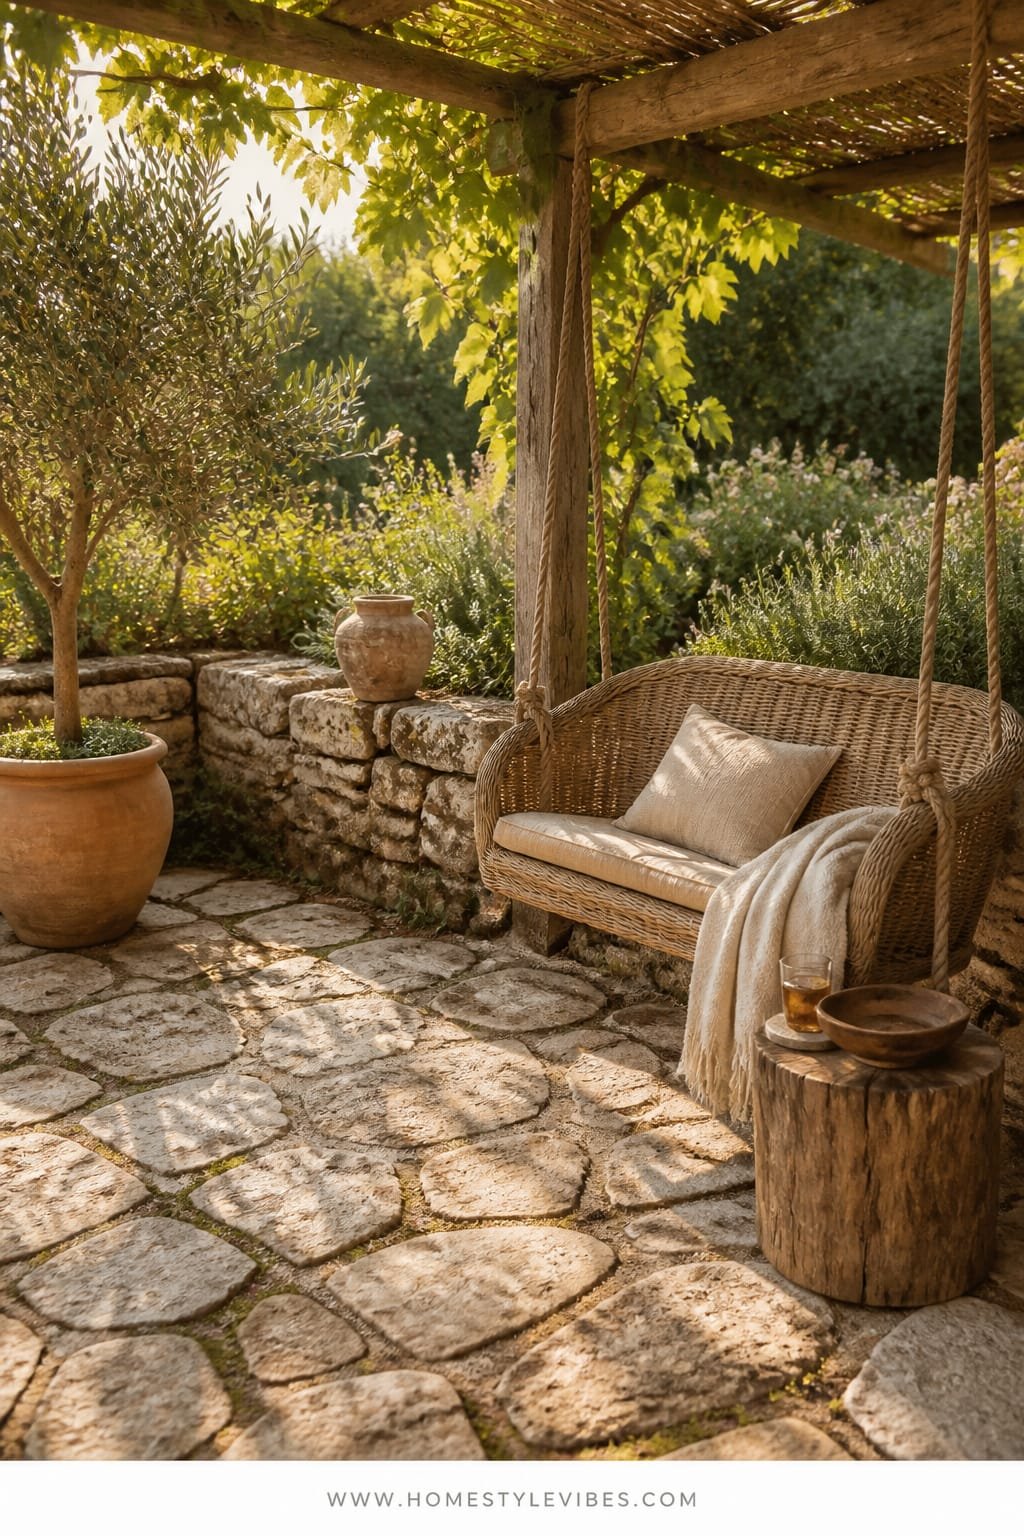
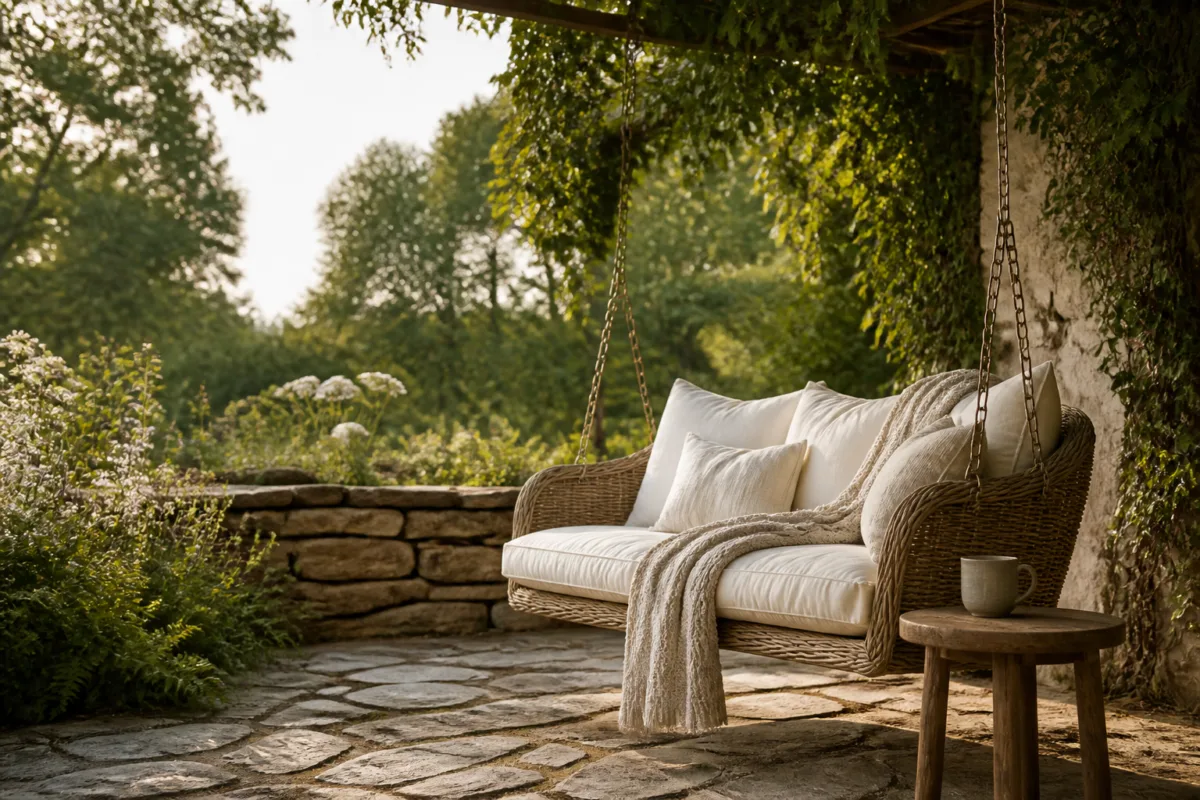
We’ve all been there: the sun hits your patio like a spotlight and instantly turns it into a space you admire from the kitchen window but never sit in. You’ve tried an umbrella. It still looks like a beach kiosk crashed into your backyard. This design builds a soft, woodland mood—think English-cottage-meets-summer-picnic—by pairing uneven, weathered stone underfoot with layered, dappled shade above and one sculptural hero: a wicker swing bench that practically begs for linen throws.
Why it works: the stone cools the eye (and the feet), the light dances instead of blares, and the swing creates playful motion. In small yards, the curved footprint of the terrace helps nudge the space from “patio slab” to “garden room.” Maintenance stays reasonable because everything you choose looks better slightly imperfect—moss in the joints, patina on the wicker, a stray petal on the cushion. Evening lighting transforms it again; string lights and a discreet up-light on nearby foliage create shadows that photograph beautifully, adding depth and a cinematic touch.
Materials lean traditional: tumbled limestone or reclaimed flagstone, rough mortar, rattan or resin-wicker for longevity, cotton-linen textiles. Photographs sing because you’ve got contrast (cool stone vs. warm wicker), varied scale (broad terrace, delicate foliage), and strong focal rhythm (swing, potted olive, iron lanterns). Renter-friendly twist? Build a portable “stone” look with large format stone-look pavers laid over a temporary base and a freestanding pergola for shade.
Variations:
- Budget-friendly: Choose concrete pavers with hand-brushed limewash edges for a softened, aged look; swap real wicker for high-quality resin in a natural tone.
- Small-space: Half-moon stone pad tucked into a corner with a compact two-person swing; use vertical trellis panels for instant green enclosure.
- Darker version: Charcoal slate pavers, black-stained pergola, tobacco-colored cushions with cream piping for sharp contrast.
- Renter-friendly: Portable deck tiles, a stand-alone egg chair, and clip-on shade sails create the vibe with zero digging.
Budget Breakdown:
- Tumbled stone or pavers: $6–$18/sq ft
- Wicker swing bench with stand: $250–$900
- Shade solution (string lights + shade sail or pergola kit): $80–$900
- Outdoor cushions/throws: $60–$250
- Planters with herbs/olive tree: $60–$220
- Low-voltage landscape lights: $120–$300
Total Estimated Cost: $700 – $3,200
Best For: Sunny patios that feel too harsh midday; cottage, farmhouse, or transitional homes; spring through early fall hangs.
Key Design Elements:
- Main materials: Tumbled stone, resin-wicker, cotton-linen
- Color palette: Weathered gray, honey wicker, cream, muted sage
- Lighting strategy: Overhead string lights, soft foliage up-lighting
- Furniture silhouettes: Curved swing bench, low iron side table
- Texture layers: Rough stone, woven wicker, nubby linen, soft moss
- Accent details (hardware, decor pieces, plants): Aged iron lanterns, clay pots, thyme and lavender
How To Recreate This Look:
- Start with the ground: lay tumbled stone or stone-look pavers in a loose pattern with generous joints.
- Add layered shade: hang lights across two anchors and add a light shade sail or pergola rafters for dappling.
- Layer the hero seat: choose a wicker swing bench; add a cream cushion and one patterned lumbar pillow.
- Install low lighting: a couple of spike lights pointed at a shrub or small tree to create shadow play.
- Style with imperfect greens: terra-cotta pots, herbs, a small olive tree, and one vintage-looking lantern.
Why This Looks Expensive: Stone underfoot instantly reads permanent, while dappled light softens edges and hides minor imperfections. The swing bench looks custom when you choose neutral cushions and one refined stripe, not a dozen patterns fighting for attention.
Watch Out: Don’t crowd the swing with too many side tables or planters. You need 30 inches of clear swing radius or it’ll feel cramped and awkward to use.
Pro Styling Tip: For photos, mist the stone lightly so it deepens in tone; place one cup of tea and a folded throw on the swing to add life without clutter.
2. Limewashed Garden Wall With Golden-Hour Glow And a Bistro-Height Iron Table
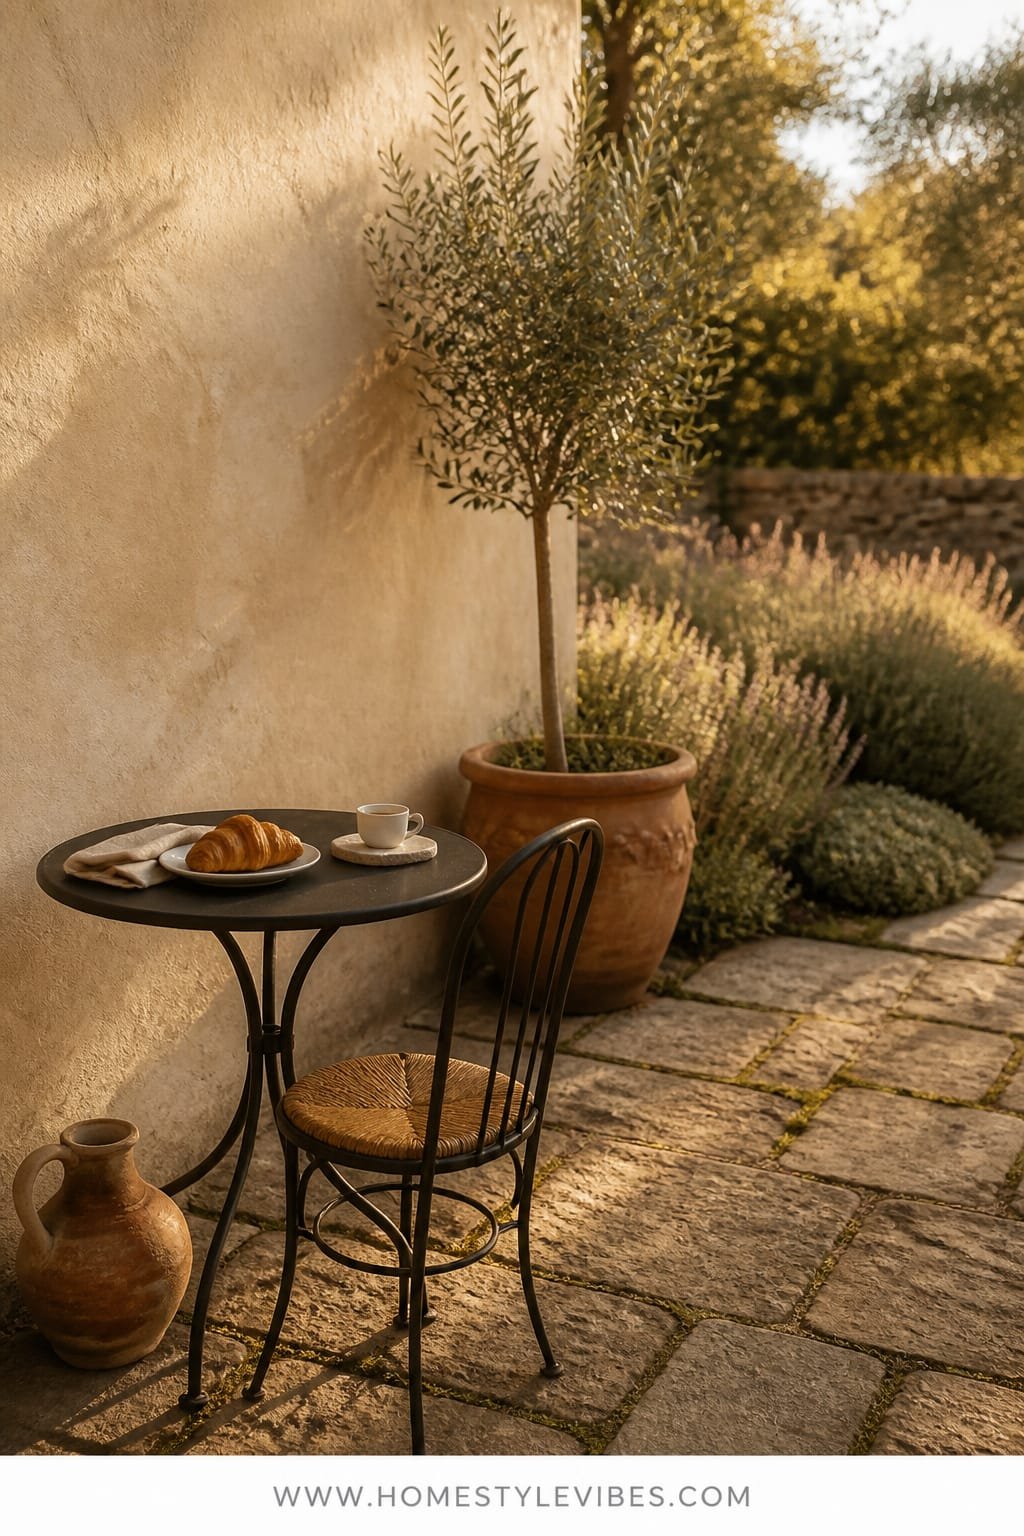
It’s that one corner that always feels flat in photos. You’ve tried hanging a wreath or stacking planters, but the wall still screams “builder’s beige.” A limewashed plaster-style wall creates that soft, historical haze you see in European courtyards. Pair it with warm, golden-hour lighting and a petite iron bistro table so your breakfast croissant finally has the romantic backdrop it deserves.
We’re chasing a relaxed Provençal mood: creamy, chalky plaster, warm light skimming across texture, and slender iron curves framing the scene. In real homes, this is practical because limewash disguises minor wall sins, resists glare, and ages like a vineyard. Add simple sconces or a lantern pendant and your evening glass of wine turns cinematic. Photography bonus: limewash captures light gradients; even a phone camera reads depth and shadow, like a built-in filter.
Scale makes it work for tight spaces. A bistro-height table pulls the eye upward, creating vertical interest and leaving floor area open. Style flexibility runs wide—swap napkins, cushions, and florals seasonally, and it still looks curated. If resale is on your radar, a limewashed accent raises “charm value” without polarizing buyers.
Variations:
- Budget-friendly: Use a pre-mixed limewash or mineral paint; DIY plaster texture with joint compound and a wide spatula.
- Small-space: Half-round bistro table mounted to the wall with two iron stools that tuck in.
- Darker version: Warm taupe limewash, oil-rubbed bronze sconces, rust-striped seat pads.
- Renter-friendly: Canvas drop cloth taped to the wall and limewashed as a removable panel; freestanding battery lanterns.
Key Design Elements:
- Main materials: Limewash, iron, linen
- Color palette: Cream, soft taupe, olive green, terracotta accents
- Lighting strategy: Warm 2200–2700K sconces or lantern; bounce light off the wall
- Furniture silhouettes: Round bistro table, petite curvy chairs
- Texture layers: Chalky wall, crisp linen napkins, patinated metal
- Accent details: Herb basket, vintage breadboard, small framed botanical print
Budget Breakdown:
- Limewash/mineral paint + tools: $80–$220
- Iron bistro set: $120–$450
- Outdoor sconces or lantern: $60–$280
- Linen textiles: $25–$120
- Planters and herbs: $40–$150
Total Estimated Cost: $325 – $1,220
Best For: Narrow patios, balconies, and side-yard nooks; anyone who loves a coffee-at-sunrise ritual.
How To Recreate This Look:
- Prep the wall: clean, patch small cracks, and apply a base coat compatible with limewash.
- Apply limewash in crisscross strokes for motion; do 2–3 thin coats for variation.
- Mount warm sconces or hang a lantern centered above the table.
- Place a round bistro table and two iron chairs; add thin striped cushions.
- Style with a woven tray, a jar of thyme, and one small framed print leaning casually.
Why This Feels Designer: The wall does the heavy lifting—light caresses texture, and the bistro set reads intentional rather than “stuck here because it fits.” Editing down to three tones keeps it refined.
One Thing To Avoid: Bright white daylight bulbs. They flatten the limewash and kill the romance. Choose warm bulbs and dim where possible.
Pro Styling Tip: Shoot at late afternoon with the sconce barely on; the mix of natural and warm artificial light gives a creamy, layered glow on camera.
Pause for a second: you don’t need an entire overhaul. Pick one surface and make it sing—floor, wall, or seating. One strong move can shift the whole mood.
3. Cedar Slat Privacy Screen With Soft Morning Light And a Deep-Cushion Daybed
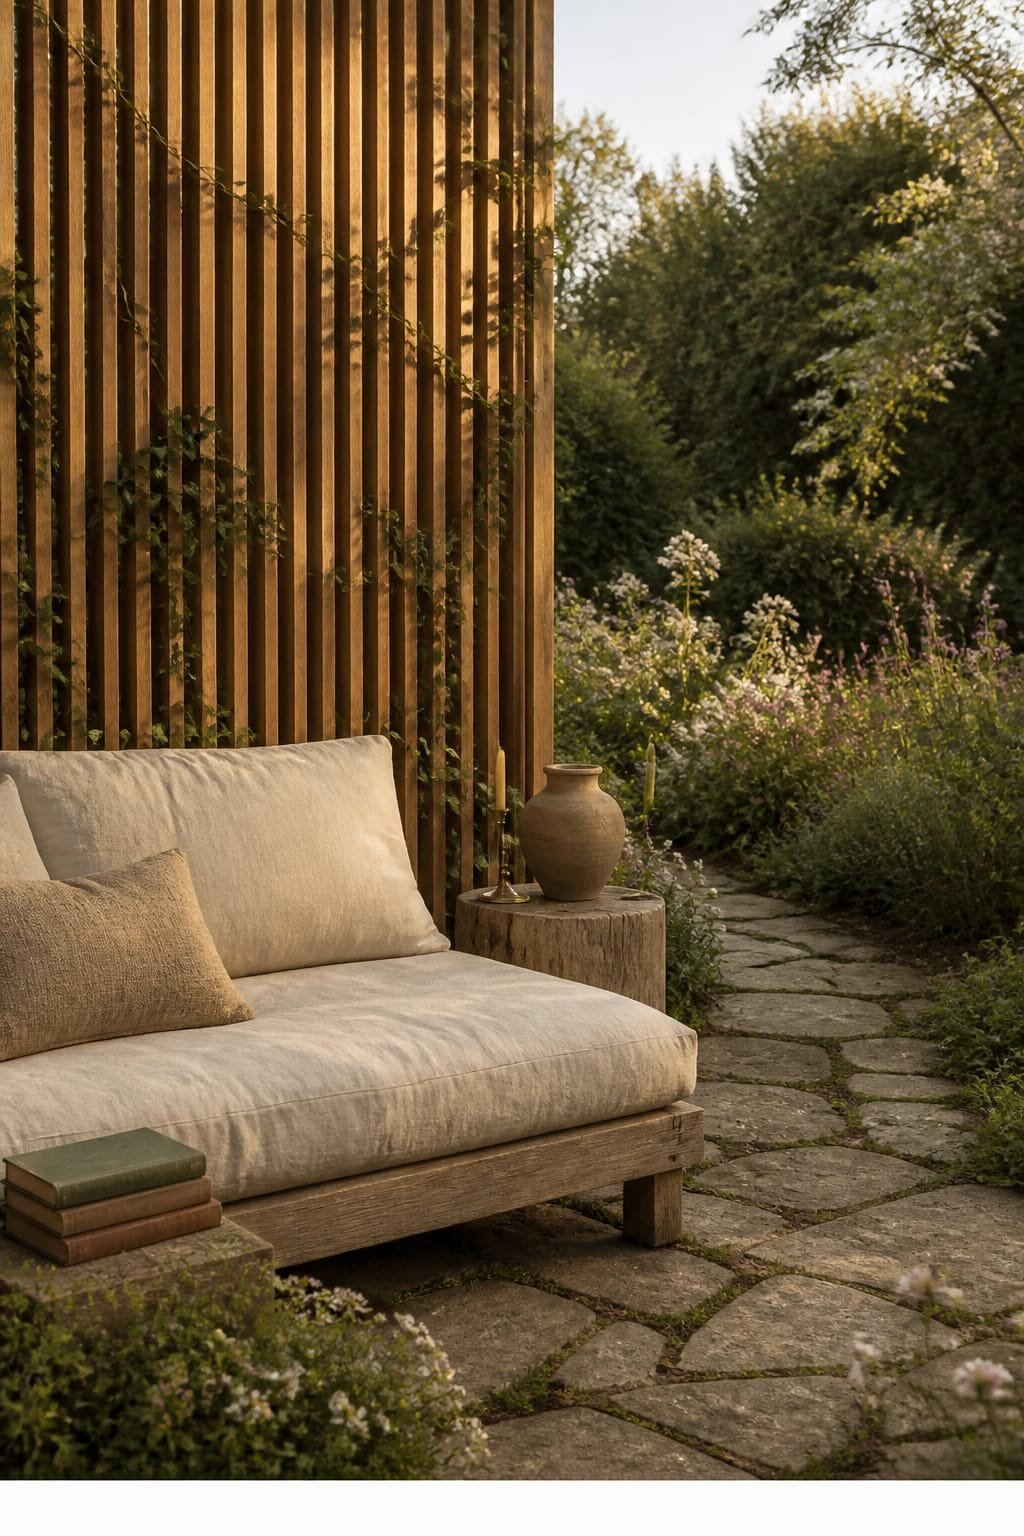
You want privacy without the “fortress fence” vibe. You tried lattice, but it looks like a garden center aisle. Enter vertical cedar slats—clean, warm, and cottage-friendly when paired with rambling vines. Add gentle morning light and a low, deep-cushion daybed for cat-nap level comfort. This is the nook where your book turns into a nap and no one can see the drool. Happily, it also handles family life with grace: cedar ages well, slats breathe, and a daybed doubles for overflow seating.
The mood leans Japandi-cottage: simple lines, tactile cushions, leafy softness. Why it works: repetition of vertical slats builds rhythm and looks custom even when it’s a weekend project. Morning light filtering through creates patterned shadows that feel spa-like. In photos, the negative space between slats gives you graphic stripes—designer-looking, no filters needed. If you’re a renter, build free-standing panels you can disassemble later. If your yard gets chaotic, this corner anchors calm.
Variations:
- Budget-friendly: Pressure-treated pine stained in a warm cedar tone; DIY cushions with outdoor foam and pre-made covers.
- Small-space: Shorter panel heights (5–6 feet) and a 60-inch apartment-size daybed.
- Darker version: Black-stained slats with eucalyptus cushions and brass side table.
- Renter-friendly: Planter-box bases with attached slats—no holes in the ground.
Budget Breakdown:
- Cedar slats and posts or planter box base: $220–$900
- Outdoor daybed or bench with cushion: $300–$1,200
- Vines or climbers (star jasmine, clematis): $30–$120
- Outdoor side table: $60–$200
- Soft lighting (solar up-lights or low-voltage strip): $50–$220
Total Estimated Cost: $660 – $2,640
Best For: Overlooked patios, townhouse yards, or condo terraces needing privacy without heaviness; morning coffee lovers.
Key Design Elements:
- Main materials: Cedar, outdoor foam, cotton-canvas
- Color palette: Honey wood, oatmeal, eucalyptus green, soft black accents
- Lighting strategy: Indirect morning light; optional low strip light under the bench
- Furniture silhouettes: Low, deep daybed; slim metal table; floor cushion poufs
- Texture layers: Smooth slats, nubby cushions, trailing vines
- Accent details: Brass tray, stitched-edge pillows, ceramic watering can
How To Recreate This Look:
- Map your privacy zone and measure for panels; aim for a rhythm of 1×2 or 1×3 slats with 1/2-inch gaps.
- Install panels in-line or in a gentle L-shape; stain or seal for longevity.
- Place a deep daybed parallel to the slats; keep at least 18 inches clear behind for plant access.
- Run a narrow ledge or install a slim shelf for cups and a candle.
- Add vines at the base and train them upward; keep the first 12 inches tidy to avoid pests.
Why This Reads High-End: Repetition equals confidence. When slats are evenly spaced and the hardware disappears, the whole wall feels custom-built. A single oversized seat instead of scattershot chairs adds restraint—and restraint says “designer.”
The Most Common Mistake: Sloppy spacing. Uneven gaps ruin the graphic effect. Use spacers (paint sticks work) and level every 3 slats.
Pro Styling Tip: For photos, tilt one cushion slightly and drape a thin throw off-center; asymmetry makes the scene feel lived-in and editorial.
Mini mindset reset: If one idea resonates more than the others, that’s your starting line. You don’t need all six—one well-executed feature can rewrite your entire garden story.
4. Reclaimed Brick Path With Candlelit Twilight And a Copper Fire Bowl
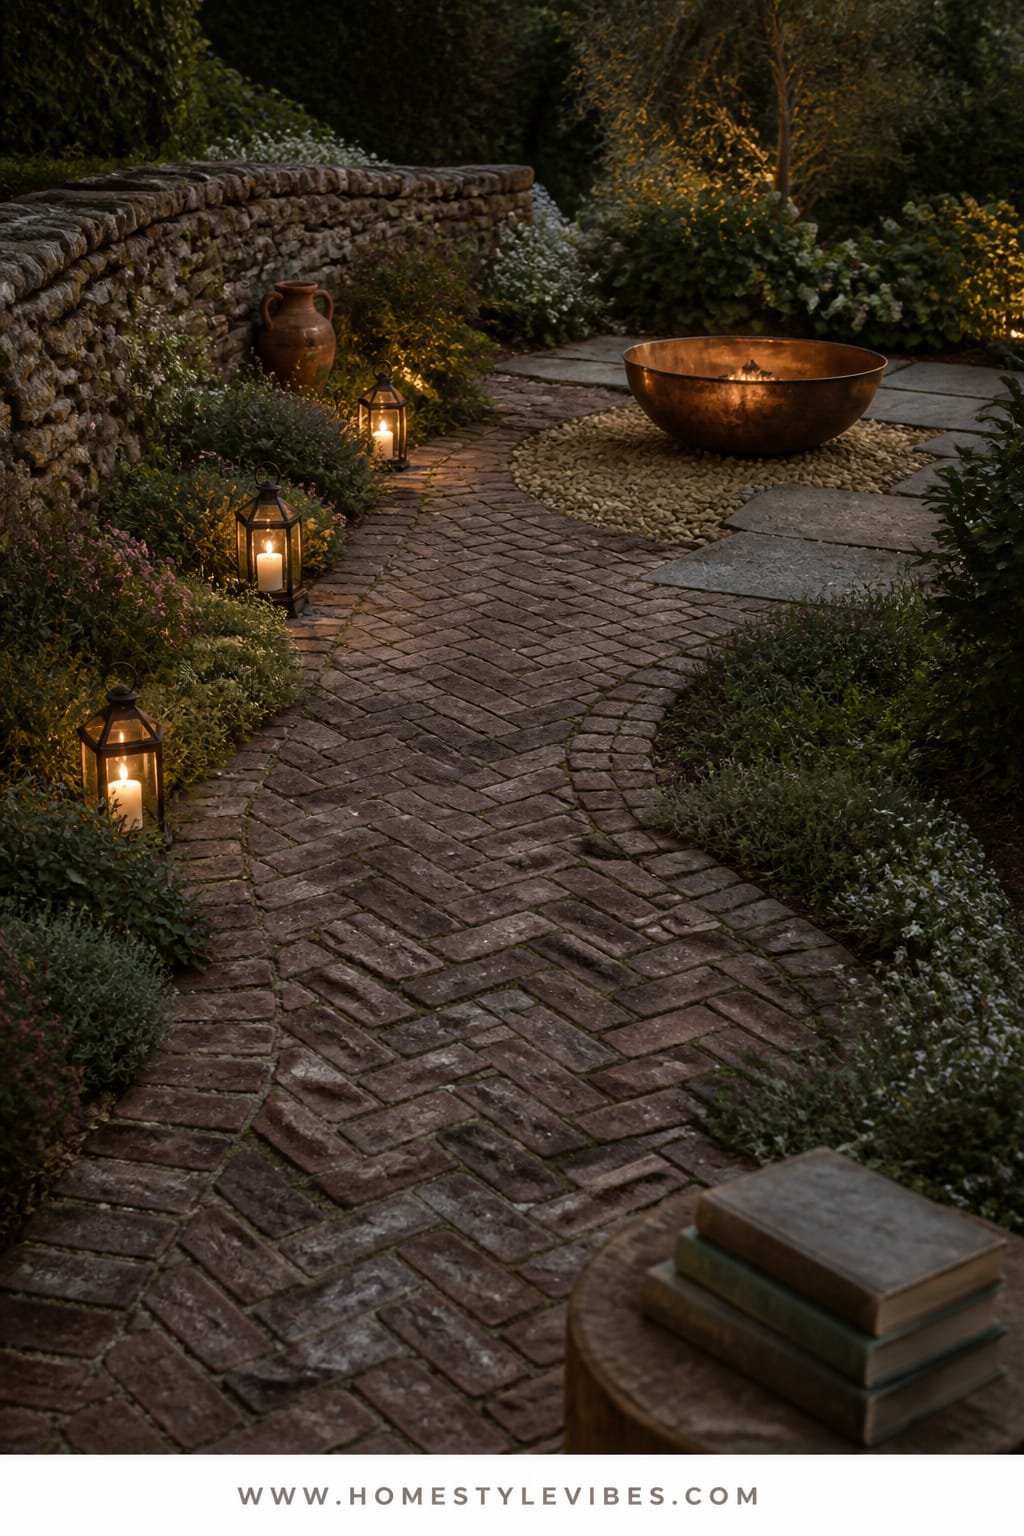
Some gardens look great at noon and disappear at night. You’ve tried solar path stakes, but the effect is more runway than romance. Build a meandering reclaimed brick path that guides guests by feel and look, then anchor the end with a low copper fire bowl. At twilight, the candle glow + ember shimmer combo turns your yard into an outdoor living room, warm and wildly inviting.
The vibe is heritage-cottage meets campfire poetry: scuffed brick, flicker-light, and a single sculptural bowl with presence. Bricks are forgiving (they welcome chips, moss, and irregularity), and they work beautifully in all four seasons. Lighting-wise, lean into candle clusters in hurricane lanterns tucked along the path, then let the fire bowl do the hero work. For families, choose a model with a spark screen and set it on a gravel or brick pad. Photos love this design because flicker creates motion blur and warm skin tones—trust me, everyone looks good by copper flame light.
Variations:
- Budget-friendly: Craigslist or salvage-yard brick; pea gravel in-between instead of mortar.
- Small-space: Short path from back door to a compact 24–28 inch fire bowl on a mini brick pad.
- Darker version: Charcoal pavers, black steel bowl, deep navy outdoor cushions.
- Renter-friendly: Dry-laid brick on landscape fabric with a portable propane fire bowl.
Budget Breakdown:
- Reclaimed brick: $0.50–$2 per brick (estimate 4.5 bricks/sq ft)
- Base materials (gravel, sand): $80–$250
- Copper or steel fire bowl: $180–$850
- Lanterns and candles: $40–$180
- Gravel or additional pavers for pad: $60–$220
Total Estimated Cost: $450 – $2,000
Best For: Long, skinny yards that need direction; cottage and bungalow homes; fall and winter evening hangs.
Key Design Elements:
- Main materials: Reclaimed brick, gravel, copper
- Color palette: Brick red, soft soot, warm copper, olive greens
- Lighting strategy: Candle clusters at knee height, firelight focal point
- Furniture silhouettes: Low sling chairs or Adirondacks
- Texture layers: Rough brick, glassy lanterns, hammered metal
- Accent details: Wool camp blanket, iron poker set, herb-filled urn
How To Recreate This Look:
- Sketch a gentle curve for the path; curves feel older and softer than straight lines.
- Excavate 3–4 inches; add gravel and sand; lay bricks in a herringbone or basketweave.
- Compact with a mallet and broom in sand or fine gravel between joints.
- Create a circular or square pad for the fire bowl; keep 36 inches of clearance all around.
- Place lanterns at uneven intervals; light just before guests arrive to avoid melted puddles.
Why This Looks Intentional: The path tells a story and the fire bowl gives a destination. When your layout leads the eye—and the feet—the garden reads designed, not decorated.
Don’t Do This: Don’t line lanterns perfectly or in pairs. Stagger them and vary heights for a softer, candlelit meadow vibe.
Pro Styling Tip: In photos, let the background fall a little dark. That contrast makes the embers and brick texture pop like a magazine spread.
5. Whitewashed Pergola With Soft Linen Curtains And a Vintage Farm Table
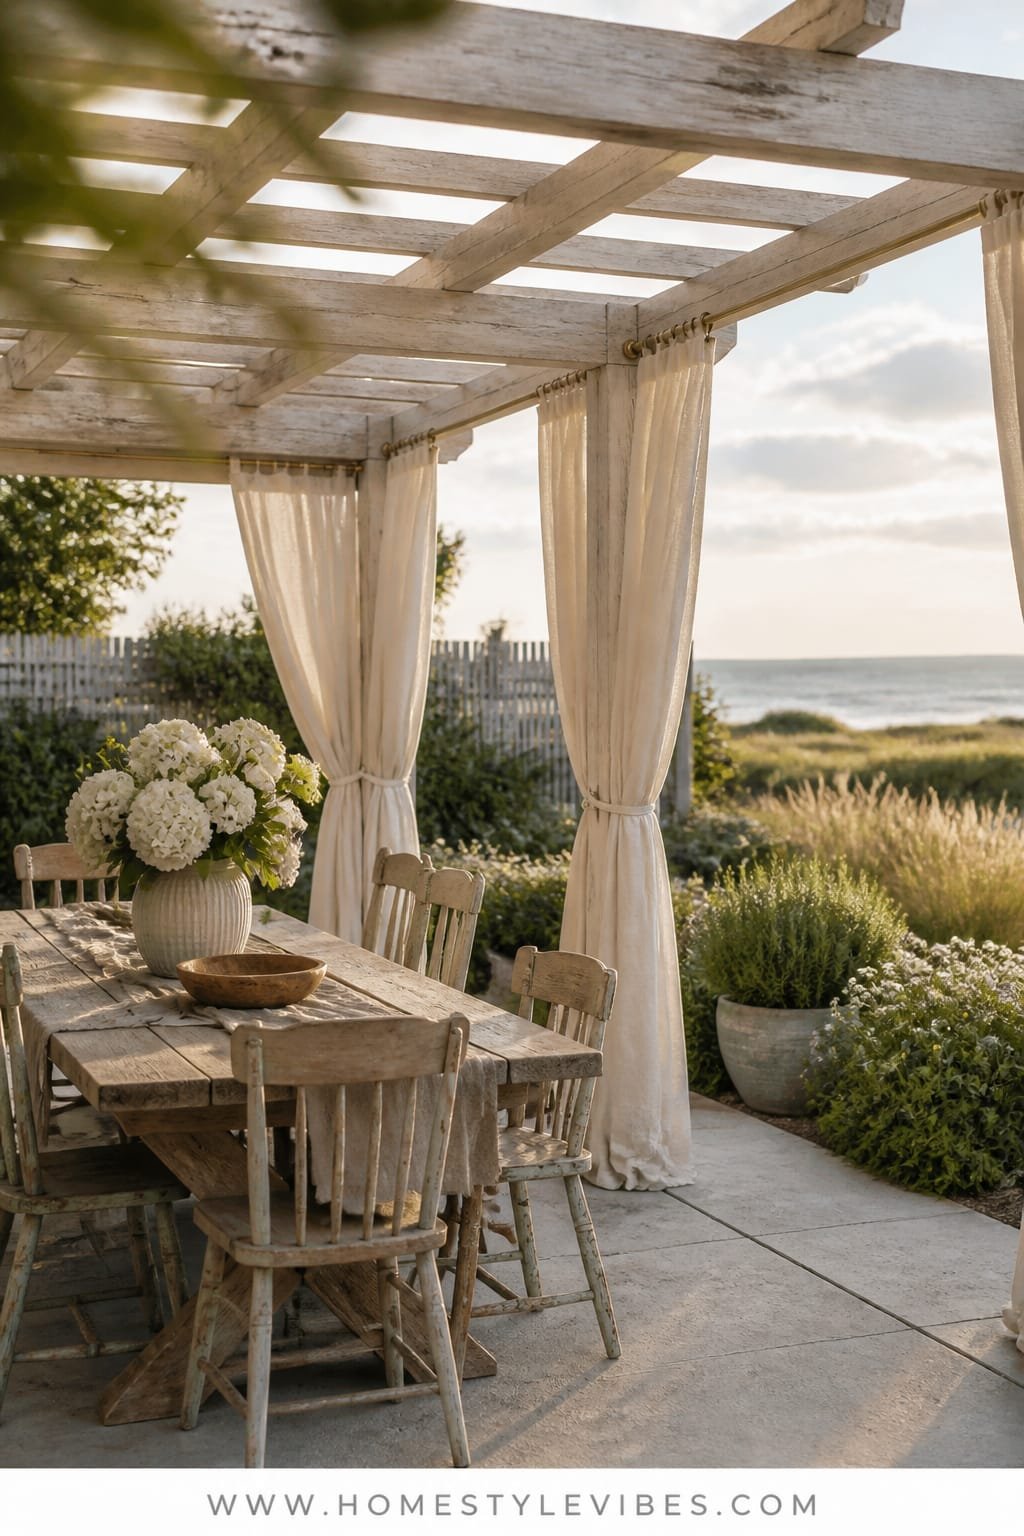
Your dining set looks… fine. But it never feels like a destination for long, lazy meals. I get it. I once agonized over chair cushions for weeks before realizing the real problem was structure—nothing framed the space. A whitewashed pergola changes that in a single weekend. Hang breezy linen curtains that stir with the slightest wind, then drop in a vintage farm table with mismatched chairs. Suddenly your outdoors has a “room” that feels like a summer wedding every Sunday.
We’re chasing a coastal-cottage-meets-French-countryside moment: bright but soft light, linen movement, and a table with history. It works in real life because you can control sun and sightlines simply by pulling the curtains. Fabric filters glare so photos look creamy instead of blown out. Whitewash keeps the pergola light, and the farm table adds soul. Pro move: run a simple cove of string lights high, tucked into the beams, so the glow feels like it’s coming from the structure, not a tangle of bulbs.
Variations:
- Budget-friendly: Pine pergola kit, diluted exterior paint for whitewash, thrifted table sanded and sealed.
- Small-space: Narrow 6-foot table with bench seating that tucks in; shorten curtains to sill height.
- Darker version: Driftwood gray finish, oatmeal curtains, black Windsor chairs for contrast.
- Renter-friendly: Freestanding pergola with weight plates and clip-on curtain rods.
Budget Breakdown:
- Pergola kit or DIY lumber: $450–$1,800
- Whitewash/paint + sealant: $50–$160
- Linen or outdoor-linen curtains and rods: $120–$420
- Vintage farm table (thrift/market): $200–$900
- Mixed chairs/bench: $160–$600
- String or cove lighting: $60–$220
Total Estimated Cost: $1,040 – $4,100
Best For: Entertainers who love long dinners, families who need shade and privacy, gardeners who want a centerpiece moment.
Key Design Elements:
- Main materials: Pine or cedar, linen, reclaimed wood
- Color palette: Whitewash, natural oak, soft oatmeal, hints of sage
- Lighting strategy: Tucked string lights + candle chandelier or woven pendant
- Furniture silhouettes: Long rustic table, mixed chairs, one bench
- Texture layers: Brushed grain wood, billowy linen, wicker chargers
- Accent details: Earthenware pitchers, stoneware plates, fresh-cut herbs
Why This Looks Expensive: The architecture frames the scene. When fabric moves, light softens, and an old table sits proud beneath a defined ceiling, it reads curated and permanent—even if it’s a kit.
How To Recreate This Look:
- Assemble or build a pergola sized to your table with at least 3 feet of clearance per side.
- Whitewash in thin layers so the grain peeks through; seal for weather.
- Mount curtain rods between posts; hang linen panels with clip rings.
- Place the farm table centered; mix chairs with one bench for visual rhythm.
- Add a central pendant or candle chandelier and tuck string lights into beams.
One Thing To Avoid: Curtains hung too short or too high. Aim to kiss the floor; that extra inch of puddle hides the gap that always looks cheaper.
Pro Styling Tip: For photos, pull two curtain panels slightly across the opening to create a soft frame around the table—instant magazine cover framing.
6. Gravel Courtyard With Soft Silver Sage Greenery And a Stone Fountain Bench
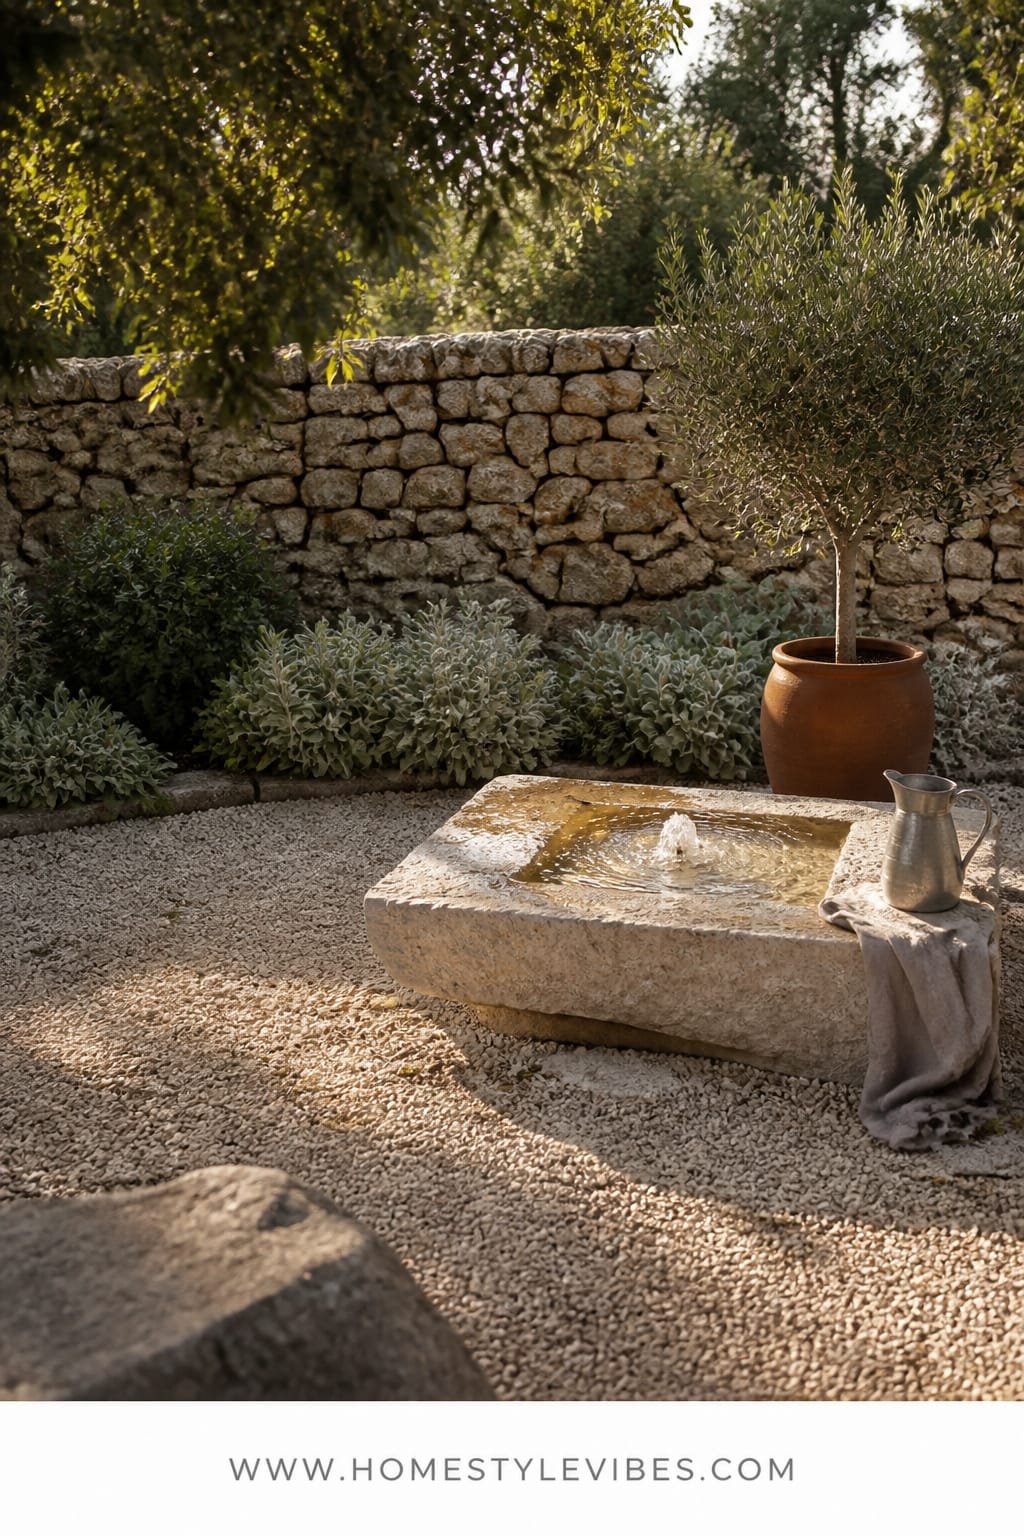
Some backyards feel scattered—too many plant pots, nowhere to land. You shuffle chairs and it still doesn’t click. A compact gravel courtyard organizes chaos with a defined footprint and a serene centerpiece: a low stone fountain bench. Picture silver-sage plants (lamb’s ear, dusty miller, olive in containers) against pale gravel, water whispering in the background. It’s minimalist cottage: calming, textural, and set-it-and-use-it easy.
It works because gravel gives instant European courtyard energy without heavy construction, and it’s forgiving around roots and uneven ground. Sound matters more than you think; water softens street noise and kids-at-play clang. In photographs, gravel reads like a matte backdrop that makes every green leaf pop. A bench wrapped around or facing a small fountain creates a clear destination. Maintenance is straightforward: rake seasonally, top up gravel yearly, and trim plants. If you’re a renter, build a framed bed with landscape edging and pour in gravel—done.
Variations:
- Budget-friendly: Concrete bowl fountain, DIY bench from stacked pavers and a wood cap.
- Small-space: 8×8 courtyard with a scaled-down 18–24 inch fountain; two narrow benches.
- Darker version: Basalt gravel, blackened steel fountain, olive-green cushions.
- Renter-friendly: Interlocking edging, weed barrier, compact gravel; plug-in tabletop fountain on a stone cube.
Budget Breakdown:
- Gravel + edging: $180–$600
- Stone fountain (pump included): $220–$1,100
- Bench (stone and wood cap or pre-made): $160–$700
- Plants (lamb’s ear, dusty miller, herbs, small olive): $80–$300
- Outdoor pillows: $40–$120
Total Estimated Cost: $680 – $2,820
Best For: Busy homeowners craving low-maintenance calm; warm climates or sunny yards needing softness without lawn care.
Key Design Elements:
- Main materials: Crushed gravel, stone, weathered wood
- Color palette: Pale gray, silver sage, soft white, olive
- Lighting strategy: Path pinlights or spike lights angled low to graze the gravel
- Furniture silhouettes: Simple straight bench with rounded edges
- Texture layers: Crunchy gravel, velvety foliage, smooth stone water basin
- Accent details: Zinc planters, linen cushions, a single olive tree in a clay pot
How To Recreate This Look:
- Frame the courtyard with edging; lay weed barrier, then pour and rake gravel to 2–3 inches deep.
- Place fountain centered or off-center with a bench in view; run power safely with outdoor-rated extension and GFCI.
- Plant silver-sage perennials along the edges; keep a 12-inch gravel reveal for a clean line.
- Add one or two pillows in stone or ivory; keep patterns minimal for quiet.
- Install low spike lights to skim across gravel and highlight plant texture.
Why This Feels Designer: Limited palette, strong focal point, and restraint. When everything hums in shades of gray-green and the fountain anchors the scene, the eye relaxes—and relaxed reads luxurious.
Watch Out: Too many plant types break the spell. Stick to three leaf textures and repeat them—velvet (lamb’s ear), feathery (sage), and glossy (olive).
Pro Styling Tip: For photos, lightly wet a small patch of gravel near the fountain to create tonal variation and a subtle highlight.
Real talk: not every idea fits every climate or HOA rule. I once tried to hang cafe lights between two young trees. They drooped so low we bonked our heads for a month. Now I always plan proper anchor points first. Imperfections happen; good design just guides them toward charm instead of chaos.
Quick Checklist
- Tumbled or reclaimed stone for visual age
- Limewashed wall to soften and add depth
- Cedar slat screen for breathable privacy
- Reclaimed brick path leading to a clear destination
- Whitewashed pergola to frame dining
- Linen curtains for movement and softness
- Deep-cushion daybed or swing as a hero seat
- Copper or steel fire bowl for nighttime warmth
- Gravel courtyard with a modest stone fountain
- Warm 2200–2700K lighting for golden ambience
- Herbs and silver-sage plants for scent and tone
- Edited color palette (3–4 hues, max) for cohesion
- Vintage or patinaed pieces to add soul
- Hidden cords and tidy hardware for a clean finish
- One strong focal point per zone
Frequently Asked Questions
How can I get the garden cottage aesthetic on a tight budget?
Pick one feature and go all in. Limewash a single wall and add a thrifted bistro set, or create a small gravel pad with two chairs and a lantern. Focus on texture (stone, linen) and warm light. One strong move reads finished faster than five halfway changes.
My patio is tiny—will these ideas make it feel cramped?
Scale down the hero piece and keep negative space. A half-round bistro table, a compact daybed, or a small fountain still deliver magic. Use vertical elements like slat screens or trellises to pull the eye up and keep the floor open.
What about maintenance—do linen curtains and limewash hold up outside?
Choose outdoor-suitable linen or linen blends with UV protection and machine-wash once or twice a season. Limewash ages gracefully; if it scuffs, add another thin coat. Embrace patina—this style loves a little weather.
I rent—how do I do this without drilling or digging?
Use freestanding pieces: pergola kits with weights, planter-based slat screens, portable fire bowls, and deck or gravel tiles over landscape fabric. Create removable limewash panels using canvas or plywood that you can lean against a wall.
What’s the most common mistake when trying a garden cottage look?
Too much stuff and too many colors. Edit down to three or four core tones and one focal point per zone. Clutter kills charm; restraint lets texture and light do the talking.
Final Thoughts
Choose one feature from these six and start there. Lay the brick path that leads to somewhere, or hang the linen curtains that make dinner feel like a small celebration. The truth is, luxury outside doesn’t come from fancy brands; it comes from texture underfoot, warm light at eye level, and the confidence to stop before you add that one extra pillow.
If you build a garden cottage retreat around those three ideas—texture, lighting, restraint—you’ll create a place you actually use. Not someday. This season. Pick your corner, set a weekend, and begin. You’ve got this, and your tea is waiting.
About the Author

Krisztina P.Rendes, Founder of Home Style Vibes
Founder of Home Style Vibes
Krisztina Puskásné Rendes created Home Style Vibes as a cozy-modern lifestyle space where homemaking meets inspiration. Her goal is to help women create beautiful, organized, and peaceful homes they truly love — without overwhelm. You’ll find here heart-driven content on home decor, cleaning tips, easy family recipes, organization and decluttering, DIY home projects, plants, and seasonal ideas — all designed to bring more calm, comfort, and style into everyday life.