7 Garden Cottage Aesthetic Ideas That Make Your Yard Look Like A Storybook
You want a yard that looks like a scene from a storybook—soft light over mossy paths, roses wrapping the fence, a vintage bistro chair waiting with a cup of tea. But the reality? Patchy lawn, random planters, and that one plastic chair that squeaks every time you sit. Let’s fix that. These seven garden cottage aesthetic ideas solve the most common yard frustrations—flat light, sparse planting, awkward layouts—while giving you a Pinterest-worthy outdoor escape you can pull together in a weekend or two, many under $600 per zone. Think limewash, dappled shade, voile curtains, chunky stone, painted trellis, herbs that actually thrive, and pockets of romance you can maintain. If your heart loves tiny details, worn textures, and soft mornings, you’ll feel right at home here.
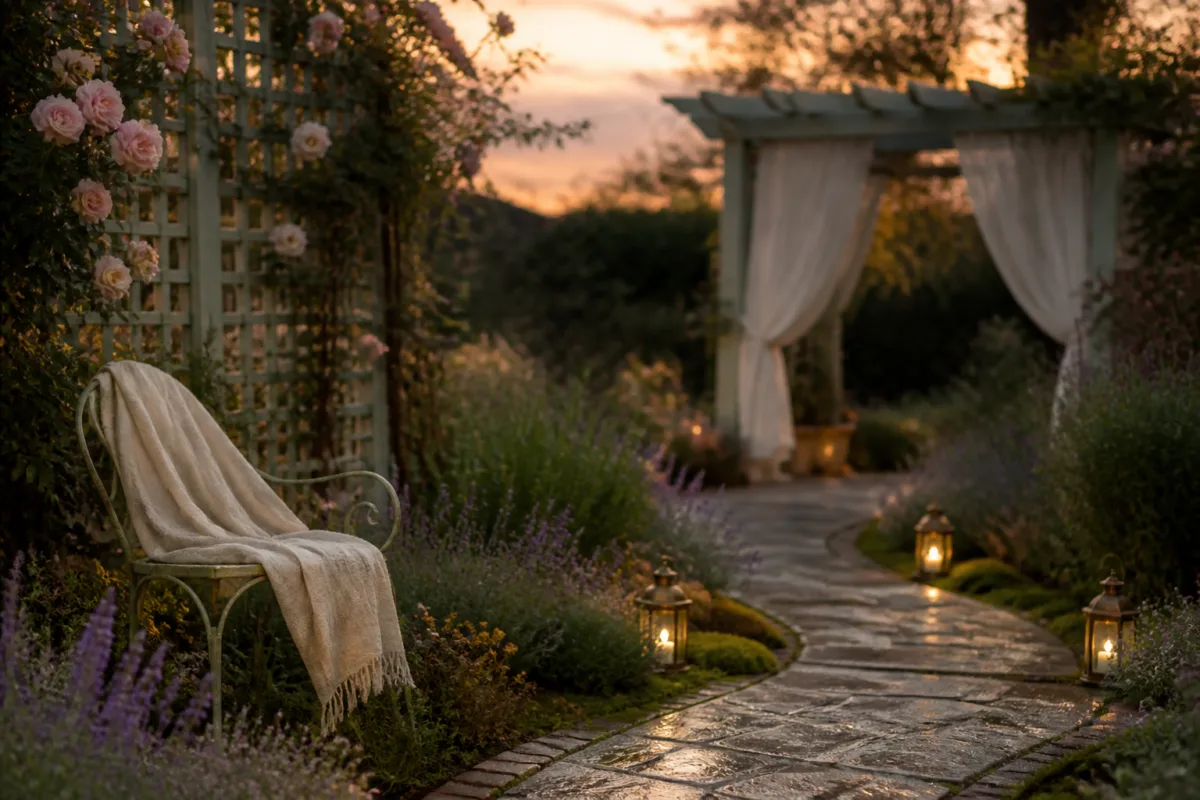
1. Flagstone Path With Limewashed Edging and Soft Lantern Glow
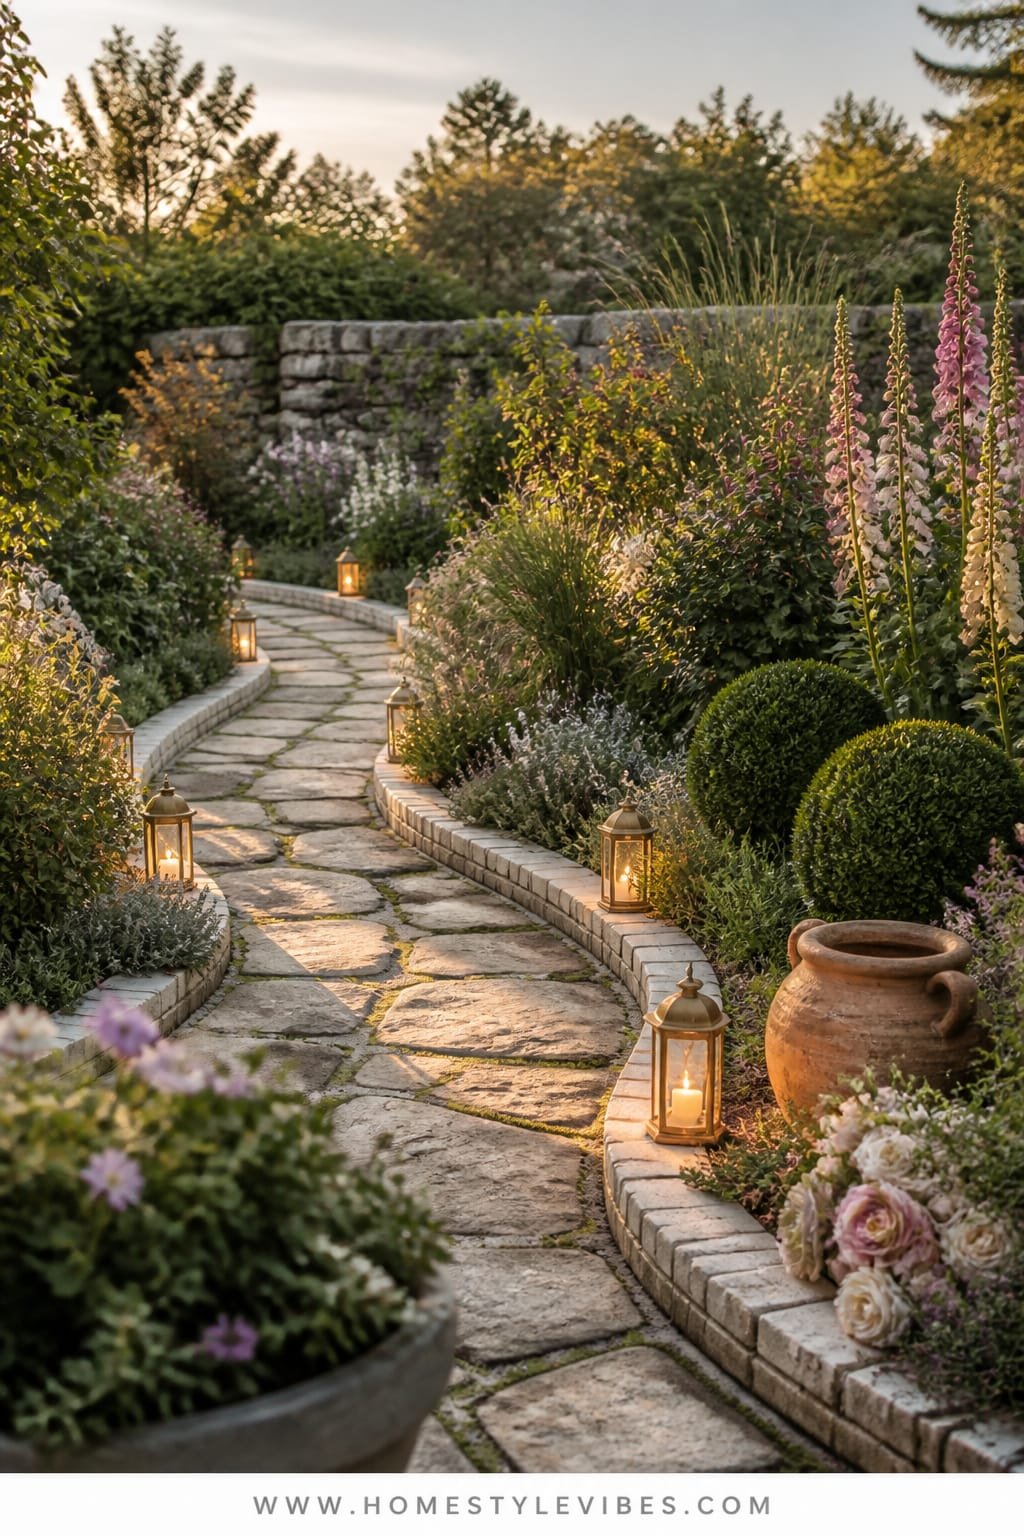
We’ve all been there: your yard has “destination energy” but no literal path to get you there. Guests tiptoe over grass, hoses tangle, and it never feels finished. This design solves movement and mood at the same time with a meandering flagstone path, limewashed brick edging, and low, warm lanterns that turn dusk into magic hour every night.
The mood is classic cottage: gentle, romantic, and slightly wild. It works brilliantly for real homes because paths make everything easier—watering, hauling garden bags, simply stepping outside with coffee. Lighting matters: a soft lantern glow at ankle height creates dimension, guides footsteps, and photographs like a dream. Materials anchor the story—flagstone for natural irregularity, limewash for that chalky, breathable softness, and aged brass or blackened steel lanterns to ground it.
Why it photographs beautifully? Contrast and texture. Rough stone against hazy limewash. Warm light kissing cool slate. The curve of the path drawing your eye like a sentence you can’t stop reading. For variations, go budget-friendly with decomposed granite instead of flagstone. In small spaces, create a single stepping-stone ribbon with thyme planted between. In shady yards, choose lighter stones like limestone to keep the scene bright. Renter-friendly? Lay pavers over landscape fabric so you can lift and take them if you move.
Budget Breakdown:
- Flagstone or pavers: $4–$12 per sq. ft.
- Limewash paint and sealer for edging: $40–$80
- Low-voltage path lights (set of 6): $90–$200
- Electrical/transformer: $120–$250
- Thyme groundcover plugs: $3–$5 each
Total Estimated Cost: $450 – $1,600
Best For: Medium to large yards that need clarity and charm; anyone who hosts at dusk or wants simple “follow me” lighting for safety and romance.
Key Design Elements:
- Main materials: Flagstone, limewashed brick, low-voltage metal lanterns
- Color palette: Soft gray, chalky white, moss green, warm amber light
- Lighting strategy: Low, warm path lights set 6–8 feet apart for rhythm
- Furniture silhouettes: Iron bench or a bentwood chair at the end to create a “destination” moment
- Texture layers: Rough stone, chalky limewash, feathery grasses
- Accent details: Thyme between stones, a vintage-looking gate, copper hose guide
How To Recreate This Look:
- Map a gentle S-curve with rope or a hose so it feels natural, not rigid.
- Lay landscape fabric to discourage weeds, then set stones with 1–2 inch gaps.
- Limewash existing brick or inexpensive landscaping stones to create a soft, old-world edge.
- Install low-voltage path lights and a transformer; keep fixtures consistent for cohesion.
- Plant creeping thyme between stones and add a bench or bistro set as the “path payoff.”
Why This Looks Expensive: Intentional lighting plus natural stone reads custom, not DIY. The limewash softens edges and fakes age in the best way—like your garden has a backstory.
Watch Out: Don’t space lights too closely or you’ll over-illuminate and flatten the vibe. And keep stone gaps consistent; irregular is lovely, chaotic is not.
Pro Styling Tip: Shoot the path at golden hour from a low angle so the lanterns rim-light the stone texture and the thyme looks lush, not patchy.
Keep scrolling—your dream garden archway and a secret breakfast nook are coming next.
2. Whitewashed Brick Patio With Dappled String Lights and a Vintage Iron Bistro Set
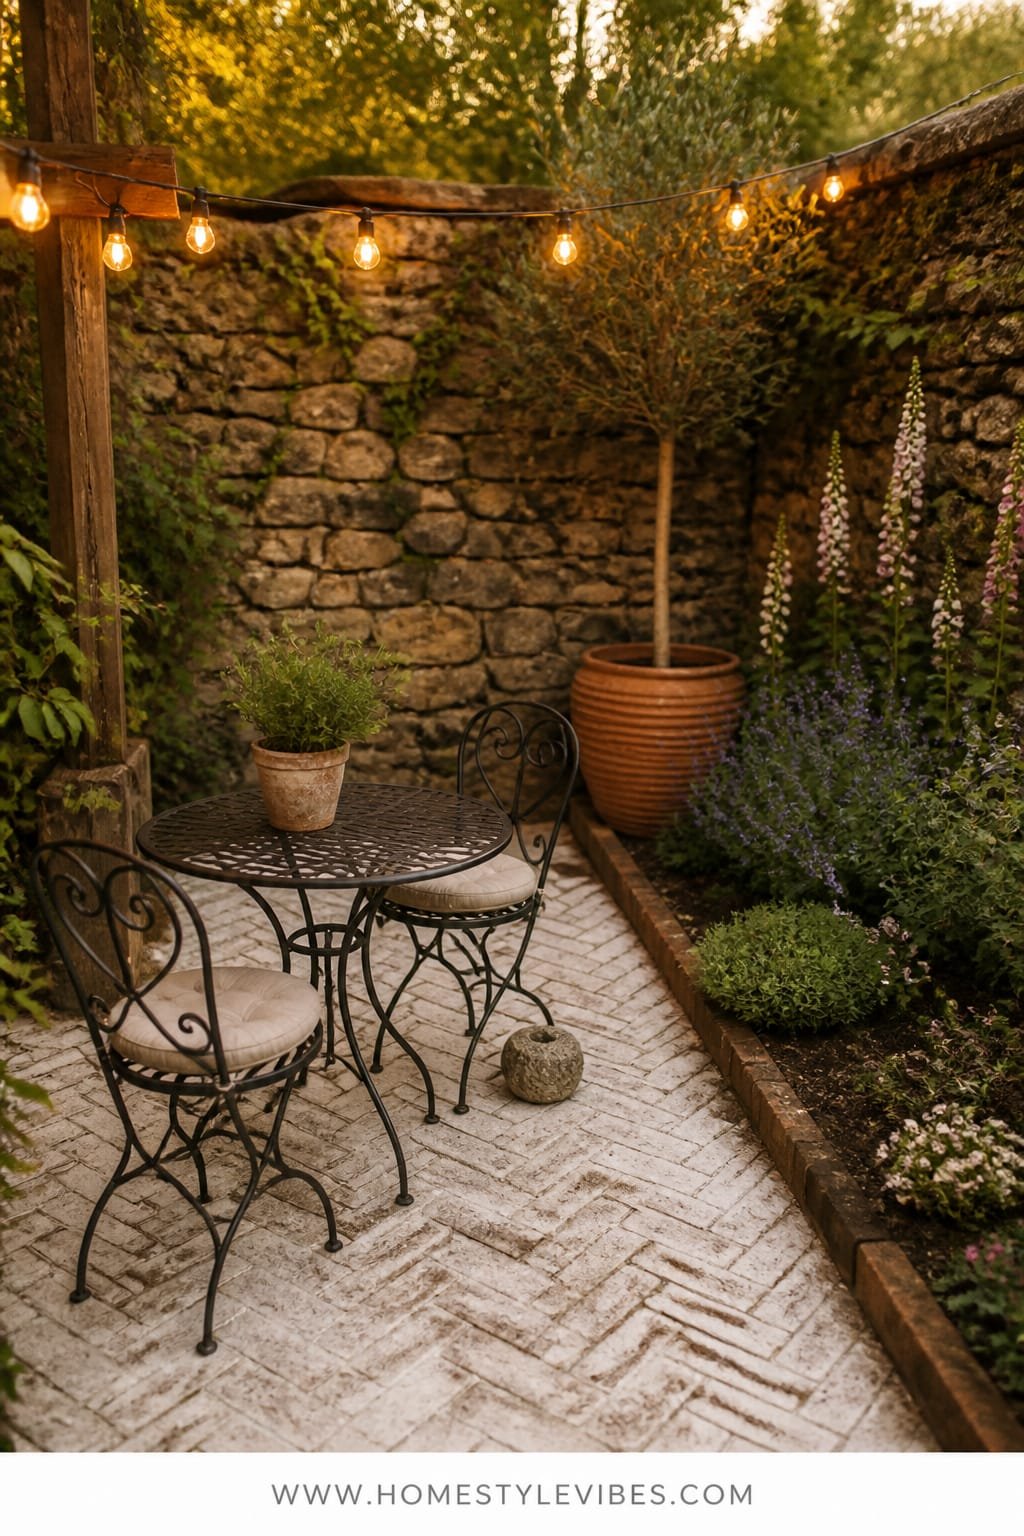
It’s that one corner that always feels off. You put out chairs, but no one uses them; the light is harsh by day and bleak by night. This patio setup fixes the vibe with the soft chalkiness of whitewashed brick underfoot, a canopy of dappled string lights overhead, and a petite iron bistro set that sits like a love letter in the shade.
The mood leans Parisian cottage—quietly charming, perfect for morning tea or late-night confessions. It suits small yards and townhomes because the footprint is compact, and the whitewash rebounds light without blinding glare. Textural contrast—dusty brick with slender iron—keeps it from reading flat. At night, warm globe lights cast soft halos and reduce the “spotty” look you get with cheap LEDs.
Two variations: For renters, use interlocking deck tiles in a faux brick pattern and apply removable whitewash stain. For a darker, moodier vibe, limewash to a creamy putty rather than white, and swap clear bulbs for amber-tinted ones. Budget route? Facebook Marketplace yields endless bistro treasures for $60–$120; spray them matte black for continuity.
Budget Breakdown:
- Old or new brick pavers: $2–$4 per paver
- Whitewash/limewash materials: $40–$80
- Outdoor string lights (commercial-grade): $60–$140
- Iron bistro set: $90–$300
- Pergola hooks/poles or guy-wires for string lights: $30–$120
Total Estimated Cost: $350 – $1,100
Best For: Small patios, balconies with coverage, and anyone seeking a coffee nook that looks French and feels (seriously) private.
Key Design Elements:
- Main materials: Brick, limewash, powder-coated iron
- Color palette: Chalk white, soot black, olive leaf, soft tan
- Lighting strategy: One zig-zag of globe string lights, 2700K warmth
- Furniture silhouettes: Slim bistro table with curved legs; delicate, stackable chairs
- Texture layers: Chalky brick, smooth iron, linen seat cushions
- Accent details: Terracotta pots, a mini herb trough, scalloped outdoor tray
Why This Feels Designer: The interplay of matte and gloss—chalky whitewash against gently reflective iron—adds depth. The lights create ceiling height outdoors, framing the zone like a room.
How To Recreate This Look:
- Measure and lay pavers in a basketweave or running bond; tamp and level for a flat sit.
- Limewash bricks, then wipe selectively so edges peek through—instant patina.
- Hang string lights at 9–11 feet high for that flattering “halo” light around faces.
- Place the bistro set off-center; asymmetry looks collected, not staged.
- Add two terracotta pots with contrasting heights and a small linen cushion per chair.
One Thing To Avoid: Don’t use cool white bulbs—they make skin tones look sallow and plants look plastic. Warm light always wins here.
Pro Styling Tip: Photograph the table slightly angled with two cups set, and let the string lights blur in the background for soft bokeh magic.
Pause here. Breathe. If one idea is already calling your name, that’s your sign. You don’t need all seven—pick the one that solves your biggest frustration and build from there.
3. Weathered Wood Arbor With Rose Blush Light and a Carved Teak Garden Bench
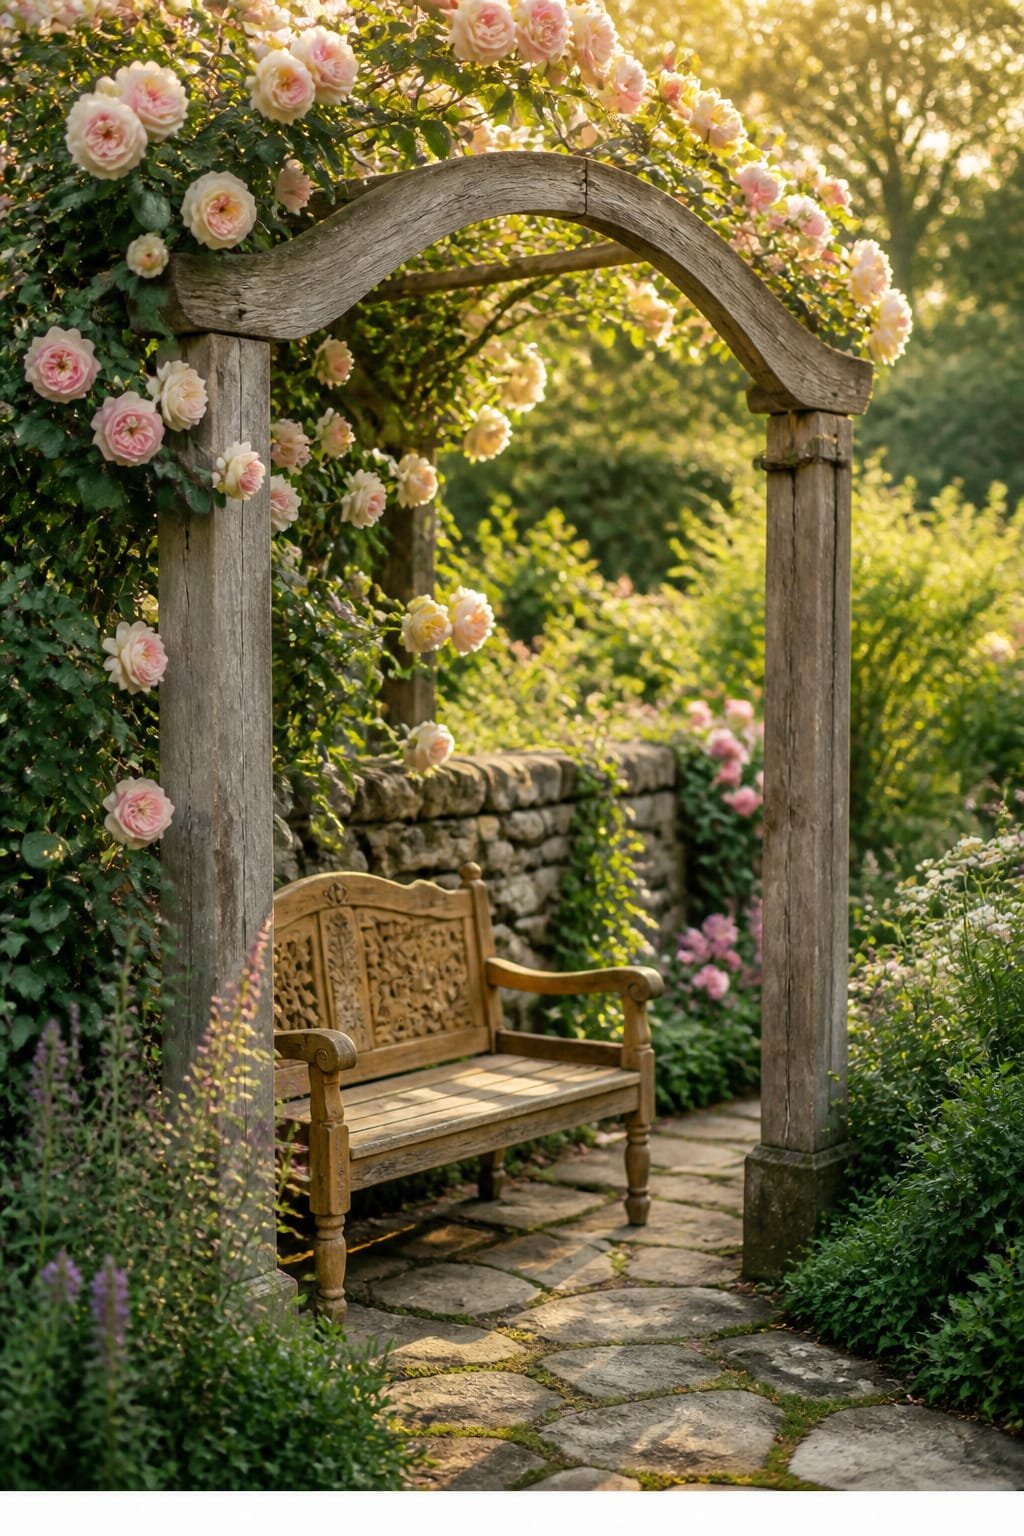
You’ve tried potted roses along the fence, but it still looks flat and disconnected. An arbor creates a threshold—an actual entry to your garden story. This version uses weathered wood so it doesn’t scream “new build,” soft blush-toned blooms to add warmth to skin and sky, and a carved teak bench under the arch for a quiet sit-spot framed by petals.
The mood hits romantic English cottage with a touch of heirloom dignity. It works in real homes because an arbor sets intention—walk here, sit here, linger here—and the vertical growth keeps small yards from feeling crowded. Light filters through rose canes to cast those dreamy petal shadows. Bonus: it photographs like a bridal portrait even on a Tuesday.
Variations? Budget-friendly pine arbor stained to driftwood gray, then sealed. Small-space version: a half-arch against a wall with an espaliered rose. Darker version: use deep magenta or burgundy blooms and a teak bench oiled to a honey finish for contrast. Renter option: freestanding arbor anchored with planters filled with pea gravel for stability.
Budget Breakdown:
- Arbor kit or custom build: $120–$450
- Climbing roses or clematis: $25–$55 each (2–3 plants)
- Teak or acacia carved bench: $180–$600
- Soil amendments/rose food: $20–$50
- Drip line kit: $35–$80
Total Estimated Cost: $380 – $1,235
Best For: Entry points, side yards that feel like hallways, and anyone who wants a romantic focal point that matures beautifully over time.
Key Design Elements:
- Main materials: Weathered wood, teak, climbing rose canes
- Color palette: Driftwood gray, blush pink, muted green, warm teak
- Lighting strategy: Late afternoon sun through the arch; optional solar uplight at the base
- Furniture silhouettes: Ornate bench with carved arms and a high back for presence
- Texture layers: Rough timber, silky petals, woven jute cushion
- Accent details: A trailing linen throw, antique-style plant markers
Why This Reads High-End: Vertical architecture plus living sculpture (the rose) feels intentional. Teak’s weight and carving say heirloom, even if you sourced it secondhand.
How To Recreate This Look:
- Position the arbor to frame a view—your prettiest tree, the path, or the sunset line.
- Secure posts deeply or use large planters filled with gravel for stability if renting.
- Plant roses on each side; weave canes horizontally as they grow for denser blooms.
- Place the bench under the arch and add a jute cushion or linen pad for texture.
- Install a small solar spotlight to graze light up the rose canes at night.
The Most Common Mistake: Over-fertilizing roses early. Be gentle the first season and focus on training canes; shape first, then abundance.
Pro Styling Tip: For photos, mist the petals lightly before shooting—droplets catch light like tiny jewels without looking staged.
4. Crushed Gravel Herb Walk With Golden Hour Lanterns and a Zinc Potting Table
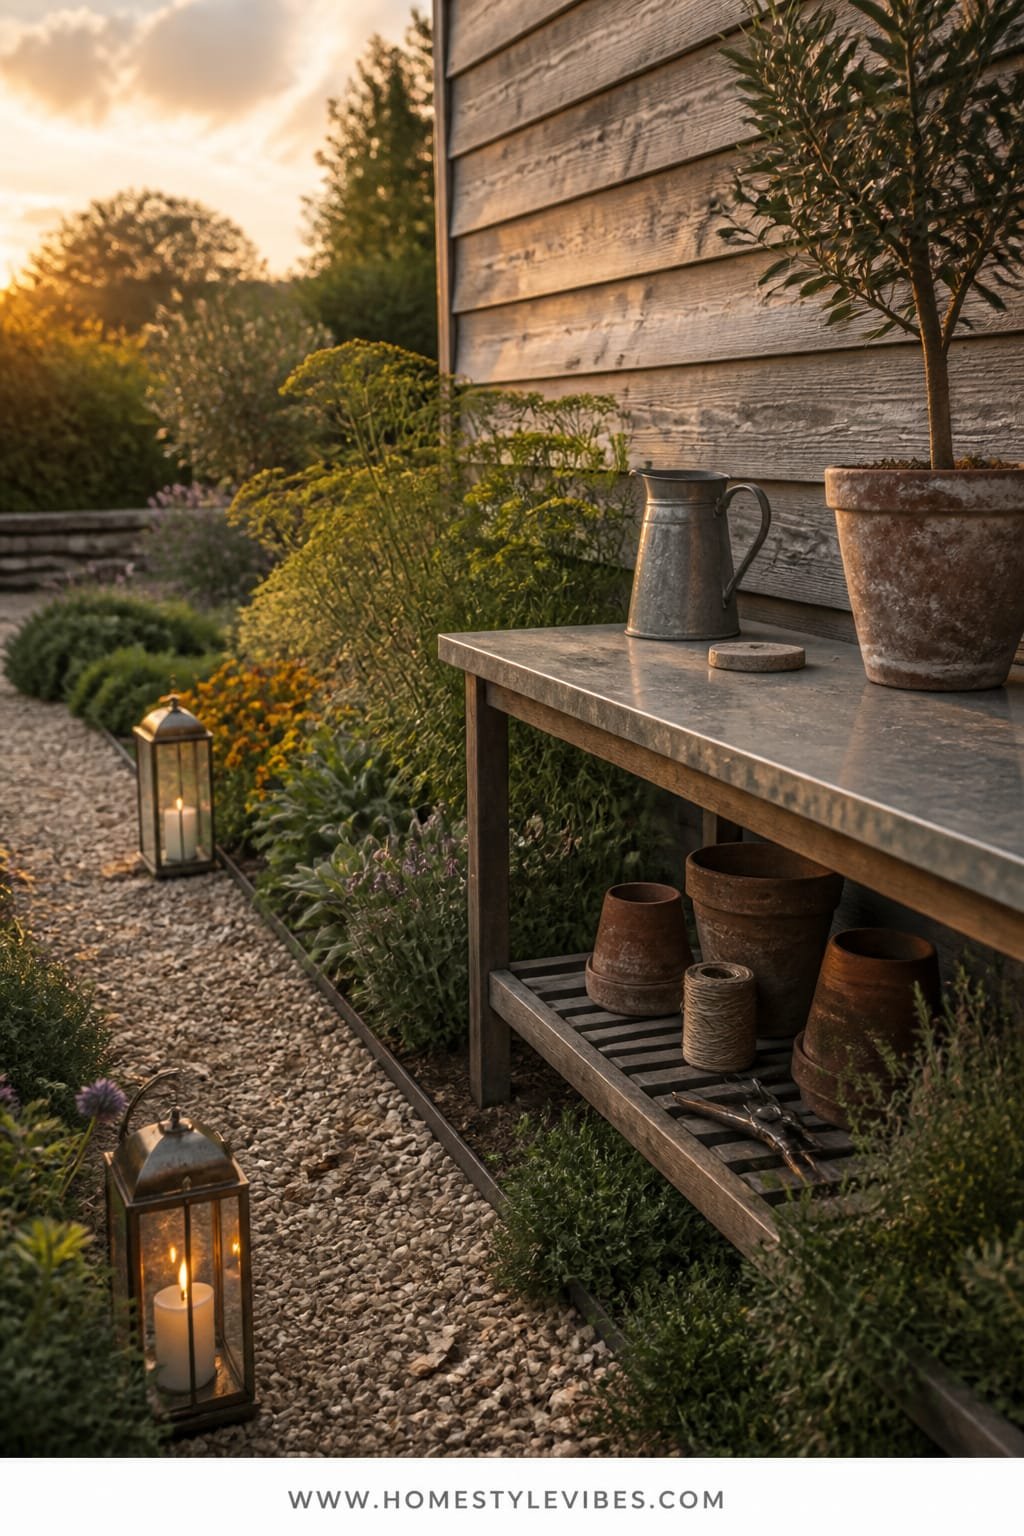
That strip along the house that collects tools, empty pots, and vague guilt? It can become your most charming lane. A crushed gravel herb walk paired with golden hour lanterns and a utilitarian zinc-topped potting table turns “catchall” into “I actually want to be here.”
The mood: rustic French potager—earthy, aromatic, quietly industrious. This layout suits narrow spaces and budget refreshes because gravel is affordable and forgiving. The zinc counter handles soil and water without drama. Lighting—two lanterns at chest height—gives a cinematic warmth that makes evening snips of thyme feel like ritual rather than chore.
Why this photographs beautifully: micro-texture everywhere. Gravel crunch, brushed zinc, feathery herb leaves, and the flicker of candle or warm LED glow. Variations: Use steel troughs for herbs if your soil is poor. Small-space version: one raised bed with a single lane of gravel and wall-mounted shelves. Renter-friendly? Lay weed barrier and pour pea gravel over it; you can scoop it up when you move.
Budget Breakdown:
- Pea gravel: $45–$75 per cubic yard
- Landscape fabric + edging: $40–$120
- Zinc or galvanized potting table: $160–$450
- Lantern sconces (hardwired or solar): $60–$180 each
- Herb starts: $4–$8 each
Total Estimated Cost: $400 – $1,200
Best For: Side yards, kitchen-adjacent strips, renters who want a movable material palette, and cooks who love easy harvesting.
Key Design Elements:
- Main materials: Crushed gravel, zinc/galvanized metal, hardwood edging
- Color palette: Stone gray, sage, olive, warm brass or black accents
- Lighting strategy: Warm sconces or lanterns placed to reduce shadows near the work area
- Furniture silhouettes: Simple, sturdy table; no fussy lines
- Texture layers: Crunchy gravel, smooth zinc, woven baskets, terracotta
- Accent details: Twine dispenser, enamel pitcher, herb markers with waxed string
How To Recreate This Look:
- Clear the strip, level the soil slightly, and lay landscape fabric.
- Add simple edging (pressure-treated or composite), then pour gravel 2–3 inches deep.
- Position the potting table where you get good light and easy hose access.
- Mount lanterns or place heavy hurricane lanterns at counter height.
- Plant herbs along the edge: thyme, oregano, chives, and rosemary for year-round scent.
Why This Looks Intentional: Even spacing of herbs and a dedicated work surface telegraph purpose. The limited palette keeps it from reading messy, even mid-project.
Don’t Do This: Avoid bright white gravel—it glares and shows debris. Choose soft, mixed gray for a forgiving, old-world feel.
Pro Styling Tip: For photos, scatter a few clipped herb sprigs on the zinc table and leave pruners slightly askew—lived-in looks stylish here.
Small confession: I once kept a “temporary” gravel strip for two years because it just worked. The crunch underfoot felt like therapy, and the herbs practically maintained themselves.
5. Willow Trellis Fence With Cool Morning Light and a Painted Farmhouse Potting Bench
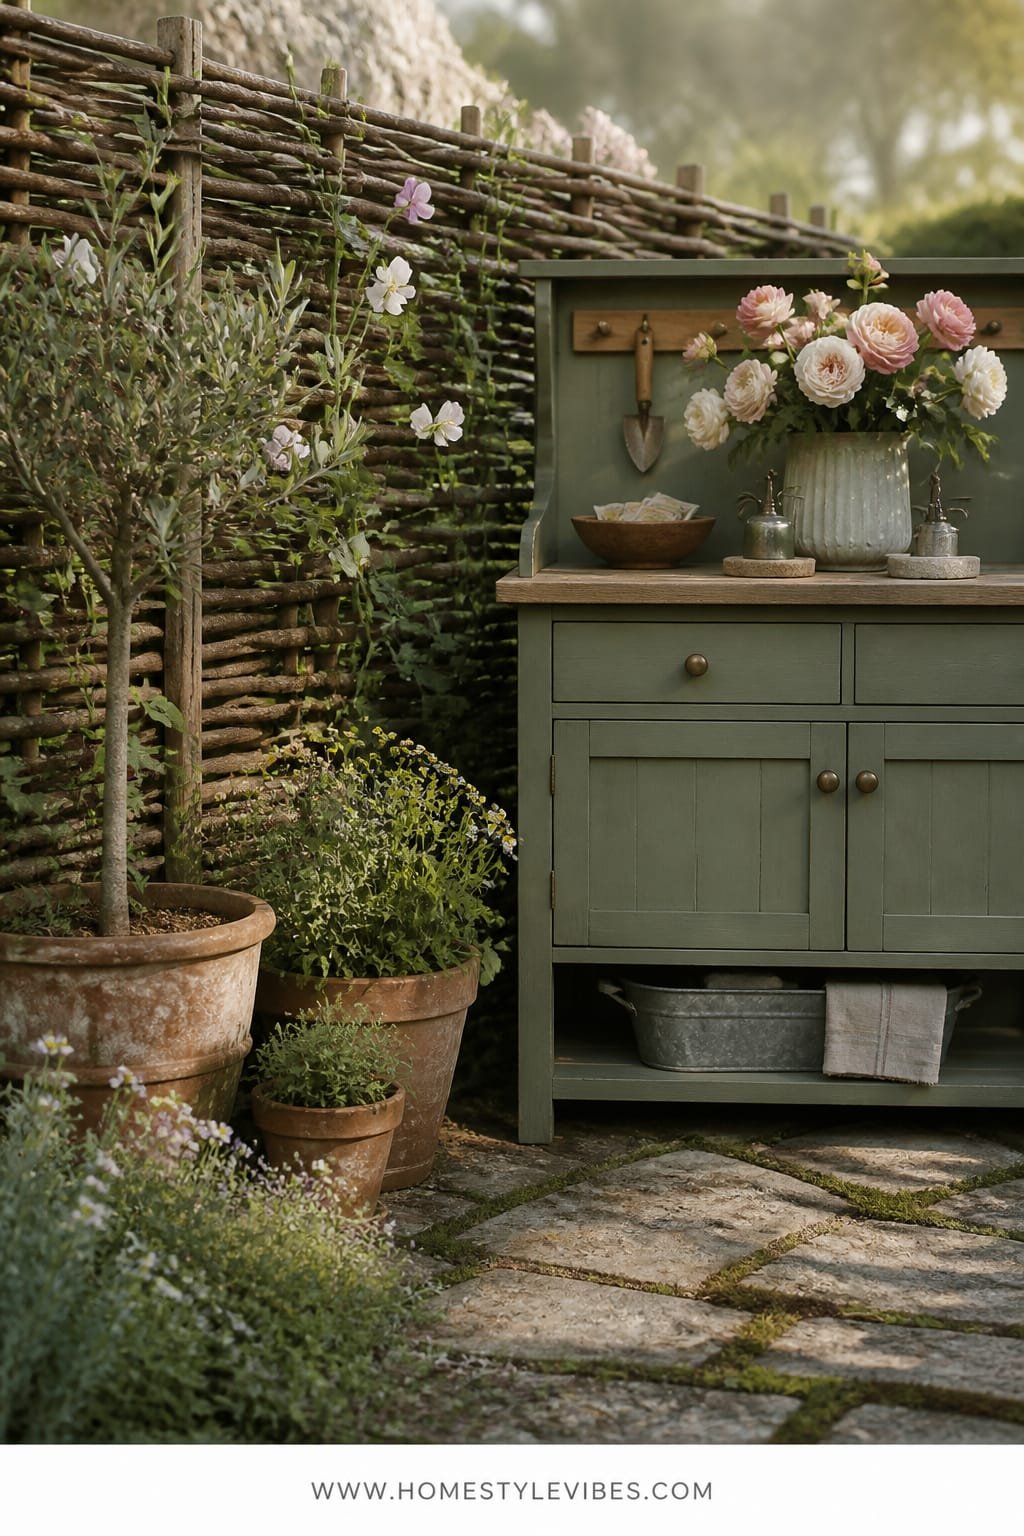
You love the garden cottage aesthetic, but your fence line looks like a hardware store aisle—random plastic pots, clashing stakes, and tools with no home. This setup anchors that visual noise with a cohesive willow trellis fence, gentle morning light, and a painted farmhouse-style potting bench that hides the chaos behind pretty doors.
The mood channels practical countryside charm. It works for families because it organizes gear while giving climbing annuals and peas a place to perform. Early light makes the paint glow softly—choose a muddied color like lichen, not pure pastels, to keep it sophisticated. Why it photographs well: repeating verticals from the willow create rhythm; the bench offers a “still life” moment with terra cotta, gloves, and jars.
Variations include a small-space version with three modular trellis panels and a narrow bench. Budget move: build the bench from two stock kitchen cabinets and a butcher block top; add vintage knobs. For a moody look, paint the bench deep olive and add antique brass hooks. Renters can mount trellis panels on freestanding planters for mobile privacy.
Budget Breakdown:
- Willow or hazel hurdle panels: $40–$120 per panel
- Farmhouse potting bench or cabinet conversion: $150–$500
- Exterior paint + primer: $50–$110
- Hooks/peg rail: $20–$60
- Climbing annuals or peas: $3–$6 per packet or $4–$8 per start
Total Estimated Cost: $300 – $1,100
Best For: Utility edges, visible side yards, small gardens needing soft privacy and tidy storage in one stroke.
Key Design Elements:
- Main materials: Willow trellis, painted wood, terracotta
- Color palette: Lichen green, clay orange, straw brown, soft black hardware
- Lighting strategy: Face the bench east if possible; morning light is flattering and practical
- Furniture silhouettes: Shaker-style doors, open shelf for baskets
- Texture layers: Woven willow, matte paint, rough clay, polished knobs
- Accent details: Peg rail with straw hat, enamel caddy for twine, galvanized watering can
Why This Feels Designer: Repetition is the secret—matching trellis panels and a single, moody paint color unify the scene. The bench acts like built-in millwork outdoors.
How To Recreate This Look:
- Measure the fence span and order enough willow panels for a continuous look.
- Install panels with even spacing; cap the top line neatly for a finished edge.
- Paint the potting bench in a lichen or thyme green; replace knobs with aged brass.
- Mount a peg rail above for tools and a sunhat—practical and pretty.
- Plant climbers at each panel seam so growth covers joins and looks seamless.
Watch Out: Don’t choose super-bright greens—they skew toy-like in full sun. Muted, muddy tones hold elegance year-round.
Pro Styling Tip: Photograph mid-morning with shadows casting diagonals across the bench—those lines add a quiet, editorial drama.
Reminder: this isn’t about recreating a showroom. It’s about building little outdoor rituals that make your yard feel like yours—the way you brew coffee, where you hang your gloves, the scent you brush past on the way to grab the mail.
6. Cobblestone Fire Nook With Amber String Light Canopy and a Wicker Wingback Chair
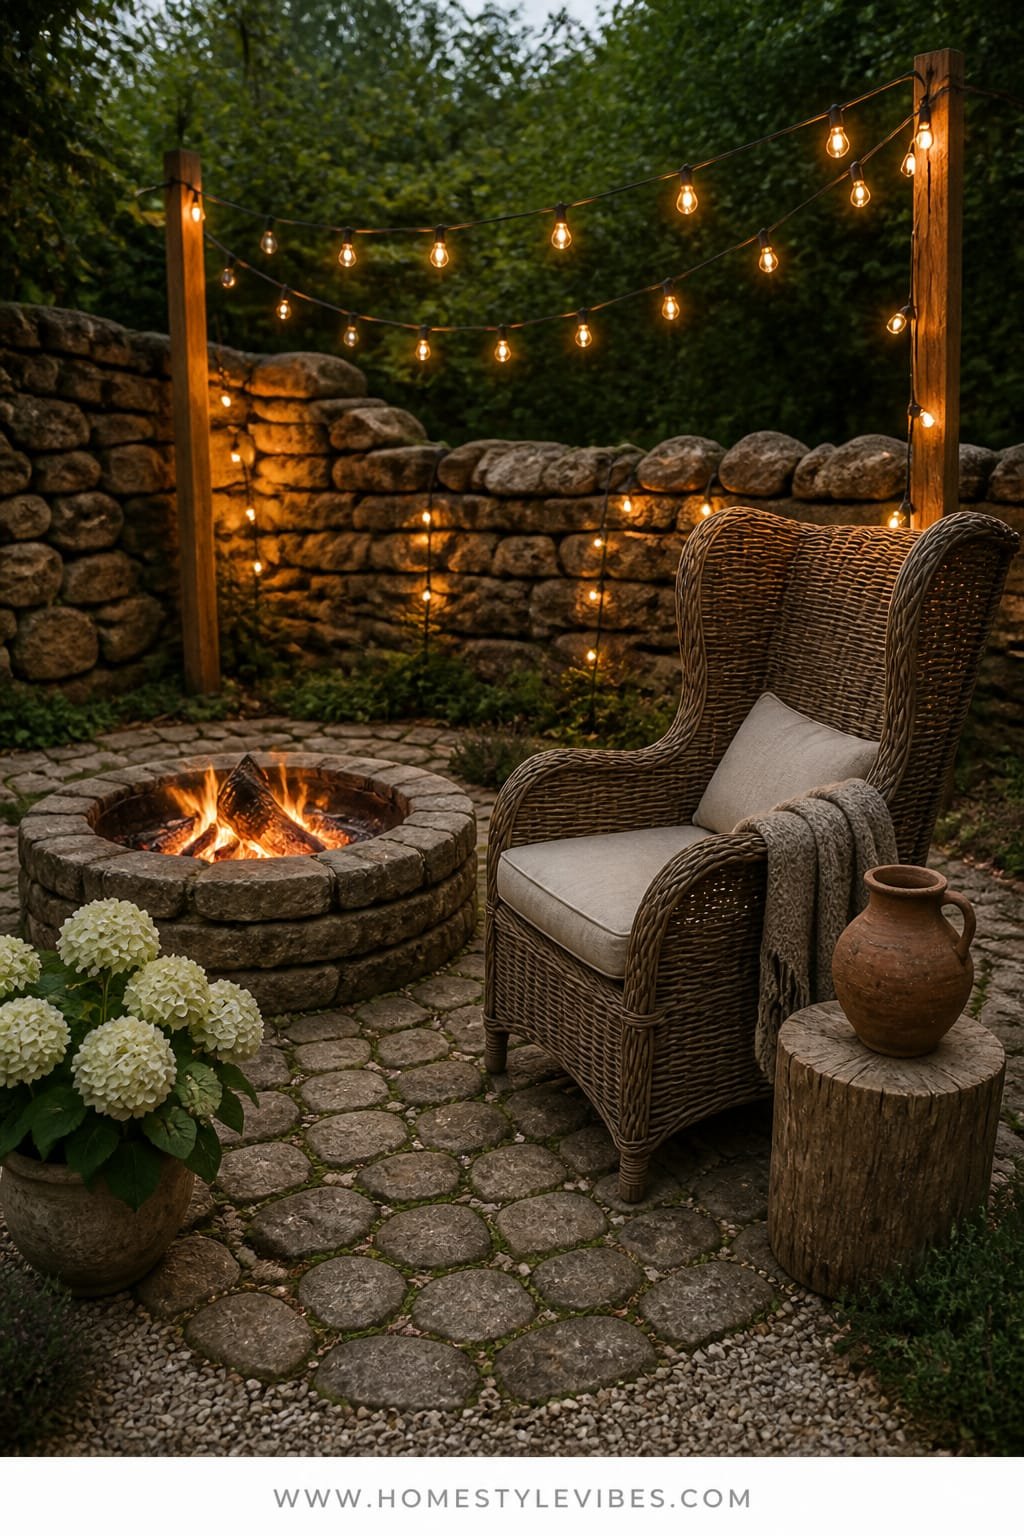
Evenings arrive, and you want a place to land—but the lawn chairs feel temporary, and the fire pit sits in a cold, exposed spot. This design carves a snug nook with old-world cobblestone underfoot, an amber string light canopy above, and a high-back wicker wing chair that cocoons you from breezes and neighbors’ eyes.
The mood tilts Nordic-cottage meets English hearth—intimate, layered, and cozy in all seasons. It works in real homes because it uses vertical light to create a room-like boundary outdoors. Cobblestones look like they’ve always been there and hide dirt well. The wicker wingback gives sculptural height and warmth; it’s your throne without being obnoxious about it.
Photographs love this moment: warm bokeh from the canopy, crisp texture from the cobbles, and a single, sculptural chair as your subject. Variations: Budget option with reclaimed concrete pavers in a circular pattern. Darker mood with charcoal cobbles, bronze lights, and a black metal side table. Small yard? One chair, one ottoman, and a tiny portable fire bowl is plenty. Renter-friendly? Use a deck-safe gel-fuel fire bowl and a freestanding light pole kit.
Budget Breakdown:
- Cobblestones or reclaimed pavers: $2–$6 each
- Leveling sand and edging: $60–$140
- Amber string lights + poles: $120–$280
- Wicker wingback chair (outdoor-rated): $250–$700
- Compact fire bowl: $60–$220
Total Estimated Cost: $550 – $1,900
Best For: Corner yards needing intimacy, four-season porches, and anyone who reads outside with a blanket and a drink.
Key Design Elements:
- Main materials: Cobblestone, wicker, metal lighting hardware
- Color palette: Charcoal, honey, tan, soft ember glow
- Lighting strategy: Overhead canopy plus a single low lantern at ankle height for depth
- Furniture silhouettes: High-back chair with generous arms; petite drum side table
- Texture layers: Woven wicker, rough stone, wool throw, linen cushion
- Accent details: Iron log holder, enamel mugs, wool blanket with fringe
How To Recreate This Look:
- Choose a corner or create one with two tall planters as “walls.”
- Lay a compact cobble pad; keep edges curved so it feels tucked-in.
- Install two or three light poles, then string amber bulbs in a swoop overhead.
- Place the wingback at a 30-degree angle to the fire bowl—flattering and wind-smart.
- Add a heavy knit throw and a lantern on the ground to layer light.
Why This Looks Expensive: Height variation and a clear focal chair read editorial. Also, cobblestone patterning hints at old craftsmanship even when it’s new.
One Thing To Avoid: Don’t flood the area with too many seats. One or two sculptural chairs beat four flimsy ones, every time.
Pro Styling Tip: Shoot after sunset with the fire lit and the canopy dimmed one stop; let the chair silhouette pop against the warm glow.
7. Mossy Stone Birdbath With Soft Dawn Light and a Painted Slat Garden Cabinet
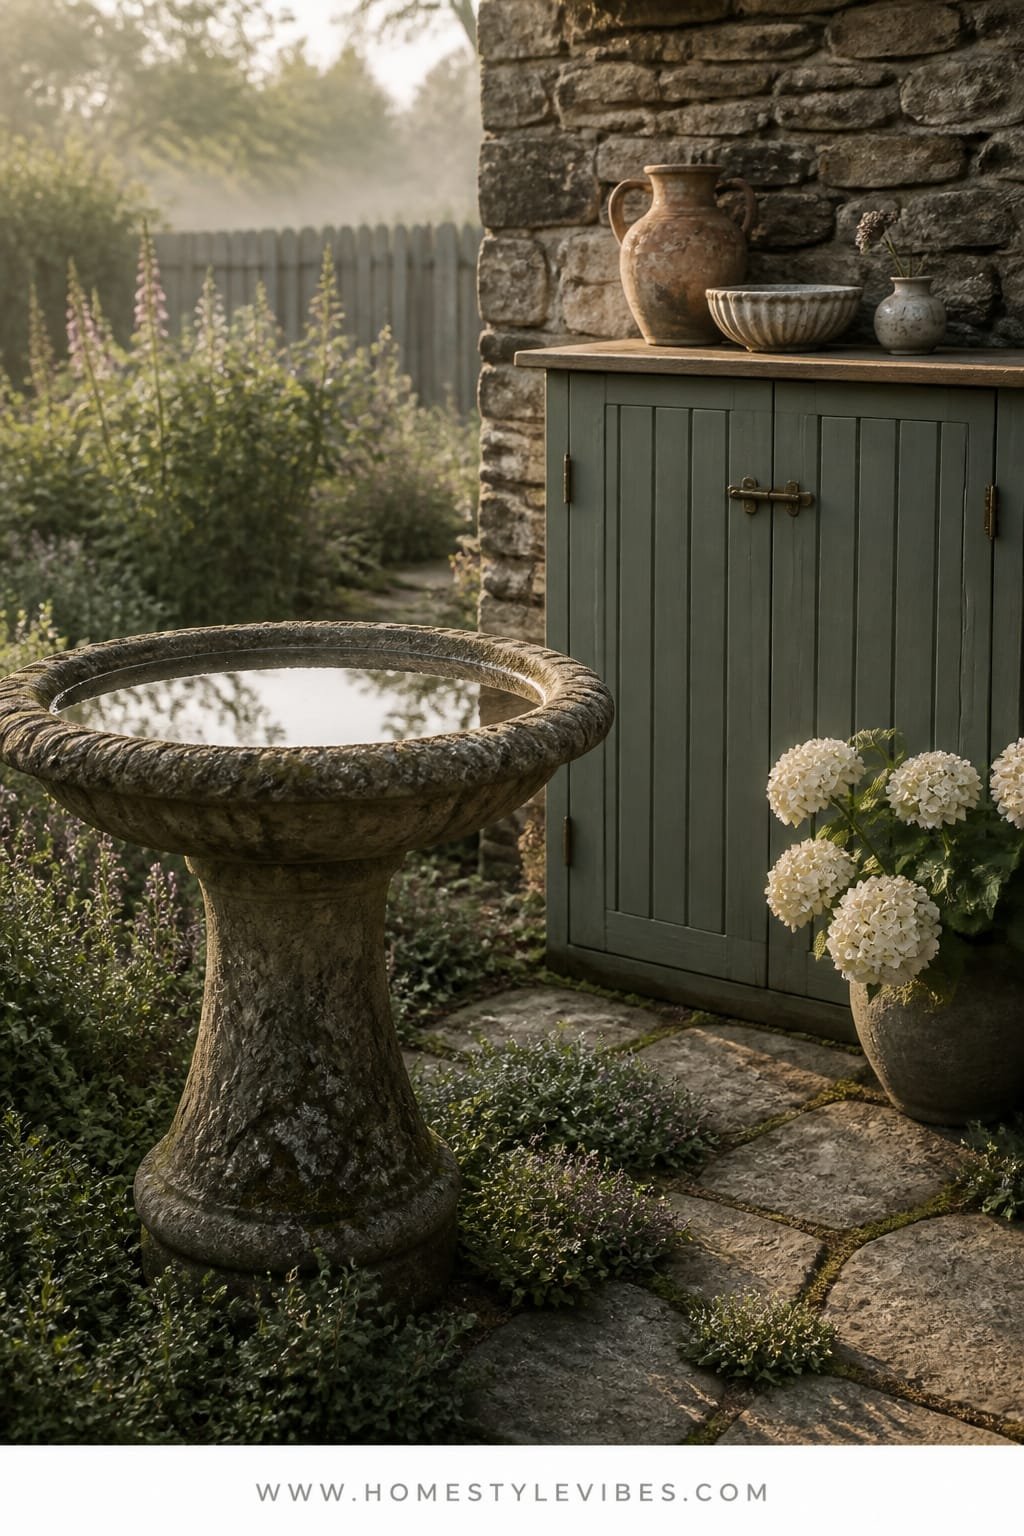
You’ve got odds and ends—fertilizer, gloves, snips—that bounce between baskets and the house. The garden looks sweet, but your storage says, “someone panicked at checkout.” This idea pairs a mossy stone birdbath as a romantic focal point with a sunrise-friendly corner and a painted slat cabinet that hides everything without killing the cottage vibe.
The mood is quiet sanctuary—dawn birdsong, dewy air, that hush before the day. It works in any size yard because the birdbath draws the eye and invites wildlife while the cabinet absorbs clutter. Dawn light, especially, makes the stone look velvety and the paint glow with a soft bloom that flatters every color.
Photographically, it’s gold: crisp detail in the moss, gloss on the water, matte slats on the cabinet. Variations: Budget-friendly concrete birdbath aged with yogurt moss mix; small-space version with a tabletop bowl on a pedestal. Renter move: use a freestanding metal locker-style cabinet painted a chalky taupe; it looks surprisingly chic outside. If you like moodier palettes, do a deep blue-green cabinet and choose a darker stone for the bath.
Budget Breakdown:
- Stone or concrete birdbath: $80–$350
- Exterior-grade slat cabinet or DIY: $180–$600
- Paint + primer: $50–$110
- Moss or aging yogurt mix supplies: $10–$20
- Shallow solar fountain insert (optional): $25–$60
Total Estimated Cost: $345 – $1,140
Best For: Entry sightlines, quiet corners by windows, bird lovers, and anyone who wants a cottage focal moment with actual function.
Key Design Elements:
- Main materials: Carved stone/concrete, painted wood, living moss
- Color palette: Taupe, stone gray, moss green, soft cream accents
- Lighting strategy: Place for dawn light; add a small uplight behind the cabinet for night silhouette
- Furniture silhouettes: Slim cabinet with slatted doors; round birdbath basin on a graceful pedestal
- Texture layers: Smooth water, velvety moss, matte paint, rough stone
- Accent details: Antique brass latch, linen-covered garden journal, bird-friendly pebbles
How To Recreate This Look:
- Pick a spot seen from indoors; you’ll enjoy it more on cold mornings.
- Level a small pad and set the birdbath securely; add flat stones around for a mini stage.
- Paint the cabinet a chalky taupe or thyme green; install simple brass or iron hardware.
- Rub a yogurt-moss mix on the birdbath base and keep it damp for a few weeks to age.
- Keep water shallow (1–2 inches) and add smooth pebbles for safe bird footing.
Why This Feels Designer: You’ve balanced romance (birdbath, moss) with function (hidden storage) and controlled palette. The restraint keeps it charming, not cluttered.
The Most Common Mistake: Placing the bath in full midday sun—water heats up and birds bail. Dawn-side placement wins for comfort and light.
Pro Styling Tip: Capture a top-down shot at dawn so the water mirrors sky color while the cabinet sits matte and calm in the background.
Micro-moment: You step out in slippers, mug in hand. A sparrow lands, takes a quick sip, and your shoulders drop. Five minutes later, you’re actually ready to open your laptop.
Quick Checklist
- Choose one focal path or pad with natural stone
- Use limewash or chalky paint to soften hard edges
- Hang warm 2700K string lights at varied heights
- Add one sculptural seat as a clear focal point
- Repeat one natural material three times for cohesion
- Layer textures: rough stone, soft textiles, matte paint
- Include vertical growth: arbor, trellis, or espalier
- Hide clutter with a painted outdoor cabinet
- Pick a signature plant color story (blush, white, or deep berry)
- Plant thyme or moss between pavers for instant charm
- Create one “destination” at the end of a path
- Photograph at golden hour or dawn for soft shadows
Frequently Asked Questions
How do I get the cottage look on a small budget?
Prioritize one zone: a path or a nook. Use decomposed granite instead of flagstone, thrift a bistro set, and apply limewash to unify. Add warm string lights and herbs—those four moves give major storybook impact for under $400.
My yard is tiny. Which idea works best without crowding?
The whitewashed brick (or tile) patio with a small bistro set and string lights. Keep furniture light and slim, choose lighter-toned stone, and make one vertical moment—like a single trellis—so the eye lifts up, not out.
I rent. What’s realistic without drilling into concrete or digging?
Interlocking deck tiles, freestanding light poles with weighted bases, planters as trellis anchors, and gravel laid over landscape fabric. A locker-style cabinet offers storage you can take with you. Keep everything modular.
Maintenance scares me. Which setup stays pretty with minimal effort?
The crushed gravel herb walk. Gravel hides dirt, herbs are forgiving, and lighting is simple. Refresh the edges monthly and snip herbs often—use equals growth, and it always looks intentional.
What common design mistake ruins the cottage vibe?
Too many finishes and clashing light temperatures. Pick one stone tone, one dominant paint color, and stick to warm 2700K bulbs. Consistency reads calm and collected, not chaotic.
The Gentle Finish
Pick one idea and start there. A path that guides you. A nook that invites you. The garden cottage aesthetic isn’t about having every charming thing—it’s about the right few pieces, layered with care, that make your yard feel like a story you want to step into.
Here’s the quiet truth: luxury outside comes from texture, lighting, and restraint. Rough against smooth, glow against shadow, repeat against surprise. Choose a material you love, set the light right, and keep the palette tight. Do that, and even a tiny balcony earns that storybook glow.
You don’t need permission or a landscape crew. You need a free afternoon, a short list, and your taste. Start with the path, or the bench, or the birdbath. Then pour a cup, step back, and enjoy the moment you just made. You’ve got this—seriously.
About the Author

Krisztina P.Rendes, Founder of Home Style Vibes
Founder of Home Style Vibes
Krisztina Puskásné Rendes created Home Style Vibes as a cozy-modern lifestyle space where homemaking meets inspiration. Her goal is to help women create beautiful, organized, and peaceful homes they truly love — without overwhelm. You’ll find here heart-driven content on home decor, cleaning tips, easy family recipes, organization and decluttering, DIY home projects, plants, and seasonal ideas — all designed to bring more calm, comfort, and style into everyday life.