7 Vintage Garden Aesthetic Ideas That Make Your Outdoor Space Look Hauntingly Beautiful
You want a vintage garden that feels like a moody poem at twilight—creeping ivy, candlelit shadows, and soft textures that whisper old-world romance. You hate that your yard currently feels patchy, overexposed, and a little too “plastic patio set.” Picture cool stone underfoot, flickering lanterns, iron silhouettes, and roses that look like they’ve held a few secrets. These 7 vintage garden aesthetic ideas fix the harsh-light, flat-texture problem and help you build layers of patina and mystery in just a few weekends, with options under $600 per area. The result is a hauntingly beautiful outdoor space that photographs like a dream and actually feels like a place you want to linger.
We’re talking shadowy nooks, earthy color, heirloom textures, and silhouettes with soul. If you love a vibe that’s cottage-meets-gothic with a little fairytale edge, this is your guide. Scroll if you want your garden to feel like a scene you stumbled into, not a showroom you copied.
1. Wrought Iron Arches With Dappled Twilight And A Stone Bench Altar
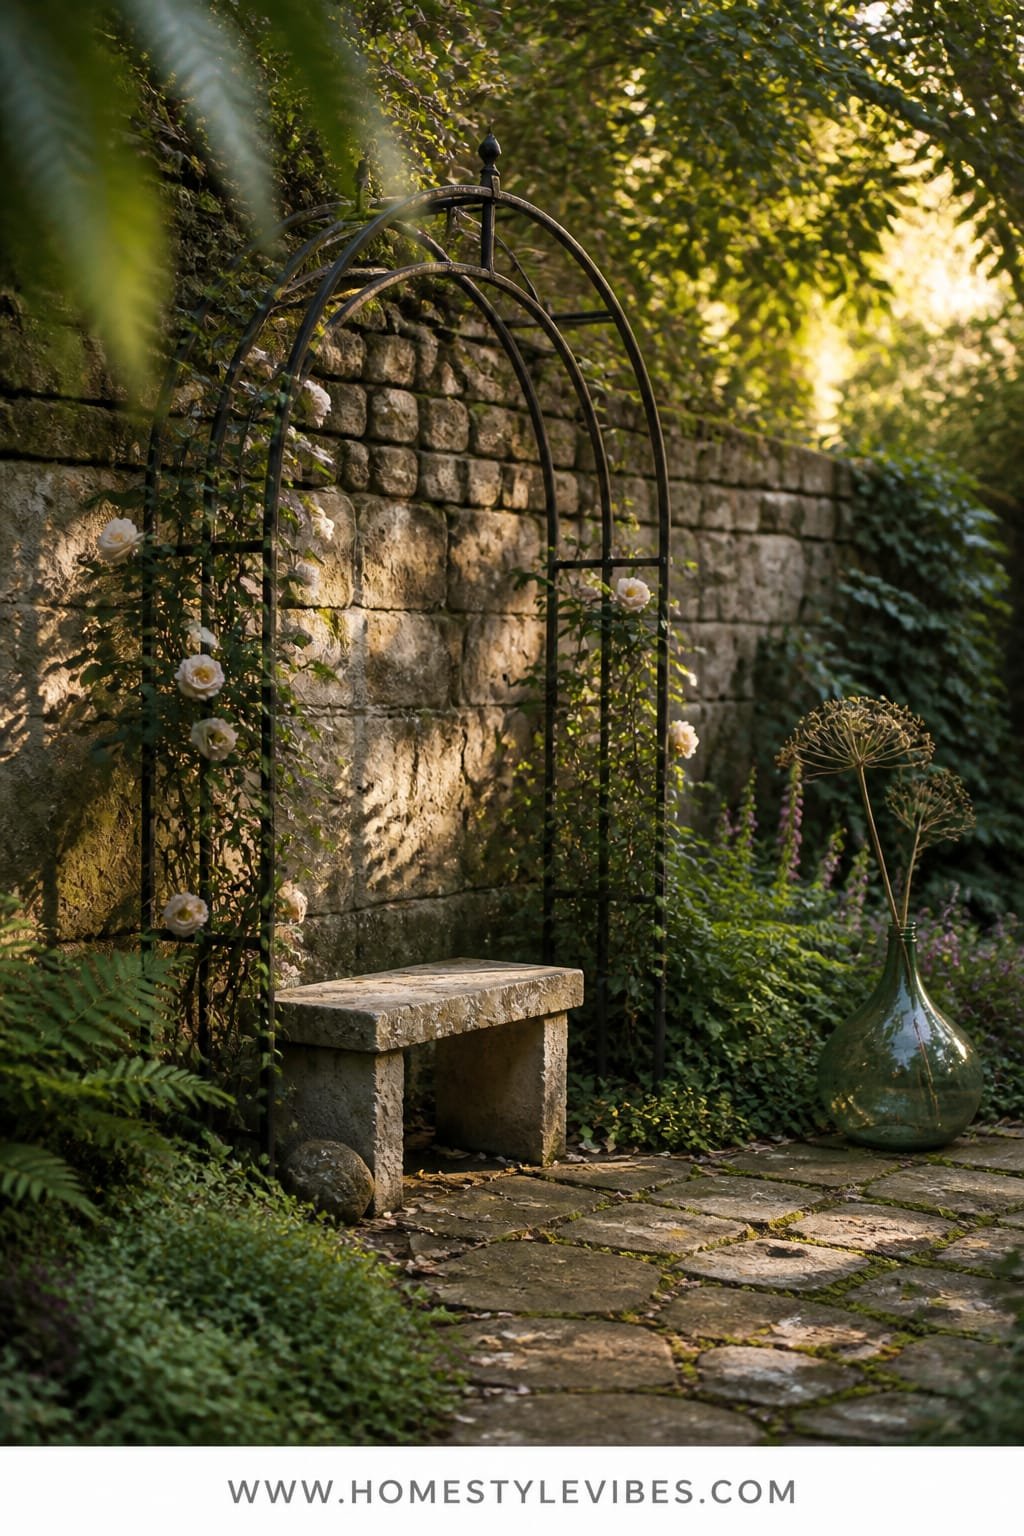
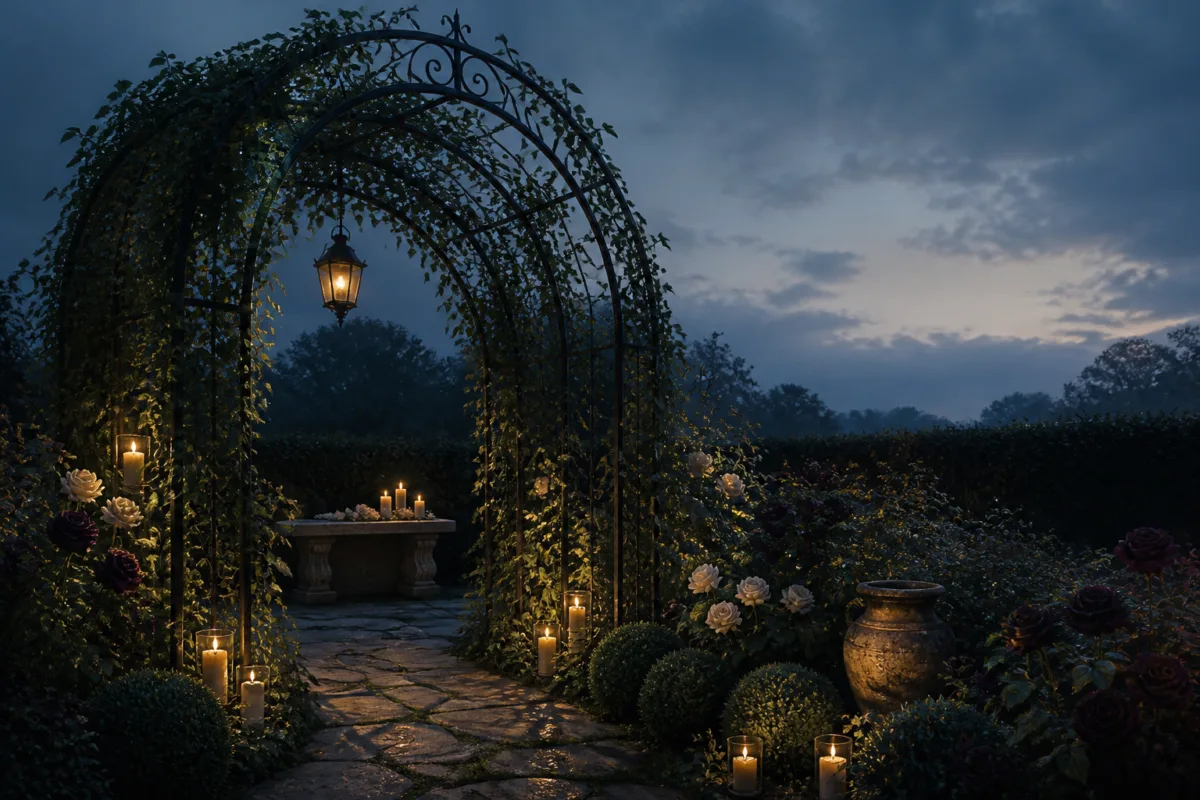
We’ve all been there: the back corner that never quite looks intentional. You try a few planters, maybe a trellis, but it still feels bare and obvious. This design uses a wrought iron arch as the spine, harnessing dappled twilight to cast delicate lattice shadows on stone. Add a simple stone bench—think of it as your quiet altar—and suddenly you have a place that feels ceremonial, romantic, and a tiny bit haunted in the best way.
Here’s the mood: gothic cottage with a poetic hush. It works in real yards because arches frame views and instantly suggest “this leads somewhere,” even if it’s just from one patch of grass to another. In small spaces, arches steal vertical real estate without devouring your footprint. The iron gives you contrast against softness—climbing roses, jasmine, or clematis—and the stone bench grounds everything so it never reads flimsy.
Lighting matters. Arrange the arch so it catches late afternoon sun, which throws patterned shadows across gravel or pavers. That interplay of light and iron is why this photographs beautifully—the shadowwork gives your garden depth and mood that flat midday sun can’t touch. Variations: go budget with a powder-coated arch and a cast-concrete bench; go renter-friendly with a freestanding arbor weighted by planters; go darker with deep burgundy climbers and antique iron lanterns hanging from the arch; or try a tiny-space iteration with a half-arch against a fence and a petite garden stool instead of a bench.
Budget Breakdown:
- Wrought iron arch/arbor: $120 – $600
- Stone or cast-concrete bench: $150 – $700
- Climbing plants (3–5): $45 – $150
- Gravel or stepping stones: $60 – $250
- Lanterns/candles (optional): $25 – $120
Total Estimated Cost: $400 – $1,820
Best For: Framing a path, disguising a fence, or creating a focal point in small to medium yards. Ideal in late spring to fall when vines fill out.
Key Design Elements:
- Main materials: wrought iron, stone, pea gravel
- Color palette: charcoal, moss green, dusty rose, off-white
- Lighting strategy: dappled late-afternoon sun, lantern glow at dusk
- Furniture silhouettes: simple slab bench with curved edge
- Texture layers: vine leaves, rough stone, fine gravel, aged metal
- Accent details: hanging lanterns, vintage finials, climbing roses or clematis
How To Recreate This Look:
- Start with your sightline—place the arch where it frames the best view or hides the worst one.
- Add a stone bench opposite the arch to create balance and a destination.
- Layer climbing plants at the base, two on each side for symmetry.
- Install a gravel bed under the arch and in front of the bench to define the zone.
- Style with lanterns at different heights and a weathered pot with trailing ivy at the bench end.
Why This Looks Expensive: The iron-and-stone combo reads like a long-term investment. The patina on metal and the matte mineral finish of stone suggest age and permanence—nothing shiny, nothing plastic, everything intentional.
Watch Out: Don’t go too small with the arch. A narrow, short arch looks like a toy. Choose one taller than your tallest guest and wide enough to walk through without ducking.
Pro Styling Tip: Photograph at golden hour—shoot from the shadow side of the arch so the light reveals the iron pattern across the gravel.
Quick Tip: If your yard feels flat, add a vertical interruption every 8–12 feet—a trellis, obelisk, or arch. It tricks the eye into seeing more depth.
2. Aged Terracotta With Overcast Light And A Vintage Birdbath Centerpiece
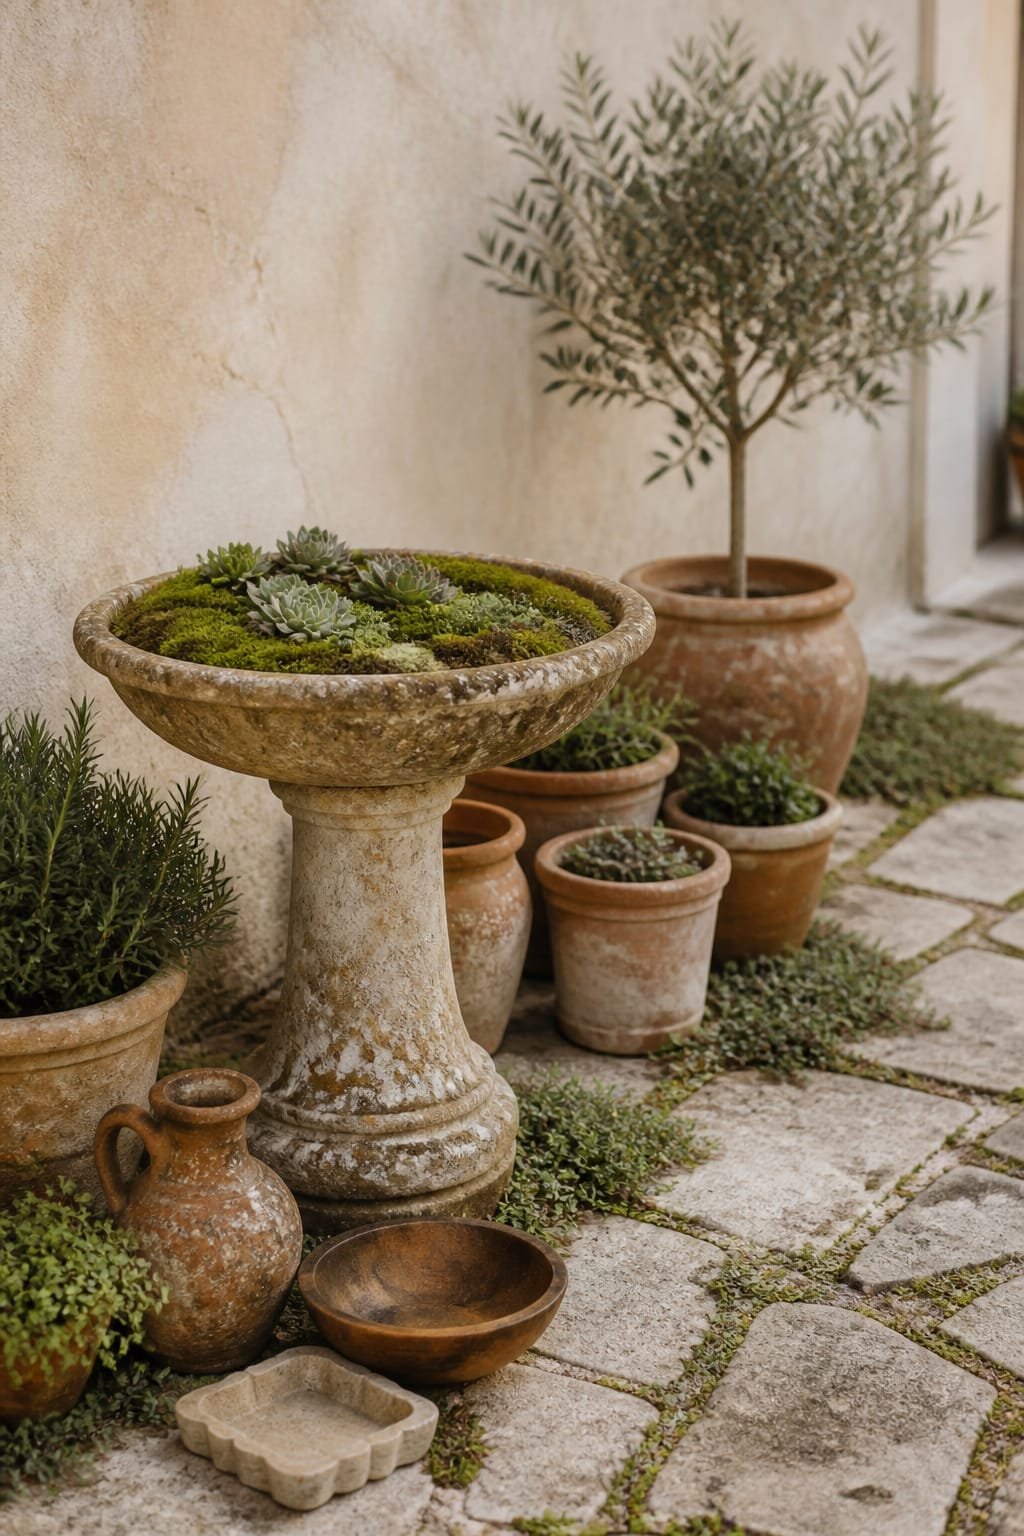
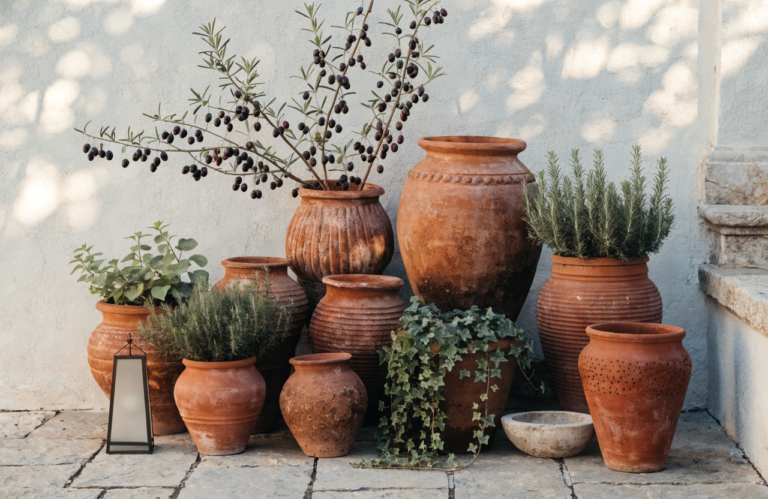
It’s that one patio corner that reads “new build waiting room.” You’ve tried bright flowers, it still feels unrooted. Terracotta—especially aged or limewashed—adds warmth and history. Under soft, overcast light, the mineral tones glow and the clay texture does that velvety thing that cameras love. A vintage birdbath planted with moss or sedum becomes your sculptural heart.
Think Mediterranean courtyard with an English secret garden twist. The reason this sings in real life: terracotta unifies mixed plantings. Even if your species vary wildly, matching clay pots make the ensemble look collected rather than chaotic. Overcast skies act as a giant softbox, so you get plush color and zero glare. Maintenance is easy—wipe pots seasonally, re-moss the birdbath when it thins out.
Try a budget version with reclaimed terracotta from marketplace finds and a secondhand concrete birdbath. Small-space? Cluster three pots of different heights and set a petite birdbath bowl on a plant stand. Darker mood? Add deep plum heuchera, oxblood snapdragons, and smoky eucalyptus. Renter-friendly: keep everything potted on a moveable tray; noncommittal but still soulful.
Budget Breakdown:
- Aged terracotta pots (5–7): $100 – $350
- Vintage or cast concrete birdbath: $80 – $400
- Moss/sedum/groundcover plugs: $30 – $90
- Limewash or yogurt patina (DIY aging): $10 – $25
- Pot feet/trivets: $15 – $50
Total Estimated Cost: $235 – $915
Best For: Patios, balconies, or decks where you need warmth and cohesion fast. Great in spring through fall, still moody in winter with evergreen herbs.
Key Design Elements:
- Main materials: terracotta, moss, cast concrete
- Color palette: cinnamon clay, olive, sage, charcoal
- Lighting strategy: overcast or filtered shade for soft texture
- Furniture silhouettes: none required—sculptural birdbath is the star
- Texture layers: pitted clay, velvet moss, trailing herbs
- Accent details: pot saucers, antique watering can, copper plant labels
How To Recreate This Look:
- Gather mixed terracotta sizes; group in odd numbers.
- Age the pots with diluted limewash or yogurt patina; let dry 24–48 hours.
- Place the birdbath slightly off-center, then anchor clusters around it.
- Plant with a mix of structure (rosemary), drape (creeping thyme), and bloom (pelargoniums).
- Finish with moss tucked around the birdbath base and pot feet to prevent moisture rings.
Why This Feels Designer: Repetition of material (clay) across varied forms reads curated, not random. The matte surfaces photograph like stoneware ceramics—subtle, quiet, chic.
One Thing To Avoid: Don’t use glossy, bright-orange pots; they can look plastic in photos. Choose muted clay or whitewashed finishes for that soft, vintage garden aesthetic.
Pro Styling Tip: Stagger heights—high, medium, low—so shadows step downward. Your eye will glide instead of stop.
Remember, this isn’t about recreating a showroom. It’s about building a space that feels like your story spilled outdoors. If one idea pulls at you more than the others, start there and ignore the rest for now.
3. Reclaimed Brick Path With Moonlit Glow And A Weathered Bistro Set
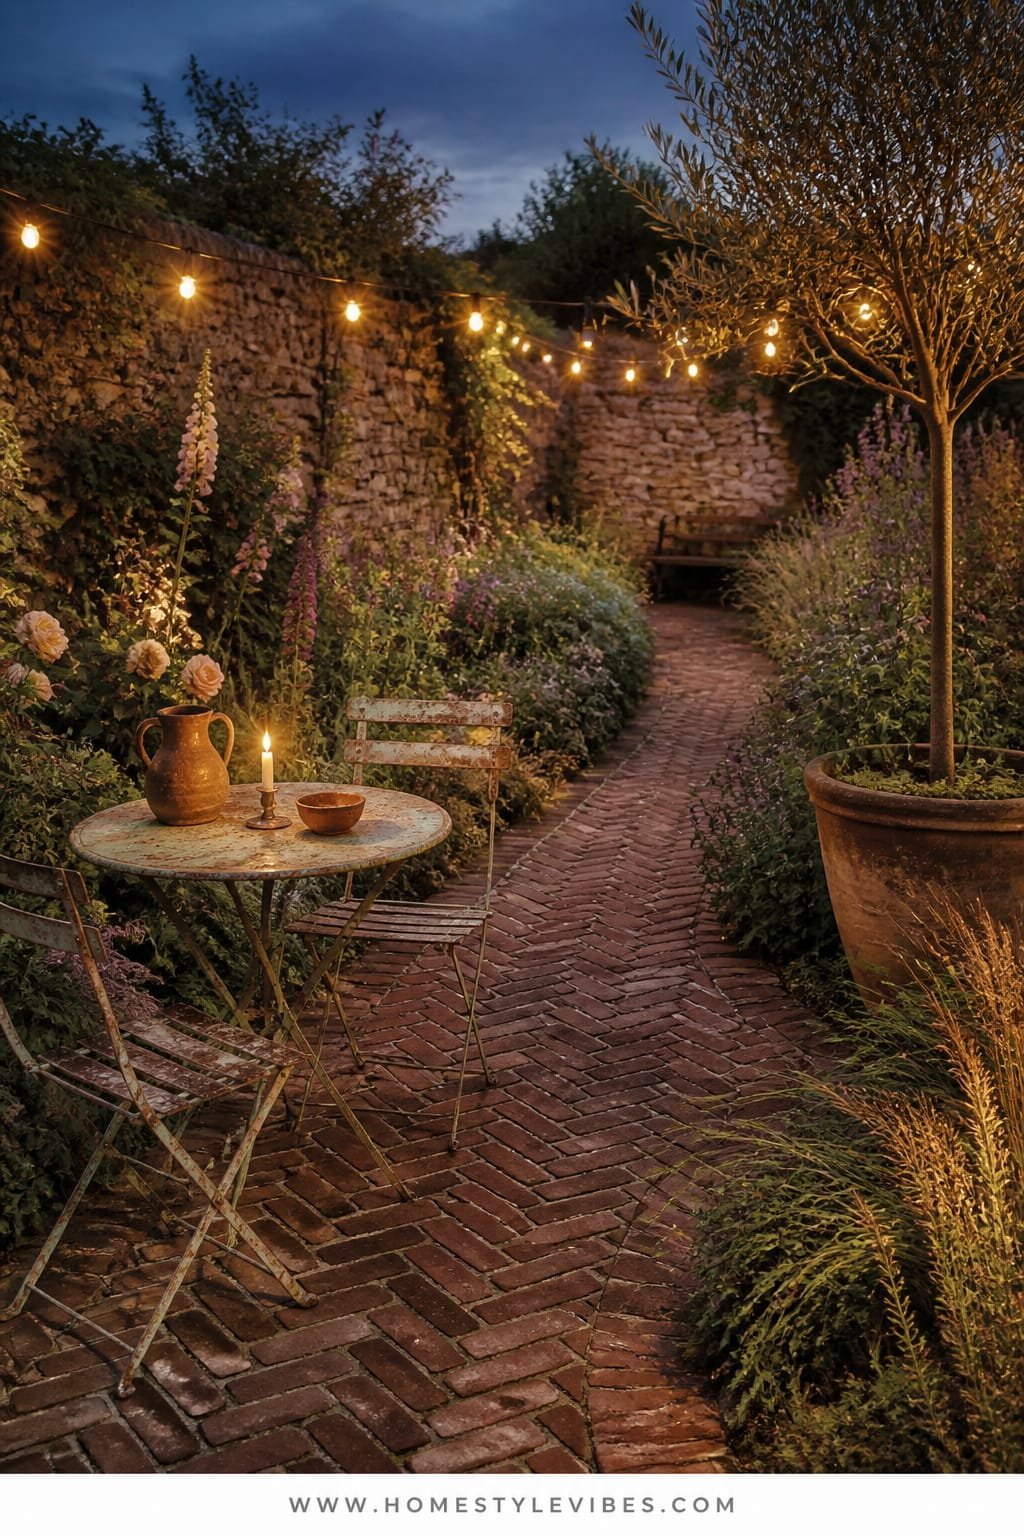
You’ve tried solar lights along a concrete path and it still feels like a runway, not romance. Reclaimed brick adds instant history and color variation that looks stunning under moonlight or warm bulbs. Flank it with wild borders and park a weathered bistro set where the path widens—breakfast by day, candle-lit whispers by night.
We’re going for European alleyway meets neighborhood secret. Brick works in family yards because it’s durable, easy to patch, and forgiving. The irregularities hide dirt and feel right at home with fallen petals. Lighting: low, warm string lights or downlights aimed indirectly create a hush. The bistro set anchors a micro-room at the end of the path so you actually use the space, not just pass through it.
Budget version? Use “brick on sand” with tamped screenings. Small yard? Create a curved brick ribbon three feet wide leading to a single cafe chair and plant stand. Darker palette: choose deeper reds and browns, add bronze fixtures, and black cushions. Renter-friendly: lay brick pavers on landscape fabric as a temporary terrace—no mortar required.
Budget Breakdown:
- Reclaimed brick (100–250 units): $120 – $500
- Paver base/sand: $60 – $180
- Bistro set (metal or wood): $120 – $450
- String lights or LED path lights: $40 – $160
- Plants for border (6–12): $60 – $240
Total Estimated Cost: $400 – $1,530
Best For: Long, narrow yards or side yards that need purpose. Ideal in three-season climates; tolerates foot traffic and weather.
Key Design Elements:
- Main materials: reclaimed brick, compacted sand, metal bistro
- Color palette: oxblood, russet, olive, cream, charcoal
- Lighting strategy: warm fairy/string lights and subtle downlighting
- Furniture silhouettes: slim, foldable cafe chairs, round table
- Texture layers: rough brick, soft foliage, linen or canvas cushions
- Accent details: candle jars, vintage match striker, enamelware planter
How To Recreate This Look:
- Sketch the path curve; curves feel older than straight lines.
- Excavate 3–4 inches; lay base and sand; tamp until level.
- Set bricks in herringbone or basketweave; tap each into place.
- Brush sand into joints; mist to settle; repeat until firm.
- Position the bistro set at a gentle widening; add string lights overhead.
Why This Reads High-End: Patterned brickwork telegraphs craftsmanship. The aged variation in tone looks collected over time—texture equals luxury in the garden.
The Most Common Mistake: Skipping border restraint. Without edging or well-compacted sides, bricks creep and the path loses crispness. Use steel edging or a soldier course.
Pro Styling Tip: For photos, dampen the bricks slightly—color deepens, moss glows, and the path looks cinematic.
Did You Know? The gap between string lights and the nearest surface changes the shadow quality. Hang them at least 18 inches from foliage to avoid harsh leaf shadows that look messy on camera.
4. Chippy Wood Potting Table With Candlelit Amber And an Enamel Sink Trough
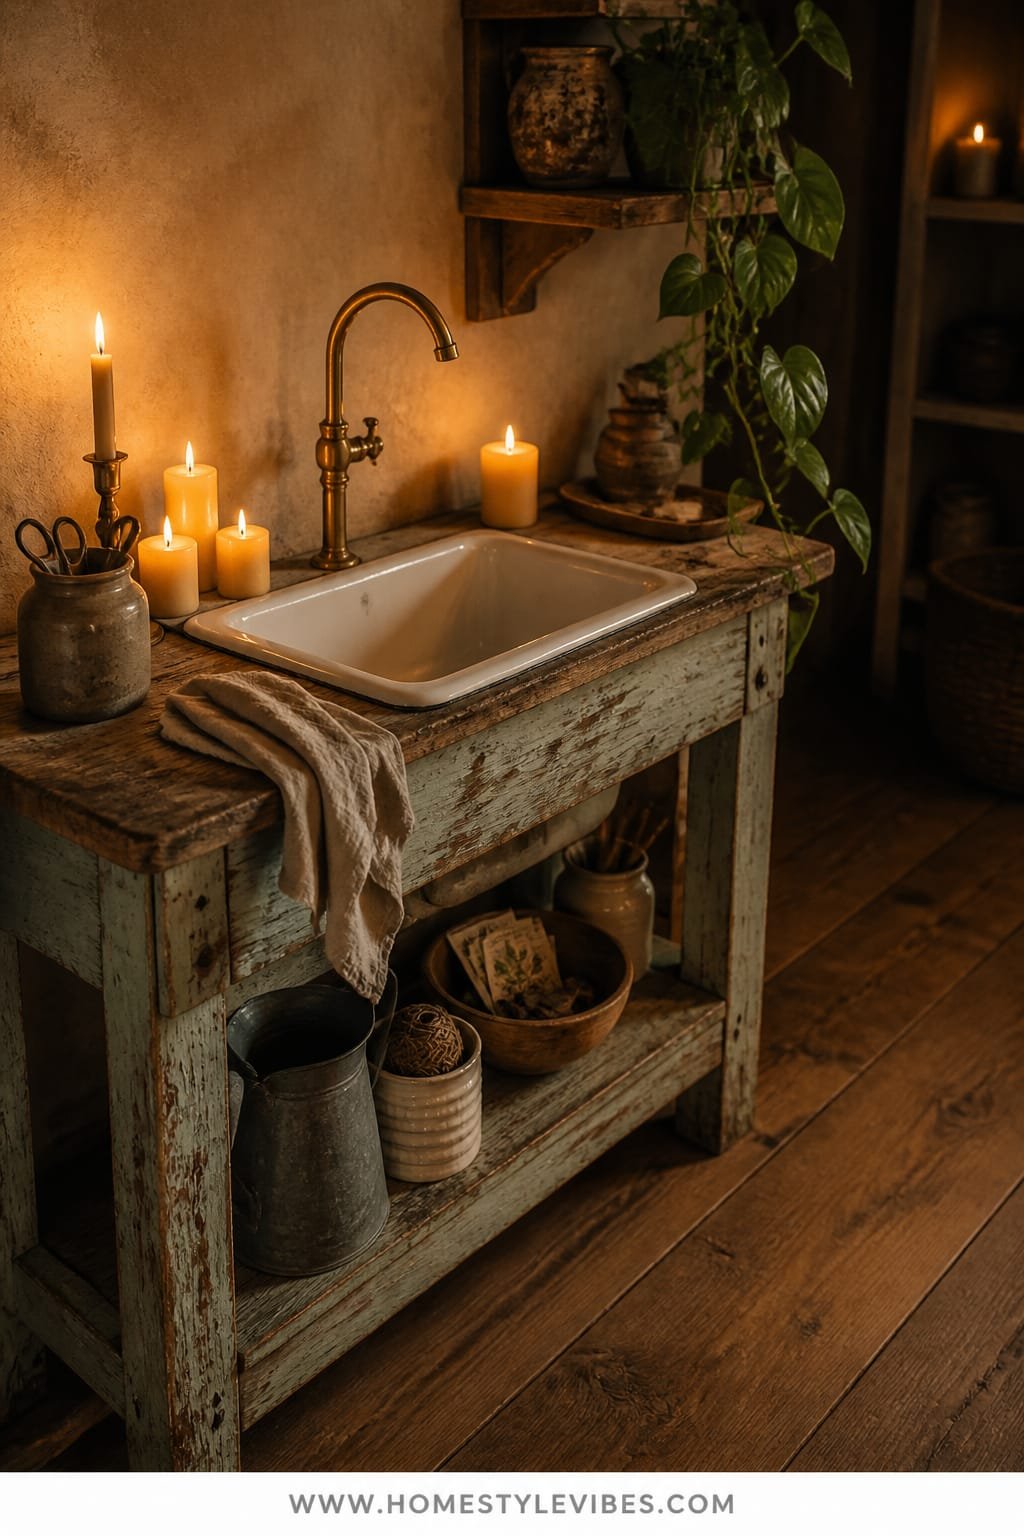
You want that cozy, useful nook where potting soil doesn’t ruin your vibe. But every utility piece you’ve tried screams garage, not garden. A chippy wood potting table solves this—weathered boards, flaky paint, and an enamel sink trough give you both function and nostalgia. Bathe it all in candlelit amber and it becomes a nighttime stage set—warm, a little witchy, completely charming.
Mood: rustic apothecary-meets-cottage studio. Real-life perks: everything has a home—twine in a jar, snips on a hook, seed packets in a crate—so mess looks intentional. If you entertain, the table moonlights as a bar for mulled wine or iced tea. LEDs in amber tones prevent the “parking lot” effect that cool LEDs create outdoors.
Variations: budget build using pallet boards and a thrifted enamel basin; small-space version with a narrow console and a deep galvanized tub; darker mood with blackened hardware and oxblood candles; renter-friendly freestanding unit with clip-on lights and removable hooks. It photographs like a set piece because the props are tactile and vintage-coded—labels, patina, glass, twine.
Budget Breakdown:
- Vintage or DIY potting table: $60 – $300
- Enamel sink or trough: $40 – $180
- Wall hooks/rail: $20 – $80
- Amber LED candles/lanterns: $30 – $120
- Organizers (crates, jars, tins): $25 – $90
Total Estimated Cost: $175 – $770
Best For: Covered patios, side yards, or garage-adjacent spots. Great for makers, plant lovers, and anyone who likes pretty storage.
Key Design Elements:
- Main materials: weathered wood, enamel, galvanized metal
- Color palette: cream, soft teal, warm oak, soot black accents
- Lighting strategy: candles and amber LEDs at eye level and below
- Furniture silhouettes: narrow console with shelf and rail
- Texture layers: chipped paint, crackled glaze, jute twine, kraft paper
- Accent details: old seed packets, ironstone pitchers, brass mister
Why This Looks Intentional: The station reads like a workbench with theater lighting. The repetition of vintage containers and the glow at hand level create editorial focus—your eye knows where to land.
How To Recreate This Look:
- Place the table against a fence or wall; paint a soft, muted backboard if needed.
- Mount a simple rail with S-hooks for tools; add a small shelf above for jars.
- Set the enamel trough into a cutout or perch it on top with wood blocks.
- Layer amber candles—one tall, one short—and a single task light.
- Style with labeled jars and a trailing plant to soften edges.
Don’t Do This: Avoid shiny chrome or bright plastic bins. They kill the mood and reflect light awkwardly, making photos look cluttered.
Pro Styling Tip: Leave a whisper of soil on the surface and a coil of twine mid-unravel. The “caught-in-use” moment makes it feel alive on camera.
A friend of mine spent weeks obsessing over plant choices before realizing the real problem was her lighting. Once we warmed up the glow around her potting table, the entire garden felt like a night garden from a novel. Point being: light first, plants second, mood always.
5. Lattice Privacy Screens With Misty Morning Light And a Cast-Iron Urn Anchor
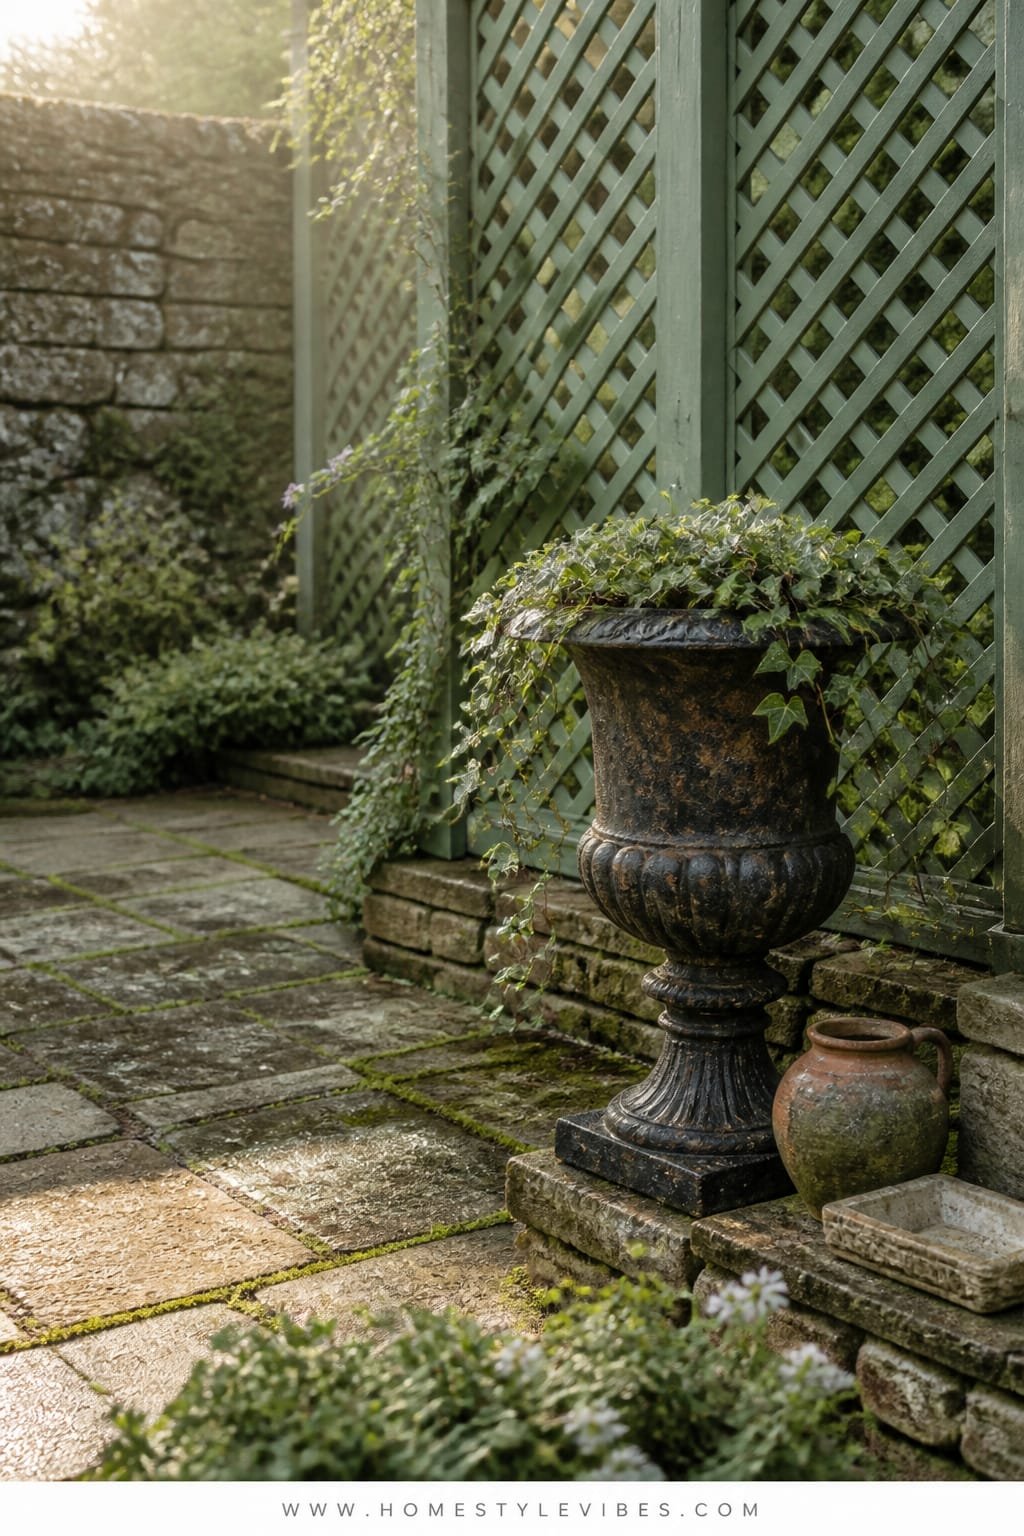
There’s always that neighbor sightline that wrecks the fantasy. You’ve tried tall shrubs, but they take ages to fill in. Lattice privacy screens create an instant veil—soft patterns, filtered views, and a place for vines to grip. Set a cast-iron urn as the anchor in front, and you have a vignette that reads stately, even if the yard is tiny.
Mood-wise, think formal garden meets secret courtyard. Why it works: lattice diffuses light and frames negative space so your eye sees depth. It’s family-friendly because it’s not a solid wall—air moves, plants thrive, and it won’t feel like a fortress. Misty morning light (or a simple hose-down before guests arrive) enhances the sense of hush—matte leaves, pearlized droplets, quiet drama.
Variations: budget-friendly premade lattice panels with painted trim; small-space freestanding screens in planters; darker vibe with black lattice and ivy; renter-friendly tension-post screens. The cast-iron urn adds vertical posture and weight—fill with ferns or trailing lobelia for instant old-world credibility. On camera, lattice grids introduce just enough geometry to counter the soft chaos of foliage, which is why this layout always reads composed.
Budget Breakdown:
- Lattice panels and posts: $120 – $420
- Exterior paint/stain: $30 – $80
- Cast-iron urn: $90 – $350
- Vines (3–4): $40 – $120
- Planter soil and mulch: $25 – $60
Total Estimated Cost: $305 – $1,030
Best For: Townhomes, row houses, or any garden with unavoidable neighbors. Great in four-season climates when paired with evergreen vines or seasonal swaps.
Key Design Elements:
- Main materials: wood lattice, iron, greenery
- Color palette: soft black or sage, charcoal, silver-green foliage
- Lighting strategy: diffuse morning light, low uplighting at night
- Furniture silhouettes: none required—urn is the hero
- Texture layers: grid lattice, fern fronds, matte iron
- Accent details: vintage gates, finials, climber ties in jute
Why This Looks Expensive: Symmetry plus contrast. The formal urn in front of delicate lattice mimics grand garden design principles—anchor piece + patterned backdrop = instant pedigree.
How To Recreate This Look:
- Map the worst sightline; place lattice just inside your boundary for maintenance.
- Paint or stain panels a deep tone for shadow play and longevity.
- Position the urn centered or slightly offset; add a gravel plinth beneath.
- Plant vines at panel bases; add discreet jute ties to guide growth.
- Install a warm LED spotlight grazing the urn at night for subtle drama.
One Thing To Avoid: Don’t use panels with oversized gaps in windy zones; they can warp quickly. Choose sturdy frames and seal edges to prevent moisture damage.
Pro Styling Tip: For photos, angle the camera to catch the lattice pattern fading into blur behind the urn—depth of field equals instant romance.
Quick Tip: Repeat one material three times across the yard—iron, terracotta, or stone. Repetition is the secret sauce that makes eclectic gardens feel curated.
6. Pea Gravel Courtyard With Soft Candlelight And a Vintage Daybed Canopy
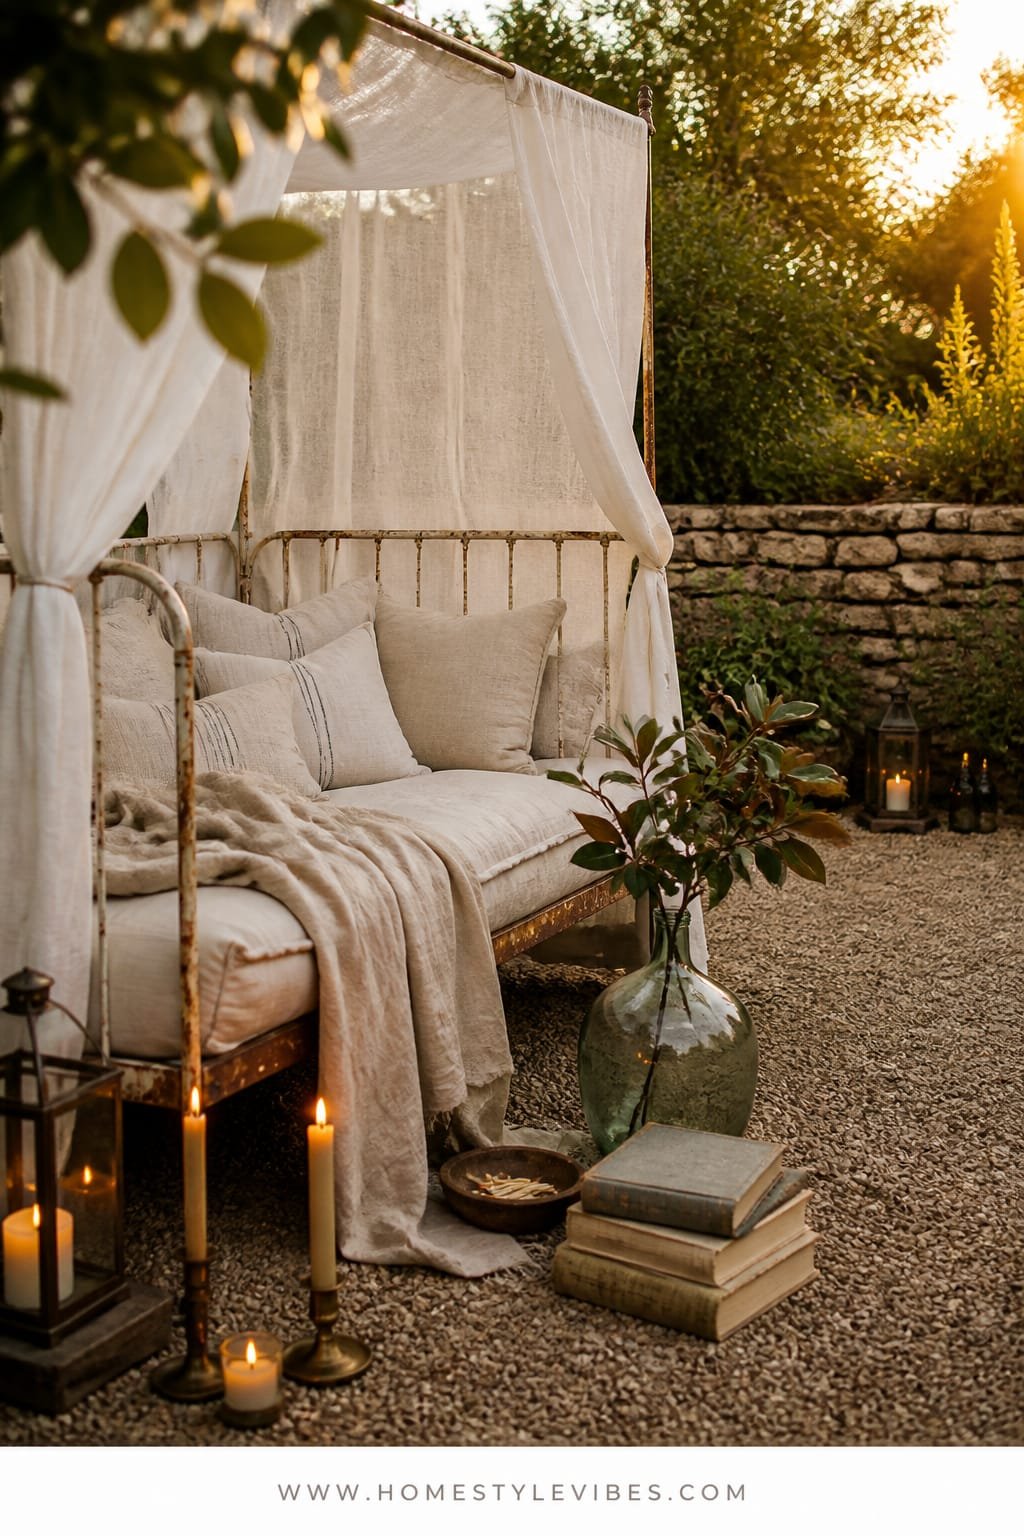
You’ve got an awkward patch that never hosts anyone. Chairs feel stiff, and the space doesn’t invite lounging. A pea gravel courtyard cozies up the ground plane, and a vintage metal daybed with a soft canopy transforms the area into a dreamy lounge. With candlelight and low lanterns, it becomes a little outdoor salon—part Paris flea market, part enchanted sleepover.
The mood swings romantic-bohemian. It works because pea gravel is affordable, drains well, and sounds satisfyingly crunchy underfoot. The daybed (with weather-treated cushions) doubles as seating by day and a napping spot on breezy afternoons. Photographically, gravel adds grain while the canopy diffuses light around the face, giving everyone that “filtered” glow IRL.
Budget move: source a used metal daybed frame and seal it with rust-inhibiting paint; layer thrifted linens. Small space: use a narrow bench with oversized cushions and a linen panel. Darker palette: smoked taupe canopy, black frame, deep green pillows. Renter-friendly: lay heavy-duty landscape fabric and contain gravel with metal edging; everything lifts later.
Budget Breakdown:
- Pea gravel (1–2 cubic yards): $80 – $200
- Landscape fabric and edging: $50 – $160
- Vintage metal daybed frame: $120 – $400
- Outdoor cushions and covers: $80 – $300
- Canopy fabric and poles: $40 – $180
- Lanterns/candles: $25 – $120
Total Estimated Cost: $395 – $1,360
Best For: Bare patches near fences or garages, small courtyards, or side yards craving a lounge zone. Works best in mild climates or with shade sails in hot areas.
Key Design Elements:
- Main materials: pea gravel, linen/cotton canopy, metal frame
- Color palette: stone gray, ecru, olive, soot black
- Lighting strategy: low candlelight and scattered lantern pools
- Furniture silhouettes: curving metal daybed, bolster pillows
- Texture layers: nubby linen, crunchy gravel, matte metal
- Accent details: tassel throws, old books, ceramic side tables
How To Recreate This Look:
- Mark out a rectangle or oval; lay fabric; add edging.
- Pour gravel 2–3 inches deep; rake level and compact slightly.
- Position daybed; secure canopy with poles or wall-mounted brackets.
- Layer cushions: base pad, two bolsters, three throw pillows.
- Scatter lanterns at floor level; add one overhead fairy-light veil if desired.
Why This Looks Expensive: The daybed reads custom and the canopy adds theatrical softness. Layered textiles against mineral ground equals editorial contrast—comfort meets grit.
Watch Out: Don’t skimp on cushion covers. Use removable, washable, water-resistant fabrics. Nothing kills romance like musty cushions after one dew-heavy night.
Pro Styling Tip: Shoot from a low angle so gravel fills the foreground and the canopy frames the scene—it creates instant depth and atmosphere.
Honest moment: outdoor textiles are tricky. I once tried a “dry clean only” vintage cover outside because it was gorgeous. One foggy evening later, it looked like a sad pancake. Go washable, even if the vintage print tempts you. Your future self will thank you.
7. Weathered Stone Wall With Blue Hour Uplight And a Copper Fountain Bowl
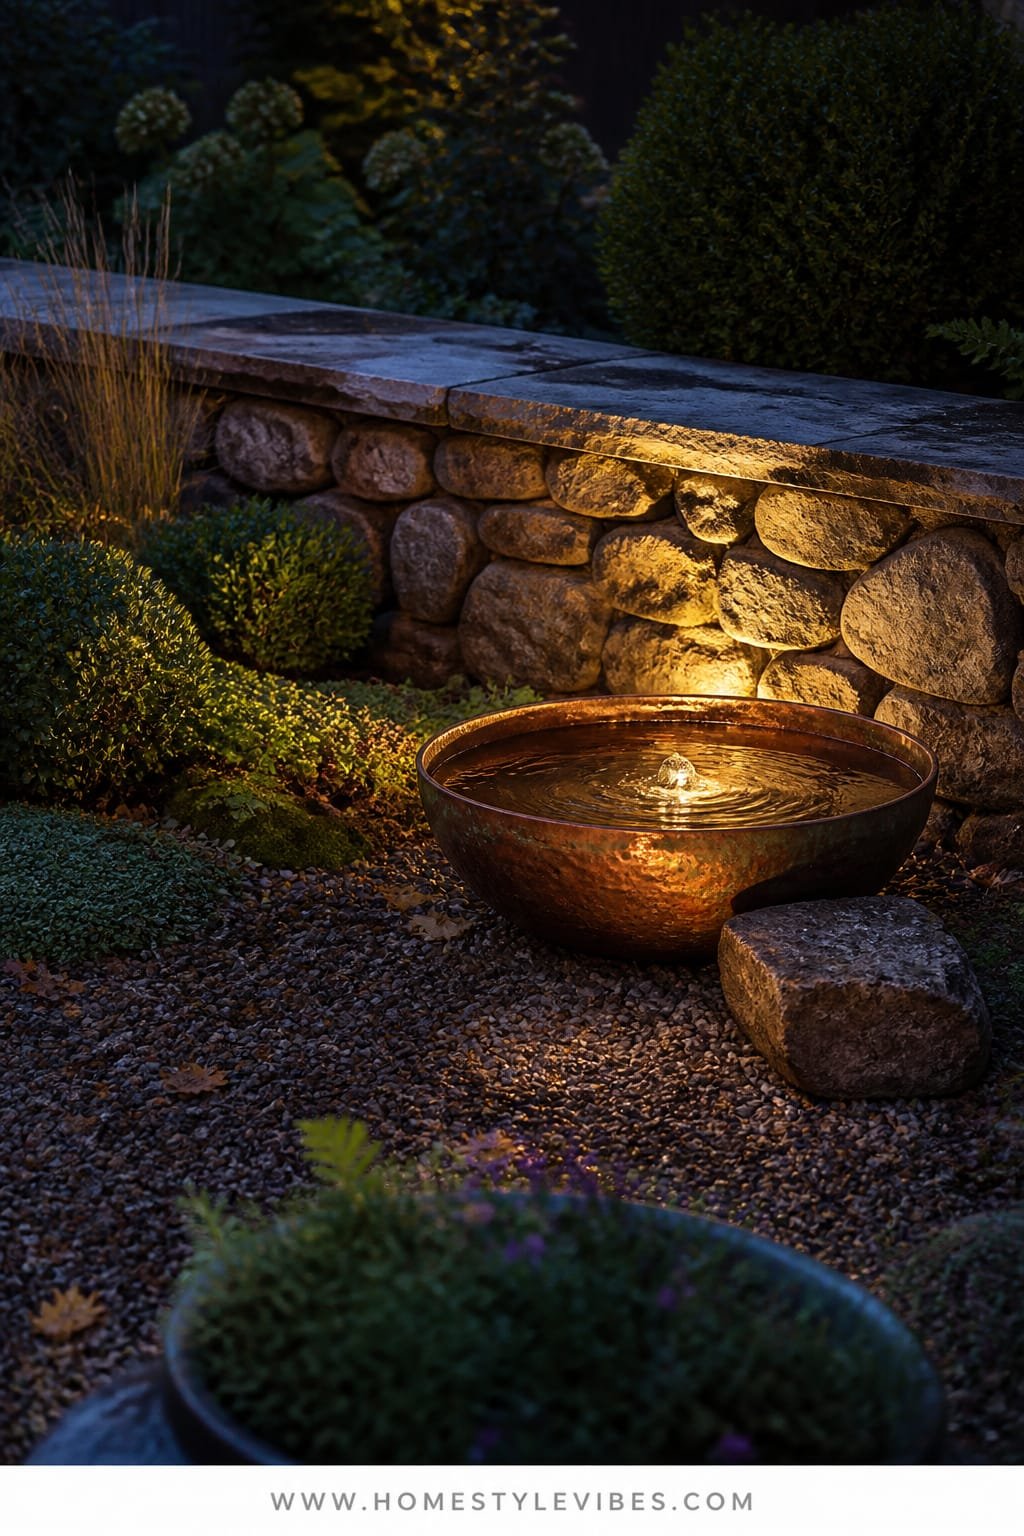
Maybe your garden has no anchor and fades into the night. You’ve hung a few lights, but it still feels scattered. A low weathered stone wall provides structure and shadow, and a shallow copper bowl fountain becomes the glowing heart of your night garden when you uplight it at blue hour. The combination of rock, water, and warm metal reads antique, elemental, and quietly cinematic.
We’re channeling old monastery courtyard—calm, magnetic, a little mysterious. Practicality-wise, a low wall retains beds, defines zones, and doubles as extra seating. A recirculating copper bowl fountain is surprisingly low maintenance and the soft water sound masks street noise. Blue hour uplight (those 10–30 minutes after sunset) catches the copper’s warm-silver shimmer while the stone sinks into shadow—gorgeous in person, jaw-dropping on camera.
Variations: dry-stack a small 12–16 inch wall for budget charm; small-space version with a single-stone plinth and tabletop copper bowl; darker palette with slate and aged verdigris; renter-friendly: set a copper bowl on a pedestal pot with a battery pump. Pair with night-scented blooms (nicotiana, honeysuckle) for a true “hauntingly beautiful” vibe.
Budget Breakdown:
- Weathered stone (1–2 pallets or loose): $200 – $900
- Gravel base and sand: $60 – $150
- Copper bowl and pump kit: $150 – $500
- Low-voltage uplights (2–3): $60 – $180
- Plants (ferns, hosta, nicotiana): $60 – $180
Total Estimated Cost: $530 – $1,910
Best For: Backdrops along fences, patio edges, or slope transitions. Perfect for evening gardens and homes near street noise.
Key Design Elements:
- Main materials: weathered stone, copper, gravel
- Color palette: stone gray, moss, verdigris, candlelight gold
- Lighting strategy: blue hour uplight on water and select plants
- Furniture silhouettes: low wall seating edge
- Texture layers: fissured stone, rippled water, soft foliage
- Accent details: antique spout, fern fronds, thyme between stones
How To Recreate This Look:
- Outline the wall line; excavate a shallow trench; add compacted gravel base.
- Dry-stack stones, staggering joints; check level as you go.
- Center the copper bowl on a gravel pad; install the pump and test flow.
- Place uplights to graze the wall and catch the fountain’s rim.
- Plant low ferns and thyme to soften; add a mossy kneeling stone nearby.
Why This Feels Designer: Elemental triad—stone, water, metal. The restrained palette and strong geometry look bespoke without shouting. Subtle lighting makes the materials do the work.
The Most Common Mistake: Over-lighting. If the wall looks like a stage set for a concert, you’ve gone too far. Two warm uplights are usually enough—let the darkness sculpt the rest.
Pro Styling Tip: Turn the fountain flow low so the water barely kisses the rim; that thin sheet reflects light like liquid glass in photos.
Did You Know? Overwatering moss around stone can make it yellow. Mist lightly in the evening and keep it shaded for that deep forest green.
If your brain feels full, take a breath. Pick the one corner that bothers you most and choose the idea that solves that specific pain point—privacy, flatness, harsh light, or no anchor. That’s your next weekend.
Quick Checklist
- Wrought iron arch sized taller than your tallest guest
- Stone bench or cast-concrete seat to ground a vignette
- Aged terracotta pots in varied heights and widths
- Vintage or cast birdbath planted with moss or sedum
- Reclaimed brick set in a classic pattern with proper edging
- Warm string lights or lanterns for soft evening glow
- Chippy wood potting table with enamel trough
- Amber LED candles for theatrical warmth
- Lattice privacy screens painted deep sage or soft black
- Cast-iron urn as a formal anchor
- Pea gravel courtyard defined by clean edging
- Vintage daybed or bench with washable outdoor textiles
- Weathered stone wall for structure and seating
- Copper bowl fountain with a quiet recirculating pump
- Low-voltage uplights aimed at materials, not faces
Frequently Asked Questions
How do I keep a vintage garden aesthetic on a tight budget?
Focus on one material repeated: terracotta, iron, or brick. Source secondhand arches, urns, and bistro sets locally. Use pea gravel instead of pavers, DIY limewash to age pots, and add just one statement piece (like a birdbath) to set the tone.
My yard is tiny. Which idea works best without crowding?
Try the lattice screen with a single cast-iron urn or the half-arch against a fence. Both create vertical drama without eating floor space. A small cluster of aged terracotta pots gives character without clutter.
I’m renting. How can I do this without permanent changes?
Go freestanding: an arbor weighted by planters, pea gravel on landscape fabric, a portable potting table, and a tabletop copper fountain. Choose clip-on or battery-powered lighting and bring everything with you later.
What about maintenance—will these looks be fussy?
Not if you choose wisely. Pea gravel and brick are low-fuss, terracotta needs a quick brush seasonally, and copper fountains just need a wipe and water refresh. Use washable outdoor textiles and plant drought-friendly vines where possible.
What’s the most common design mistake in vintage-style gardens?
Mixing too many materials and colors. Limit yourself to two or three main materials and a tight palette. Also avoid harsh, cool lighting—it flattens textures and ruins the mood. Warm, low light at key focal points wins every time.
The Wrap-Up
Start small and specific. Pick the one zone that makes you sigh and choose the idea that fixes that exact problem—privacy screens for nosy views, an iron arch for a focal point, or a copper bowl for a night-time heart. One weekend, one material, one vibe. That’s how a garden starts to feel like a story, not a spreadsheet.
The truth is, luxury outside comes from three things: texture, lighting, and restraint. Stone against foliage, iron against petals, candlelight against shadow. Let materials age. Keep the palette quiet. Place a single statement piece, not seven. Your garden will reward you with depth, calm, and that haunting beauty you can’t stop photographing.
You’ve got this. Choose your anchor, light it softly, and let the plants take their time. By dusk next Sunday, you’ll see it: a vintage garden aesthetic that finally feels like yours—beautiful, whispered, unforgettable.
About the Author

Krisztina P.Rendes, Founder of Home Style Vibes
Founder of Home Style Vibes
Krisztina Puskásné Rendes created Home Style Vibes as a cozy-modern lifestyle space where homemaking meets inspiration. Her goal is to help women create beautiful, organized, and peaceful homes they truly love — without overwhelm. You’ll find here heart-driven content on home decor, cleaning tips, easy family recipes, organization and decluttering, DIY home projects, plants, and seasonal ideas — all designed to bring more calm, comfort, and style into everyday life.