6 Summer Garden Party Table And Drink Setup Ideas Guests Will Absolutely Love
You want that dreamy, sun-dappled summer garden party where the table glows, the drinks sparkle, and guests linger long after sunset. But sticky logistics keep crashing the vision: wilting flowers, messy drink stations, cluttered mismatched serveware, and nowhere to set a glass. You picture linen fluttering in the breeze, mossy greens against soft terracotta, candlelight catching on glass, and a table that looks like it wandered out of a magazine shoot—minus the pretension. These 6 ideas fix the exact frustrations that make outdoor entertaining feel chaotic. They’ll give you photo-ready table and drink setups that look luxe, stay functional, and don’t exceed a realistic budget—all in an afternoon or a weekend max.
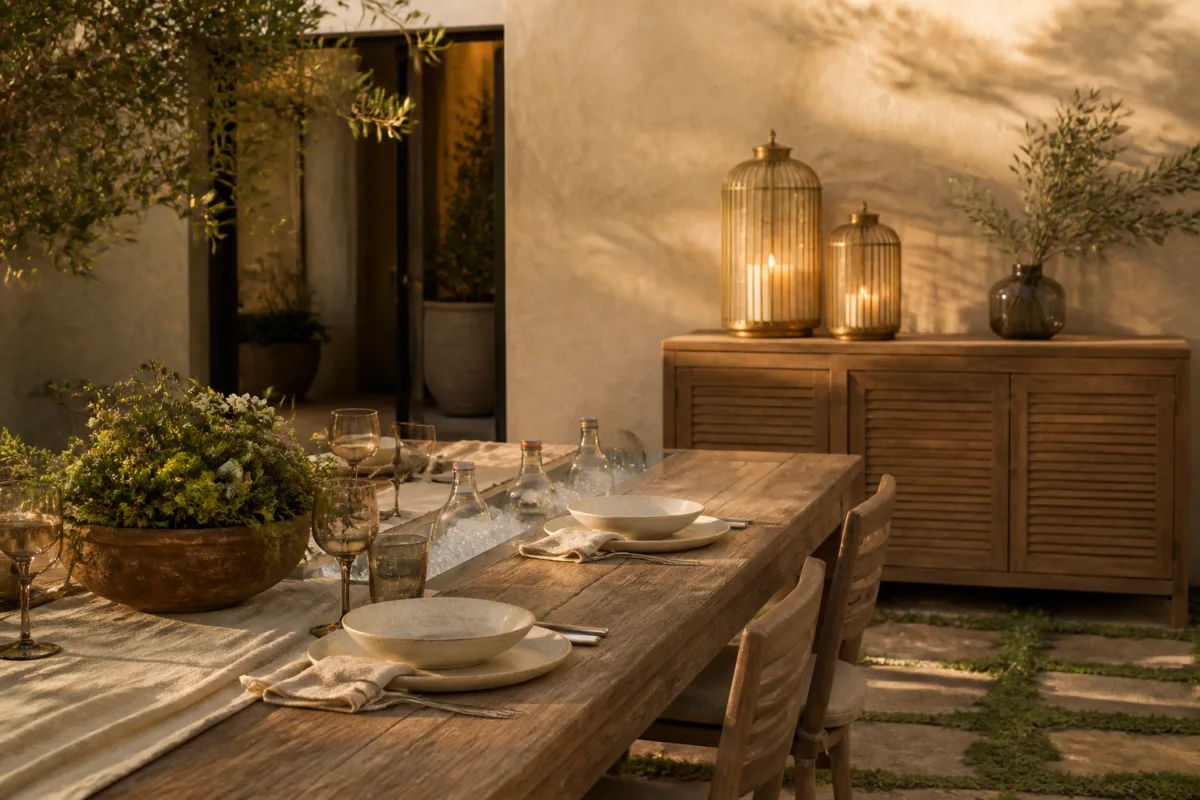
Expect layered textures, tone-on-tone palettes, and simple lighting strategies that do most of the heavy lifting. These summer garden party ideas are Pinterest-worthy without being precious—think approachable sophistication and smart details that solve real problems. If you love unfussy beauty and you want your guests to say “Wait… how did you do this?”—you’re in the right place. This vibe works beautifully for relaxed birthdays, casual anniversaries, low-key bridal showers, or just because it’s a perfect evening and you want to savor it.
1. Weathered Teak Buffet with Golden Hour Lantern Glow and a Slimline Ice Trough
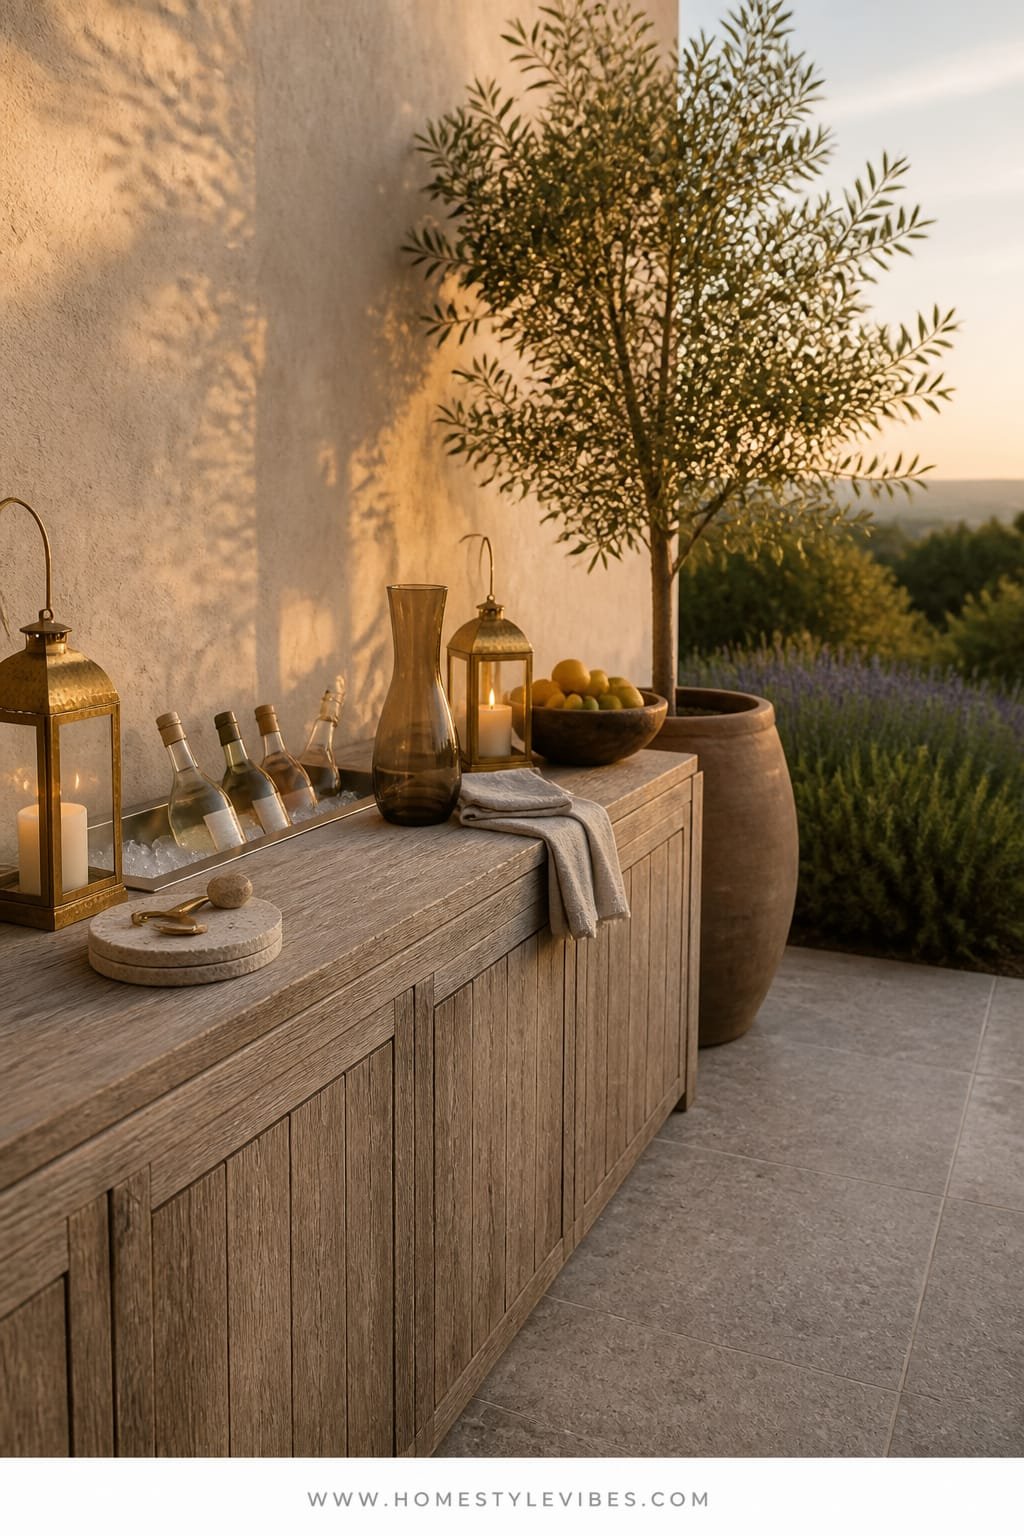
We’ve all been there: guests constantly crowd the kitchen island because your outdoor drink setup never quite works. Either the ice melts too fast, or you run out of surface space after the second round. This design solves the pinch point with a long, weathered teak buffet that wears sun and spills like a pro, warm lantern light that flatters everyone’s skin tone, and a narrow stainless-steel ice trough that keeps bottles frosty without hogging the whole table. The mood reads modern Mediterranean meets wine-country picnic—casual, sexy, and totally functional.
Here’s why it works in real homes: teak takes a beating, stainless cleans easily, and the lanterns give off relaxed, vacation energy without harsh glare. The lighting here is everything—low, golden, and diffuse. It softens edges at dusk and turns condensation on glass into little sparkles your phone camera loves. The dominant materials—teak, brushed stainless, handblown glass—create a layered texture story that photographs beautifully because you get contrast (warm wood vs cool metal) and depth (glass reflections, soft flames, shadow play under the buffet’s ledge).
Variations make it easy: for a budget-friendly version, swap teak for an acacia console or even a secondhand dresser sealed with marine varnish. For tiny patios, choose a half-width plant stand and a mini ice trough (think countertop planter repurposed). Renter-friendly? Use a folding banquet table hidden under a linen tablecloth with a faux-teak runner—and no one will know.
Budget Breakdown:
- Weathered teak buffet/console: $350–$900 (or acacia alternative: $120–$250)
- Stainless slimline ice trough: $60–$160
- Outdoor-safe lanterns (3–5 units): $15–$60 each
- Handblown drinkware set (12–16): $60–$180
- Linen runner + bar towels: $25–$80
- Melamine or enamel trays for garnish/bitters: $10–$30 each
Total Estimated Cost: $520 – $1,410
Best For: Medium patios or gardens; hosts who love self-serve drinks and a slow, sunset start time. Works spring through late summer.
Key Design Elements:
- Main materials: weathered teak, brushed stainless, clear handblown glass
- Color palette: honey teak, soft gold candlelight, pale sage accents, clear glass
- Lighting strategy: staggered lantern heights with LED candles plus one hidden warm-white puck under the buffet lip
- Furniture silhouettes: long, low buffet; slim trough; simple trays
- Texture layers: wood grain, linen runner, glass condensation
- Accent details: citrus in a shallow bowl, a spriggy herb bouquet, brass bottle opener
How To Recreate This Look:
- Start with a console or buffet and ensure it’s stable on pavers or grass—shim legs with rubber pads if needed.
- Add a narrow stainless ice trough down the center and fill with a 60/40 mix of ice and water for faster chilling.
- Layer a linen runner along the back edge to define a “dry zone” for glassware and napkins.
- Install warm LED candles in lanterns and place them in asymmetric clusters—two tall on one side, a medium and a short on the other.
- Style with citrus, herbs, and two trays: one for garnishes, one for bar tools. Keep straws and stir sticks corralled in a single tall vessel.
Why This Looks Expensive: The wood-and-metal combo feels substantial, and everything has a designated zone. The lantern glow adds a cinematic layer that reads luxe in person and on camera.
Watch Out: Don’t push the buffet flush against a wall. You’ll create a traffic jam. Leave at least 24 inches behind for a fluid serving loop.
Pro Styling Tip: Wipe down glassware just before guests arrive so it catches lantern reflections without fingerprints—those highlights sell the scene.
Scroll on—because the next idea solves the “where do I sit and where do I set my plate?” struggle with serious comfort cred.
2. Natural Linen Dining with Dappled Shade Light and a Terracotta Pitcher Centerpiece
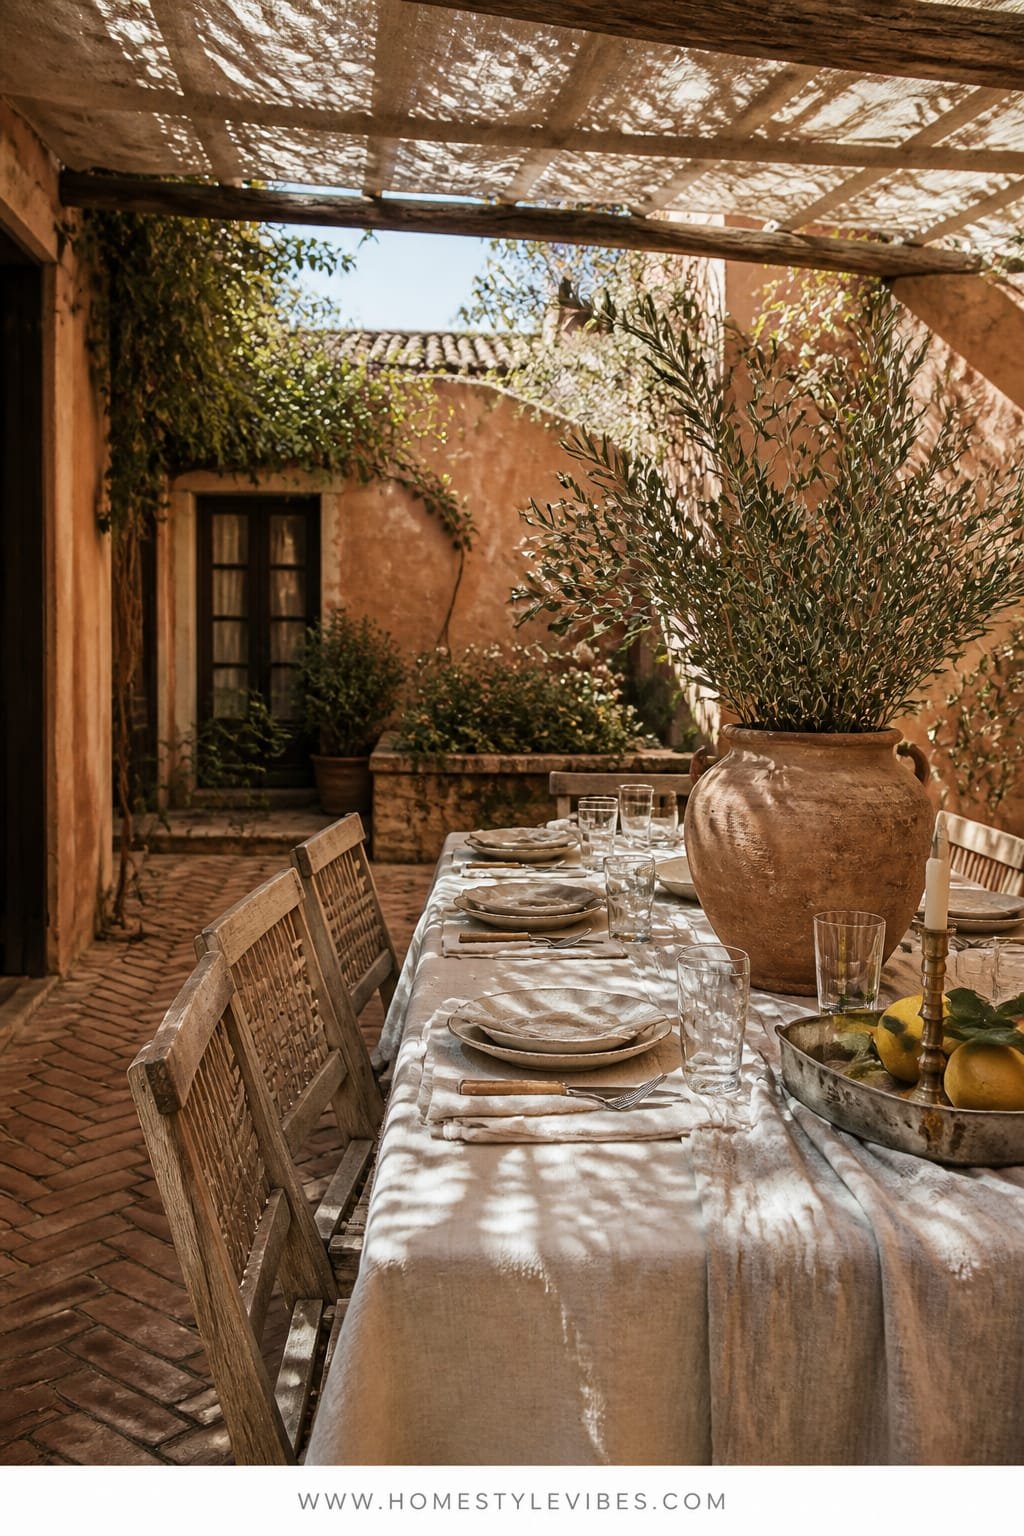
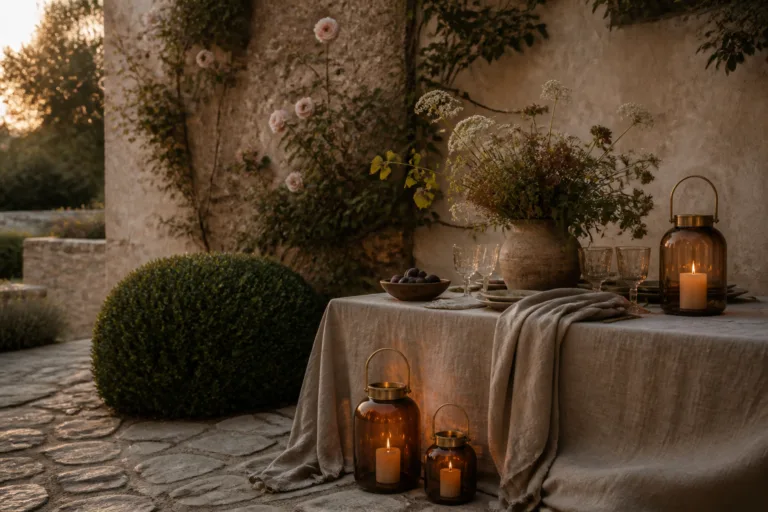
It’s that one corner that always feels off: you set a gorgeous table, but guests squint under harsh sun or sit in the chilly shade. You’ve tried umbrellas and still end up with weird spotlight patches and squabbles about who’s too warm. This setup leans into dappled shade—think under a tree or pergola with a linen canopy—so the entire table bathes in soft, moving light. A long natural-linen cloth anchors the look, while oversized terracotta pitchers filled with olive branches or bay leaves become the sculptural center that doesn’t block sightlines.
The mood is coastal farmhouse meets minimalist Mediterranean bistro. It works because linen naturally crinkles into an effortless texture, terracotta warms everything up, and the light quality creates flattering, even tones that make your guests and your photos look better. Real homes benefit from easy-care materials: linen hides wrinkles by embracing them, terracotta ages nicely, and a simple canopy (even a painter’s drop cloth washed and softened) filters sun without darkening the setting.
Two practical variations: on a budget, use an unbleached cotton tablecloth and thrifted terracotta planters as vessels (line with mason jars for water). Small space? Go round table, one central pitcher, and low-profile plates so nothing feels cramped. Renter-friendly canopy: clip a linen sheet to string lights using small binder clips—works, looks chic, comes down in ten minutes.
Budget Breakdown:
- Natural linen tablecloth (8–10 ft): $35–$120
- Terracotta pitchers (1–3): $25–$70 each
- Cloth napkins (set of 8–12): $18–$48
- Everyday ceramic plates (matte white or cream): $3–$12 each
- Canopy solution (linen sheet/cloth + clips): $20–$60
- Olive/bay/eucalyptus stems: $12–$35
Total Estimated Cost: $180 – $525
Best For: Long lunches that drift into evening; patios with partial shade; families who like easy cleanup and unfussy styling.
Key Design Elements:
- Main materials: natural linen, terracotta, matte ceramic
- Color palette: warm ivory, clay, olive green, soft charcoal
- Lighting strategy: filtered dappled light under canopy or tree; string lights for a soft evening layer
- Furniture silhouettes: simple trestle table or farmhouse table; low-profile chairs
- Texture layers: soft linen, clay, matte glaze, leafy greens
- Accent details: salt pinch bowls, olive-wood serveware, a single candle cluster at one end
How To Recreate This Look:
- Start with a neutral cloth that hangs at least 8–10 inches over each side—floor length for drama if you can manage it.
- Add a canopy or sheet overhead, securing it loosely to allow gentle movement (use two points higher, one lower for a casual drape).
- Layer terracotta pitchers down the center, spacing so guests can see across the table.
- Install string lights around the perimeter on warm white; avoid cool white which flattens the palette.
- Style with matte plates, cloth napkins tied in a loose knot, and a small bowl of citrus to pull the palette together.
Why This Feels Designer: The interplay of dappled light on linen plus sculptural terracotta reads intentional and editorial, even though the pieces are humble.
One Thing To Avoid: Avoid tall, dense floral arrangements. They cast odd shadows and force guests to crane around them. Keep centerpieces low or airy.
Pro Styling Tip: For photos, mist the olive branches lightly—water drops catch the light and make greenery look alive.
Quick Tip: Draw a tiny plan of your table on a sticky note and mark where plates, pitchers, and candles go. Five minutes of planning saves thirty minutes of last-minute shuffling when guests are at the gate.
3. Black Steel Bar Cart with Cool Moonlight LEDs and a Fluted Glass Dispenser
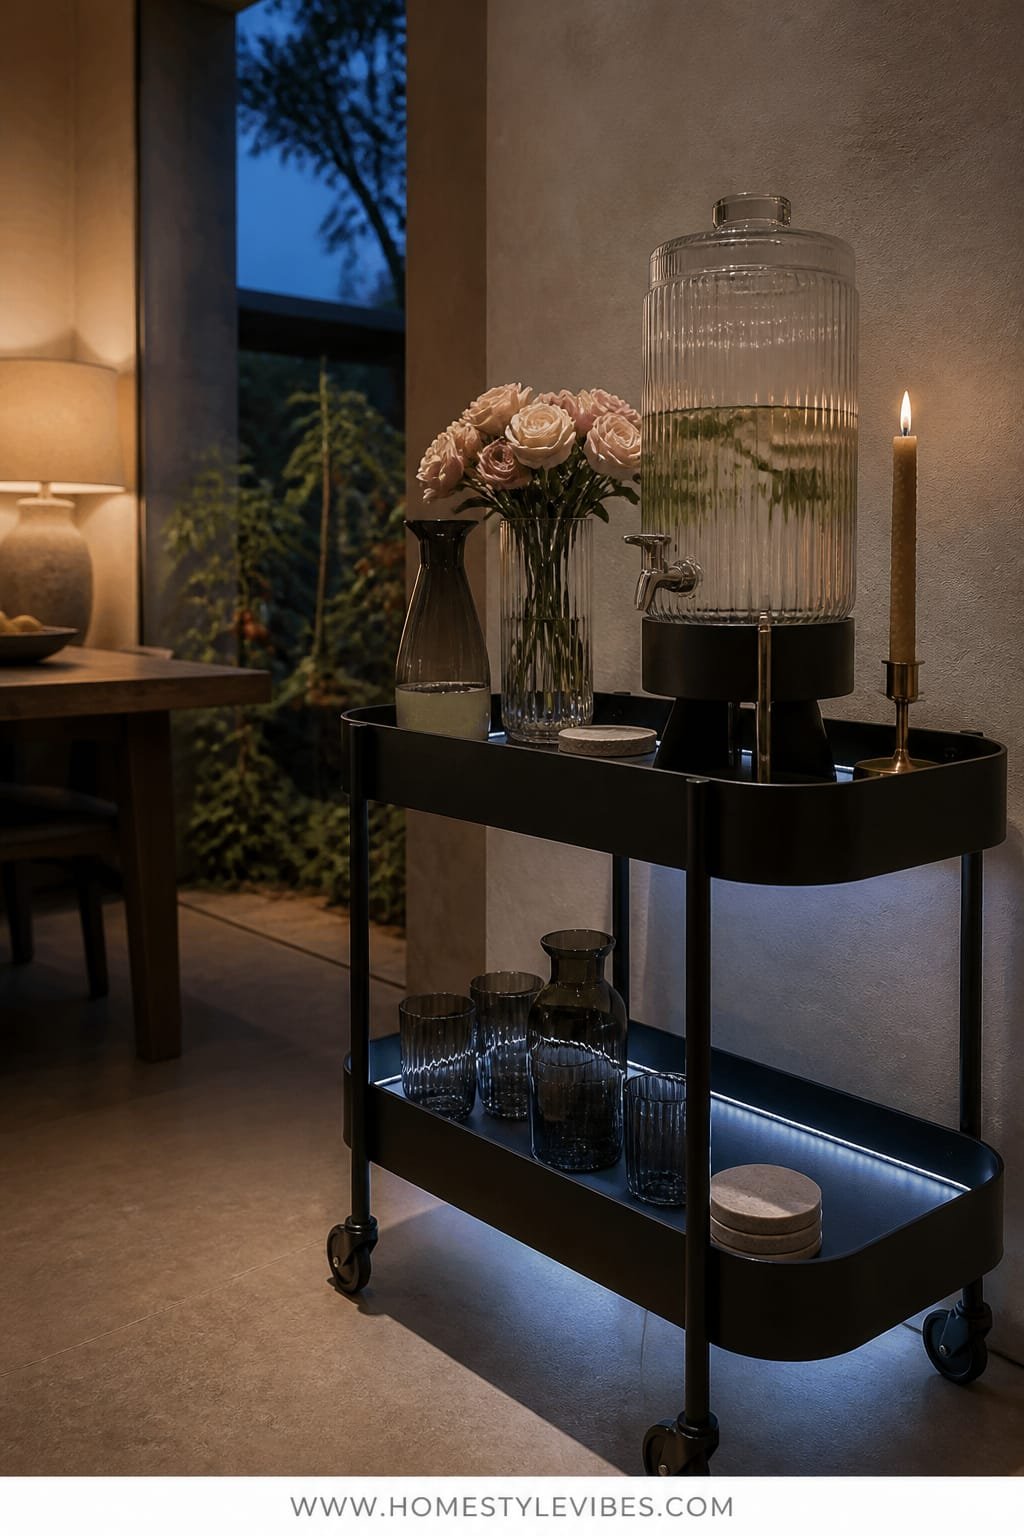
You want a sleek, easy-to-move drink station that doesn’t slosh everywhere the second someone bumps it. But your current cart either looks flimsy or turns into a pile of bottles and napkin chaos. This black steel bar cart brings weight and presence, while a fluted glass dispenser becomes the sculptural focal point. Layer in cool moonlight LEDs tucked under the cart’s shelves to create an after-hours glow that feels like a rooftop bar, even if you’re steps from your tomato plants.
This mood skews modern city-meets-garden: crisp, minimal, a little moody. It works because the cart’s darker silhouette recedes against foliage, so what you notice is the glass, the ice, and the clean lines. Photography loves it for the contrast: black steel frames the translucent dispenser, and cooler LEDs add drama without harshness. Plus, wheels mean you can pivot the whole setup into the perfect patch of shade—or closer to the table when it’s time for refills.
Variations: on a tight budget, spray-paint a thrifted cart in matte black and add stick-on LED strips. Small patios can do a half-cart (tiered plant stand) with a 1-gallon dispenser and a small ice bucket. For a renter-friendly swap, use removable adhesive cable clips to hide any cords and keep the look seamless.
Budget Breakdown:
- Black steel bar cart: $120–$350
- Fluted glass drink dispenser: $35–$95
- LED strip lights (cool white, dimmable): $18–$40
- Matte black ice bucket + tongs: $20–$60
- Acrylic highball glasses (set of 12): $24–$60
- Small cutting board + paring knife for garnishes: $12–$30
Total Estimated Cost: $229 – $635
Best For: Evening garden parties, balcony setups, and hosts who want drinks centralized and stylish with minimal fuss.
Key Design Elements:
- Main materials: black powder-coated steel, fluted glass, acrylic drinkware
- Color palette: black, clear glass, silver accents, a pop of green from herbs
- Lighting strategy: cool LED underglow plus one tealight cluster on top shelf for warmth
- Furniture silhouettes: rectilinear cart, cylindrical dispenser
- Texture layers: ribbed glass, matte metal, glossy citrus
- Accent details: rosemary skewers, metal cocktail picks, a single framed menu card
Why This Reads High-End: Monochrome base, strong geometry, and one sculptural glass focus piece—this is restraint with intention. It looks like you edited, not that you’re missing items.
How To Recreate This Look:
- Start by assembling the cart and testing LED strips under each shelf; hide the battery pack or plug behind the frame.
- Add the fluted dispenser centered on the top shelf, weighted with ice first to check stability.
- Layer an ice bucket and stacked acrylic glasses on the second shelf; keep napkins in a low tray to avoid wind casualties.
- Install one small tealight cluster or candle for a touch of warmth at eye level.
- Style with a framed mini-menu and keep garnishes pre-sliced in a lidded container to avoid fruit flies.
The Most Common Mistake: Overloading the top shelf. Keep it minimal to prevent tipping and to maintain negative space—your eye needs a breath.
Pro Styling Tip: Chill the dispenser and glasses ahead of time; condensation beads photograph like jewelry under cool LEDs.
Did You Know? Most cheap LED strips cast a blue tint that flattens greens and skin. Choose a “neutral-to-cool” around 4000K–4500K so drinks sparkle without turning chilly grey in photos.
Remember, this isn’t about recreating a showroom. It’s about building a party flow that works for you. If one idea sings, start there and let the rest wait—you only need one strong anchor to make the night feel special.
4. Whitewashed Farm Table with Soft Candlelight Strings and a Woven Rattan Drinks Caddy
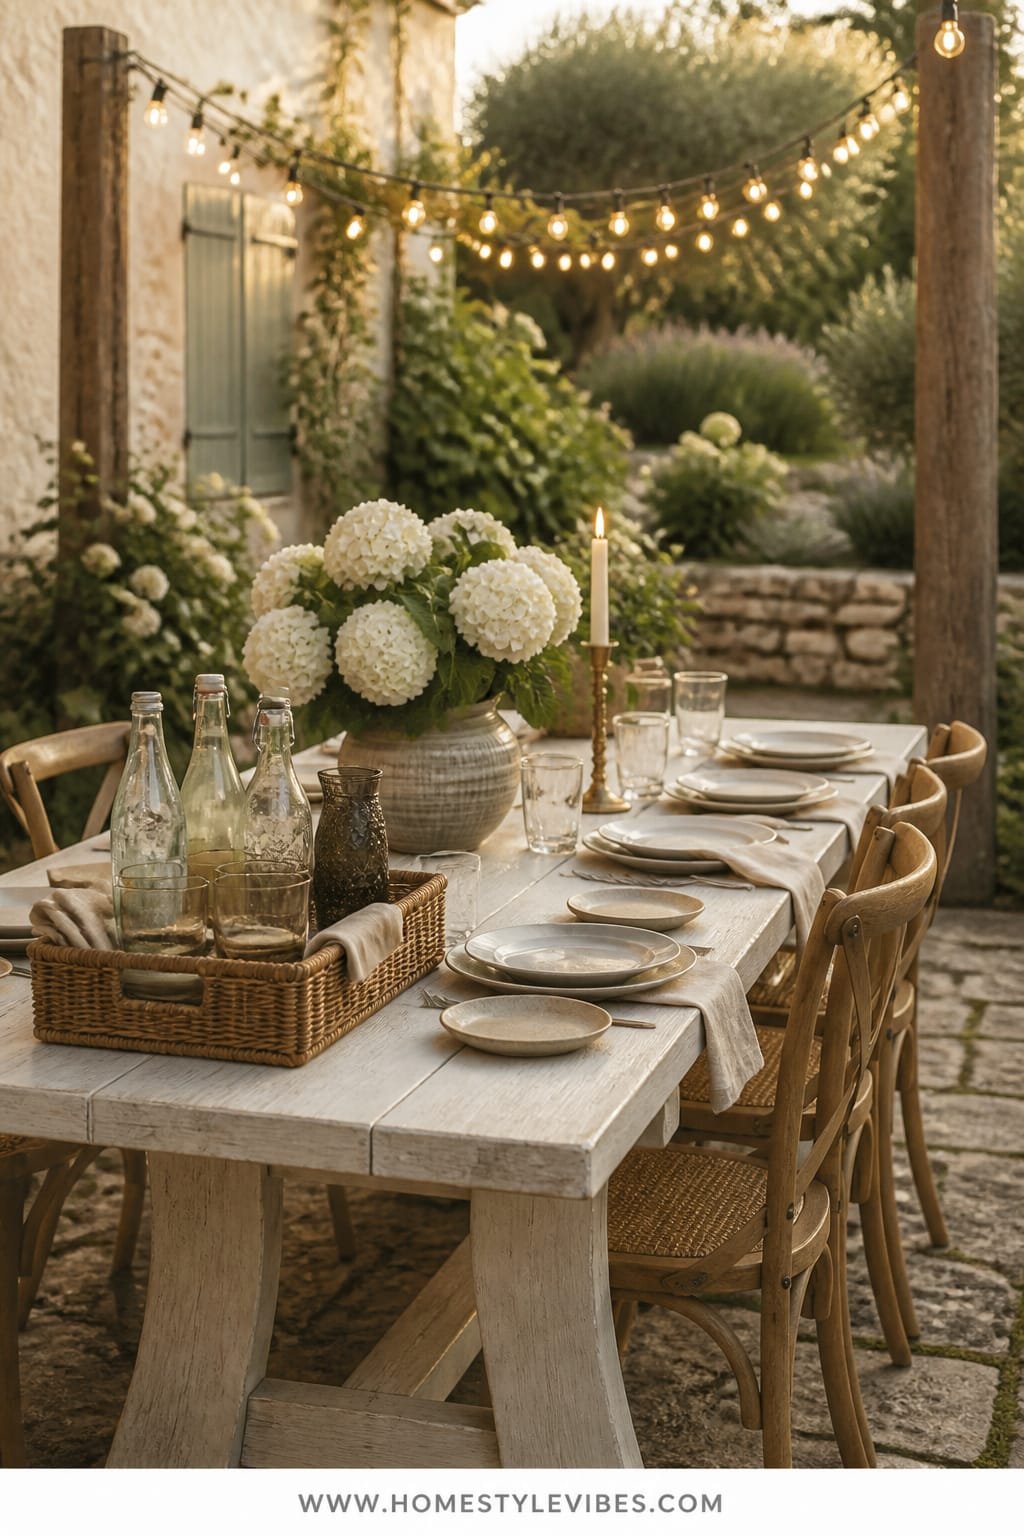
You’ve got the table. What you don’t have is cohesion—the plates look fine, but everything else feels like a random collection of bits. This design brings a gentle farmhouse romance: a whitewashed table that lightens even a shady nook, whisper-soft string lights overhead, and a rattan caddy that corrals bottles, napkins, and utensils like a tidy little butler. It solves clutter without feeling fussy and shifts the focus to a calm, creamy palette that makes food pop and guests relax.
The vibe is airy, French-country adjacent, with a soft-focus effect. It works particularly well in family settings because nothing is too precious, and rattan ages gracefully. Lighting matters here: string lights give consistent warmth, while the whitewashed surface bounces the glow back up, so faces look bright and welcoming. In photos, the whitewash acts as a built-in reflector, eliminating harsh shadows under plates and glassware.
Budget play: whitewash a thrifted table with diluted chalk paint and seal it with a matte outdoor topcoat. For tiny areas, use a square bistro table and a mini caddy. Renter-friendly? Hang string lights with removable outdoor hooks and tension between two tall planters with poles—no drilling.
Budget Breakdown:
- Whitewashed table or DIY materials: $80–$300
- String lights (warm, shatterproof): $20–$60
- Rattan drinks caddy: $25–$70
- Ceramic serving platters (2–3): $16–$90 each
- Votive holders (6–10): $12–$40
- Simple wildflower bunches: $10–$25
Total Estimated Cost: $163 – $585
Best For: Family-style dinners, potlucks, and any host who wants a clean base that hides mess while still feeling light.
Key Design Elements:
- Main materials: whitewashed wood, woven rattan, matte ceramics
- Color palette: chalk white, oat, buttery warm light, herb green
- Lighting strategy: overhead string lights dimmed low; votives grouped, not scattered
- Furniture silhouettes: simple plank table, curved rattan caddy, footed platters
- Texture layers: chalky paint, basket weave, linen napkins, wild blooms
- Accent details: soft-edged flatware, ceramic salt cellars, unscented candles
How To Recreate This Look:
- Start with a table you can lighten—paint or use a light-toned cloth if needed.
- Add string lights overhead in a simple zigzag; keep them taut to avoid droop shadows in photos.
- Layer a rattan caddy for essentials—one section per item so clean-up stays faster than the mess.
- Install a row of votives down the center; cluster them near platters to add soft highlights to the food.
- Style with casual blooms in short vessels and a bowl of lemons for a gentle color punch.
Why This Looks Intentional: A limited palette with recurring materials—whitewashed wood, rattan, matte ceramics—reads cohesive, not matchy. Your eye connects the dots without shouting.
Don’t Do This: Don’t mix cool-white string lights with warm votives. The color clash screams “store aisle,” not “gentle evening.” Keep all lighting warm and consistent.
Pro Styling Tip: Angle platters slightly toward the brightest light source so textures in food catch highlights—your photos will look editorial with zero filters.
Still with me? Good. The next idea embraces color and fizz—perfect if your guests love a little theater with their spritz.
5. Glazed Ceramic Tasting Table with Sunset Amber Tassel Lights and a Brass Soda Siphon
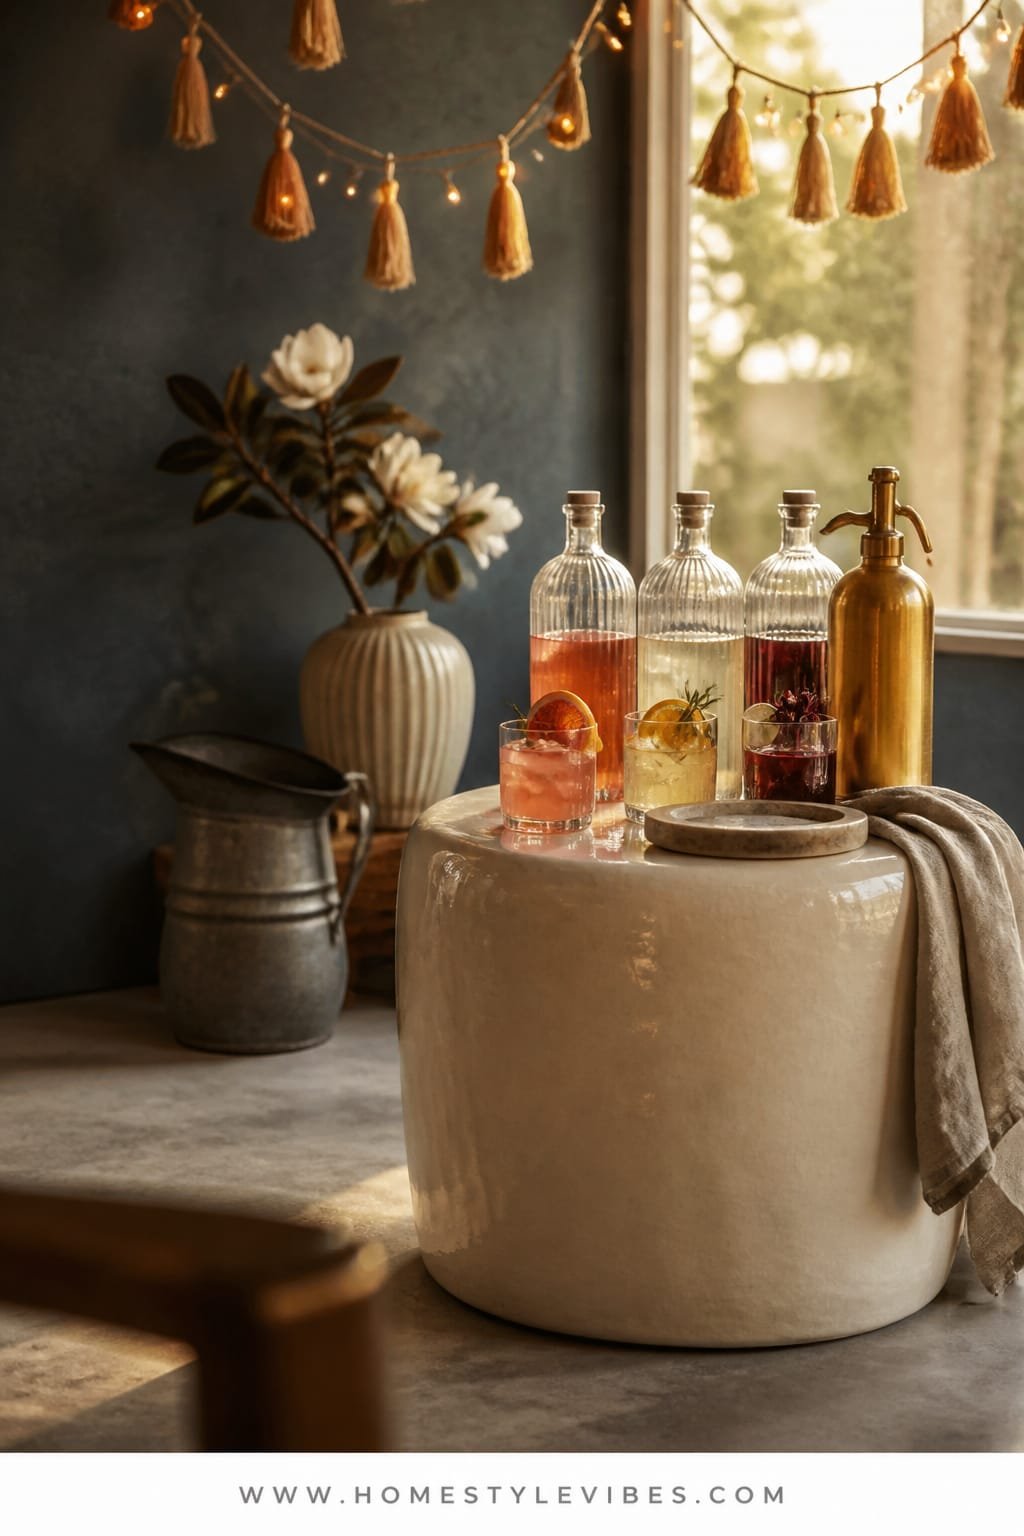
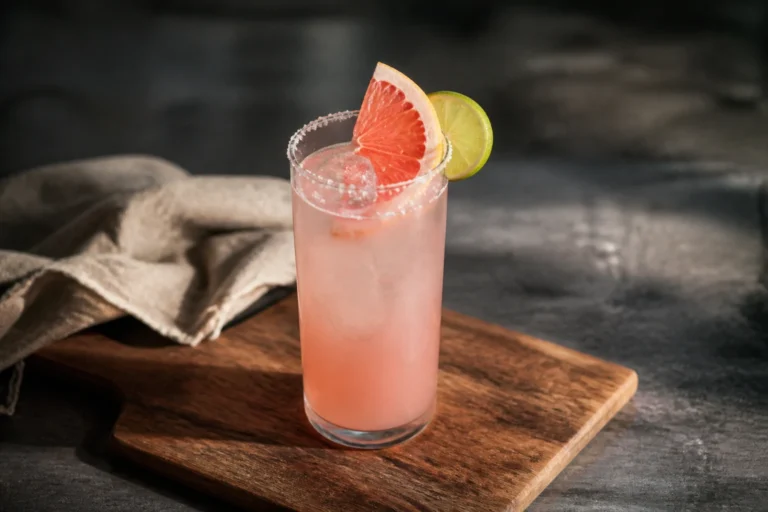
Entertaining can feel flat when every drink looks the same and your table reads “beige forever.” You want flair—without juggling five cocktail shakers. This tasting table is your move: a glossy glazed-ceramic accent table as the tasting hub, warm amber tassel lights overhead for a bohemian glow, and a vintage-style brass soda siphon for instant bubbles. Mix three pre-batched spritz bases (think grapefruit-rosemary, bitter orange, and hibiscus-lime), and let guests fizz their own.
The style vibe? European market stall meets boutique bar. It works exceptionally well in small spaces because the tasting station is compact and activity-based—guests gather, chat, and move on. The shiny glaze throws back sunset tones from the lights, making drinks gleam. In photos, color contrast steals the show: ruby hibiscus next to smoky brass and creamy ceramics creates a layered, editorial look without extra props.
Variations: use a side table you already own and top it with a round ceramic tray for that high-gloss moment. On a budget, source a used soda siphon or a modern seltzer maker with a brass sleeve. For a tiny balcony, place everything on a wide railing tray with safety clamps—works, looks curated, and saves floor space.
Budget Breakdown:
- Glazed ceramic side table or stool: $70–$240
- Amber tassel or lantern string lights: $22–$65
- Brass soda siphon or seltzer maker: $45–$140
- Glass carafes (3): $18–$54
- Small tasting glasses (12): $24–$60
- Citrus and herb garnish set: $10–$30
Total Estimated Cost: $189 – $589
Best For: Cocktail-forward evenings, color lovers, and hosts who like an interactive element without bartending all night.
Key Design Elements:
- Main materials: glazed ceramic, brass, clear glass
- Color palette: amber, brass gold, ruby, grapefruit pink, eucalyptus green
- Lighting strategy: low, warm tassel lights to amplify saturated drink colors
- Furniture silhouettes: round pedestal or drum table, slim carafes, sculptural siphon
- Texture layers: gloss glaze, metallic shine, citrus peel, frosted ice
- Accent details: handwritten tasting cards, tiny cloth coasters, dried citrus wheels
Why This Looks Expensive: One high-gloss hero piece plus a single metallic accent creates a boutique feel. The color story feels curated, not random.
How To Recreate This Look:
- Start by positioning the ceramic table where light can graze the surface—near sunset rays or under the tassel lights.
- Add three carafes with pre-batched bases; use uniform bottles for cohesion.
- Layer the brass soda siphon with a small bowl of ice and a micro-tongs set.
- Install tassel lights directly overhead or draped behind to create a warm halo.
- Style with tasting cards that list garnish suggestions and small plates for citrus rinds.
Watch Out: Don’t place the ceramic table on soft grass without stabilizing it—use a paver or tray underneath to avoid wobbles and shattered glass.
Pro Styling Tip: Add a micro pinch of salt to one spritz base—salt brightens flavors and, fun fact, it makes liquid colors look richer in photos.
Quick Tip: If you’re pre-batching, label carafes with painter’s tape under the base where it won’t show. You’ll remember what’s what without cluttering the scene.
True story: a friend of mine spent weeks agonizing over which aperitivo bottles to buy, then realized the real magic came from the glassware heights and the lighting. We swapped two short glasses for taller coupes and moved one string light. Instant “Where did you get this done?” energy.
6. Concrete Slab Coffee Table with Soft Sage Uplight and a Copper Chiller Bench
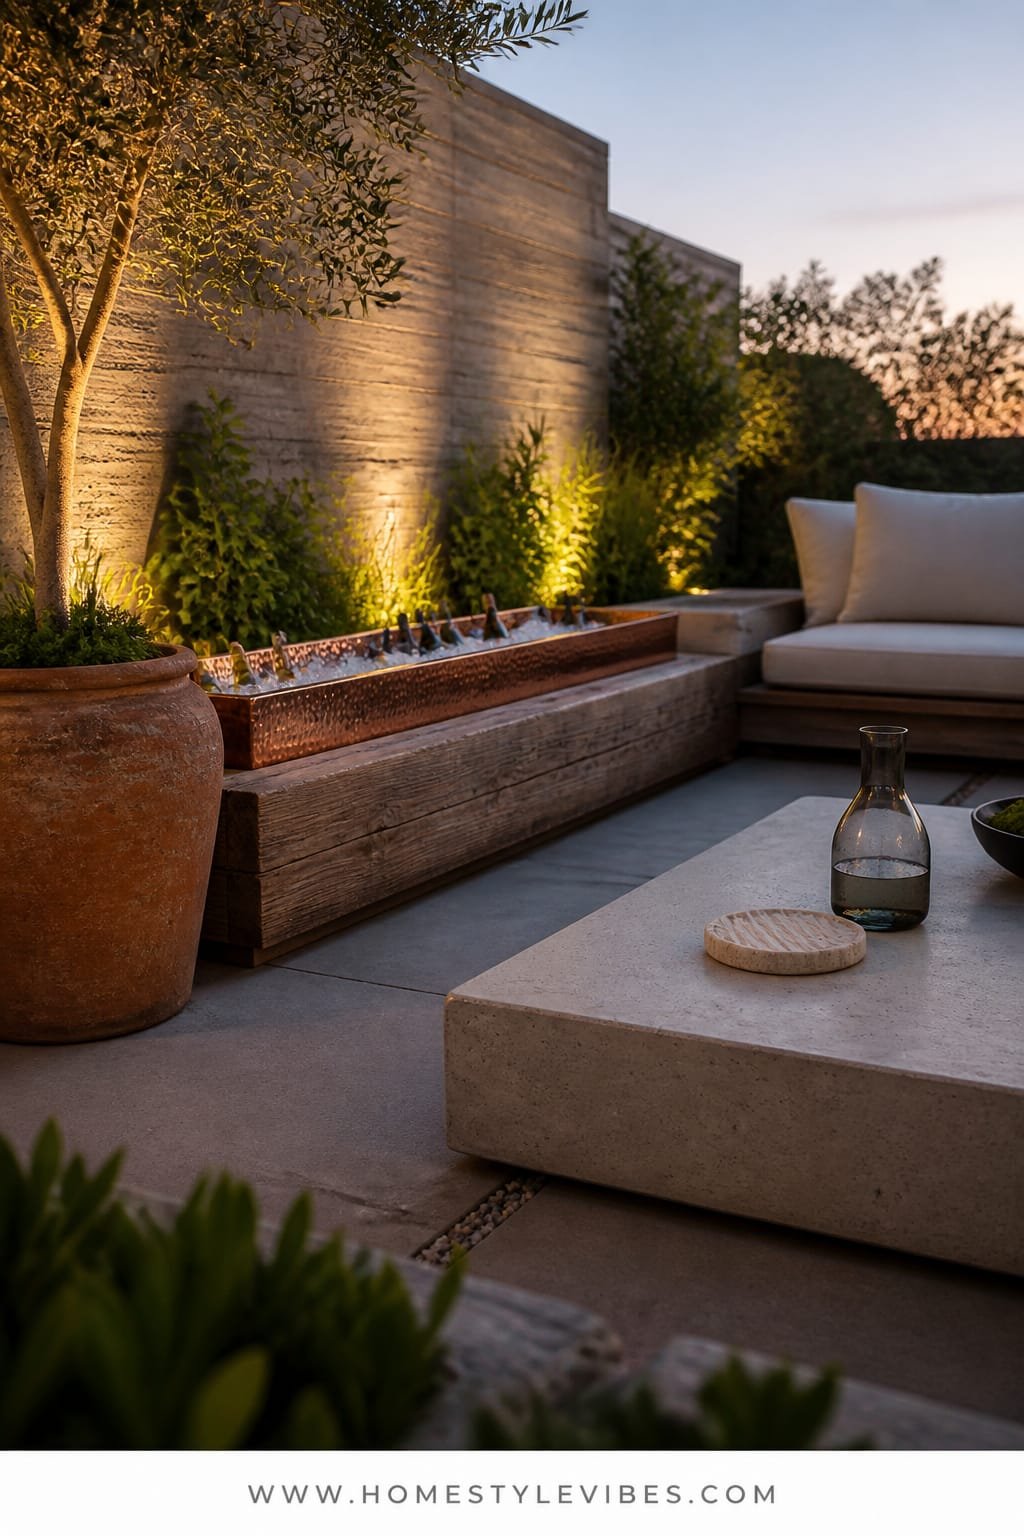
You love a loungey, low-seating vibe, but every time you try, the drinks end up on the ground or precariously balanced on poufs. It looks cool for five minutes and then devolves into spills. Enter a low concrete slab coffee table—substantial, stable, and weatherproof—paired with soft sage-green uplighting hidden in nearby planters. A long copper chiller bench (think a hammered copper trough set into a rustic wooden bench frame) runs alongside as your bottle-and-ice HQ. It’s an outdoor living room that actually functions.
The mood leans modern rustic with a zen undertone. Concrete gives you that architectural presence, while copper brings warmth and texture. Uplighting washes your greenery so the entire seating zone feels serene, not cave-like. Photos love this combo because you capture shine on copper, a velvety glow on leaves, and the matte solidity of the concrete—complex and editorial without being fussy.
For smaller spaces, use a concrete-look fiberstone table (lighter to move) and a half-length copper trough. On a budget, repurpose a concrete paver over sturdy milk crates and drape with a linen runner for a softened edge. Renter-friendly lighting? Solar uplights tucked in planters—no cords, all mood.
Budget Breakdown:
- Concrete or fiberstone coffee table: $150–$600
- Copper trough and bench frame (DIY or buy): $90–$350
- Sage-toned uplights (plug-in or solar, 2–4): $30–$120
- Low outdoor cushions or floor pillows (4–8): $60–$200
- Non-slip coasters (set of 8): $10–$24
- Tray for snacks at low height: $18–$40
Total Estimated Cost: $358 – $1,334
Best For: Casual lounges, post-dinner sips, late-night conversations; ideal for patios with surrounding greenery or planters.
Key Design Elements:
- Main materials: concrete, copper, linen or cotton canvas
- Color palette: charcoal, weathered copper penny, sage green, warm sand
- Lighting strategy: low-intensity uplights with a green tint to flatter foliage; one candle lantern at table edge for flicker
- Furniture silhouettes: thick slab table, linear trough bench, low cushion seating
- Texture layers: cool matte concrete, hammered copper, soft textiles
- Accent details: herb bundles tied with twine, smoked salt rim dish, ceramic snack bowls
How To Recreate This Look:
- Start by placing the slab table on stable ground; add rubber feet if needed to level.
- Add the copper chiller bench along one side, slightly behind seating to keep drips off the main area.
- Layer low cushions around with a few firmer bolsters for lumbar support—your back will thank you.
- Install uplights behind plants to graze leaves; dim to avoid harsh beam spots on faces.
- Style with a single long tray, non-slip coasters, and a small salt-and-spice plate for garnishes.
Why This Feels Designer: The mix of elemental materials—stone look, metal, and soft textiles—creates a grounded, high-contrast scene that looks curated from every angle.
The Most Common Mistake: Skipping coasters on concrete. Water rings and mineral streaks can appear. Use non-slip coasters so drinks stay put even when someone leans in with a story.
Pro Styling Tip: Shoot from a low angle and let the copper trough catch the uplight—those highlights read like a magazine spread.
Did You Know? The color of your uplift can shift the vibe. A subtle sage filter makes foliage look lush and skin tones restful, while blue-green can feel cold. If your lights allow, test two presets at dusk and choose the one that flatters faces.
I tried a version of this last summer—thought the concrete would feel too stark. Turns out, the copper warmth balances it. The only tricky part? Not filling the trough so full you splash. Leave two inches at the top and you’ll keep the lounge dry.
If one idea resonates more than the others, that’s your starting point. You don’t need all six. Layer in a second only if it solves a real need—like more surface area or better light.
Quick Checklist
- Weathered teak or acacia console for a sturdy drinks hub
- Narrow stainless ice trough for efficient chilling
- Lanterns with warm LED candles for golden-hour glow
- Natural linen tablecloth or runner to soften and unify
- Terracotta pitchers with airy greenery for low, sculptural height
- Black steel bar cart for mobile service and contrast
- Fluted glass dispenser as a single statement piece
- Cool-neutral LED strips for subtle under-shelf lighting
- Whitewashed table surface for softer, brighter photos
- Rattan caddy to corral napkins, utensils, and bottles
- Glazed ceramic accent table for a glossy tasting station
- Brass soda siphon for effortless fizz and shine
- Amber tassel lights to warm drink colors at dusk
- Concrete or fiberstone coffee table for low, stable lounging
- Copper trough chiller for tactile warmth and capacity
- Sage-toned uplights to flatter foliage and faces
- Non-slip coasters to protect surfaces and prevent spills
- Cloth napkins in a neutral palette for cohesion
- Uniform glassware sets to reduce visual noise
- Fresh citrus and herb garnishes for scent and color
Frequently Asked Questions
How do I keep drinks cold outside without constantly refilling ice?
Use a slimline trough with a 60/40 ice-to-water mix and salt a small pinch to drop the temp. Keep a backup ice stash in a shaded cooler. Pre-chill bottles so they maintain temp longer.
My patio is tiny—how can I do a garden party table and drink setup without clutter?
Pick one anchor: a bar cart or a compact tasting table. Use vertical space with string lights and keep surfaces minimal—one dispenser, one garnish bowl, a small stack of glasses. Edit hard; duplication creates clutter fast.
What lighting is best for flattering people and photos after sunset?
Warm white in the 2200K–2700K range for string lights and candles. Avoid mixing color temperatures. Add one subtle underlight or uplight for depth. Keep brightness low—soft light is more flattering than bright light.
I’m renting and can’t drill—how do I hang lights and canopies?
Use tension between two freestanding poles in planters or clamp string lights to fences with removable outdoor clips. For canopies, binder-clip fabric to the string light cable or a laundry line strung between poles.
How do I prevent my setup from looking mismatched when I’m using things I already own?
Commit to one material story and one metal tone. For example, linen + terracotta + matte black. Then repeat those elements at least three times each. Consistency makes “collected” feel cohesive.
Here’s the Part Where You Start
Pick the one idea that solves your biggest summer garden party headache—maybe it’s drinks with no landing spot, or lighting that makes people squint, or a table that never feels finished. Begin there. Prep just that zone this week and live with it for a night. You’ll learn what actually serves your crowd and what you can skip.
The truth is, luxury outside isn’t about price tags. It comes from texture you can feel, lighting that flatters, and restraint in your palette. That’s what makes a setup read calm, intentional, and deeply welcoming. When surfaces invite touch and the light kisses glass and linen just right, the whole scene hums.
You’ve got this. Choose one of these six summer garden party ideas, set it up, and let the evening take care of itself. Guests won’t remember the brand of lanterns. They’ll remember the way the table glowed and how easy it felt to find a glass, pour a drink, and settle in. And honestly? That’s the whole point.
About the Author

Krisztina P.Rendes, Founder of Home Style Vibes
Founder of Home Style Vibes
Krisztina Puskásné Rendes created Home Style Vibes as a cozy-modern lifestyle space where homemaking meets inspiration. Her goal is to help women create beautiful, organized, and peaceful homes they truly love — without overwhelm. You’ll find here heart-driven content on home decor, cleaning tips, easy family recipes, organization and decluttering, DIY home projects, plants, and seasonal ideas — all designed to bring more calm, comfort, and style into everyday life.