7 Cheap Fence Ideas That Look Expensive (Privacy, Dog-Friendly & Backyard Budget Wins)
You want a backyard that feels private, polished, and peaceful. You hate that your current fence (or lack of one) screams “temporary” and turns every BBQ into a view of trash cans and neighbor drama. Imagine dappled light slipping through warm wood slats, velvety greenery softening lines, and a layout that actually calms your nervous system. These 7 cheap fence ideas that look expensive will fix the frustration—giving you privacy, dog-friendly function, and real curb appeal for under $1,500 in most cases, many in a single weekend.
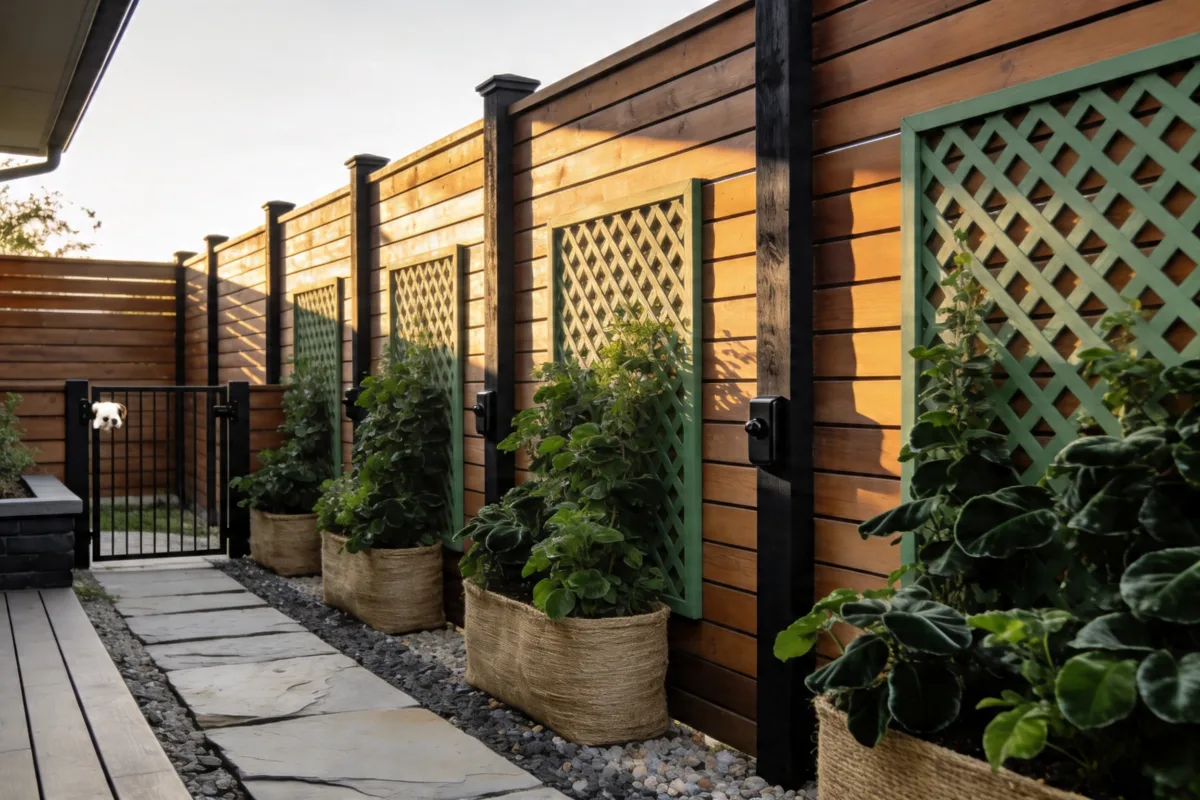
We’ll talk tones, textures, and how to get that editorial look in daylight and twilight. Think ebony-stained posts, jute-wrapped planters, sage green lattice, and hardware that doesn’t squeak. Each design is complete and distinct, so you can pick your vibe and run with it. Perfect for first-time homeowners, style obsessives on a budget, and renters who want moves they can undo when the lease is up. And yes, highly photogenic. Pin-it-all-day photogenic.
1. Modern Horizontal Slats With Shadow Play
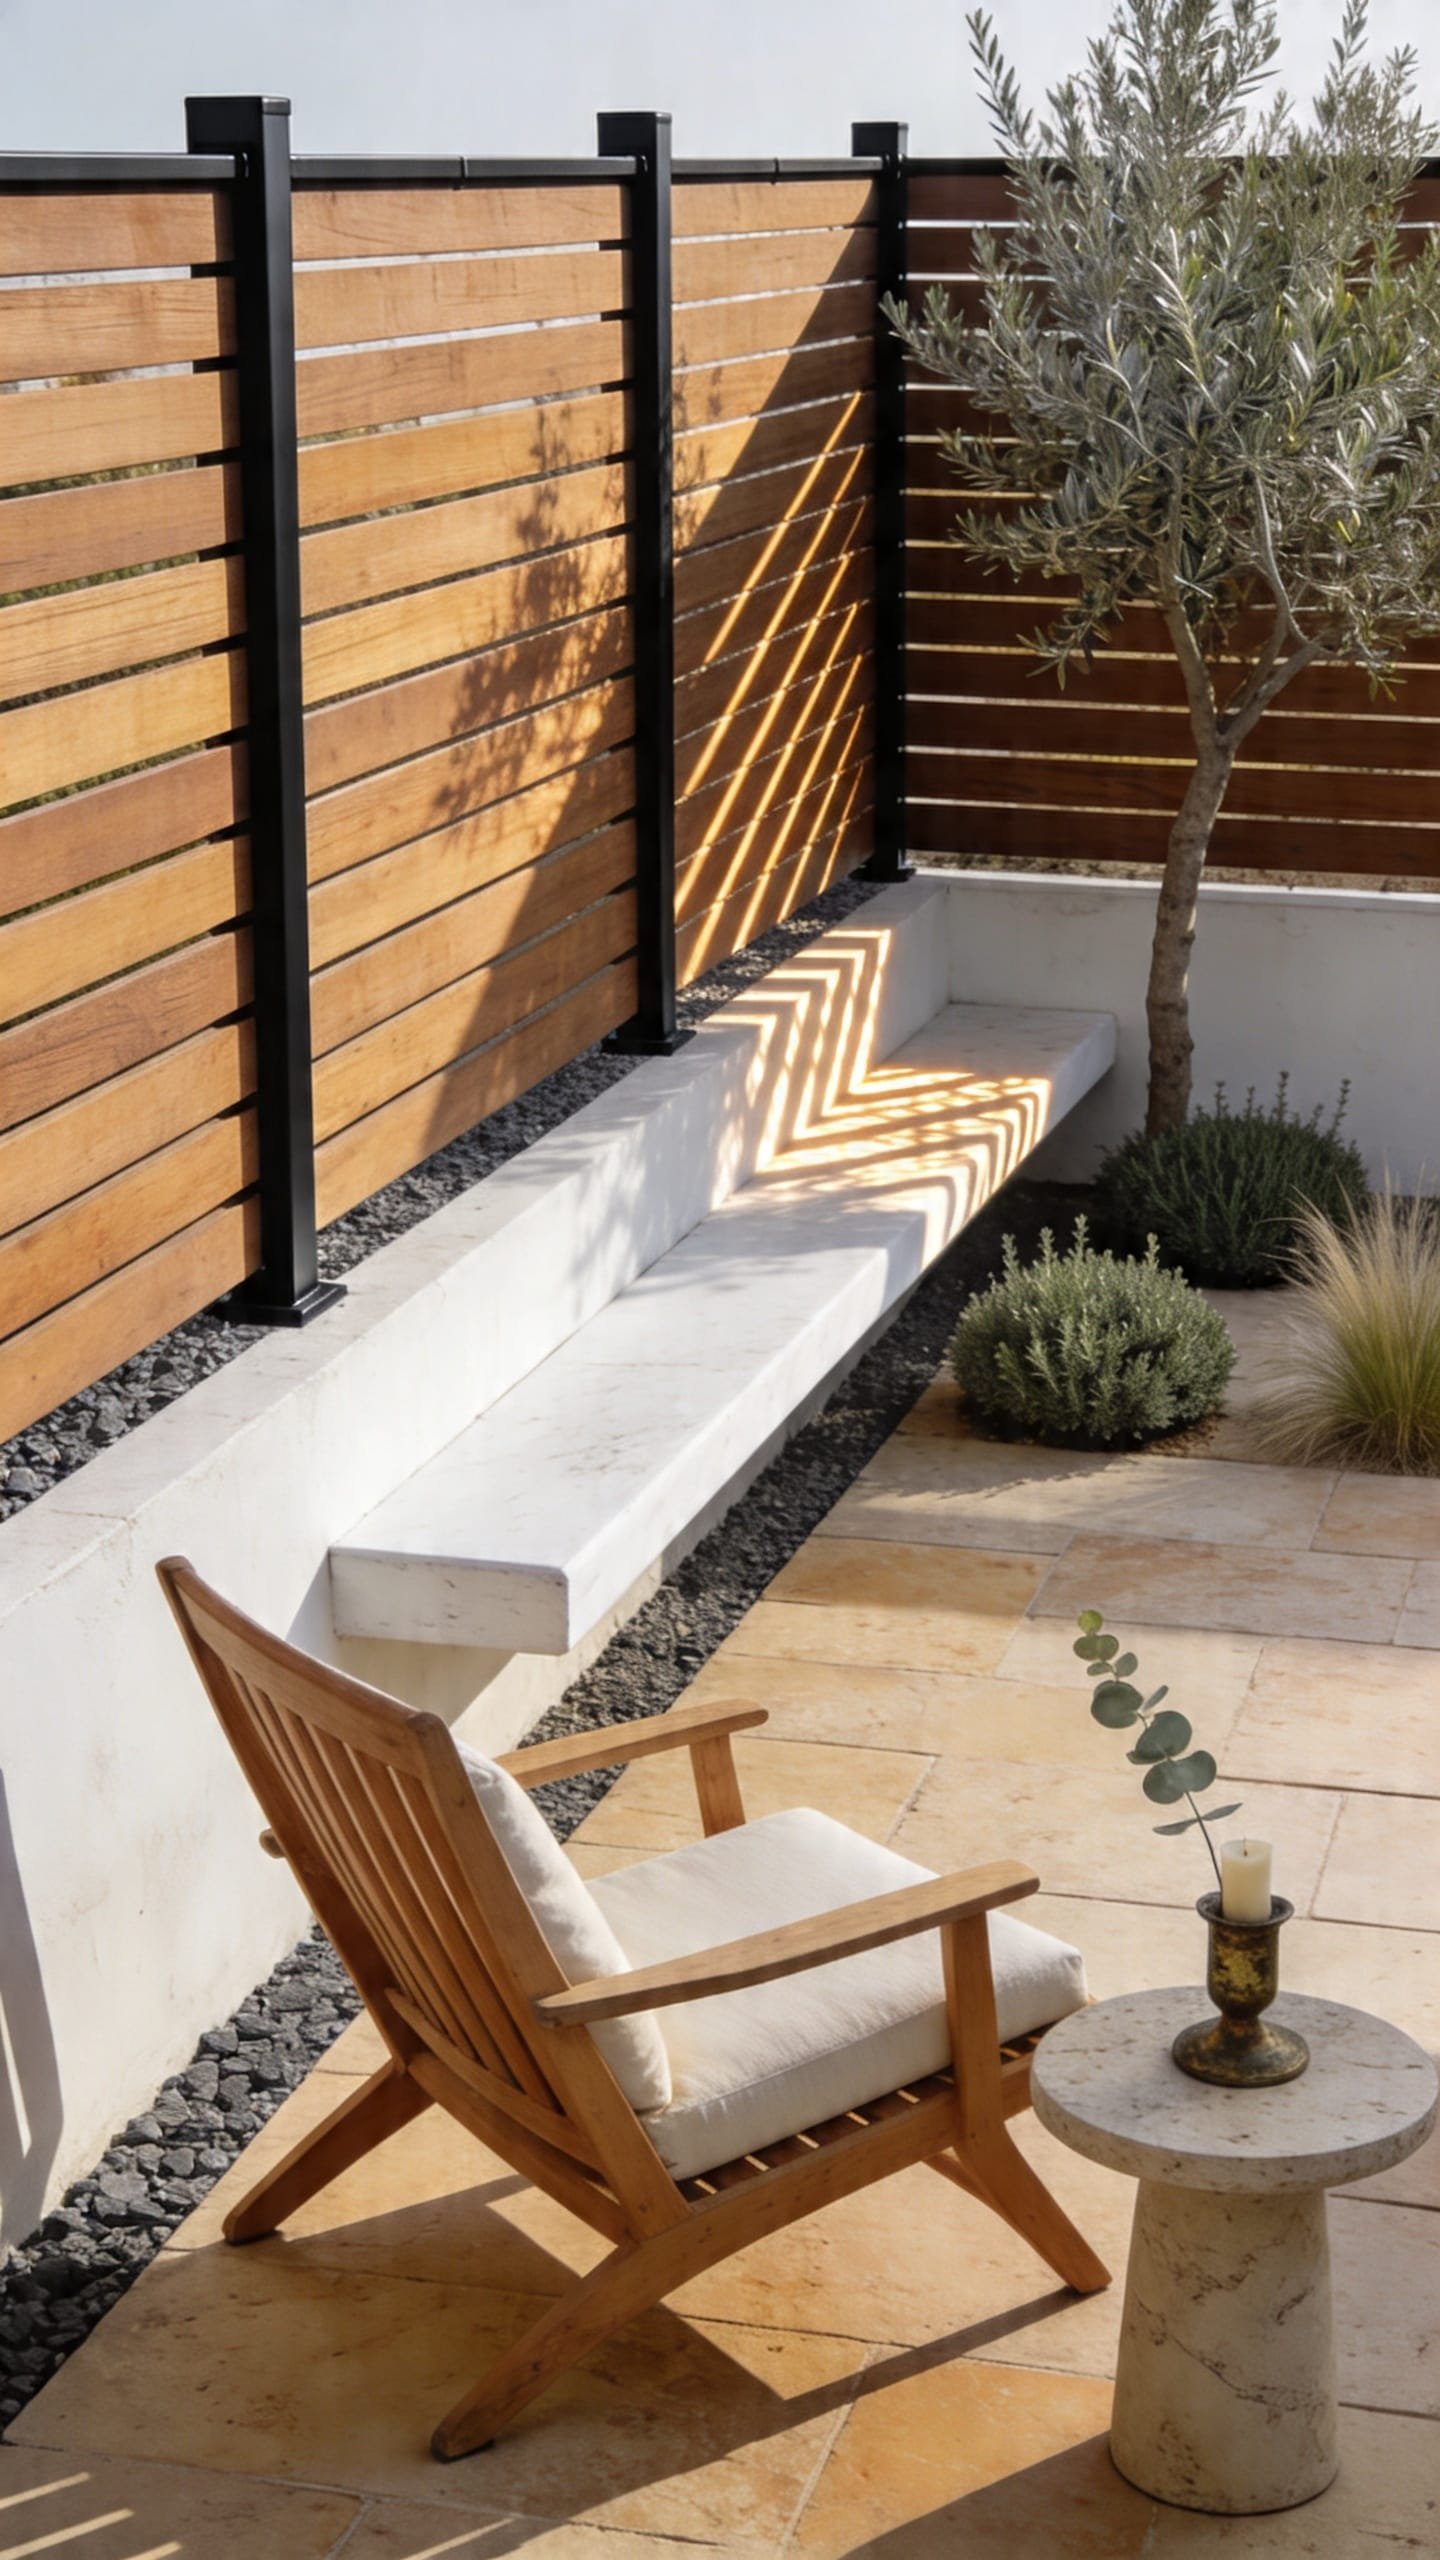
We’ve all been there: you try a basic vertical panel, and it just reads “builder grade backyard, 2012.” This design flips the script with tight horizontal slats and controlled spacing that creates rhythmic shadows. The mood is modern Mediterranean meets California cool—calm, minimal, and sun-kissed.
Why it works for real homes: Horizontal lines visually widen small yards, instantly making them feel larger. It’s dog-friendly if you keep the slat gaps under 1.5 inches, and the structure handles climbing plants surprisingly well. Lighting? Early evening is magic—those linear shadows stack across your patio like a design feature you meant all along.
Materials do the heavy lifting: pressure-treated 1×4 or 1×6 boards, stained warm walnut or soft black; simple galvanized screws; and optional steel post anchors for renters. It photographs beautifully because the uniform spacing and long lines create depth, while a low-sheen stain adds richness without glare.
Variations:
- Budget-friendly: Use 1×3 furring strips, pre-stained, with 1-inch spacers.
- Small-space: Shorten the panel height to 5 feet and cap with a slim, contrasting top rail.
- Darker version: Go nearly black with an oil-based exterior stain; pair with brass gate hardware for contrast.
- Renter-friendly: Build freestanding panels between weighted planters with concrete pavers in the base.
Budget Breakdown:
- Pressure-treated boards: $2–$5 per linear foot
- 4×4 posts: $12–$25 each
- Stain and sealer: $35–$70
- Hardware and screws: $20–$50
- Post anchors or footing mix: $30–$80
Total Estimated Cost: $300 – $900 (typical side yard run)
Best For: Narrow yards, modern bungalows, and anyone who wants privacy without the “walled-in” feeling. Great for homes with evening hangouts.
Key Design Elements:
- Main materials: Pressure-treated pine or cedar, galvanized fasteners
- Color palette: Walnut, espresso, charcoal, or soft black
- Lighting strategy: Low, warm uplights at posts for dramatic shadow lines
- Furniture silhouettes: Low-profile lounge chairs, slim metal frames
- Texture layers: Smooth wood + matte stain + climbing jasmine
- Accent details: Brass latch, slim top cap, black planter boxes
How To Recreate This Look:
- Start with a clear line and set your 4×4 posts 6–8 feet apart with concrete or anchors.
- Add a string line to keep slats perfectly level.
- Layer slats horizontally with 0.75–1.5 inch spacers for even gaps.
- Install a thin top cap for a finished edge.
- Style with two tall planters and warm solar spotlights.
Why This Looks Expensive: Controlled repetition and intentional shadow gaps read custom, not off-the-shelf. The matte, nearly-black stain adds quiet luxury that hides imperfections.
Watch Out: Don’t skip sealing cut ends—they’ll weather faster and look patchy within weeks.
Pro Styling Tip: Shoot in late golden hour; angle the camera to catch the stacked shadow bands against a pale outdoor rug for gorgeous contrast.
2. Staggered Board-on-Board Privacy With Breezy Top Lattice
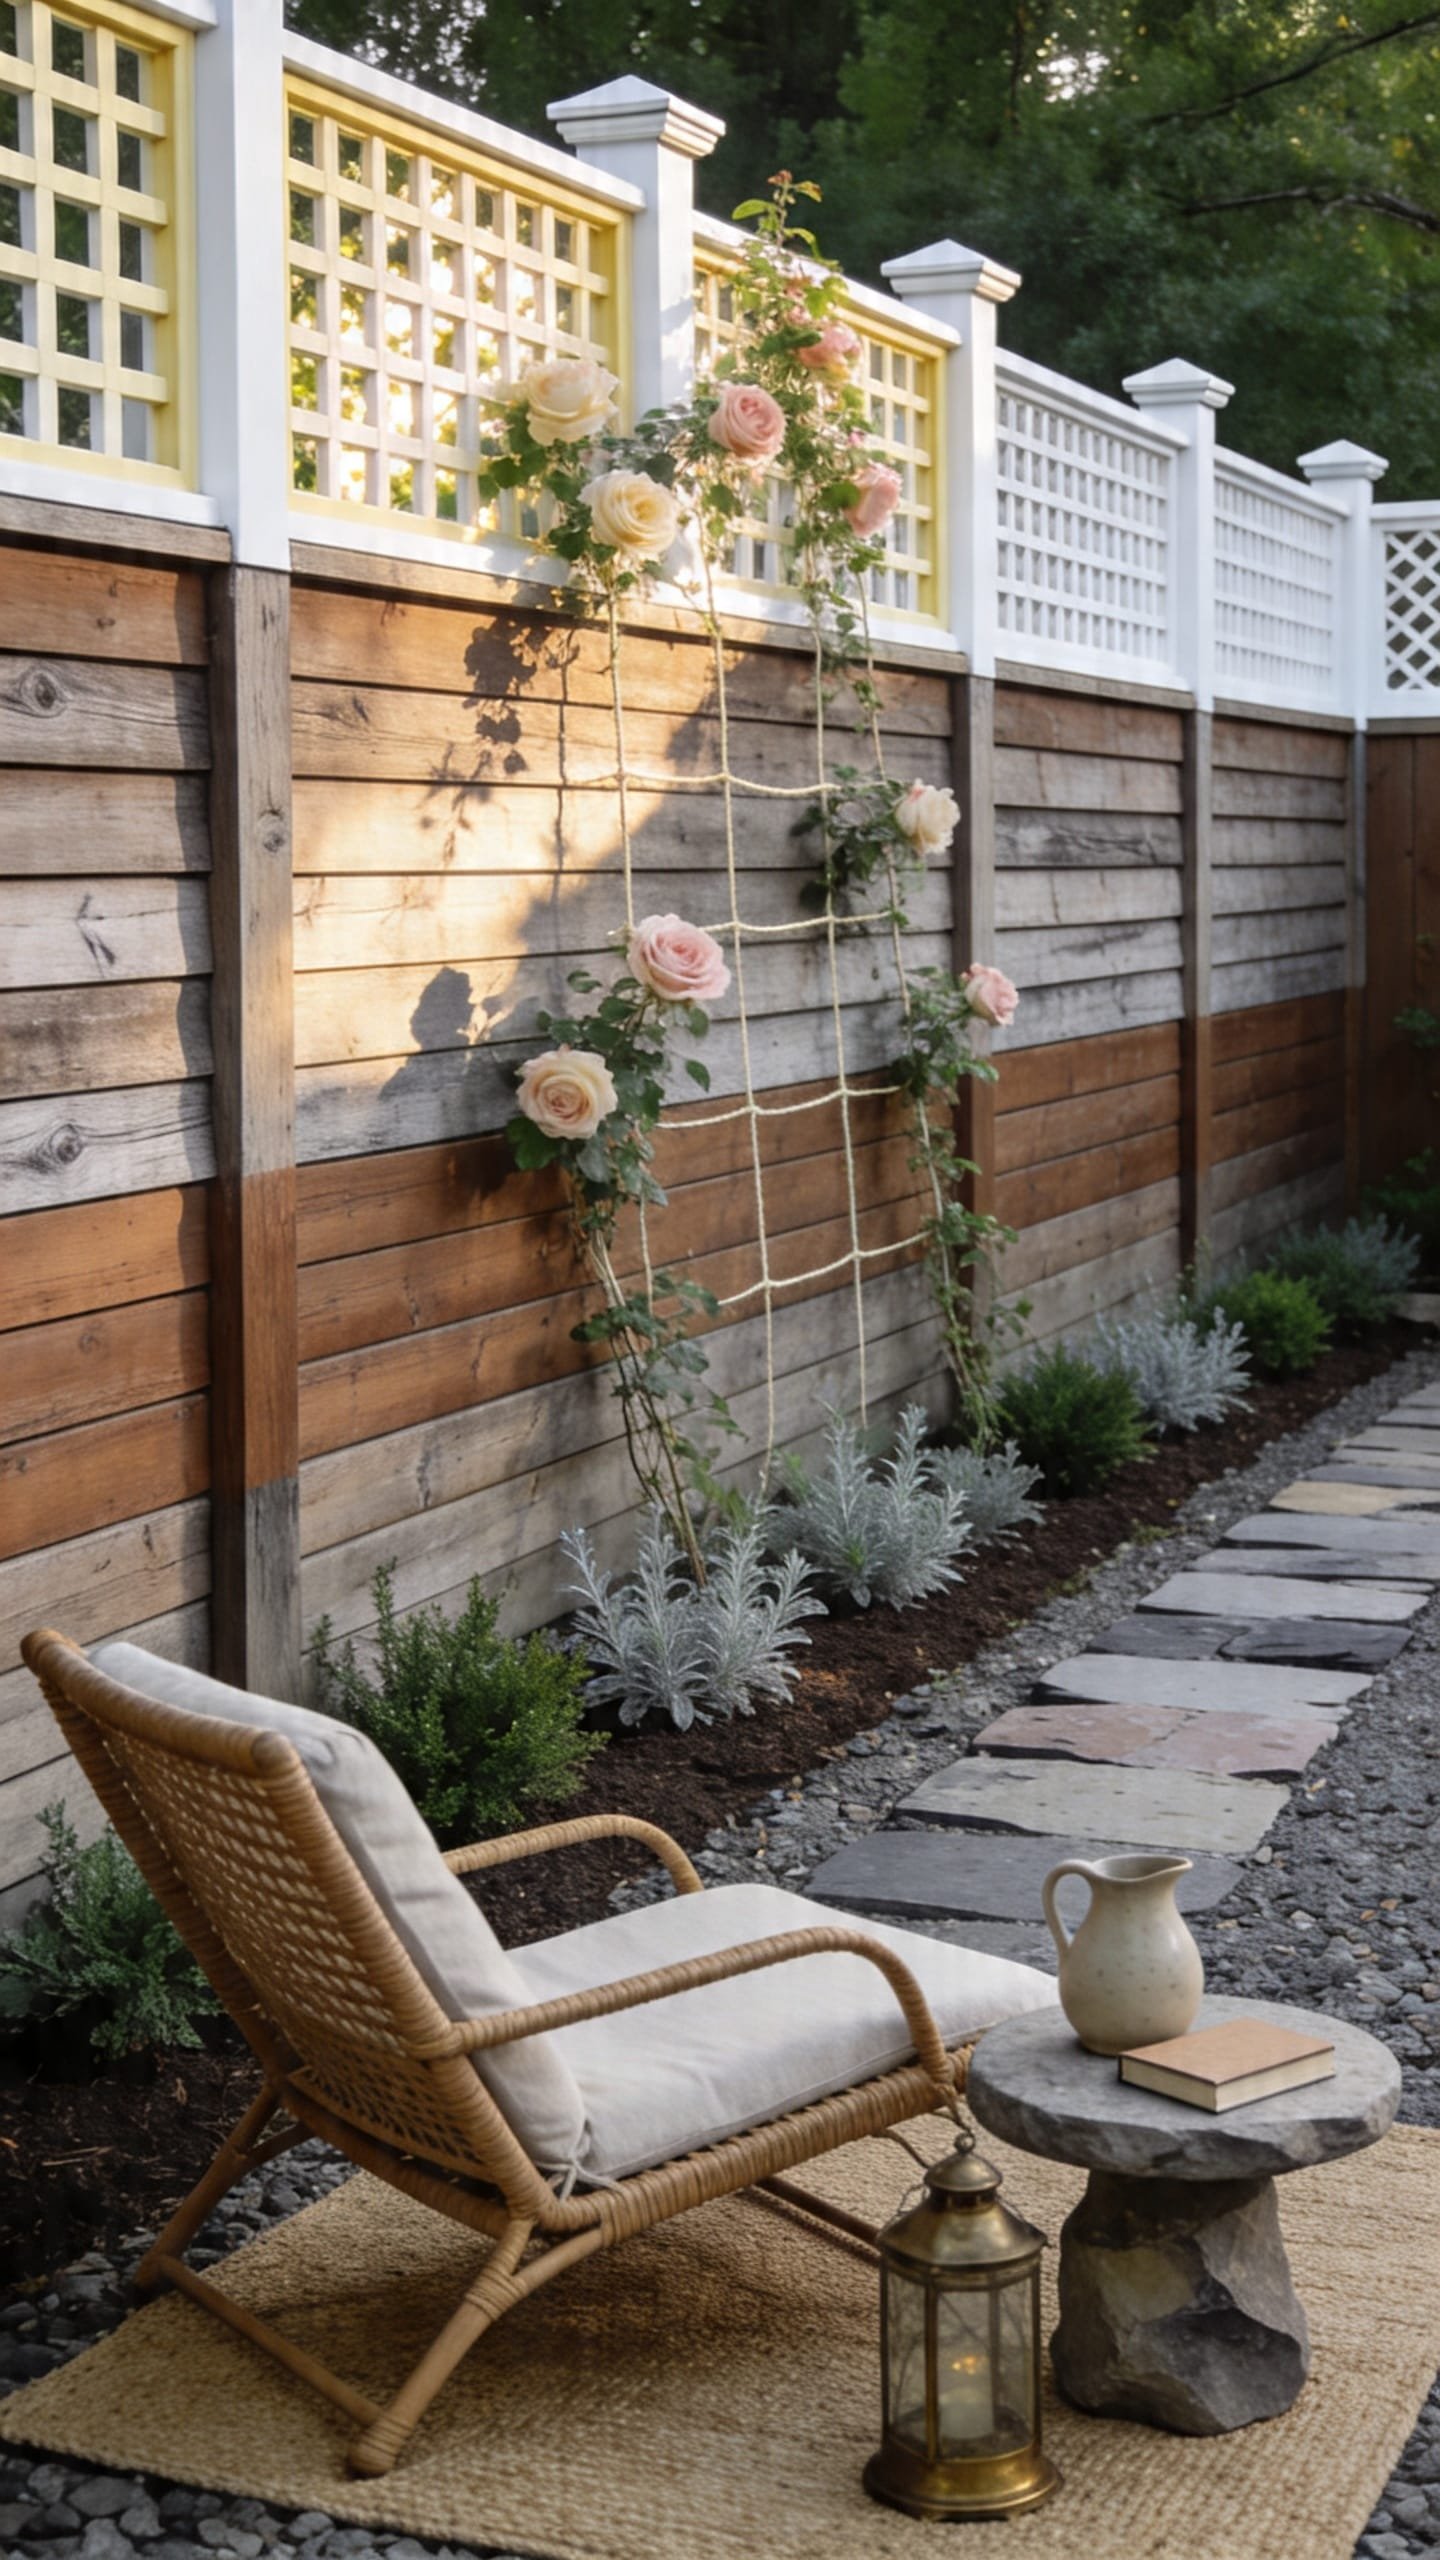
It’s that one stretch along the neighbor’s kitchen window that always feels… watched. You’ve tried taller panels, but it felt oppressive. This board-on-board pattern delivers full privacy at seated eye level with a breathable lattice up top to keep the space light and airy.
The mood leans coastal cottage with a grown-up twist—think driftwood browns, creamy white lattice, and the soft rustle of climbing roses. Great for family backyards because dogs can’t peek through the overlapped boards, and kids can’t wedge toys through either.
In photos, the change in density—from solid lower boards to open lattice—adds visual interest and a subtle gradient. Early morning light kisses the lattice and makes the whole run look more custom than it cost.
Variations:
- Budget-friendly: Skip the lattice and finish with a double top rail painted off-white.
- Small-space: Use a 5-foot privacy lower section with an 8-inch lattice topper for light flow.
- Darker version: Charcoal-brown stain on boards; paint lattice warm greige for depth.
- Renter-friendly: Assemble modular panels with bolt-together brackets; secure with ground spikes.
Key Design Elements:
- Main materials: Pressure-treated or cedar boards, premade lattice panels
- Color palette: Driftwood brown, cream, greige
- Lighting strategy: Discreet solar caps on posts; a string of Edison lights along the lattice
- Furniture silhouettes: Woven outdoor chairs, farmhouse table
- Texture layers: Overlapped boards + crisp lattice + soft florals
- Accent details: Matte black hinges, cottage-style gate latch
Budget Breakdown:
- Boards (board-on-board): $3–$6 per linear foot
- Lattice panels: $20–$40 each
- Posts and concrete: $60–$150 total
- Stain/paint: $40–$80
- Hardware: $25–$50
Total Estimated Cost: $350 – $1,100
Best For: Traditional homes, cottage-style yards, and patios that need privacy but still want top light and airflow.
How To Recreate This Look:
- Start by setting posts and installing vertical rails.
- Add overlapped vertical boards for a zero-gap lower section.
- Install a horizontal support, then attach lattice topper with trim pieces.
- Seal boards and paint lattice for subtle contrast.
- Style with roses or star jasmine to soften the transition line.
Why This Feels Designer: The mix of weights—solid base with delicate topper—mimics custom millwork. That layered density looks intentional and photogenic from inside and out.
One Thing To Avoid: Don’t align lattice seams with post centers; you’ll accentuate joints and lose that clean, continuous look.
Pro Styling Tip: Place a linen runner and white ceramics on your outdoor table near the fence; the creamy tones echo the lattice for cohesive photos.
Take a breath and pick a lane. You don’t need all seven. Choose the one that makes your shoulders drop and your coffee taste better on a slow Sunday. That’s your fence.
3. Painted Pallet Panels With Climbing Green Wall
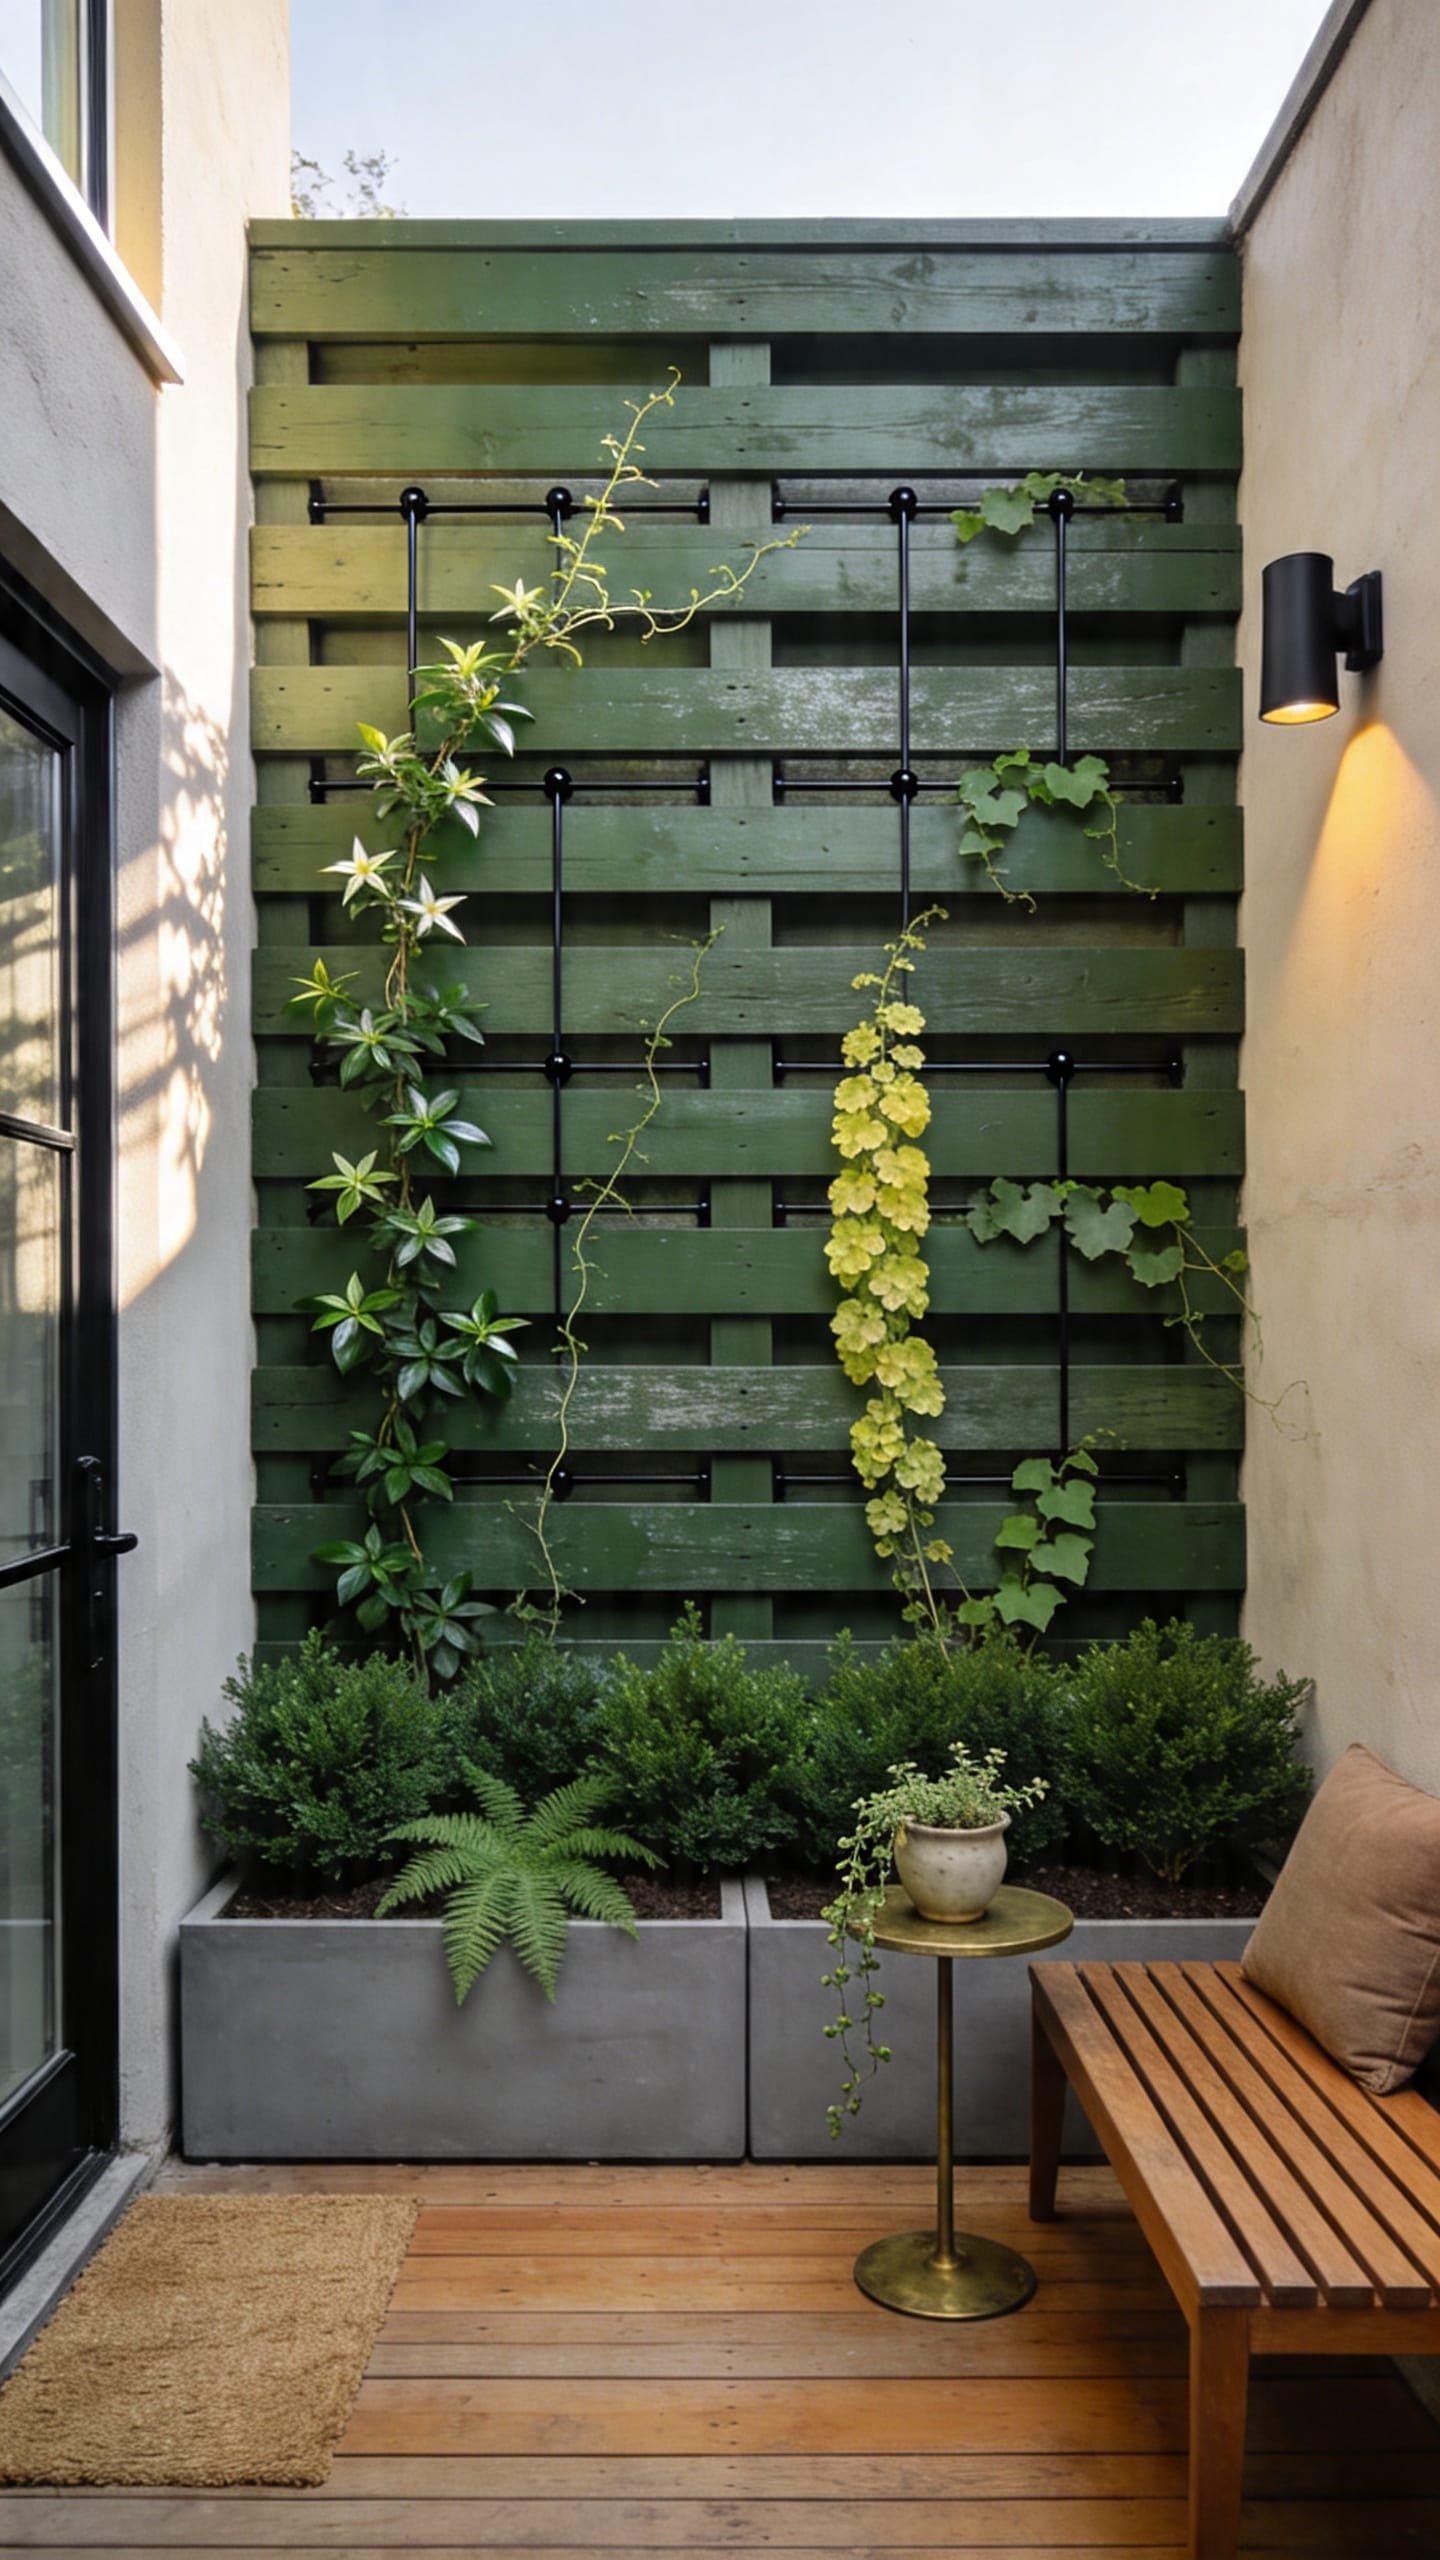
You love the idea of a living fence, but the cost of custom trellis systems makes your eyes water. Here’s the hack: reclaimed pallets (or pallet slats) painted a lush color become a sturdy trellis wall that dogs can’t bulldoze and vines can gracefully conquer.
The mood skews urban courtyard meets secret garden—deep paint tones, powdery matte finish, and soft green layers. It thrives in small spaces because vertical planting multiplies greenery without stealing floor area. Morning shade? Perfect. Late afternoon glow on dark paint? Delicious.
Photographically, the matte paint against glossy leaves gives you that editorial contrast. The randomness of pallet slats creates shadow texture you can’t fake. I tried this behind my tiny grilling corner last fall and honestly couldn’t believe how much bigger the space felt once the eye had something structured to land on.
Variations:
- Budget-friendly: Source free pallets; use exterior paint samples for a tonal mix.
- Small-space: Mount a single 6×6 panel as a feature wall instead of a full run.
- Darker version: Go midnight green with limewash texture on top for depth.
- Renter-friendly: Build a freestanding frame with casters; weigh planters at the base.
Budget Breakdown:
- Pallet slats or reclaimed boards: Free – $2 each
- Exterior paint (1 gallon): $30–$60
- Trellis wire or eye hooks: $10–$25
- Posts/frame lumber: $50–$120
- Climbers (jasmine, clematis, ivy): $12–$25 per plant
Total Estimated Cost: $150 – $500
Best For: City patios, budget makeovers, and renters who want high impact, low permanence.
Key Design Elements:
- Main materials: Reclaimed wood, exterior matte paint, climbing plants
- Color palette: Pine green, inky blue, earthy charcoal
- Lighting strategy: Clip-on string lights along the top rail for sparkle
- Furniture silhouettes: Bistro table, slim metal stools, foldable benches
- Texture layers: Rough wood + velvety paint + glossy leaves
- Accent details: Terracotta pots, woven jute plant hangers
Why This Reads High-End: A deep, saturated paint color creates uniformity across mixed wood sources. The living layer feels bespoke, like a boutique hotel courtyard.
How To Recreate This Look:
- Start by sanding pallet slats lightly and removing staples.
- Add a simple 2×3 frame and attach slats horizontally or in a chevron pattern.
- Layer with two coats of exterior matte paint.
- Install eye hooks and run trellis wire diagonally.
- Style with 3–5 climbers planted in a row, and tuck in solar path lights at the base.
The Most Common Mistake: Ignoring drainage for planters near the fence. Water staining on dark paint looks messy fast—use saucers or lift pots on ceramic risers.
Pro Styling Tip: Leave a 6-inch shadow gap between panel and wall; that tiny reveal photographs as depth and fakes a custom installation.
4. Split-Rail + Wire Mesh Country-Modern Hybrid
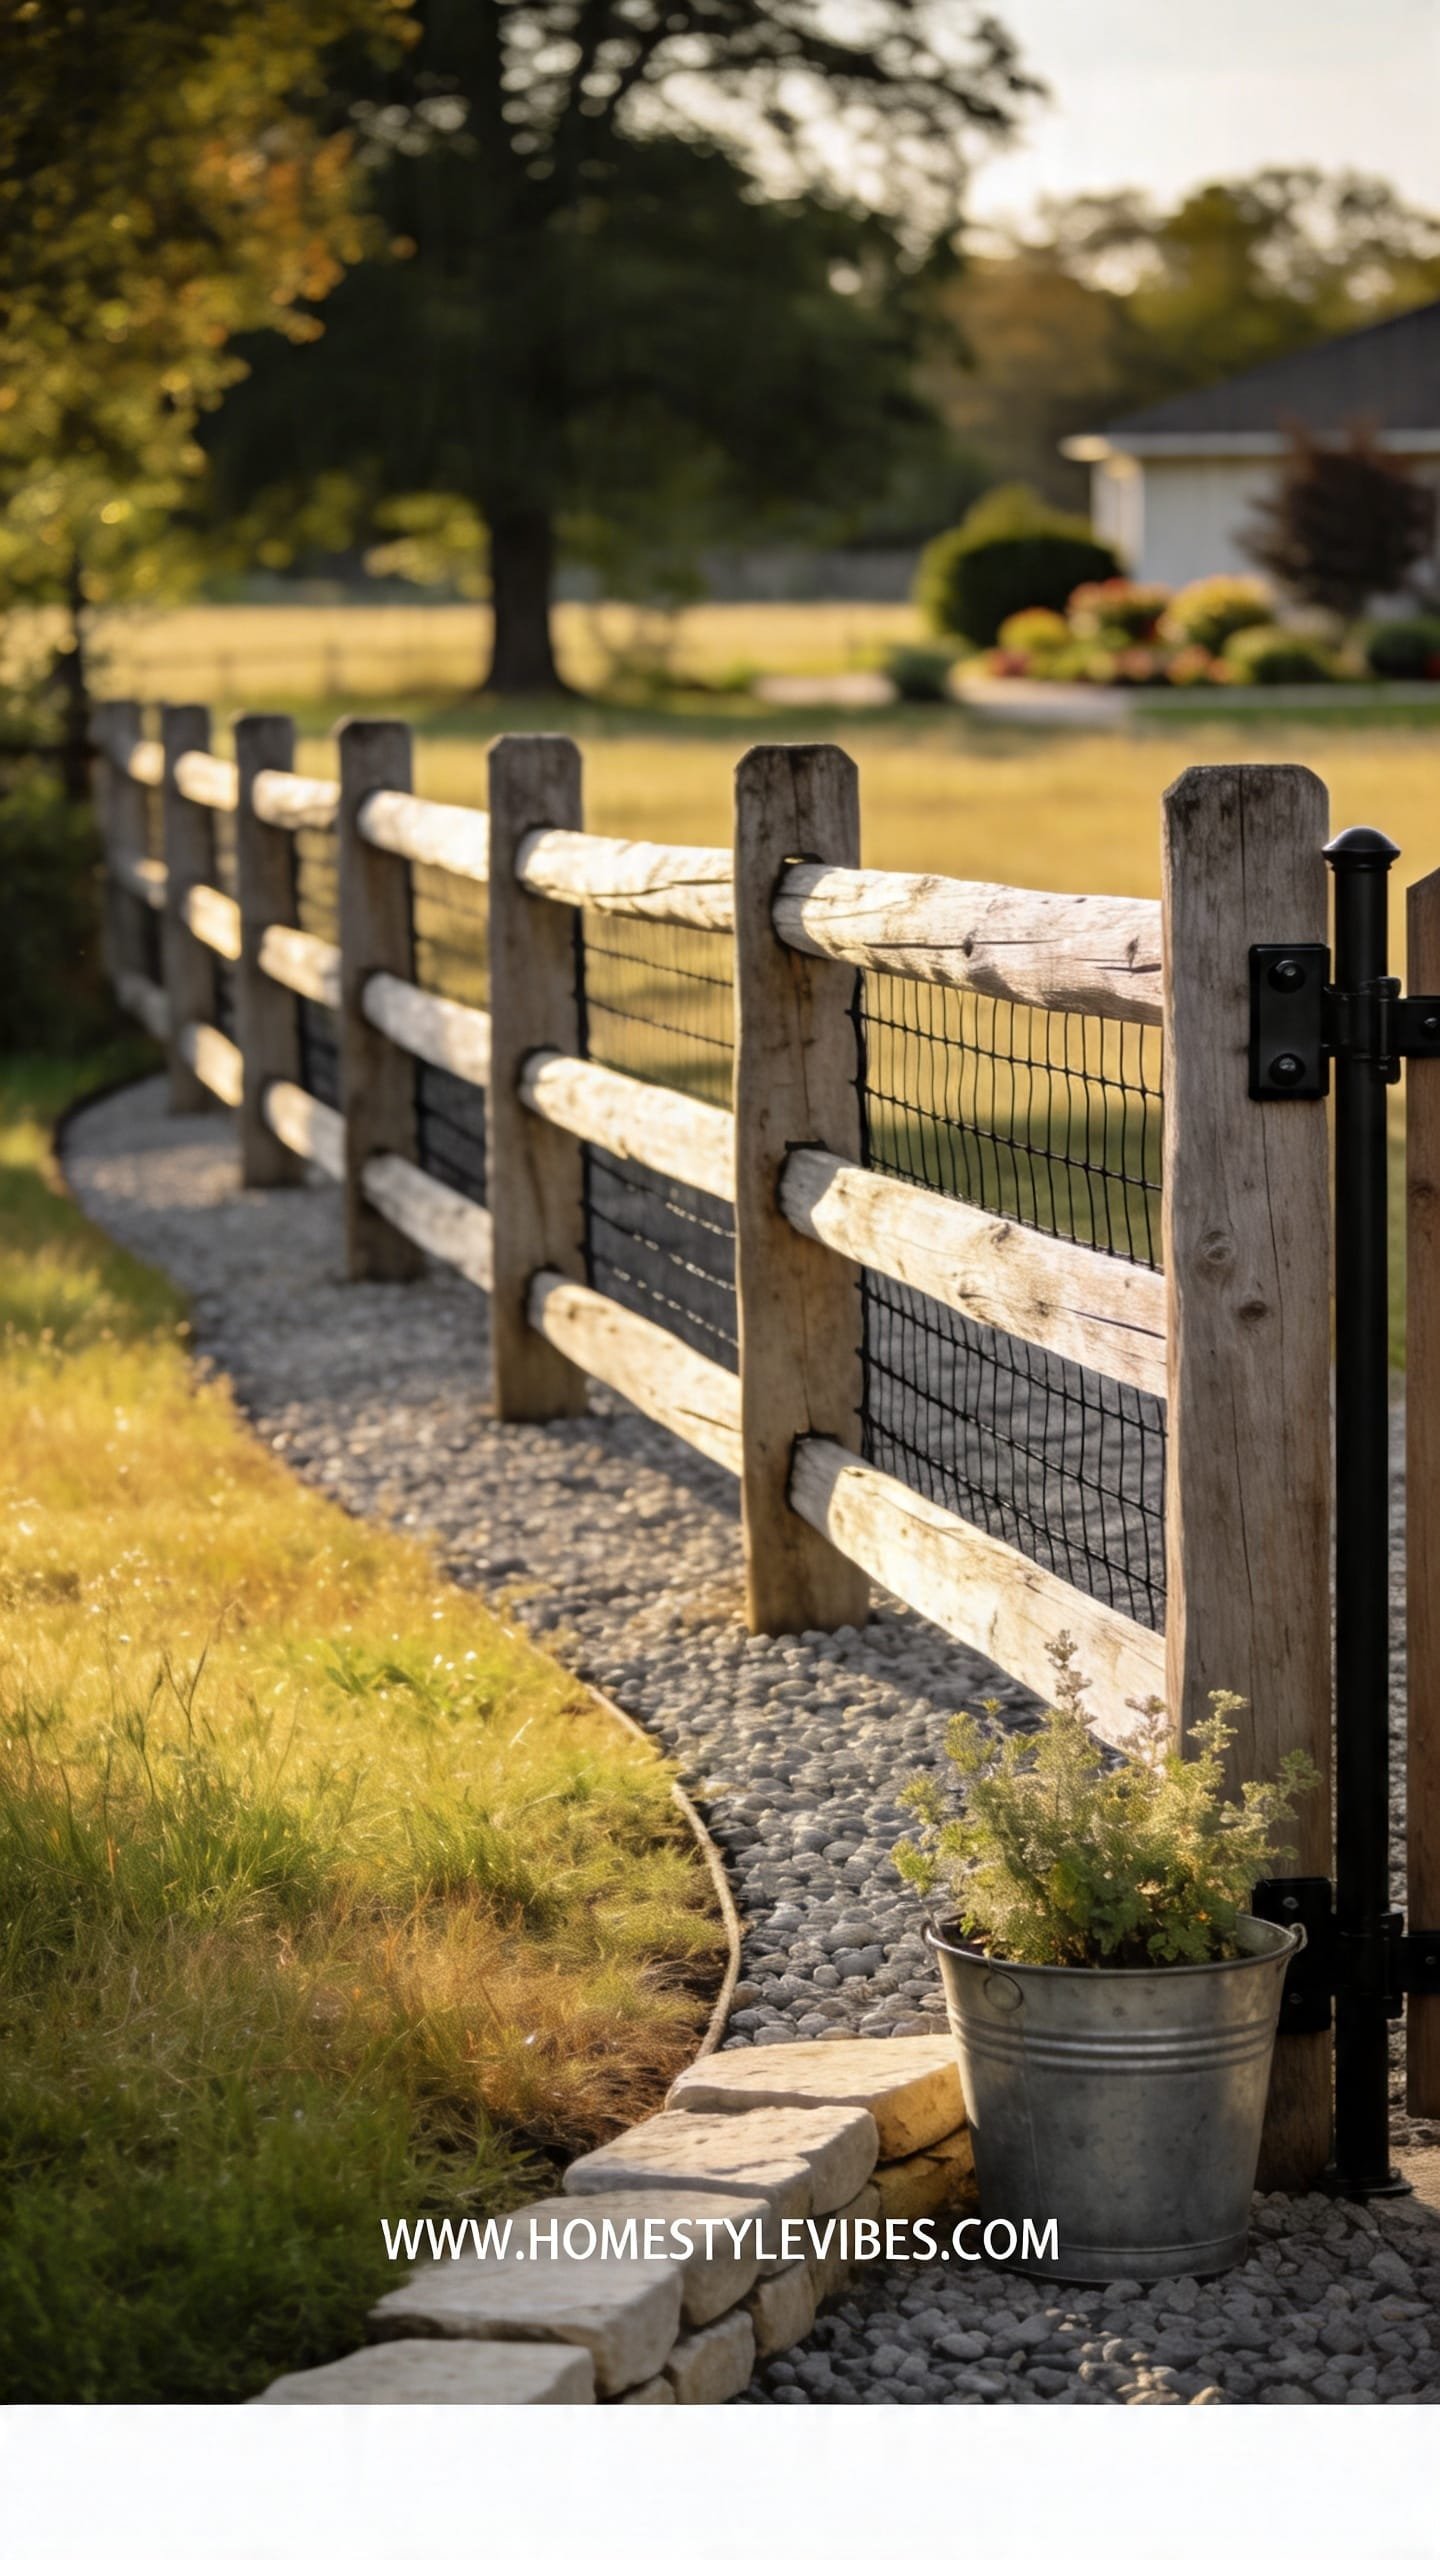
You want a dog-friendly fence that doesn’t feel like a kennel. You tried chain-link once and regretted it immediately. This hybrid pairs rustic split-rail charm with nearly invisible black wire mesh for safety, airflow, and that breezy, pastoral vibe.
The mood is modern farmhouse without the clichés: sunlit grass, clean black accents, soft gravel paths. It keeps sight lines open, which is perfect if your yard flows into a view or a neighbor with nice landscaping. At golden hour, the mesh disappears in photos and the rails glow—truly lovely.
Why it works: It’s affordable per foot, super fast to install, and adaptable to sloped yards. Dogs stay in, bunnies stay out. Bonus: it avoids the “fortress” syndrome, so your yard still feels expansive.
Variations:
- Budget-friendly: Use treated round posts and cattle fencing; paint posts black.
- Small-space: Use half-height rails to define zones without blocking light.
- Darker version: Stain rails deep brown and use black PVC-coated mesh.
- Renter-friendly: Use metal T-posts with removable clamps and unroll mesh when moving.
Key Design Elements:
- Main materials: Split-rail wood, black PVC-coated wire mesh
- Color palette: Honey wood, black mesh, soft neutrals
- Lighting strategy: Minimal—let moonlight and nearby sconces do the work
- Furniture silhouettes: Adirondack or sling chairs; stone or concrete fire pit
- Texture layers: Rough wood + sleek mesh + crushed gravel
- Accent details: Simple black gate latch, tall grasses along the run
Budget Breakdown:
- Split-rail posts/rails: $8–$20 per rail
- Black mesh roll: $60–$140 per 50 feet
- Staples/clips and gate hardware: $20–$60
- Optional stain: $30–$70
Total Estimated Cost: $250 – $800 (per small yard perimeter section)
Best For: Suburban or rural lots, pet owners, families with sightline-sensitive neighbors.
How To Recreate This Look:
- Start by setting rails and posts according to your yard slope.
- Add black mesh on the inside of rails; pull taut for clean lines.
- Layer a simple wooden gate using the same mesh for continuity.
- Install path edging and a strip of crushed gravel along the fence to reduce mud.
- Style with ornamental grasses and one oversized planter near the gate.
Why This Looks Intentional: The mesh “disappears,” leaving the warm rails as the hero. Repeated black accents on hardware tie the whole property together.
Don’t Do This: Avoid silver galvanized mesh—it reflects light and photographs harshly, instantly cheapening the look.
Pro Styling Tip: Shoot with the sun behind you so the mesh vanishes; the rails will carry the frame with a soft, editorial glow.
Remember, this isn’t about recreating a showroom. It’s about building a backyard that lets you exhale. If one idea makes you smile, start there and ignore the rest for now.
5. Reed Screen + Slatted Frame Spa Wall
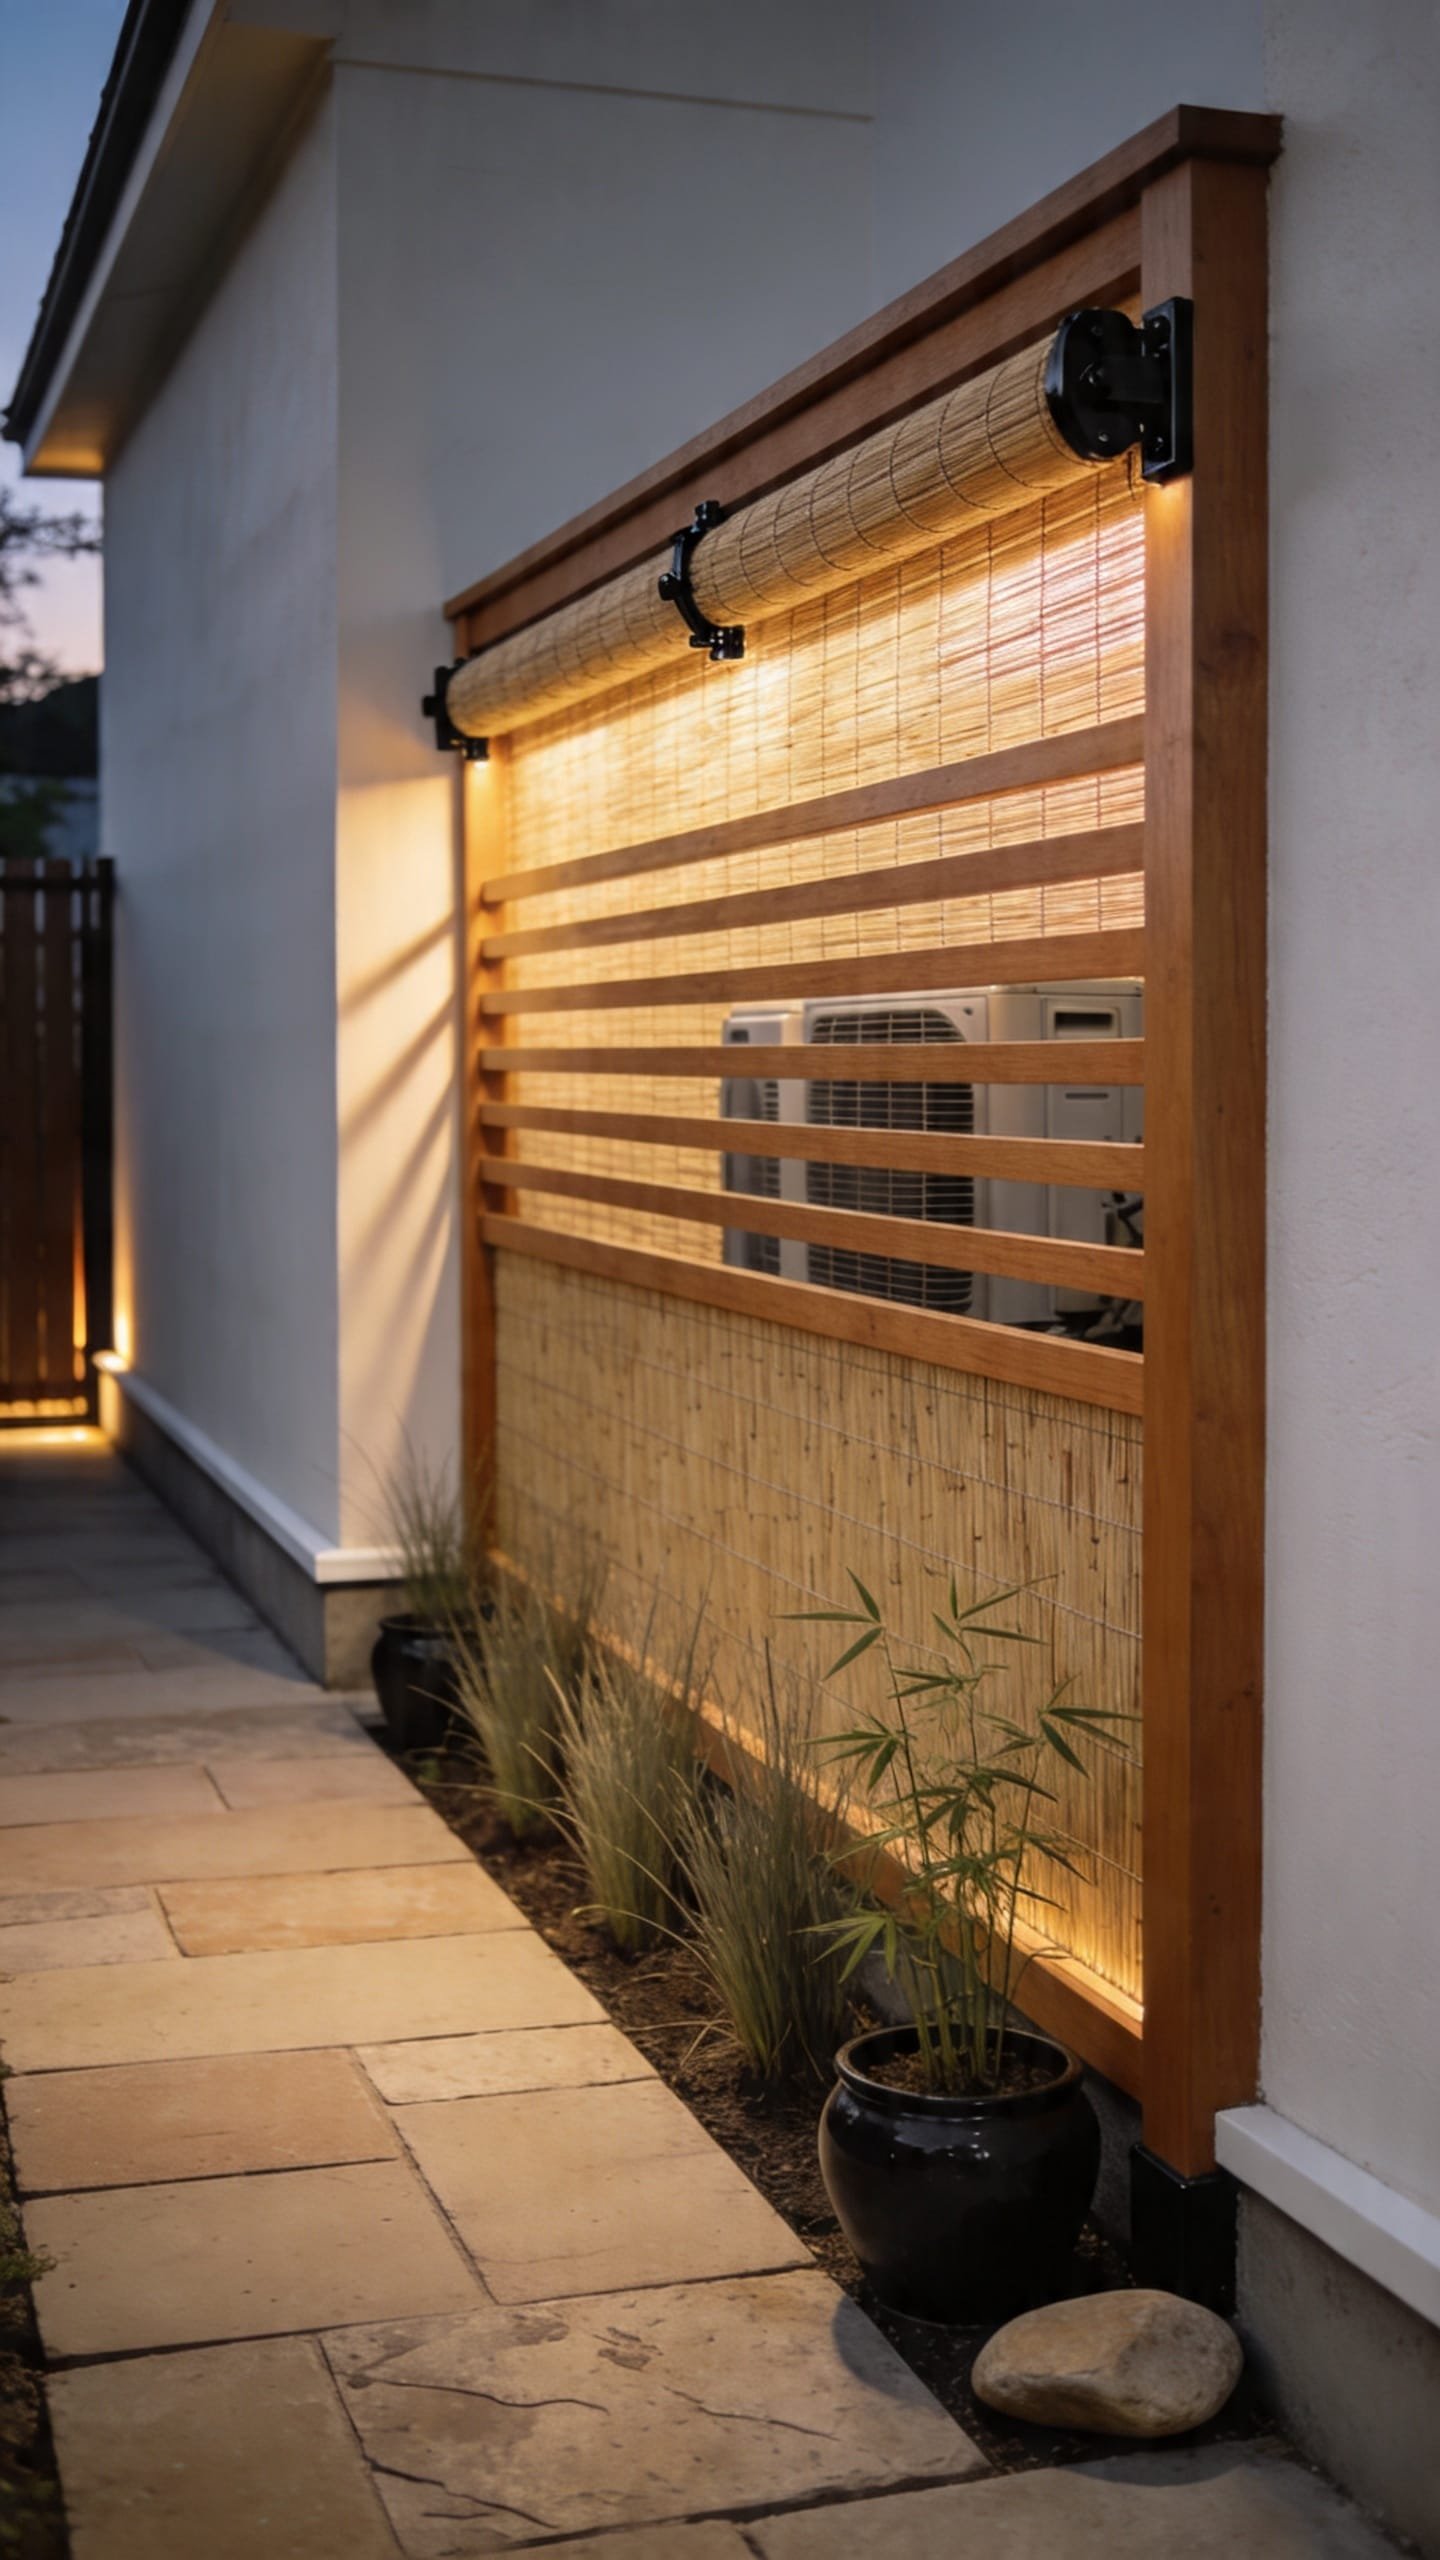
There’s that awkward side yard where air conditioners live and privacy dies. You’ve tried those flimsy standalone screens that blow over in a stiff breeze. This design wraps an affordable reed or bamboo roll in a sturdy wood frame with horizontal slats—spa energy unlocked, equipment hidden, budget intact.
The mood leans hotel-spa meets Japanese courtyard: light-diffusing reed, rhythmic wood slats, and subtle, warm lighting. It performs well in tight spaces because it’s thin and forgiving. At night, backlights produce a gauzy glow through the reeds that looks pricier than it is.
Photographs love the grain of reed against the crisp edge of a slatted frame. It’s texture stacking at its finest: matte wood, fibrous reed, and a warm light spill that softens any hard corner.
Variations:
- Budget-friendly: Use willow or reed fencing rolls; frame with 1×2 pine.
- Small-space: Build panels just 24 inches wide and hinge them to fold as needed.
- Darker version: Stain frame espresso and use smoked bamboo rolls.
- Renter-friendly: Mount to freestanding planters with L-brackets; add sandbags inside the planters for stability.
Key Design Elements:
- Main materials: Reed or bamboo rolls, 1×2 or 1×3 frame, horizontal top slats
- Color palette: Natural straw, warm wood, amber light
- Lighting strategy: LED strip behind panels or small solar uplights
- Furniture silhouettes: Teak bench, black metal side table
- Texture layers: Fibrous reed + smooth wood + glossy leaf plants
- Accent details: River stones, cedar mat, slim black hardware
Budget Breakdown:
- Reed/bamboo roll: $25–$70 per 6–16 feet
- Framing lumber: $40–$120
- Exterior stain/seal: $30–$60
- Solar/LED lighting: $20–$80
- Hardware/clips: $15–$35
Total Estimated Cost: $150 – $450
Best For: Narrow side yards, screening utility areas, renters who want portable privacy.
How To Recreate This Look:
- Start with a simple rectangular frame and cross braces for rigidity.
- Add reed roll to the back, stapling every 6–8 inches.
- Layer a top band of horizontal slats for a tailored finish.
- Install lighting behind or below for soft glow.
- Style with a bench, potted palm, and river stones underfoot.
Why This Feels Designer: Mixing a humble material (reed) with a crisp, architectural frame turns “temporary” into “intentional.” The top slat band acts like a crown molding for the outdoors.
One Thing To Avoid: Don’t leave reed untreated in full sun; a quick UV-protective sealant keeps it from fading and fraying too fast.
Pro Styling Tip: If you’re shooting at dusk, tuck a candle lantern just out of frame—the warm reflection in the reed adds a luxury glow.
6. Painted Lattice Privacy Grid With Planter Ledge
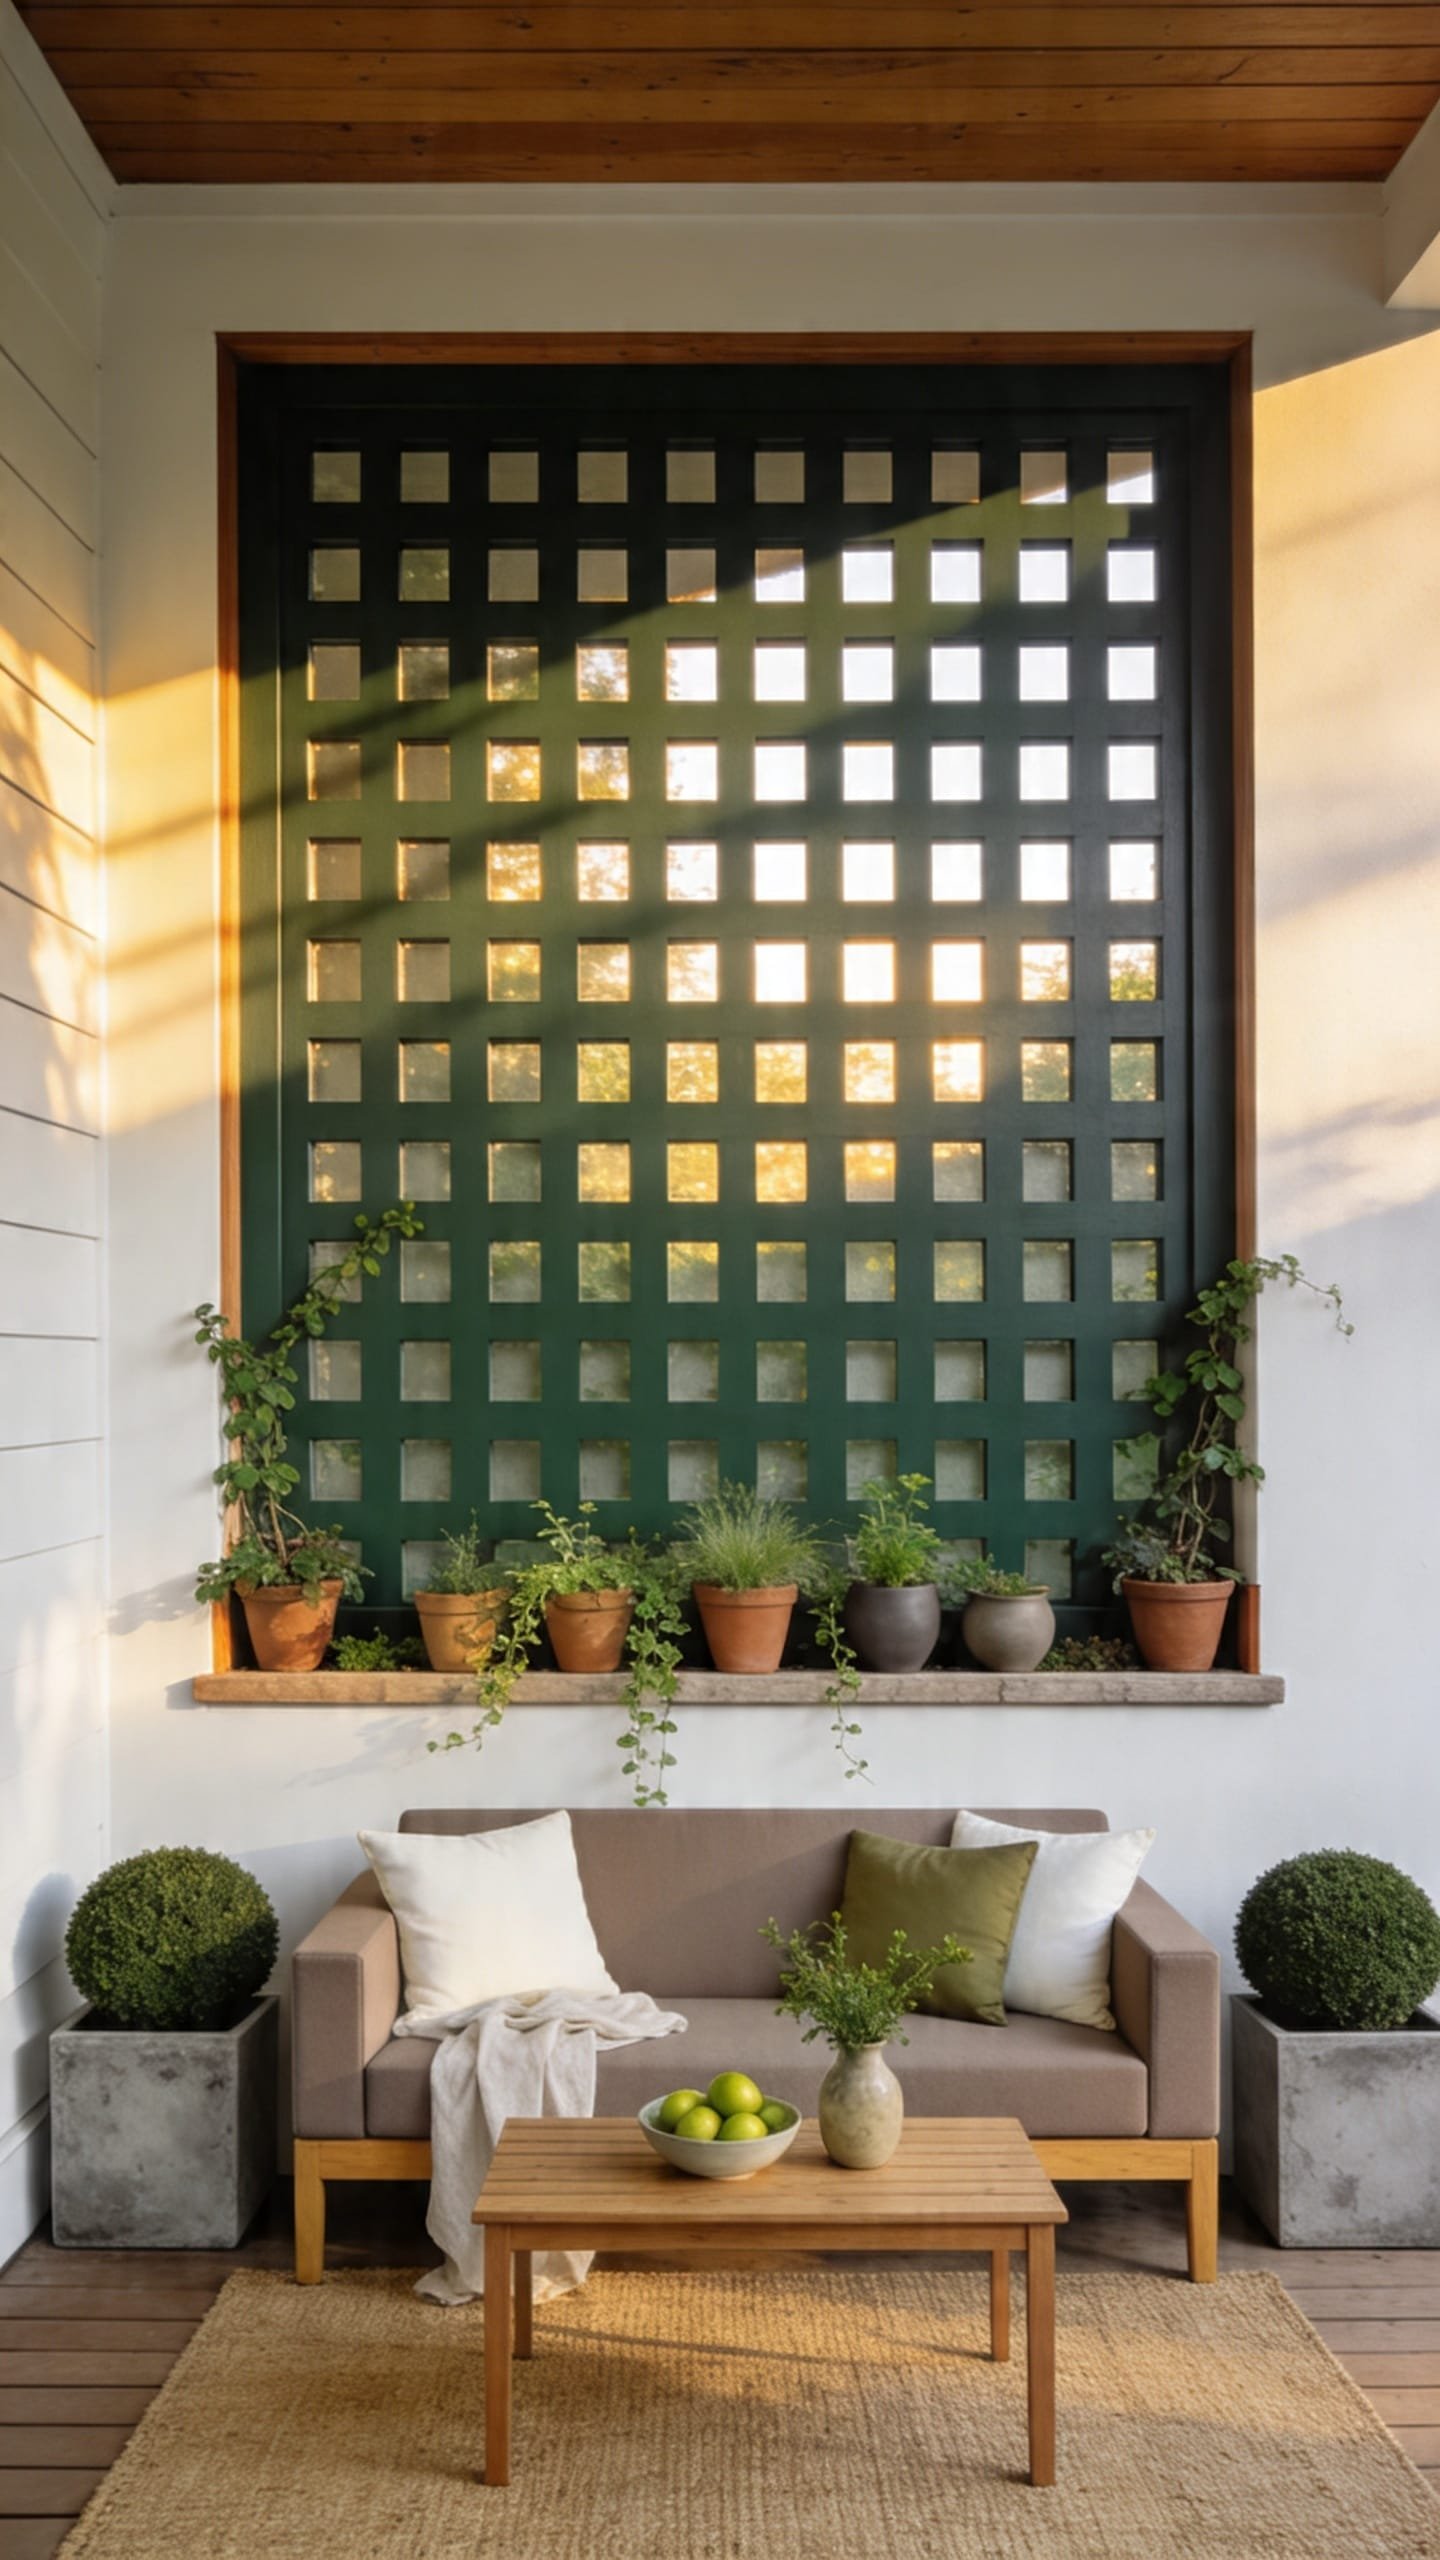
Confession: lattice can look cheesy if you treat it like an afterthought. But paint it a sophisticated color, run it in large square grids, and add a slim planter ledge? Suddenly, it’s crisp, modern, and tailored enough to sit behind your outdoor sofa like it was meant for magazine spreads.
The vibe is tailored garden room—structured, symmetrical, and endlessly flexible. It’s amazing for small patios because the open squares create privacy blur without blocking breezes. During golden hour, the grid casts a delicate net of shadows that makes even a modest seating area feel styled.
I watched a friend agonize over deck stain colors for weeks before realizing the real issue was the lack of vertical interest. We added a painted lattice grid in a sage-gray with a cedar ledge, and her deck went from “meh” to “cocktail hour ready” in one Saturday.
Variations:
- Budget-friendly: Use treated wood lattice; reinforce with simple 1×2 trim.
- Small-space: Opt for larger grid squares (4–5 inches) to reduce visual noise.
- Darker version: Go deep olive or lamp black; add brass screws for intentional detail.
- Renter-friendly: Build freestanding screens with planter boxes as footers.
Budget Breakdown:
- Wood lattice or DIY grid strips: $20–$80
- 1×2 framing and trim: $40–$120
- Exterior paint: $30–$60
- Planter ledge lumber: $20–$50
- Mounting hardware: $15–$30
Total Estimated Cost: $150 – $450
Best For: Decks and patios that need a pretty backdrop; renters who want removable panels.
Key Design Elements:
- Main materials: Lattice or custom grid strips, trim, ledge board
- Color palette: Sage-gray, olive, lamp black with warm wood ledge
- Lighting strategy: Clip-on spotlights under the ledge for plant glow
- Furniture silhouettes: Boxy outdoor sofa, round side tables
- Texture layers: Smooth painted grid + trailing plants + linen cushions
- Accent details: Herb planters, matte black watering can, small trellis hooks
Why This Looks Expensive: Uniform paint and precise grid spacing telegraph custom carpentry. The ledge adds architecture and gives your eye a styled “moment.”
How To Recreate This Look:
- Start with a sturdy frame sized to your wall run.
- Add lattice or evenly spaced strips to form a square grid.
- Paint everything one color for cohesiveness.
- Install a 5–6 inch deep planter ledge across the center or top third.
- Style with small herbs, trailing ivy, and one sculptural planter for height.
Watch Out: Don’t choose a high-gloss paint; reflections will highlight imperfections and read “plastic.” Go satin or matte.
Pro Styling Tip: Place one tall olive tree or ficus near one end to break the symmetry—your photo will feel editorial, not staged.
If this is starting to feel like a lot, zoom out. The secret is repetition. Pick one wood tone, one metal accent, and commit. That limited palette is what reads polished in photos and IRL.
7. Corrugated Metal + Wood Frame with Picture-Frame Gate
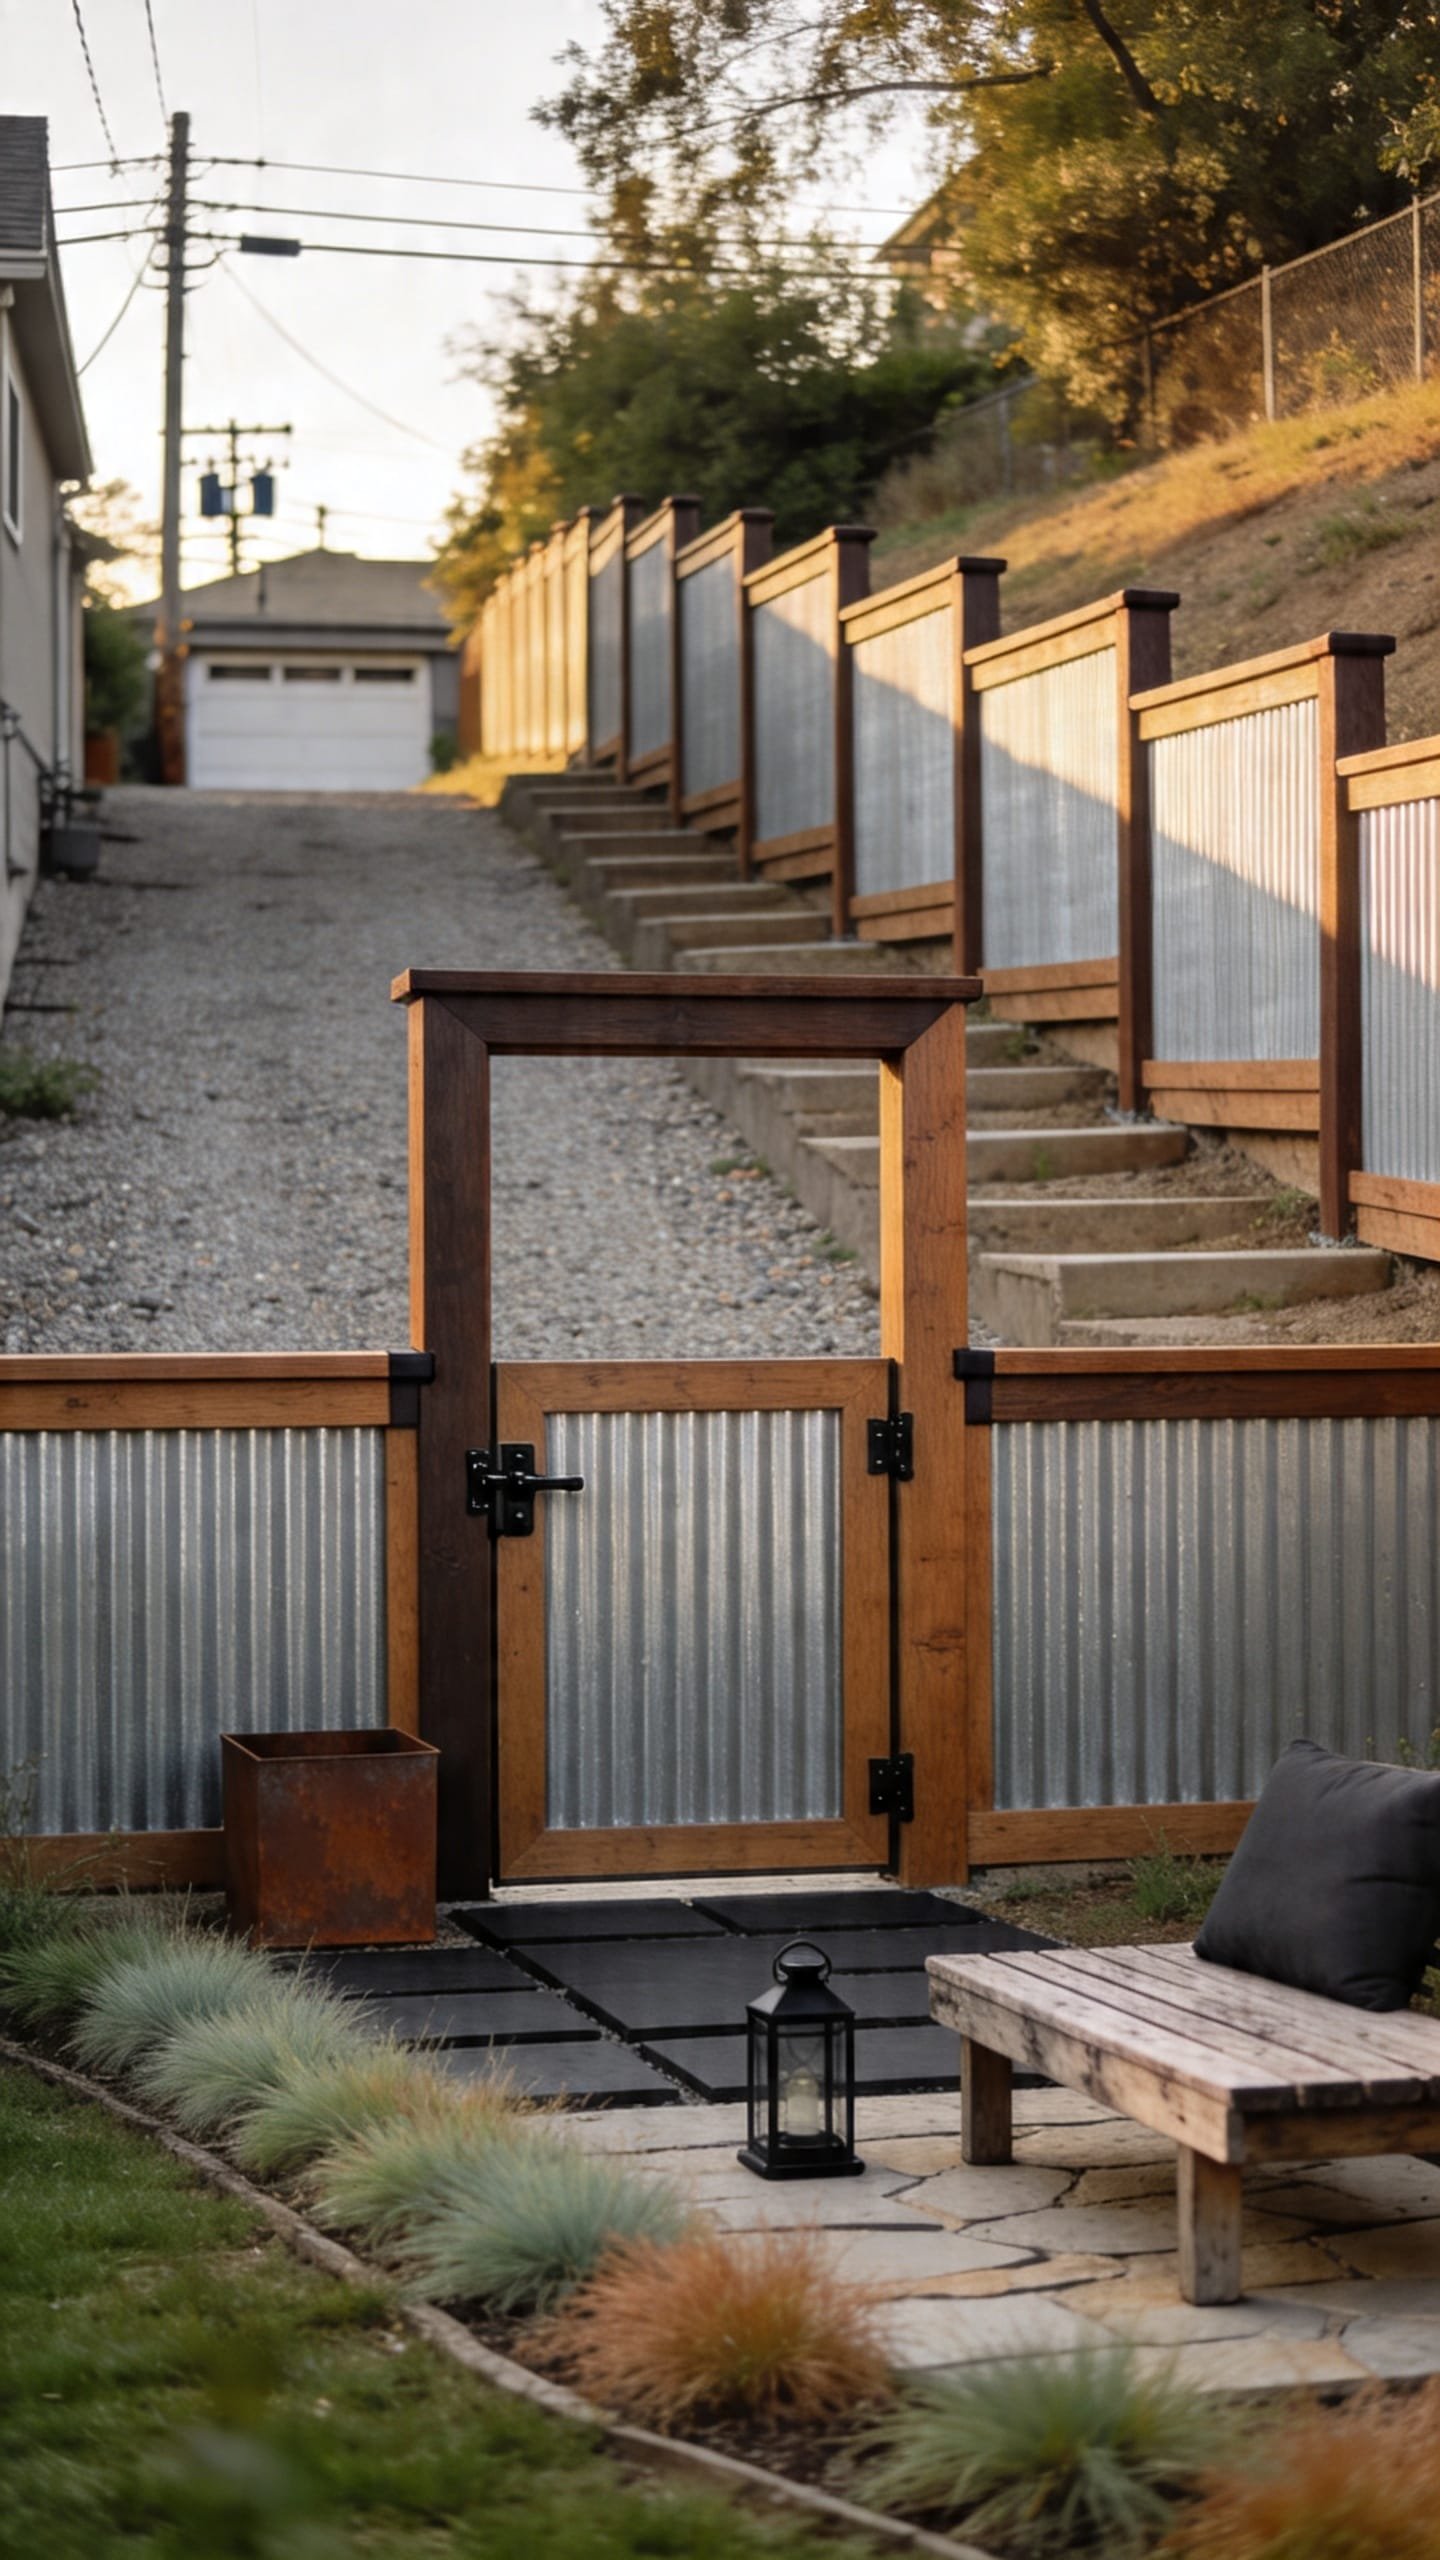
Big privacy, small budget. You’ve considered corrugated panels, but worried they’d scream industrial. Here’s the fix: frame them in warm wood with generous borders and a picture-frame gate. Modern ranch, but make it pretty.
The mood is rustic-modern with a little edge—think espresso-stained posts, matte galvanized or black corrugated panels, and crisp mitered corners. This works beautifully on sloped lots and alley-facing runs where durability matters. It blocks noise better than wood alone, and with the right lighting, it looks downright chic.
Photos love contrast. The reflective ripple of metal against a matte wood frame creates a rhythm that feels expensive. Add a bold gate handle and you’ve got an entrance with presence.
Variations:
- Budget-friendly: Use standard galvanized panels; keep wood simple and stain dark.
- Small-space: Orient panels horizontally for a sleeker, more continuous line.
- Darker version: Black-painted corrugated with cedar frame—drama without shouting.
- Renter-friendly: Bolt panels to a free-standing frame weighted with concrete piers.
Key Design Elements:
- Main materials: Corrugated metal panels, 4×4 posts, 2×3 framing, bold gate hardware
- Color palette: Espresso wood, galvanized silver or matte black metal
- Lighting strategy: Narrow-beam spotlights uplighting the gate posts
- Furniture silhouettes: Angular chairs, concrete-topped tables
- Texture layers: Rippled metal + smooth wood + soft grasses
- Accent details: Oversized black handle, house numbers on the gate
Budget Breakdown:
- Corrugated panels: $20–$45 each (2–3 feet wide by 8–10 feet long)
- Framing and posts: $80–$200
- Stain/paint: $30–$70
- Gate hardware: $35–$120
- Fasteners and trim: $20–$50
Total Estimated Cost: $250 – $900
Best For: Back alleys, modern homes, and areas needing durable, low-maintenance privacy.
How To Recreate This Look:
- Start by setting sturdy posts; add a lower and upper rail.
- Add a wood frame opening sized for your panels with a 1-inch reveal.
- Layer corrugated panels inside the frame; use rubber washers for clean installation.
- Install a picture-frame gate with miters and a bold, heavy handle.
- Style with two clumps of feather reed grass to soften the metal line.
Why This Reads High-End: It’s all in the proportions. Thick wood borders around a lean metal infill suggests custom fabrication, not a quick fix.
The Most Common Mistake: Using shiny screws that dot the panel like glitter. Choose black or color-matched fasteners for a quiet, refined finish.
Pro Styling Tip: For photos, wipe the panels clean and spritz the surrounding concrete—slightly darker ground tones make the wood grain pop.
Quick Checklist
- Choose one primary wood tone for consistency
- Use matte or satin finishes to avoid harsh reflections
- Control spacing on slats or grids for rhythmic shadows
- Stain or paint before installation for even coverage
- Color-match hardware and fasteners to your design
- Add a top cap or ledge for a finished, tailored look
- Integrate plants to soften lines and add movement
- Plan lighting: solar caps, uplights, or hidden LED strips
- Test dog-proofing with tight gaps and buried mesh edges
- Leave 1–2 inch ground clearance for moisture control
- Use black zip ties or screws where visible
- Photograph at golden hour for depth and warmth
Frequently Asked Questions
How do I keep costs under control without the fence looking cheap?
Limit your material palette and repeat it. Pick one wood, one metal finish, one stain color. Pre-plan hardware and lighting so you don’t impulse-buy mismatched pieces that add cost and visual noise. Consistency reads as quality.
I rent—how can I get privacy without permanent posts?
Build freestanding panels anchored by large planters or concrete pavers in hidden bases. Use post anchors bolted to deck boards where allowed. Choose designs with modular widths so you can move and reuse them later.
What’s the easiest dog-friendly option that still looks high-end?
Try the split-rail + black mesh hybrid. It’s secure, visually light, and when you use black PVC-coated mesh, it disappears. Keep the bottom edge buried or stapled to a ground board so escape artists can’t nose under.
Small yard here—how do I avoid feeling boxed in?
Go horizontal slats with 1-inch gaps or a painted lattice grid with larger squares. Keep colors cohesive and use uplighting at posts to push light outward. Add one focal plant or sculpture so the space has a hero moment instead of clutter.
Maintenance scares me. What finishes last longest?
Oil-based or penetrating stains in darker tones hide wear best. For painted looks, choose exterior acrylic in satin or matte and plan a gentle wash each spring. Seal reed or bamboo with a UV protectant to prevent early fading.
Closing Thoughts
Start with one idea. Maybe it’s the horizontal slats that make your yard look wider. Maybe it’s the reed spa wall that finally hides the AC unit. One section, one weekend, under a clear plan—and you’ll feel the shift every time you step outside.
The truth is, luxury outdoors comes from texture, controlled color, and good light. Repeat materials with intention, keep lines tight and clean, and let plants do the softening. You don’t need the fanciest lumber; you need rhythm, shadow, and a finish that feels calm.
Pick your favorite of these seven cheap fence ideas that look expensive, gather the materials, and give yourself an afternoon to begin. You’ve got the taste. Now you’ve got the plan. And when the sun hits that new fence just right, you’ll know—this is your backyard now, exactly how you wanted it.

About the Author

Krisztina P.Rendes, Founder of Home Style Vibes
Founder of Home Style Vibes
Krisztina Puskásné Rendes created Home Style Vibes as a cozy-modern lifestyle space where homemaking meets inspiration. Her goal is to help women create beautiful, organized, and peaceful homes they truly love — without overwhelm. You’ll find here heart-driven content on home decor, cleaning tips, easy family recipes, organization and decluttering, DIY home projects, plants, and seasonal ideas — all designed to bring more calm, comfort, and style into everyday life.