7 Indoor Herb Garden Ideas For Your Kitchen That Are Beautiful And Practical
You want fresh basil at arm’s reach and a kitchen that looks like a sunlit cookbook spread… but the reality is a cluttered counter, leggy mint, and a window that gets two good hours of light on a Tuesday. You crave a calm, tactile kitchen—soft linen towels, creamy stoneware, warm wood—yet the herb situation keeps turning into soggy pots and gnats. These 7 indoor herb garden ideas fix that exact frustration, with designs that are as photogenic as they are practical. Choose one and you can have a magazine-level herb setup in under a weekend, under $300 if you want to keep it tight, and yes—your pasta will taste better.
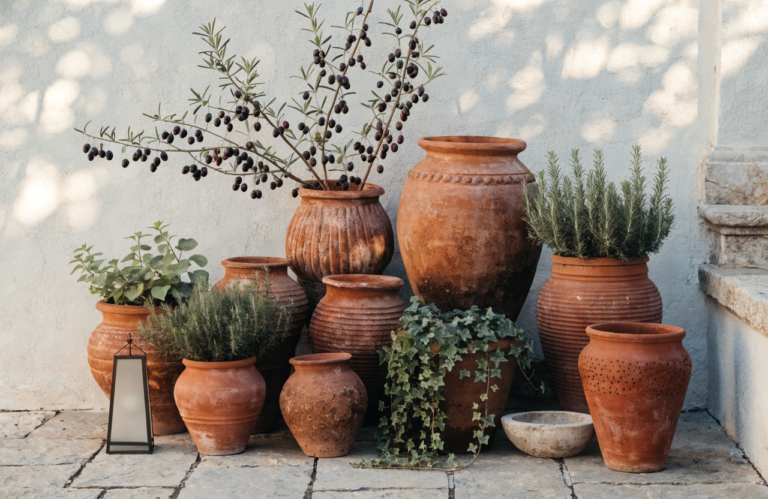
Think: dappled morning light on glossy leaves, matte ceramics against brushed brass, little shadows that make everything feel intentional. These ideas are built for real kitchens, including rentals, dim corners, and the world’s tiniest windowsill. If you love a serene vibe with a hint of drama (and herbs that actually thrive), one of these will feel like home.
1. Fluted Oak Ledge With Soft Diffused Morning Light And Matte Stone Crocks
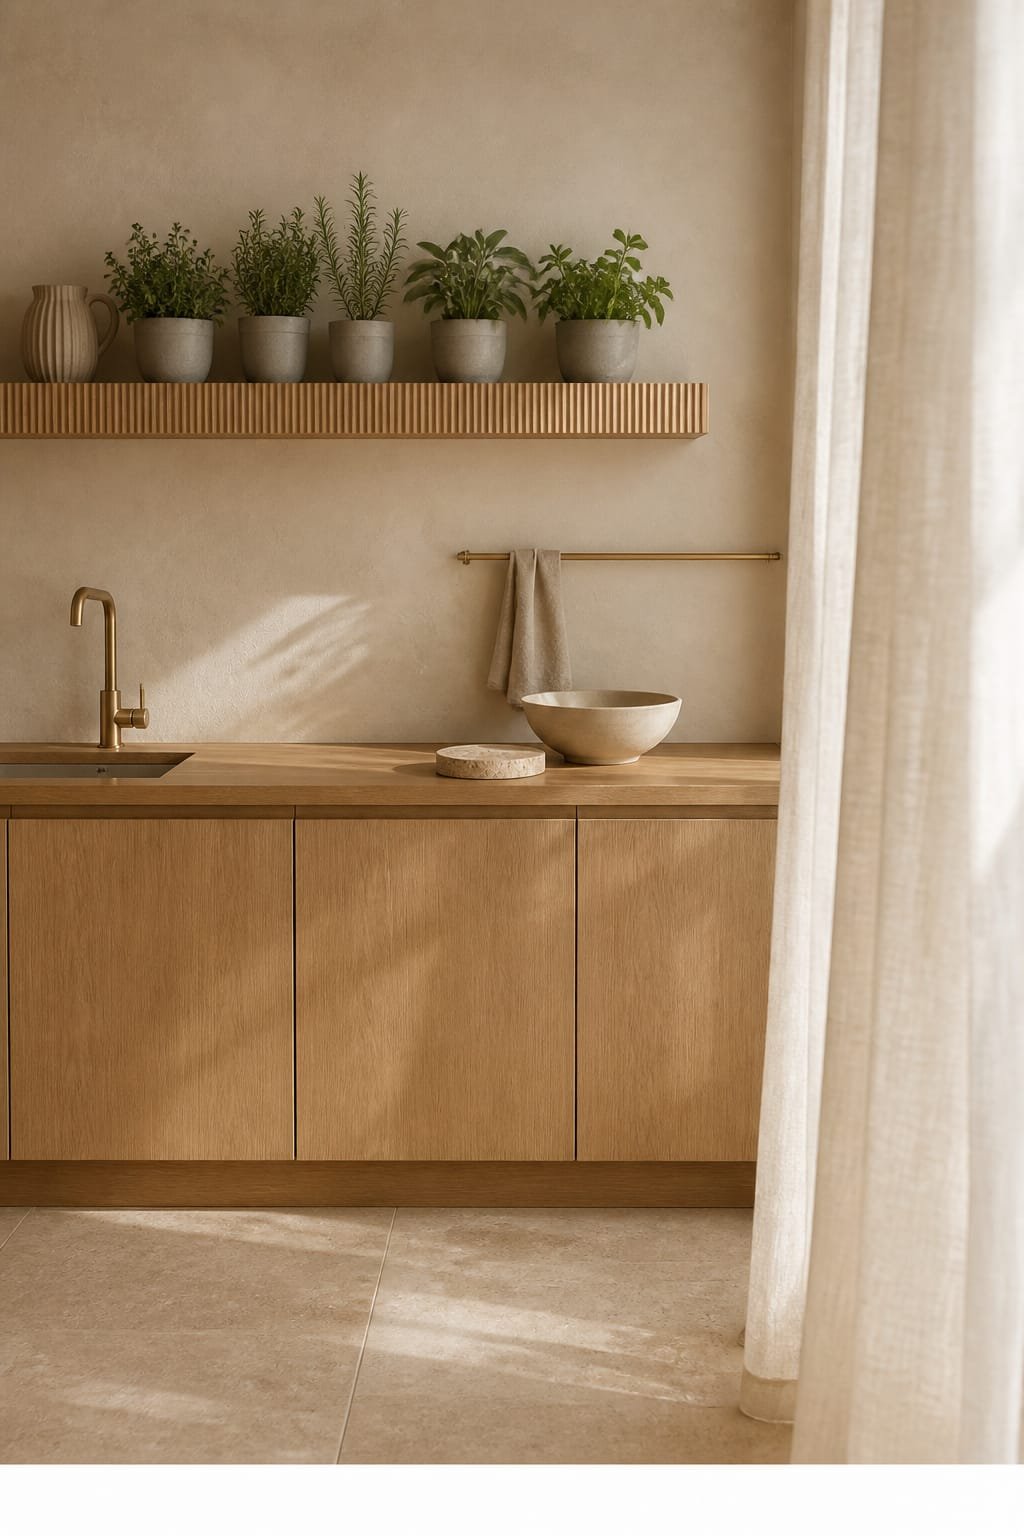
We’ve all been there: your counter looks messy no matter what you do, and those plastic herb pots from the store scream “temporary.” This design corrals everything onto a single fluted oak ledge under gentle morning light, with herbs tucked into matte stone crocks that read like sculpture. The mood is warm minimal—quiet, textural, and calm—like a slow Sunday morning even on a Wednesday.
It works in real homes because the ledge creates a boundary line that makes any cluster look intentional. Diffused light (from a sheer or frosted film) keeps herbs from scorching while encouraging compact, lush growth. Oak and stone are forgiving, photograph beautifully, and bring balance: the warm wood grain plays against the cool chalky ceramic so your greens look extra vibrant.
Photographically, this shines thanks to soft shadow play along the fluting, the low sheen of matte glaze, and layered heights that add depth. Small kitchen? Use a 24-inch ledge over the sink. Renter? Mount with heavy-duty removable brackets or use a no-drill tension shelf in the window reveal. Want a darker mood? Swap light oak for smoked oak and stone for deep charcoal ceramics.
Budget Breakdown:
- Custom or pre-made fluted oak shelf: $80–$200
- Matte stoneware crocks (set of 4–6): $40–$120
- Sheer linen cafe curtain or frosted window film: $20–$60
- Waterproof tray or slim saucers: $12–$30
- Organic herb starts (basil, thyme, mint, parsley): $16–$28
Total Estimated Cost: $168 – $438
Best For: East-facing windows, cozy galley kitchens, anyone who craves order and hates countertop clutter. Great for slow-style minimalists and renters who still want a finished look.
Key Design Elements:
- Main materials: fluted oak, matte stoneware, linen sheer
- Color palette: warm honey wood, chalky cream, soft gray, vivid herb green
- Lighting strategy: diffused morning light via sheer or film to prevent leaf scorch
- Furniture silhouettes: slim ledge with strong horizontal line
- Texture layers: ribbed wood, chalky ceramics, woven linen
- Accent details: brass L-brackets, petite saucers, slim black watering can
How To Recreate This Look:
- Start with a 24–36 inch fluted oak shelf; mount 12–16 inches above the counter.
- Add sheer linen or frosted film to soften harsh light.
- Layer stone crocks in varying diameters; place saucers inside to catch drips.
- Install small brass brackets to read like jewelry against the wood.
- Style with a slim watering can and one small art piece leaning behind the herbs.
Why This Looks Intentional: The continuous ribbing on the oak creates rhythm. Matching crocks and a single shelf line pull disparate pots into one cohesive moment, like a still life that happens to be edible.
Watch Out: Don’t crowd the crocks. Tight spacing blocks airflow and invites fungus. Leave a two-finger gap between pots and rotate them weekly to prevent lopsided growth.
Pro Styling Tip: Angle one crock forward by an inch and keep one slightly taller plant in the back; the staggered heights create camera-friendly depth and soft, layered shadows.
Quick Tip: Herbs hate wet feet. Slip a layer of aquarium gravel or broken terracotta at the base of each crock to keep roots from sitting in water.
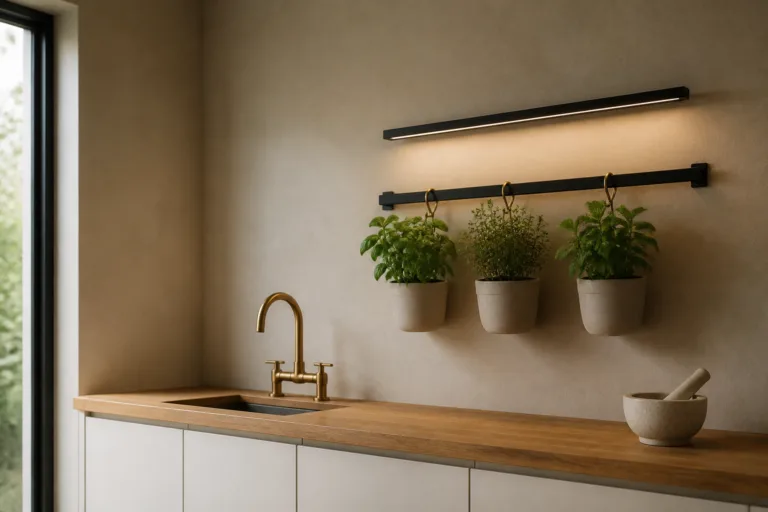
2. Blackened Steel Rail With Cool Task Lighting And Hanging Terracotta Pods
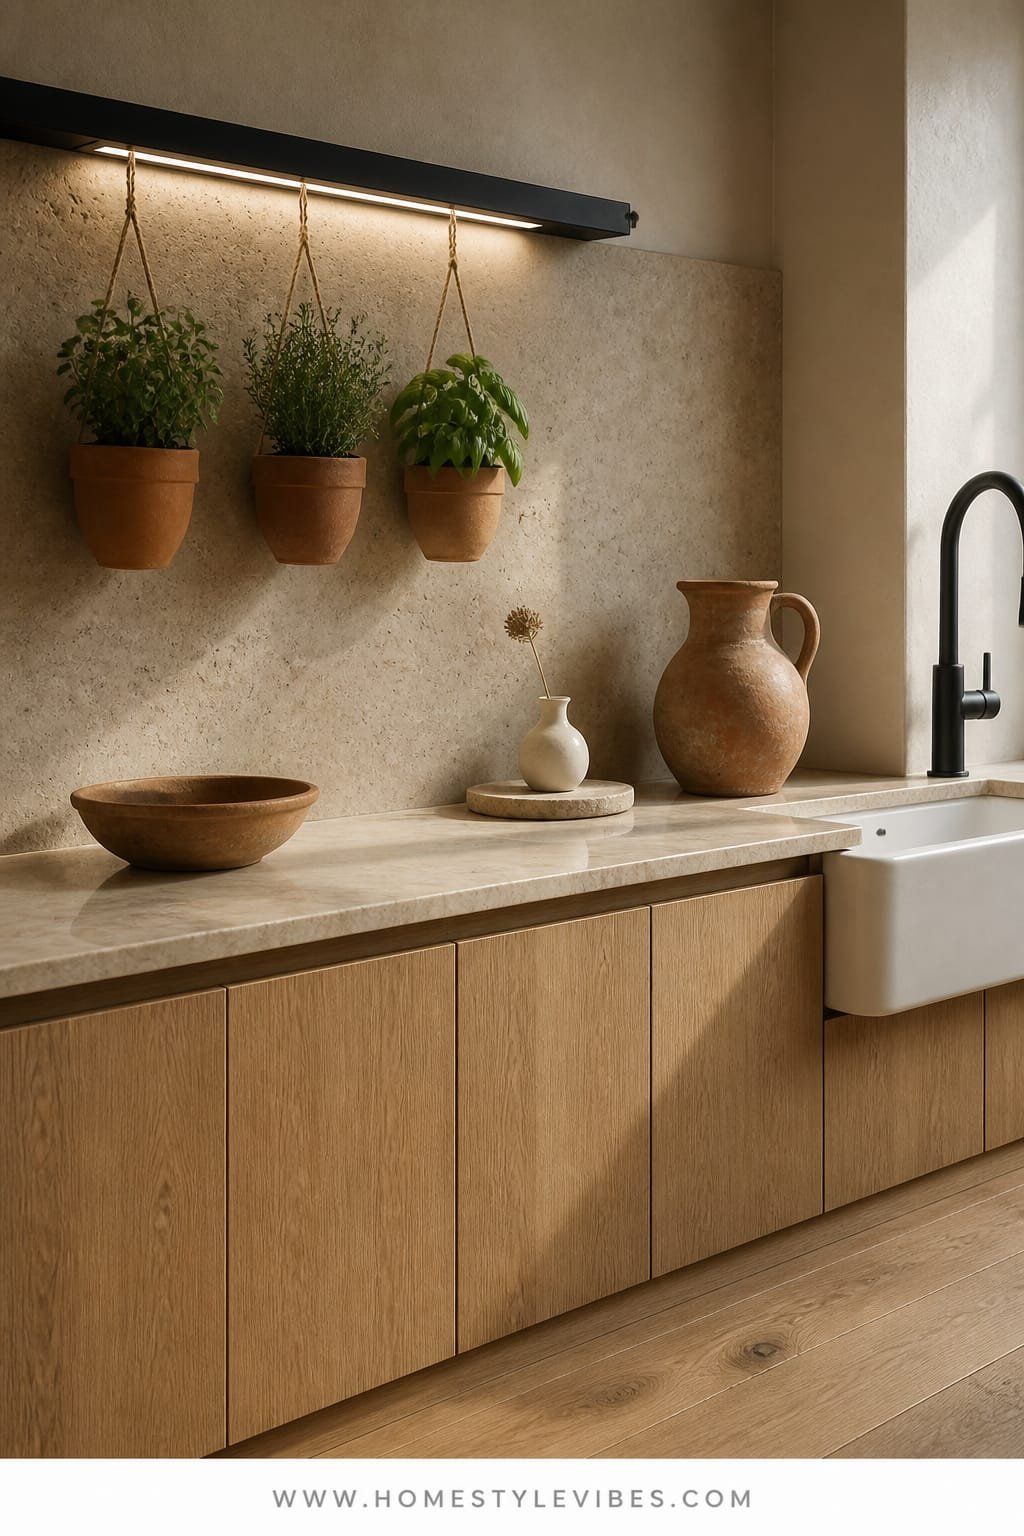
It’s that one backsplash that always feels flat—nothing happening, just tile and a sad utensil jar. You’ve tried countertop planters, but they hog prep space and look messy by Friday. This rail system lifts herbs up and off the counter, letting your tile breathe while keeping oregano right where you need it. The mood leans urban rustic: a whisper of industrial, but softened by hand-thrown terracotta pods.
Why it works: vertical real estate. A blackened steel rail spans your work zone, and modular hooks hold lightweight terracotta planters with built-in drainage. Cool under-cabinet task lighting doubles as grow support for low-light herbs like parsley and chives. It’s family-friendly: nothing to knock over, and you can wipe the counter without playing planter Tetris.
It photographs beautifully thanks to the color contrast—black rail, warm terracotta, crisp tile—and the repetition of small pods along the rail. Short or narrow kitchen? Use two shorter rails stacked with 8–10 inches between. Renter-friendly? Use adhesive rail brackets or a tension rod inside a niche. Dark kitchen? Add a slim LED grow strip above the rail and you’re set.
Budget Breakdown:
- Blackened steel or matte black rail with hooks: $40–$120
- Hanging terracotta pods (set of 4–6): $30–$90
- Slim LED task/grow strip: $25–$80
- Herb starts: $16–$28
- Moisture mat or small drip tray behind stove zone: $10–$20
Total Estimated Cost: $121 – $338
Best For: Small kitchens with limited counter space; cooks who want herbs within chop-and-drop reach. Works beautifully with white subway, zellige, or stone slab backsplashes.
Key Design Elements:
- Main materials: blackened steel, terracotta, glazed tile
- Color palette: matte black, burnt clay, off-white tile, fresh green
- Lighting strategy: cool task lighting with optional grow spectrum add-on
- Furniture silhouettes: linear rail with repeating rounded pods
- Texture layers: smooth tile, gritty clay, powder-coated metal
- Accent details: s-hooks, tiny plant markers, a single brass ladle for warmth
How To Recreate This Look:
- Install a 24–36 inch rail along your backsplash, 12 inches above the counter.
- Add hooks and attach lightweight terracotta pods with saucers or liners.
- Mount a slim LED strip under your cabinet, centered above the rail.
- Pot herbs in a gritty mix; clip labels neatly to each pod.
- Style with one unexpected object on the rail—like shears on a leather loop.
Why This Feels Designer: Repetition with restraint. The black line of the rail anchors the wall; matching pods create rhythm; and the cool glow reads like a deliberate light feature rather than a utility strip.
One Thing To Avoid: Don’t hang heavy, water-soaked clay without checking load limits. Keep each pod under 2–3 pounds and water with a squeeze bottle to control drips.
Pro Styling Tip: Keep two empty hooks between herb pods to let the backsplash peek through; negative space photographs like confidence.
Still with me? The next idea swaps metal for pure calm and adds a soft wash of color that flatters every leaf.
3. Limewashed Niche With Warm Glow Sconces And Shallow Stone Trough Planter
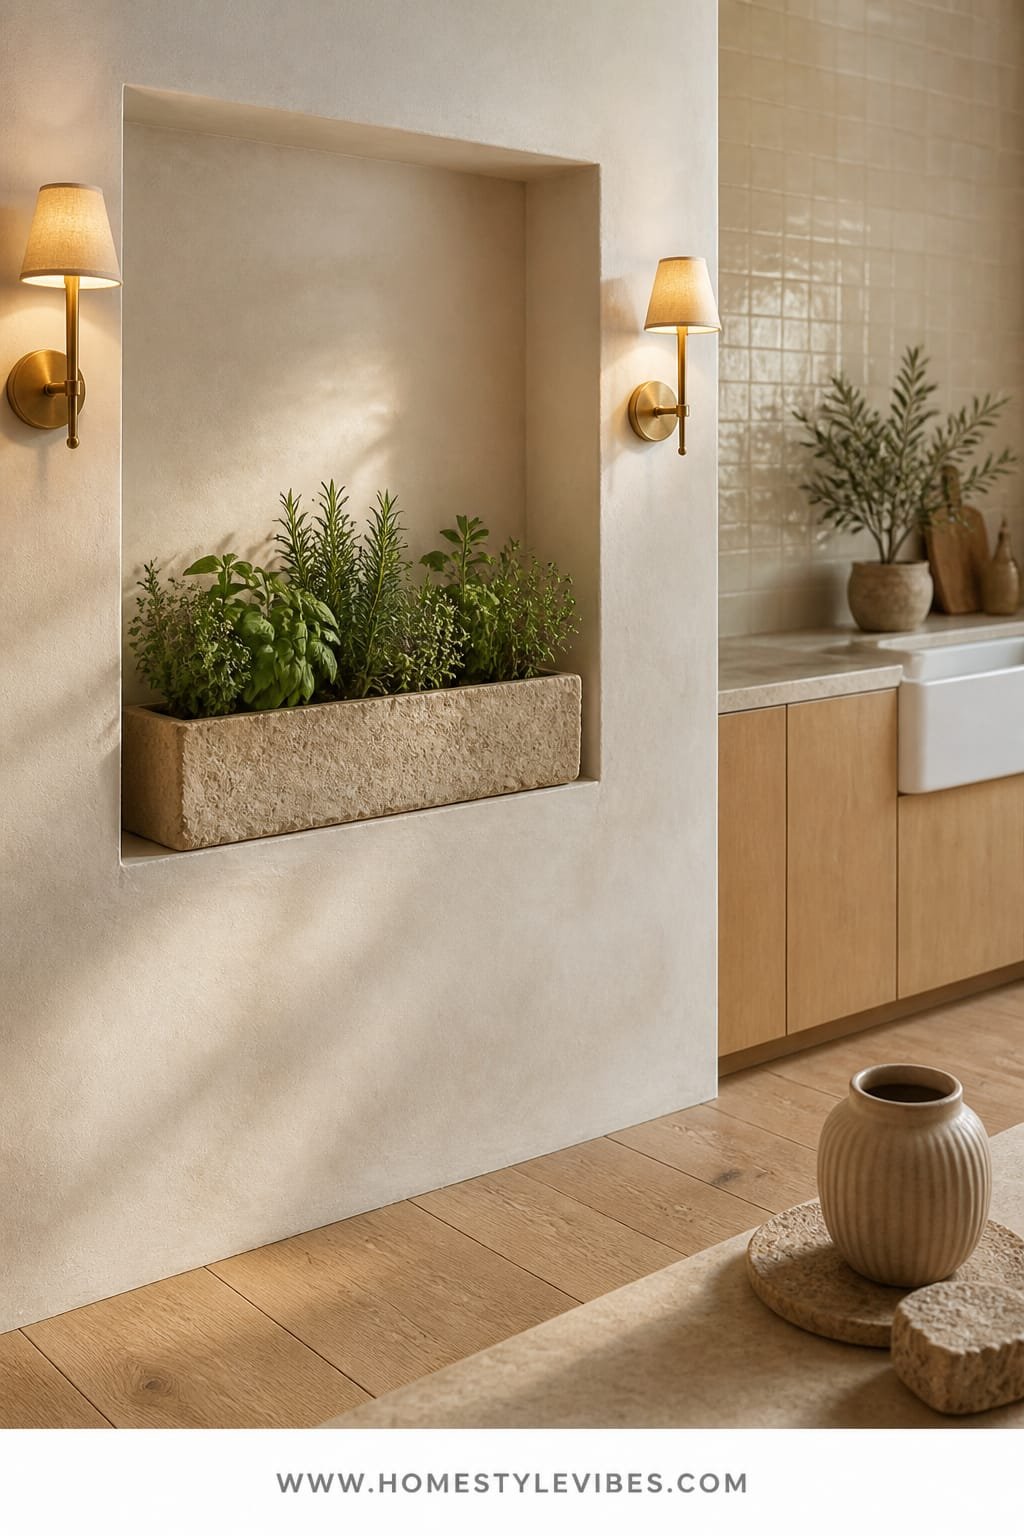
You’ve tried shoving a planter into that awkward corner, but it always looks like an afterthought. This approach frames your herbs as art: a shallow stone trough set inside a limewashed niche, flanked by two warm-glow sconces. The mood is modern Mediterranean—sun-soaked, refined, a little romantic without being fussy.
Why it works: the niche creates a destination in the kitchen, an intentional pause. Limewash has that soft, clouded depth that loves natural light and makes greens pop. A trough keeps all herbs together, so watering and trimming feel easy and contained. If you cook a lot, this centralizes your greens while keeping the counter free.
Photographs sing here—plaster texture catches light, sconces cast a gentle halo, and the low silhouette of the trough showcases perky stems. Have zero niche? Fake it with a floating shelf and a painted rectangle in a slightly deeper tone. Renter-friendly version: use peel-and-stick limewash-look vinyl and plug-in sconces with adhesive cable covers.
Budget Breakdown:
- Limewash paint and brush: $45–$100
- Pair of warm-glow sconces (hardwired or plug-in): $80–$240
- Shallow stone trough planter (24–30 inches): $60–$180
- Herb starts and soil: $20–$35
- Optional: moisture barrier liner: $10–$18
Total Estimated Cost: $215 – $573
Best For: Open-plan kitchens that need a focal point; evening cooks; anyone who craves ambiance and soft texture.
How To Recreate This Look:
- Choose a wall zone and map a 30–36 inch wide “niche” rectangle with painter’s tape.
- Apply limewash in cross-hatched passes for depth; let the edges feather.
- Mount or plug in two sconces, one on each side, with warm 2700K bulbs.
- Place a shallow stone trough on a shelf or low ledge; line and fill with gritty soil.
- Group herbs by height, thyme and oregano up front, basil and parsley behind.
Why This Reads High-End: Layered finishes. Limewash avoids flat paint glare, the stone trough adds heft, and the sconces create flattering, directional light that feels more boutique wine bar than kitchen chore zone.
The Most Common Mistake: Oversizing the trough. If it’s deeper than 6–8 inches, it reads bulky and shadows the leaves. Keep it shallow and long for sleek lines.
Pro Styling Tip: Brush a slightly deeper limewash “shadow” at the niche base to ground the trough; it photographs like a custom plaster build-out.
Did You Know? Basil prefers warm feet. Set the trough near a spot that gets a touch of afternoon warmth—away from direct AC vents—and growth will stay fuller and sweeter.
Pause. If one idea is tugging at you more than the others, that’s your starting point. You don’t need all seven. Choose the one that solves your daily irritation first—like “I can’t spare the counter space” or “my kitchen feels flat at night.” Small wins stack fast.
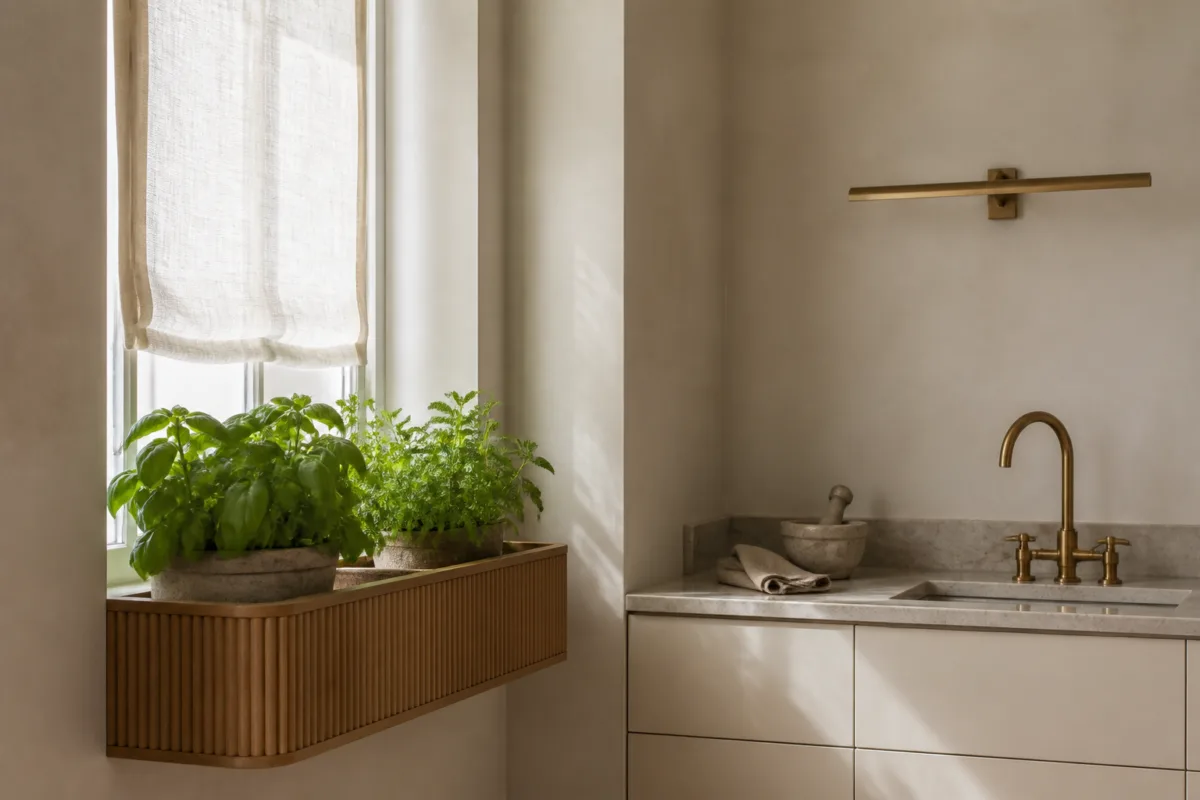
4. Honed Marble Windowsill With Crisp Daylight And Slim Brass Plant Stand
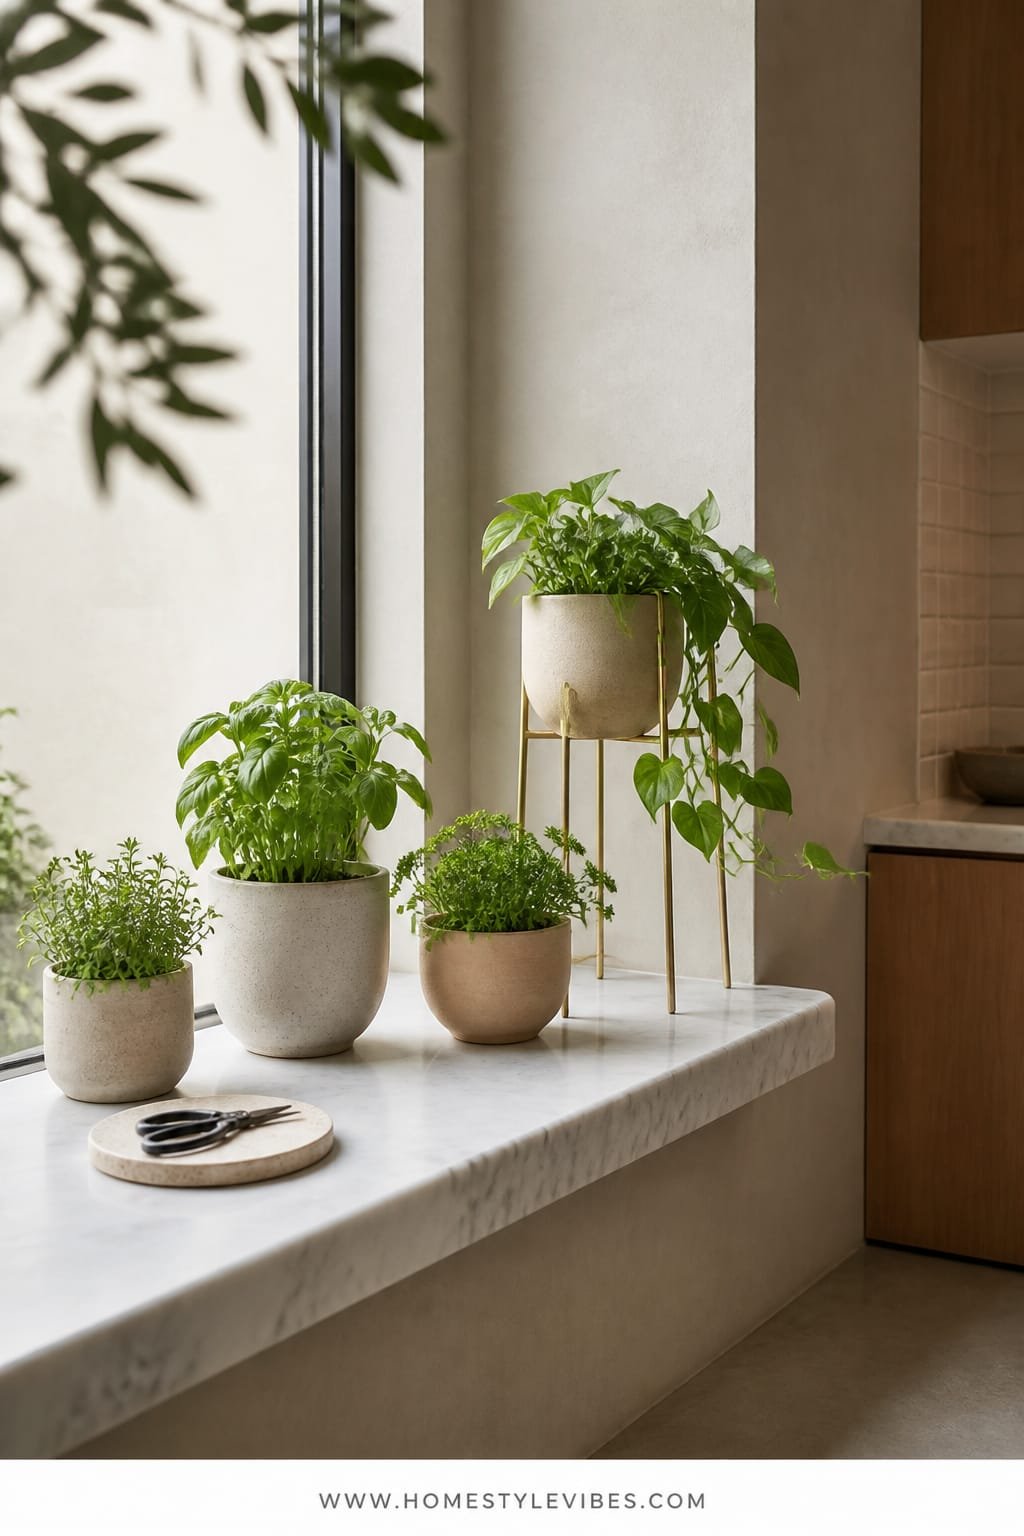
You love the idea of a windowsill garden, but it either puddles water or turns into a tangled jungle. A honed marble slab expands your sill just enough for herbs, while a slim brass stand lifts the tallest pot for that editorial “staggered heights” look. The mood is classic-meets-modern: timeless materials, clean lines, zero chaos.
This works in real homes because it uses the brightest spot you already have and fixes two pain points: surface size and drainage. Honed marble hides water marks better than polished, and a thin profile looks elegant rather than heavy. A petite brass stand adds that jewelry moment without clutter.
Photographically, the combo of soft daylight on marble and glossy green leaves is unbeatable. The subtle brass reflection warms up the scene, which helps kitchens that skew cool. Tiny kitchen? Cut a 6-inch deep marble sill; it’s enough for three 4-inch pots. Renter version: a removable marble cutting board flush with the sill, with silicone dots for grip.
Budget Breakdown:
- Honed marble remnant cut to size: $60–$180
- Slim brass plant stand: $25–$80
- Non-slip silicone dots and saucers: $10–$20
- Herb trio (basil, chives, thyme): $12–$20
- Lightweight clay or ceramic pots: $20–$60
Total Estimated Cost: $127 – $360
Best For: Bright windows, apartment kitchens, and anyone who appreciates a clean, luxe finish without a full remodel.
Key Design Elements:
- Main materials: honed marble, brass, clay/ceramic
- Color palette: soft white/gray stone, warm brass, fresh green
- Lighting strategy: use brightest window; rotate weekly to prevent lean
- Furniture silhouettes: thin slab, delicate stand, low round pots
- Texture layers: velvety stone, smooth brass, slightly rough clay
- Accent details: linen cafe curtain, tiny black snips, glass mister
Why This Looks Expensive: Restraint. Three to five pots max, one elevated on brass, and negative space around each. The honed surface and precise edges read custom even if it’s a remnant.
How To Recreate This Look:
- Measure the sill and source a marble remnant; have edges eased for safety.
- Place silicone dots under the slab and pots for grip and airflow.
- Set one pot on a slim brass stand; keep tallest herb there.
- Use matching pots for cohesion; leave 2 inches between each.
- Add a sheer curtain high and wide to wash the light; keep fabric off the slab.
Don’t Do This: Avoid polished marble here. Water rings and glare show instantly, and herbs photograph flat on a shiny surface.
Pro Styling Tip: For photos, wipe the slab with a barely damp cloth right before shooting—micro sheen, no glare; leaves look crisper against that soft glow.
Quick Tip: Snip herbs in the morning when leaves are turgid; they perk on camera and taste sweeter in sauces.
5. Warm Walnut Pegboard With Ambient Backlighting And Modular Ceramic Cups
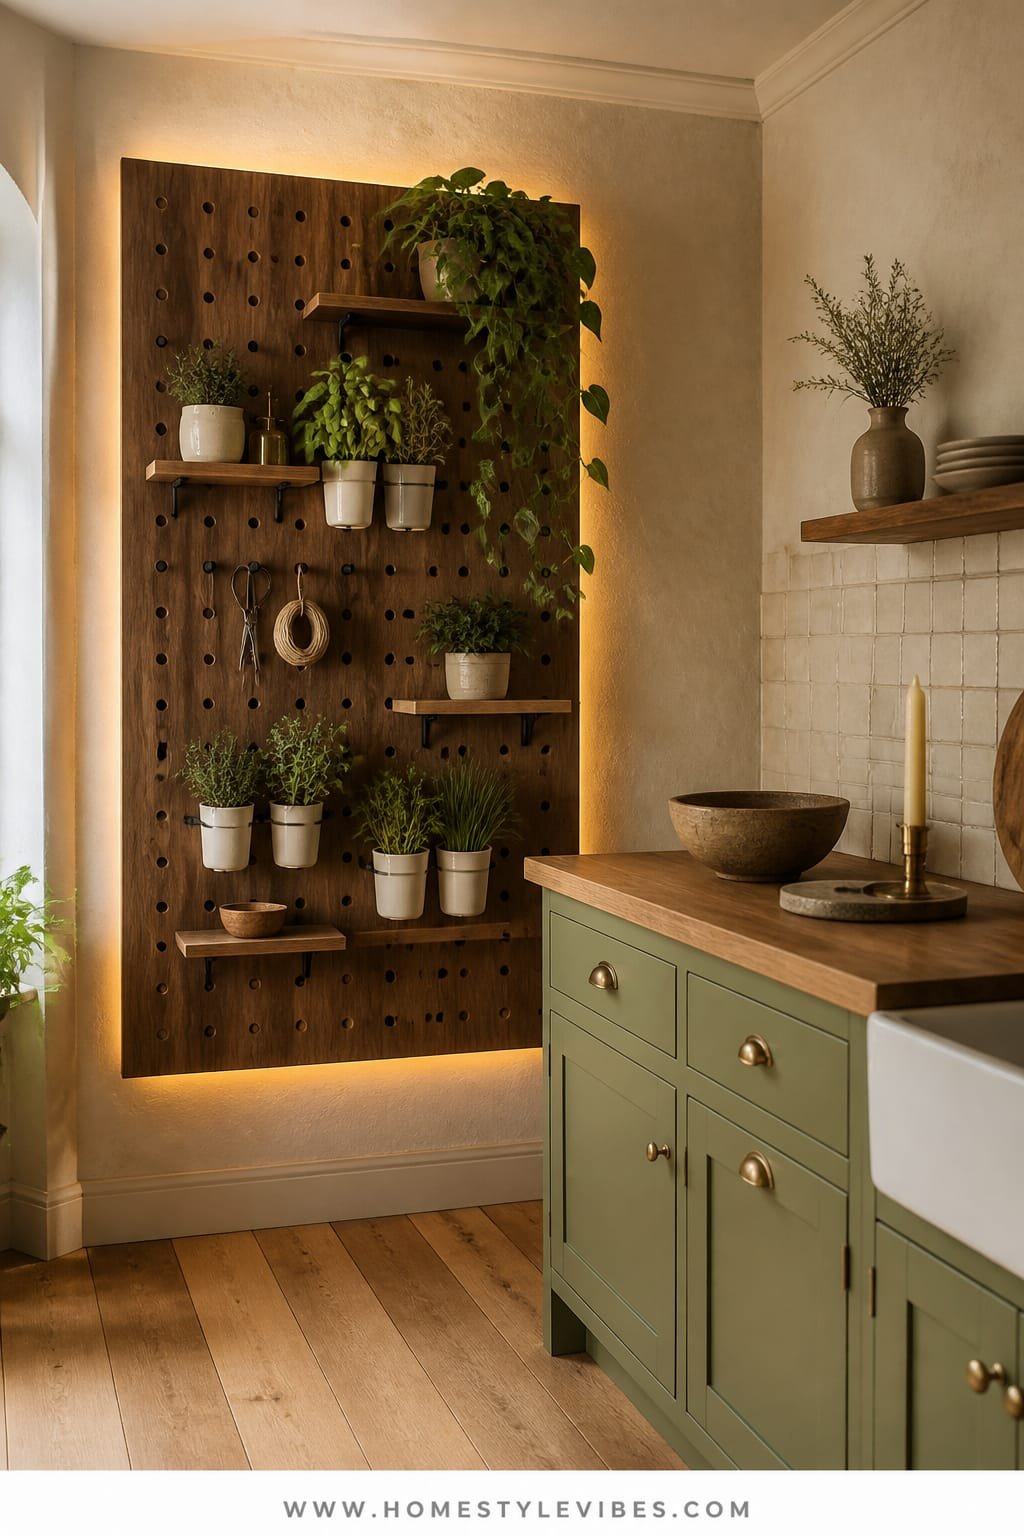
You’ve tried every organizer under the sun, but the chaos sneaks back. The pegboard solves layout frustration because you can move cups, shelves, and hooks until your kitchen actually flows. This version uses warm walnut for the panel, subtle backlighting for glow, and modular ceramic cups for herbs and tools. The vibe is Scandinavian-calm meets maker-studio: functional, tactile, endlessly adaptable.
Why it works in real homes: you can scale it to any wall, even a skinny sliver near the fridge. Backlighting keeps it from feeling heavy and doubles as low-wattage evening light. Ceramic cups stand in for planters; they’re easy to swap for utensils during a party. Family-friendly? Absolutely—kids can pluck mint leaves for lemonade without climbing the counter.
Photographs love the grid of pegs, the walnut grain, and the micro-gleam of ceramic. It’s high-impact but not bossy. Want a budget version? Use birch plywood with a walnut stain. Darker version? Go smoked oak with charcoal cups and a warmer LED strip.
Key Design Elements:
- Main materials: walnut panel, ceramic cups, LED strip
- Color palette: cocoa brown wood, cream ceramic, soft amber light, vivid greens
- Lighting strategy: backlit panel with dimmer for evening ambiance; neutral white for day
- Furniture silhouettes: gridded pegs, cylindrical cups, slim shelves
- Texture layers: wood grain, glossy glaze, linen towel on a peg
- Accent details: leather loops, brass pins, narrow shears
Budget Breakdown:
- Walnut pegboard panel or DIY kit: $120–$320
- LED backlight strip with diffuser: $30–$90
- Modular ceramic cups and pegs: $40–$140
- Herbs and soil: $20–$35
- Mounting hardware and spacers: $15–$30
Total Estimated Cost: $225 – $615
Best For: Busy households, renters with a blank wall, and anyone who rearranges their kitchen every season for sanity.
How To Recreate This Look:
- Mount the pegboard with 1-inch spacers to allow backlight and airflow.
- Run an LED strip behind the panel edges; add a dimmer.
- Hang three to five ceramic cups along the midline for herbs.
- Add a mini shelf for a watering can and a shallow tray for pruning shears.
- Rearrange monthly based on what you reach for most; that’s your real layout.
Why This Feels Designer: Adaptive symmetry. The peg grid keeps order, but the movable cups read custom and intentional. The backlight casts a halo that adds depth to even the plainest wall.
One Thing To Avoid: Overloading the cups with wet soil. Use lightweight potting mix and perforated liners; heavy cups strain pegs and look droopy.
Pro Styling Tip: Keep one empty peg column to the left or right; the negative space frames the composition and makes leaves read sharper on camera.
Mini reset: This isn’t about recreating a showroom. It’s about building a kitchen that actually works for how you cook and clean. If a design makes watering stressful, it’s not your design—no matter how pretty the Pinterest board looks.
6. Textured Concrete Planter Row With Bright Skylight And Integrated Watering Channel

Here’s the truth: watering is where herb dreams go to die. You forget, or you flood. This design solves it with a sleek row of textured concrete planters linked by an invisible watering channel. Place them under a skylight or the brightest patch of ceiling light, and every leaf gets what it needs. The mood is contemporary and architectural—think boutique coffee bar, but in your kitchen.
Why it works: concrete holds temperature well, the channel equalizes moisture, and a long row keeps the composition clean. Bright overhead light encourages upright growth, which means tidy silhouettes that don’t flop into your chopping board. It’s surprisingly low-maintenance; you fill a single reservoir and the capillary action does the rest.
On camera, the concrete’s sandy grit and the crisp leaf edges deliver high contrast. It’s a strong statement in a minimalist kitchen, especially against white walls or black counters. Small space? Use three modular planters instead of five. Renter? Choose a self-watering modular set that mimics concrete with lightweight fiberstone.
Budget Breakdown:
- Textured concrete or fiberstone planter set (3–5 units): $90–$260
- Capillary mat or integrated channel kit: $20–$60
- Skylight-friendly LED grow bar (if needed): $50–$140
- Herbs and soil: $20–$40
- Slim drip tray or shelf liner: $12–$25
Total Estimated Cost: $192 – $525
Best For: Bright kitchens, plant beginners who forget watering, and anyone who prefers straight lines over cute clusters.
Key Design Elements:
- Main materials: concrete/fiberstone, capillary mat, aluminum LED bar
- Color palette: cool gray, matte black, crisp white, saturated green
- Lighting strategy: overhead skylight or supplemental bar at 12–18 inches above
- Furniture silhouettes: linear row, rectangular or cylindrical forms
- Texture layers: gritty concrete, smooth aluminum, glossy leaves
- Accent details: black labels, magnetic pruning shears holder
Why This Reads High-End: Engineering disguised as art. The integrated watering looks seamless; the line of planters creates a gallery-like plinth for your herbs.
How To Recreate This Look:
- Position a long tray where overhead light is strongest; verify no AC vent blasts directly.
- Cut capillary mat to fit and route into a slim reservoir at one end.
- Set planters in a straight row with 1-inch gaps for shadow play.
- Plant herbs in airy mix; wick a strip of mat up into each planter.
- Add an LED grow bar if skylight is inconsistent; use a timer for 12–14 hours on winter days.
Don’t Do This: Do not mix thirsty herbs with drought lovers in one channel without dividers. Keep basil and mint together; rosemary and thyme in a separate loop.
Pro Styling Tip: Light the planters from one side for strong directional shadows; it photographs architectural and makes the concrete texture pop.
Did You Know? Most kitchen herbs prefer slightly alkaline soil. A pinch of crushed eggshell in the mix boosts calcium and firms up stems—especially for basil.
7. Cane-Front Cart With Golden Hour Pendant And Deep Glazed Planter Bowls
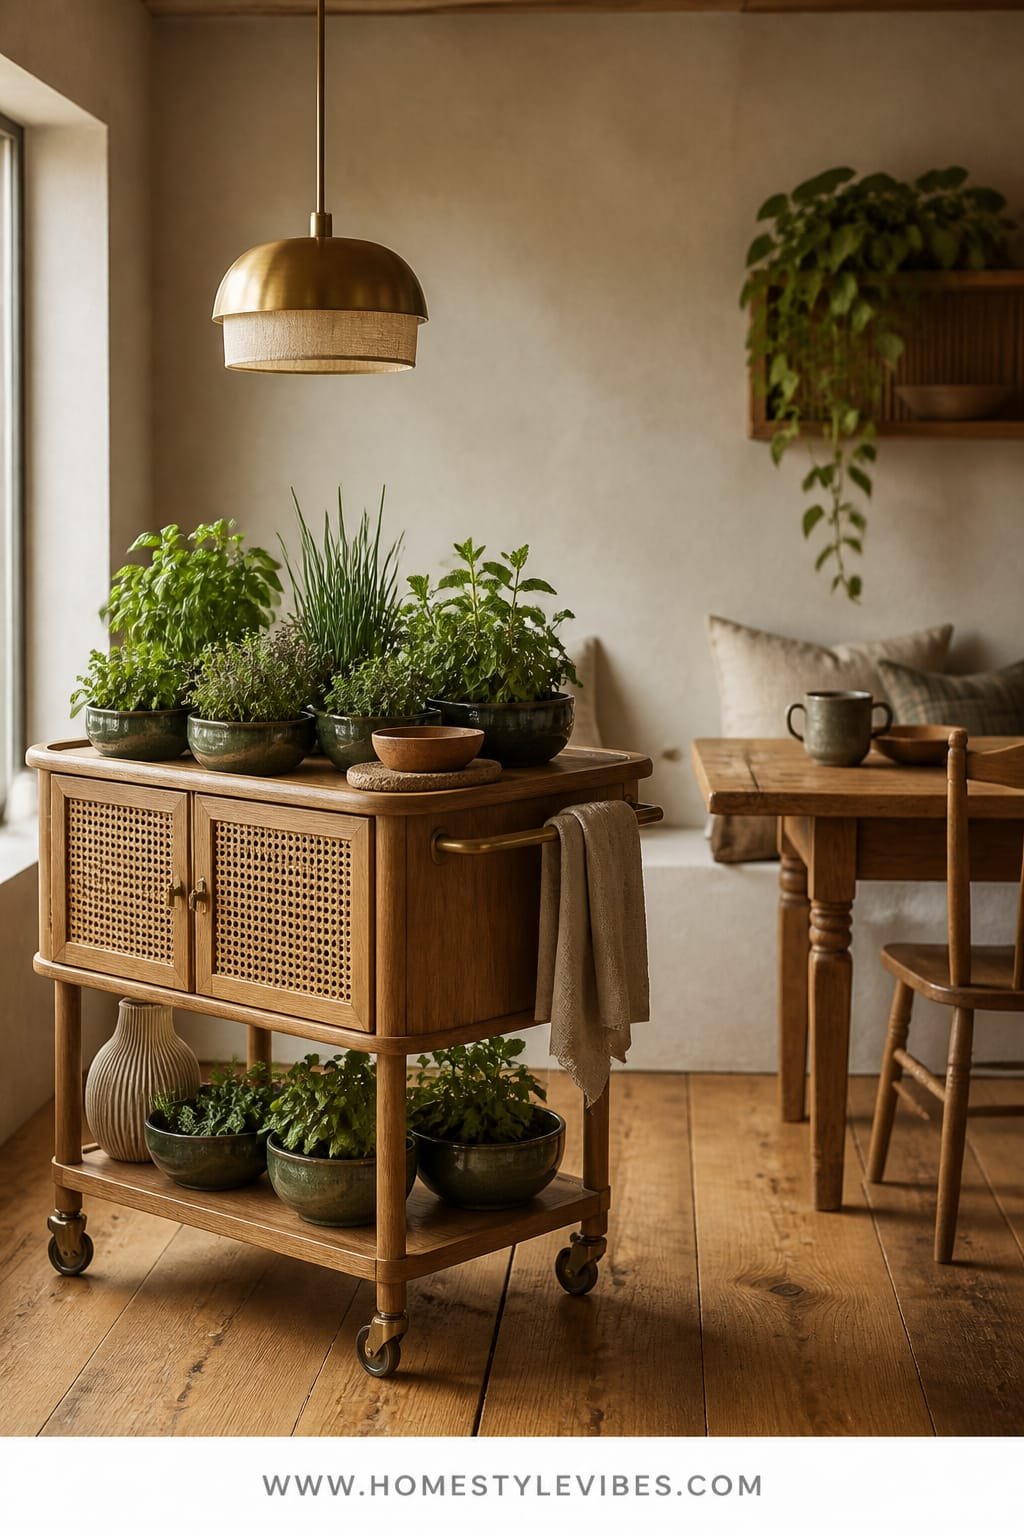
You want herbs, but you also want flexibility: brunch buffet one weekend, cocktail station the next. Enter the cane-front cart—mobile, breezy, and ridiculously charming—with a cluster of deep glazed bowls for herbs that can travel with you. The overhead pendant sets a warm “golden hour” mood even at night, and the cart tucks away when you need the floor back.
This works because mobility solves light and layout issues. Roll the cart near a window in the morning, park it under a pendant at night. Cane fronts hide the ugly stuff: extra soil, snips, a mister. The deep bowls hold moisture well so you can spend more time cooking, less time babysitting. For small apartments, it’s a tiny island, a bar, and an indoor herb garden all in one.
On camera, cane texture reads like summer—light through weave, soft shadows, glossy bowls catching highlights. Money-saving version: thrift a wood cart and add cane panels with peel-and-stick trim. Darker version: espresso-stained cart, forest-green bowls, and a smoked glass pendant for moody evenings.
Budget Breakdown:
- Cane-front cart or DIY conversion: $120–$420
- Warm pendant (2700K) with dimmer: $60–$180
- Deep glazed planter bowls (set of 3–5): $45–$150
- Casters upgrade (locking): $20–$40
- Herb set and soil: $20–$40
Total Estimated Cost: $265 – $830
Best For: Renters, entertainers, and anyone whose kitchen does triple duty. Also perfect for kitchens starved of natural light—just park under the pendant with a grow bulb.
Key Design Elements:
- Main materials: cane weave, solid wood cart, glazed ceramic
- Color palette: honey cane, warm wood, deep jewel bowls, amber light
- Lighting strategy: single pendant with warm bulb; add a full-spectrum LED if needed
- Furniture silhouettes: rectangular cart, rounded bowls, slender pendant dome
- Texture layers: airy cane, glossy glaze, linen runner, brushed brass handle
- Accent details: tiny coasters under bowls, leather-wrapped shears, citrus bowl
How To Recreate This Look:
- Choose a cart with a solid top and enclosed storage; add locking casters for stability.
- Install a pendant on a swag hook over the cart zone; put it on a dimmer.
- Arrange 3–5 deep bowls; keep tallest herbs at the back-left corner for asymmetry.
- Store tools inside the cart; add a linen runner on top for softness and grip.
- Roll the cart to the window for morning sun; bring it back in the evening for pendant glow.
Why This Looks Expensive: Mixed natural textures that feel collected: cane with wood, glossy bowls with linen, warm metal with soft light. It reads like lifestyle, not just storage.
Watch Out: Don’t overload the top. Leave a tray-sized patch of empty space so the cart can still be functional for serving. Clutter kills the vibe quickly.
Pro Styling Tip: For photos, tuck one sprig of mint over the edge of a bowl and place a lemon nearby; the color triad of green, yellow, and honey cane is instant editorial satisfaction.
Quick Tip: Swapping one bulb to a high-CRI full-spectrum LED overhead can make greens look richer and help growth. It’s the cheapest “wow” you can buy for herbs after good soil.
Real talk: I once kept my basil alive purely out of spite after three failed rounds. What changed wasn’t the plant—it was the setup. A simple rail and better light. Suddenly, it behaved. A friend of mine spent weeks choosing the “perfect” green pot before realizing the problem was her west window blasting 4 pm heat. She added a sheer, and the leggy stems turned into compact, glossy bunches. Small shifts, huge upgrade in daily life.
Quick Checklist
- Choose one herb garden idea that solves your biggest pain point
- Match herbs to the light you actually have, not the light you wish you had
- Use gritty, well-draining soil and add a drainage layer
- Group herbs by thirst levels; keep mint and basil together
- Set herbs at varied heights for depth and airflow
- Limit your palette: 1 wood tone, 1 metal, 1 ceramic finish
- Add a dimmable light source near your herb zone
- Leave negative space so the setup reads intentional
- Rotate pots weekly to prevent leaning
- Snip little and often to encourage bushy growth
Frequently Asked Questions
How do I keep herbs alive in a low-light kitchen?
Prioritize low-light herbs like parsley, mint, and chives, and add a discreet LED grow strip or bulb near the setup. Set a timer for 12–14 hours during winter. The right spectrum matters more than blasting brightness.
What’s the most budget-friendly version of these ideas?
Go with a single shelf or rail plus matching thrifted terracotta pots. Add frosted film to soften harsh light and a basic plug-in LED strip. Keep the palette tight so it still looks polished.
I rent—how do I do this without drilling?
Use tension shelves inside a window frame, adhesive-mounted rails, or a rolling cane-front cart. Plug-in sconces and swag pendants add light without hardwiring. Command hooks can hold lightweight planters and tools.
My kitchen is tiny. Which idea works best?
The black steel rail with hanging terracotta pods frees counter space instantly. A honed marble windowsill extension also works—just enough surface for three small pots without crowding.
Why do my herbs get leggy and sad-looking?
They’re stretching for light. Move them closer to a window, add a sheer to diffuse harsh sun, and rotate weekly. Snip the tips often—regular harvesting promotes fuller, bushier growth.
Conclusion
Pick the one idea that solves your everyday snag and start there. If your counter is cluttered, go vertical with a rail. If your window is bright, claim it with marble and brass. If you forget to water, try the concrete row with a channel. One thoughtful decision can turn that annoying corner into your favorite view of the day.
Remember, the luxury you’re chasing isn’t about more stuff; it’s texture, lighting, and restraint. Fluted wood next to matte ceramic. A soft glow that flatters every leaf. Space between objects so your eye can rest. Do that, and your indoor herb garden will look like it’s always been part of the kitchen’s story.
Start small. Pot three herbs you actually cook with, add one good light source, and keep the palette tight. You’ve got this—seriously. Tonight’s pasta is going to taste like summer, and your kitchen will finally feel finished.