5 Alice In Wonderland Home Decor Ideas That Make Your Space Feel Like Pure Magic
You want a home that feels like stepping through the looking glass—curious, enchanting, a little mischievous. But clutter, flat lighting, and random impulse buys keep tripping you up. You crave velvet shadows, moonlit whites, and those jewel-box surprises that make guests pause, smile, and ask, “Wait, where did you find that?” These five Alice in Wonderland home decor ideas fix the overwhelm with precise, photogenic moves you can pull off in a weekend or two, under a reasonable budget cap per room.
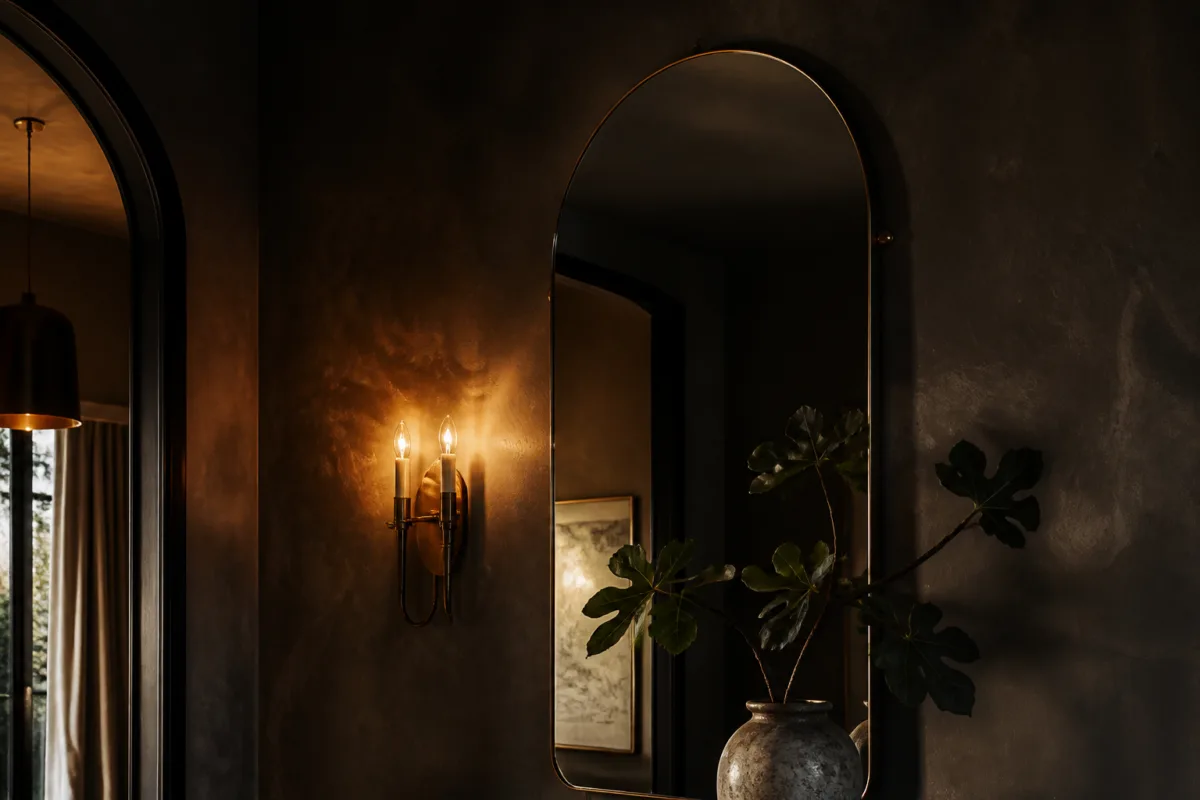
Each concept solves a real frustration—awkward corners, boring lighting, beige fatigue, bland hallways—and turns it into a set piece worthy of tea with the Mad Hatter. Expect saturated color, layered textures, and theatrical lighting that makes your home camera-ready. Pin-worthy? Absolutely. But more importantly, livable, cozy, and uniquely you. If you’ve ever wanted your space to feel like a chic storybook (minus the chaos), this is your secret door.
1. Checkerboard Marble Entry With Candlelit Gilded Mirror And Curved Console
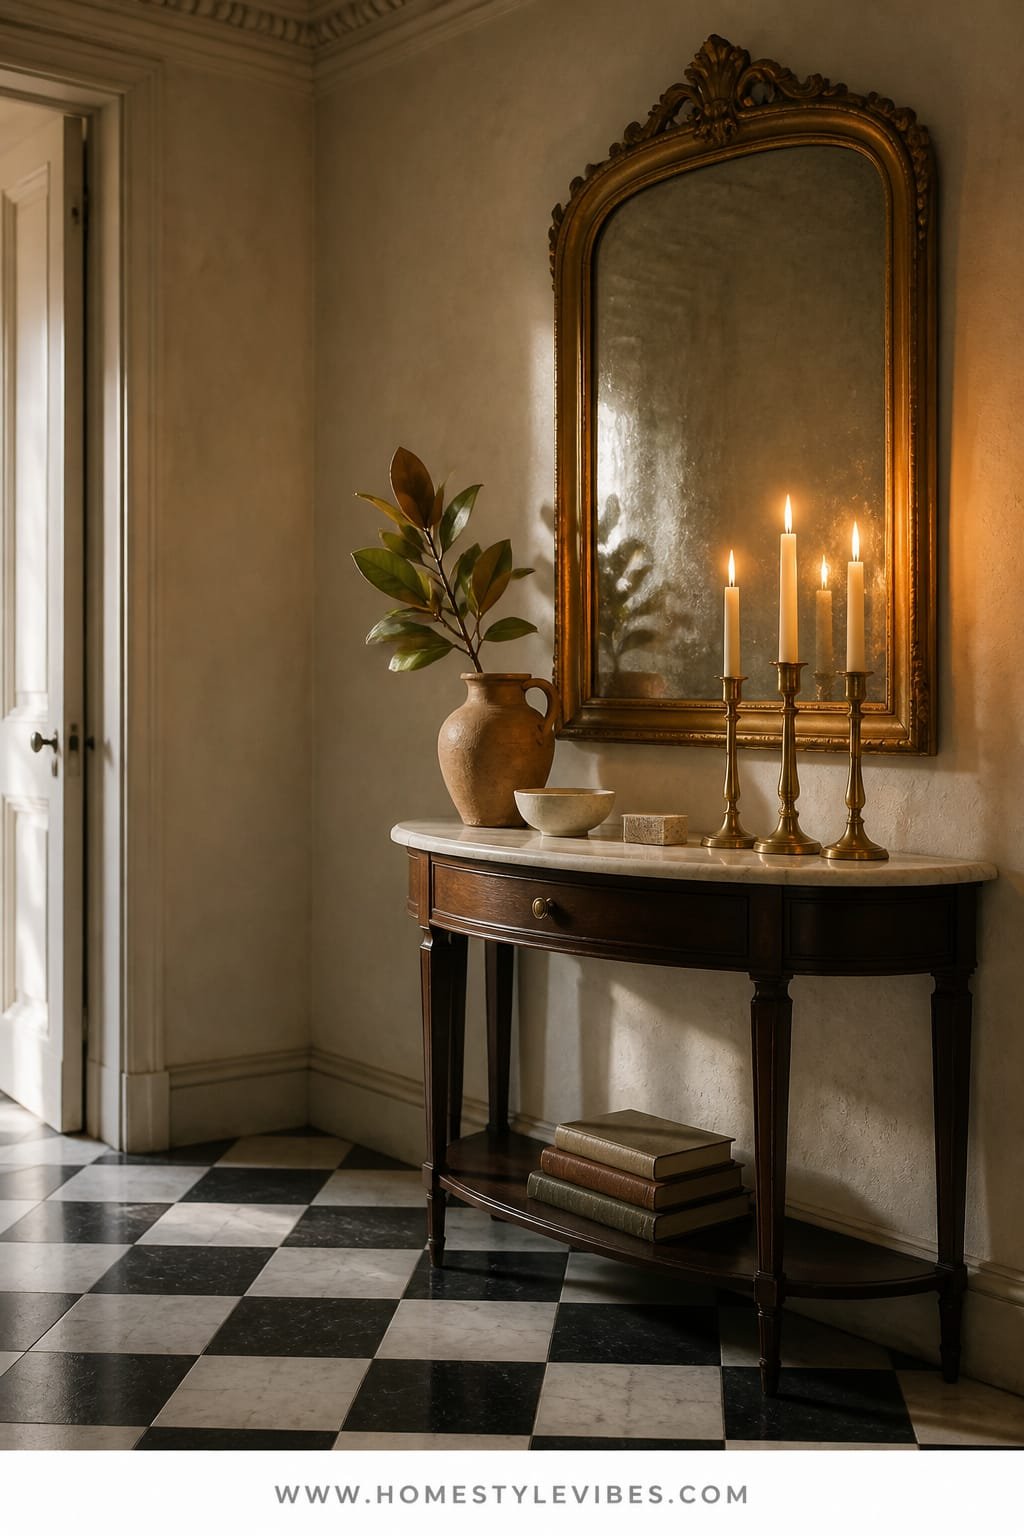
We’ve all been there: the entry that never quite sings. Coats pile up, keys go missing, and the first impression says “generic apartment” instead of “curious, come closer.” This Alice in Wonderland home decor move brings in a bold, cinematic welcome using high-contrast checkerboard marble (or marble-look) floors, a candlelit gilded mirror that throws warm, wavy light, and a curved console that whispers Old World charm with a modern wink.
The mood lands at “enchanted townhouse.” Think candle-glow warmth, polished stone, and that delicious hush you get right before a secret is told. Why it works in real homes: the high-contrast floor pattern expands small entries, camouflages dirt, and adds instant structure. The curved console softens tight corners, so traffic flows naturally. Lighting does heavy lifting here—candles (real or LED) playing off a gilt mirror create shadow depth and dimension that make a tiny foyer feel like a scene.
Materials are precise: marble or porcelain in black and white checkerboard, a vintage or vintage-look gilded mirror, and a curved wood or lacquer console. This setup photographs beautifully because of contrast (black/white), reflective surfaces (mirror, polished stone), and layered lighting (candles + a small shaded sconce). If your space is rental or tight, no stress—I’ve included an easy swap for the floors and flexible hook-and-shelf solutions.
Budget Breakdown:
- Porcelain checkerboard tiles (12×12): $3–$7 per sq ft
- Peel-and-stick vinyl checkerboard (renter-friendly): $1.50–$3 per sq ft
- Gilded mirror (vintage or repro): $120–$450
- Curved console (MDF or wood): $150–$800
- LED taper candles + holders: $30–$120
- Small shaded sconce (plug-in): $80–$200
- Entry tray + key bowl + umbrella stand: $50–$150
Total Estimated Cost: $431 – $2,047
Best For: Narrow hallways, small foyers, apartments craving instant drama. Great for busy households that need containment and a touch of theater.
Key Design Elements:
- Main materials: Marble or marble-look tile, gilt frame, curved wood or lacquer
- Color palette: Crisp black/white anchor with antique gold and soft cream
li>Lighting strategy: Candlelight reflections + one dimmable plug-in sconce to warm shadows
- Furniture silhouettes: Narrow, curved console; arched or baroque mirror
- Texture layers: Polished stone, lightly distressed gold, crisp cotton or linen runner
- Accent details: Ornate key bowl, tiny porcelain rabbit, brass umbrella stand, striped ribbon on a hook
How To Recreate This Look:
- Start with flooring. If you can’t tile, use peel-and-stick checkerboard to test the pattern and commitment level.
- Add a curved console that hugs the wall and keeps the path clear. Look for a lip or rail to corral mail.
- Hang a gilded mirror at eye height, tilted slightly forward to catch candlelight and elongate the space.
- Install or plug in a small shaded sconce on a dimmer. Aim the light to hit the console, not your face—glow, not glare.
- Style with a narrow runner, LED tapers in brass holders, a tiny whimsical figurine (rabbit, teacup), and a structured catch-all.
Why This Looks Expensive: The crisp geometry of checkerboard plus the patina of gilded metal reads collected and intentional. The curved console keeps it sculptural, while layered light turns functional entry gear into a still life.
Watch Out: Don’t leave a gap between the console and wall. That shadow line screams “too small.” Also, avoid cool, blue-leaning bulbs—warmth is the magic here.
Pro Styling Tip: Shoot at dusk with only the sconce and candles on. The mirror will double the flame, and the floor will throw a soft gradient that looks editorial.
Curious what happens when Wonderland goes botanical? Keep scrolling for living room enchantment that actually works on a Tuesday night.
2. Moss Velvet Lounge With Dappled Green Light And Oversized Teacup Coffee Table
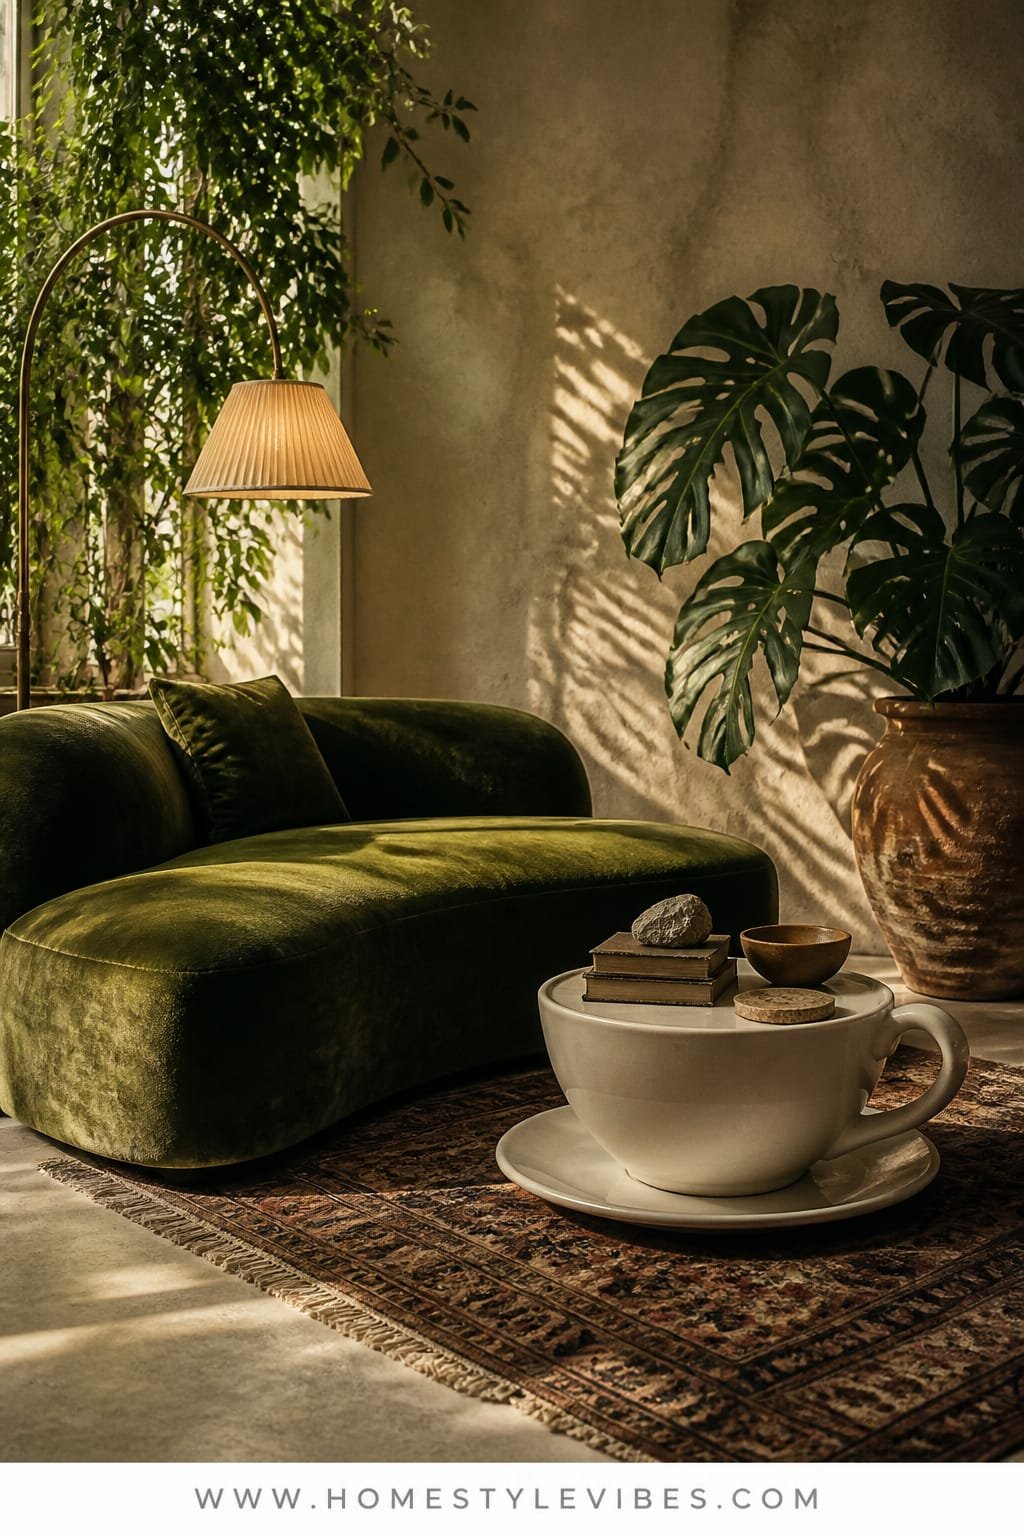
It’s that one corner that always feels off—your living room begs for personality, but one big sofa in a neutral leaves it feeling flat. You’ve tried throw pillows, but it still looks like a default couch catalog. This Alice in Wonderland home decor idea leans into lush textures and whimsical scale: moss velvet seating, dappled green light (courtesy of layered plants and dimmable lamps), and a playful oversized teacup coffee table that sparks conversation every single time.
The mood is “enchanted conservatory meets cozy library.” Velvet invites lounging, the green palette calms, and the teacup table adds wit without chaos. Why it works: deep seating is kid-and-guest-friendly, velvet wears surprisingly well when you choose performance fabric, and the dappled light filters give skin a warm glow at night. In photos, shadows play across velvet piles and leaf shapes for depth you can’t fake.
Lighting matters more than you think. I once swapped one cool overhead for two warm floor lamps behind plants—suddenly my entire room looked layered and expensive. Plants break up even cheap lamp shades and cast beautiful leaf shadows across the sofa. Bonus: they hide rogue cords like ninjas.
Key Design Elements:
- Main materials: Performance velvet, matte ceramic, aged brass
- Color palette: Moss, sage, ivory, antique brass, a dash of oxblood or plum
- Lighting strategy: Layered floor lamps behind plants + table lamps with warm bulbs (2700K)
- Furniture silhouettes: Low, deep sofa; round, oversized teacup coffee table; petite drink tables
- Texture layers: Velvet, boucle throw, nubby wool rug, leafy plants (monstera, fig, ferns)
- Accent details: Botanical prints, chessboard tray, stack of storybooks with ribbon bookmark
Budget Breakdown:
- Performance velvet sofa: $900–$2,500
- Oversized teacup coffee table (sculptural fiberglass/ceramic): $250–$900
- Floor lamps (2) + warm bulbs: $160–$500
- Nubby wool or wool-look rug: $250–$800
- Plants + planters: $80–$250
- Accent tables (2): $120–$400
- Art prints (botanical): $60–$200
Total Estimated Cost: $1,820 – $5,550
Best For: Living rooms or dens that feel flat; renters who can’t touch walls but crave drama; pet owners who appreciate performance fabric.
How To Recreate This Look:
- Start with the seating: choose a moss or deep olive velvet sofa with clean lines. If you already own a neutral couch, add two moss velvet armchairs.
- Add dappled light: position two floor lamps behind leafy plants. Keep bulbs around 2700K and use linen or parchment shades.
- Introduce the statement: an oversized teacup coffee table centered on a wool rug. If that’s too playful, try a round pedestal with a ceramic glaze.
- Layer texture: a boucle or mohair throw, a chessboard tray, and 2–3 botanical prints hung low, just above eye line when seated.
- Style with color accents: one plum velvet cushion, brass candleholders, and a small stack of hardcover books with rich linen dust jackets.
Why This Feels Designer: Scale and texture do the heavy lifting. One sculptural piece + a tone-on-tone palette with subtle contrast (velvet vs. wool) reads curated instead of busy. The dappled lighting hides imperfections and flat paint.
One Thing To Avoid: Don’t overcrowd with plants. Three medium plants beat nine small ones. Too many little pots = visual noise.
Pro Styling Tip: For photos, fluff velvet by brushing your hand against the nap in alternating directions—those soft stripes look decadent.
If you’re craving color but want more structure than a lounge moment, wait for the next one. We’re going bold on walls—no regrets.
Remember, this isn’t about recreating a showroom. It’s about crafting a mood that feels like yours. If one idea grabs you, start there and ignore the rest for now. Tiny steps count, especially in lighting and texture.
3. Painted Harlequin Dining With Moody Indigo Walls And Mismatched Thrifted Chairs
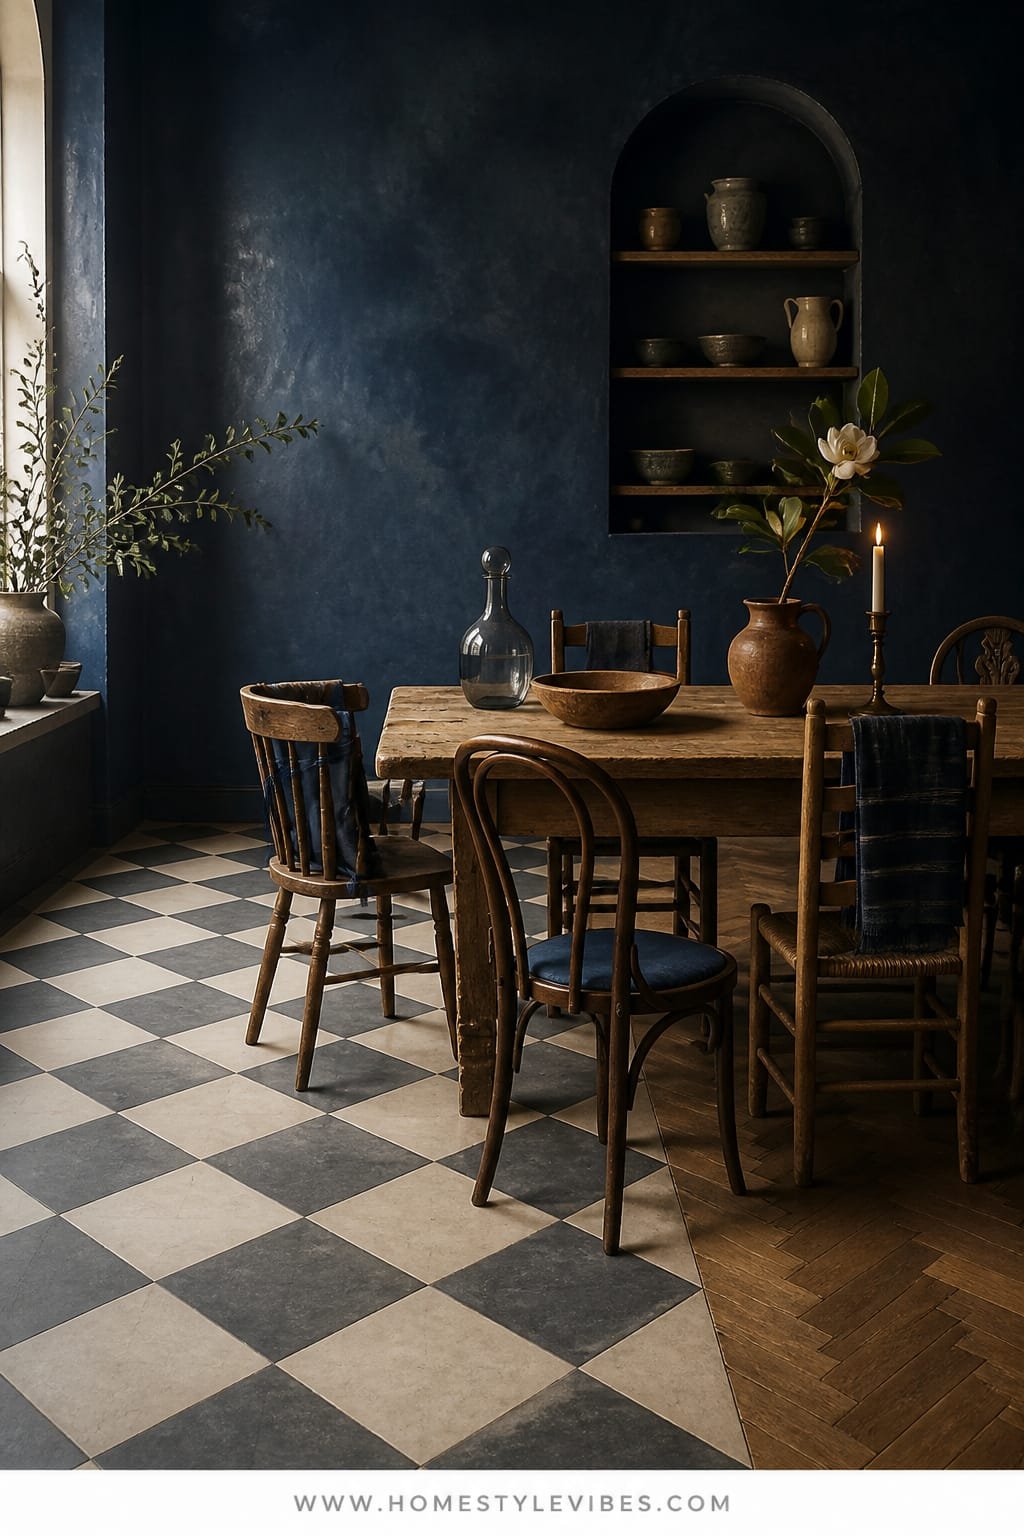
You love hosting, but your dining room just never lands. The table feels too serious or too flimsy, the chairs don’t match in a chic way, and dinner at 7 p.m. looks like a dim cafeteria. Here’s the fix: a hand-painted harlequin floor or rug effect, moody indigo walls that shift with candlelight, and mismatched chairs collected from thrift stores—unified by one detail: paint, upholstery, or ribbon ties.
The mood hits “storybook supper club.” Indigo absorbs light in a way that makes flames look golden and faces glow (every friend texts you later asking what filter you used—none). Harlequin diamonds add a whimsical wink without feeling childish because the palette stays grown-up. Mismatched chairs give conversation points and are wildly practical—you can source them affordably and they photograph like a dream around a sturdy table.
This works in real homes because it hides wear. A painted harlequin rug on a jute base or a DIY painted canvas underfoot is renter-friendly and instantly charming. A bold wall color cleans up visual clutter—suddenly the random cabinet looks like a styled vignette instead of “extra storage.” I helped a friend do this last fall; she spent weeks agonizing over wall swatches before realizing the real problem was her cool, overhead LED. We swapped bulbs, then committed to indigo. She texted me a photo after the first coat: “It’s a hug.”
Budget Breakdown:
- Wall paint (gallon, high-quality matte): $50–$90
- Floor paint + sealer (for wood) or canvas drop cloth + paint (for faux rug): $60–$150
- Thrifted chairs (6–8): $15–$80 each
- Table (solid wood or pedestal): $300–$1,200
- Candlesticks and tapers: $40–$160
- Pendant or chandelier (dimmable): $120–$600
- Linen table runner + napkins: $60–$180
Total Estimated Cost: $1,175 – $3,680
Best For: Medium dining rooms or breakfast nooks that need personality; great in older homes with character details you want to spotlight.
Key Design Elements:
- Main materials: Matte wall paint, sealed floor paint or painted canvas, solid wood
- Color palette: Indigo, inky blue, cream, warm brass, oxblood for pops
- Lighting strategy: Dimmable central pendant + candles + one shaded buffet lamp for side glow
- Furniture silhouettes: Pedestal or trestle table; mixed chair backs (spindle, bentwood, ladderback)
- Texture layers: Linen runner, rough jute, ceramic pitchers with wildflowers
- Accent details: Ribbon ties on chair backs, vintage teacups mixed with modern plates
How To Recreate This Look:
- Start with lighting. Replace cold bulbs with warm dimmables. Hang your pendant 30–36 inches above the table.
- Paint the walls indigo in a matte finish. Test at night and morning; commit to the shade that flatters skin tones.
- Create the harlequin: tape a grid of diamonds on the floor or a canvas drop cloth. Paint alternating tones of cream and muted gray, then seal.
- Collect chairs over time. Unite them with one detail: paint them all the same black, add the same linen seat pad, or tie matching ribbons around each back.
- Layer the table with a simple linen runner, stacked plates, and candles of varying heights. Keep florals wild and asymmetrical.
Why This Reads High-End: Matte indigo absorbs light like a velvet curtain, and repetition of one unifying detail across mixed chairs screams intentional curation. The harlequin brings motion and frames the table like a stage.
The Most Common Mistake: Hanging the pendant too high. It breaks the intimacy bubble. Stay within 30–36 inches above the tabletop for cozy, flattering light.
Pro Styling Tip: Photograph from a seated angle. You’ll catch candlelight reflections on glassware and the pattern peeking beyond chair legs—instant mood.
Feeling brave now? Good. Next, we scale up the whimsy and dial up the romance in a bedroom that invites daydreaming and sleep in equal measure.
4. Carved Wood Canopy Bedroom With Moonlit White Drapery And Keyhole Headboard
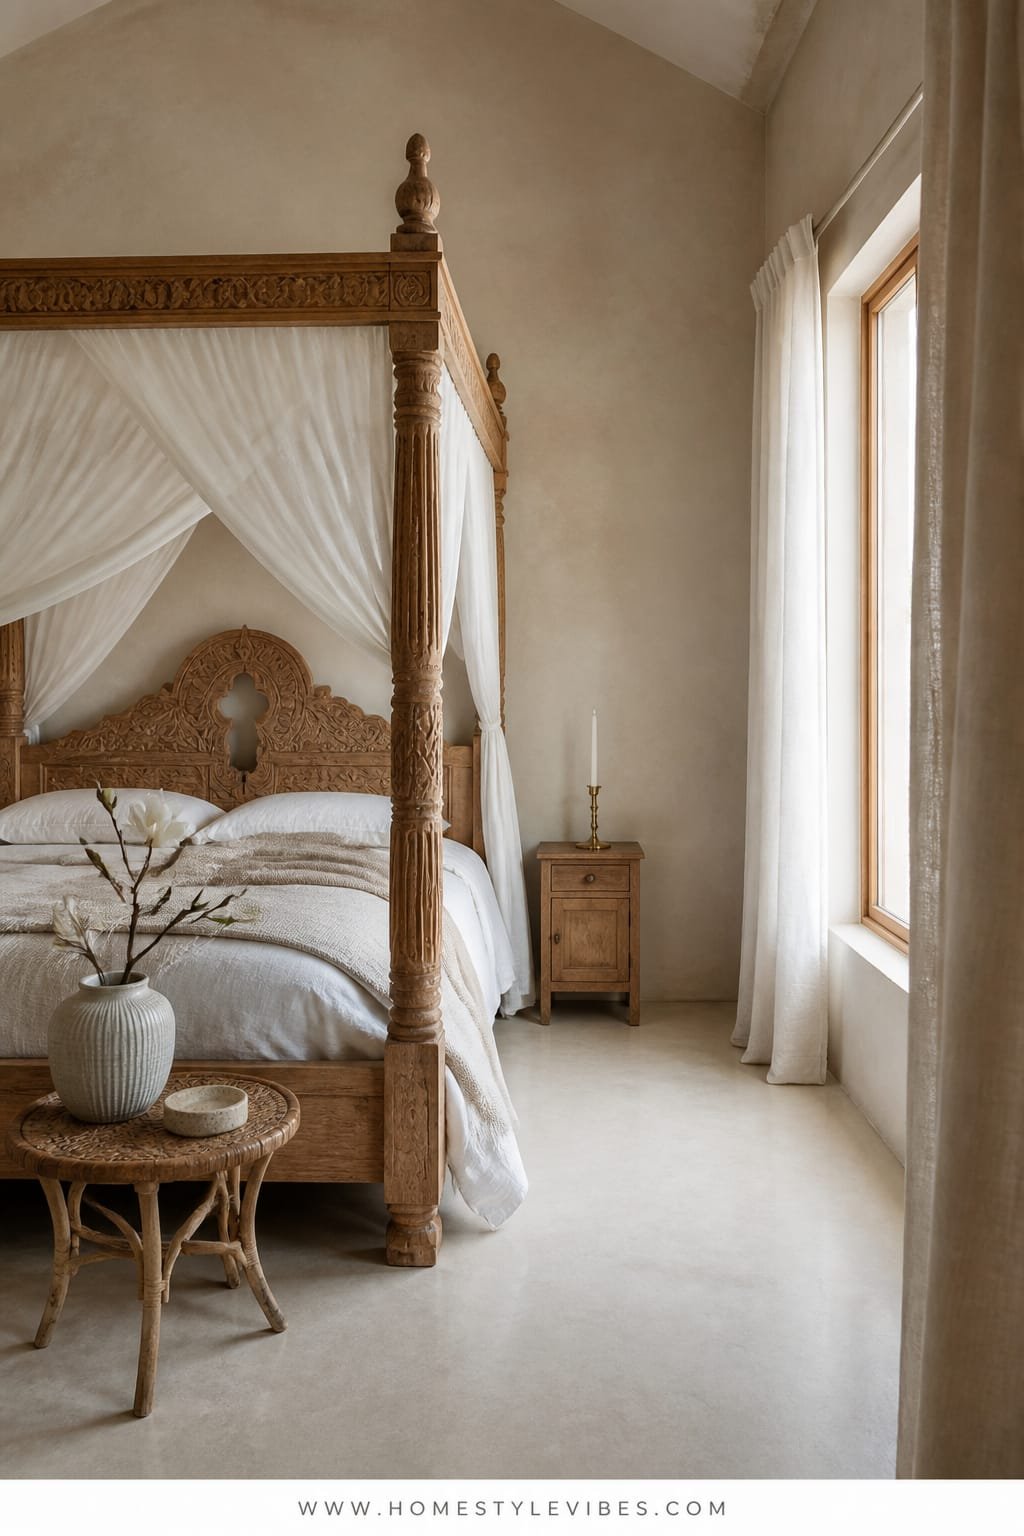
You want romance, but you hate fuss. Lace frills aren’t you, and five throw pillows end up on the floor every night. This Alice in Wonderland home decor concept uses restraint: a carved wood canopy bed for sculpture, moonlit white drapery that diffuses light, and a keyhole headboard detail that nods to secret doors without tipping into kitsch.
The mood is serene storybook: quiet, layered whites with warm wood. It works in small rooms because the vertical height of a canopy draws the eye up, and sheer drapes soften harsh corners. Lighting becomes your friend: a pair of shaded sconces plus a dimmable overhead or cove lighting give you control from soft reading glow to clean morning light.
I tried a version of this in my own guest room—simple linen sheers around a wood canopy, nothing else fancy—and honestly couldn’t believe the difference. Guests linger. People nap. The room smells like cedar and linen spray, and everyone asks about the “hotel” curtains. Secret: they’re just two panels per side on tension rods, hemmed with iron-on tape.
Budget Breakdown:
- Carved wood canopy frame: $800–$2,500
- Sheer moonlit white drapery (8–12 panels): $180–$600
- Keyhole headboard (DIY cutout or prefab): $200–$700
- Wall sconces (plug-in or hardwired) with shades: $150–$500
- Linen duvet + two euro shams: $180–$500
- Wool-blend rug (solid or faint check): $250–$900
- Antique brass knobs for nightstands: $20–$60
Total Estimated Cost: $1,780 – $5,760
Best For: Primary bedrooms or guest rooms with low natural light, anyone craving quiet luxury without clutter, renters who can use tension or ceiling hooks.
Key Design Elements:
- Main materials: Carved hardwood, sheer linen or poly-linen, antique brass
- Color palette: Moonlit white, warm oak, soft cream, hint of blush or smokey gray
- Lighting strategy: Two shaded sconces with dimmers + warm overhead on a low setting
- Furniture silhouettes: Simple nightstands, low-profile dresser, round ottoman
- Texture layers: Linen, wool, carved wood, ceramic bedside dishes
- Accent details: Tiny brass key charms on drapery tiebacks, tea light holders, a single framed silhouette portrait
How To Recreate This Look:
- Start with the bed: choose a carved or gently arched canopy. If space is tight, opt for a slimmer frame with open sides.
- Hang moonlit white drapery on small tension rods inside the canopy or from ceiling hooks. Keep panels just brushing the floor—no puddling for easy maintenance.
- Install plug-in sconces with fabric shades at shoulder height when seated in bed. Put them on dimmers immediately.
- Style the bed with a linen duvet and two large euro shams. Skip excess throw pillows—add one bolster if you love a finished look.
- Ground the room with a wool-blend rug, then add a brass catch-all and a tiny dish for rings. A single silhouette portrait above the dresser seals the storybook vibe.
Why This Looks Intentional: Height + softness + negative space. The canopy defines the room, drapery diffuses light, and minimal accents keep your eye on the sculptural wood. It reads serene, not spare.
Don’t Do This: Avoid bright white bulbs. They flatten the space and kill the moonlit effect. Aim for 2700K bulbs, always.
Pro Styling Tip: For photos, crack the drapes just a few inches on one corner—this creates a “peek” moment that feels intimate and cinematic.
If one idea is tugging at you, follow it. You don’t need five projects at once. Layer them over time like chapters in a well-loved book.
5. Lacquered Red Hall With Glowing Amber Sconces And A Grandfather Clock Cabinet
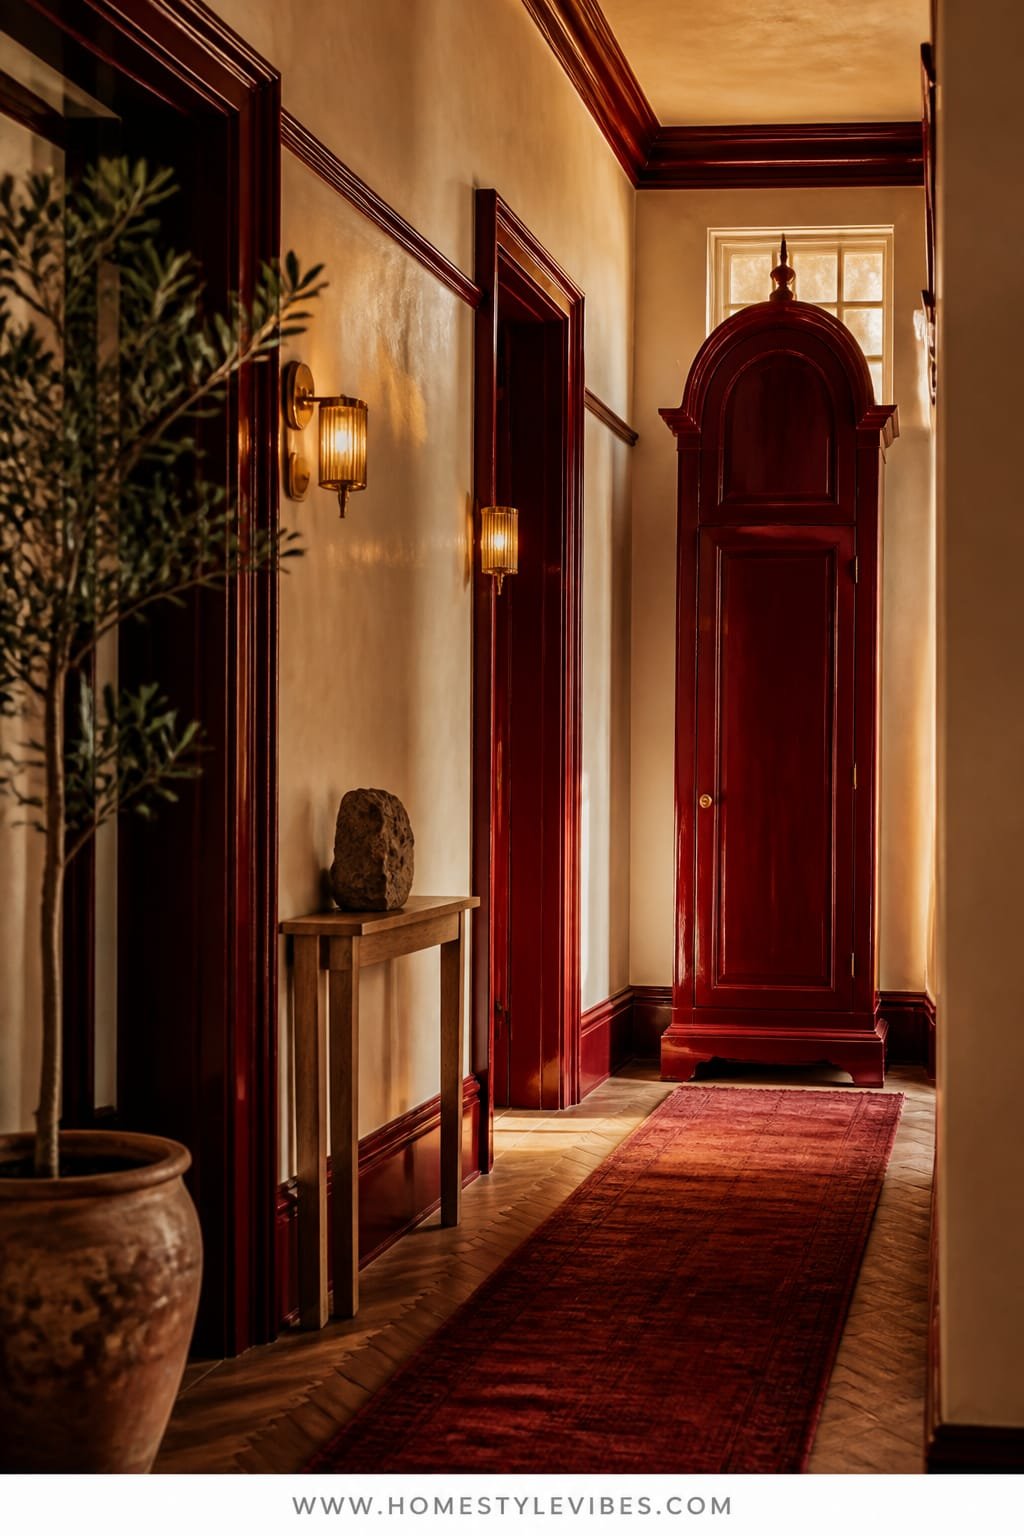
Hallways: long, beige, and forgettable. You rush through them every day and never feel anything except the urge to repaint “someday.” Let’s make it deliciously theatrical. This Alice in Wonderland home decor idea wraps your corridor in lacquered red (or an easier high-gloss sheen), adds glowing amber sconces that turn walls into soft-lit ribbons, and anchors the end with a grandfather clock cabinet—an unexpected storage hero that looks like a portal.
The mood lands “curious townhouse corridor”—dramatic, slightly surreal, but purposeful. High gloss reflects light down narrow spaces; amber glass keeps it warm and cinematic. The grandfather clock cabinet stores scarves, board games, or even wine. This works because hallways can handle bold color better than main rooms, and a strong terminus point (the cabinet) tricks the eye into perceiving balance and intention.
Variation-friendly, too. For renters, try a peel-and-stick lacquer effect or a deep red removable wallpaper with a subtle sheen. For minimalists, choose oxblood or merlot instead of poppy red. If your hallway is tiny, paint just the lower two-thirds in gloss and keep the top in a soft cream—still dramatic, less overwhelming.
Budget Breakdown:
- High-gloss paint (quality matters here): $70–$120 per gallon
- Wall prep (primer, sanding blocks): $30–$80
- Amber glass sconces (2–4): $160–$700
- Grandfather clock cabinet (antique or repro): $350–$1,500
- Runner rug (narrow, patterned): $120–$500
- Brass tacks or nailhead trim for runner edges: $20–$60
Total Estimated Cost: $750 – $2,960
Best For: Narrow corridors and stairs; homeowners craving a bold moment in a small footprint; collectors who enjoy a nod to history.
Key Design Elements:
- Main materials: High-gloss lacquer paint, amber glass, hardwood cabinet
- Color palette: Lacquer red or merlot, brass, warm cream ceiling, patterned runner
- Lighting strategy: Evenly spaced sconces on dimmers; skip the harsh overhead when possible
- Furniture silhouettes: Tall, slender cabinet with clock face; built-in or freestanding
- Texture layers: Gloss walls, woven runner, tarnished brass, smooth glass
- Accent details: Tiny framed playing cards as art, white rabbit figurine on the cabinet shelf, small bell pull
How To Recreate This Look:
- Start with prep: sand lightly and prime for a smooth gloss finish. Gloss reveals every flaw; be patient here.
- Paint in high gloss from baseboard to picture rail or ceiling. If nervous, do a half wall with a clean chair-rail line.
- Install dimmable amber glass sconces every 6–8 feet. Aim for even pools of light to create a gentle rhythm.
- Place a grandfather clock cabinet at the end of the hall as the focal point. Keep surrounding decor minimal.
- Lay a patterned runner and secure edges neatly. Add tiny framed playing cards in a tight grid along one side.
Why This Looks Expensive: Reflective lacquer paired with controlled, warm lighting creates a moody, gallery-like corridor. The tall cabinet grounds the view and suggests custom millwork, even if it’s freestanding.
Watch Out: Don’t mix cool chrome and warm brass in this scheme. Stick to one warm metal for cohesion, especially with red tones.
Pro Styling Tip: For photos, turn off overheads, dim the sconces, and shoot from a low angle toward the cabinet—this exaggerates length and glow.
If you’ve made it this far, you already know which idea is calling your name. Start small—a lamp here, a painted panel there—and let the story build room by room.
Quick Checklist
- Choose one Wonderland anchor per room: pattern, texture, or whimsical form
- Swap cool bulbs for warm dimmables (2700K)
- Add one reflective surface to amplify light and shadow
- Ground the space with a natural texture: wool, linen, or wood
- Edit decor—leave negative space so statements can breathe
- Unify mismatched items with one repeating detail
- Commit to a dominant color and two supporting tones
- Photograph at golden hour or dusk for layered shadows
- Secure rugs and runners cleanly to avoid ripples
- Style vignettes with height variation: tall, mid, low
Frequently Asked Questions
How do I do Alice in Wonderland decor without making my home feel like a children’s theme party?
Stick to grown-up materials (marble, brass, velvet), limit the color palette, and choose one whimsical item per room—like a teacup table or playing-card art—then keep everything else restrained. The contrast is what feels chic.
What if my budget is tight—where should I spend first?
Lighting. Replace harsh overheads with warm bulbs and add one dimmable lamp. Then choose a single statement piece per room (mirror, rug pattern, or chair) and build slowly with thrift finds.
My space is small. Won’t bold colors make it feel tinier?
Not if you control sheen and light. Dark matte walls with warm lamps can feel cocoon-like and actually simplify visual clutter. Use mirrors and one reflective surface to bounce light where needed.
I rent and can’t paint floors or walls. Any workarounds?
Use peel-and-stick tiles or vinyl rugs for checkerboard and harlequin looks, tension rods for canopy drapery, plug-in sconces, and removable wallpaper or painted canvases hung like art panels.
What’s the most common styling mistake with whimsical decor?
Too many small objects. Curate. Choose one or two larger statements and give them space. Cluster tiny items on a tray instead of scattering them across every surface.
Conclusion
Start with the moment that makes your pulse quicken. Is it the checkerboard entry, the moss velvet lounge, the moody indigo dining, the moonlit canopy, or the lacquered red hall? Pick one and do it well. This approach looks intentional because it is.
The truth is, luxury comes from texture, lighting, and restraint. Velvet against wool, gloss against matte, candlelight pooling on stone—these are the ingredients that photograph beautifully and feel even better in real life. You don’t need a dozen accents. You need a clear story and a little follow-through.
So go choose your rabbit hole. Light a candle, move the lamp, test the paint swatch at night, and trust your eye. You’ve got this—and your home is about to feel like pure magic.
About the Author

Krisztina P.Rendes, Founder of Home Style Vibes
Founder of Home Style Vibes
Krisztina Puskásné Rendes created Home Style Vibes as a cozy-modern lifestyle space where homemaking meets inspiration. Her goal is to help women create beautiful, organized, and peaceful homes they truly love — without overwhelm. You’ll find here heart-driven content on home decor, cleaning tips, easy family recipes, organization and decluttering, DIY home projects, plants, and seasonal ideas — all designed to bring more calm, comfort, and style into everyday life.