6 Fall Window Box Ideas That Look Beautiful All Season Long
You want fall window boxes that look lush and vibrant—like a postcard every time you pull into the driveway. You hate when they fizzle by mid-October: mums collapse, leaves crisp up overnight, and suddenly your “harvest moment” reads tired. Picture this instead: saturated rusts and burgundies, flickering lantern glow from the kitchen, trailing greens catching golden afternoon light. These 6 fall window box ideas fix the exact frustration of short-lived curb appeal with smart plant pairings, long-lasting textures, and eye-catching color stories that stay gorgeous from September through Thanksgiving—on a realistic budget and timeline.
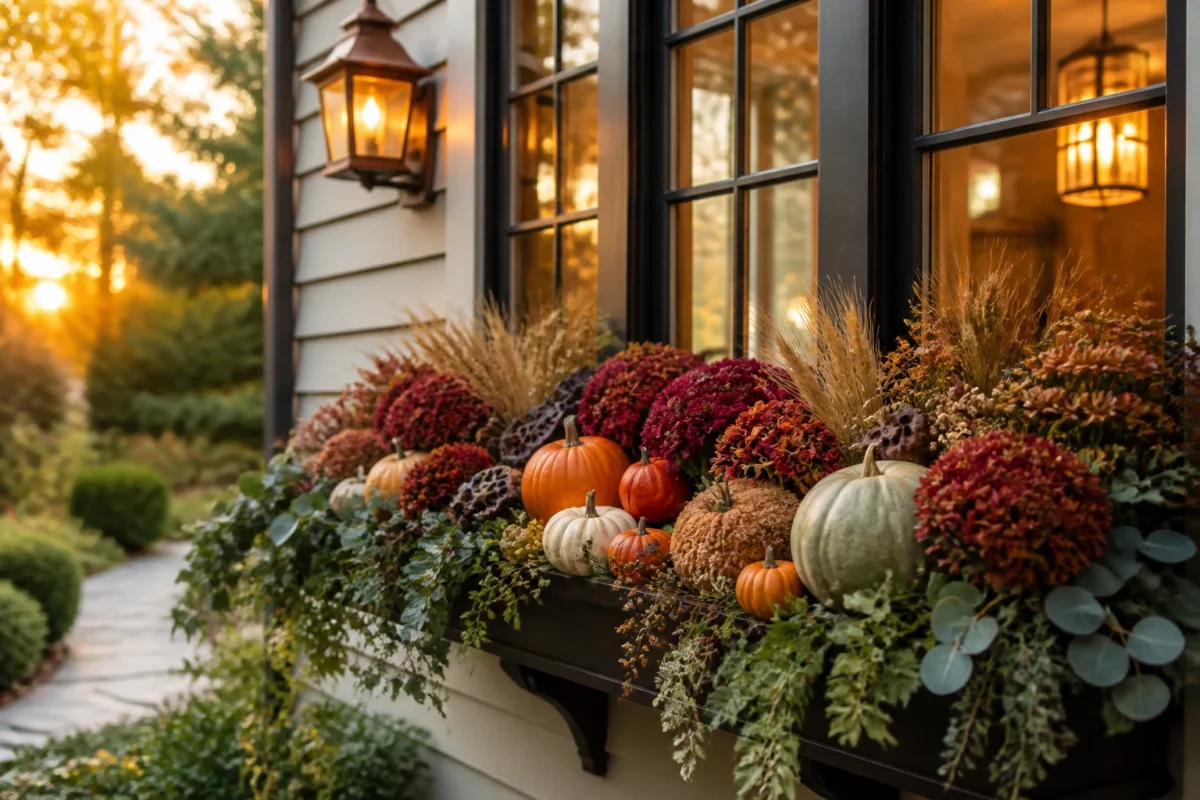
We’re talking easy-care plants, dried stems that never wilt, and accents that photograph beautifully (hi, Pinterest). Expect warm tones, coppery shine, and real pumpkins that don’t look sad by week three. These looks are for anyone who wants easy weekend projects with big visual payoff—and the kind of cozy, abundant vibe you can see from the street and feel in your bones when you step inside.
1. Pumpkin-Layered Window Box With Golden Glow Lanterns And Dried Florals
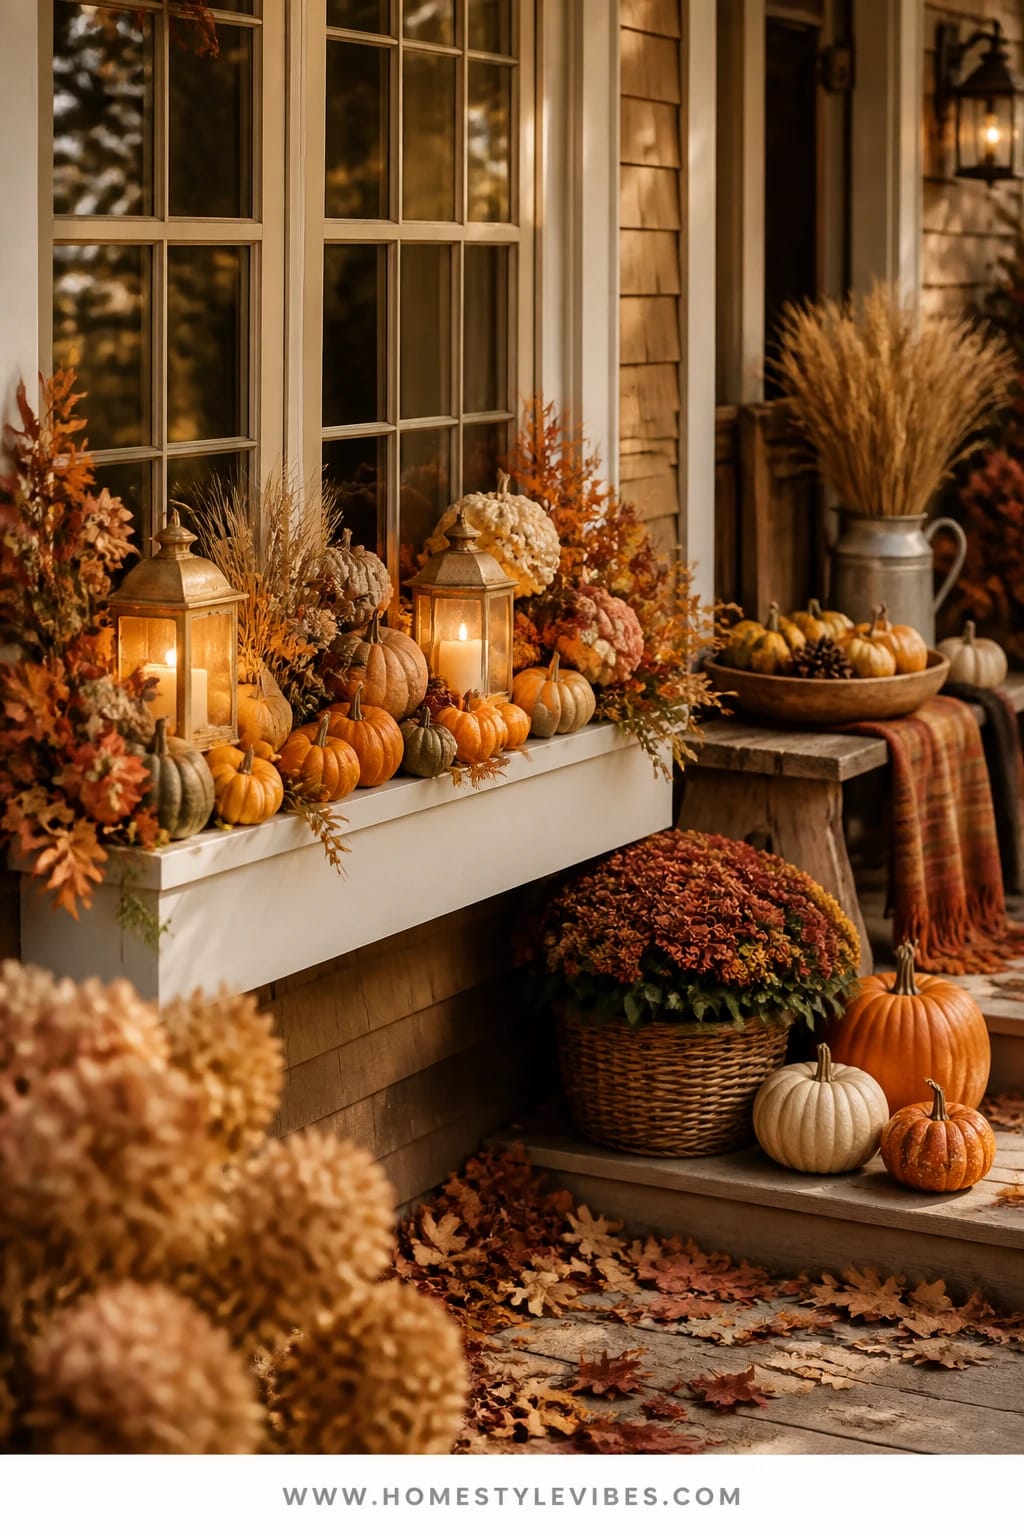
We’ve all been there: you splurge on mums, cram them into the box, and it still looks flat and fussy by week two. This setup solves that “stiff and skimpy” feeling by layering low pumpkins with dried florals and tucked-in lanterns. The vibe is warm harvest abundance—think market-day crates, amber flicker at dusk, and the papery rustle of dried wheat when the breeze kicks up.
Here’s why it works in real life: dried florals and seedpods don’t wilt, mini pumpkins hold shape in cooler temps, and LED lanterns tuck right into the planting mix without cords. Warm lighting brings the whole arrangement to life after sunset, giving you that golden glow passing cars will actually slow down to admire. Materials lean natural and tactile—wheat bundles, broom corn, millet, strawflower, and a few knobby gourds for personality. Photographs love this one: rich color, varied shapes, and layers create instant depth.
Variations? Try a budget version with mostly foraged branches and a single wheat bundle, then fill gaps with faux eucalyptus. Prefer a subtle palette? Use white pumpkins, toffee-colored strawflowers, and pale dried grasses for a softer, neutral moment that still reads fall.
Budget Breakdown:
- Mini pumpkins and gourds (8–12): $12–$36
- Dried wheat, millet, broom corn bundles (3–5): $15–$45
- Two small outdoor-safe lanterns with LED candles: $30–$80
- Faux trailing eucalyptus or ivy (2–3 stems): $12–$36
- Coconut coir liner (if needed): $8–$15
Total Estimated Cost: $77 – $212
Best For: Classic homes with window boxes 30–48 inches wide. Great from late September through Thanksgiving and for anyone who wants a high-impact look without constant watering.
Key Design Elements:
- Main seasonal props: mini pumpkins, dried wheat and broom corn, LED lanterns
- Color palette: burnt orange, amber, honey gold, natural straw
- Lighting strategy: two lanterns tucked in asymmetrically for after-dark glow
- Textile layers: none needed—texture comes from husks and straw
- Natural elements: gourds, seedpods, wheat, curly willow twigs
- Accent details: copper-finish lantern metal, jute twine, coir liner
How To Recreate This Look:
- Start with a fresh coir liner and a base of potting mix so you can anchor stems securely.
- Add two faux trailing greens to spill over the front edge for softness.
- Layer dried wheat and broom corn at the back, nestling stems into the soil at varying heights.
- Place mini pumpkins across the front lip, staggering sizes for a natural rhythm.
- Style with two small lanterns off-center—left front and right middle—then fill gaps with seedpods or pinecones.
Why This Looks Expensive: The secret is repetition with variation—multiples of the same element (pumpkins, wheat) in different sizes and heights. Copper-toned metal and warm light read luxe, especially against matte dried textures.
Watch Out: Don’t overcrowd. If pumpkins press against each other, they bruise and mold sooner. Leave a finger-width gap so air circulates.
Pro Styling Tip: Angle one lantern slightly toward the street; that off-axis glow catches the eye and photographs as a warm focal point at dusk.
Keep scrolling—you’ll see how to add rich color without relying on mums.
2. Burgundy Mums And Lantern-Spiked Window Box With Trailing Ivy
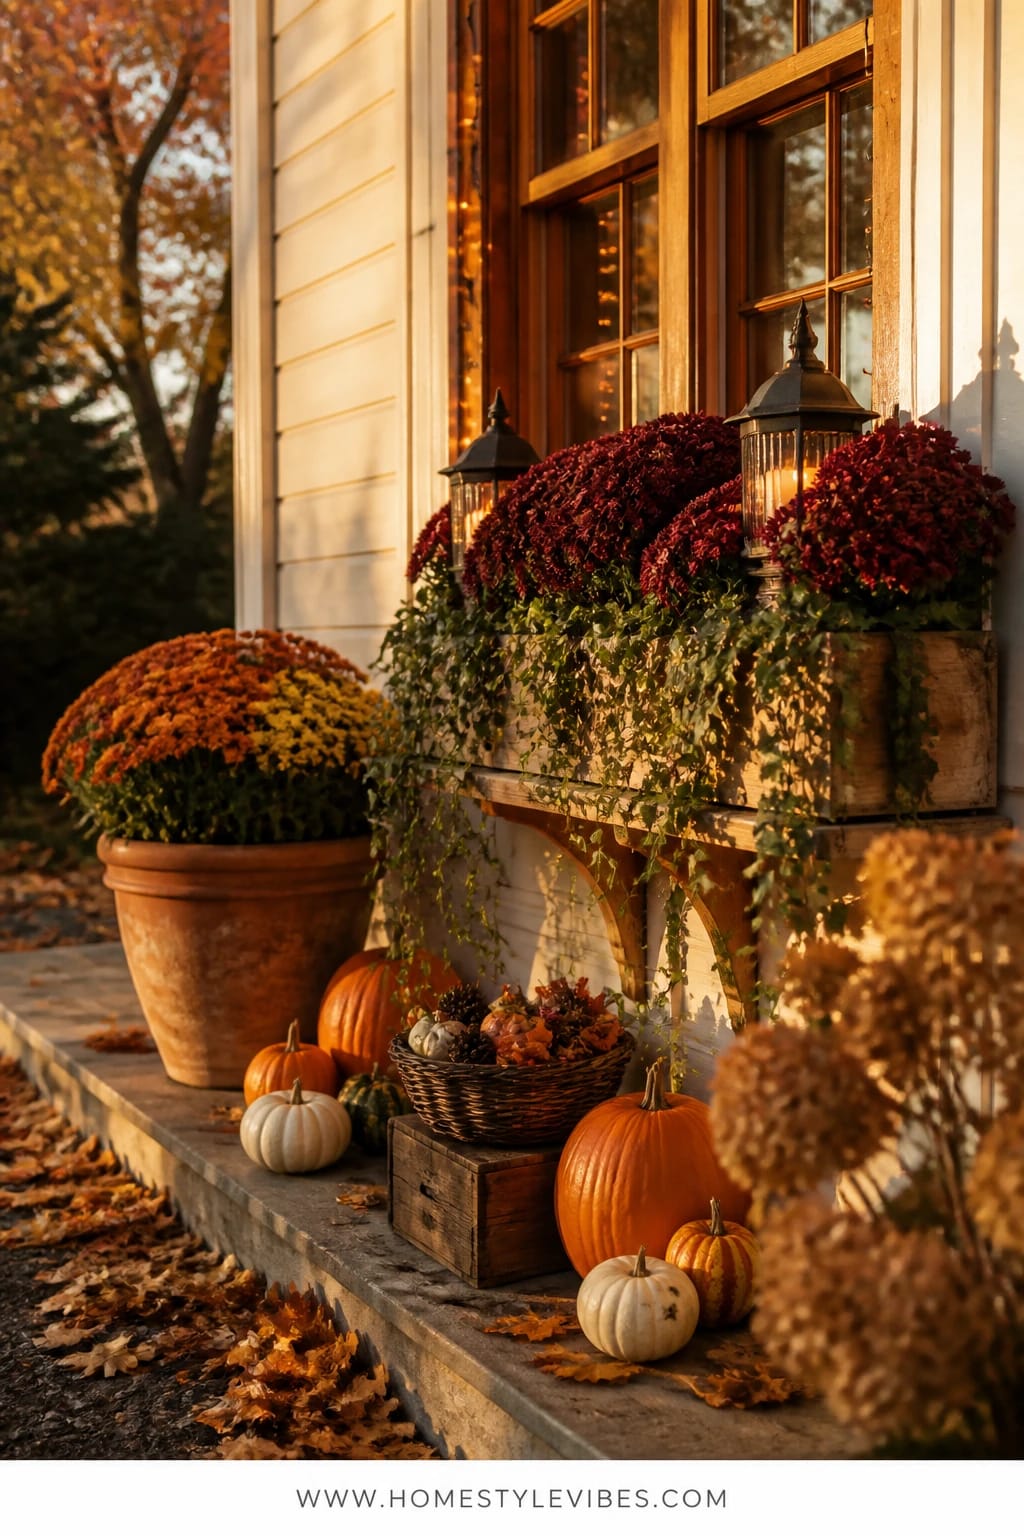
It’s that one window that always reads “nice… but meh.” You’ve tried a single row of mums, but it still looks flat. This idea brings burgundy depth, glossy greens, and low lantern spikes so the whole box has rhythm and movement instead of feeling like one fuzzy row of pom-poms.
The mood is classic harvest with a hint of wine-country richness. Deep mums anchor the color story; ivy softens edges and ties the plants to the architecture by cascading over trim. Warm lighting comes from narrow lantern stakes or slim path lights you can insert right into the soil—instant candlelit warmth without juggling cords. Why this wins in real homes: mums are affordable and easy to replace one by one if a plant fails, while ivy lasts until frost and hides small gaps. Photos love the tonal layering—maroon petals, glossy green, and that little hit of brass or black metal from the lantern stakes.
Small-space version? Use one big mum flanked by two trailing ivies and a single lantern stake—simple, full, not fussy. Neutral lover? Swap burgundy for rust or toffee mums, pair with variegated ivy, and choose black lantern stakes for a quieter silhouette that still sings at sunset.
Key Design Elements:
- Main seasonal props: burgundy mums, trailing ivy, slim lantern stakes
- Color palette: burgundy, deep green, touches of brass or matte black
- Lighting strategy: low-profile lantern stakes placed evenly to create a dotted glow
- Textile layers: none—let foliage and petals own the texture
- Natural elements: ivy spill, moss tucked at the base to hide soil
- Accent details: brass/black lanterns, simple plant markers to label varieties
Budget Breakdown:
- Burgundy mums (3–5 medium): $24–$60
- Trailing ivy (2–3 plants): $12–$36
- Lantern stakes with LED (2–3): $24–$72
- Moss or bark mulch: $6–$12
Total Estimated Cost: $66 – $180
Best For: Traditional or cottage-style facades and anyone who wants easy maintenance plus quick plant swap-outs during the season.
How To Recreate This Look:
- Start by centering one mum and flanking with two more; leave space between plants for airflow.
- Add trailing ivy near the corners so it can spill down the sides.
- Layer moss or bark mulch around the base to hide soil and support moisture.
- Place lantern stakes evenly through the mums—front left and back right or three across for larger boxes.
- Style with a small handful of pinecones at the edges for a woodland whisper.
Why This Feels Designer: Repeating one rich flower color, then contrasting it with glossy trailing green, looks intentional—and the slim lanterns read like jewelry for your window box.
One Thing To Avoid: Overwatering. Mums sulk in soggy soil. Water deeply, then let the top inch dry before the next soak.
Pro Styling Tip: Tuck the mums slightly higher in the back row so the flower domes stair-step toward the street—your photos will show perfect, tiered fullness.
Quick Tip — Imagine a triangle. When you place your tallest element at one point and step down height in two directions, your eye moves naturally across the box. That movement = instant “finished” look.
If color isn’t your thing, the next one leans into texture and scent.
3. Cinnamon-Scented Pinecone Window Box With Amber String Lights And Rust Accents
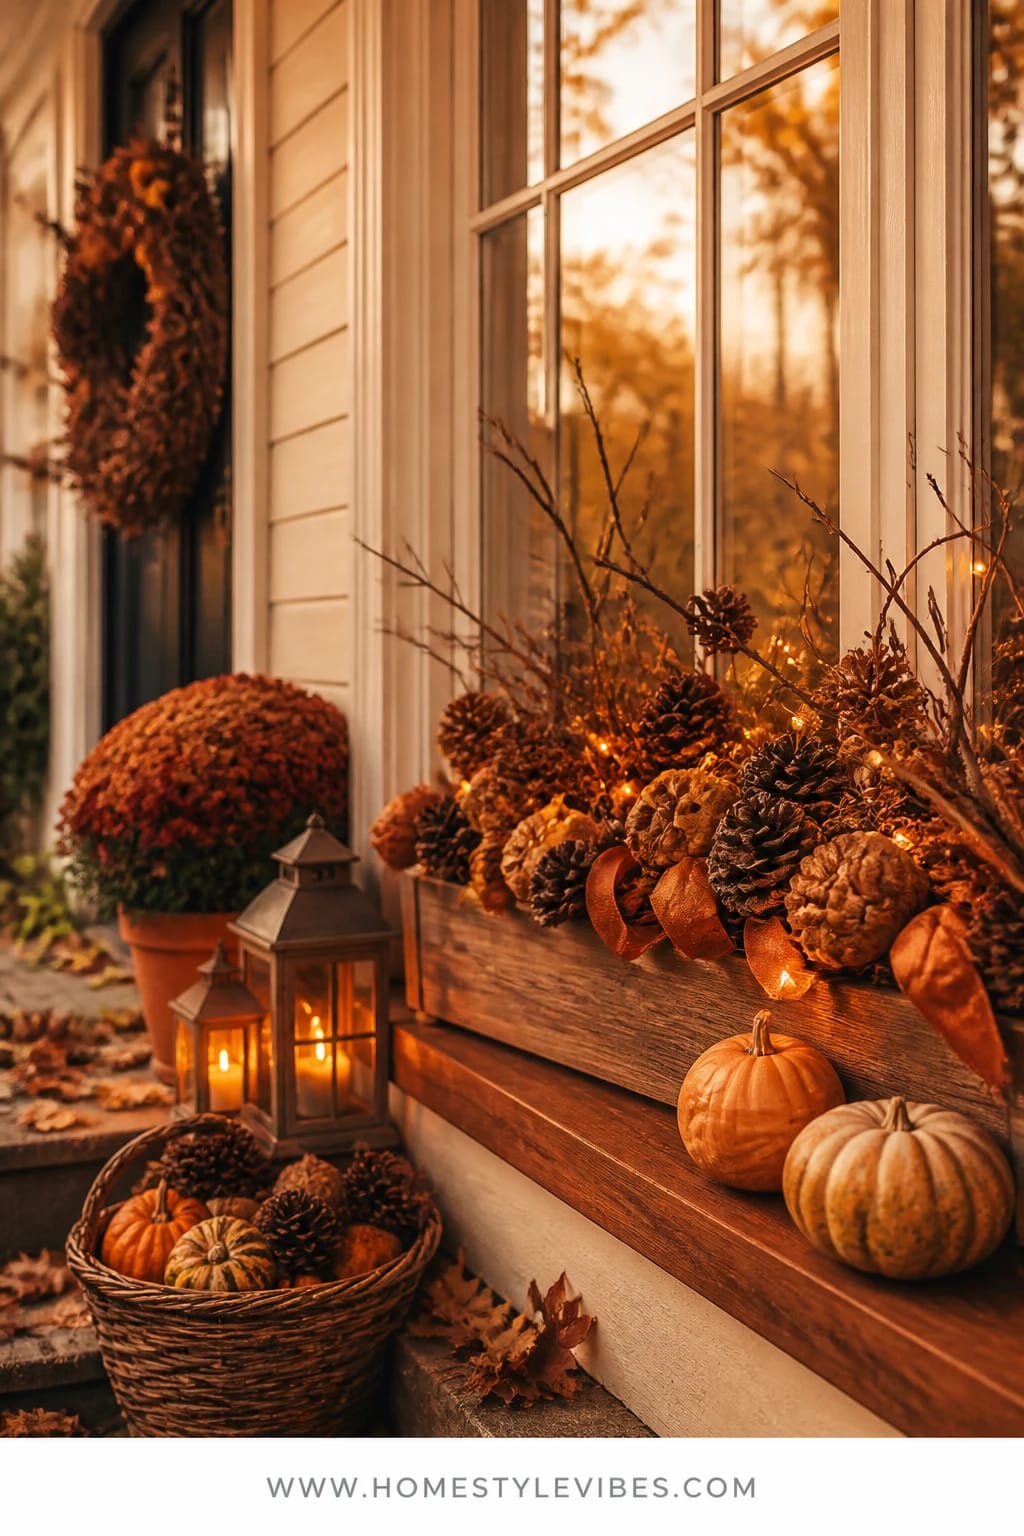
Some years, flowers feel like too much fuss. Maybe you’re juggling soccer games, late work nights, and trying to remember which bin holds the Halloween lights. This pinecone-forward box brings fall without the watering schedule: sculptural, fragrant, and wonderfully low-maintenance.
The mood is woodsy cabin comfort. Pinecones, seedpods, and clipped branches create shadows and interesting forms. Rust-colored ribbon or painted accents add warmth, while amber string lights weave through the arrangement for a cozy evening glow. Why it works: pinecones don’t mind cold snaps, they’re reusable next year, and they pack into storage easily. Photographs turn moody and rich with layered browns, amber sparkles, and the satisfying contrast of matte cones against little hits of metal or ribbon.
Budget-friendly twist? Forage pinecones and branches, then spend on one pretty spool of rust velvet ribbon and a high-quality weatherproof light strand. Want a neutral, modern version? Keep everything in shades of brown and black with matte black ribbon and smoked-amber lights.
Budget Breakdown:
- Pinecones (a bulk bag or foraged): $0–$18
- Amber outdoor string lights (15–25 ft): $20–$40
- Rust velvet ribbon (1–2 spools): $8–$24
- Seedpods/branches (foraged or purchased): $0–$15
- Weatherproof timer for lights: $10–$18
Total Estimated Cost: $38 – $115
Best For: Busy households, shady exposures, and locations with early frosts—this look doesn’t care about sunlight or temperature swings.
Key Design Elements:
- Main seasonal props: pinecones, seedpods, foraged branches
- Color palette: rust, chestnut, espresso brown, amber light
- Lighting strategy: one continuous strand woven front to back on a timer
- Textile layers: velvet ribbon tails tucked among cones
- Natural elements: dried twigs, acorns, magnolia pods
- Accent details: a few copper bells or tiny brass ornaments for sparkle
How To Recreate This Look:
- Start with a base of branches crisscrossed to create height and pockets.
- Add pinecones in clusters of three to five, alternating sizes for dimension.
- Layer in seedpods and acorns to fill negative space.
- Place rust ribbon ties sparingly—two or three bows, plus a few short tails.
- Style with amber string lights, snaking them under and over cones so the bulbs peek out.
Why This Reads High-End: The restraint. Limiting yourself to a tight palette and one hero texture (pinecones) feels artful, like a nature study. The velvet ribbon is the quiet luxury moment.
The Most Common Mistake: Visible wire clutter. Keep the plug and extra cord tucked behind the box or under the sill to maintain that effortless glow.
Pro Styling Tip: Place a few larger cones at the extreme ends of the box; in photos, this frames the shot and prevents that “everything in the center” look.
Remember, this isn’t about recreating a showroom. It’s about crafting curb appeal that actually fits your life and your climate, so you smile every time you come home.
4. Plaid-Trimmed Window Box With Lantern Corners, Pumpkins, And Warm String Lights
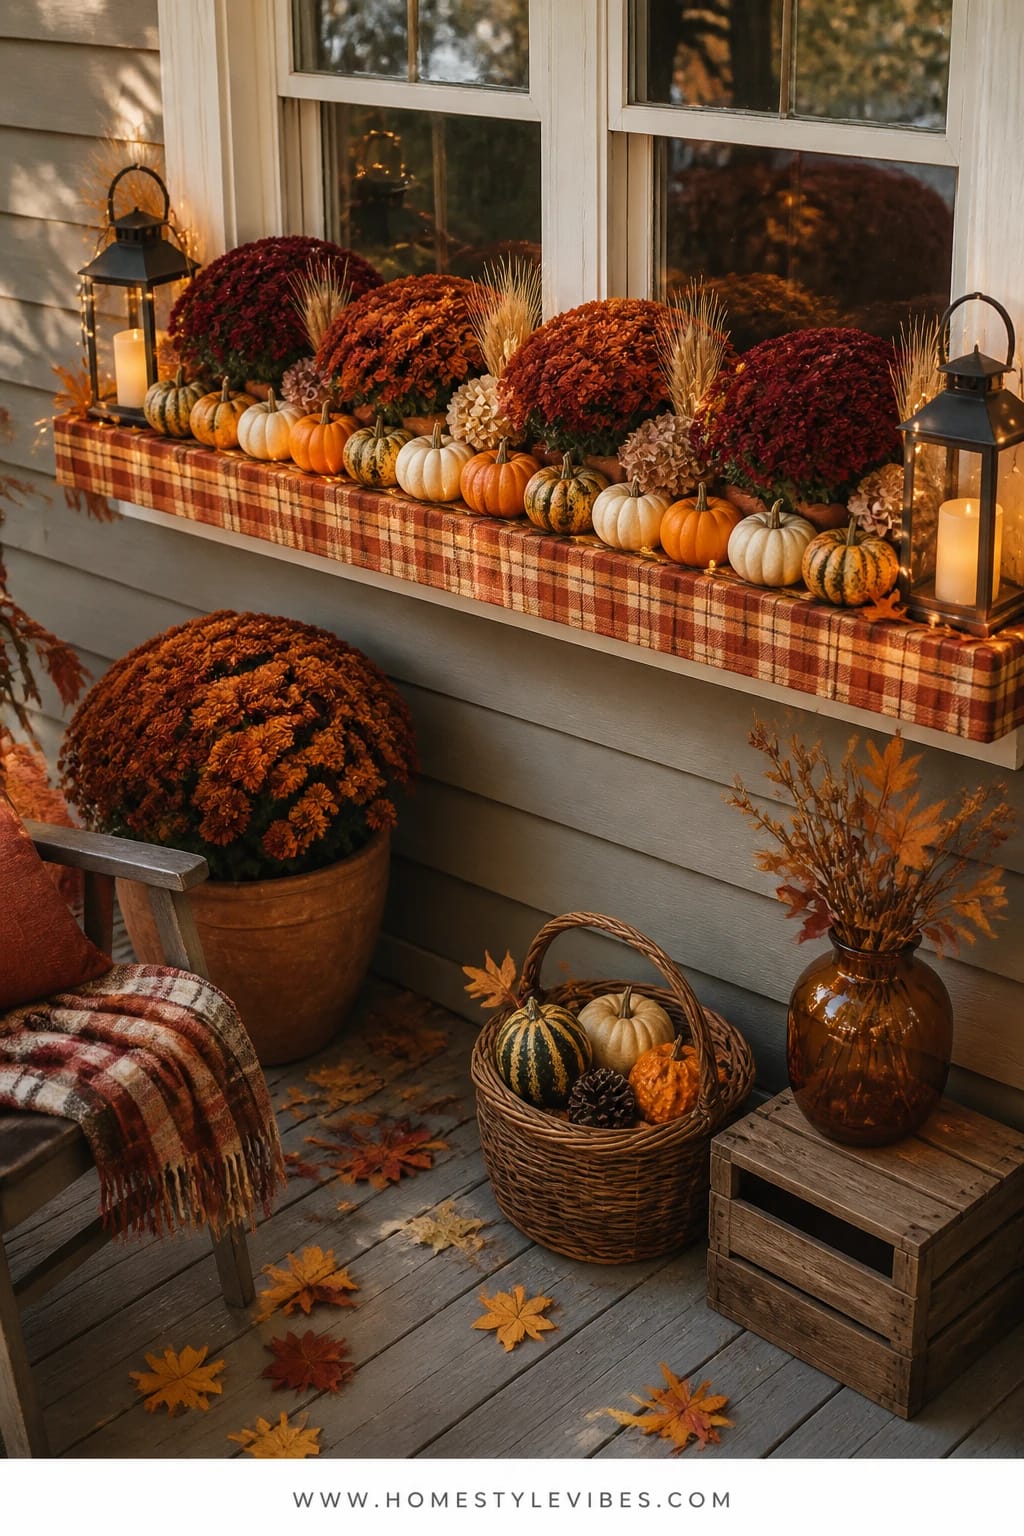
Confession: I used to fight my box shape. Long, skinny, and right under a drafty window—plants always looked choppy. The fix was leaning into structure: plaid trims, neat lantern corners, and a rhythm of small pumpkins that guide the eye across the span.
This look creates cheerful, old-town-street energy—like you’re about to wander into a bakery that smells like cinnamon. It’s fantastically practical: lanterns anchor the corners, plaid ribbon or a weather-safe plaid fabric band wraps the box, and mini pumpkins or faux gourds sit neatly in between. Warm string lights threaded just along the top lip add that “candlelit warmth” every evening. Why it photographs beautifully: repeating shapes across the length makes the box read fuller and longer, and plaid gives a crisp graphic punch that pops in low light.
Try a budget edit with thrifted lanterns you spray-paint matte black and a single roll of outdoor-safe plaid ribbon. Prefer a softened palette? Go with soft rust and camel plaid, white pumpkins, and golden lights—calm but still festive.
Budget Breakdown:
- Two medium outdoor lanterns: $40–$100
- Outdoor-safe plaid ribbon or fabric banding: $10–$25
- Mini pumpkins or faux gourds (8–12): $12–$48
- Warm white micro string lights (battery timer): $10–$20
- Zip ties or outdoor command hooks for ribbon/cord control: $6–$12
Total Estimated Cost: $78 – $205
Best For: Long window boxes where you want order and symmetry; works from September through early November and pairs well with a classic front door wreath.
Key Design Elements:
- Main seasonal props: plaid ribbon trim, mini pumpkins, lantern corners
- Color palette: rust, camel, black or bronze metal, warm white light
- Lighting strategy: a single light strand along the top edge for even glow
- Textile layers: plaid banding is the “textile” moment
- Natural elements: pumpkins, optional clipped boxwood or spruce tips
- Accent details: metal lantern finishes, matte-black spray paint for cohesion
How To Recreate This Look:
- Start by wrapping your box with plaid ribbon or fabric, securing on the backside with zip ties or hooks.
- Add lanterns to both corners; check sightlines from inside so they don’t block your view.
- Layer a shallow line of faux greenery or clipped evergreens along the back edge for structure.
- Place mini pumpkins evenly spaced across the front, alternating colors or sizes for cadence.
- Style with a strand of micro lights tucked under the greenery, bulbs peeking out every few inches.
Why This Looks Intentional: The corners are anchored, the middle repeats a motif, and the plaid band pulls it all together—like a belt on a great fall coat.
Don’t Do This: Don’t skip securing the ribbon. A windy October day can turn your neat band into a flag. Anchor in at least 4–6 places.
Pro Styling Tip: Nudge one pumpkin askew—slightly angled toward the street—for that lived-in charm that keeps photos from feeling too rigid.
Did You Know? A single continuous light strand looks smoother than two shorter ones. That tiny brightness “seam” where strands meet always shows up in night photos.
Ready for something moody and modern? Let’s go jewel-toned and sculptural.
5. Dried Hydrangea And Eucalyptus Window Box With Amber Glass Bottles And Lantern Glow
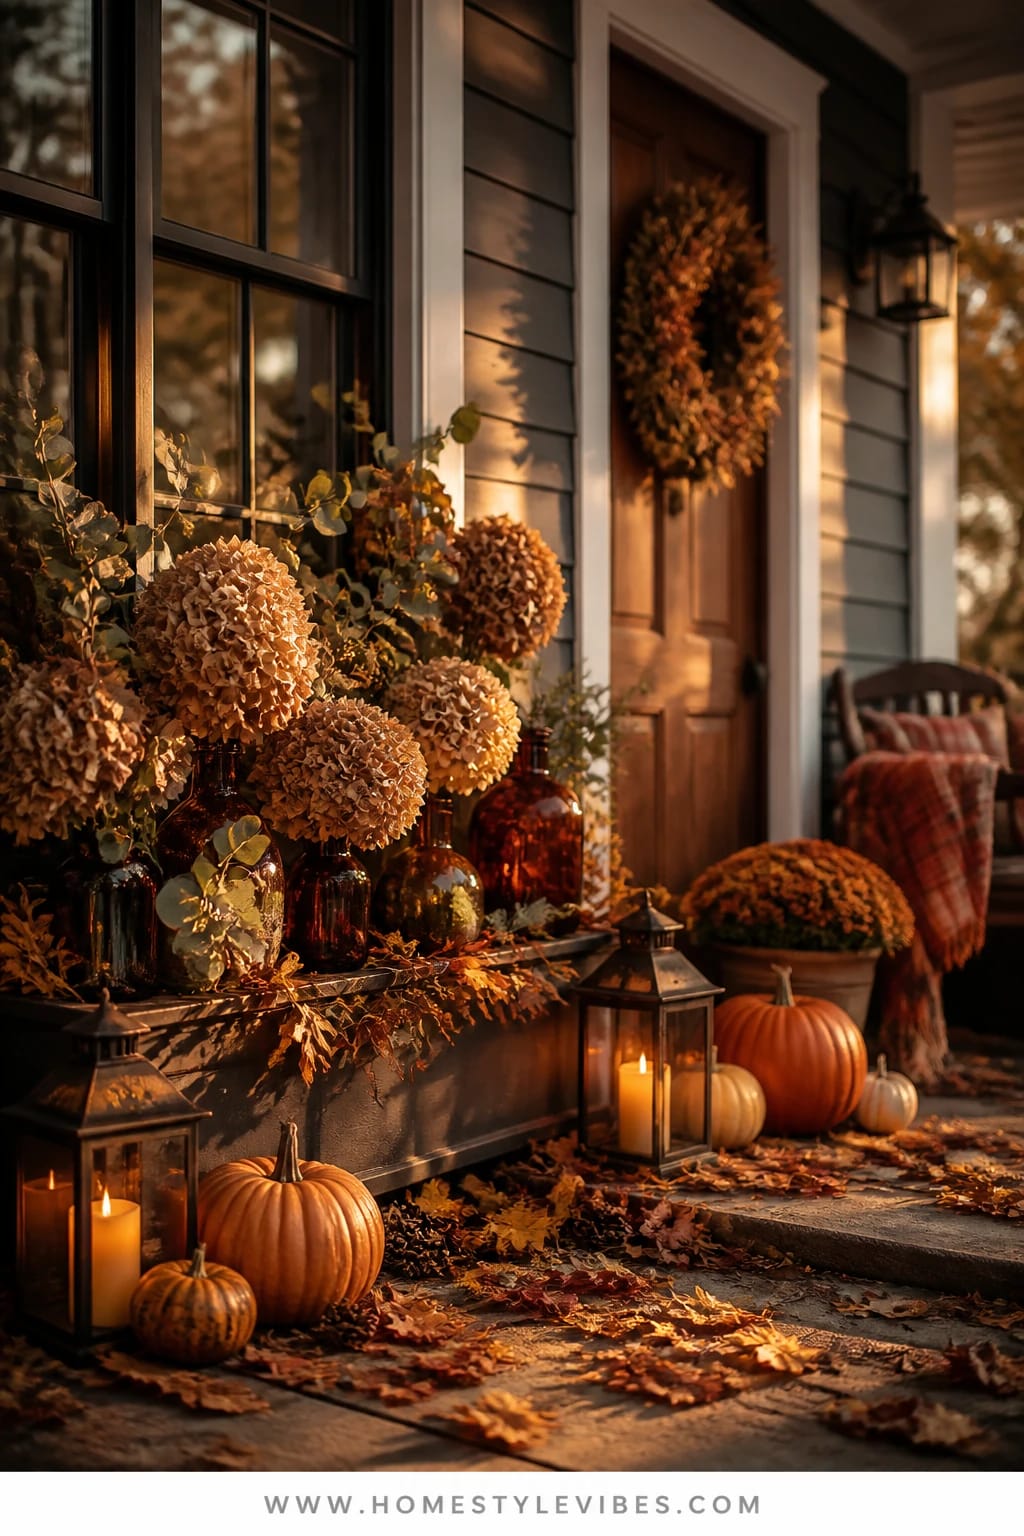
You’ve seen hydrangeas turn papery and perfect at the end of summer—don’t toss them. This concept leans into those moody dried heads, pairing them with eucalyptus and amber bottle accents for a look that feels like a still-life painting.
The mood is sophisticated and serene; think golden-hour shadowplay across deep, muted colors. Because you’re using dried hydrangea heads and faux or preserved eucalyptus, the upkeep is basically dust control and the occasional re-tuck after a windy day. Warm lighting comes from one or two small lanterns and the natural gleam of amber glass catching dusk light. Photos adore this palette—muted greens, dusky mauves, and smoky browns saturate in low sun, making the whole box read like a vignette.
For a more budget-friendly version, reuse bottles from your recycling bin—remove labels and add a faux amber tint spray. If you prefer brighter, replace eucalyptus with olive-tone faux stems and mix in a few white strawflowers for lift.
Budget Breakdown:
- Dried hydrangea heads (foraged or purchased): $0–$30
- Preserved or faux eucalyptus (3–5 stems): $15–$40
- Amber bottles or bud vases (3–5): $12–$40
- Small lantern with LED candle (1–2): $15–$50
- Floral wire and clips: $6–$10
Total Estimated Cost: $48 – $170
Best For: Homes with partial shade where flowers struggle; ideal if you love a quieter, curated fall look that lasts for weeks.
Key Design Elements:
- Main seasonal props: dried hydrangea, eucalyptus, amber glass bottles
- Color palette: rust-tinged mauve, sage, smoke, amber
- Lighting strategy: one lantern near the bottle cluster to bounce warm highlights
- Textile layers: optional silk ribbon in tobacco or rust
- Natural elements: hydrangea, seedheads, olive-toned leaves
- Accent details: vintage-looking bottles, matte-black or brass lantern
How To Recreate This Look:
- Start by clustering 3–5 amber bottles off-center, wiring them discretely to the box if wind is an issue.
- Add dried hydrangea heads behind and slightly above the bottles for height.
- Layer eucalyptus between hydrangea clusters to break up the shapes.
- Place a small lantern to one side, angled to reflect light through the glass.
- Style with a few ribbon tails tucked around bottle necks for a soft, textural note.
Why This Feels Designer: Negative space. You’re not filling every inch—those airy pockets around the bottle cluster and between florals look intentional and expensive.
Watch Out: Dried hydrangea can fade if blasted by direct sun day after day. Rotate heads or shift the arrangement mid-season if one side bleaches out.
Pro Styling Tip: Photograph at golden hour; the amber bottles flare with warm highlights that make the whole window box glow on camera.
If you’ve got a spot that gets morning sun and afternoon shade, the finale is for you: maximum texture, minimal babysitting.
6. Harvest Herbs And Pumpkin Window Box With Golden-Hour String Lights And Pinecones
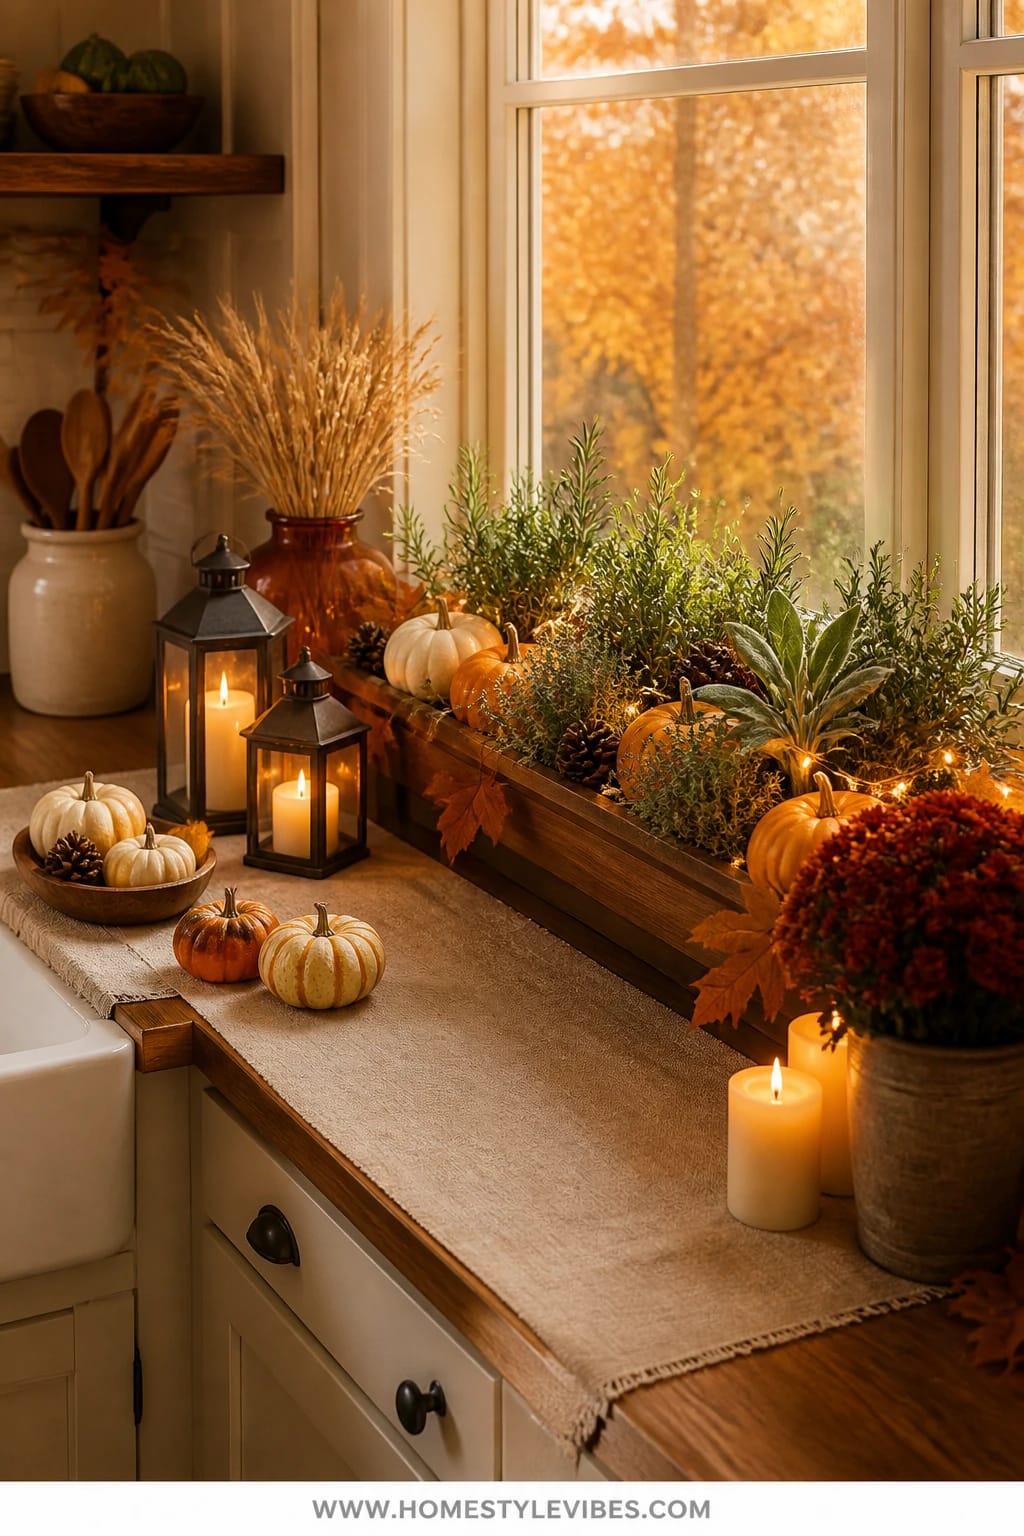
Have you ever planted a fall box that looked gorgeous… for five days? Then the heat spiked, or you forgot to water, and it lost steam. This herb-forward box has stamina and scent—rosemary, thyme, and sage—mixed with small pumpkins and a sprinkle of pinecones. It’s the definition of practical pretty: you can snip herbs for dinner and still get that photogenic, abundant look.
The mood is farmhouse kitchen meets October farmer’s market. Silvery sage leaves, spiky rosemary, and plush thyme mounds create varied textures. Golden string lights threaded just along the back line add glow without shouting, and pumpkins nestle between herb mounds like little treasures. Why this works: herbs tolerate cooler nights, the palette plays well with any exterior, and you can refresh the pumpkins once mid-season if needed. Photos love the mix—fine textures, plump shapes, and a mellow gold wash at dusk.
For a tiny box, stick to one rosemary, one trailing thyme, and two mini pumpkins. Want a neutral take? Use white or pale gray pumpkins, bronze micro lights, and lots of silvery sage for a calm, tonal story.
Budget Breakdown:
- Herb plants (rosemary, thyme, sage—4–6 total): $16–$42
- Mini pumpkins (6–8): $9–$24
- Pinecones (small bag): $6–$12
- Warm micro string lights with timer: $10–$20
- Soil/top-dress mulch: $6–$12
Total Estimated Cost: $47 – $110
Best For: Sunny to part-sun boxes and anyone who cooks—this stays pretty and useful from late September through Thanksgiving.
Key Design Elements:
- Main seasonal props: culinary herbs, mini pumpkins, pinecones
- Color palette: sage green, deep green, warm pumpkin, golden light
- Lighting strategy: micro lights along the back rail to silhouette herbs
- Textile layers: none—texture is in the foliage
- Natural elements: herbs, pumpkins, pinecones
- Accent details: small copper plant markers, twine ties for stems
How To Recreate This Look:
- Start with a tall rosemary at one end for height, then add sage and thyme to create mounds.
- Add mini pumpkins between herb clumps, tucking them slightly into foliage.
- Layer a handful of pinecones around pumpkin bases for a woodland note.
- Place micro lights along the back, weaving between herb stems for halo glow.
- Style with copper plant markers and a tiny snip of twine around one pumpkin stem.
Why This Looks Expensive: Functional beauty. When plant choices make sense (you can cook with them), the whole box feels curated, not random. The copper touches seal the deal.
The Most Common Mistake: Mixing thirsty annuals with drought-tolerant herbs. Keep your planting partners with similar water needs so the box stays happy.
Pro Styling Tip: Mist the herbs before a photo—leaves deepen in color and catch tiny sparkles from the lights.
Quick Tip — Real pumpkins last longest if you keep them off constantly wet soil. Nestle on a thin bark mulch layer or a discreet slice of cork coasters to avoid soggy bottoms.
If one idea resonates more than the others, that’s your starting point. You don’t need all six—choose the one that fits your light, budget, and patience level this season.
Quick Checklist
- Decide on a color story (rust, burgundy, or neutrals)
- Pick one lighting approach (lanterns, stakes, or micro string lights)
- Choose a hero texture (dried florals, pinecones, or herbs)
- Gather repeats of one element (multiples always read fuller)
- Secure everything for wind (wire, clips, or zip ties)
- Top-dress soil with moss or mulch to hide gaps
- Place taller elements toward the back for depth
- Leave small air gaps between pumpkins to prevent rot
- Put lights on a timer for consistent evening glow
- Plan one mid-season refresh (swap a tired plant or add fresh pumpkins)
Frequently Asked Questions
How much should I budget for a fall window box that lasts from September to Thanksgiving?
Plan on $60–$180 per box depending on materials. Dried and foraged elements lower costs, while multiple lanterns or high-end faux stems increase them. If you reuse lights and lanterns yearly, future seasons drop closer to $30–$70 for fresh pumpkins or plant swaps.
Are real or faux pumpkins and florals better for window boxes?
IMO, real pumpkins win outdoors for texture and weight—they stay put and look authentic. Pair them with dried or high-quality faux greens for longevity. If your box gets intense sun, dried florals handle it better than fresh mums.
My window box is tiny. Can I still make this work?
Yes. Pick one hero element and repeat it: three mini pumpkins plus one trailing ivy, or a single mum flanked by two pinecone clusters. Keep lights micro and tuck one small lantern off to the side rather than crowding the center.
How do I store everything after the season?
Brush off dried florals and store in a tall box upright to protect heads. Coil string lights loosely and label them “window box left,” etc. Lanterns get wiped down and wrapped in paper. Pinecones go in a breathable bag so they don’t get musty.
Are candles safe in window boxes with kids and pets around?
Use LED candles only. Real flame near dried materials is a no. Choose lanterns with latched doors and weather-sealed battery compartments so curious hands can’t access the lights.
When should I start decorating my fall window boxes?
Early to mid-September is ideal. If your area stays hot, begin with dried elements and lights, then add real pumpkins and mums when nights drop below 60°F for longer life.
Final Thoughts
Pick one idea and start this weekend. Lay out your elements on the ground first, then build the box like a little stage—tall in back, story in the middle, charm up front. The truth is, “cozy” outside comes from layers, repetition, and warm light that clicks on right as the air cools.
As you tuck in that last pumpkin or clip the string lights into place, notice how the whole house suddenly feels ready for cider and golden-hour walks. You did that. And every time you turn into the driveway, your fall window boxes will greet you with a soft glow and a whole lot of heart. Seriously—go make it pretty out there.

About the Author

Krisztina P.Rendes, Founder of Home Style Vibes
Founder of Home Style Vibes
Krisztina Puskásné Rendes created Home Style Vibes as a cozy-modern lifestyle space where homemaking meets inspiration. Her goal is to help women create beautiful, organized, and peaceful homes they truly love — without overwhelm. You’ll find here heart-driven content on home decor, cleaning tips, easy family recipes, organization and decluttering, DIY home projects, plants, and seasonal ideas — all designed to bring more calm, comfort, and style into everyday life.