7 Fall Outdoor Planter Ideas That Add Color To Your Porch And Garden
You want a porch that greets you with a burst of color and that soft, golden fall glow every time you come home. You hate that your summer containers look tired, leggy, and kind of sad once September hits. You see those Pinterest-perfect porches—coppery mums, plump pumpkins, lanterns flickering at dusk—and you’re thinking: beautiful, but where do I even start, and how much will this cost me? Consider this your friendly, practical guide to seven fall outdoor planter ideas that add color to your porch and garden—each designed to be totally doable in a single afternoon and under a realistic budget.
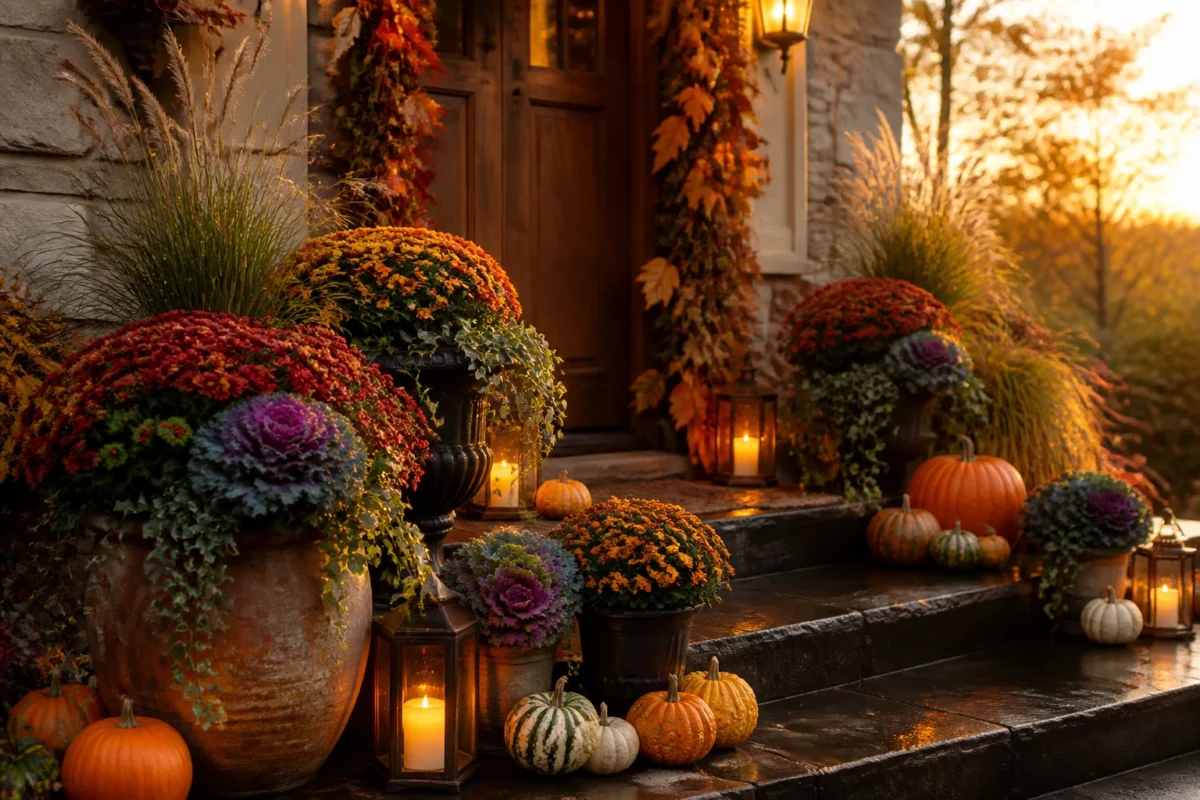
Picture it: rust and burgundy blooms against weathered wood, leaf-garland brims, amber lantern light, and that crisp October air. These porch and garden planters bring saturated color, sculptural texture, and that cozy fall feeling that photographs like a dream. I’ll show you the exact combinations, lighting, and styling tricks that make them sing—plus easy swaps so they carry you from early September through Thanksgiving. If you love an abundant, warm fall vibe and want ideas you can actually pull off, you’re in the right place.
1. Pumpkin-Layered Porch Steps With Golden Glow Lanterns And Mums
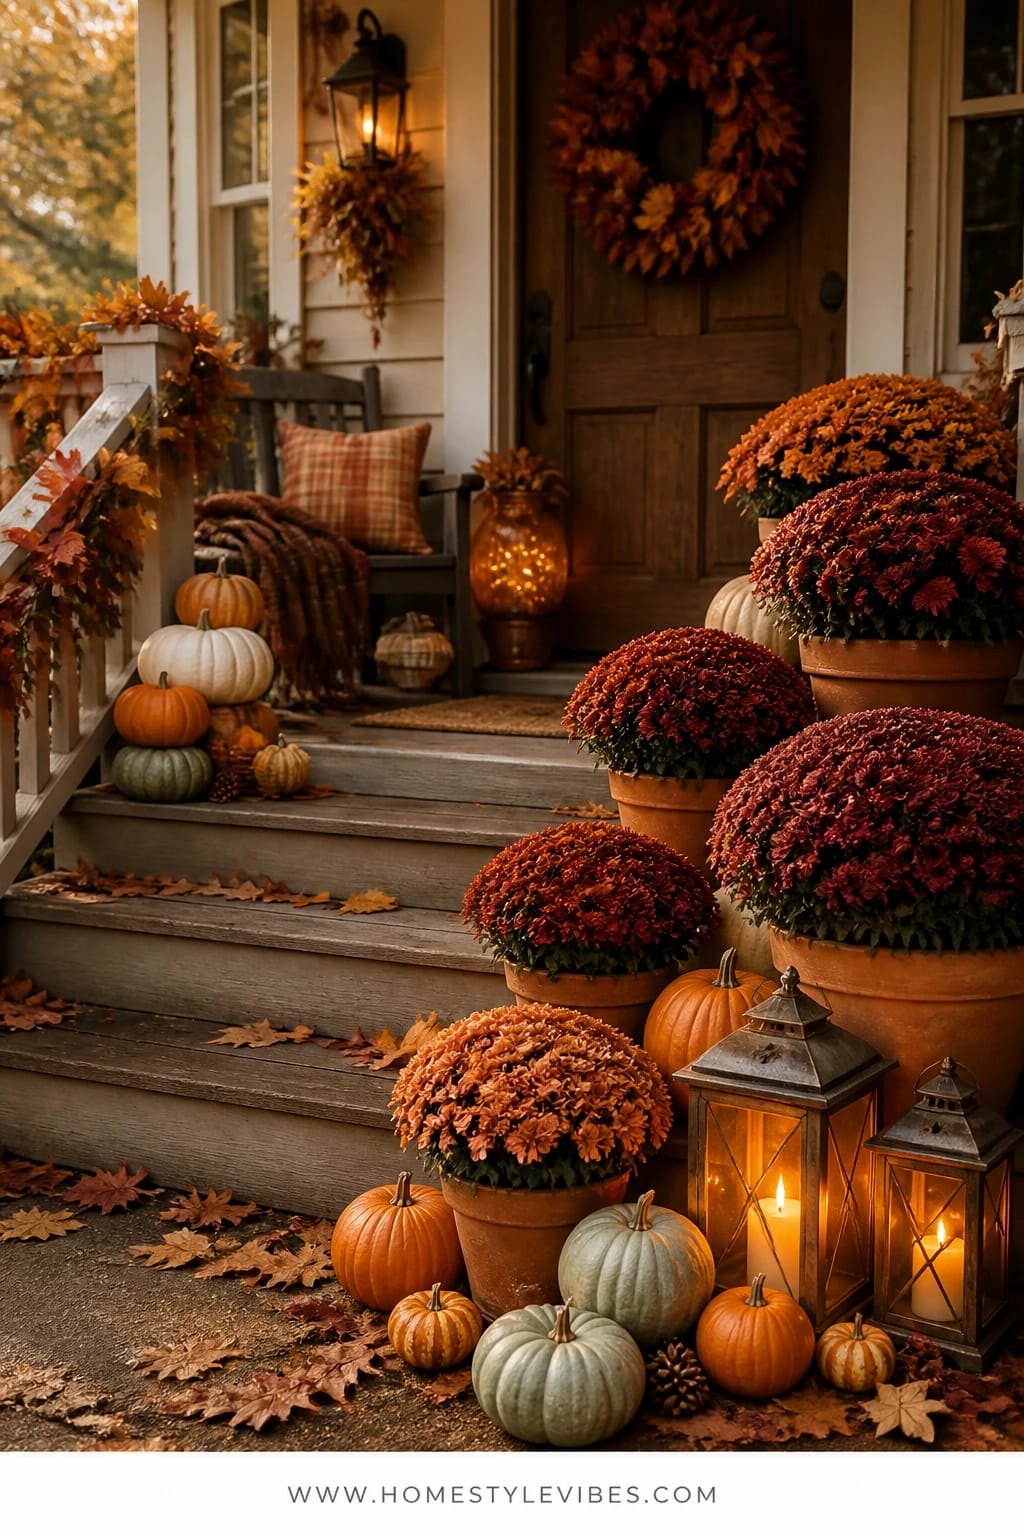
We’ve all been there: you line up a couple of mums on the porch steps and it still looks… sparse. The color’s there, but the vibe is missing. This planter idea solves that by treating your porch steps like a layered stage. Think tiers of mum-filled planters in rust and burgundy, flanked by clusters of pumpkins in varied sizes, with lanterns casting a golden glow as the sun dips. The mood feels like harvest-party energy—festive, generous, and deeply cozy right where you kick off your boots.
Here’s why this works in real homes: you’re using the steps’ natural elevation as built-in risers, so even a small porch looks abundant. Warm lantern light at ankle height gives everything that after-dinner flicker, and the color saturation from russet mums against neutral concrete or wood just photographs beautifully. Add a couple of cool-toned heirloom pumpkins for contrast and you’ll get that “this must be staged” feeling without trying too hard.
Make it your own with variations: go budget-friendly by mixing one large mum with two smaller grocery-store versions and a handful of mini pumpkins, or try a muted palette—soft butterscotch mums, white pumpkins, and brass lanterns—for a calmer look that lasts into November. Small porch? Stack two planters on one step and let the pumpkins tuck in tightly beneath the rail.
Budget Breakdown:
- Mums (3–5 pots, mixed sizes): $20–$60
- Assorted pumpkins (5–9 pieces): $25–$60
- Metal or wood lanterns (2–3): $30–$120
- Battery candles or tea lights: $10–$25
- Planter fillers (soil, moss): $8–$15
Total Estimated Cost: $93 – $280
Best For: Homes with visible porch steps that need presence from the curb; works well from mid-September through Thanksgiving. Great for family homes where you want a cheerful welcome without major landscaping changes.
Key Design Elements:
- Main seasonal props: mums in rust and burgundy, mixed pumpkins, lanterns with warm candles
- Color palette: rust, burgundy, cream, and soft sage from heirloom pumpkins
- Lighting strategy: low lanterns at the sides for golden glow and evening drama
- Textile layers: optional outdoor plaid throw draped over the rail
- Natural elements: moss or straw at planter bases to hide soil
- Accent details: brass or black lantern finishes, weathered clay pots
How To Recreate This Look:
- Start with clean steps; sweep and remove summer debris.
- Add your largest mum on the top step and work down with medium and small ones to create a cascade.
- Layer pumpkins in mixed sizes, tucking mini varieties at the base of planters and the rail corners.
- Place lanterns at two different heights—one on a step, one on a small overturned crate—so the candlelight staggers.
- Style with moss or straw around the planter rims to soften edges and add that “harvest” texture.
Why This Looks Expensive: Graduated heights, a tight color palette, and mixed pumpkin sizes read intentional and styled. The lantern glow adds depth and makes everything feel curated rather than thrown together.
Watch Out: Don’t crowd every step. Leave a safe walking lane and avoid balancing pumpkins where they can roll—especially important if you’ve got kids barreling through after soccer practice.
Pro Styling Tip: For photos, light the lanterns just before sunset and angle one toward a lighter pumpkin to bounce warm light back into your scene.
Keep scrolling—next up is all about sculptural shape and that crackly-dry texture everyone forgets but secretly loves.
2. Dried Floral Urns With Amber String Lights By The Front Door
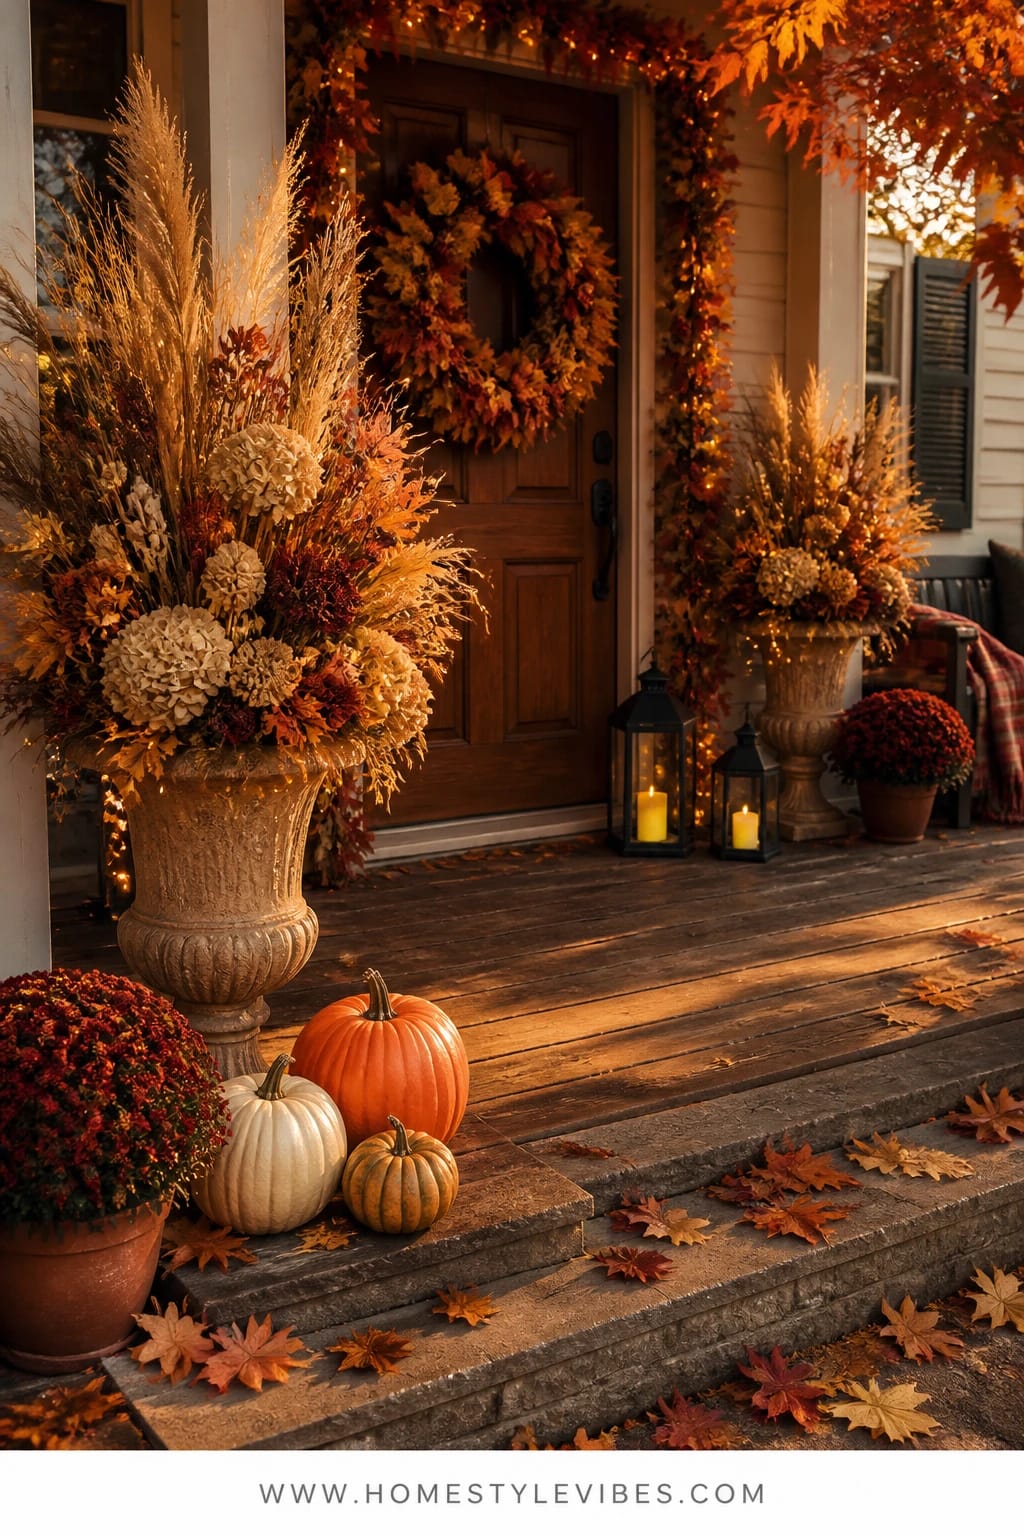
It’s that one corner that always feels off—the space by the front door that should be a showstopper but ends up flat. You’ve tried one mum per side and it still looks skimpy. Enter oversized urns filled with dried florals and grasses, plus a subtle halo of amber string lights tucked through. The vibe: old-world harvest meets modern glow. It’s elegant without feeling stiff, and the texture is unreal.
Why this works: dried florals add height and structure without weekly watering, so it’s low-maintenance and wind-friendly. The amber string lights do the heavy lifting after dark, warming up those wheat and millet tones. Dried arrangements also photograph ridiculously well—every feathery plume catches light and creates soft shadows that add depth. And unlike fresh blooms, these don’t collapse after a cold snap.
Variations? Go tall and dramatic with oversized pampas and bronze millet, or keep it compact with mini bundles of dried bunny tails, eucalyptus, and strawflower stems. Budget version: thrift your urns and spray-paint them matte black, oil-rubbed bronze, or rusty copper. Neutral lovers can skip orange entirely and lean into toffee, cream, and muted green tips.
Budget Breakdown:
- Large urns or tall planters (pair): $60–$240
- Dried florals and grasses (mixed bundles): $40–$120
- Amber string lights (warm white, battery): $10–$25
- Floral foam or chicken wire for structure: $6–$12
- Decorative moss/topper: $6–$10
Total Estimated Cost: $122 – $407
Best For: A front door that needs height and presence; homes in cooler climates where live plants fade early; low-maintenance decorators who want October-through-Thanksgiving staying power.
Key Design Elements:
- Main seasonal props: dried pampas, wheat, millet, strawflower
- Color palette: amber, toffee, cream, and bronze
- Lighting strategy: soft amber string lights woven discreetly among stems
- Textile layers: optional burlap or wool ribbon around urn necks
- Natural elements: seed pods, curly willow branches
- Accent details: urns in matte black or aged stone
How To Recreate This Look:
- Start with a heavy urn for wind resistance; anchor floral foam or chicken wire inside.
- Add your tallest grasses at the center-back to set the height.
- Layer in medium dried florals around, keeping a loose fan shape for fullness.
- Weave amber string lights in a zigzag, hiding the battery pack at the back under moss.
- Style with a few seed pods or wheat bundles near the rim for a finished look.
Why This Feels Designer: The structured silhouette with restrained color is sophisticated. The lights are barely visible by day but glow at night, which gives that “how did they do that?” moment.
One Thing To Avoid: Don’t overfill with too many competing textures. Pick three main textures (e.g., pampas, wheat, strawflower) and repeat them for rhythm.
Pro Styling Tip: Angle the tallest plume toward your porch light so it catches the warm beam and creates a golden halo in evening photos.
Pause here. Take a breath. Remember, this isn’t about recreating a showroom. It’s about building a porch that gives you a little jolt of joy when you pull in the driveway. If one idea speaks to you, that’s your starting point—you don’t need all seven.
3. Burgundy Kale And Pumpkin Cluster On The Garden Bench With Lantern Glow
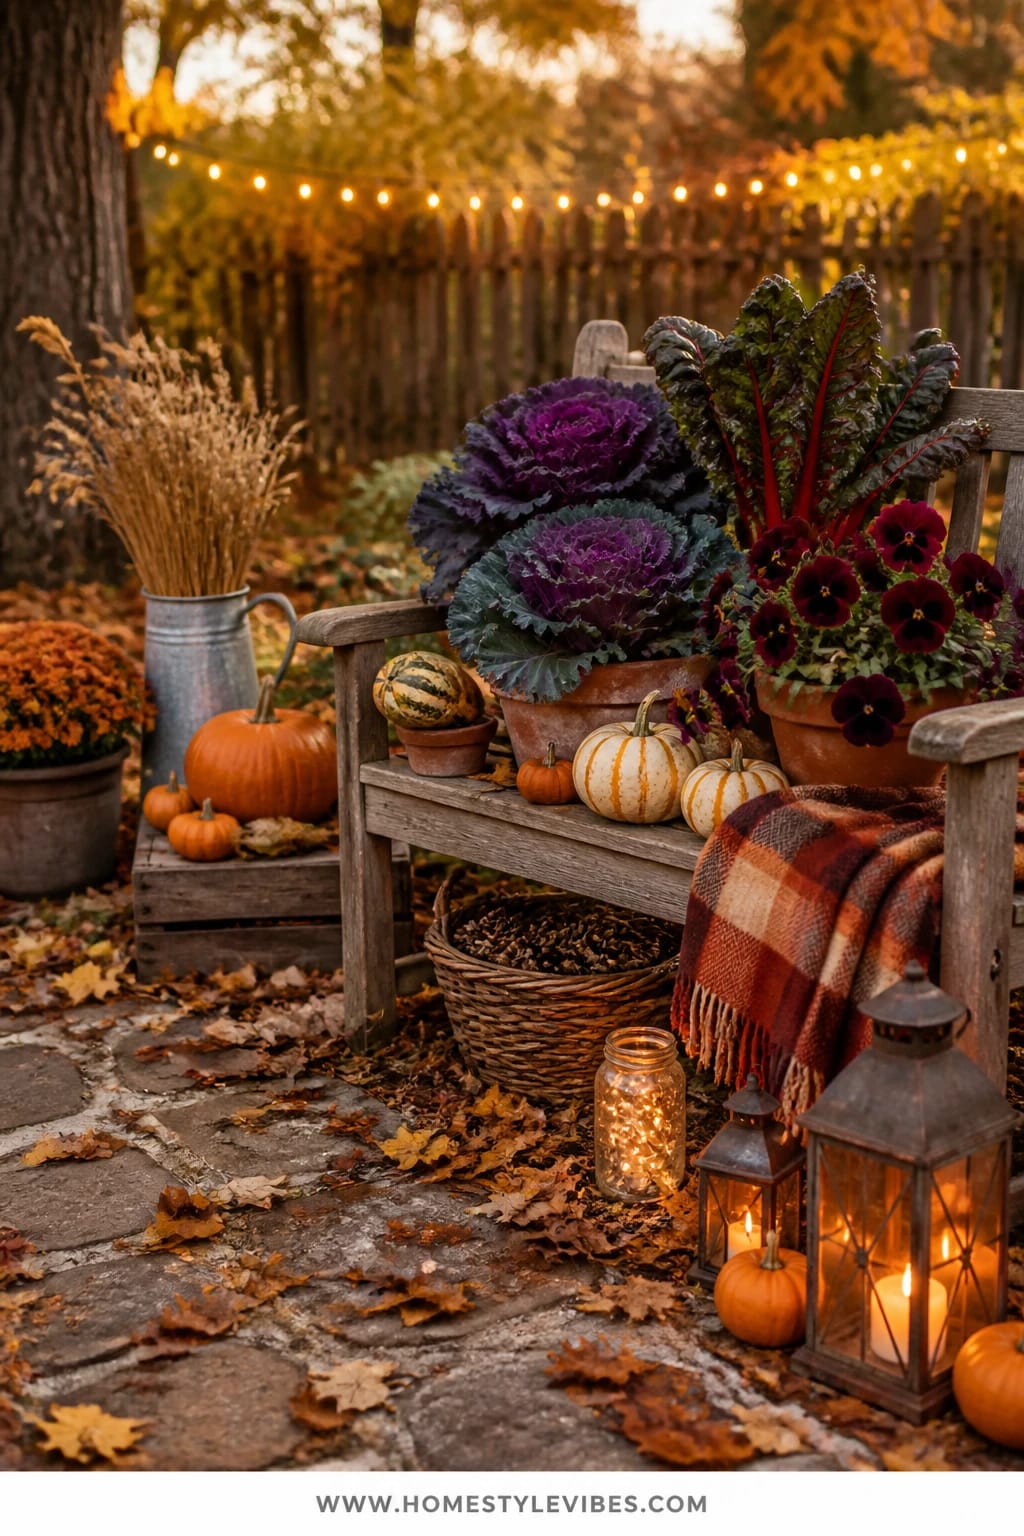
Let’s talk garden benches. They’re notorious for looking lonely after summer blooms fade. Maybe you plop a cushion out there and it still feels like a stage waiting for actors. This setup turns your garden bench into a moody, abundant corner using edible ornamentals like burgundy ornamental kale, deep green Swiss chard, and dusky purple pansies, plus pumpkins and one or two lanterns for glow. The mood is cozy-cabin-meets-kitchen-garden: very “I make soup and wear chunky sweaters.”
Real home perks: these plants thrive in cool temps and keep their color even after a light frost. They’re sturdy, pet-friendly, and easy to water in one go. The lantern’s golden glow nestles under the bench seat, lighting the arrangement from below and making the colors look saturated and rich for evening photos. A little moss or straw hides plastic pot rims and finishes the look.
Variations: go small-space with a single large bowl planter on the bench filled with purple kale, creeping thyme, and mini white pumpkins. Prefer neutrals? Swap orange pumpkins for ghost-white and muted green heirlooms. Budget trick: buy veggie starts from the grocery store’s produce section—yes, sometimes they have living herb pots and tiny kales that work great.
Budget Breakdown:
- Ornamental kale and chard (3–5 plants): $15–$40
- Pansies or violas (6-pack): $4–$8
- Pumpkins (3–5 mixed sizes): $15–$40
- Lantern (1–2) + candles: $20–$80
- Moss or straw topper: $6–$10
Total Estimated Cost: $60 – $178
Best For: Side-yard nooks, cottage-style gardens, or porches with a bench that needs love. Great for October into late November.
Key Design Elements:
- Main seasonal props: burgundy kale, pansies, pumpkins, lantern
- Color palette: burgundy, deep green, cream, and muted orange
- Lighting strategy: one lantern placed low for up-lighting
- Textile layers: a plaid wool scarf draped across one bench corner
- Natural elements: straw and moss fillers
- Accent details: aged terracotta or galvanized tubs
How To Recreate This Look:
- Start by clearing the bench and sweeping the area beneath.
- Add one large kale to anchor the scene, then flank it with smaller chard and pansies.
- Layer in pumpkins at differing heights—one on the bench, a couple below.
- Place the lantern slightly off-center under the bench seat.
- Style with moss around pot rims and a plaid scarf tossed casually at one end.
Why This Reads High-End: Using edible ornamentals with rich tones looks bespoke, like something from a chef’s garden. The under-lighting adds theatrical depth at night.
The Most Common Mistake: Spreading plants too far apart. Keep them clustered and tight for a lush look—gaps make everything feel skimpy.
Pro Styling Tip: For photos, slightly mist kale leaves so they catch tiny highlights that read as freshness and texture.
4. Plaid-Lined Patio Table Planters With Rust-Toned Pumpkins And Leaf Garland
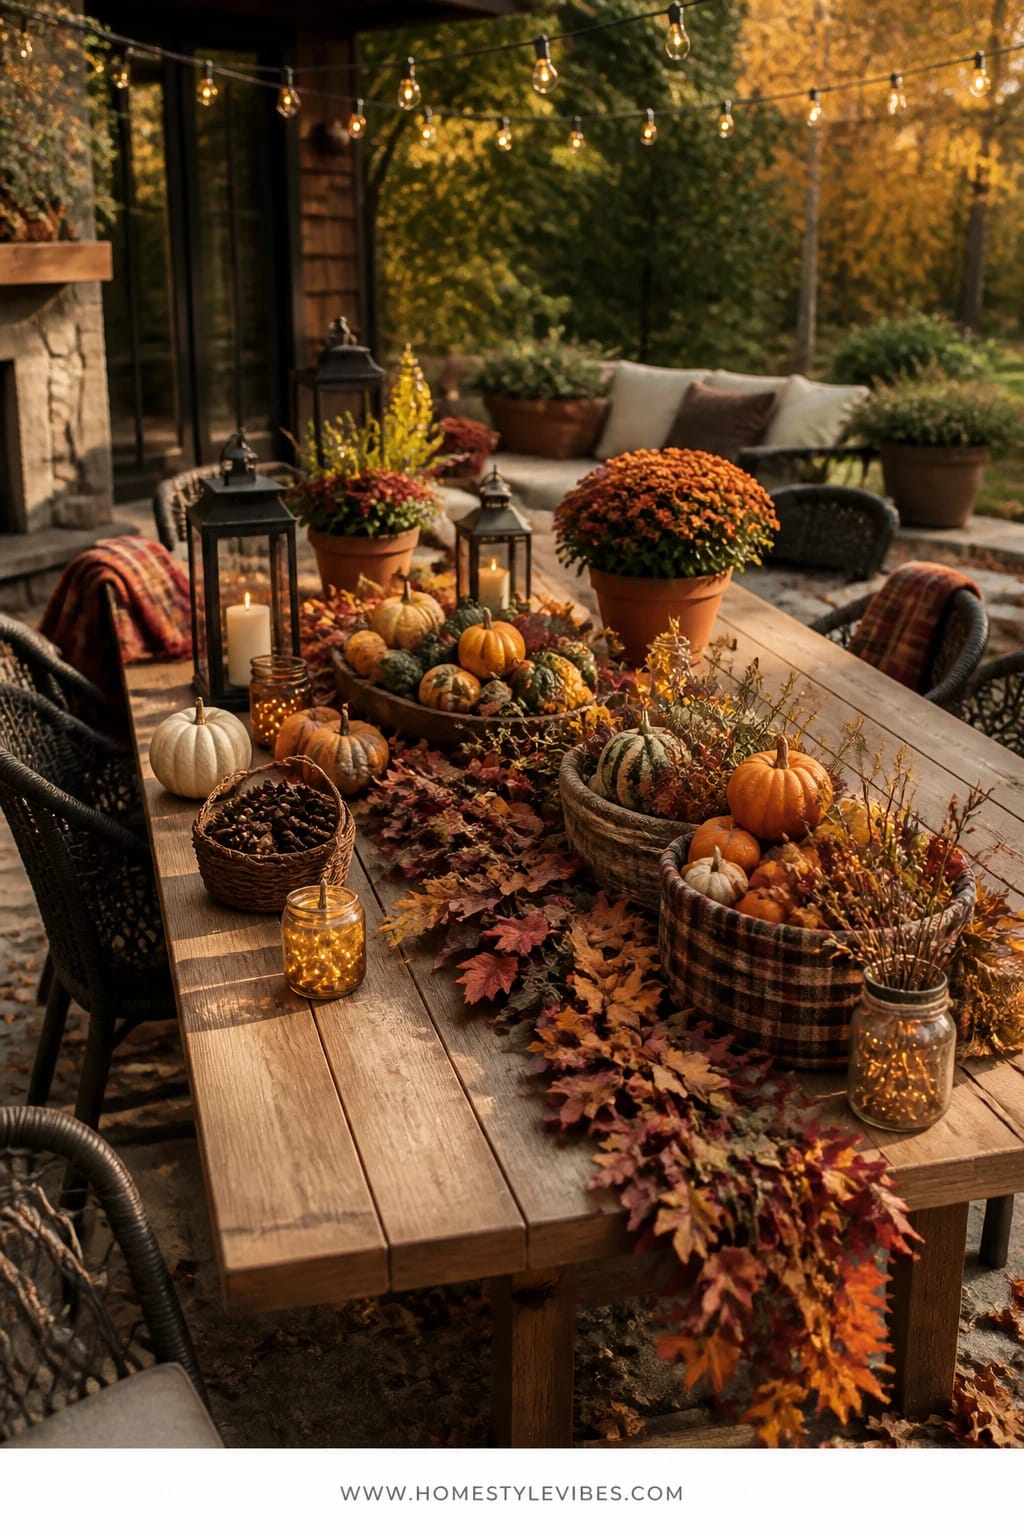
Patio tables can feel cold once summer ends. The umbrella comes down, the flowers fade, and suddenly it’s just a lonely surface. This idea creates a centerpiece that radiates fall warmth using a pair of low planters lined with plaid fabric, filled with mini pumpkins and clipped branches, then connected by a rust-hued leaf garland that runs like a river of color down the middle. The mood is “harvest supper under cafe lights” even if you’re eating takeout and wearing a hoodie.
Why this works: low planters won’t block faces, so you can still gather around. The plaid liner adds unexpected textile texture that feels homey and layered (plus it hides not-so-pretty plastic pots). Rust leaf garland brings the color story together. This setup photographs beautifully thanks to repeating shapes (pumpkins) and the linear flow of the garland, which draws the eye across the table.
Variations: no patio table? Use a small bistro table with one planter and a short garland loop. Prefer neutrals? Try tan or cream plaid with soft eucalyptus garland and white pumpkins. Budget-friendly? Use thrifted bowls as planters and tuck in leaf stems instead of a full garland.
Budget Breakdown:
- Low planters or bowls (2): $20–$80
- Plaid fabric or scarf liner: $8–$25
- Mini pumpkins and gourds (10–16): $15–$40
- Leaf garland in rust tones (1–2 strands): $15–$50
- Clipped branches or faux stems: $0–$20
Total Estimated Cost: $58 – $215
Best For: Patios that host casual hangouts; great through October, then swap the pumpkins for pinecones for a late-fall look.
Key Design Elements:
- Main seasonal props: mini pumpkins, rust leaf garland, plaid liner
- Color palette: rust, pumpkin orange, cream, and charcoal from the plaid
- Lighting strategy: optional tea lights in small glass cups scattered along the garland
- Textile layers: plaid fabric inside bowls, a runner if desired
- Natural elements: clipped branches, twigs, or eucalyptus
- Accent details: matte ceramic bowls, weathered wood table
How To Recreate This Look:
- Start by centering two low bowls on the patio table.
- Add a square of plaid fabric to each, letting the corners drape over the rim.
- Layer in mini pumpkins, mixing colors and shapes snugly.
- Place the rust garland to connect both bowls and snake it slightly for movement.
- Style with a few tea lights in clear cups tucked safely among the pumpkins.
Why This Looks Intentional: The repeated elements (two bowls) and a single color story (rust) keep it cohesive. The fabric liner adds softness that “finishes” the display, the way a rug finishes a room.
Don’t Do This: Skip overly tall candles on windy nights—they’ll lean, drip, and look messy. Use enclosed tea lights or battery options instead.
Pro Styling Tip: Angle your garland so it slightly crosses the centerline of the table for a dynamic composition that reads beautifully in photos.
Quick pause for real talk: I once tried to style a patio table centerpiece with four different garlands because I couldn’t decide. It looked like a tangled forest situation until I pulled back to just one rust strand. The secret isn’t “more stuff”—it’s editing and glow.
5. Lantern-Framed Front Door Planters With Burnt Orange Pumpkins And Pinecones
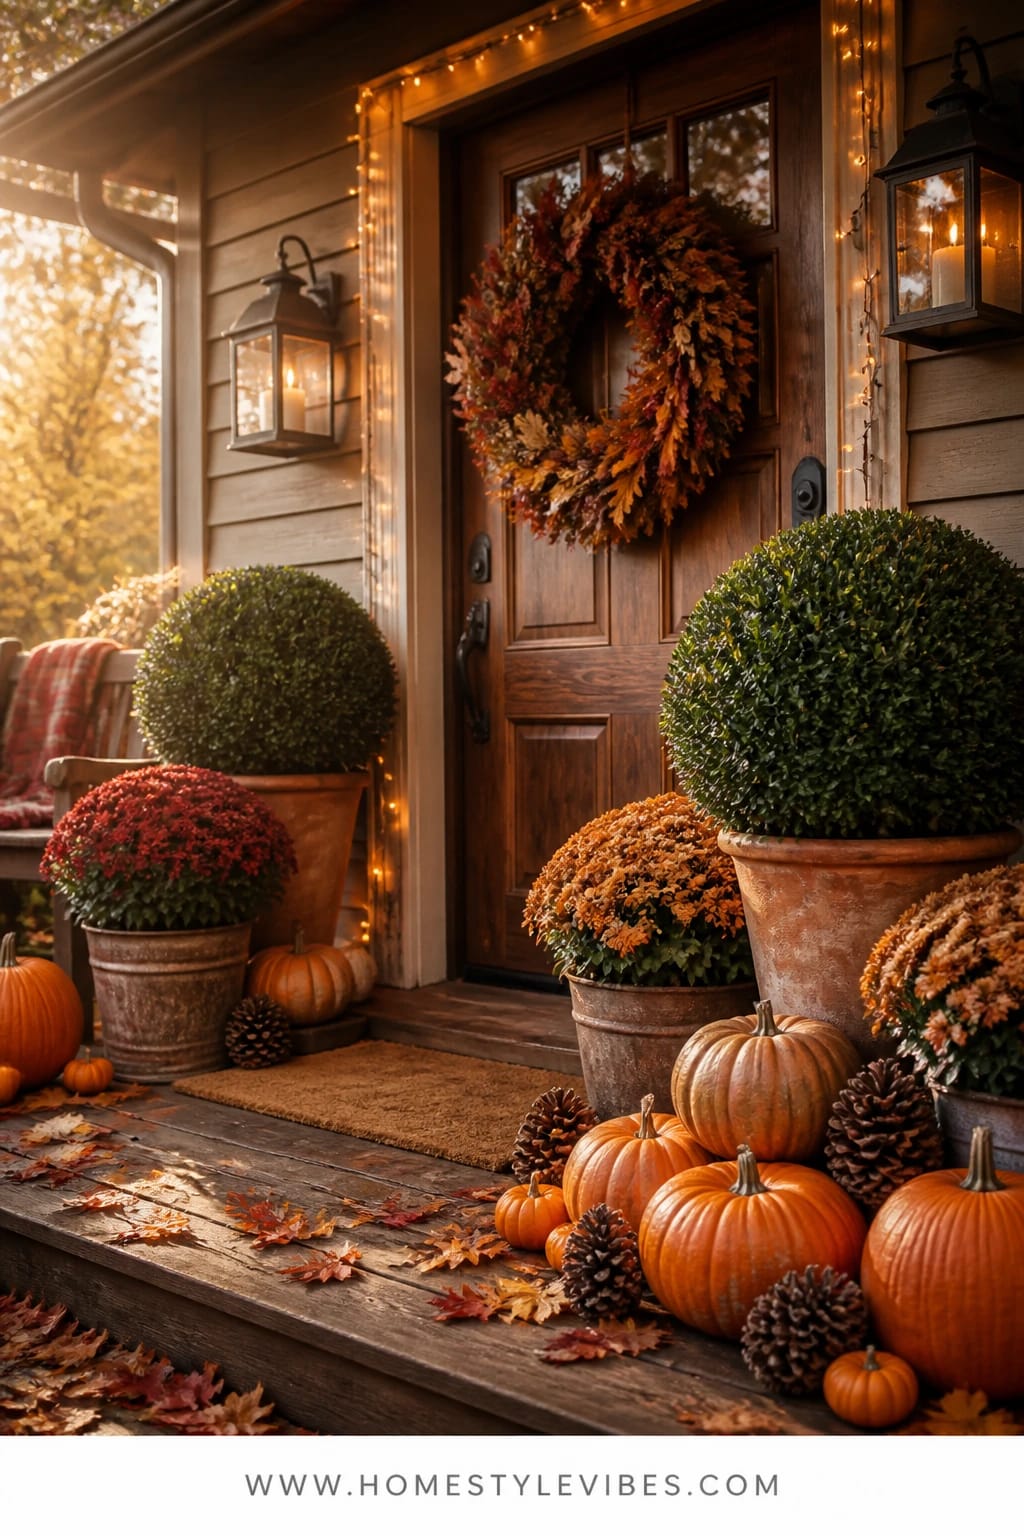
You’ve got planters by the front door, but they feel like summer leftovers in September. Or worse, empty. This look pairs structured evergreen or boxwood forms with seasonal accents—burnt orange pumpkins and chunky pinecones—then frames the whole doorway with tall lanterns for warm symmetry. The mood is classic and welcoming, the sort of entry that says, “We have hot cider inside.”
Here’s why it works: keeping the base greenery perennial (or faux) gives year-round structure, and the seasonal layer rides on top—less to redo later. Pinecones bring the bridge-to-winter texture, so you can keep this combo well into late fall just by swapping the pumpkins for cedar clippings after Thanksgiving. Designer-wise, the symmetry of matching planters and lanterns reads polished from the street.
Variations: no boxwood? Use rosemary topiaries or even tall grasses. Prefer asymmetry? Put a single tall lantern on one side and a stack of pumpkins on the other for a casual, collected feel. Tight budget? Thrift lanterns and refresh with high-heat matte black spray paint.
Budget Breakdown:
- Two front door planters with evergreen base: $40–$160
- Burnt orange pumpkins (4–6 mixed sizes): $20–$50
- Pinecones (bag): $8–$18
- Tall lanterns (2): $40–$180
- Battery pillar candles (2–4): $20–$45
Total Estimated Cost: $128 – $453
Best For: Traditional or modern entries that benefit from clean lines. Great for busy households; durable and family-friendly.
Key Design Elements:
- Main seasonal props: burnt orange pumpkins, pinecones, lanterns
- Color palette: deep green, burnt orange, warm bronze/black
- Lighting strategy: lanterns with timers to click on at dusk
- Textile layers: optional doormat with warm-toned plaid pattern
- Natural elements: evergreen base, cedar or magnolia clippings later
- Accent details: brass handles, matte lantern finishes
How To Recreate This Look:
- Start by fluffing or trimming your evergreen base in each planter.
- Add pumpkins low around the base, staggering sizes for a natural scatter.
- Tuck pinecones at the edges and near the stems for layered texture.
- Place one lantern beside each planter; set candles to a warm-white timer.
- Style with a new coir mat and, if you like, a plaid layering rug beneath it.
Why This Looks Expensive: Year-round structure with seasonal accents reads elevated. The lantern height frames the door like lighting in a fine entryway.
Watch Out: Avoid mixing too many pumpkin colors here. Stick to burnt orange and maybe one heirloom green—more than that competes with the greenery.
Pro Styling Tip: Position lanterns so their light grazes the planter edges—grazing light creates highlights and shadows that add instant dimension in photos.
6. Copper-Burnished Barrel Planter With Candles And Dried Wheat On The Porch Steps
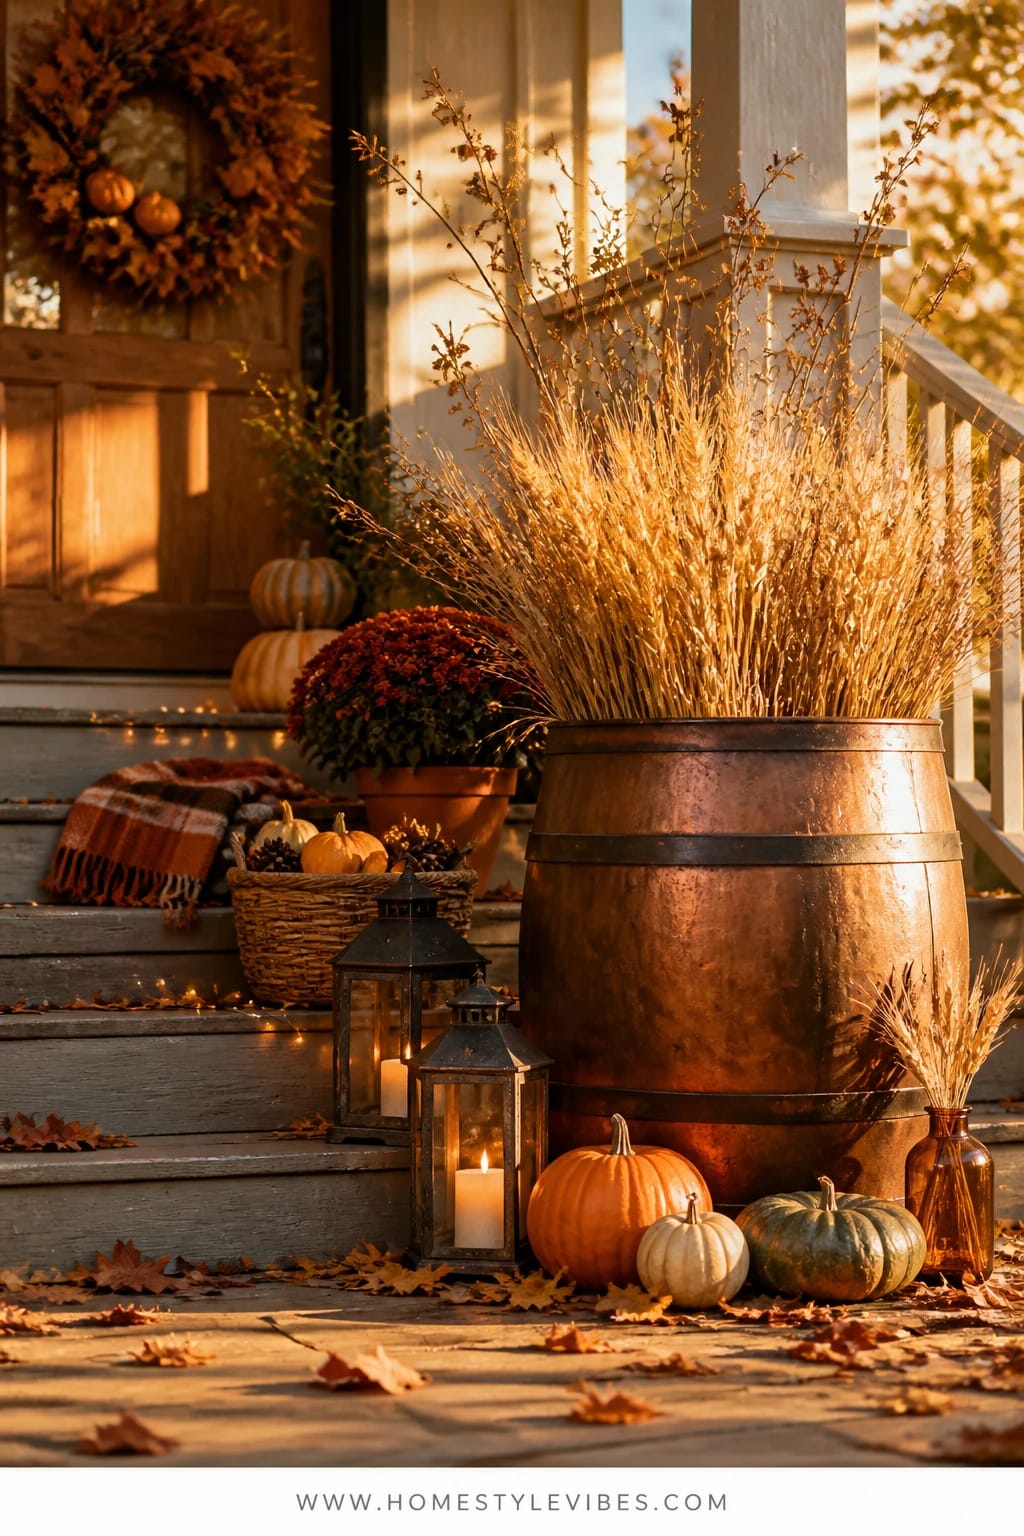
Some corners crave drama. If your porch steps have a wide landing or a little nook, a single oversized barrel planter in a copper-burnished finish can carry the whole scene. Fill it with dried wheat, branches, and a cluster of safe outdoor candles nestled in at mid-height, so the light shines through the stalks. Add a few pumpkins at the base and boom: warm, cinematic glow that stops neighbors in their tracks.
Real-life practicality: dried wheat looks the same from early fall to late November, and a single statement planter is easy to maintain. Battery candles on timers keep it low-fuss. Plus, the metallic-copper finish bounces warm light at dusk, getting you that rich, candlelit warmth even before you flip any switches.
Variations: keep it neutral with white pumpkins and tan wheat, or go moody with deep rust candles and a handful of burgundy preserved eucalyptus stems mixed in. Budget idea: use a wooden half-barrel and rub a little metallic craft wax to give it a copper-kissed edge without a full paint job.
Budget Breakdown:
- Oversized barrel planter: $40–$120
- Dried wheat bundles (3–5): $15–$40
- Branches (for height): $0–$10
- Outdoor-safe LED candles (3–5): $25–$70
- Pumpkins (2–4): $10–$35
Total Estimated Cost: $90 – $275
Best For: Larger porches or step landings that can host one bold piece. Ideal for mid-October nights and any home that wants a candle-forward moment outdoors.
Key Design Elements:
- Main seasonal props: dried wheat, LED candles, pumpkins
- Color palette: copper, tan, cream, and soft rust
- Lighting strategy: candles placed at mid-height inside the arrangement
- Textile layers: optional woven basket nearby with a plaid throw for softness
- Natural elements: branches, wheat, gourds at the base
- Accent details: copper-burnished finish, brass candle cups
How To Recreate This Look:
- Start by weighting the bottom of your planter with rocks for stability.
- Add a grid of chicken wire or foam to hold wheat upright.
- Layer wheat in a dome shape, mixing heights for movement.
- Place LED candles at mid-level on upside-down nursery pots hidden within.
- Style pumpkins at the base and tuck in a few wheat sprigs for cohesion.
Why This Feels Designer: A single oversized statement with a metallic accent and internal lighting looks curated, like a focal point in a styled photoshoot.
One Thing To Avoid: Don’t place candles too low; the glow gets lost. Mid-height light shines through the stalks and reads beautifully at night.
Pro Styling Tip: For a warm, saturated photo, shoot at blue hour—when the sky is dusky—so the candlelight feels extra golden by contrast.
Remember: you don’t have to chase every trend. Pick one anchor—lanterns, plaid, or dried florals—and repeat it. Repetition calms the eye and makes the whole porch feel finished.
7. Golden Leaf Wreath And String Lights Pairing With Pumpkin Planters At The Front Door
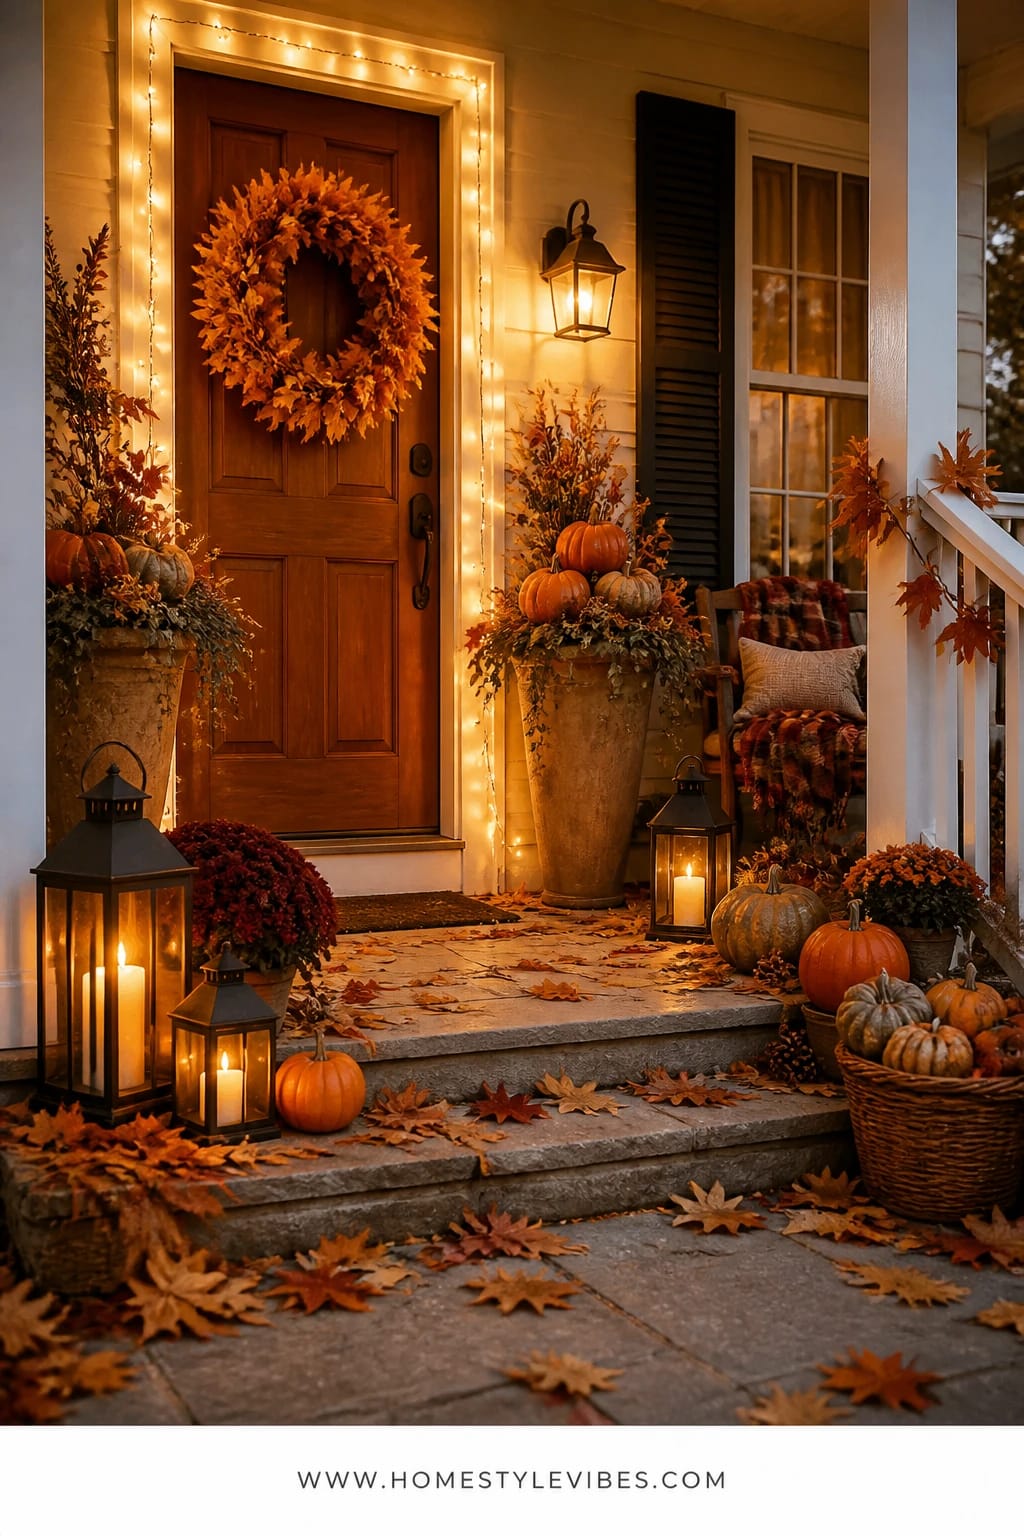
Sometimes the issue isn’t your plants—it’s the lack of a vertical focal point. You hang one wreath and it still feels underwhelming from the street. Pair a golden leaf wreath on the door with warm string lights traced along the doorframe, then echo that glow with two pumpkin-packed planters below. The result? A cohesive column of light and color that reads from half a block away.
Why this setup shines: the eye loves repetition. Golden tones at eye level (wreath), at the frame (string lights), and at the ground (planters) create a visual triangle that feels balanced and festive. The planters bring saturated color—think burnt orange, mustard mums, and variegated ivy—while the string lights add that fairytale sparkle that photographs like a postcard. Bonus: the whole scene can live from early fall through Thanksgiving with minimal edits.
Variations: If your door color clashes with gold, choose a coppery wreath or one with magnolia leaves. For the planters, go monochrome with all-white pumpkins and cream mums if you’re feeling minimal. Small stoop? Use one planter and a thinner wreath; keep the lights tighter to the trim.
Budget Breakdown:
- Golden leaf wreath: $25–$120
- Warm string lights (outdoor-rated): $15–$40
- Two planters with mums, ivy, and pumpkins: $50–$160
- Adhesive light clips or hooks: $6–$12
- Moss or straw topper: $6–$10
Total Estimated Cost: $102 – $342
Best For: Front doors that need nighttime presence; homes with darker exteriors benefit from the warm silhouette. Great from late September onward.
Key Design Elements:
- Main seasonal props: golden leaf wreath, string lights, pumpkin planters
- Color palette: gold, burnt orange, mustard, and deep green
- Lighting strategy: string lights on a timer, warm-white bulbs
- Textile layers: optional plaid doormat or runner at the threshold
- Natural elements: mums, ivy, pumpkins
- Accent details: brass door hardware, thin black light clips
How To Recreate This Look:
- Start by hanging the wreath centered and secure.
- Add string lights around the doorframe with clear outdoor clips—keep spacing even.
- Layer planters with a tall mum at the center, trailing ivy at edges, and pumpkins tucked in.
- Place a coir doormat; if layering, add a plaid rug underneath.
- Style with moss to cover soil and hide any plastic rims for a polished finish.
Why This Looks Intentional: The vertical repetition of gold light ties every element together. It reads as a single composition, not separate pieces fighting for attention.
The Most Common Mistake: Using cool-white lights. Cool tones clash with fall warmth and photograph harsh. Choose warm or amber bulbs every time.
Pro Styling Tip: For photos, step back and include a sliver of your path or steps in the frame—foreground adds depth and makes the glow feel inviting.
Before we wrap up, a little honesty: I once over-watered my fall planters because I missed babying summer petunias. Fall plants need less—cool air plus rain does most of the work. When in doubt, check soil moisture with your finger. Dry an inch down? Water. Still cool and damp? Wait a day.
Quick Checklist
- Warm-white or amber outdoor string lights
- Lanterns in black, bronze, or brass
- Real or heirloom pumpkins in varied sizes
- Mums in rust, burgundy, cream, or mustard
- Dried wheat, pampas, or millet bundles
- Pinecones for texture and late-fall bridge
- Moss or straw to hide soil and pot rims
- Plaid fabric or scarves for soft layers
- Sturdy planters or urns with weight for wind
- Battery candles on timers for hassle-free glow
- Clear outdoor light clips and extra batteries
- Coir doormat and optional plaid layering rug
Frequently Asked Questions
How can I keep costs under control while still getting that abundant fall look?
Pick one anchor element and repeat it. For example, buy one large mum and two smalls, then surround them with affordable mini pumpkins and a single lantern. Thrift planters and lanterns, and use moss or straw to hide budget pots. Editing to a tight color story—rust and cream, or gold and green—makes everything feel finished without buying more.
Are real pumpkins and florals better than faux for outdoor planters?
IMO, real pumpkins outdoors always win for texture and color variation. They photograph beautifully and last weeks in cool weather. Dried florals and grasses are a great middle ground—real, but long-lasting. If you go faux, keep to high-quality stems and mix them with real moss or pinecones so the overall read is natural.
My porch is tiny. Which planter idea works best in a small space?
Try the dried floral urns by the front door (Section 2) with a single urn, or the barrel planter with candles (Section 6) as one strong statement. One bold piece plus a small lantern beats five mini items that read cluttered. Keep colors cohesive and tuck mini pumpkins in tight clusters instead of scattering.
How do I store decor after the season without taking over my garage?
Group by category: one bin for lighting, one for textiles and garlands, one for faux stems. Nest lanterns and use soft items like scarves to cushion them. For dried florals, store upright in a tall box lined with paper so they don’t crush. Label bins by “Front Door Fall” or “Patio Table Fall” so next year you can recreate fast.
What about pets and kids—are candles and string lights safe on the porch?
Use outdoor-safe LED candles in lanterns and keep cords clipped firmly along trim or tucked behind planters. Avoid loose tea lights on steps where little hands can reach. If you have chewers, battery packs should live inside planters or behind lantern bases where they can’t be accessed.
When should I start decorating for fall outside?
Kick off with dried elements and string lights in early September. Add mums and pumpkins by late September. If you’re in a warm climate, wait until nights cool down to avoid wilting. Keep the base the same and just refresh pumpkins mid-October if needed.
Wrap-Up: Your Porch, Your Season
Feeling excited yet? You’ve got seven fall outdoor planter ideas that add color to your porch and garden, each with a clear plan and a warm, cozy payoff. Pick one place—a lonely bench, the front door, the bottom two porch steps—and start there. One hour, one color story, one or two glow points. That’s it.
The truth is, cozy doesn’t come from buying everything in the seasonal aisle. It comes from layering: warm light, saturated fall color, generous texture, and a few thoughtful repeats. Let the mums do the heavy lifting, let pumpkins add the sculptural shape, and let lanterns and string lights pull it all together every evening when the sky turns lavender.
You don’t need a design degree. You need to trust your eye, keep the palette tight, and give yourself permission to play. Step outside tonight, light the lanterns, and enjoy that golden glow on your own porch. You’ve got this—and it’s going to look beautiful.

About the Author

Krisztina P.Rendes, Founder of Home Style Vibes
Founder of Home Style Vibes
Krisztina Puskásné Rendes created Home Style Vibes as a cozy-modern lifestyle space where homemaking meets inspiration. Her goal is to help women create beautiful, organized, and peaceful homes they truly love — without overwhelm. You’ll find here heart-driven content on home decor, cleaning tips, easy family recipes, organization and decluttering, DIY home projects, plants, and seasonal ideas — all designed to bring more calm, comfort, and style into everyday life.