5 Thanksgiving Kids Table Ideas That Keep Little Ones Happy And Busy
You want a Thanksgiving that feels like a warm, golden movie scene—amber candle glow, plaid napkins, bowls of cider donuts within arm’s reach, and grown-up conversation that doesn’t get derailed every eight minutes. You hate that the kids’ table usually turns into a paper-and-crumb tornado with three meltdowns before the turkey is sliced. This guide lands you squarely in cozy-bright autumn territory—rich rusts, soft burgundy, cheerful plaid, pumpkins, and that honeyed light that makes every photo look like a memory. And yes, these 5 Thanksgiving kids’ table ideas will actually keep little ones happy and busy—on a real-life budget, in a real home, with supplies you can pull together in a week.
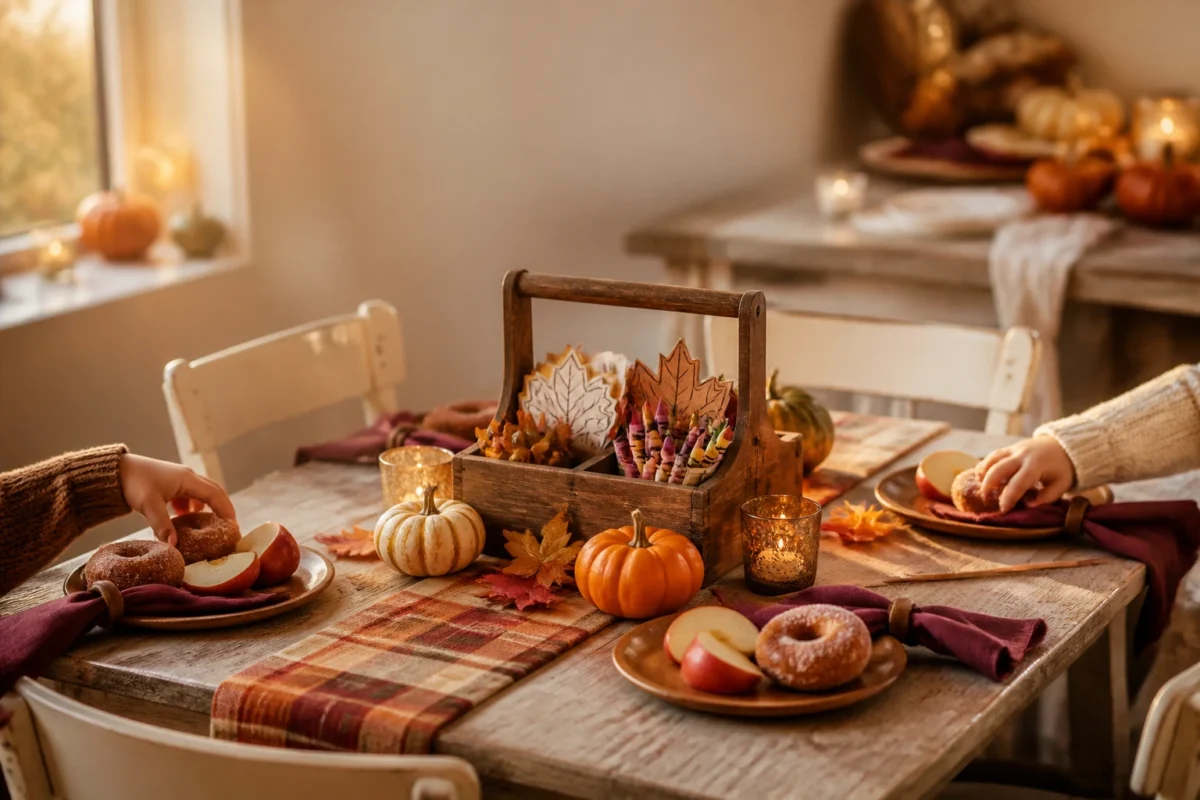
Expect simple setups that feel abundant and festive without becoming a craft store explosion. Think tactile textiles, activity stations tucked into your centerpiece, and smart layouts that give kids things to do while they munch. We’re talking photogenic, Pinterest-ready moments, but designed to hold up to flying peas and crayon enthusiasm. If your style leans cozy, color-filled, and family-forward, this is your sweet spot—and it’s perfect from mid-October through Thanksgiving weekend.
1) Pumpkin Craft Caddy With Amber Glow On A Farmhouse Dining Table
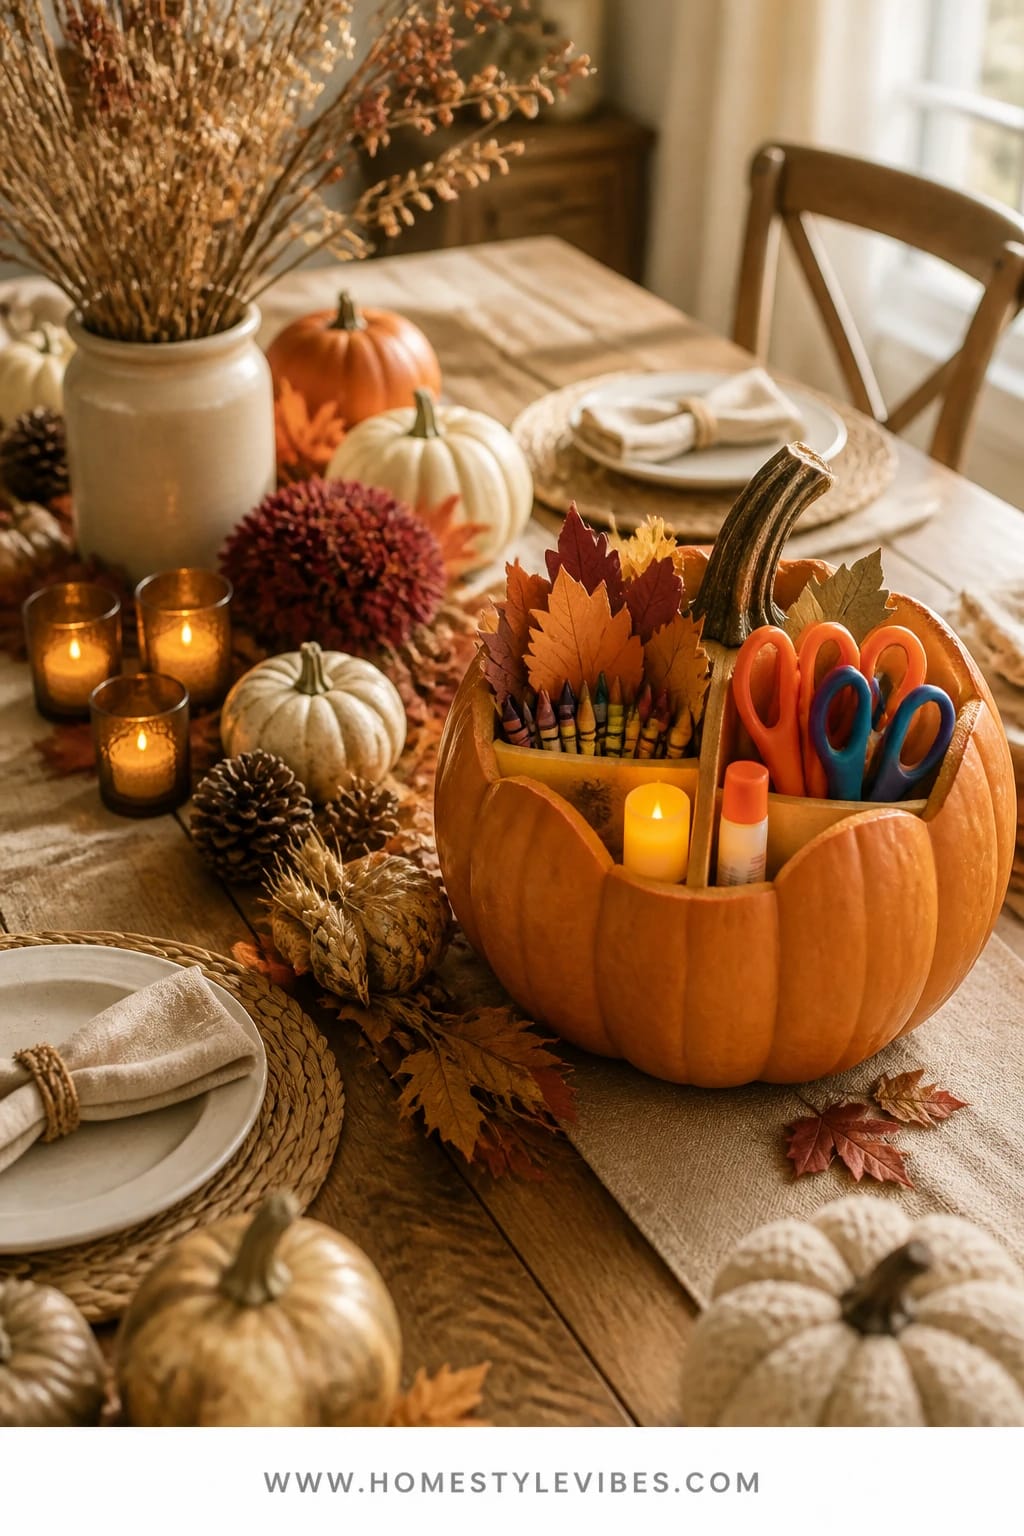
We’ve all been there: you set the kid table, place the crayons, and within five minutes everything has rolled under a chair or gotten lost inside a napkin fold. The vibe you want is harvest abundance—pumpkins, amber candlelight, plaid layers—but the reality is chaos. This pumpkin craft caddy solves the sprawl and makes the table feel like an inviting fall workshop kids can actually manage while they nibble.
The mood is cozy-bright all the way: an amber glow from flameless votives peeking between mini pumpkins, saturated yet warm color from rust napkins and a burgundy-gingham runner, and a sturdy wooden caddy down the center filled with pre-bundled activities. It works because every supply has a home, and that home is right in front of them. The lighting isn’t just pretty—it’s functional, giving a warm cast that makes colored pencils and stickers easier to spot without going full overhead interrogation light. You’ll use kidproof materials—washable markers, stamp pads that won’t transfer on elbows—and props that store flat for next year.
Why it photographs beautifully: depth and layers. A caddy feels sculptural; pumpkins add height; little jars of crayons create a repeating rhythm. If your dining room catches that golden late-afternoon window light, trust me, the coppery tones of the caddy and orange pumpkins will hum on camera.
Variations: For small spaces, scale the caddy down to a handled breadboard with jam jars as compartments. On a tight budget, use a clean shoe box wrapped in kraft paper, then line with plastic containers from yogurt or applesauce. Want a gentler palette? Swap bright orange pumpkins for soft rust and cream pumpkins and use tan kraft paper runners with a faint plaid tape border.
Budget Breakdown:
- Wooden caddy or divided tray: $15–$35
- Mini pumpkins (real or faux): $1–$3 each (6–10 pieces)
- Flameless votive set (warm white): $12–$25
- Kraft paper roll runner: $6–$12
- Washable markers, crayons, stickers: $10–$20
- Mason or jam jars for sorting: $0–$12 (save and reuse)
- Rust or burgundy cloth napkins: $12–$24 (set of 4)
Total Estimated Cost: $56–$131
Best For: Family dining rooms where the kids share table space with adults or nearby; hosts who like a sentimental, homemade vibe and want the table activity to last from appetizers to pie.
Key Design Elements:
- Main seasonal props: Mini pumpkins, flameless votives, plaid runner
- Color palette: Amber, rust, burgundy, warm wood
- Lighting strategy: Low flameless candles along the caddy, dimmed overhead fixtures
- Textile layers: Plaid or gingham runner, cotton napkins, optional seat cushions
- Natural elements: Real mini pumpkins, dried wheat sprigs tucked into the caddy
- Accent details (vessels, baskets, metal accents): Mason jars, small copper cups, wooden compartments
How To Recreate This Look:
- Start with a kraft paper runner down your farmhouse dining table to create a neutral, writable base.
- Add a divided wooden caddy in the center and fill with jars of crayons, markers, glue sticks, and fall stickers.
- Layer in mini pumpkins around and inside the caddy, spacing them in odd-numbered clusters for a natural look.
- Place flameless votives between pumpkins for that amber glow without safety worries.
- Style with rust or burgundy napkins and set a small pumpkin at each place as a name card holder using a toothpick flag.
Why This Looks Expensive: The secret is repetition with quality basics. Matching votives, a real-wood caddy, and consistent color in the pumpkins read intentional and finished, even though the supplies themselves are simple.
Watch Out: Don’t overload the caddy. Too many supplies invite mess. Keep it to three main tools (crayons/markers, stickers, glue) and rotate activities between courses if needed.
Pro Styling Tip: For photos, slide two votives to the front edge of the caddy, slightly off-center, so your camera catches warm light flaring across the pumpkins.
2) Plaid Paper Runner With Cider Crayon Cozies On A Kitchen Island
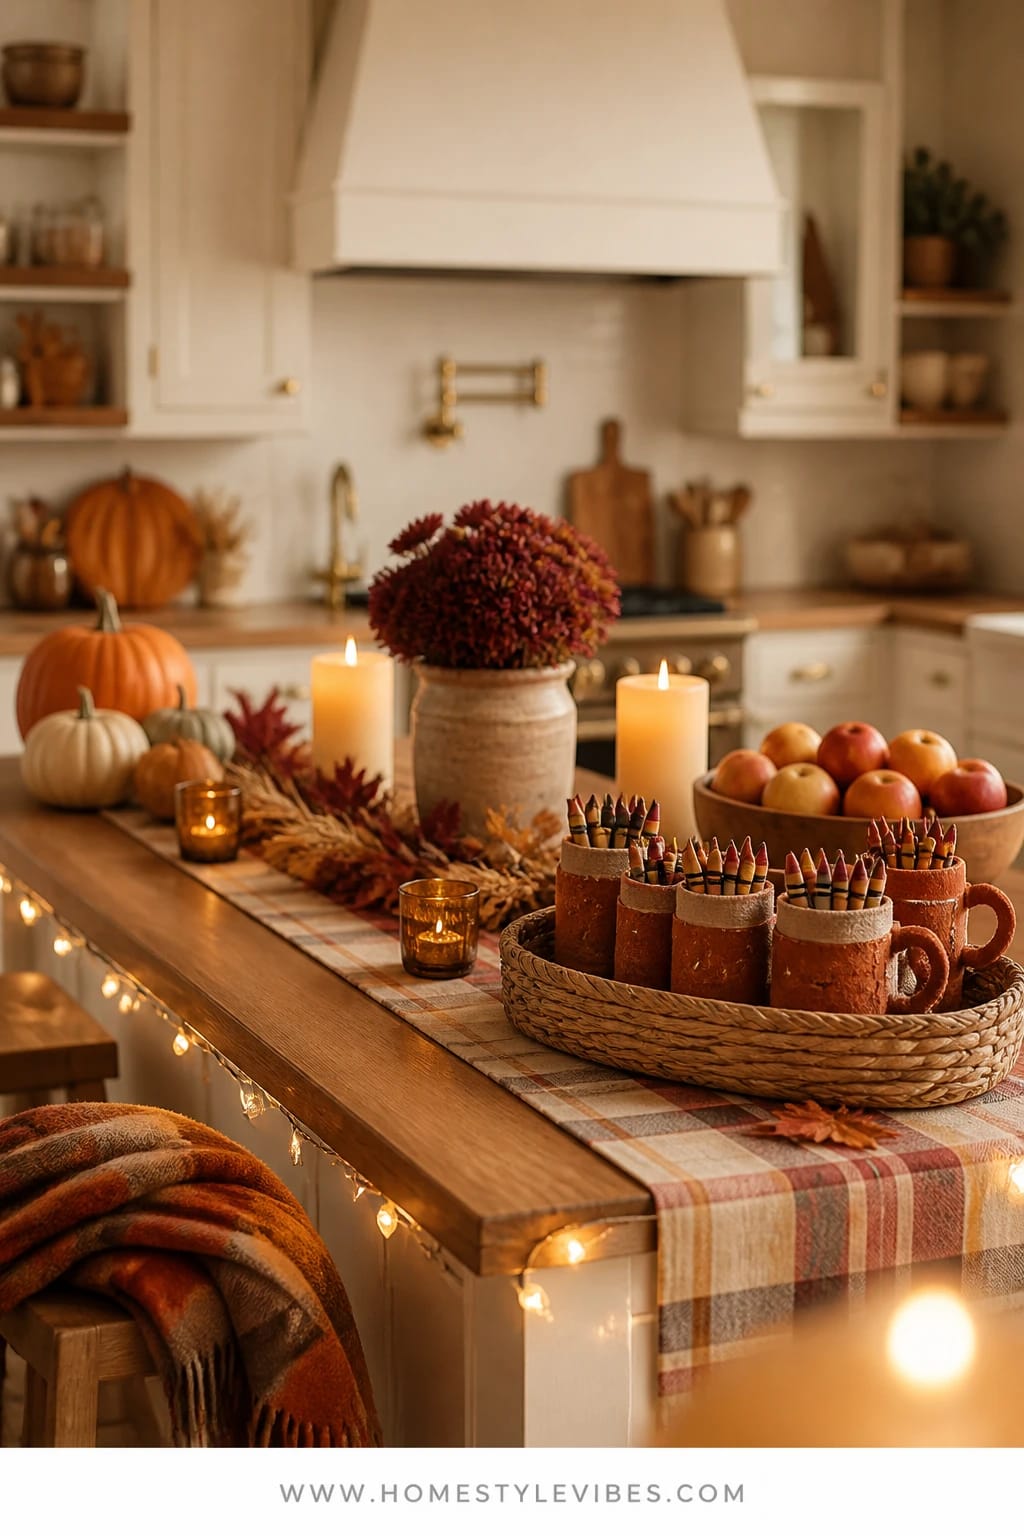
It’s that one spot that always feels off: the kitchen island becomes a landing pad for random kid stuff and half-eaten rolls. You’ve tried setting out coloring pages, but everything gets sticky. Let’s turn the island into a cheerful, contained activity zone that invites kids to perch while you carve, baste, and answer ten thousand questions with a smile.
The feeling here is bright, bustling, and beautifully casual—think plaid paper runner, a low basket of apples, and “cider crayon cozies” (felt sleeves tied with gingham ribbon) that feel seasonal and special. This works in real homes because kitchen islands are command central; kids want to be near the action. By giving them a soft landing with clear boundaries, you channel their energy into something productive. Lighting-wise, under-cabinet warmth and pendant glow bounce off the island surface and make colors pop, while still keeping the look tidy.
It photographs well because of graphic contrast: the stripe of plaid down the center, the tidy rows of crayons in felt sleeves, and round apples for a soft shape break. A shallow tray corrals everything so it never sprawls. If your kitchen leans white or light wood, the fall reds and golds will sing.
Variations: On a tiny island or peninsula, use a short runner rectangle just big enough for elbow room. If you’re low on time, skip the felt sleeves and tie crayons into trios with ribbon—fast and adorable. Want fewer crumbs? Offer “quiet snacks” like apple slices and cheese cubes instead of crackers.
Key Design Elements:
- Main seasonal props: Plaid paper runner, apples, cinnamon sticks
- Color palette: Cherry red, pumpkin orange, cinnamon brown, cream
- Lighting strategy: Warm pendants on a dimmer, a single battery tea light in a glass jar for soft glow
- Textile layers: Felt crayon cozies, gingham ribbon ties, cotton kitchen towels at seats
- Natural elements: Whole apples, a small bouquet of mums in a jar
- Accent details: Shallow wooden tray, enamel mugs for apple cider (or apple juice)
Budget Breakdown:
- Plaid paper runner: $8–$15
- Felt sheets for cozies: $4–$9
- Gingham ribbon: $3–$6
- Shallow wooden tray: $10–$25
- Battery tea lights and jar: $6–$12
- Bag of apples: $5–$8
- Enamel mugs (set of 4): $18–$28
Total Estimated Cost: $54–$103
Best For: Busy kitchens where kids hover; families who want an activity they can clean up in under two minutes when it’s time to plate the meal.
How To Recreate This Look:
- Roll out a plaid paper runner down the kitchen island, trimming to fit.
- Place a shallow wooden tray in the center with apples, a jar candle (battery), and a short stack of coloring cards.
- Create crayon cozies by folding felt strips around groups of 5–6 crayons and tying with ribbon.
- Set out enamel mugs and a small pitcher of apple juice; tuck cinnamon sticks nearby as stirrers.
- Keep a towel-lined basket at the end to catch used coloring pages and snack napkins.
Why This Feels Designer: The coordinated repeat—the plaid runner, the ribbon, the enamel mugs—communicates intention. It’s not about fancy items; it’s about harmony in color, scale, and function.
One Thing To Avoid: Don’t put sticky craft supplies (glue, paint) on the island if you’re cooking. Keep it strictly coloring and simple stickers so the surface stays dinner-ready.
Pro Styling Tip: Angle the tray slightly and offset the apple pile to one corner; asymmetry keeps the photo from looking like a product shot.
Remember, this isn’t about creating a showroom. It’s about a kids’ table that actually works for your family’s rhythms. If one idea resonates more than the others, that’s your starting point. You don’t need all five.
3) Leaf Garland Storyline With Golden Fairy Lights On A Breakfast Nook Table
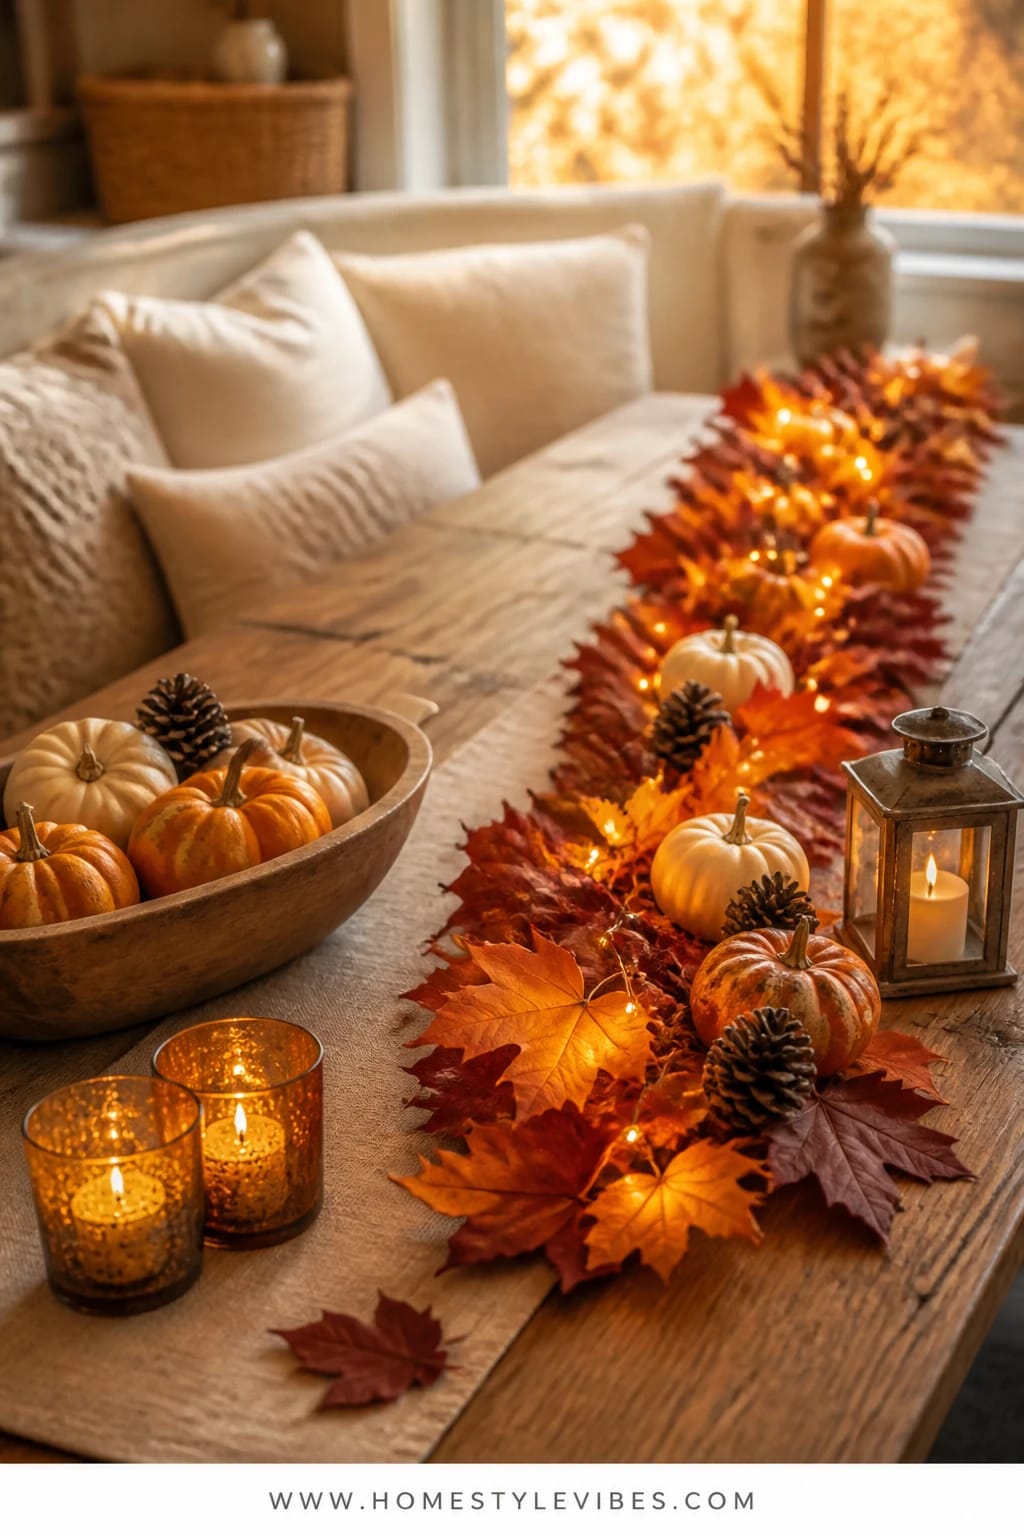
Ever notice how kids get restless between courses? That’s where this becomes magic. You create a gentle storytelling path right down the center of your breakfast nook table with a soft leaf garland, tiny pumpkins, and golden micro-lights woven through. Each child gets a stack of “story cards” with Thanksgiving-y prompts and blank backs for drawing. Dinner becomes a slow, sparkling scavenger hunt of imagination.
The mood is intimate and whimsical—cozy-bright meets twinkle. Warm string lights under the garland create tiny pockets of glow that make crayons and story cards feel a little enchanted. In a real home, this works because the breakfast nook is contained and close to the kitchen. You can listen in as kids invent turkey superheroes and pumpkin pirates while you plate the stuffing. Those fairy lights are clutch: they invite kids to lean in, literally bringing their focus to the tabletop.
Photographically, it’s dreamy: the garland creates a soft, meandering line; gold lights add bokeh; pumpkin stems give texture. Layer in a wool throw on the bench for a tactile moment and you’ve got a shot that looks like a memory you’ll want to revisit.
Variations: Tiny space? Use a single strand of faux leaves, 3–4 pumpkins, and one short fairy light string. Lower cost? Swap premade story cards for index cards with washi-taped borders. For a quieter palette, choose wheat-colored leaves and cream pumpkins with champagne micro-lights.
Budget Breakdown:
- Faux leaf garland: $12–$28
- Micro fairy lights (warm): $8–$16
- Mini pumpkins (cream and orange mix): $1–$3 each (6–8 pieces)
- Blank story cards or index cards: $3–$8
- Crayons/colored pencils: $5–$12
- Wool throw for bench: $25–$60 (reusable beyond the season)
Total Estimated Cost: $54–$127
Best For: Breakfast nooks with benches and a smaller kid group; families who love storytelling and want a low-mess, high-imagination activity.
Key Design Elements:
- Main seasonal props: Leaf garland, story cards
- Color palette: Golden light, harvest orange, cream, soft moss
- Lighting strategy: Micro-lights woven through garland, dimmed pendant overhead, candle-like glow without open flame
- Textile layers: Bench throw, cotton placemats, soft napkins
- Natural elements: Real pumpkins or dried leaves if you prefer
- Accent details: Brass or wood card holders, tiny clip pins for displaying finished art
How To Recreate This Look:
- Start with a neutral tablecloth or bare wood table for warmth.
- Add a single faux leaf garland down the middle, loosely draped.
- Weave a strand of warm micro-lights through the garland, tucking the battery pack in a small basket at the end.
- Place mini pumpkins along the garland in clusters of two and three.
- Set story cards at each place with crayons and a prompt (e.g., “Draw the turkey’s secret hideout”).
Why This Reads High-End: Restraint. Instead of 15 competing centerpieces, you have one continuous line of light and foliage that looks curated. Natural textures and a tight color story feel polished.
The Most Common Mistake: Over-bright lights. Cold, blue LEDs kill the cozy factor. Always choose warm white or amber micro-lights for that golden, fall feeling.
Pro Styling Tip: For photos, turn off harsh overheads and let the micro-lights do most of the work; it creates beautiful depth and a soft glow on small faces.
Honest moment: I once tried a super elaborate kids’ table with individual mini-easels and watercolor palettes. Gorgeous, but by the time the potatoes hit the table, everything was damp and the napkins were… abstract art. Keep it simple and dry at mealtime; save paint for post-pie.
4) Harvest Sticker Placemats With Honeyed Candles On A Dining Table Extension
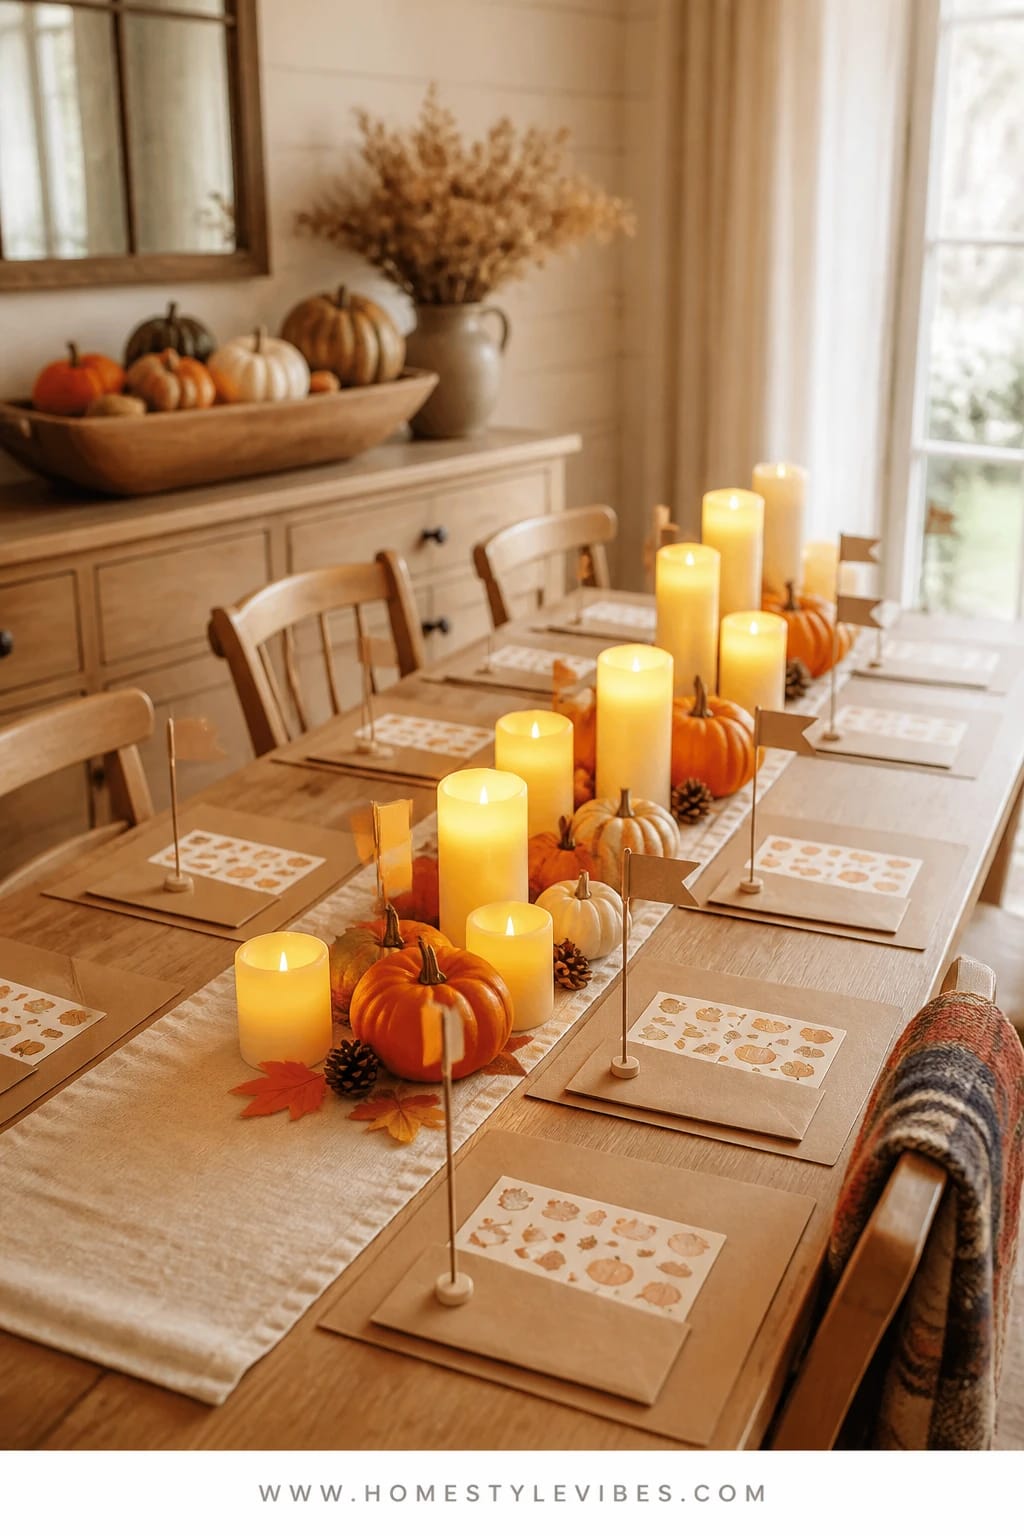
Big family? Add a dining table extension or a second folding table and let this idea carry the weight. You’ll create personal placemat kits that double as quiet entertainment and little memory-makers. Each child gets a kraft placemat, a sheet of autumn stickers, a name flag, and a pocket envelope to stash their finished art. Slide a line of honey-hued flameless pillars down the center to cast that soft, candlelit moment without any worry about sleeves near flames.
The mood is classic Thanksgiving: saturated rusts and golden warmth, low-center abundance, and activity that doesn’t require instructions. It works because sticker play is ageless and low-mess, and the placemat format has a clear “zone.” I’ve seen kids decorate, pause to eat, then return to their design between courses like little editors, moving leaves and turkeys around with serious concentration. The amber pillar “candles” add a gentle, flickering glow that flatters everything on the table and keeps the vibe calm.
Photographically this is a winner: uniform placemats lined up like a fall parade, glossy stickers catching the light, and the honey glow skimming across plates. Add one garland of faux berries or eucalyptus to soften the line and you’re set.
Variations: For a modern look, choose matte stickers in muted harvest tones (oatmeal, sage, soft rust). To save money, print black-and-white fall icons on regular paper and let kids color-and-cut to make their own “stickers” with glue sticks. If you want to lean more into color, use jewel-toned sticker dots to create “pie sprinkles” and “corn kernels” patterns.
Budget Breakdown:
- Kraft paper placemats: $6–$12 (pack)
- Autumn sticker sheets: $8–$20 (multi-pack)
- Small envelopes for keepsakes: $4–$8
- Flameless pillar candle set: $20–$40
- Simple faux berry/eucalyptus garland: $12–$24
- Name flags (or DIY from cardstock): $2–$6
Total Estimated Cost: $52–$110
Best For: Larger groups with mixed ages; hosts who prefer activities that stay in each kid’s “zone,” making cleanup and transitions smooth.
Key Design Elements:
- Main seasonal props: Kraft placemats, fall stickers, faux berry garland
- Color palette: Honey, rust, berry red, pumpkin orange
- Lighting strategy: Flameless amber pillar candles at varied heights
- Textile layers: Simple cotton runner under the candles, linen-look napkins
- Natural elements: Optional dried wheat bundles at table ends
- Accent details: Envelope “pockets,” tiny clothespins to clip artwork to the glass of a water goblet
How To Recreate This Look:
- Start by laying a neutral runner down the center of the extension table.
- Add flameless pillar candles in a staggered line; vary heights for interest.
- Layer a thin faux berry or eucalyptus garland around the candles.
- Place kraft placemats at each setting, tuck a sticker sheet and envelope under the napkin.
- Set a name flag into a mini pumpkin at each seat so kids know exactly where to land.
Why This Looks Intentional: Consistency in scale and spacing. Matching placemats, evenly spaced candles, and a repeating garland line make the table look composed and calm—even when kids are in full creative mode.
Don’t Do This: Avoid scented candles here, even flameless with fragrance. Competing smells during dinner can be overwhelming, and scent plus turkey equals headache.
Pro Styling Tip: Keep the candle cluster slightly denser in the middle third of the table; that’s where most photos end up framed.
Small reminder: progress over perfection. If the kids’ table looks half-done by showtime but the energy feels calm and happy, you’ve nailed it. The point is connection and color, not a museum exhibit.
5) Pumpkin Pie Play-Dough Bar With Warm String Lights On A Coffee Table
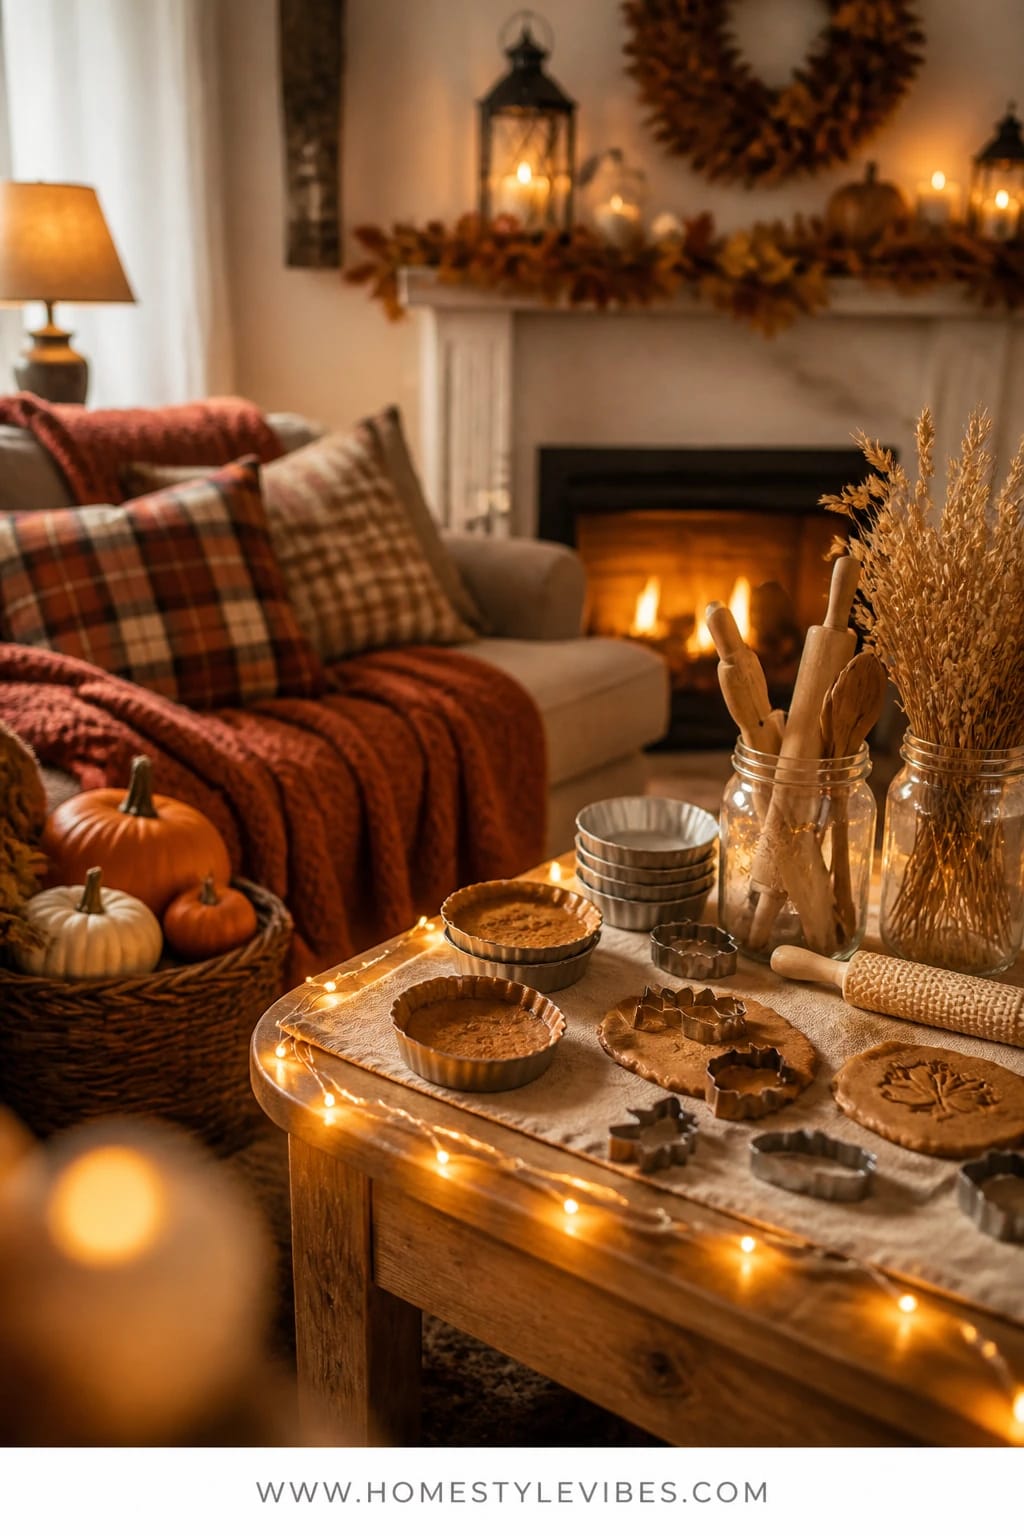
Here’s the truth: some kids need to move and squish. Coloring won’t cut it past minute twelve. A low-traffic coffee table a few steps from the main dining zone can transform into a pumpkin pie “bakery” with cinnamon-scented homemade play-dough, mini pie tins, and cookie cutters. Wrap the edge of the table with warm string lights (battery-powered) and the whole corner hums with cozy-bright fun.
The mood is festive and hands-on—think pumpkin spice, giggles, and soft textures on repeat. In real homes, a coffee table works because it’s low and accessible; preschoolers can stand or kneel comfortably. You keep the materials contained in lidded containers and swap in fresh batches post-dinner if you want round two. Lighting from a nearby lamp and the string lights sets a dreamy stage without being bright enough to overstimulate.
This photographs like a styled editorial: little hands pressing leaf shapes, warm light stringing across the scene, and neutral textiles grounding the color. Place a plaid blanket under the table if the flooring is delicate; your photos will get that extra layer of pattern and the kids get a soft landing zone.
Variations: For super small spaces, set this up on a sturdy ottoman tray with one container of dough and two cutters. If cinnamon-scented dough feels too messy, use store-bought dough in pumpkin and cream colors and add a single bottle of pumpkin-spice sprinkles for “topping.” Keep wipes nearby for quick resets.
Budget Breakdown:
- Homemade play-dough ingredients (flour, salt, cream of tartar, oil, food coloring, cinnamon): $6–$10
- Mini pie tins (set): $8–$12
- Leaf/turkey cookie cutters: $6–$15
- Battery string lights (warm): $8–$16
- Plastic containers with lids for dough: $6–$12
- Wipes/hand towels: $3–$6
Total Estimated Cost: $37–$71
Best For: Families with tactile kids; living rooms open to the dining area so you can keep eyes and ears on activity while hosting.
Key Design Elements:
- Main seasonal props: Cinnamon play-dough, pie tins, fall cookie cutters
- Color palette: Pumpkin orange, cream, gingerbread brown, warm gold
- Lighting strategy: Warm string lights along coffee table edge, a nearby table lamp with a soft shade
- Textile layers: Plaid throw under the table, cotton towels for cleanup
- Natural elements: Whole cinnamon sticks as “rolling pins” for small hands
- Accent details: Wooden spoons, labeled containers, a chalkboard sign that reads “Pie Bar”
How To Recreate This Look:
- Start by clearing the coffee table and wrapping the perimeter with warm battery string lights, taping the battery pack underneath.
- Add a plaid blanket on the floor, then set the table with mini pie tins, cookie cutters, and wooden spoons.
- Mix or set out play-dough in pumpkin and cream colors; store extra in lidded containers.
- Place wipes and a small trash bin within reach for quick tidying.
- Finish with a small chalkboard “Pie Bar” sign to make it feel like a destination.
Why This Looks Expensive: Theme cohesion. Everything points to “pie”—tins, cutters, cinnamon scent, warm light. It reads as an intentional vignette rather than a random pile of toys.
Watch Out: Don’t set this station too close to vents or radiators—play-dough dries out faster than you can say “seconds on stuffing.” Keep lids handy and portion smaller amounts at a time.
Pro Styling Tip: Photograph hands-in-action with the string lights slightly out of focus in the foreground for that cozy glow halo.
Mini anecdote: A friend texted me a photo last year—her nephew carefully “serving” slices of dough pie on coasters while the adults cheered. She said it bought their table an extra 40 minutes of laughter and absolutely saved dessert service. Sometimes, it’s the tiny props that unlock the big memories.
Quick Checklist
- Kraft paper runner or placemats
- Mini pumpkins (mix of orange and cream)
- Flameless votives or pillars in warm white
- Micro fairy lights or warm string lights
- Wooden caddy or shallow tray
- Washable crayons and markers
- Fall sticker sheets and glue sticks
- Faux leaf or berry garland
- Index/story cards with prompts
- Felt and ribbon for crayon cozies
- Mini pie tins and cookie cutters
- Lidded containers for play-dough
- Named place flags or toothpick banners
- Bench throw or plaid blanket for softness
- Small wipes/towels basket for quick cleanup
Frequently Asked Questions
How do I keep costs down for a Thanksgiving kids’ table without it feeling cheap?
Choose one anchor element to invest in (a wooden caddy or good flameless candles) and keep everything else simple: kraft paper, real mini pumpkins, and a single activity. Repetition makes it feel polished—ten mini pumpkins in the same color read richer than a mishmash of styles.
Are real pumpkins better than faux for these setups?
IMO, real mini pumpkins win every time for warmth and texture. They photograph beautifully and last through Thanksgiving if you keep them away from heat vents. If storage matters, mix in a few faux cream pumpkins and stash them for next year; just avoid shiny finishes that read plastic in photos.
We have a small dining area. Which idea fits best?
Go for the breakfast nook leaf garland with micro-lights or the kitchen island plaid runner. Both use a narrow footprint and contain supplies in a single line or tray. Scale the garland and light strand to your exact table length and skip extras.
What about storage after the season? I don’t want extra bins.
Choose flat or foldable items: paper runners, felt sleeves, and sticker sheets get used up. Store faux leaves and flameless candles in a single shoebox-sized bin labeled “Kids’ Fall Table.” The wooden caddy works year-round for art supplies or coffee station pods.
Are candles safe around kids? I love the glow but worry about little hands.
Use flameless pillars and votives—warm white or amber. They provide that golden, cozy look with zero risk. If you absolutely love real candles, keep them high on a mantel or console far from the kids’ reach and avoid scented ones during dinner.
When should I set up the kids’ table?
Do a dry run two to three days before Thanksgiving. Set the runner, caddy, and lights; leave paper goods and stickers sealed. On the day, place crayons, story cards, and snacks right before guests arrive so everything feels fresh and exciting.
Closing Thoughts
Pick one idea that made your shoulders drop with relief—that’s your move. Maybe it’s the pumpkin craft caddy that turns clutter into calm, or the sticker placemats that quietly hold attention. Build that one fully, then add a second tiny layer if you have time. You don’t need to orchestrate an entire carnival; you need a warm table, a dash of structure, and a glow that makes the room feel like Thanksgiving.
This entire approach lives in cozy-bright language: layered textures, saturated fall color, and warm light that guides little eyes to the task at hand. That’s the secret—not more stuff, but better rhythm. Let the candles flicker, the micro-lights twinkle, and the pumpkins anchor everything to the season. You’ll get the pretty photos, sure. More importantly, you’ll get a table that hums with small, contented voices.
You’ve got this. Start with a runner, add a pumpkin or three, and tuck in an activity kids can dive into without directions. Happy, busy kids and a peaceful, abundant Thanksgiving? Absolutely on the table.

About the Author

Krisztina P.Rendes, Founder of Home Style Vibes
Founder of Home Style Vibes
Krisztina Puskásné Rendes created Home Style Vibes as a cozy-modern lifestyle space where homemaking meets inspiration. Her goal is to help women create beautiful, organized, and peaceful homes they truly love — without overwhelm. You’ll find here heart-driven content on home decor, cleaning tips, easy family recipes, organization and decluttering, DIY home projects, plants, and seasonal ideas — all designed to bring more calm, comfort, and style into everyday life.