6 Fall Porch Step Decor Ideas With Pumpkins Mums And Lanterns
You want a front porch that glows with rich autumn color, stacked pumpkins, and lantern light that says “Welcome, cider’s on.” But your steps feel bare, your mums fizzle out too fast, and the lanterns you own look more “leftover summer hurricane” than “cozy bright autumn.” This guide to fall porch step decor ideas with pumpkins, mums, and lanterns fixes that with six deeply different, super-achievable concepts that turn a ho-hum entry into a harvest moment in under a weekend and under $250 per look. Expect saturated rust and burgundy, warm golden glow, generous layers, and photogenic details that pop on your feed without feeling try-hard.
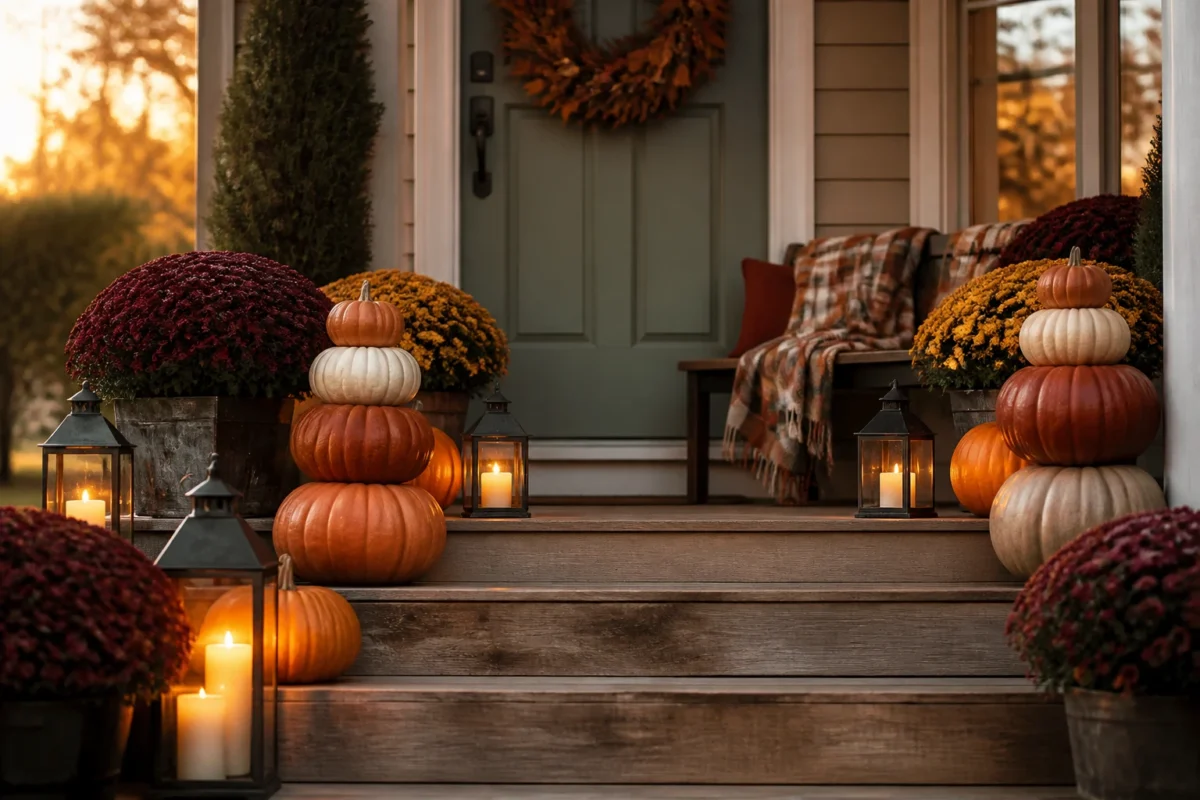
We’re talking candlelit warmth, ripe pumpkin stacks, lush mums, and just the right amount of plaid—ideas that solve real-life pain points like shaded steps, narrow landings, mischievous toddlers, and picky HOAs. These are the porch vibes you’ve been craving: welcoming, abundant, and downright joyful from late September through Thanksgiving. Let’s style a front entry you’ll actually look forward to coming home to, every single day.
1) Stacked Pumpkin Pyramids With Amber Lantern Glow On the Center Step
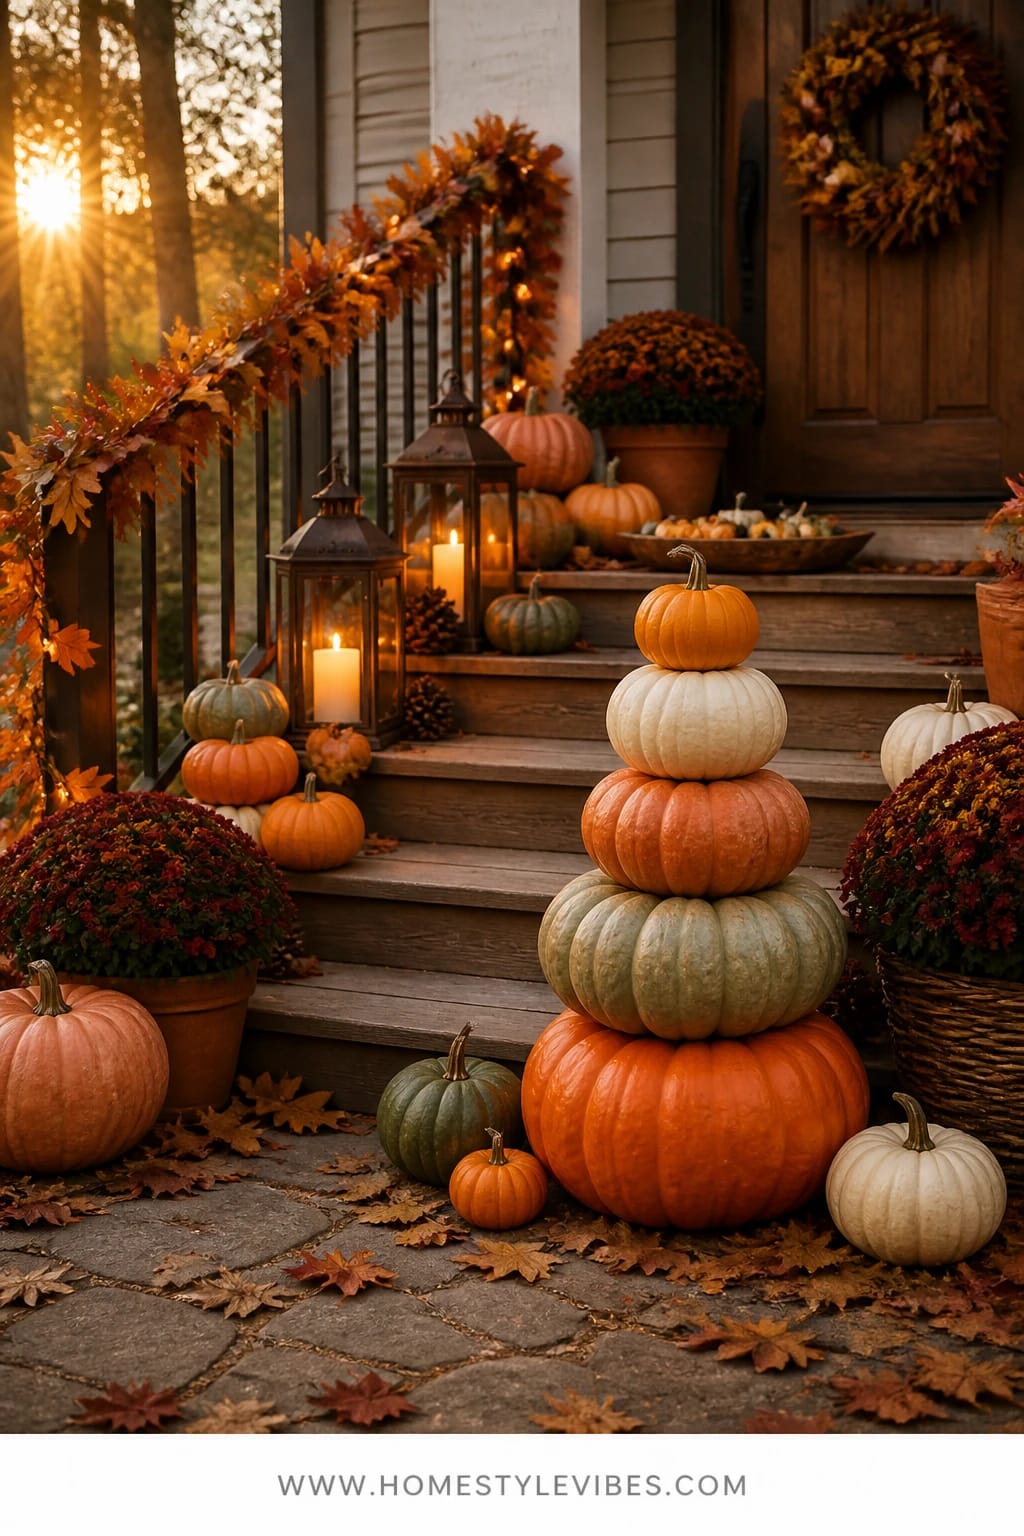
We’ve all been there: you set a pumpkin or two on the porch and… it looks lonely. The steps still feel empty, the scale feels off, and you can’t figure out how to get that scroll-stopping abundance. This design leans into bold vertical stacks—pumpkin pyramids—anchored by the warm amber glow of lanterns at the mid-landing. It’s a cozy bright autumn statement that reads generous and intentional, even on narrow stoops.
The mood is layered harvest warmth. Pyramids of pumpkins (think heirlooms in saturated rust, deep orange, and a whisper of sage for contrast) give your porch steps height and rhythm, while varied lantern sizes cast a golden candle glow across the treads. It works because verticality solves the “flat porch” problem instantly, and the repeating lantern light adds depth at dusk. The materials? Real pumpkins (IMO, they always win), galvanized or black lanterns with warm LED pillars, and hardy mums with tight buds for longer bloom time.
Here’s why it photographs beautifully: the stepped layers create foreground, middle, and background; the lanterns create highlights; and the pumpkin stems (don’t trim them!) add line and texture. A small-space version still reads full: two compact pyramids on either side of the center step, a single mid-size lantern between, and one mum tucked in low for fullness. Prefer a more muted look? Choose white, pale peach, and soft sage pumpkins and swap amber candles for creamy ivory pillars.
Lighting note: Candlelight accentuates the pumpkin contours and the mums’ petal texture. Place one lantern slightly behind a stack so the light grazes across the pumpkins—this is the trick that makes everything look rich on camera.
Budget Breakdown:
- Pumpkins (9–12 mixed sizes): $45–$90
- Lanterns (2–4 mixed heights): $40–$120
- LED pillar candles (warm white/amber): $18–$40
- Mums (2–3, 10–12”): $24–$48
- Door mat upgrade (optional coir in rust stripe): $18–$35
Total Estimated Cost: $125 – $300
Best For: Porches with symmetrical steps and a center landing; families who want a big harvest look without lots of props. Ideal from late September through Halloween, then refresh the mums for a strong Thanksgiving finish.
Key Design Elements:
- Main seasonal props: Mixed heirloom pumpkins, compact and large mums, metal lanterns
- Color palette: Saturated rust, traditional orange, burgundy mums, touches of sage
- Lighting strategy: Clustered lantern glow at the middle step to backlight stacks
- Textile layers: Coir mat with rust or plaid accent runner on the top tread
- Natural elements: Real pumpkin stems, a few gathered maple leaves
- Accent details: Galvanized or black lanterns, aged brass candle sleeves if you have them
How To Recreate This Look:
- Start with a clean sweep—hose down steps and shake out your mat.
- Add two mums to flank the center step; keep them in nursery pots tucked into baskets or urns.
- Layer pumpkin pyramids: largest on bottom, medium in the middle, a small or flat “Cinderella” on top. Create two stacks for balance.
- Place lanterns: one medium lantern between stacks, and one smaller lantern staggered forward or back for depth.
- Style with a rust-striped coir mat, then sprinkle a few crisp leaves for texture (not too many—this is styling, not yard work).
Why This Looks Expensive: Repetition and scale. Matching lantern finishes and evenly proportioned pumpkin stacks read curated instead of random, like you sourced from a boutique garden center.
Watch Out: Don’t push stacks too close to the edge of the step. Sturdy looks good; teetering looks stressful. Leave a clear walking path.
Pro Styling Tip: Angle the top pumpkin slightly so the stem points toward the door—this subtly guides the eye inward in photos.
2) Plaid Blanket-Wrapped Mums With Golden Lanterns On the Side Steps
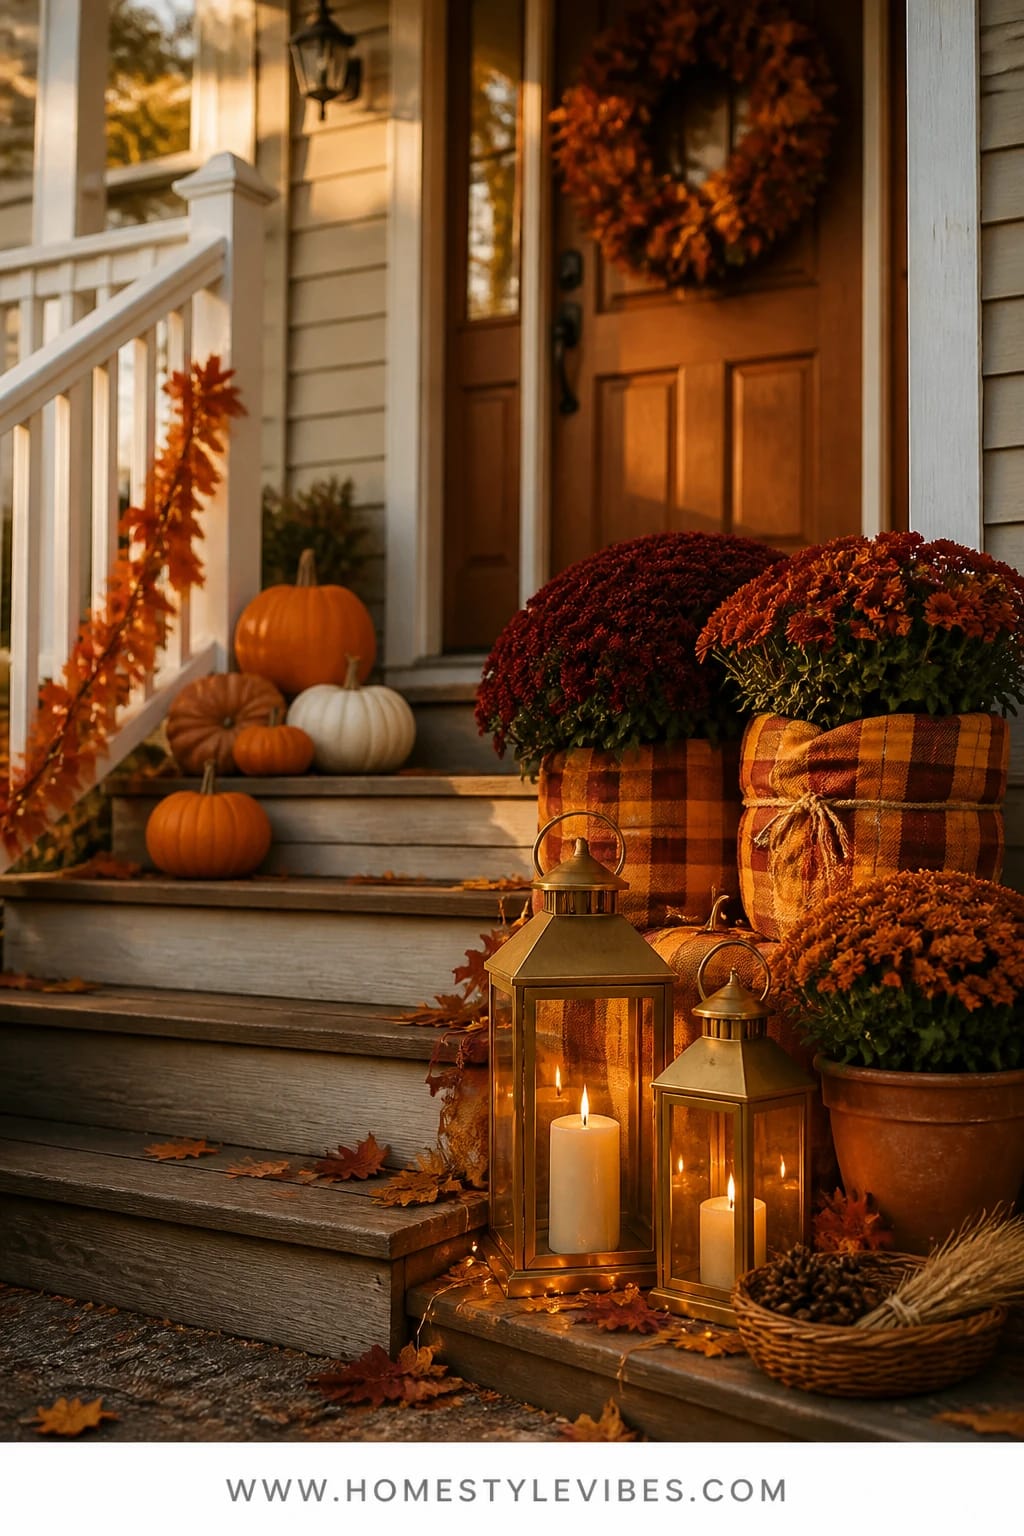
It’s that one corner that always feels off—maybe your steps widen to one side, or the railing interrupts your symmetry. You’ve tried matching pots on both sides, but it still looks lopsided. The solution: lean into the asymmetry with a cozy-bright move—wrap a few nursery mums in plaid blankets and cluster golden lanterns to one side. Suddenly the “weird” side becomes the charming side.
The vibe is classic fall porch step decor: playful, warm, and layered. Flannel plaid introduces pattern, and the wraps disguise black nursery pots in fifteen seconds. The golden lanterns—brass or aged gold—bring a candlelit glow that bounces off the mums’ petals at dusk. Why this works: textiles soften hard lines, absorb visual noise near railings, and create a lived-in, welcoming feel. It’s also super family-friendly—no fragile urns for kids to topple.
Small-side-porch variation: two wrapped mums, one lantern, and a single pumpkin trio. Budget version: thrift store blankets (or even cut yardage of inexpensive plaid fabric), plus simple battery candles on timers. Prefer a calmer palette? Choose a plaid in wheat and taupe and use white mums with white pumpkins—still cozy, just quieter.
Budget Breakdown:
- Mums (3–5): $36–$80
- Thrifted plaid blankets (2–3) or fabric yardage: $12–$45
- Golden lanterns (2–3): $45–$120
- Pumpkins (5–7 mixed sizes): $25–$55
- Twine or leather cord to secure wraps: $4–$10
Total Estimated Cost: $122 – $265
Best For: Porches with railings, off-center steps, or side-anchored landings. Great for households that want softness and warmth without heavy planters.
Key Design Elements:
- Main seasonal props: Mums in nursery pots, plaid blanket wraps, metal lanterns, accent pumpkins
- Color palette: Burgundy, mustard, and forest in the plaid; orange and white pumpkins
- Lighting strategy: Timer candles for effortless evening glow
- Textile layers: Flannel wraps, optional small outdoor pillow on top step bench (if you have one)
- Natural elements: Maple and oak leaves, twiggy branches tucked behind a pot
- Accent details: Leather cord, brass lantern finish, woven baskets for hidden pots
How To Recreate This Look:
- Start by arranging mums on the wider side of your steps; stagger heights for a cascade effect.
- Add blanket wraps: fold blankets lengthwise, wrap around the pot, and tie with twine or leather for a tidy cinch.
- Layer pumpkins at the base of the clusters; use varying sizes and tuck smaller ones near the railing posts.
- Place golden lanterns so each blanket-wrapped pot catches a little backlight—think “glow meets plaid.”
- Style a final handful of leaves across the step edge to soften lines and add movement.
Why This Feels Designer: Fabric wrapping transforms humble nursery pots into tailored “planters,” while repeating the lantern finish knits the whole side together.
One Thing To Avoid: Don’t choose blankets that are too bulky; they’ll slip and look messy. Thin flannel or wool-blend throws hold a crisp edge.
Pro Styling Tip: Shoot at blue hour—ten minutes after sunset—when your lanterns are bright and the plaid still shows color depth.
Keep scrolling—the next idea solves the “too many steps, not enough budget” puzzle with rhythm and restraint.
3) Lantern Stair Run With Burnt-Orange Mums Along a Wide Entry
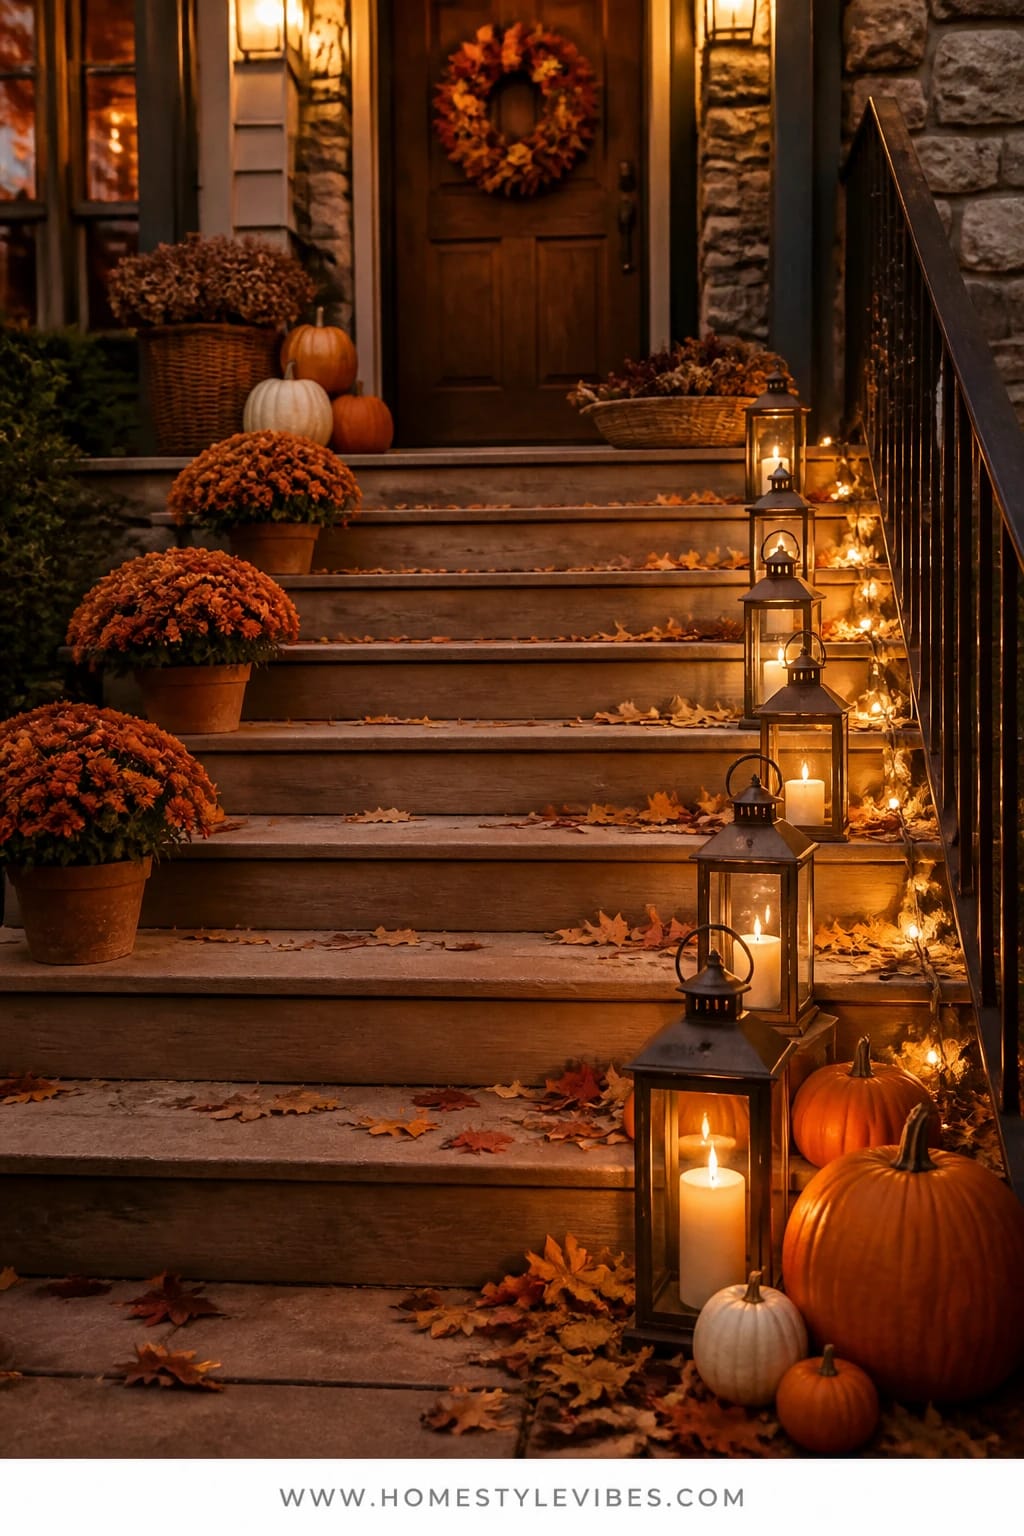
Maybe your porch has five or six shallow steps and every year the decor looks scattered. Too many surfaces, not enough plan. Here’s the fix: create a lantern “run” down one side, then place burnt-orange mums at every other tread like visual punctuation. The rhythm creates calm and makes even a big staircase feel thoughtfully styled.
The mood is classic and a bit cinematic: a runway of warm light guiding guests up to your door. Burnt-orange mums pulse with saturated color, while a neat row of lanterns feels intentional. This is a great family-home solution because it keeps the walking path uncluttered and the heat of real candles away from curious hands if you choose LEDs. Pro tip: stick to one lantern style in 2–3 sizes for a cohesive line.
For a small-space spin, do a half-run with three lanterns and two mums. Want a neutral twist? Use wheat-colored mums (yes, those exist in paler tones) with white pumpkins tucked at the base of each lantern, and keep the glow soft ivory instead of amber.
Budget Breakdown:
- Lantern set (4–6 in mixed heights): $80–$180
- LED candles with remotes (pack of 6): $28–$50
- Mums (3–5, burnt orange): $36–$80
- Pumpkins (optional, 3–5): $15–$40
- Outdoor extension timer (for LEDs with plugs): $12–$20
Total Estimated Cost: $171 – $370
Best For: Wide, multi-step entries where clutter control matters—think busy households, frequent deliveries, and lots of foot traffic.
Key Design Elements:
- Main seasonal props: Matching lanterns in graduated heights, bold mums
- Color palette: Burnt orange, warm brass or black, soft ivory candlelight
- Lighting strategy: Evenly spaced, consistent glow along one side only
- Textile layers: None needed—clean and graphic
- Natural elements: A few strategically placed pumpkins or a scatter of leaves
- Accent details: Subtle metal finish repetition for polish
Why This Reads High-End: Discipline. Repetition and spacing make even budget lanterns look custom. The eye reads the pattern, not the price tag.
How To Recreate This Look:
- Measure your step depth and plan spacing (every other tread is a safe bet).
- Place the largest lantern at the bottom, scaling smaller as you climb.
- Add mums on alternating steps, opposite the lanterns to create a zigzag rhythm.
- Insert candles and set timers so they flick on at dusk daily.
- Finish with a few pumpkins at the base of the bottom lantern to ground the run.
The Most Common Mistake: Mixing too many lantern styles. Stick to one finish and shape family for a clean line.
Pro Styling Tip: Slightly angle each lantern toward the door for a subtle perspective line that draws eyes upward in photos.
Pause here. Notice how each idea solves a different frustration—scale, symmetry, clutter. Pick the one that instantly makes your porch feel calmer in your mind. That’s your starting point.
4) Harvest Baskets of Mums With Copper Lanterns On the Lower Steps
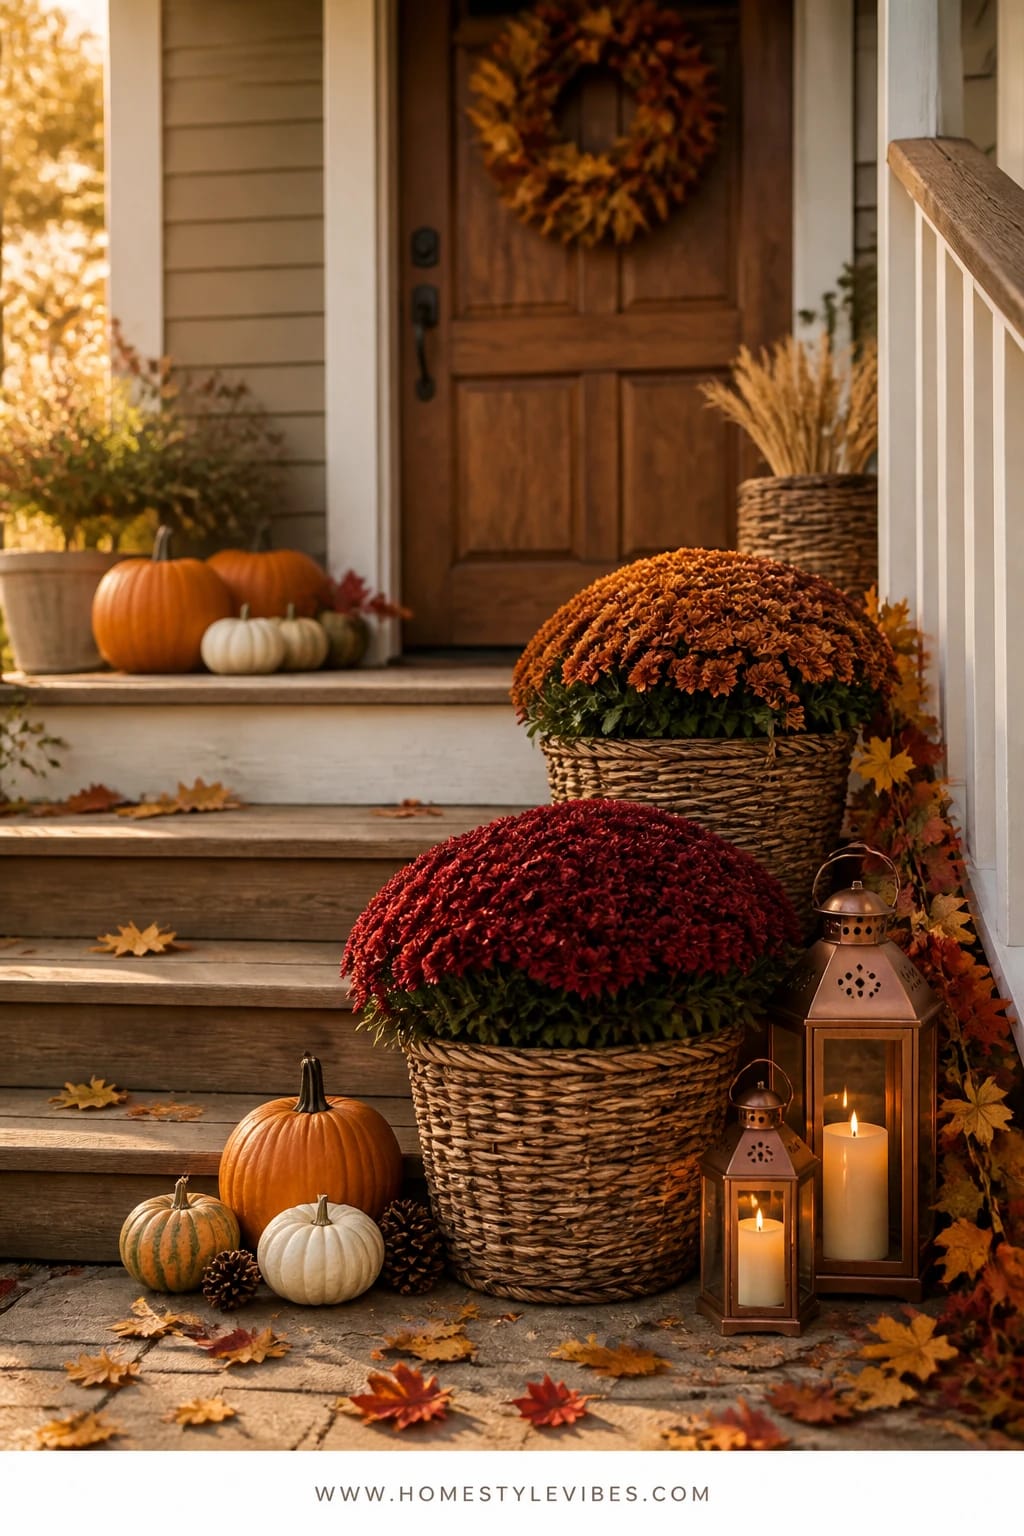
You piled pumpkins everywhere last year and then had nowhere to actually walk. Lower steps can easily get crowded. This concept keeps the top landing mostly open while concentrating lush harvest baskets on the bottom two treads, paired with copper lanterns that catch the light like a sunset.
The mood leans harvest garden energy—abundant without chaos. Wicker or seagrass baskets hide plastic pots, and the warmth of copper plays off burgundy and rust mums like a fall color wheel moment. It works in real life because baskets corral petals and leaves (less sweeping), and copper lanterns throw a deep amber light that makes even a gray day feel toasty.
If you’re budget-conscious, mix one real copper lantern with two copper-finish versions; the eye reads “copper” as a set. For tight steps, use oval baskets and position them lengthwise to save space. Prefer a softer palette? Choose cream mums, pale pumpkin stacks, and antique copper that’s more penny than shine.
Budget Breakdown:
- Large baskets (2–3): $40–$90
- Mums (3–5 mixed sizes): $36–$80
- Copper lanterns (2–3): $60–$180
- Pumpkins (4–6 heirloom mix): $25–$55
- Coconut coir or burlap (to line baskets): $8–$16
Total Estimated Cost: $169 – $421
Best For: Homes with deep lower steps or a generous bottom landing; anyone who wants maximum curb appeal from the sidewalk view.
Key Design Elements:
- Main seasonal props: Wicker baskets, mixed mums, copper lanterns, heirloom pumpkins
- Color palette: Burgundy, rust, copper, creamy neutrals
- Lighting strategy: Copper glow clustered low for sidewalk impact
- Textile layers: Burlap or coir peeking from baskets for texture
- Natural elements: Twining grapevine, a few wheat stems tucked in
- Accent details: A braided jute doormat to echo basket texture
How To Recreate This Look:
- Start by lining baskets with burlap or coir to elevate pots and help drainage.
- Add mums, mixing heights so petals spill at different levels.
- Layer pumpkins in small groups near each basket; vary shapes for personality.
- Place copper lanterns at basket edges so light skims the blooms.
- Style with a couple grapevine loops resting against baskets for organic movement.
Why This Looks Intentional: Textural echo. Baskets, jute, and coir repeat a natural weave that ties the entire bottom tier together—no single piece looks random.
Don’t Do This: Avoid stuffed-full baskets that smother blooms. Give mums an inch or two of “air” around the rim to breathe and to show off the liner texture.
Pro Styling Tip: Wipe lantern glass with a microfiber cloth before sunset; ultra-clear panes make the candle glow appear brighter in photos.
Remember, this isn’t about recreating a showroom. It’s about crafting a porch that feels like your version of fall—doable, warm, and a tiny bit extra in the best way.
5) White Pumpkins With Warm String Lights And Lanterns On Narrow Steps
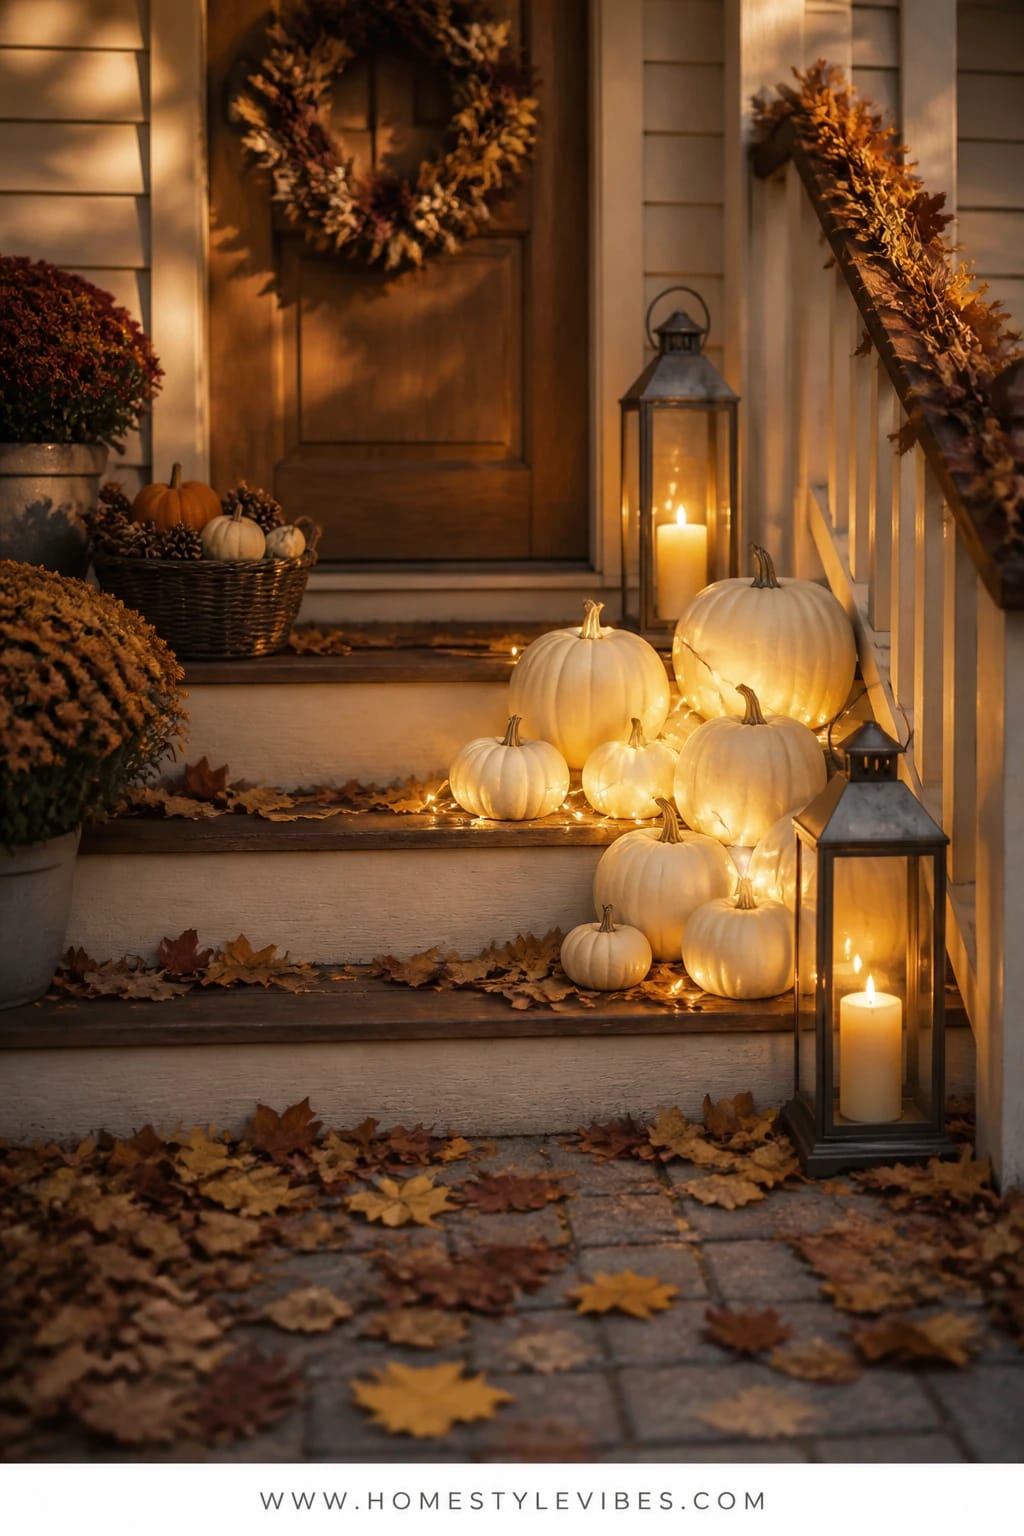
Small stoop? Narrow steps? You’re not doomed to a single sad pumpkin. The move here is a tight color palette—white pumpkins only—plus warm micro string lights and a couple of slender lanterns. It’s crisp, bright, and perfect for those petite entries where every inch counts.
The vibe is cozy bright minimal: airier than traditional orange but still deeply seasonal. White pumpkins reflect light beautifully, so even one strand of warm fairy lights feels like a lot. Slim lanterns (tall and narrow) tuck against the edges without stealing walking space. This approach photographs like a dream because the tonal palette lets texture and glow do the talking—white ridges, golden twinkle, crisp shadows.
Budget tweak: use faux white pumpkins mixed with a few real minis; the real stems sell the look. For color lovers, add a single rust plaid doormat to keep the palette warm and grounded. And for the longevity win, place a cool battery pack under the top step lip to hide cords neatly.
Budget Breakdown:
- White pumpkins (6–10 mixed sizes, real or faux): $30–$90
- Micro string lights (plug-in or battery, warm white): $10–$30
- Slender lanterns (2): $30–$80
- Doormat upgrade: $18–$35
- Rechargeable batteries/charger (if using battery lights): $15–$25
Total Estimated Cost: $103 – $260
Best For: Narrow or shallow steps, city stoops, and anyone craving a lighter, slightly modern porch that still reads fall.
Key Design Elements:
- Main seasonal props: White pumpkins, slim lanterns, micro string lights
- Color palette: Cream, soft gray-green stems, warm gold light
- Lighting strategy: Twinkle line along step edges + two steady candle glows
- Textile layers: Simple coir mat or subtle rust plaid
- Natural elements: A few eucalyptus sprigs or dusty miller tucked among pumpkins
- Accent details: Minimal metal finishes; matte black or brushed nickel
Why This Looks Expensive: Monochrome restraint. A limited palette with beautiful light reads curated and serene rather than skimpy.
How To Recreate This Look:
- Start with the mat—keep it simple to set the tone.
- Add string lights along the inner edges of each step (use clear outdoor clips under the lip to hide them).
- Place two slender lanterns—one on the bottom step, one near the top for balance.
- Layer white pumpkins in odd-numbered groups, largest near the riser, smaller toward the edge.
- Style with a handful of eucalyptus sprigs tucked between pumpkins for a whisper of sage.
Watch Out: Don’t overdo the twinkle. One continuous strand is magic; three become a tangle. Keep it tidy for that high-end quiet glow.
Pro Styling Tip: Snap photos right after you switch on the lights while there’s still a hint of daylight—the white pumpkins will glow without blowing out highlights.
6) Rustic Crate Layers, Marigold Mums, And Iron Lanterns On the Top Landing
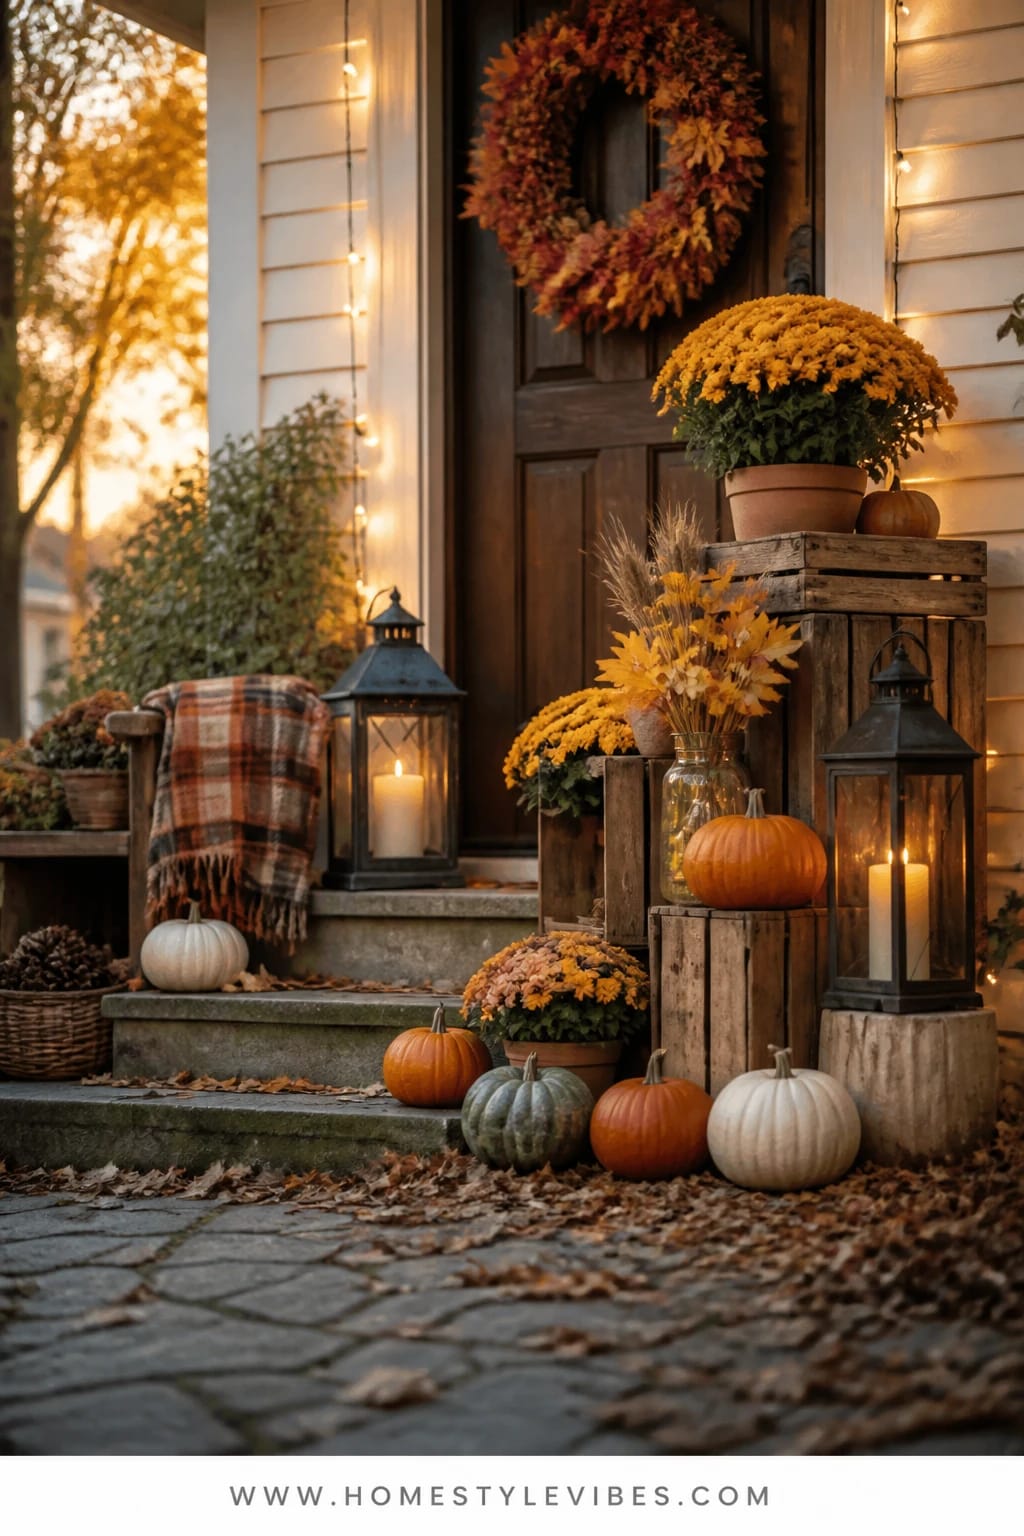
Here’s the truth: if your top landing feels flat, everything below it will, too. You’ve placed a pot and a pumpkin up top for years, but it still reads “empty.” Enter rustic crates for height layering, marigold mums for a sunny harvest punch, and weighty iron lanterns to frame the door. This trio gives your entry a real “harvest stall” feel without becoming cluttered.
The mood is exuberant cozy bright autumn—think farmers’ market on your doorstep. Crates stacked at different orientations create risers for mums and pumpkin groupings. Iron lanterns bring that steady, old-world glow. This is easy to store (crates nest inside each other) and easy to refresh (swap spent mums and keep the structure). It also solves a surprising pain point: doorbell camera angles. The layered top landing looks great from straight on and side angles.
Variation: paint crates a deep brown or stain them for a more polished read. Short on space? Use a single crate rotated to create a two-level display. Prefer less color? Swap marigold for white mums and trade orange pumpkins for soft sage and peach heirlooms.
Budget Breakdown:
- Wood crates (2–4): $24–$80
- Marigold mums (2–3, large): $24–$48
- Iron lanterns (2): $50–$140
- Pumpkins (5–7 mixed): $25–$55
- Non-slip pads for under crates: $6–$12
Total Estimated Cost: $129 – $335
Best For: Homes with a generous top landing or a deep stoop; anyone who wants big impact around the door where guests linger.
Key Design Elements:
- Main seasonal props: Wood crates, marigold mums, iron lanterns, pumpkin clusters
- Color palette: Marigold, classic orange, natural wood, inky iron
- Lighting strategy: Two iron lantern beacons framing the door with steady candles
- Textile layers: Optional rust-toned outdoor runner on the landing
- Natural elements: Dried corn cobs or wheat bundles tucked into crates
- Accent details: House numbers in black metal to echo lantern finish
How To Recreate This Look:
- Start with crate placement—one flat, one on its side to create shelves.
- Add non-slip pads beneath to keep stacks steady.
- Place marigold mums on the top “shelf” and a medium pumpkin inside the open crate.
- Set iron lanterns on either side of the door for symmetry and glow.
- Style with a few dried corn cobs or wheat stems for that market-stall feel.
Why This Feels Designer: Purposeful vertical layering. Crates create levels so every element has a “stage,” which looks styled, not piled.
The Most Common Mistake: Overstacking crates to an unstable height. Two levels max on a porch—safety and style both win.
Pro Styling Tip: Stagger the crate faces so you see both an open cavity and a solid panel in photos—more depth, more story.
Little confession: I tried a version of this last October and accidentally stacked a crate too close to the door swing. The door smacked a pumpkin and we got the dramatic “squash thud” nobody asked for. Learn from me—open your door fully when you test placement.
If one idea resonates more than the others, that’s your cue. You don’t need all six. Start with the one that makes you feel that instant “yes” and build from there as the season goes on.
Quick Checklist
- Choose a focal idea: stacks, run, crates, or baskets
- Pick a tight color palette (2–3 main hues)
- Buy mums with tight buds to extend bloom time
- Mix pumpkin sizes and shapes for natural rhythm
- Repeat one metal finish for lanterns
- Use timer LEDs for effortless nightly glow
- Anchor decor to one side if your steps are narrow
- Leave a clear walking path on every tread
- Hide nursery pots in baskets or blankets
- Test door swing and delivery path before finalizing
- Clean lantern glass for brighter candlelight
- Rotate mums for even blooms and shape
- Refresh a few pumpkins mid-season for longevity
- Photograph at blue hour for the richest glow
- Store crates nested and blankets rolled for next year
Frequently Asked Questions
How much should I budget for a photogenic fall porch with pumpkins, mums, and lanterns?
Plan on $125–$350 depending on lantern quality and how many pumpkins you use. You can land closer to $150 with nursery mums, a modest pumpkin haul, and a pair of budget lanterns. High-end lanterns and heirloom pumpkin stacks push the total upward, but you can reuse the lanterns and crates for years.
Are real or faux pumpkins better for porch steps?
Real pumpkins look and photograph best, IMO, especially the stems and imperfect surfaces. If you get strong sun or a long season, mix in a few high-quality faux whites or sages to avoid the sad, softened pumpkins by week three. Keep real pumpkins shaded when possible and off wet concrete to extend life.
How do I make this work on a very small stoop or narrow steps?
Use vertical strategies: one pumpkin stack, a single slim lantern, and a compact mum in a wrapped pot. Tuck micro string lights under the step lip for glow without clutter. Anchor decor to one side, leave a clear path, and avoid wide urns that hog space.
What’s the best way to store everything after the season?
Nest crates together and stack lanterns with bubble wrap between glass panes. Roll blankets and slip them into a breathable bin with cedar blocks. Compost real pumpkins (or leave a couple for wildlife if that fits your area) and transplant mums to the yard if they’re hardy in your zone.
Are candles safe with kids and pets on the porch?
Go with LED pillars on timers for worry-free evenings. If you love real flame, use heavy lanterns with latched doors and thick, slow-burning pillars placed away from high-traffic zones. Always blow out before bed and keep wicks trimmed to minimize smoke.
When should I start decorating my porch for fall?
Late September is a sweet spot in most regions. If it’s still hot, start with lanterns, crates, and a few faux pumpkins, then add real mums and more pumpkins when daytime temps drop below 75°F to keep everything fresher longer.
The Cozy Wrap-Up
Fall porch step decor with pumpkins, mums, and lanterns is about more than cute photos. It’s the warm hello at the end of a long day, the flicker that makes you pause in the driveway and breathe for a second. Pick one idea—stacked pumpkin pyramids, a lantern stair run, or a rustic crate landing—and start small. The abundance comes from layering: a few more pumpkins, one more glow, a mum or two with tight buds ready to burst.
Here’s the secret: cozy bright autumn isn’t complicated. It’s repetition, height changes, saturated color, and warm light that nudges everything into that “ahh, this feels right” place. You’ve got this. Brew something cinnamon-y, cue up your favorite sweater playlist, and give your steps that harvest welcome you’ve been craving. Your porch is about to become the best part of the neighborhood stroll—seriously.

About the Author

Krisztina P.Rendes, Founder of Home Style Vibes
Founder of Home Style Vibes
Krisztina Puskásné Rendes created Home Style Vibes as a cozy-modern lifestyle space where homemaking meets inspiration. Her goal is to help women create beautiful, organized, and peaceful homes they truly love — without overwhelm. You’ll find here heart-driven content on home decor, cleaning tips, easy family recipes, organization and decluttering, DIY home projects, plants, and seasonal ideas — all designed to bring more calm, comfort, and style into everyday life.