6 Thanksgiving Kitchen Decor Ideas For The Heart Of The Holiday
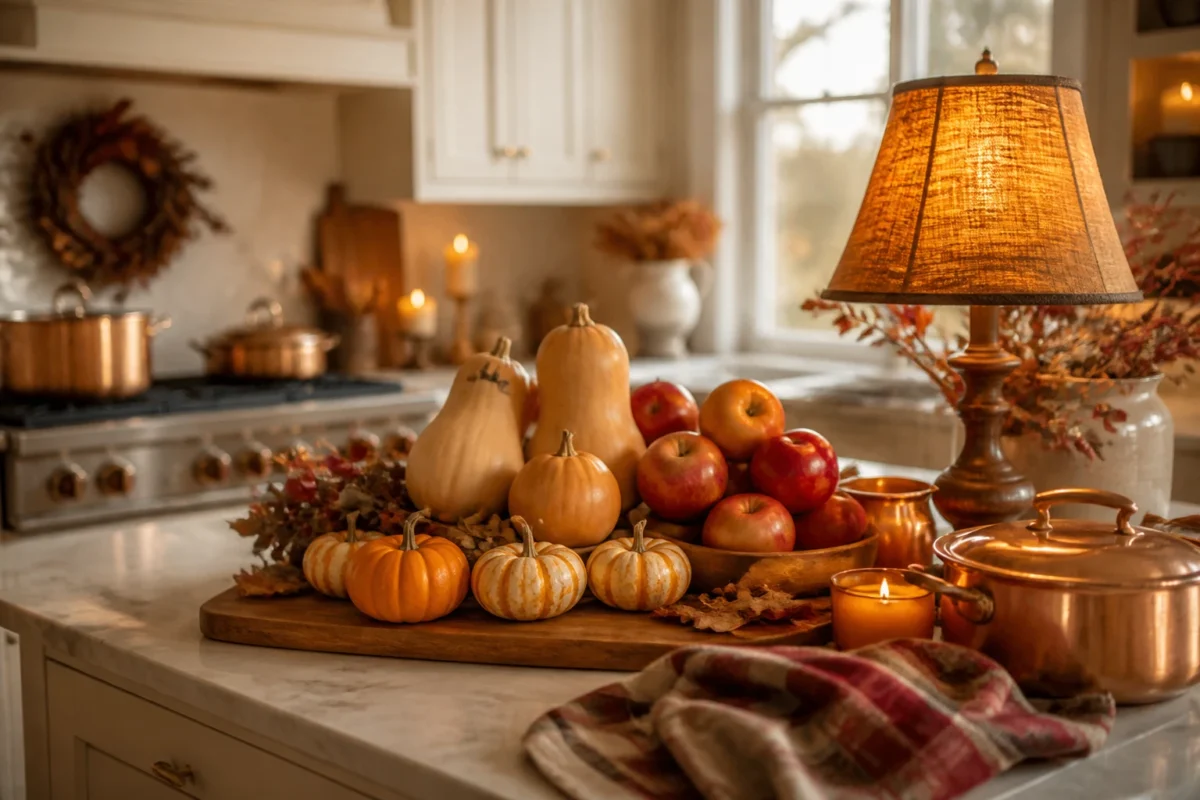
You want a kitchen that feels like the warm, generous soul of Thanksgiving—golden window light on copper, plaid tea towels draped just so, bowls heaped with apples and tiny pumpkins, and that unmistakable cozy-bright autumn glow. But the reality? Your counters feel cluttered, the island looks like a prep zone instead of a celebration, and your “fall decor” is a sad grocery-store bouquet that gave up last Tuesday. Let’s fix that. These 6 Thanksgiving kitchen decor ideas bring saturated rust and burgundy, amber candle glow, harvest abundance, and actually functional styling so you can cook, gather, and photograph it all without losing your mind. You’ll get a polished, cohesive look in a weekend for under $300 per concept—less if you shop your home. This is for the host who loves the holiday, the snackers who hover while pies cool, and anyone who wants their kitchen to be the heart of the holiday, not just the place where the dishes pile up.
1) Pumpkin Spice Produce Pile With Golden Lamp Glow On The Kitchen Island
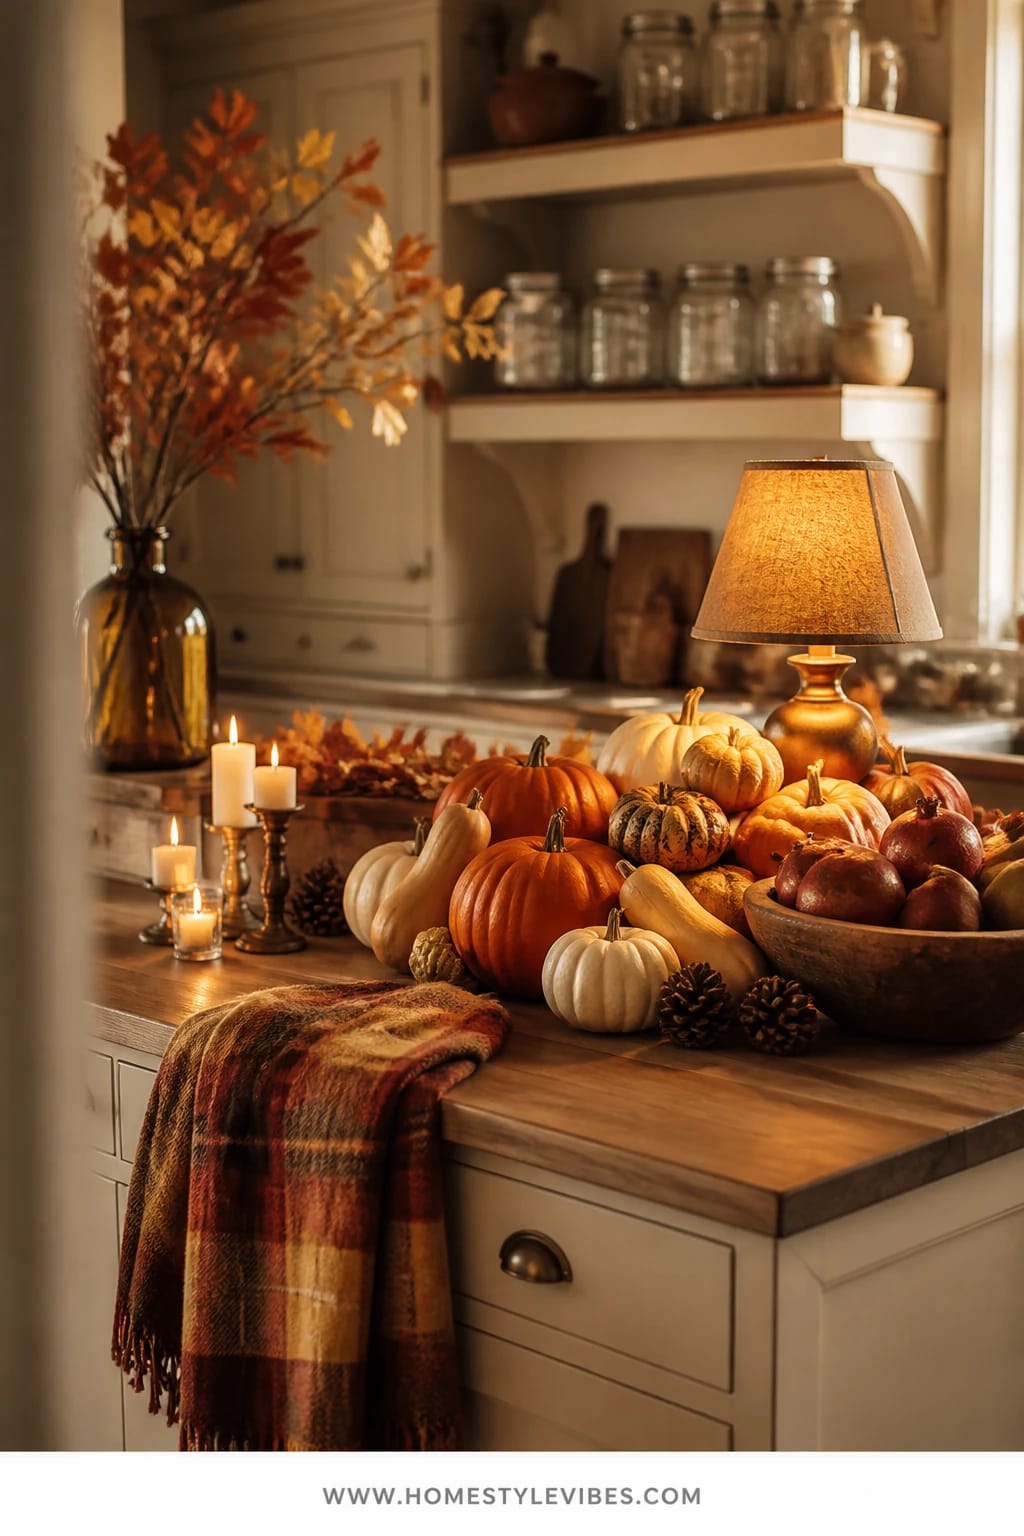
We’ve all been there: the kitchen island becomes a dumping ground for mail, plastic grocery bags, and that one rogue water bottle that never finds its lid. You’ve tried a tray, but it still looks chaotic, not cozy. This idea turns your island into a living, breathing still life with a warm table lamp as the hero light. The mood is pure cozy bright autumn—think amber lamp glow hitting the curved sides of butternut squash, a tuck of plaid, and a clattering bowl of pomegranates that begs for a photo.
Why it works: an island centerpiece that’s edible frees up cabinet space while giving your kitchen seasonal color saturation—russet, persimmon, deep green—without any precious “don’t touch” decor. A small lamp adds instant warmth and makes everyone linger. In photos, the mix of shapes (round pumpkins, tall lamp, low trays) creates depth. This is also family-friendly and easy to deconstruct when it’s time to cook. Light the lamp early evening so the golden halo lands on the produce—seriously, it’s Pinterest bait.
Variations: Small-space? Do a half-moon cluster at one corner of the island using a footed fruit bowl and two mini pumpkins. Neutral lover? Choose pale wheat squash, white pumpkins, and a creamy linen runner with just one rusty napkin for color. If you’re on a tight budget, rely on bulk apples and a few standout gourds, then borrow a lamp from the living room for the day.
Budget Breakdown:
- Table lamp with warm tone shade: $35–$120
- Assorted squash, apples, pears, and mini pumpkins: $20–$50
- Large tray or breadboard: $25–$70
- Plaid kitchen towel set: $12–$30
- Vintage-style footed bowl (optional): $20–$60
Total Estimated Cost: $92 – $330
Best For: Open kitchens with a central island or large peninsula; households that cook a lot and want everything to remain functional through Thanksgiving week.
Key Design Elements:
- Main seasonal props: Pumpkins, squash, apples, pears
- Color palette: Rust, burgundy, persimmon, deep green, warm wood
- Lighting strategy: One warm table lamp with a soft white bulb (2700–3000K)
- Textile layers: Plaid towel, linen runner, or small wool felt coasters under bowls
- Natural elements: Fresh produce, bay leaves tucked in, eucalyptus sprigs
- Accent details: Wooden tray, copper bowl, ceramic footed compote
How To Recreate This Look:
- Start with a wide tray or breadboard to define the zone and protect the surface.
- Add a lamp with a fabric shade and warm bulb; place it slightly off-center.
- Layer a plaid towel loosely under a footed bowl for a casual drape.
- Place the largest pumpkins or squash first, then nestle apples and pears to fill gaps.
- Style with a few bay leaves or eucalyptus for a hint of green and a finishing spritz of water for a fresh sheen.
Why This Looks Expensive: The lamp gives purposeful glow, the footed bowl adds height variation, and keeping everything in a tight color story (two warms + one green) reads curated, not random grocery pile.
Watch Out: Don’t crowd the prep zone. Leave at least 18 inches of open counter for chopping or plating, otherwise the look becomes impractical fast.
Pro Styling Tip: Angle the lamp so its light skims the produce from the side—this side-lighting creates rake-like shadows that photograph beautifully.
2) Copper Mugs And Cranberry Garland Under Warm Task Lights On The Open Shelves
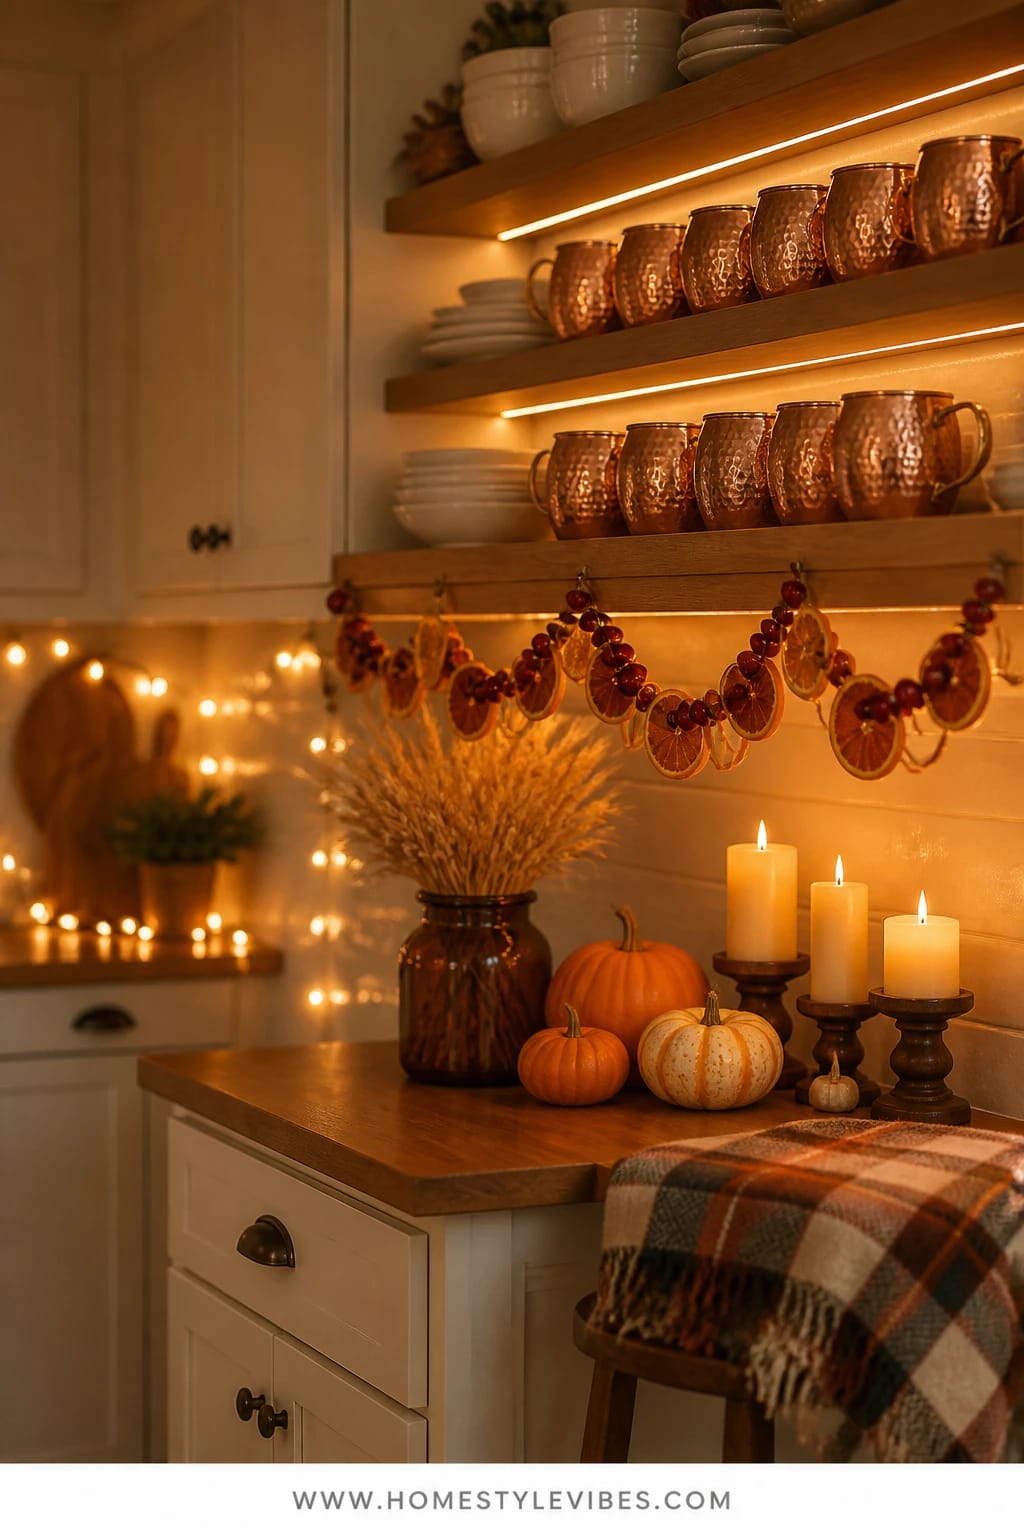
It’s that one corner that always feels off—the open shelves look bare or messy no matter how you style them. You’ve tried a pumpkin here and a mug there, but it still reads like storage, not seasonal. This shelf story leans into repetition: neat rows of copper mugs, sturdy white dishes, and a cranberry-and-orange-slice garland that runs just under your under-cabinet or shelf lights. The result? A glowing harvest vignette that doubles as a serve zone for cider and cocoa all weekend.
The mood is cozy-bright with a little sparkle. Why it works in real homes: shelves handle visual clutter better when you repeat shapes and metals. Copper warms any cool white tile and bounces light around like tiny sunsets. The garland adds soft color without stealing the show. With lighting, keep task lights on dim in the evening; the gleam on copper creates that high-end kitchen fantasy you see in magazines.
Variations: On a budget, spray thrifted mugs or stainless tumblers in hammered copper paint and mix with two real copper pieces for authenticity. For a more neutral look, skip the cranberry color and hang a muted wheat garland with a few dried orange slices for tone-on-tone warmth.
Budget Breakdown:
- Copper or copper-finish mugs (set of 4–8): $28–$120
- DIY dried orange and cranberry garland supplies: $10–$25
- Simple white dishes to stack: shop your home or $20–$60
- Small shelf risers or plate stands: $12–$30
- Under-shelf clip-on puck lights (if needed): $18–$40
Total Estimated Cost: $88 – $275
Best For: Kitchens with open shelves or glass fronts; perfect for hosts who love a dedicated beverage zone during Thanksgiving week.
Key Design Elements:
- Main seasonal props: Copper mugs, cranberry-orange garland
- Color palette: Copper, white, cranberry, soft wheat
- Lighting strategy: Under-shelf lights on low, or puck lights with warm bulbs
- Textile layers: One folded plaid runner as a shelf liner to anchor the mugs
- Natural elements: Dried orange slices, fresh cranberries, a sprig of rosemary in a tiny bud vase
- Accent details: Small wooden risers, glass syrup bottle, cinnamon sticks in a jar
How To Recreate This Look:
- Start with the middle shelf at eye level and line a narrow runner or placemat for visual grounding.
- Add stacks of white dishes to one side; they quietly frame the scene.
- Hang the garland beneath the shelf lip using mini clear hooks, keeping a gentle dip.
- Place copper mugs in an even row, then add a second row if you have height.
- Style with a small jar of cinnamon sticks and a glass bottle of maple syrup for a warm touch.
Why This Feels Designer: Repetition is a designer’s best friend. Uniform mugs and a single garland line create order, while copper’s reflective quality fakes luxury lighting.
One Thing To Avoid: Don’t overload with too many different mugs or colors—mixed styles break the rhythm and look messy quickly.
Pro Styling Tip: When you photograph, shoot slightly from below the shelf so the garland drapes against the light; the translucence of the oranges will glow like tiny stained glass.
Remember, this isn’t about recreating a showroom. It’s about building a kitchen that can handle mashed potatoes and a midnight pie slice and still feel beautiful. If one corner sings, you’re doing it right.
3) Plaid Runners And Amber Glass On The Breakfast Nook Table
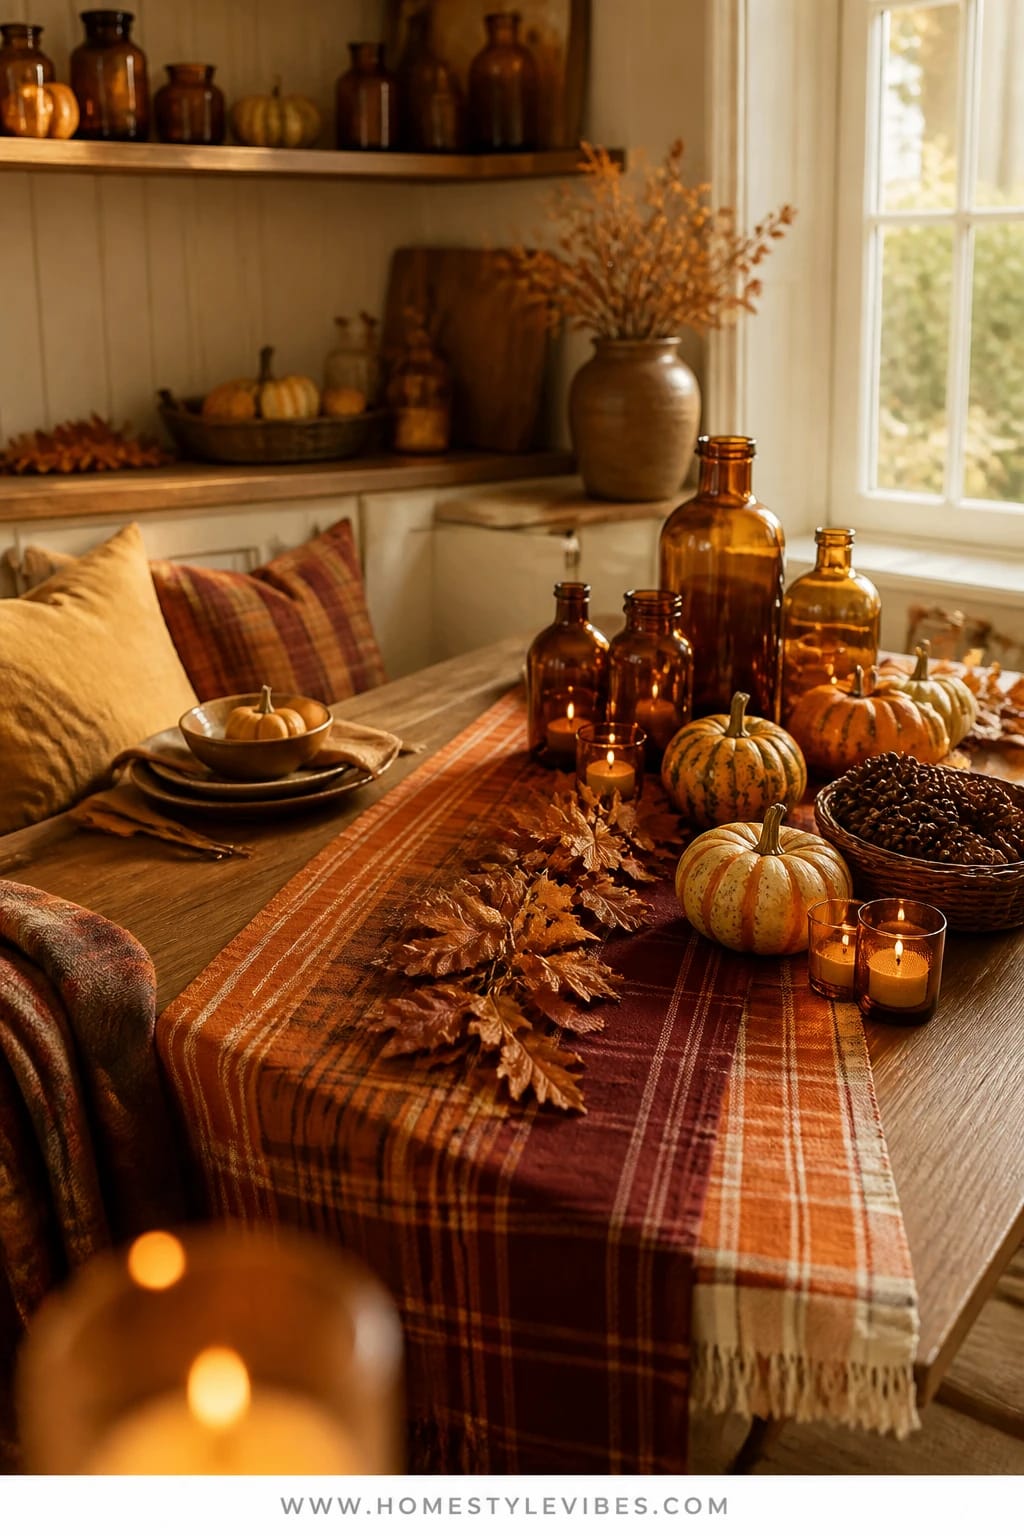
Some breakfast nooks read like accidental storage: laptop, salt shaker, stray mail, repeat. You’ve tried a centerpiece, but it’s either too tall to talk over or too fussy to keep clean. This idea is all about low profile and layered textiles—two overlapping plaid runners, a line of amber glass bottles, and a few squat pumpkins. The look is cozy bright autumn in a nutshell: soft checks, rich glow, and everyday ease.
It works in real homes because nothing here interferes with actual eating. The color palette of warm amber and rust against cream plaids marries well with any wood tone. Light plays beautifully through amber glass, especially if the nook catches afternoon sun. For photos, this layered runner trick adds movement without clutter, and the line of bottles creates a strong, graphic anchor.
Variations: Tight table? Use one runner turned crosswise and just three bottles. Wish it quieter? Pick oatmeal and white plaid with clear glass and a single butternut squash for a gentler take. Kid-heavy homes can swap glass for amber plastic bud vases—no judgment, I’ve done it after one memorable spaghetti incident.
Budget Breakdown:
- Two plaid runners: $24–$60
- Amber glass bottles/bud vases (set of 5–7): $20–$70
- Mini pumpkins and gourds: $10–$20
- Tea lights in votive holders (optional): $10–$18
- Neutral placemats (optional): $16–$40
Total Estimated Cost: $64 – $208
Best For: Breakfast nooks or small dining corners used daily; families who need spill-friendly style that still photographs well on the holiday.
Key Design Elements:
- Main seasonal props: Amber glass bottles, mini pumpkins
- Color palette: Rust, amber, cream, soft brown
- Lighting strategy: Natural afternoon sun, with a couple of tea lights for evening
- Textile layers: Overlapped plaid runners, optionally padded with placemats
- Natural elements: Dried wheat stems or oak leaves tucked into bottles
- Accent details: Ceramic salt cellar, wooden pepper mill, matte black napkin rings
Why This Reads High-End: Layering textiles in a considered way makes the table feel finished. Matching the amber glass tones to the plaid’s warm notes ties everything together like a stylist did it.
How To Recreate This Look:
- Start by laying one runner down the length of the table, then angle the second runner slightly for casual overlap.
- Add amber bottles in a neat row down the center, varying heights for rhythm.
- Layer mini pumpkins near the bottles, keeping them low for easy conversation.
- Place two tea lights spaced evenly for nighttime glow.
- Style with a small handful of dried wheat in every other bottle to balance height.
The Most Common Mistake: Choosing runners that are too short. Aim for at least 12 inches of overhang total so it looks intentional, not like a scarf thrown on a table.
Pro Styling Tip: For photos, pull the chairs out slightly and angle one; the negative space frames your centerpiece and keeps the shot airy.
4) Harvest Herb Wreath And Warm Brass On The Range Hood Shelf
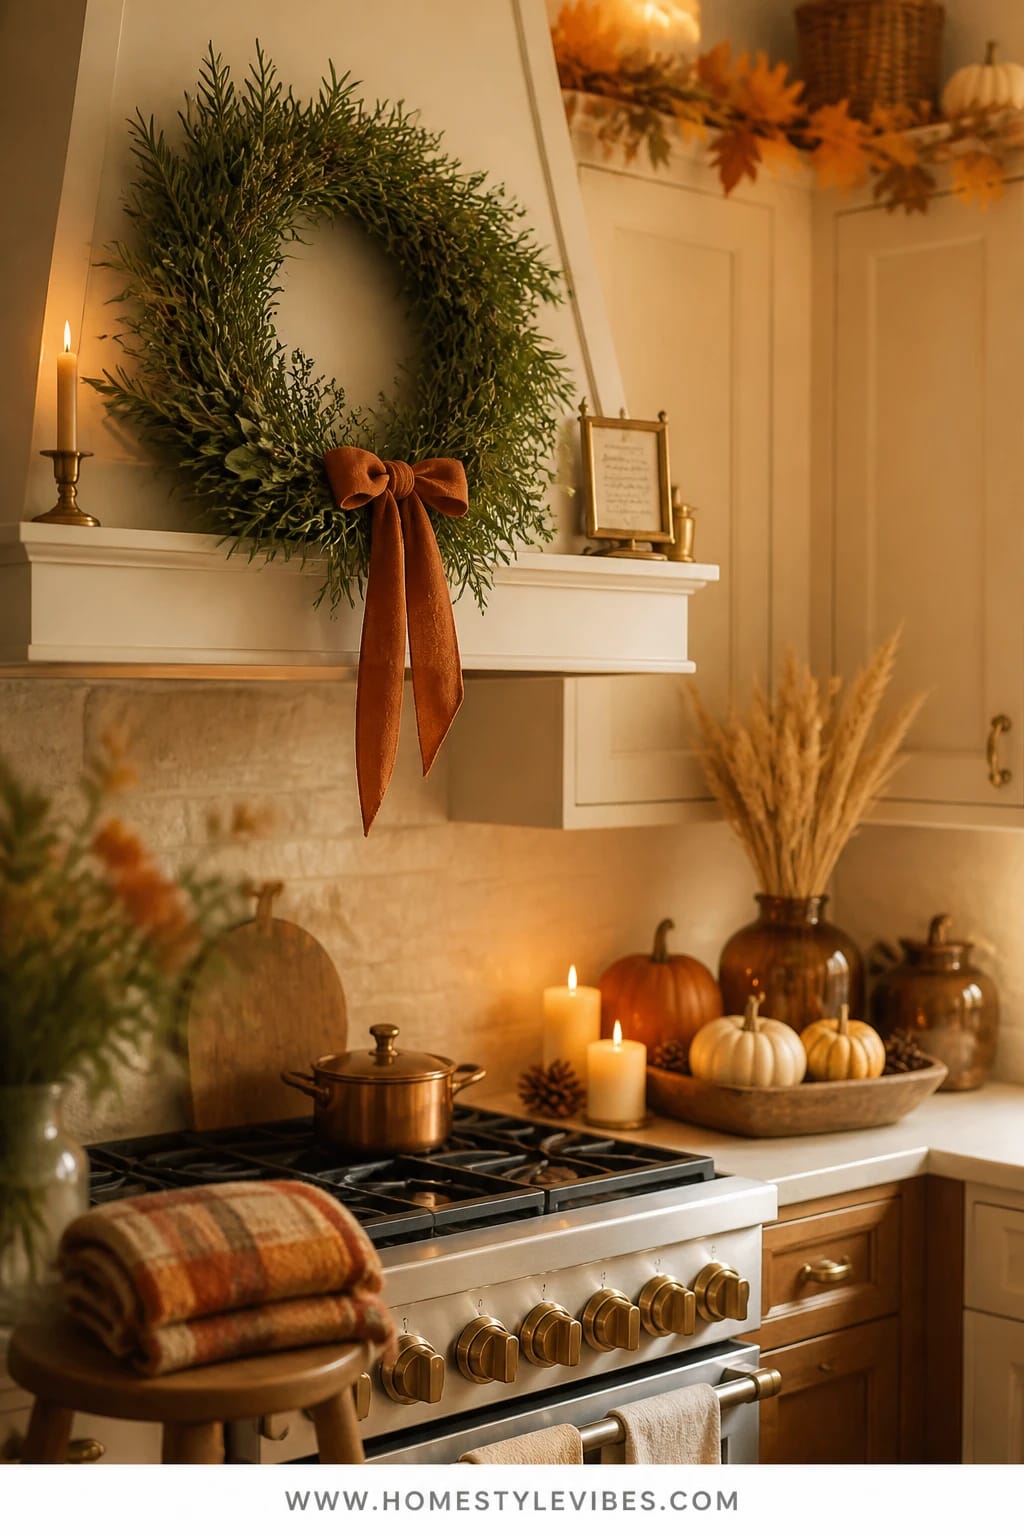
That little ledge or trim on your range hood? It’s usually ignored. Or worse: it’s hosting a dusty faux ivy situation from 2012. You’ve tried a metal “Gather” sign, but it never felt substantial. Enter the harvest herb wreath—think fresh rosemary, bay, and thyme tied with spicy rust ribbon—and a pair of warm brass accents (tiny taper holders or a petite framed recipe card in brass). The mood lands squarely in cozy bright: green herbs, glints of brass, and a subtle ribbon tail that feels festive without shouting.
Here’s why it works: it adds life where the eye naturally lands—over the stove—without being a grease magnet if you keep it high and simple. Herbs dry beautifully and fill the kitchen with the faintest savory scent. Under hood lights at night, brass picks up the glow and the ribbon softens the line of the hood. Photos love the wreath’s round shape breaking up all the right angles in a kitchen.
Variations: No hood ledge? Hang the wreath on a Command hook centered on the hood. If you want something longer-lasting, choose a preserved bay wreath and wire in a couple of faux rosemary sprigs. For a more minimal look, skip the ribbon and add just one slender brass candleholder on the adjacent counter to echo the metal.
Budget Breakdown:
- Fresh herb bundle or pre-made herb wreath: $18–$65
- Ribbon in rust or cranberry: $6–$14
- Two small brass accents (vintage brass candlesticks or frame): $20–$60
- Command hook or small wreath hanger: $6–$12
Total Estimated Cost: $50 – $151
Best For: Kitchens with a visible range hood or focal stove wall; home cooks who appreciate a subtle, savory note during Thanksgiving week.
Key Design Elements:
- Main seasonal props: Fresh herb wreath, rust ribbon
- Color palette: Deep green, rust, brass, creamy white
- Lighting strategy: Use the hood’s built-in lights at low for evening warmth
- Textile layers: Ribbon tails for soft movement
- Natural elements: Rosemary, thyme, bay leaves
- Accent details: Brass candlesticks, petite brass frame with Grandma’s pie recipe
How To Recreate This Look:
- Start with a command hook centered on the hood or ledge.
- Add the herb wreath and adjust the ribbon length so it ends just above the range controls.
- Layer in two small brass accents either on the hood ledge (if safe) or on the nearby counter.
- Place a tiny dish of whole nutmeg and a grater next to the brass accent for a usable detail.
- Style with hood lights on a dimmer during evening hosting for soft drama.
Why This Looks Intentional: The circle of the wreath and the linear brass details create harmony, while the restrained color palette keeps the focus where it belongs—your holiday cooking.
Don’t Do This: Avoid overly fragrant wreaths like eucalyptus directly above the stove if you’re sensitive; the steam can amplify scent and compete with your recipes.
Pro Styling Tip: Photograph the wreath slightly off-center with your tallest pot on the front burner—it tells the story of cooking and celebration in one frame.
Quick mindset pause: You don’t need to do everything. Pick the area guests see first—or the spot that bothers you most—and give it real attention. One finished moment feels better than five half-styled corners.
5) Cinnamon Candle Cluster And Plaid Pot Holders On The Coffee Station
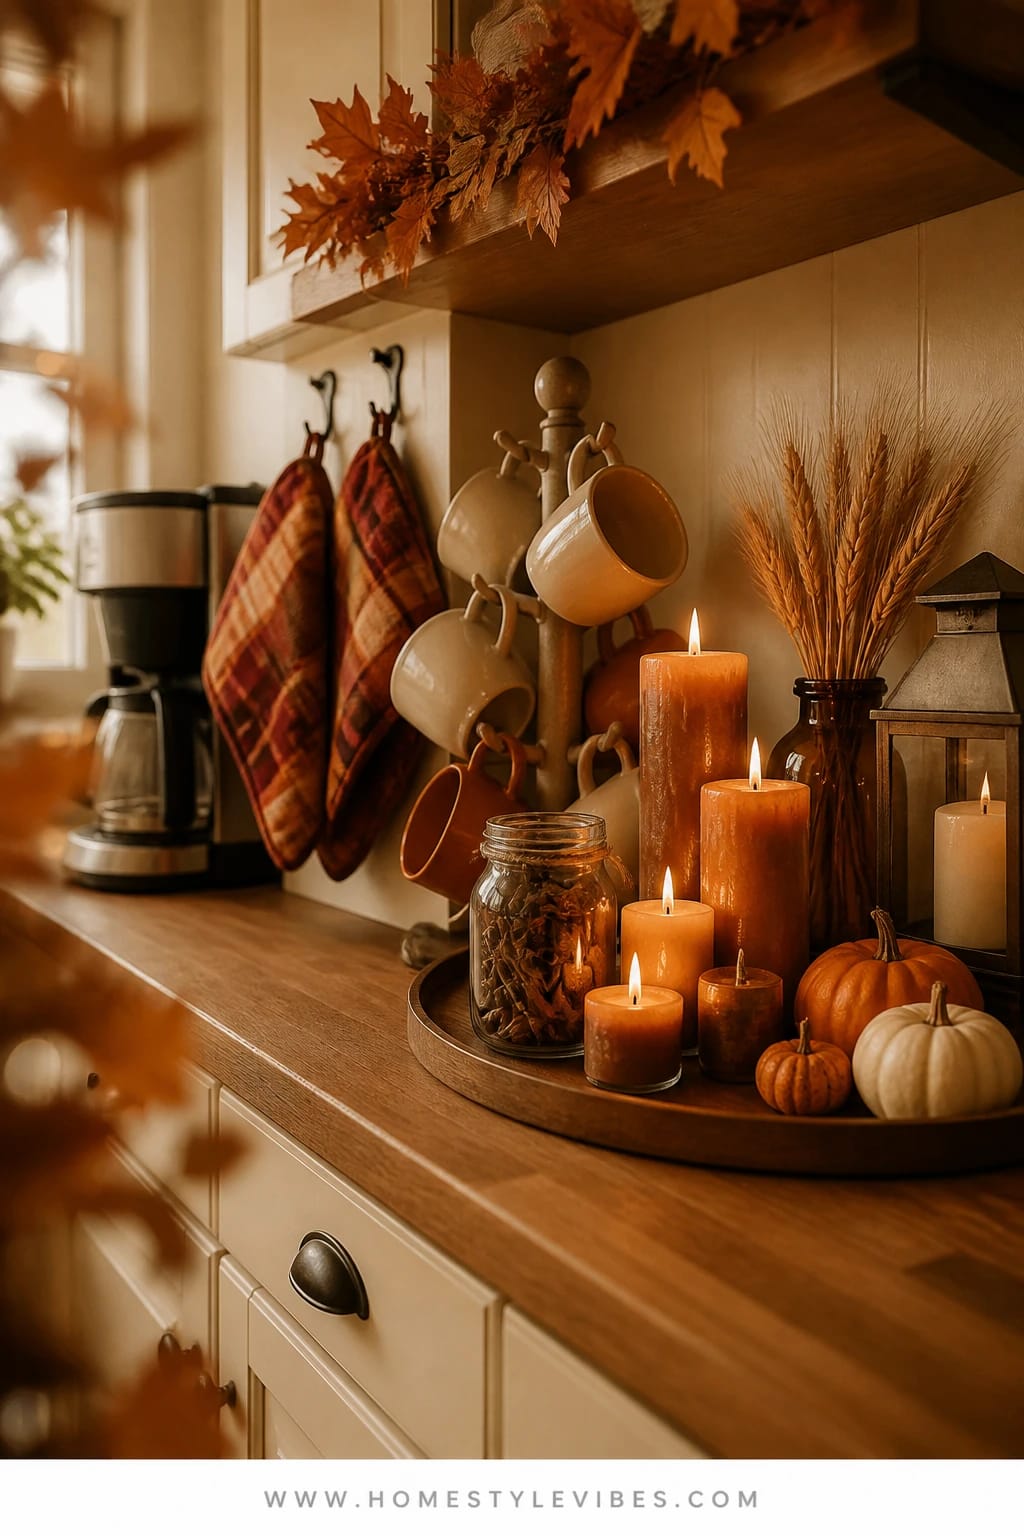
Coffee zones often look like a tangle of cords, pods, and a sugar jar that never quite seals. You’ve rearranged the mugs three times but it still feels random. The secret isn’t adding more—it’s corralling everything on a deep tray, then adding one sensory layer: scent and texture. Create a Thanksgiving coffee bar that welcomes early risers with a cinnamon candle cluster, a pair of richly patterned plaid pot holders hooked nearby, and a jar of whole spices (cloves, star anise) for steeping in cider.
This idea sets a warm, cozy-bright tone every morning of the holiday week. Why it works for real life: the tray defines the mess, the candle cluster warms the scene without taking much space, and the pot holders pull double duty—style and utility. Use a mix of candle heights for depth and stick to spicy gourmands—cinnamon, clove, a hint of orange. Soft lamp-like light? Add one tiny battery tea light among real candles for twinkle without heat near cords.
Variations: Tiny counter? Use a narrow breadboard with just one candle and your most beautiful mug. If you’re concerned about open flame, swap to flameless candles with a realistic flicker and tuck cinnamon sticks around the base. Love neutrals? Choose oatmeal plaid and an unscented beeswax pillar for a clean look.
Budget Breakdown:
- Deep tray or breadboard: $25–$70
- Candles (1–3 pillars, 2–4 votives): $18–$48
- Plaid pot holders or oven mitt set: $12–$28
- Glass jar with whole spices: $8–$16
- Small lidded sugar bowl/creamer (optional): $15–$35
Total Estimated Cost: $78 – $197
Best For: Households that run on caffeine; great near a pantry cabinet or a short stretch of counter by the fridge for self-serve refills on Thanksgiving morning.
Key Design Elements:
- Main seasonal props: Cinnamon candles, plaid holders, whole spices
- Color palette: Warm caramel, rust, cranberry accents, creamy white
- Lighting strategy: Candle flicker plus nearby under-cabinet light on low
- Textile layers: Plaid pot holders hung on adhesive hooks, one folded under the sugar bowl
- Natural elements: Cinnamon sticks, star anise, clove buds
- Accent details: Stoneware canisters, matte black scoop, brass teaspoon
Why This Looks Expensive: Symmetry and restraint. A tidy tray with clustered candles and one strong textile reads curated café, not chaotic countertop.
How To Recreate This Look:
- Start with a tray big enough to hold your coffee maker, canisters, and candle cluster.
- Add your tallest candle at the back left, then step down heights to the right for a visual cascade.
- Layer two plaid pot holders on hooks above or beside the station for vertical interest.
- Place a small jar of whole spices with a note that says “Steep me in cider” for a charming touch.
- Style with a spoon rest and one beautiful mug facing forward like it’s waiting for its moment.
Watch Out: Keep open flames clear of cords and cabinets; leave at least 6 inches of space. If in doubt, go flameless and tuck scent via a simmer pot on the stove instead.
Pro Styling Tip: For photos, turn off overhead cans and leave only the under-cabinet light and candles—the warm pool of light isolates the vignette beautifully.
6) Cranberry Linen And Gilded Stemware On The Eat-In Counter
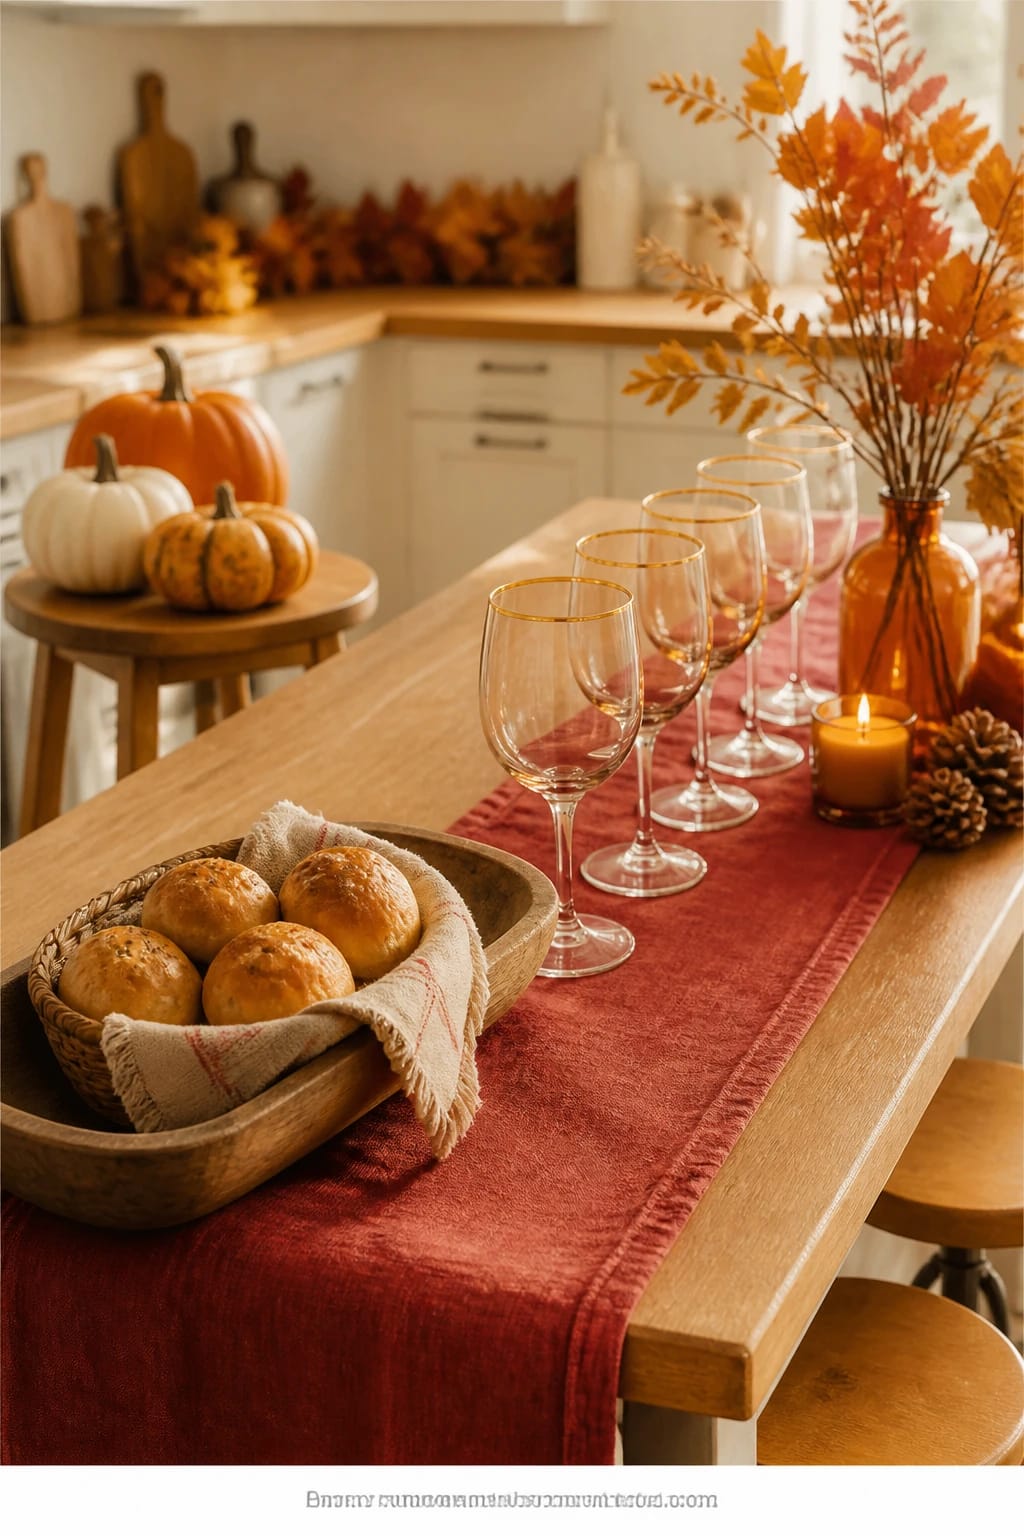
I see this all the time: the eat-in counter with barstools becomes an overflow drop zone—keys, backpacks, mail avalanche. You’ve tried a bowl, but it just catches more stuff. On Thanksgiving week, turn it into a dressed-but-useful tasting rail: cranberry linen runner, a neat line of gilded or gold-rimmed stemware, and a low basket of rolls with a tea towel. It’s a hospitality moment even if the dining table is elsewhere. Guests can perch, sip, and chat while you baste the turkey. It reads festive, not fussy.
The mood is classic cozy-bright: rich cranberry fabric, warm gold accents, and soft candle shimmer reflected in glass if you add a couple of votives. Why it works: it’s linear, so it doesn’t block traffic or prep. The stemware repetition makes the counter look styled in 30 seconds. In photos, the gold rims pick up any warm bulb in your pendants and multiply it—like little halos for your cocktails.
Variations: If you don’t own gold-rimmed glasses, tie a thin satin ribbon around standard wine stems for a hint of gleam. No barstools? Set the runner along the back edge of the counter to define a “no clutter” zone where glasses live all week. If red reads too bold for you, swap to a mulled-wine plum runner with clear glass for a quieter mood.
Budget Breakdown:
- Cranberry linen runner: $20–$48
- Gold-rimmed stemware (set of 6): $36–$120
- Low bread basket + tea towel: $18–$40
- Two glass votives (optional): $8–$16
- Small tasting cards/place tags (optional): $6–$12
Total Estimated Cost: $88 – $236
Best For: Kitchens with a peninsula or bar seating; perfect for casual sipping, mocktail tasting, or pie flights around dessert time.
Key Design Elements:
- Main seasonal props: Cranberry runner, gold-rimmed glasses, bread basket
- Color palette: Cranberry, gold, cream, warm wood
- Lighting strategy: Pendant lights on dim, votives for sparkle
- Textile layers: Linen runner, cotton tea towel lining the basket
- Natural elements: Rosemary sprig tucked in the basket, orange peel twist for garnishes
- Accent details: Slim place cards, small brass bowl of sugared cranberries
How To Recreate This Look:
- Start by running the linen along the center of the counter, leaving room at the front for plates.
- Add a straight line of stemware, evenly spaced like little soldiers.
- Layer in a low basket with rolls or crackers, lined with a pretty tea towel.
- Place two votives between glasses for a warm reflection at night.
- Style with tiny tags for drink names or pie pairings—yes, that’s a thing and it’s delightful.
Why This Looks Expensive: Consistent glassware and a single strong textile color create cohesion; the gold detailing telegraphs celebration with minimal effort.
The Most Common Mistake: Too many competing heights. Keep everything low and linear so you don’t block eye contact or chop the counter visually.
Pro Styling Tip: Photograph from the stool side with pendants dimmed; the glass rims will glow and the cranberry runner will look rich and saturated.
Micro-story time: A friend of mine set this up last year with just regular wine glasses and a pack of gold stickers from the craft store—tiny stars at the base of each stem. She texted me a photo five minutes before guests arrived and confessed she forgot flowers. Honestly? No one noticed. The glow on the glass stole the show.
One more mindset moment: edit before you add. Clear the counter or shelf completely, wipe it down, then build the idea. The 10 minutes you spend resetting will make everything else look suddenly, wonderfully intentional.
Quick Checklist
- Warm table lamp for island glow
- Assorted real pumpkins, squash, and apples
- Large wooden tray or breadboard
- Plaid kitchen towels or runners
- Copper mugs for open shelves
- Dried orange and cranberry garland supplies
- Amber glass bottles for breakfast nook
- Mini pumpkins for low centerpieces
- Fresh herb wreath materials (rosemary, bay, thyme)
- Rust or cranberry ribbon
- Brass candlesticks or a small brass frame
- Deep tray for coffee station
- Cinnamon and clove candles (or flameless)
- Glass jar of whole spices
- Cranberry linen runner for eat-in counter
- Gold-rimmed or clear stemware
- Low bread basket with tea towel
- Warm bulbs (2700–3000K) for all task and accent lights
Frequently Asked Questions
How do I keep Thanksgiving kitchen decor under budget without it looking cheap?
Use edible decor and repetition. Pile real produce (apples, squash) in one or two signature vessels, and repeat one metal (copper or brass) in 2–3 places. Shop your home for trays and lamps, then add one textile in a strong seasonal color—cranberry or rust—to tie it together.
Real or faux pumpkins and florals—what’s better for the kitchen?
For the kitchen, IMO real wins. Produce holds up well in cooler corners and can be cooked later. For flowers, choose hardy stems (mums, eucalyptus) or dried elements (wheat, bay). Keep anything delicate away from the stove and heat vents to avoid the sad half-deflated look by week three.
My kitchen is tiny. Which idea should I start with?
Go with the breakfast nook table styling or the coffee station tray. Both contain clutter, use low-profile pieces, and give you a big visual payoff without stealing prep space. If you don’t have a nook, do a compact island corner with one lamp, one bowl, and three mini pumpkins.
How do I store these items after the season so they don’t get ruined?
Eat the produce, compost what’s past its prime, and wipe down trays with mineral oil if they’re wood. For textiles, wash and store in a clear bin with cedar sachets. Wrap copper and brass separately in paper towels to prevent scratches and label everything so next year’s setup takes minutes, not hours.
Are candles safe around kids and pets in a busy Thanksgiving kitchen?
Use common sense zones. Real flames only in areas with supervision (coffee station while you’re nearby), and choose flameless for shelves or tight counters. Keep wicks trimmed, avoid placing candles under cabinets, and consider a simmer pot on the back burner for scent instead.
When should I start decorating the kitchen for Thanksgiving?
Set the base layers (runners, trays, wreath) the first week of November. Add produce and fresh herbs 3–5 days before the holiday, and hold candles for the night before so they look crisp. Garlands and amber glass can go up anytime; they’ll last the month.
Closing Thoughts
Pick one corner today. Maybe it’s the island that catches everything, or the shelves that never look right. Clear it, lay down a runner or tray, and add two or three seasonal layers—pumpkin, plaid, warm light. That’s it. The rest can come in waves as the week unfolds.
Thanksgiving kitchen decor isn’t about perfection. It’s about that cozy-bright feeling: golden glow on copper, the papery rustle of dried wheat, a cranberry runner catching the pendant light while someone steals a pre-dinner roll. Layer warmth, choose a simple color story, and let function lead. You’ll cook better in a kitchen that feels loved.
You’ve got this. Start small, light the warm bulb, and watch your kitchen become the heart of the holiday—exactly where everyone wants to be.

About the Author

Krisztina P.Rendes, Founder of Home Style Vibes
Founder of Home Style Vibes
Krisztina Puskásné Rendes created Home Style Vibes as a cozy-modern lifestyle space where homemaking meets inspiration. Her goal is to help women create beautiful, organized, and peaceful homes they truly love — without overwhelm. You’ll find here heart-driven content on home decor, cleaning tips, easy family recipes, organization and decluttering, DIY home projects, plants, and seasonal ideas — all designed to bring more calm, comfort, and style into everyday life.