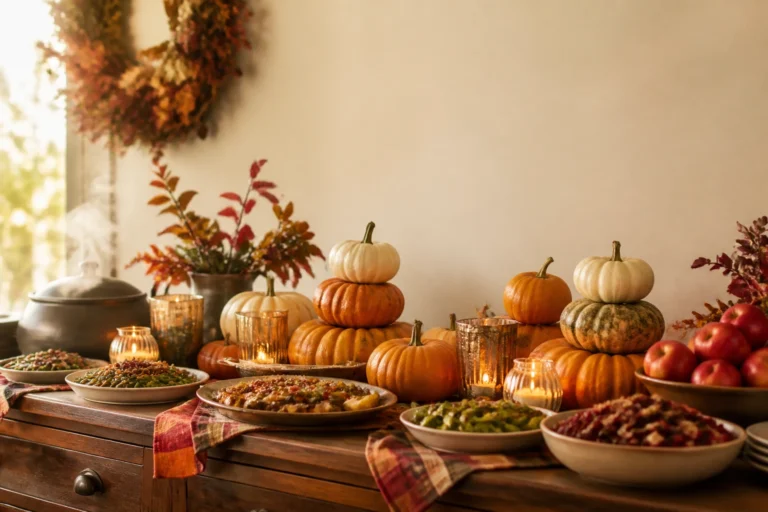
6 Fall Vegetable Garden Ideas And What To Plant This Autumn
You want crunchy, sweet carrots and armfuls of kale that actually look like the seed packet. You hate staring at tired summer beds, confused about what survives cool nights and that first nip of frost. This is your Garden Grow season—cedar beds, crumbly soil, tidy trellises, and baskets brimming with fall crops—and these 6 fall vegetable garden ideas will cut through the guesswork and give you a productive, photogenic harvest in 6 weeks to 90 days, depending on the crop. Consider this your friendly roadmap to raised beds, succession sowing, simple protection, and smart plant pairings that turn September-to-November into your easiest season yet.
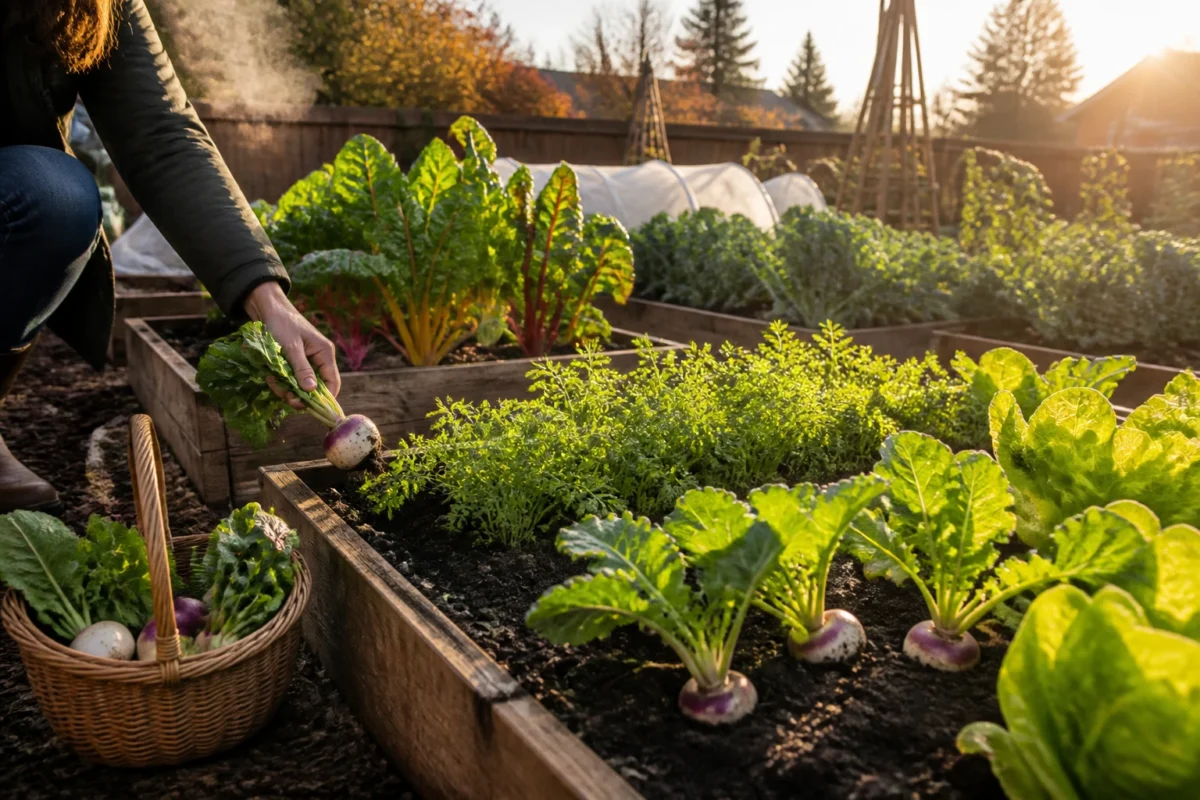
We’re keeping it real: quick wins, high-yield crops, and practical structures you can build or set up in an afternoon. Expect soil upgrades, spacing tricks, and cool-season plant lists that don’t quit. You’ll get the harvest garden vibe—dark soil flecked with compost, cedar frames, a crisp morning with your breath fogging a little as you tug another purple-topped turnip free. Highly photographable? Absolutely. Perfect for anyone who missed the summer window or wants to push their garden into Thanksgiving with pride.
1) Cedar Raised Beds With Rainbow Chard And A Late-Season Kale Row
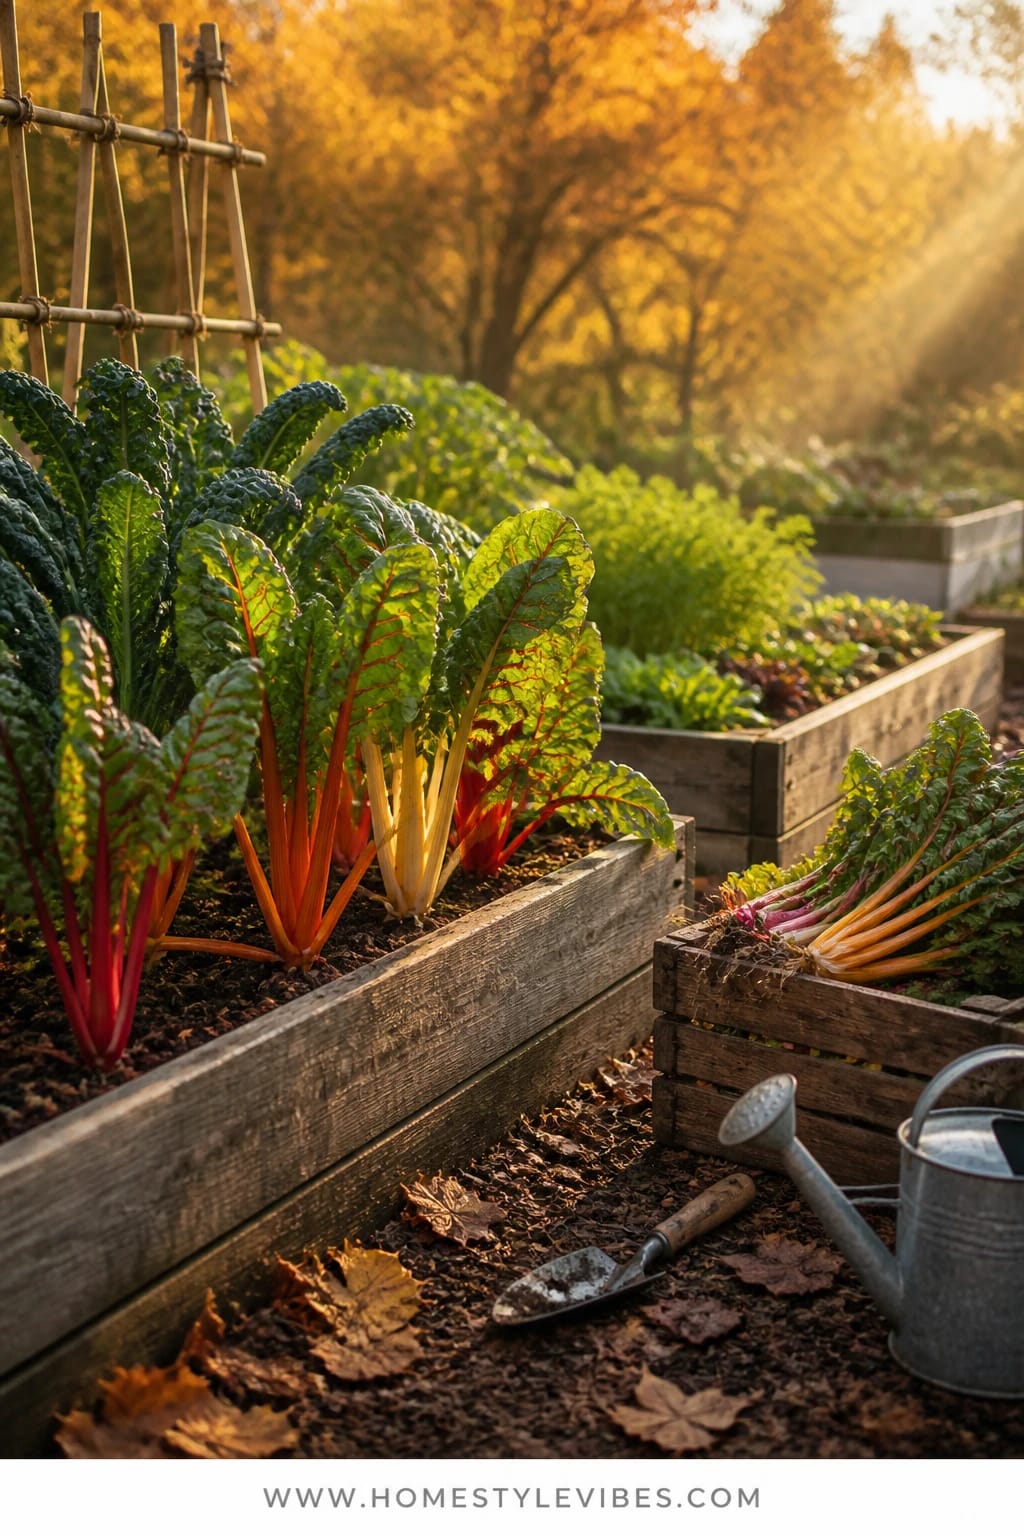
We’ve all been there: the summer tomatoes are done, the basil is bolting, and the beds feel like a mess. You’ve tried tossing in a few fall seedlings, but it still looks sparse and underwhelming. This setup solves that by turning your raised beds into a fall powerhouse of color and productivity—think glossy rainbow chard stems, deep green dinosaur kale, and rugged soil tucked with compost. The mood is productive garden satisfaction: crisp air, tidy rows, and the happy rhythm of weekly cut-and-come-again harvests.
Here’s why it works. Chard and kale love cooling temperatures and won’t throw a tantrum at a light frost. In real homes—aka real gardens with kids, pets, and busy schedules—these are forgiving crops with a long picking window. Morning light makes the chard stems glow like stained glass, and the kale’s waxy leaves photograph beautifully with a little dew. Materials are simple and sturdy: cedar beds, compost, a trowel, and labeled stakes so you actually remember which kale is which. It’s approachable, un-fussy, and high yield. It transitions seamlessly from late September to Thanksgiving, especially if you start with transplants for a head start.
Small-space spin: if you don’t have large beds, dedicate a single 4×4 to a checkerboard of chard and kale, alternating colors for a quilt effect. Budget variation: start from seed for kale (it sprouts reliably in cool weather) and only buy a few rainbow chard plugs for immediate color.
Budget Breakdown:
- Cedar raised bed kit (4×8): $120–$220
- Bulk compost/topsoil blend (1–2 yards): $40–$100
- Kale seedlings or seed packets: $3–$18
- Rainbow chard seedlings or seed packets: $4–$20
- Plant labels and basic trowel: $10–$25
Total Estimated Cost: $177 – $383
Best For: Families and busy gardeners who want reliable greens from mid-fall to early winter; full-sun beds in zones 5–9 that get at least 5 hours of light.
Key Design Elements:
- Main seasonal props: Cedar beds, compost top-off, rainbow chard, lacinato and curly kale
- Color palette: Emerald greens, ruby/orange/yellow chard stems, dark brown soil
- Lighting strategy: Early morning harvests; a simple hoop cover ready for frost
- Textile layers: Garden gloves, knee pad for weeding comfort
- Natural elements: Mulched pathways with wood chips for clean lines
- Accent details: Bamboo stakes at corners; galvanized watering can
How To Recreate This Look:
- Start with a deep clean: remove summer crops, pull stakes, and spread 1–2 inches of compost over the bed.
- Add a grid: mark rows 12–16 inches apart for kale, 10–12 inches for chard.
- Layer seedlings: alternate kale varieties to vary leaf textures, and interplant chard in bold color clusters for visual impact.
- Place a simple hoop frame: push flexible PVC or wire hoops in now so you can add row cover quickly when frost looms.
- Style with labels: mark varieties and dates; water deeply and mulch lightly around stems to stabilize temperature.
Why This Looks Intentional: Uniform spacing and alternating textures read “planned” rather than “leftover summer scramble.” The bold chard stems act like living accent pieces, and clean edges on the bed make everything feel tidy.
Watch Out: Overcrowding reduces airflow and flavor. Give those kale leaves room or you’ll invite aphids by Halloween. Also, don’t forget to water during dry fall stretches—cool doesn’t mean wet.
Pro Styling Tip: Harvest into a shallow basket and leave a few colorful chard stems standing tall—instant “market garden” moment in photos.
2) Brick Path Border With Garlic Cloves And Straw Mulch
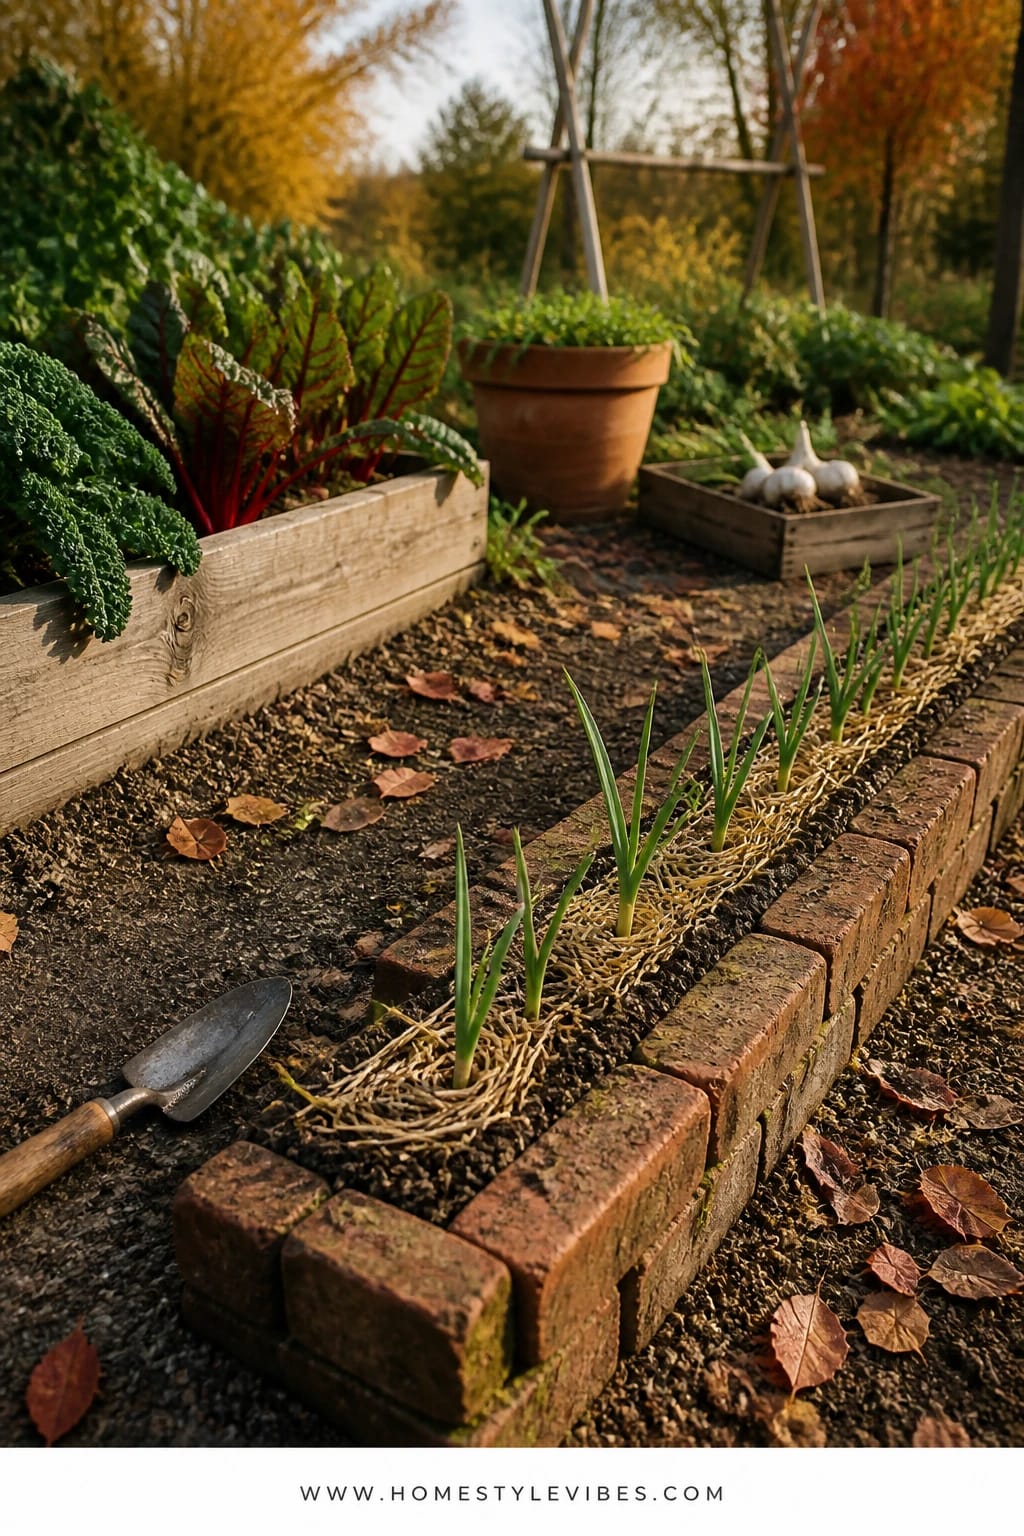
It’s that one edge along your path that always feels like dead space. You planted marigolds in summer, but by October it’s bare and muddy. Planting garlic in a brick path border turns a nothing zone into a winter project that pays off in June with big, fragrant bulbs. The mood? Quiet productivity and patience—tucking cloves into rich soil, mulching with golden straw, and letting winter do the work.
Why it works in real gardens: garlic is incredibly low maintenance and uses otherwise wasted space. You plant it once in fall, mulch it, and basically ignore it until spring shoots arrive. Morning side light along a path highlights those green spears beautifully, and straw mulch brings cohesive color and a neat, finished look. It’s also kid-proof and pet-friendly as long as you keep planting depth consistent and edges tidy.
Variations: If you’re in a colder zone (3–5), choose hardneck varieties for reliable overwintering and better scapes in spring. Warmer zones (7–9) can rock softneck varieties for longer storage braids. On a tight budget? Buy seed garlic by the bulb, break into cloves, and skip fancy edging—just be consistent with rows.
Budget Breakdown:
- Seed garlic (hardneck or softneck), 1–2 lbs: $12–$30
- Straw bale: $8–$15
- Compost/top dressing (bagged): $5–$15
- Path edging refresh (optional bricks or pavers): $30–$120
Total Estimated Cost: $25 – $180
Best For: Border spaces getting 4–6 hours of sun; gardeners who want set-it-and-forget-it winter crops with a satisfying June harvest.
Key Design Elements:
- Main seasonal props: Seed garlic cloves, straw mulch, compost top-dressing
- Color palette: Wheat-gold straw, earthy brown soil, spring-green shoots
- Lighting strategy: Late afternoon light to warm soil after cool mornings
- Textile layers: Thick gloves for straw handling
- Natural elements: Brick or stone path to frame rows
- Accent details: Simple row markers with planting date and variety
How To Recreate This Look:
- Start with the border: loosen soil 6–8 inches deep and mix in compost.
- Add cloves: plant pointy side up, 2 inches deep, 6 inches apart, rows 8 inches apart.
- Layer straw: a 2–3 inch blanket; don’t smother the area—light and fluffy is best.
- Place markers: label variety and planting date to time your summer harvest.
- Style with path tidy-up: sweep bricks, refresh edges, and water in gently.
Why This Feels Designer: The clean, repeating rhythm of evenly spaced rows against a defined border looks intentional and calm. Straw’s uniform texture is the unifying element that turns function into style.
One Thing To Avoid: Planting grocery store garlic. It’s often treated to prevent sprouting and may bring disease. Go for seed garlic from a reputable source.
Pro Styling Tip: Leave a narrow, straw-free reveal along the brick edge; that crisp line reads beautifully in photos and keeps mulch from spilling onto the path.
Pause and breathe. Fall gardening is about small daily care—top-dressing a bed, tucking in a row cover—rather than marathon weekends. If one idea clicks, start there. You don’t need the whole list to feel proud of your garden.
3) Galvanized Trough Planters With Mizuna Greens Under A Simple Row Cover
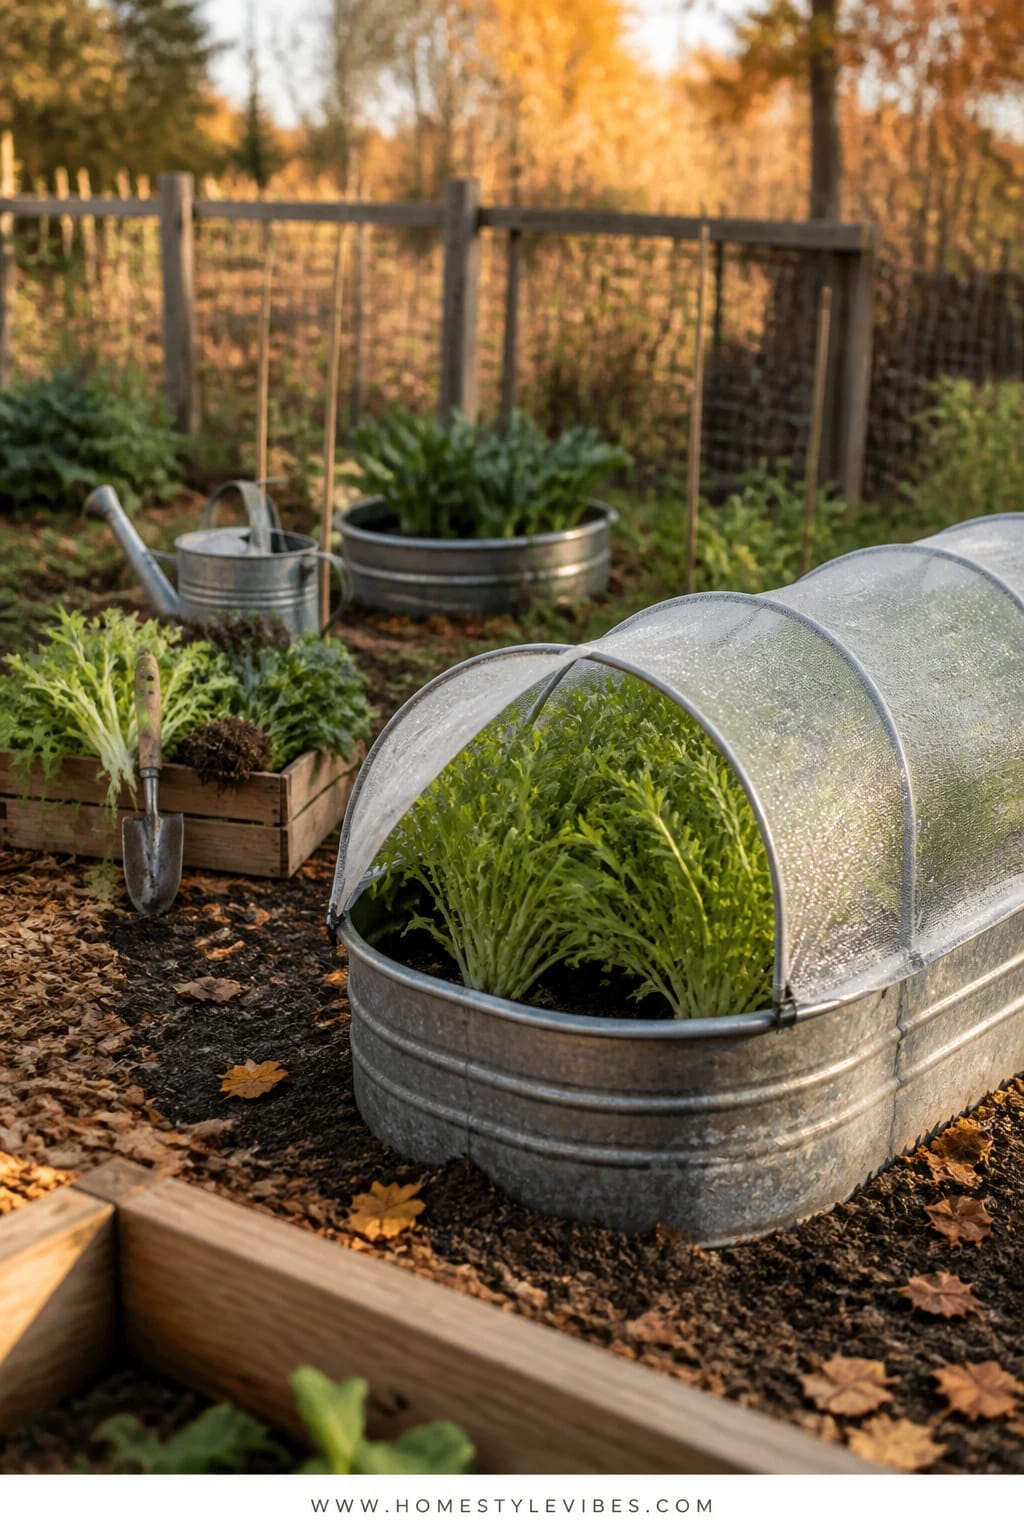
Short on ground space? Or maybe your soil is stubborn clay that turns to concrete by October? Galvanized trough planters step in as tidy, mobile garden units that make fall salads a daily reality. The vibe here is clean utility: silver metal, bright baby greens, a light row cover stretched like a drum to guard against frost and flea beetles. It’s incredibly photogenic—soft morning light on those frilly mizuna leaves looks like lace.
This works because cool greens like mizuna, arugula, and tatsoi are sprinters in fall. They germinate fast, grow in tight succession, and give you quick harvests 20–40 days from sowing. The row cover controls pests without sprays and buffers chilly nights. In real homes, that means you can clip a bowl of greens before dinner and still have time to deal with Tuesday chaos. Small-space gardeners, this one’s your sweetheart.
Variations: Budget version uses heavy-duty storage totes (drilled for drainage) instead of troughs. If you prefer a milder salad, swap arugula for buttercrunch lettuce starts under the same cover. Urban balcony? Add casters to your trough base to chase the sun.
Budget Breakdown:
- Galvanized trough (2–3 ft): $40–$120
- Potting mix + compost blend: $15–$40
- Seed packets (mizuna, arugula, tatsoi): $6–$12
- Row cover fabric + clips: $15–$30
- PVC hoops or wire supports: $8–$20
Total Estimated Cost: $84 – $222
Best For: Patios, balconies, and side yards with partial to full sun; households that want quick-cut salad greens through late fall.
Key Design Elements:
- Main seasonal props: Galvanized planters, cool-season greens, breathable row cover
- Color palette: Silvery metal, charcoaled soil, lime-to-forest greens
- Lighting strategy: Morning sun, dappled afternoon for tender leaves
- Textile layers: Lightweight frost cloth (row cover) for airflow
- Natural elements: Compost-rich potting mix for steady growth
- Accent details: Spring clamps or binder clips to secure fabric fast
How To Recreate This Look:
- Start by drilling drainage holes (if needed) and filling with a 60/40 potting mix-to-compost blend.
- Add shallow furrows with your fingers and scatter seeds generously for a cut-and-come-again bed.
- Layer a light dusting of soil over seeds; water with a gentle rose head or spray nozzle.
- Place hoops and row cover; clip snugly so wind doesn’t whip the fabric.
- Style a small harvest station nearby—scissors, a rinse bowl, and a towel for quick salad prep.
Why This Reads High-End: Repetition of matching planters lined in a row looks polished, and the subtle arc of the row cover lends a greenhouse vibe. Keep tools minimal and coordinated for a tidy visual.
The Most Common Mistake: Overwatering. Cool-season greens in deep planters don’t need daily drenching—aim for consistently moist, not soggy, or you’ll get damping-off and sad seedlings.
Pro Styling Tip: Sow mizuna in a thicker band down the center with a thinner arugula border—the leaf texture contrast photographs like intentional patterning.
4) Cold-Frame Edge With Spinach Starts And Brick Heat Sink
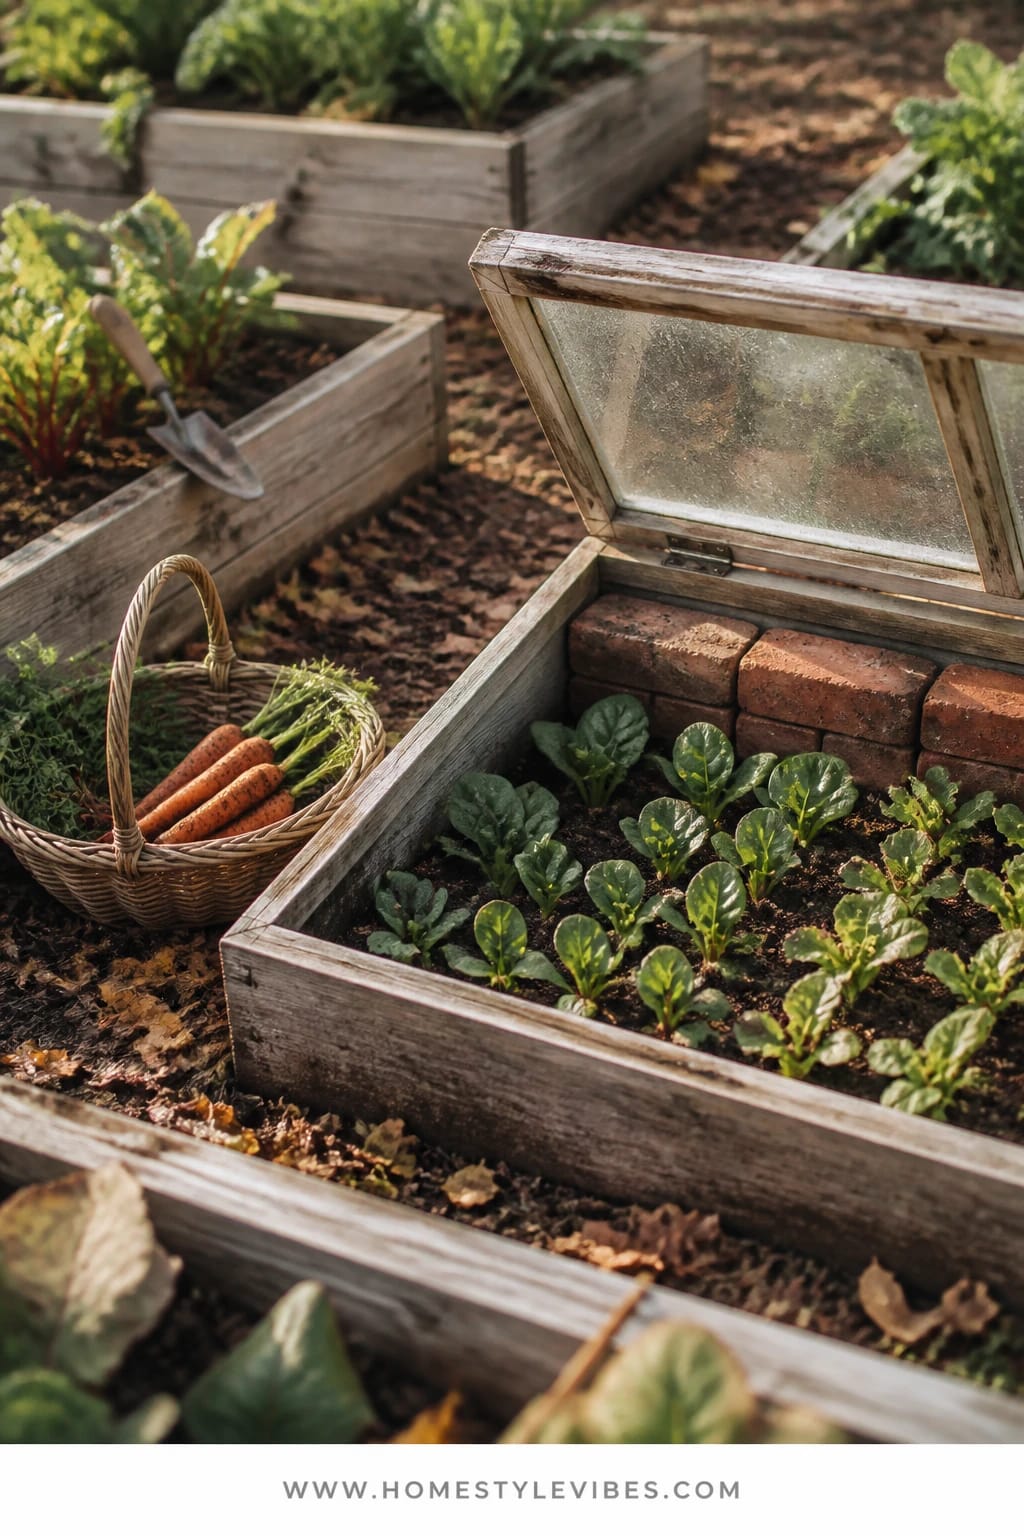
Do you always quit gardening after the first frost out of habit, even though part of you knows you could keep going? A simple cold frame built along a sunny edge extends your fall harvest by weeks. The feel is resourceful and slightly old-world: salvaged windows, a low pine frame, a line of bricks soaking up sun and releasing warmth overnight. Spinach thrives here, and tender lettuce mixes happily tag along.
Why it works: cold frames create a microclimate, trapping daytime heat and blocking wind. Spinach laughs at cold nights and actually sweetens in the chill. It’s a real-home win because the lid lets you walk away without fuss—close at dusk, crack open on sunny days to prevent overheating. The warm brick border acts like a tiny radiator. On the practical side, the structure is compact enough to store in spring, and you can build it over existing soil beds.
Variations: Upcycle thrifted storm windows for the lid and use scrap lumber for the base. No windows on hand? Use twin-wall polycarbonate panels—lightweight, durable, and warm. If you’re in a windy spot, add simple hinges and a prop stick so the lid doesn’t slam shut.
Budget Breakdown:
- Scrap lumber or new pine boards: $20–$80
- Old window or polycarbonate panel: $0–$90
- Bricks (used or new): $0–$40
- Spinach starts or seed: $3–$15
- Hinges and screws: $6–$15
Total Estimated Cost: $29 – $240
Best For: South-facing bed edges; gardeners in zones 5–8 aiming to harvest greens into December, or longer with insulation.
Key Design Elements:
- Main seasonal props: Cold frame box, salvaged window lid, spinach seedlings
- Color palette: Clear glass, deep green leaves, red or buff brick
- Lighting strategy: Max morning-to-midday sun; prop open lid on bright days
- Textile layers: Old blanket or tarp for extra-cold nights
- Natural elements: Soil topped with compost, leaf mulch around exterior
- Accent details: Simple thermometer inside to gauge temps
How To Recreate This Look:
- Start by leveling a 3×4 area and setting a single line of bricks along the back edge.
- Add the frame: screw together a low box with the back side 2–3 inches taller for drainage and sun angle.
- Layer 1–2 inches of compost on existing soil and plant spinach 6–8 inches apart.
- Place the lid; add hinges if wind is common. Crack open on sunny afternoons to vent.
- Style a simple prop stick and label rows with sowing dates to track maturity.
Why This Looks Expensive: Glass catches the light and adds crisp lines; brick provides a rich, warm accent and makes the setup feel substantial, not temporary.
Don’t Do This: Forget to vent. A sunny 55-degree day can cook your greens under glass. Set a phone reminder until it becomes habit.
Pro Styling Tip: Brush soil off the brick and wipe the glass—clean surfaces make even a DIY frame photograph like a catalog.
Remember: this isn’t about building a botanical garden overnight. It’s about creating a few smart structures and planting the crops that actually pay you back this season. Pick the one that feels, “I can do that today.” That’s your win.
5) Trellis Tunnel With Sugar Snap Peas And Late Nasturtiums
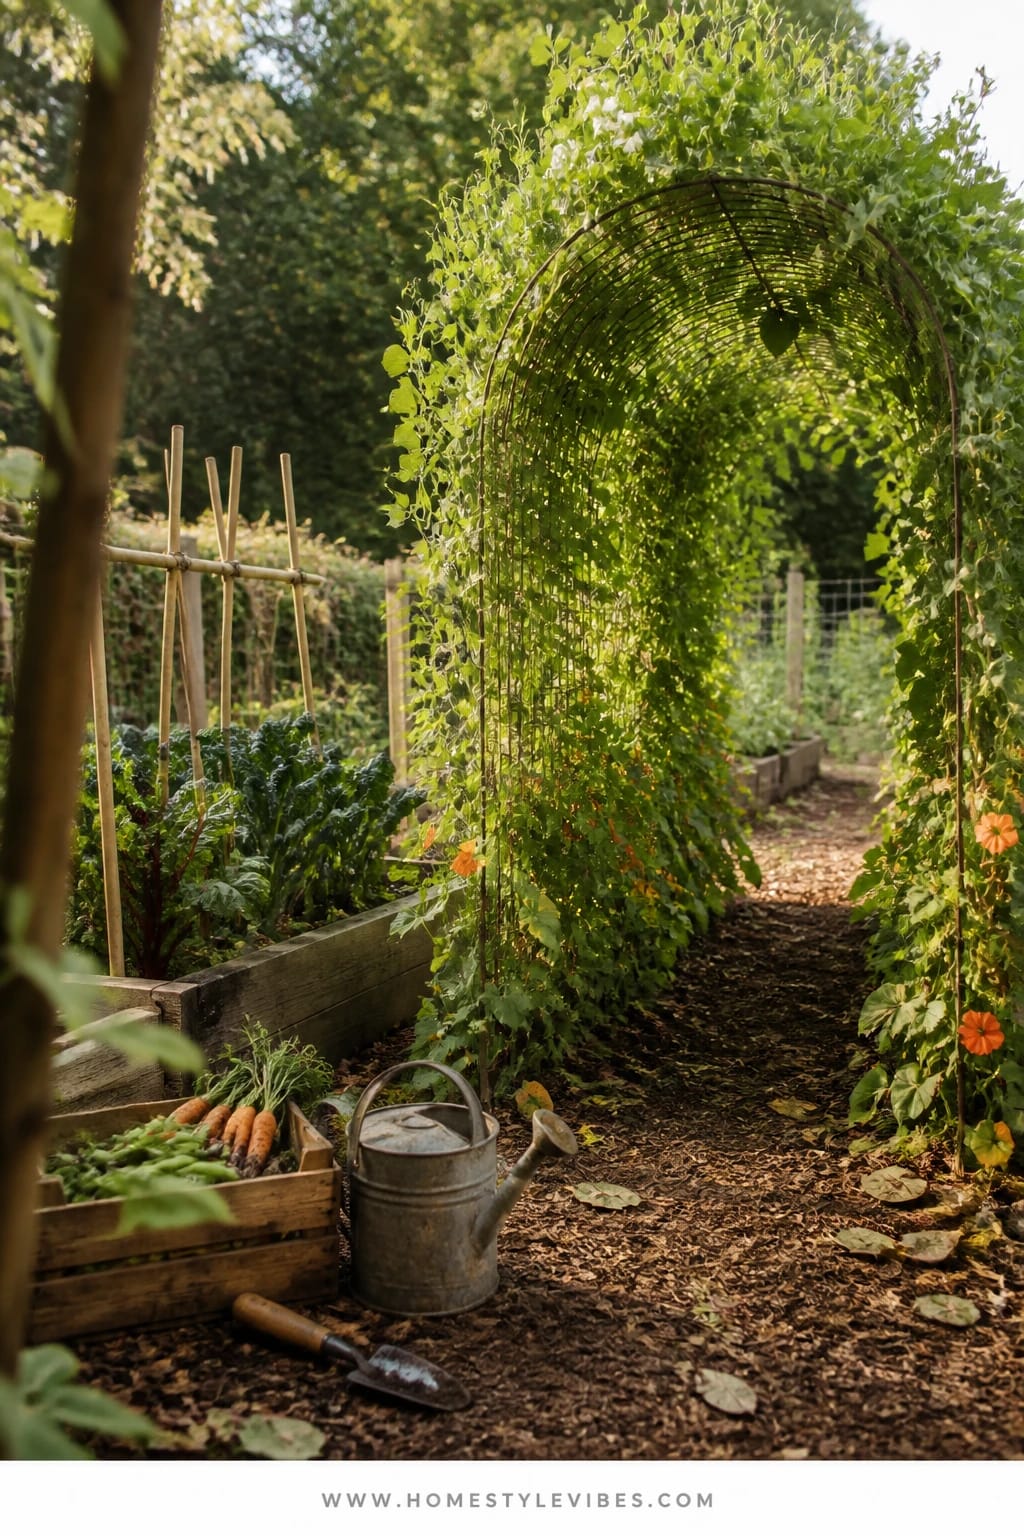
You’ve tried growing peas, but the vines flop or you scramble with twine when it’s already too late. A simple trellis tunnel turns chaos into a living archway loaded with crisp sugar snaps and peppery nasturtium flowers that thrive in the cool-down. The mood is playful productivity: walking through a green tunnel, plucking pods at kid height, and spotting edible blooms dotted along the edges.
Why it works for real homes: vertical growing saves space, reduces mildew by increasing airflow, and keeps harvests cleaner. Fall peas love cooler weather and shorter days, and nasturtiums can rebound when the heat breaks. Morning light through the arch adds natural backlighting that makes even quick phone photos look thoughtful. Maintenance is minimal beyond guiding a few tendrils in the first two weeks.
Variations: Use cattle panels bowed into an arch between two beds for a sturdy, budget-friendly tunnel. For smaller gardens, a pair of A-frame trellises with jute netting does the trick. If you’re in a frost-prone area, throw a row cover over the tunnel on cold nights and clip it to the frame—instant pea parka.
Budget Breakdown:
- Cattle panel or trellis netting: $20–$60
- T-posts or wood stakes: $10–$30
- Pea seeds (sugar snaps or snow peas): $3–$8
- Nasturtium seeds: $2–$6
- Row cover (optional): $15–$30
Total Estimated Cost: $50 – $134
Best For: Pathways between raised beds or narrow side yards; families with kids who love grazing snacks straight from the garden.
Key Design Elements:
- Main seasonal props: Arched trellis, sugar snap pea vines, nasturtium flowers
- Color palette: Fresh greens, soft orange or jewel-toned blooms, matte metal or wood
- Lighting strategy: East-facing morning sun; afternoon shade preserves tenderness
- Textile layers: Jute twine for early training
- Natural elements: Compost-amended soil; light mulch on the root zone
- Accent details: Sturdy clips to secure row cover; harvest basket at one end
How To Recreate This Look:
- Start by setting two beds or borders 3–4 feet apart and anchoring a cattle panel arch with T-posts.
- Add a generous layer of compost along both sides and sow peas 2 inches apart in double rows.
- Layer nasturtium seeds at the outer edges, 8–10 inches apart.
- Place jute ties for the first two weeks to guide vines upward; after that, they’ll climb on their own.
- Style the entry with a low stool or crate—perfect to set your basket while you pick.
Why This Looks Intentional: The repeating arch shape frames the space and pulls your eye down the path. Mixed textures—metal grid, fine pea tendrils, rounded nasturtium leaves—feel thoughtfully composed.
Watch Out: Plant too late, and peas won’t mature before hard frost. Count back 60–70 days from your average first frost date for direct sowing.
Pro Styling Tip: For photos, pick a few pods but leave many on the vine; abundance reads best when there’s density plus a handful of empty tendrils for texture.
6) Root Row With Carrots, Beets, And A DIY Sand Storage Crate
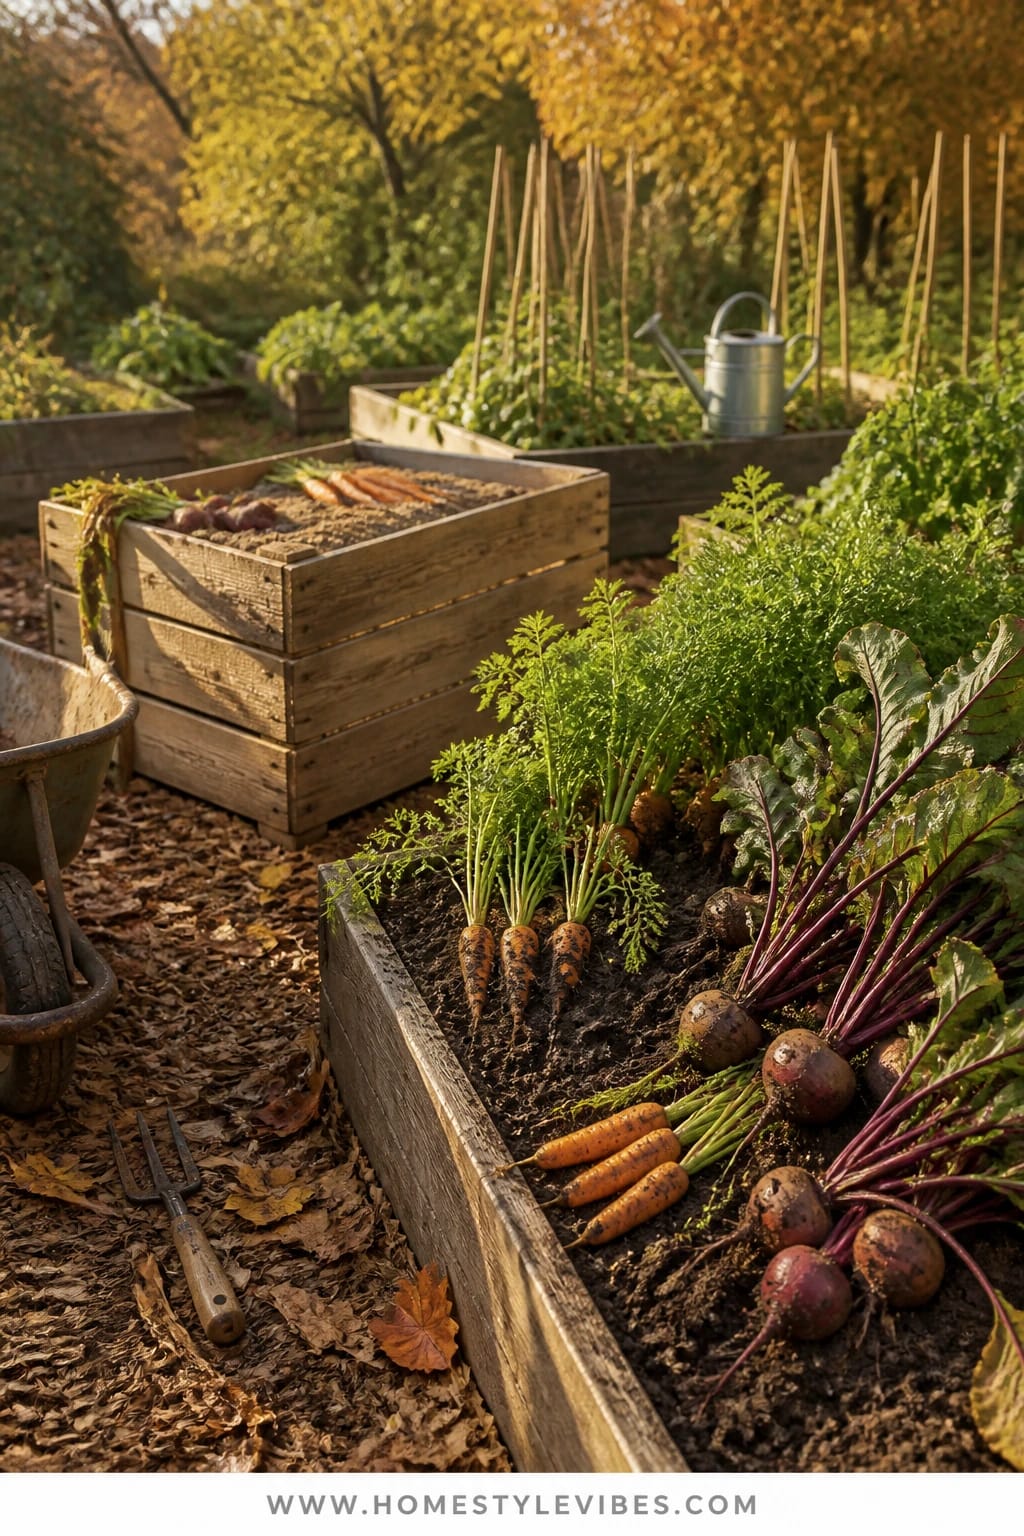
Ever pulled spindly carrots and wondered what went wrong? Rock-hard soil, too-close spacing, and late sowing are the usual suspects. The root row concept fixes that: one long, deeply loosened bed just for carrots and beets in fall, paired with a DIY sand storage crate so you can keep roots fresh for weeks in a cool garage. The vibe is harvest garden living at its most practical—earthy, satisfying, and deliciously organized.
Why this works in real gardens: fall-grown roots are sweeter. Cool nights mean slow, even growth, and flavor concentrates. A dedicated row lets you prep properly—sift stones, add fine compost, and keep watering consistent. The storage crate extends usefulness into winter without requiring a cellar. Honestly, the first time I layered beets in damp sand and pulled them out crisp a month later, I felt like I’d unlocked a secret pantry.
Variations: If your ground is stubborn, use a 12-inch-deep trough or a tall raised bed with a sandy loam blend. Prefer color? Plant rainbow carrots and Chioggia beets for stripey reveals at the cutting board. In very cold zones, add a thick straw mulch once temps hover near freezing; you can harvest in place well into December by peeling back the mulch like a blanket.
Budget Breakdown:
- Fine compost and play sand for blending: $10–$30
- Seed packets (carrot, beet): $6–$12
- Seed sifter (DIY hardware cloth frame): $8–$20
- Wood for storage crate or lidded tote: $0–$25
- Clean sand for storage: $5–$12
Total Estimated Cost: $29 – $99
Best For: Full-sun strips or raised beds; gardeners who like batch harvesting and want pantry-ready produce through early winter.
Key Design Elements:
- Main seasonal props: Deep, stone-free row; uniform sowing; sand-filled storage crate
- Color palette: Rusty-orange carrots, ruby beets, warm tan sand, rich brown soil
- Lighting strategy: Full sun to push steady root development
- Textile layers: Burlap or frost cloth for late-season protection
- Natural elements: Fine compost, leaf mold, and a touch of sand for drainage
- Accent details: Measuring stick or board to keep rows straight
How To Recreate This Look:
- Start by loosening soil 12 inches deep and sifting out stones; blend 70% native soil with 30% fine compost and a sprinkle of sand for drainage.
- Add perfectly straight shallow furrows; sow carrot seed thinly, beet seed 3 inches apart.
- Layer a light cover of soil, then water with a gentle spray to avoid washouts.
- Place burlap over the row to hold moisture until germination; remove as soon as sprouts appear.
- Style your storage: Build or repurpose a crate, add 2 inches of damp (not wet) sand, layer roots without touching, and store cool and dark.
Why This Feels Designer: A single-purpose row with razor-straight lines and tidy mulch edges reads like a gardener who knows what they’re doing. The matching storage crate is the finishing touch—function that looks put-together.
The Most Common Mistake: Skipping thinning. Crowded carrots stay skinny. Thin to one carrot every 2 inches once tops are finger-length—painful in the moment, worth it at harvest. I still sigh when I do it, but the plump roots later are the payoff.
Pro Styling Tip: For that “just-harvested” photo, leave a trace of soil on the roots and coil the greens casually in the basket—clean but not scrubbed sterile.
Quick mindset check: perfection doesn’t feed you—consistent, small actions do. Your fall vegetable garden is a living classroom. If the peas sulk or the carrots misbehave, you learned what to tweak next week, not next year.
Quick Checklist
- Top-dress beds with 1–2 inches of compost before planting
- Choose cool-season winners: kale, chard, spinach, peas, carrots, beets, mizuna, arugula, garlic
- Install simple structures now: hoops, cold frame, trellis tunnel
- Mulch smartly: straw for garlic, light mulch for greens, heavier for roots after frost
- Vent cold frames on sunny days
- Count back from first frost to time sowing and transplants
- Pre-sprout peas if running late
- Thin carrots and beets for proper spacing
- Keep watering consistent during dry, cool spells
- Label rows with varieties and dates
- Prepare a sand storage crate for roots
- Have row cover and clips ready before the first cold snap
Frequently Asked Questions
When should I start my fall vegetable garden if I missed August?
Work backward from your average first frost date. Fast growers like arugula, mizuna, and radishes need 20–40 days, so you can sow them even a month before frost. For peas and carrots, aim 60–70 days before frost or use transplants (for greens) and pre-sprouting (for peas) to gain time.
Do I really need row cover or a cold frame for fall greens?
No, but they make a noticeable difference. Row cover shields from frost and pests, extending harvests by a few weeks. A cold frame creates a mini greenhouse, so spinach and lettuce keep producing into early winter. If you choose one tool, row cover is cheaper and more flexible.
What’s the cheapest way to set up fall beds quickly?
Clear summer plants, spread 1–2 inches of compost, and direct-sow fast greens. Use inexpensive wire hoops with lightweight row cover and skip fancy edging for now. A $30 setup can feed you salad for months.
Is straw mulch better than wood chips for garlic?
Yes for the bed itself. Straw keeps soil insulated and is easy to pull back in spring. Use wood chips only for the pathways so they don’t tie up nitrogen in the garlic bed.
How do I store carrots and beets without a root cellar?
Use a plastic tote or wooden crate with damp sand. Layer clean (not washed) roots so they don’t touch, lid loosely, and keep in a cool, dark spot like a garage. Check monthly, and you’ll have crisp roots for weeks.
Closing Thoughts
Pick one idea and get it in the ground this week—maybe it’s that rainbow chard and kale bed that gives you color and dinner on repeat, or the garlic border that quietly sets up next summer’s best pasta nights. Fall vegetable gardening rewards simple structures, good soil, and steady care. No drama, just the patient pleasure of checking your beds on a cool morning and seeing everything still growing.
Lean into the season’s strengths: steady light, cool nights, and crops that love a little chill. Add compost, space thoughtfully, and keep a row cover handy. The rest is small daily care—watering, thinning, and a happy harvest basket by the back door. You’ve got this. Your autumn garden is about to feed you well and look good doing it, seriously.

About the Author

Krisztina P.Rendes, Founder of Home Style Vibes
Founder of Home Style Vibes
Krisztina Puskásné Rendes created Home Style Vibes as a cozy-modern lifestyle space where homemaking meets inspiration. Her goal is to help women create beautiful, organized, and peaceful homes they truly love — without overwhelm. You’ll find here heart-driven content on home decor, cleaning tips, easy family recipes, organization and decluttering, DIY home projects, plants, and seasonal ideas — all designed to bring more calm, comfort, and style into everyday life.