6 Fall Festival At Home Ideas That Bring The Fair To Your Backyard
You want that big-hearted, county-fair feeling—warm cider in hand, a glow on every face, laughter traveling across the lawn. But corralling the chaos of food, music, and activities into something that feels charming instead of clunky? That’s the part that stops you. Consider this your friendly blueprint: six fall festival at home ideas, all outdoors, all achievable, all soaked in cozy bright autumn vibes—think saturated rust, bundled plaid, pumpkin stacks, amber string lights, and harvest abundance. These are real-home friendly (budget caps and backup plans included), wildly photogenic, and designed to sidestep the typical backyard party pitfalls.
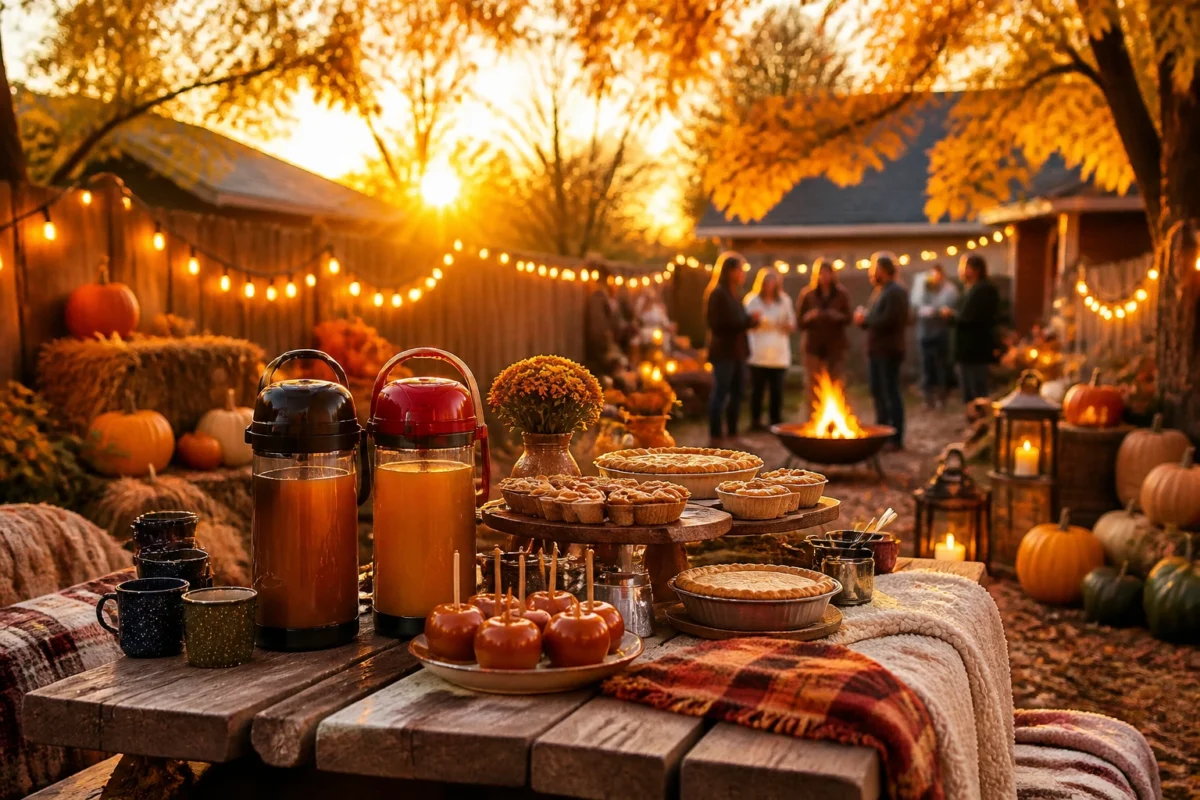
We’re talking warm light, layered textures, and easy stations that keep guests moving and mingling. If you’ve ever tried to host a “fall fair” and wound up juggling a burned chili and a dead string light (just me?), this set is for you. The promise: six fully-formed concepts you can set up in a weekend for $50–$350 per station, with smart swaps to bring that budget down if you need. Use one idea for a quick Saturday hangout, or layer two to three for a full-on backyard festival that feels straight out of your fall Pinterest board—minus the overwhelm. Families, friend groups, and neighbors will love it from the first candlelight to the last plaid blanket pack-up.
1) Pumpkin Patch Corner With Golden String Lights By the Garden Fence
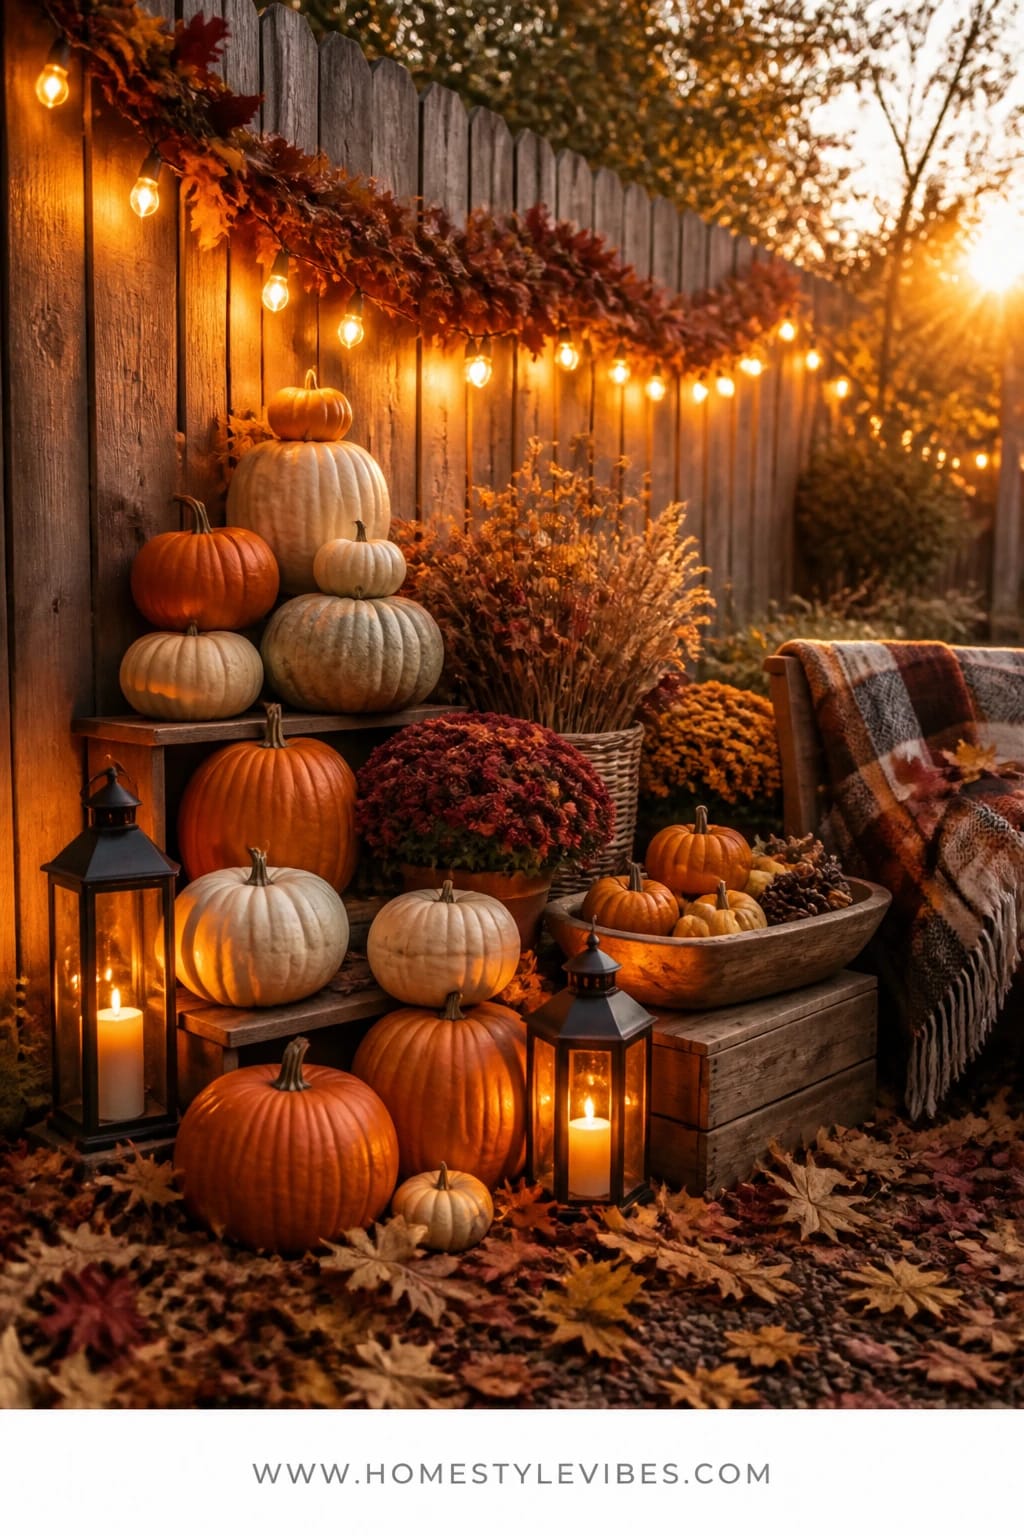
We’ve all been there: you buy a trunk-load of pumpkins, scatter them around, and somehow it still looks like the produce aisle had a sale. The secret isn’t more pumpkins—it’s structure, glow, and height. This pumpkin patch corner builds a mini “fair photo moment” by anchoring to your fence line, saturating the space with amber string lights, and stacking pumpkins in tiers instead of sprinkling them. The mood? Pure harvest abundance. Warm, welcoming, a little nostalgic, and very “we planned this on purpose.”
It works in real yards because everything gathers along the fence (or a hedge), leaving the rest of your lawn open for mingling and games. The golden lights cast that flattering, late-afternoon glow even after sunset, and the pumpkin stacks add visual depth you never get from a flat lineup. Prop-wise: mix traditional orange with a handful of heirloom greens and whites, tuck in a few straw bales, then soften it all with plaid blanket throws. Why it photographs beautifully: depth from layered heights, a string-light bokeh in the background, and color contrast between pumpkins, straw, and wood.
Variations: Small yard? Use two straw bales stacked at a corner angle, three pumpkins per tier, and one 25-foot light strand—you’ll still get the vibe. Budget move: Skip bales and stack pumpkins on upside-down planters or crates draped in a burlap runner. Want a softer palette? Lean into pale wheat, creamy whites, and a single muted rust throw for a quieter take.
Budget Breakdown:
- Pumpkins (mix of sizes): $40–$120
- Straw bales or crates: $15–$45
- Outdoor-safe string lights (warm white): $20–$50
- Burlap runner or plaid throws: $10–$40
- Zip ties and stakes for light support: $5–$12
Total Estimated Cost: $90 – $267
Best For: Medium to large backyards or side yards with a fence line; works best for early October through Thanksgiving when evenings cool and lights glow earlier.
Key Design Elements:
- Main seasonal props: Mixed pumpkins, straw bales, wood crates
- Color palette: Saturated orange, creamy white, muted green, warm wood
- Lighting strategy: One or two amber-hued string lights draped loosely
- Textile layers: Plaid throws and a burlap runner
- Natural elements: Corn stalks and scattered maple leaves (real or faux)
- Accent details: Galvanized buckets, a chalkboard “Pumpkin Patch” sign
How To Recreate This Look:
- Start with structure: Angle two straw bales or three stacked crates at the fence to form a tiered corner.
- Add lighting: Drape warm string lights from fence posts, securing with zip ties; keep the drape soft and a little swoopy.
- Layer pumpkins: Largest at the base, mediums in the middle, smalls at the top and front edges for dimension.
- Place textiles: Drape a plaid throw over one bale; add a burlap runner over a crate stack.
- Style with accents: Tuck in cornstalks, a galvanized bucket of mini gourds, and a small chalkboard sign with a playful price list.
Why This Looks Expensive: Tiered height and intentional clustering read curated, not chaotic. The golden light seals it—ambient glow instantly cues “special.”
Watch Out: Don’t spread pumpkins too far apart. Tight groupings look lush and photo-ready; wide spacing looks like leftovers.
Pro Styling Tip: For photos, place one or two pumpkins halfway into frame at the corner to create depth and an intimate, documentary feel.
2) Harvest Pie Bar Under a Copper Lantern by the Patio Table
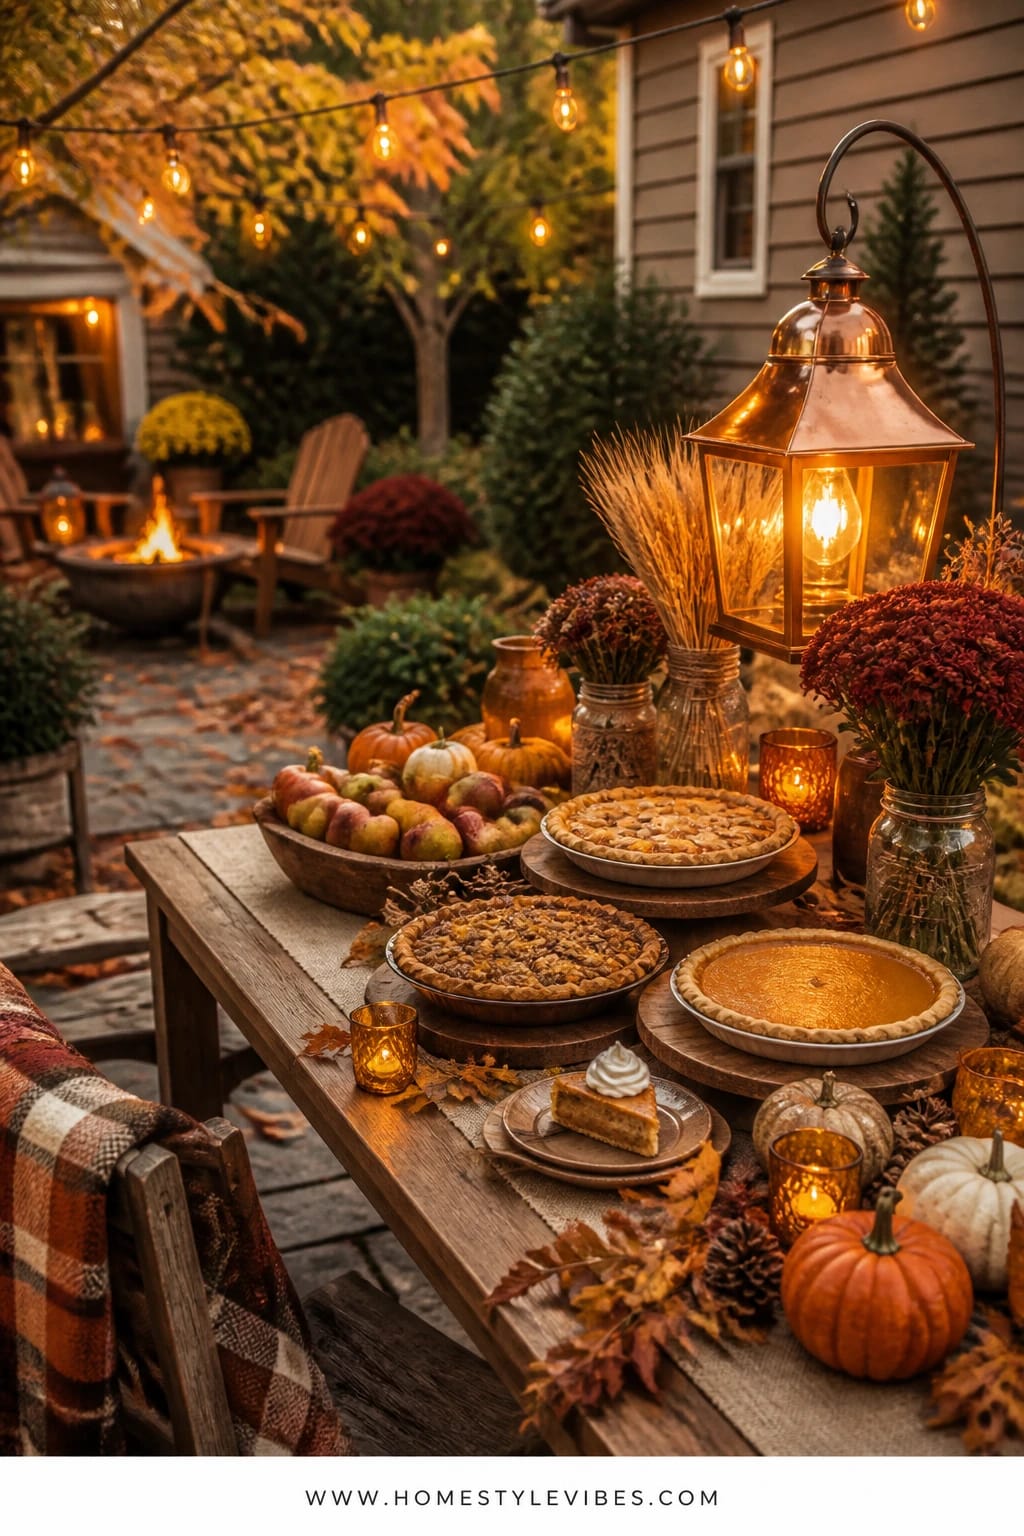
It’s that one hosting hurdle that always feels off: dessert turns into a free-for-all, and your pretty pies get hidden behind plates and napkins. You’ve tried setting them on the kitchen island, but where’s the fall magic in that? This outdoor pie bar turns your patio table into a mini market stall—wood boards, a copper lantern or two, bales for height, and slices served on rustic platters with cinnamon sugar dusted on top. The vibe is harvest bakery meets small-town fair prize table. Sweet, simple, irresistible.
It works because it’s self-serve and contained. Guests gravitate to the glow of lanterns as dusk arrives, and the scent of warm spices carries outside. Plus, pies photograph at their best with side lighting and rough-cut edges. You can pre-slice or cue a “pie slicing show” moment with a vintage-style knife. Keep servers and plates on a lower crate so tops stay clean and the display reads tidy. Pro move: Label pies with mini kraft cards—Grandma’s Apple, Maple Pecan, Pumpkin Cream—so no one has to ask.
Variations: Budget-friendly? Bake two crowd-pleaser pies and supplement with market donuts. Small patio? Use a narrow console table against the wall and hang one lantern from a shepherd’s hook. Lighter palette? Whites and creams for plates, a raw linen runner, and pale pumpkins instead of citrusy orange.
Budget Breakdown:
- Two pies (homemade or bakery): $20–$48
- Lanterns (copper or brass finish): $25–$80
- Battery LED candles (warm): $15–$30
- Wood boards/risers: $10–$35
- Disposable compostable pie plates and forks: $8–$16
- Runner or linen: $12–$28
Total Estimated Cost: $90 – $237
Best For: Any backyard with a patio table or folding table; ideal for late October evenings and post-pumpkin-carving gatherings.
Key Design Elements:
- Main seasonal props: Pies, donuts, cider carafe, mini pumpkins
- Color palette: Amber, copper, cinnamon brown, cream
- Lighting strategy: One or two copper lanterns with warm LED candles for safe glow
- Textile layers: Linen runner, plaid napkins
- Natural elements: Apple branches, cinnamon sticks in a jar
- Accent details: Kraft labels, twine-tied pie server
How To Recreate This Look:
- Start with a runner to define the zone and soften the tabletop.
- Add height using a crate or wood riser for one hero pie.
- Layer in a copper lantern on one side, and a small vase with apple branches on the other to balance.
- Place pies with 6–8 inches between for breathing room; pre-slice one to invite first bites.
- Style with label cards, a covered bowl of whipped cream, and a stack of napkins tied with twine.
Why This Feels Designer: Repeating materials—wood, copper, linen—creates cohesion, while layered heights give it “styled” authority.
One Thing To Avoid: Don’t cram every dessert you bought onto the table. Keep it to 2–3 focal bakes and a supporting cast of cookies—negative space is your friend.
Pro Styling Tip: Dust a wood board lightly with powdered sugar, then set a pie on top—the contrast photographs like a cookbook spread.
Ready for something interactive? The next idea gets everyone moving and laughing, even the shy ones.
3) Plaid Blanket Lawn With Amber Lantern Glow Beside the Fire Pit
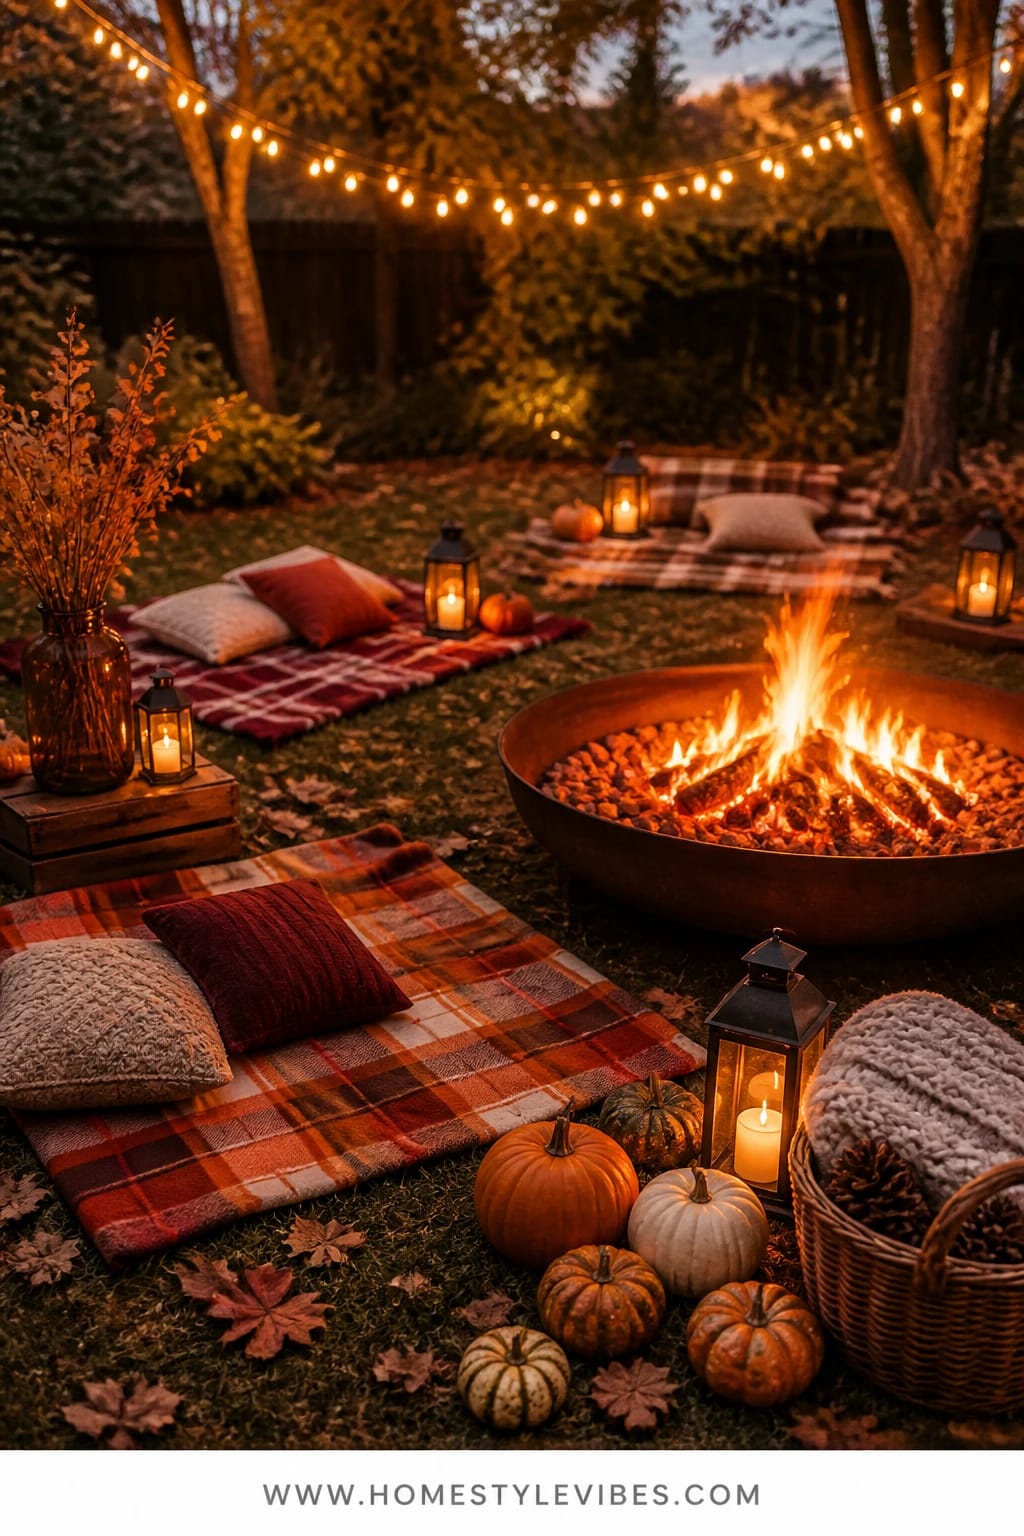
You want people to actually sit and stay awhile, not hover awkwardly with paper cups. But outdoor seating can feel fussy or limited. Enter the plaid blanket lawn: a loose grid of cozy throws with low lanterns, floor cushions, and a central fire pit as the warm-hearted anchor. The mood here is campfire night at the fairgrounds—cider in hand, the soft pop of a crackling wick, friends sprawled comfortably and not just perching on the edge of a chair.
This works beautifully because it removes the chair bottleneck. You instantly create flexible seating for families and bigger friend groups without hauling out twelve folding chairs. The amber glow from lanterns at ankle height flatters faces without blinding anyone, and the layered textiles feel intentional, not makeshift. Also, dogs approve this message. It’s pet-friendly and kid-proof if you keep flame inside lanterns and use a spark screen on the fire pit.
Variations: No fire pit? Cluster three lanterns in the center and add a big tray with thermoses of hot cocoa and cider. Rain plan: Pop-up canopy with fairy lights, blankets still work. Toned-down palette? Choose oatmeal, cream, and soft rust blankets rather than primary plaids.
Budget Breakdown:
- Assorted plaid blankets (thrift or new): $40–$120
- Floor cushions or poufs: $20–$100
- Lantern set (4–6 pieces) with LED candles: $40–$120
- Fire pit or spark screen: $0–$120 (if you already have one, free!)
- Tray + thermoses: $15–$40
Total Estimated Cost: $115 – $500
Best For: Larger grass area or level patio space; perfect for cool nights from late September onward.
Key Design Elements:
- Main seasonal props: Plaid throws, lanterns, floor cushions
- Color palette: Burnt orange, burgundy, mustard, deep navy
- Lighting strategy: Low lantern clusters at every other blanket; optional overhead bistro lights
- Textile layers: Wool or fleece throws, outdoor-safe cushions
- Natural elements: A basket of pinecones near the pit
- Accent details: Enamel mugs, a woven basket for extra blankets
Why This Reads High-End: Repetition and rhythm. Repeating blanket sizes and lantern shapes across the lawn feels orchestrated, the way event planners do it.
How To Recreate This Look:
- Start by mowing or raking your lawn so blankets lay smooth.
- Place the fire pit, then lay blankets radiating out, leaving 18–24 inches between each for foot traffic.
- Add floor cushions at the corners and a lantern near each blanket’s edge.
- Set a central tray with mugs and thermoses, plus a basket of extra throws.
- If using bistro lights, string them along the fence line to frame the area without overhead clutter.
The Most Common Mistake: Skipping layers. One thin blanket over bumpy grass reads “picnic emergency.” Double up on throws or use a rug pad beneath key areas for comfort.
Pro Styling Tip: Angle a few blankets slightly—perfectly square grids can look stiff. A tiny tilt adds life in photos.
Quick breather: you don’t need all six ideas. If one of these is giving you butterflies, start there. You can always add a second station next weekend.
4) Cider Stand With Marigold Fairy Lights on a Rustic Folding Cart
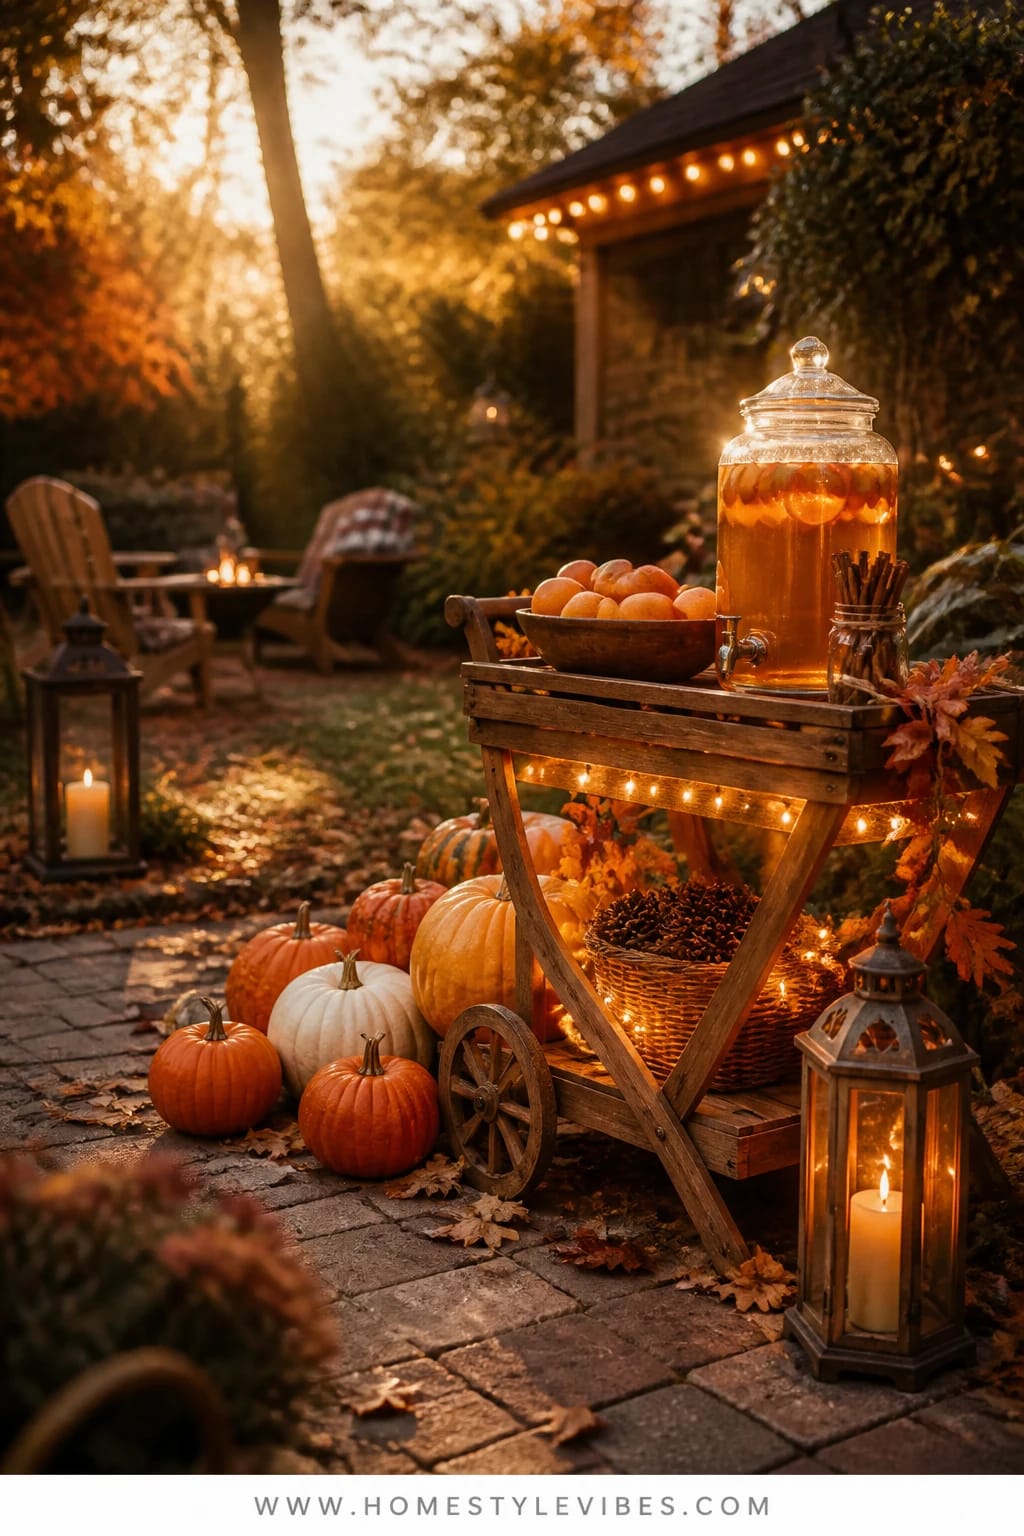
Hot drink chaos is real. You set out cider, and suddenly your kitchen becomes the traffic jam. This cider stand lives outside on a folding cart or potting bench so guests serve themselves. Picture a glass dispenser, sticks of cinnamon, a bowl of sliced oranges, and marigold-glow fairy lights tucked under the cart’s top shelf. It’s charming, practical, and it smells like autumn walked into your backyard wearing a cinnamon scarf.
Why it works: A dedicated drink station keeps people mingling outdoors and eases pressure on the cook. It encourages small moments—someone garnishes a mug with an orange wheel and chats with the person behind them. The fairy lights add shimmer at a small scale, which looks great in twilight photos. And because everything sits on a compact cart, cleanup happens in one swoop.
Variations: No dispenser? Stock an enamel kettle and ladle. For a chilled version, offer cold cider with mulling spices on the side. Smaller yard? Use a narrow bar cart nestled against a fence post. For a neutral minimal twist, swap marigold lights for soft warm white and opt for clear glass over colored jars.
Budget Breakdown:
- Drink dispenser or kettle: $15–$45
- Cider (2 gallons): $10–$18
- Spices, oranges, clove-studded garnish: $6–$12
- Disposable cups or enamel mugs: $8–$40
- Marigold-tone fairy lights (battery): $8–$16
- Folding cart or potting bench: $0–$120 (use what you have!)
Total Estimated Cost: $47 – $251
Best For: Any outdoor setup from driveway to deck; ideal for late afternoon through evening when lights sparkle best.
Key Design Elements:
- Main seasonal props: Cider dispenser, oranges, cinnamon sticks, star anise
- Color palette: Amber cider, marigold lights, warm wood, copper accents
- Lighting strategy: Battery fairy lights tucked along the cart edges
- Textile layers: Small plaid towel, burlap wrap around the dispenser base
- Natural elements: Apple branches or a small potted mum nearby
- Accent details: Chalk sign—“Cider, Hot & Spiced”—tied with twine
How To Recreate This Look:
- Start with a cart and wipe the surfaces clean for that “ready for close-ups” finish.
- Add the dispenser or kettle at the back, cups in the front within easy reach.
- Layer fairy lights under the lip of the top shelf and coil extras inside a clear jar.
- Place garnishes in small bowls and set a napkin stack near the front corner.
- Style a tiny crate or cake stand for height and tuck apples around the base.
Why This Looks Intentional: A clear, two-tier system—beverages up top, backup cups and napkins below—signals order and care.
Don’t Do This: Don’t place the cart directly in a wind tunnel corner. Your napkins will end up three houses over. Tuck it against a wall or fence.
Pro Styling Tip: Float a few orange slices and cinnamon sticks inside the dispenser; the warm-toned circles photograph beautifully through glass.
Maybe you’re craving something hands-on next. The kind that keeps kids busy while adults actually finish a conversation? Keep scrolling.
5) Gourd Ring Toss Under Warm Bistro Lights by the Yard Game Zone
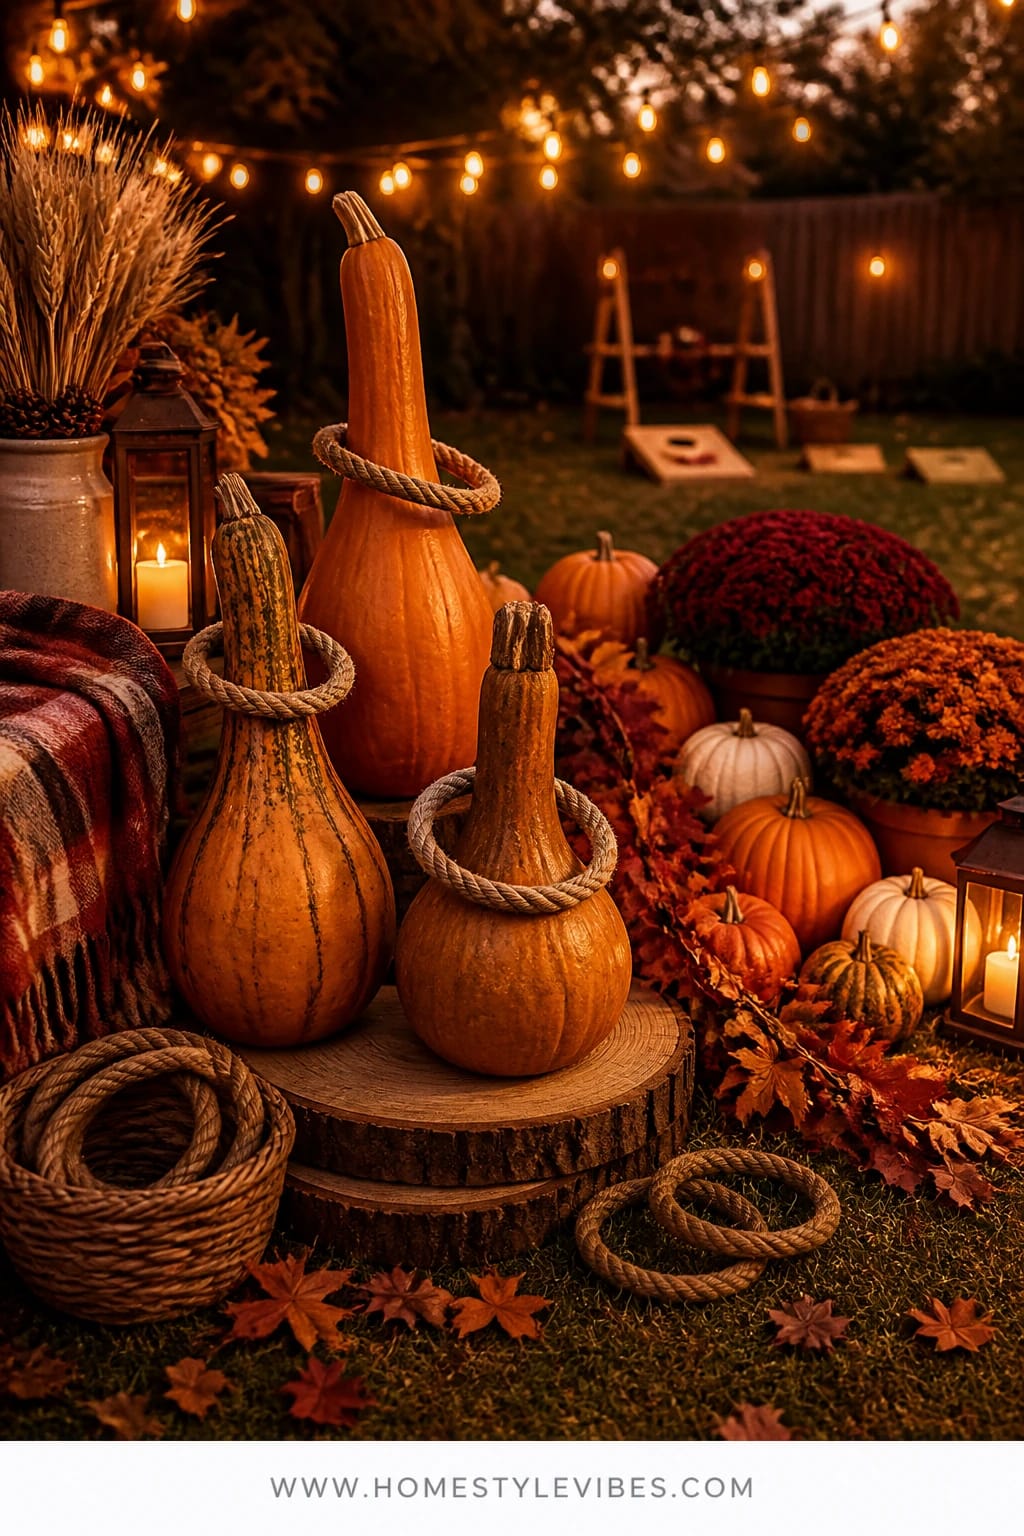
Party lulls happen. Conversation dips, and people start scrolling their phones. A yard game solves it—but plastic bean bags and neon rings can clash with your cozy autumn mood. This version keeps the fair vibe intact: line up a trio of sturdy gourds or bottle-neck pumpkins, place them on wood rounds, and use rope rings for an old-fashioned ring toss that looks as good as it plays. Under bistro lights, it feels like a county fair alley, just smaller and friendlier.
Why it works in real life: It’s low-tech, easy for all ages, and impossible to break (within reason). The materials—natural rope, pumpkins, wood—harmonize with your other fall stations. Plus, the exaggerated shapes of gourds make for great silhouettes in photos, especially with the warm string lights glowing overhead. Pro tip: choose flatter-bottom pumpkins so they don’t wobble after every successful toss.
Variations: Tight on space? Use one pumpkin and position players five feet back. Wet lawn? Switch to a patio corner and add a jute runner for grip. Color-wise, lean into burnt orange pumpkins with cream rope or go heirloom green-on-natural for a more muted palette. For a kid-forward event, add prize tickets in a little jar and let them “redeem” for donuts later.
Budget Breakdown:
- 3–5 pumpkins or gourds: $15–$40
- Rope rings (DIY or purchased): $6–$18
- Wood rounds or stepping stones: $10–$30
- Bistro lights (if needed): $20–$50
- Chalkboard score sign: $5–$12
Total Estimated Cost: $56 – $150
Best For: Side-yard lanes or a patio edge; great from afternoon through evening—especially fun post-dinner.
Key Design Elements:
- Main seasonal props: Pumpkins/gourds, rope rings, wood rounds
- Color palette: Rustic orange, warm beige, deep brown wood
- Lighting strategy: Overhead bistro lights or a single string zigzagged above
- Textile layers: Jute or outdoor rug for a defined lane
- Natural elements: Scattered leaves for a soft, organic finish
- Accent details: Small crate with prize tickets or wrapped caramels
Why This Looks Expensive: Uniformity with a twist—consistent ring sizes and neatly spaced bases say “curated,” while the organic shapes of gourds keep it whimsical.
How To Recreate This Look:
- Start by defining the lane with a jute runner or tape line; clear sticks and bumps.
- Place pumpkins on wood rounds spaced 18–24 inches apart.
- Add lighting overhead if possible; one strand is plenty.
- Set a small crate with rope rings and a chalkboard for scorekeeping.
- Style with a light leaf scatter for softness—keep it minimal so rings don’t snag.
The Most Common Mistake: Using top-heavy gourds. If they wobble when touched, they’ll frustrate players and look sloppy in photos. Test stability before the party.
Pro Styling Tip: Shoot at ring height, with the bistro lights blurred in the background—that twinkly bokeh screams “fall fair.”
Pause for a mindset check: This isn’t about recreating a county fair. It’s about capturing the feeling. Pick your favorite two stations and let the rest be simple. Less clutter, more joy.
6) Backyard Chili Cook-Off With Rust Enamel Dutch Ovens on the Picnic Table
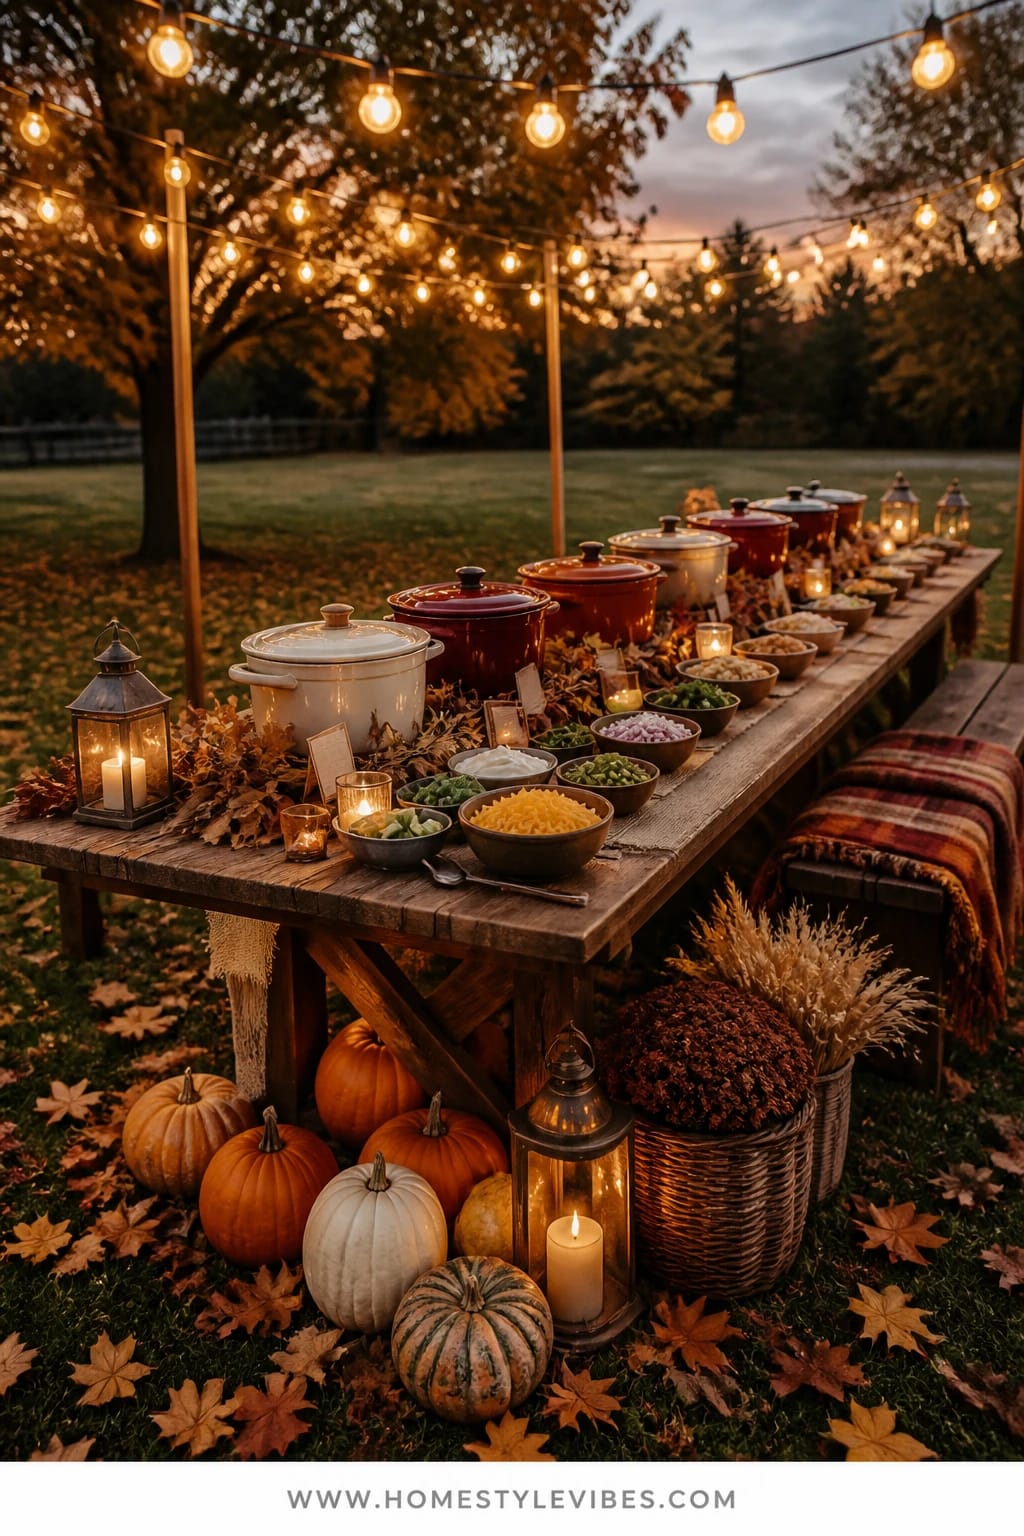
Feeding a crowd is where outdoor parties fall apart. The truth is, a chili cook-off handles itself—and it becomes the event. Set up a long picnic table with a row of enamel Dutch ovens or slow cookers (rust, burgundy, and cream are the vibe), a chili number card next to each, and a toppings spread that makes every bowl feel custom. Under a canopy of string lights, this feels like a small-town festival tasting tent—warm, hearty, and wildly satisfying.
Why it works: Chili stays hot, people serve themselves, and dietary preferences sort themselves out with clear labels. You gain time to actually enjoy the evening. The color story—deep red pots, bowls of emerald scallions, cheddar gold, and sour cream white—looks abundant and delicious. Add cornbread muffins in a lined basket and you’ll hear that contented hush only hearty food can create. Lighting the table with a couple of amber glass lanterns adds that crucial glow without heating the food.
Anecdote time: I tried this last October with four friends bringing their “secret” recipes. We used number cards and mini tasting cups. The only hiccup? We forgot spoons near the cups and created a traffic jam. Ten seconds later, we added spoons at three points along the table—problem solved and never repeated.
Variations: Tiny group? Do two chilis—a classic and a white chicken—and keep the toppings bold. Budget-friendly? One big pot of chili, plus a “toppings tower” of pickled jalapeños, shredded cheese, chopped onions, and hot sauce. Neutral-lovers: swap the bright bowls for creamware and take the color punch from toppings only.
Budget Breakdown:
- Chili ingredients for 10–12 servings: $25–$60
- Enamel Dutch ovens or slow cookers (borrow if possible): $0–$100
- Toppings: $12–$30
- Cornbread or rolls: $8–$20
- Number cards + markers: $3–$8
- Lanterns + LED candles: $20–$50
Total Estimated Cost: $68 – $268
Best For: Larger groups, neighbors, and family nights; prime season is mid-October to chilly November evenings.
Key Design Elements:
- Main seasonal props: Enamel pots, toppings bowls, cornbread basket
- Color palette: Rust, burgundy, mustard, cream
- Lighting strategy: Overhead string lights plus two amber lanterns flanking the table
- Textile layers: A washable table runner and plaid napkins
- Natural elements: A small vase of wheat stems
- Accent details: Numbered tasting cards, clip-on ladle rests
Why This Looks Intentional: Repeated vessel shapes and consistent ladles signal a planned tasting, not a potluck scramble. The number cards add a playful “judging” moment.
How To Recreate This Look:
- Start with a long table and place a runner down the center.
- Line up your pots with 8–10 inches between each; label with number cards.
- Cluster toppings in the center at two points to prevent bottlenecks.
- Place cornbread baskets at both ends to guide flow.
- Add lanterns to the corners and string lights overhead for that amber glow.
Don’t Do This: Don’t forget extra ladles and spoons. Place them every 2–3 feet so people aren’t backtracking.
Pro Styling Tip: Use small cream ramekins for toppings; the pale background makes every color pop in photos.
Another honesty moment: Wind happens, kids run, and one string of lights will wait until guests arrive to give up on life. Keep spare batteries and one backup strand on hand. I learned this the hard way at a neighborhood potluck when our “main character” strand died mid-toast. We switched it during a pie break and nobody even noticed.
Quick Checklist
- Warm white string lights (2200–2700K)
- Lanterns with LED candles
- Assorted pumpkins and gourds (mixed sizes)
- Straw bales or wood crates for height
- Plaid blankets and floor cushions
- Drink dispenser and garnishes (or kettle)
- Wood boards and risers for desserts
- Chalkboard signs and number cards
- Rope rings and wood rounds for games
- Thermoses, enamel mugs, compostable cups
- Runner and linens (washable)
- Basket for extra throws
- Spark screen for fire pit
- Backup light strand and extra batteries
- Zip ties, stakes, and twine for quick fixes
Frequently Asked Questions
How much should I budget to create a full “fall festival at home” in my backyard?
If you choose two to three stations (say, Pumpkin Patch Corner, Cider Stand, and Plaid Blanket Lawn), plan on $200–$600 total depending on pumpkins and lighting. Borrow where you can—lanterns, slow cookers, blankets—to trim costs fast.
Are real pumpkins worth it, or should I buy faux so I can reuse them?
IMO, real pumpkins win every time for color depth and that imperfect, organic shape. If you want longevity, mix: 70% real, 30% faux heirlooms tucked in the back for height. Keep real pumpkins off damp soil to avoid that sad half-deflated look by week three.
What if my backyard is tiny—can I still do this?
Absolutely. Pick one anchor idea: a mini pie bar or a micro pumpkin stack with one light strand. Keep pathways clear and use vertical height (crates, lantern hooks). Even a narrow patio can host a cider cart and a single game lane.
How do I store everything after the season?
Group like with like. Pack lighting in clear bins with a note about length and Kelvin. Roll linens and store in a breathable bag. Faux accents go in one labeled bin; keep a zip bag of hooks, ties, and batteries right on top so next year’s setup is easy.
Are candles safe with kids and pets around?
Go LED for lanterns and tabletop glow. Save real flame for a supervised fire pit with a spark screen. Place lanterns low but not in main traffic paths, and secure with a bit of museum gel if they sit on crates.
When should I start setting up for a backyard fall festival?
Do a light test the night before (seriously). Set the big pieces—lights, tables, crates—2–24 hours ahead. Day-of, style pumpkins and food within two hours of guests arriving so everything looks fresh.
What about renters or folks who can’t attach lights to a fence?
Use freestanding shepherd’s hooks, umbrella poles, or a pair of tall planters with conduit poles to drape lights. Ground them with sandbags in the planters; no drilling required.
Closing Thoughts
Pick one idea that makes your heart leap a little and start there. Maybe it’s the pie bar with copper lanterns, or a blanket lawn that invites everyone to stay until the stars arrive. You don’t need a full county fair—just a corner that glows and a plan that lets you breathe.
Cozy bright autumn style is about layering: warm light, generous texture, and harvest abundance. When you cluster pumpkins instead of scattering, add amber light instead of bright white, and corral activity into clear stations, your backyard stops feeling random and starts feeling like a story. One that unfolds from golden hour to candlelit night.
You’ve got this. A few strings of lights, a stack of plaid, a pot of chili—and suddenly your home is the fair everyone wants to come back to next weekend. I’ll save you a slice of pumpkin pie.
About the Author

Krisztina P.Rendes, Founder of Home Style Vibes
Founder of Home Style Vibes
Krisztina Puskásné Rendes created Home Style Vibes as a cozy-modern lifestyle space where homemaking meets inspiration. Her goal is to help women create beautiful, organized, and peaceful homes they truly love — without overwhelm. You’ll find here heart-driven content on home decor, cleaning tips, easy family recipes, organization and decluttering, DIY home projects, plants, and seasonal ideas — all designed to bring more calm, comfort, and style into everyday life.