8 Home Garden Aesthetic Ideas For A Beautiful Vegetable And Fruit Garden
You want a lush, edible garden that looks like a magazine spread—ripe tomatoes glinting in late sun, glossy basil spilling over, espaliered pears like living sculpture. You hate the chaos, the mismatched plastic pots, the sad, leggy herbs that somehow always end up by the trash cans. This guide gives you eight garden aesthetic ideas that make your vegetable and fruit garden look stunning and grow beautifully—no more than a weekend per idea and under a realistic budget for most. Expect layered textures, intentional lines, and a glow that makes neighbors slow down on their evening walk. These are highly photogenic, Pinterest-worthy, and they’re built to fix the real frustrations you’ve had with your edible space. Think earthy woods, limewash terracotta, dappled light, and planted abundance that still feels calm. If you love structure with soul, these are for you.
1. Charred Cedar Framework With Golden Hour Backlighting and a Statement Arch Trellis
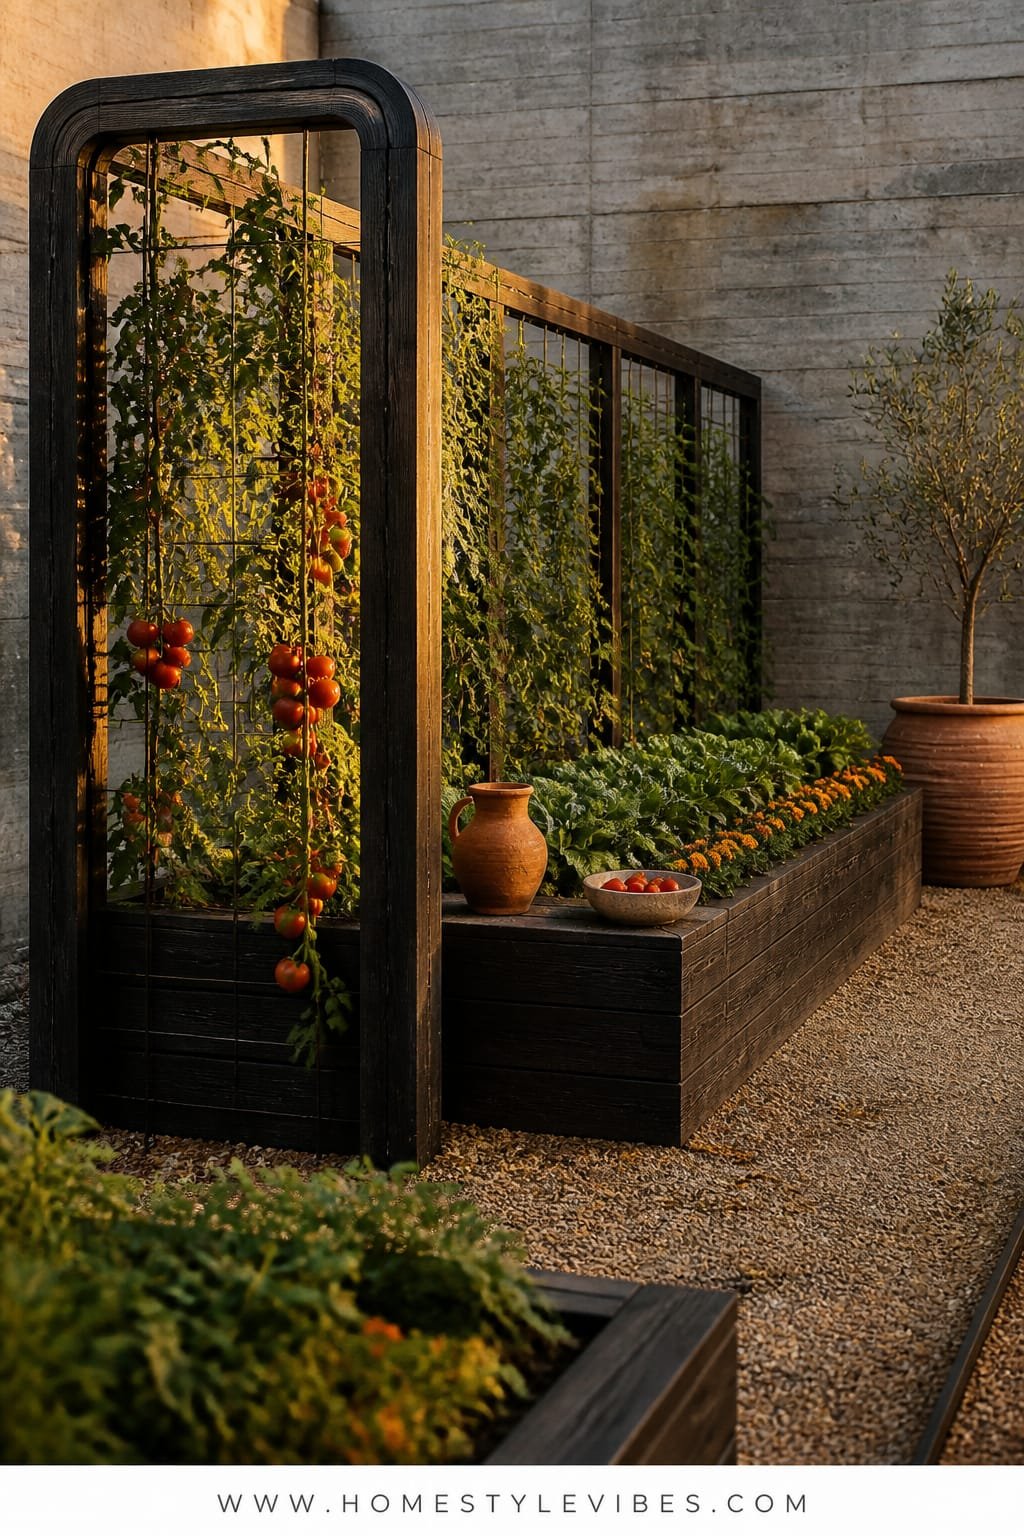
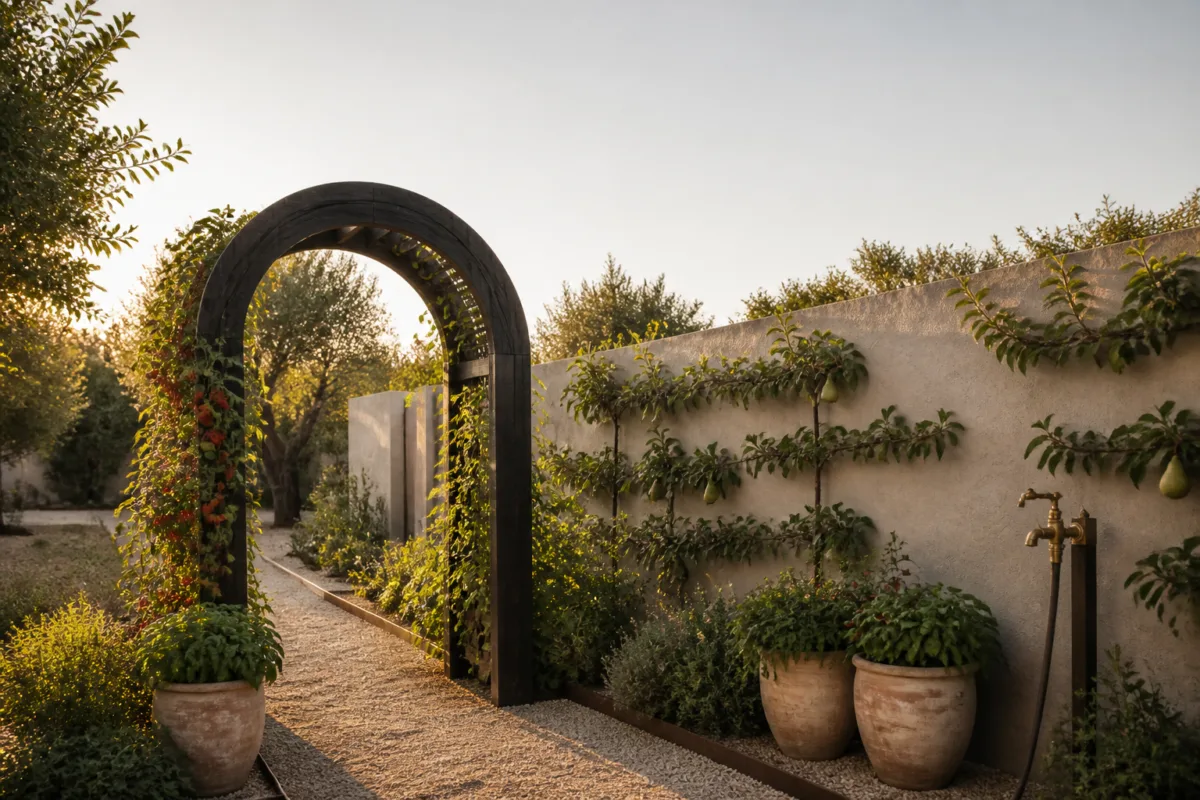
We’ve all been there: you start with a couple of tomato cages and a dream, and by midsummer the vines are flopping, the paths are muddy, and nothing looks intentional. This design creates a modern Mediterranean-meets-farmhouse mood: clean lines, warm wood, and fruiting vines that read like art. The structure keeps chaos in check and the backlighting makes every leaf glow and every tomato look like a jewel at sunset.
Here’s why it works in real homes: charred cedar (Shou Sugi Ban) resists rot and looks luxe without constant maintenance. A single arch trellis becomes your hero piece—instant height, instant drama. Golden hour accent lights (low-voltage stakes or warm strip lights under the rails) give you a soft, cinematic garden after dark, perfect for a twilight harvest. Materials skew natural: charred wood, matte black hardware, gravel or decomposed granite paths, and a whisper of brushed brass on hose bibs or labels. Photographs beautifully because of the deep, inky cedar against fresh greens, plus shadow play under the arch.
Variations make it flexible: a budget-friendly version swaps charred cedar for pre-stained pine and a powder-coated steel arch; a small-space version uses a single box with a half-arch mounted to a fence; a renter-friendly take uses modular cedar boxes and clip-on solar backlights.
Budget Breakdown:
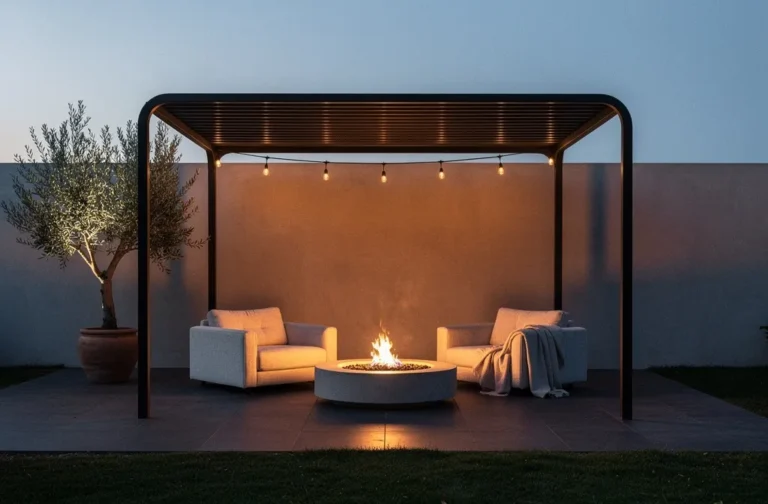
- Charred cedar boards for raised beds: $180–$450
- Metal arch trellis (powder-coated): $120–$350
- Low-voltage or solar stake lights (warm white): $60–$180
- Gravel or decomposed granite for paths: $100–$250
- Matte black brackets/fasteners: $25–$75
- Brass plant labels: $15–$40
Total Estimated Cost: $500 – $1,345
Best For: Rectangular yards, side yards, or front-yard edible gardens that need presence. Suits modern, Scandinavian, and contemporary cottages. Best late spring to early fall.
Key Design Elements:
- Main materials: charred cedar, powder-coated steel, decomposed granite
- Color palette: deep espresso, olive green, sage, brass highlights
- Lighting strategy: warm 2700K backlighting at knee height, facing plants
- Furniture silhouettes: simple bench in cedar or black metal, slim lines
- Texture layers: smooth charred wood, crunch of gravel, soft foliage
- Accent details: brass labels, matte black hose pot, subtle striped outdoor cushion
How To Recreate This Look:
- Start with two to three raised beds in a row, leaving a 24–36 inch path for comfort.
- Add an arch trellis at the main path entrance and plant two climbers (tomatoes, beans, or cucumbers) to frame the view.
- Layer decomposed granite or gravel across paths for a clean visual floor.
- Install warm white stake lights on the bed exteriors so leaves catch the glow.
- Style with brass labels, a slim bench, and one low, wide planter at the arch base.
Why This Looks Expensive: The contrast of dark wood against fresh foliage reads editorial, while a single grand gesture—the arch—signals intent. Continuous path material and consistent hardware tie it together like a custom build.
Watch Out: Don’t place lights too high; face them low and slightly inward to avoid glare and harsh top shadows. Too bright ruins the golden hour vibe.
Pro Styling Tip: Shoot at dusk with lights on; step back so the arch sits off-center, and let one bed edge lead your eye into the frame for natural depth.
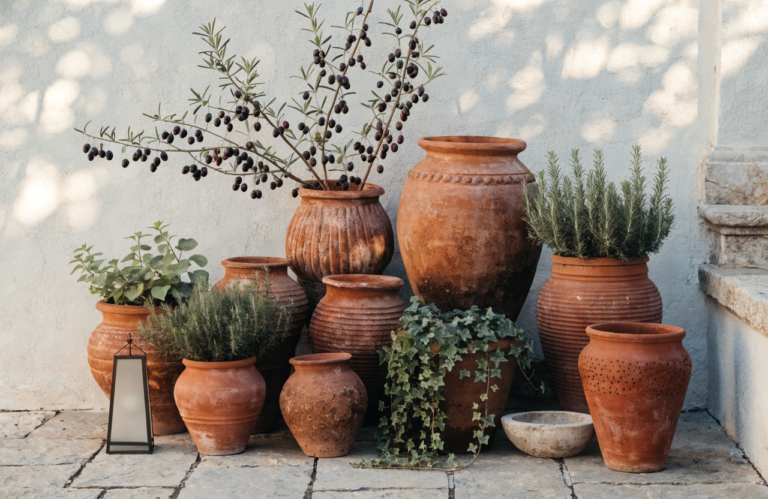
2. Fluted Terracotta Planters With Soft Morning Light and a Sculptural Olive Jar Fountain
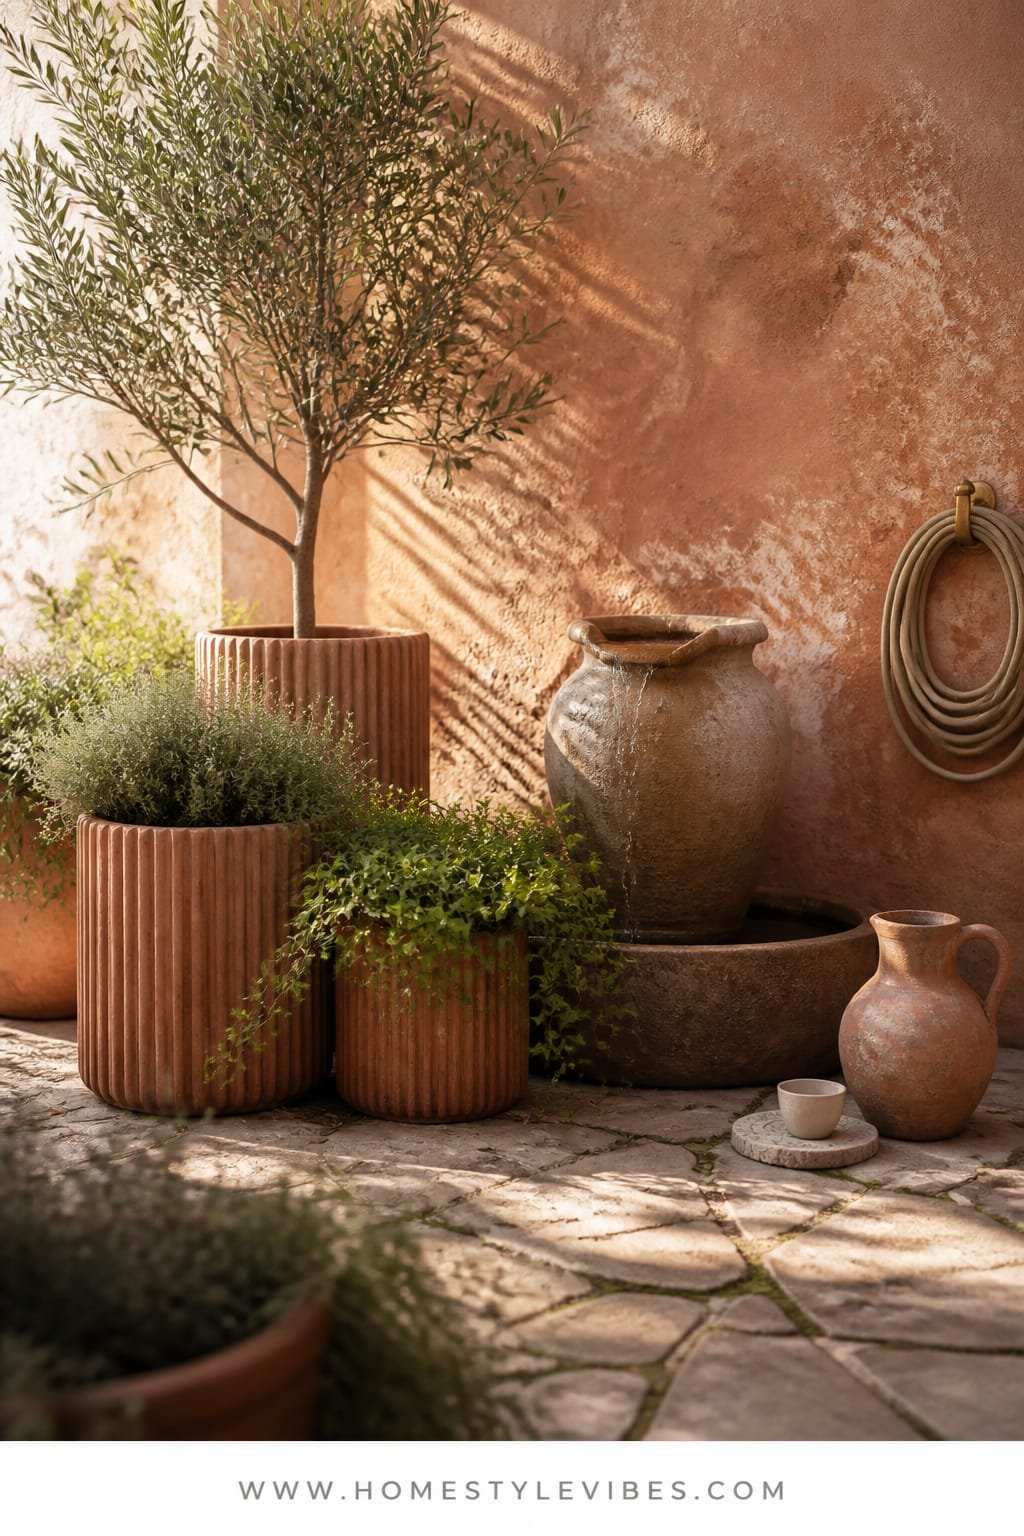
It’s that one corner that always feels off: the hose coils there, weeds collect, and nothing thrives. This concept builds a calm, sun-washed nook that feels like a tiny courtyard in Provence, using textured terracotta, gentle water sound, and pale herbs cascading like lace. The mood reads slow living—oatmeal linen apron, bare feet, coffee at 8 a.m. on a Saturday.
It works because fluted terracotta adds vertical rhythm and makes even ordinary parsley look couture. Morning light is kinder to foliage (less scorching) and kinder to faces if you’re snapping photos. A single olive jar fountain (or a glazed urn with a pump kit) adds motion and masks street noise. Easy to maintain: terracotta breathes, roots don’t stay soggy, and the fountain recirculates.
Variations: budget-friendly terracotta from big-box stores with limewash to fake patina; a small-space version uses three planters in a triangle and a tabletop fountain; a darker version swaps terracotta for charcoal clay with silvery herbs (sage, lavender) for moody contrast; a renter-friendly swap uses saucers on plant dollies so you can roll the whole vignette away when you move.
Key Design Elements:
- Main materials: fluted terracotta, natural stone pavers, linen-textured cushions
- Color palette: warm clay, soft sage, dusty lavender, pale cream
- Lighting strategy: position planters where they catch indirect morning light; add a single solar uplight aimed at the fountain base for evening
- Furniture silhouettes: low bistro chair with curved back, petite round table
- Texture layers: ribbed terracotta, feathered herbs, rippled water, woven jute mat
- Accent details: copper watering can, aged zinc plant markers, narrow stripe cushion
Budget Breakdown:
- Fluted terracotta planters (3–5): $120–$400
- Olive jar fountain or urn + pump: $180–$600
- Stone pavers or stepping stones: $80–$220
- Tabletop bistro set: $120–$350
- Solar uplight: $20–$45
- Jute mat and accessories: $30–$80
Total Estimated Cost: $550 – $1,695
Best For: Small patios, balcony corners, or side-yard nooks that get gentle morning sun. Ideal for anyone who loves herbs, tea rituals, and modest watering schedules.
How To Recreate This Look:
- Start with 3–5 fluted terracotta planters in mixed heights; group them tightly for a collected feel.
- Add a central olive jar fountain or a glazed urn with a DIY recirculating kit.
- Layer in herbs by texture: feathery dill, draping thyme, upright rosemary.
- Place pavers to form a shallow pad; tuck a jute mat under the bistro chair.
- Style with a small copper watering can and striped linen napkins at the table.
Why This Feels Designer: Repetition of one material (terracotta) in varied forms feels curated. The single water feature creates a focal point and soundscape, so everything else can stay minimal.
One Thing To Avoid: Don’t scatter planters all over; tight grouping builds presence and keeps watering efficient. Sparse placement looks random and under-designed.
Pro Styling Tip: Photograph in soft morning light with the fountain slightly off-center; include the table edge in the foreground for depth and an easy still-life moment.
Pause here. Breathe. You don’t need to implement every idea. Choose one nook and make it sing—that’s how the whole vegetable and fruit garden starts to feel intentional.
3. Whitewashed Brick Beds With Cool Shade Dapple and a Vintage Potting Bench as Hero
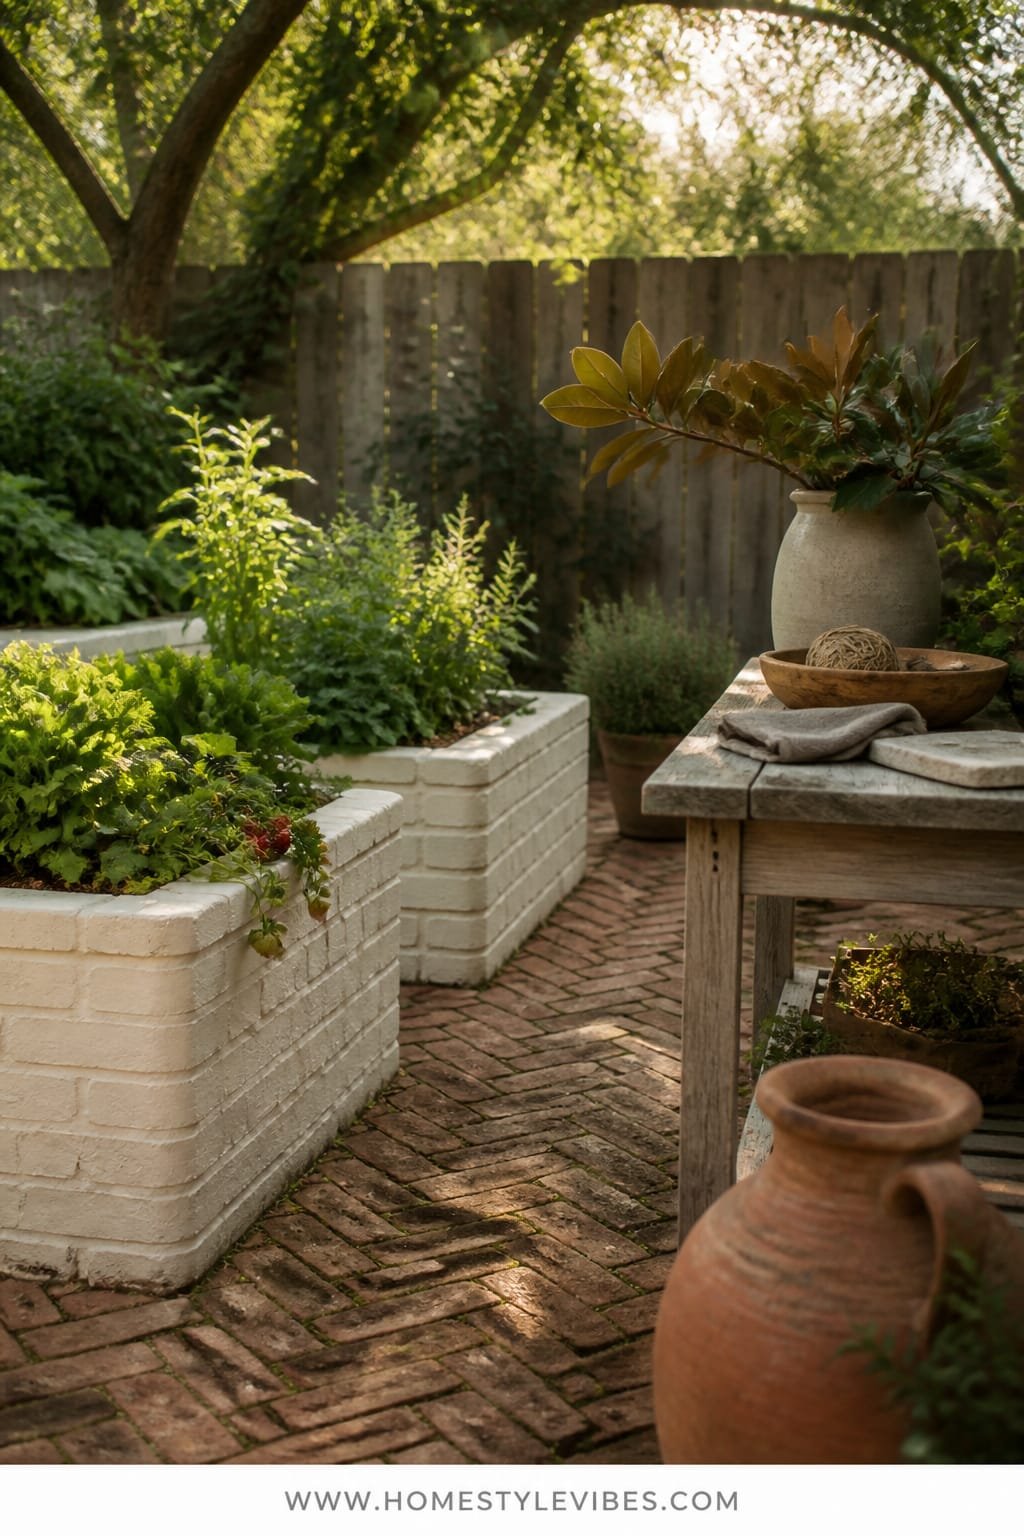
You’ve tried throwing more sun at sad greens, but your yard skews shady and tender crops bolt or sulk. Whitewashed brick beds paired with dappled light are the move for leafy vegetables, strawberries, and shade-tolerant herbs. The vibe? Cottage greenhouse meets Brooklyn stoop—fresh, airy, and a little nostalgic.
Whitewash bounces light back onto foliage and makes green tones pop, which means your photos look crisp even under trees. A vintage potting bench becomes the statement “furniture,” a stage for seedlings, tools, and a bowl of washed berries. It’s family-friendly: bricks hold heat for cooler evenings, edges stay tidy, and the bench keeps the mess gathered in one pretty spot.
Flex options: budget version uses reclaimed brick with DIY limewash; small-space uses two short L-shaped beds and a half-width bench; renter-friendly swaps in stacked planters against a whitewashed plywood backdrop. Maintenance stays simple: re-limewash once a season, sweep leaves, and keep the bench top oiled.
Budget Breakdown:
- Reclaimed brick + limewash: $200–$500
- Vintage or new potting bench: $150–$450
- Shade cloth or pruned canopy work: $40–$120
- Soil and compost: $100–$250
- Wire baskets and enamel bowls: $30–$80
Total Estimated Cost: $520 – $1,400
Best For: Partial shade patios, urban courtyards, yards with mature trees. Great for families who snack from the garden—strawberries and lettuces thrive here.
Key Design Elements:
- Main materials: brick, limewash, aged pine or teak bench
- Color palette: chalk white, deep green, moss, enamel cream, galvanized gray
- Lighting strategy: maximize dapple—thin an overgrown canopy or use 30–40% shade cloth
- Furniture silhouettes: open-shelf bench, simple lines with a towel bar
- Texture layers: matte brick, chalky lime, glossy leaves, zinc and enamel
- Accent details: hook rail for tools, striped hand towel, berry colander
How To Recreate This Look:
- Lay shallow brick beds (or brick edges ringed around existing beds) and limewash for brightness.
- Set a potting bench nearby with easy reach to the beds.
- Plant shade lovers: lettuce mixes, sorrel, alpine strawberries, mint (contained).
- Add a light shade cloth if needed to even out harsh midday beams.
- Style with wire baskets, vintage jars for twine, and one big enamel bowl.
Why This Reads High-End: The matte limewash finish and consistent material palette evoke boutique hotel gardens. Function looks intentional, not improvised.
The Most Common Mistake: Skipping edge definition. Without crisp brick lines, shade gardens can look messy fast. Define paths and bed edges first—plants second.
Pro Styling Tip: Take photos on overcast days to avoid speckled highlights; the whitewash will lift the scene and keep greens saturated.
4. Corten Steel Edges With Sunset Ember Glow and a Cantilevered Fruit Tree Espalier
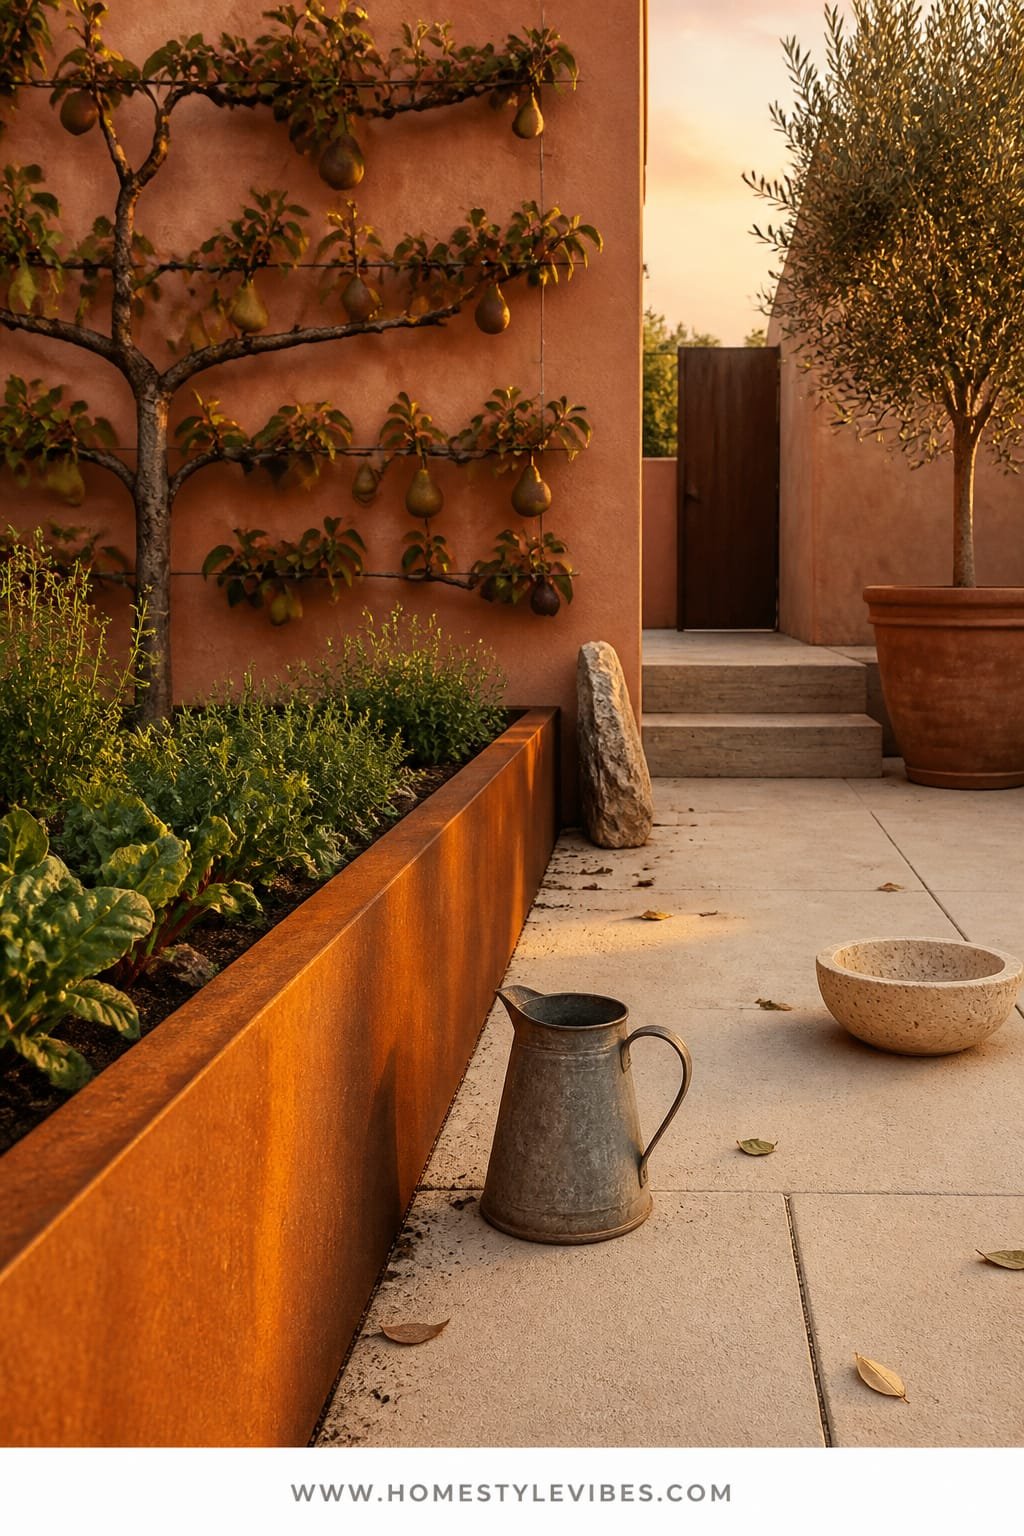
You crave structure, but wood beds feel too farmhouse for your architecture. Corten steel edges bring a sculptural, modern energy and play beautifully with fruit tree espaliers trained flat against a fence. The mood is modern Mediterranean—minimal, sun-kissed, and quietly dramatic, like a gallery garden for figs and pears.
Why it works: Corten’s rusty orange deepens with time, giving cozy contrast to gray homes or stucco. Espaliered trees become living wall art while saving space and improving yields in small yards. A slim, cantilevered espalier frame (think black metal crossbars) underlines that this is sculpture, not just orchard. Sunset lighting gilds the steel like ember—set a single linear fixture along the base and you’ll gasp at the glow after dinner.
Variations: lower budget swaps in powder-coated borders in warm brown; small-space version uses two fruit espaliers and shallow herb strips; renter-friendly uses freestanding trellis panels and steel-look planters with rust patina paint.
Key Design Elements:
- Main materials: Corten steel, black powder-coated frames, crushed gravel
- Color palette: rust, charcoal, olive, pale limestone, fig green
- Lighting strategy: low linear light washing up the espaliered fence; 2200–2700K
- Furniture silhouettes: angular bench or narrow concrete perch
- Texture layers: rough steel patina, smooth leaves, gritty gravel, glossy figs
- Accent details: slate stepping stones, matte black hose reel, restrained plant tags
Budget Breakdown:
- Corten edging/beds: $300–$900
- Espalier frames and training wire: $80–$220
- Fruit trees (2–3): $90–$240
- Linear light and transformer: $120–$300
- Gravel and stepping stones: $120–$280
Total Estimated Cost: $710 – $1,940
Best For: Narrow side yards, modern homes, and anyone who wants fruit without orchard sprawl. Best in full to part sun.
How To Recreate This Look:
- Install Corten edging to create crisp planting ribbons with 24–30 inch depth.
- Mount black espalier frames on a fence at 12–18 inch vertical intervals.
- Plant dwarf or semi-dwarf pears, apples, or figs; begin training main laterals.
- Fill in with gravel and set a minimal bench opposite the trees.
- Add a warm linear light along the base of the fence for subtle evening drama.
Why This Looks Intentional: Strong lines and a single repeated material carry the scheme. The tight espalier plane turns fruit into an architectural surface rather than random trees.
Don’t Do This: Avoid mixing too many edging materials. One steel detail is striking; three different metals read chaotic and cheap.
Pro Styling Tip: Frame your shot so the espalier grid fills the background like patterned wallpaper, then place one fruit in sharp focus near the foreground leaf edge.
Remember, this isn’t about recreating a showroom. It’s about building a garden that actually fits your light, your time, and your taste. If one idea resonates, that’s your green light—start there.
5. Limewashed Terraces With High-Noon Reflective Whites and a Rustic Stone Pizza Oven Nook
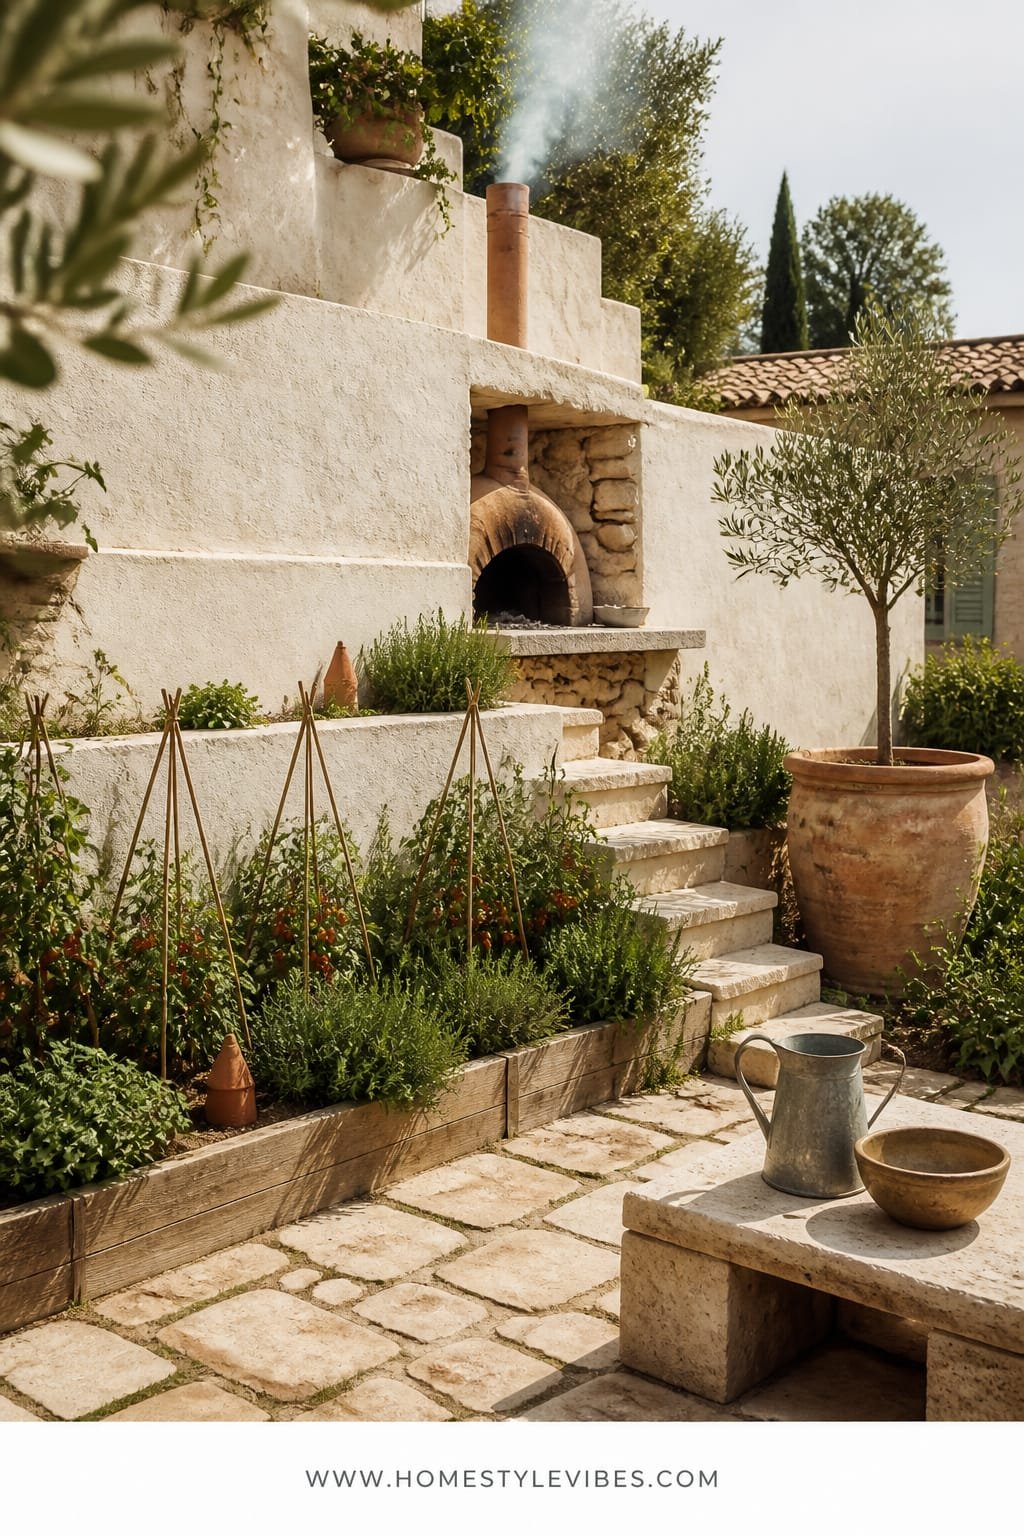
Midday sun making your garden look washed out and tired? High-noon glare is unforgiving. This design leans into bright whites and terraces so instead of fighting the sun, you harness it. The mood is hillside Mediterranean—lazy lunches, tomato salads, fresh basil, and a little smoke rising from a compact pizza oven tucked into a stone niche.
Limewashed terrace walls reflect light onto the lower beds, boosting growth for sun-lovers. Stone steps and niches add dimension so photos have shadow and depth even at noon. The pizza oven becomes the statement fixture and doubles as garden theater—pick a tomato, slice some mozzarella, done. Practical too: terraces reduce erosion, and limewash is breathable and fixable with a quick recoat.
Options: a budget-friendly steel pizza oven on a cart with faux-stone surround; small-space version uses two short terraces and a tabletop oven; darker variation uses warm sand-colored limewash and deeper terracotta mulch to avoid blinding glare; renter-friendly version swaps terraces for stacked planters at different heights.
Key Design Elements:
- Main materials: limewashed block, natural stone, terracotta mulch
- Color palette: chalk white, sun-baked tan, basil green, tomato red accents
- Lighting strategy: rely on reflective surfaces; add minimal warm string lights for evenings
- Furniture silhouettes: low, chunky stools; slim metal prep table
- Texture layers: chalky limewash, rough stone, glossy tomatoes, crisp steel
- Accent details: pizza peel on a hook, herb pots near the oven, striped tea towels
Budget Breakdown:
- Terrace materials and limewash: $500–$1,800
- Compact pizza oven: $250–$1,200
- Stone steps and niche build-out: $300–$1,000
- String lights and hooks: $30–$90
- Terracotta mulch and planters: $80–$180
Total Estimated Cost: $1,160 – $4,270
Best For: Sloped yards or bright, open spaces. Ideal for cooks who love to harvest and serve in one zone.
Why This Looks Expensive: Terracing alone signals landscape design. Pair that with a single “chef’s toy” and a restrained palette, and it looks like a vacation rental you actually live in.
How To Recreate This Look:
- Build or define two to three terraces; limewash vertical surfaces.
- Position the pizza oven in a shallow stone niche with small prep surface.
- Plant sun-worshippers: tomatoes, peppers, basil, eggplant on upper terraces.
- Mulch with terracotta chips to hold moisture and bounce warm tones.
- String minimal cafe lights for evening ambiance.
Watch Out: Pure white everywhere can glare. Balance with natural stone and terracotta underfoot so your eyes have somewhere warm to rest.
Pro Styling Tip: Photograph at 11 a.m. or 3 p.m. when shadows just begin to stretch; include a pizza peel or basil bunch in the foreground for an immediate story.
6. Weathered Teak Potager Grid With Overcast Diffused Light and a Copper Obelisk Centerpiece
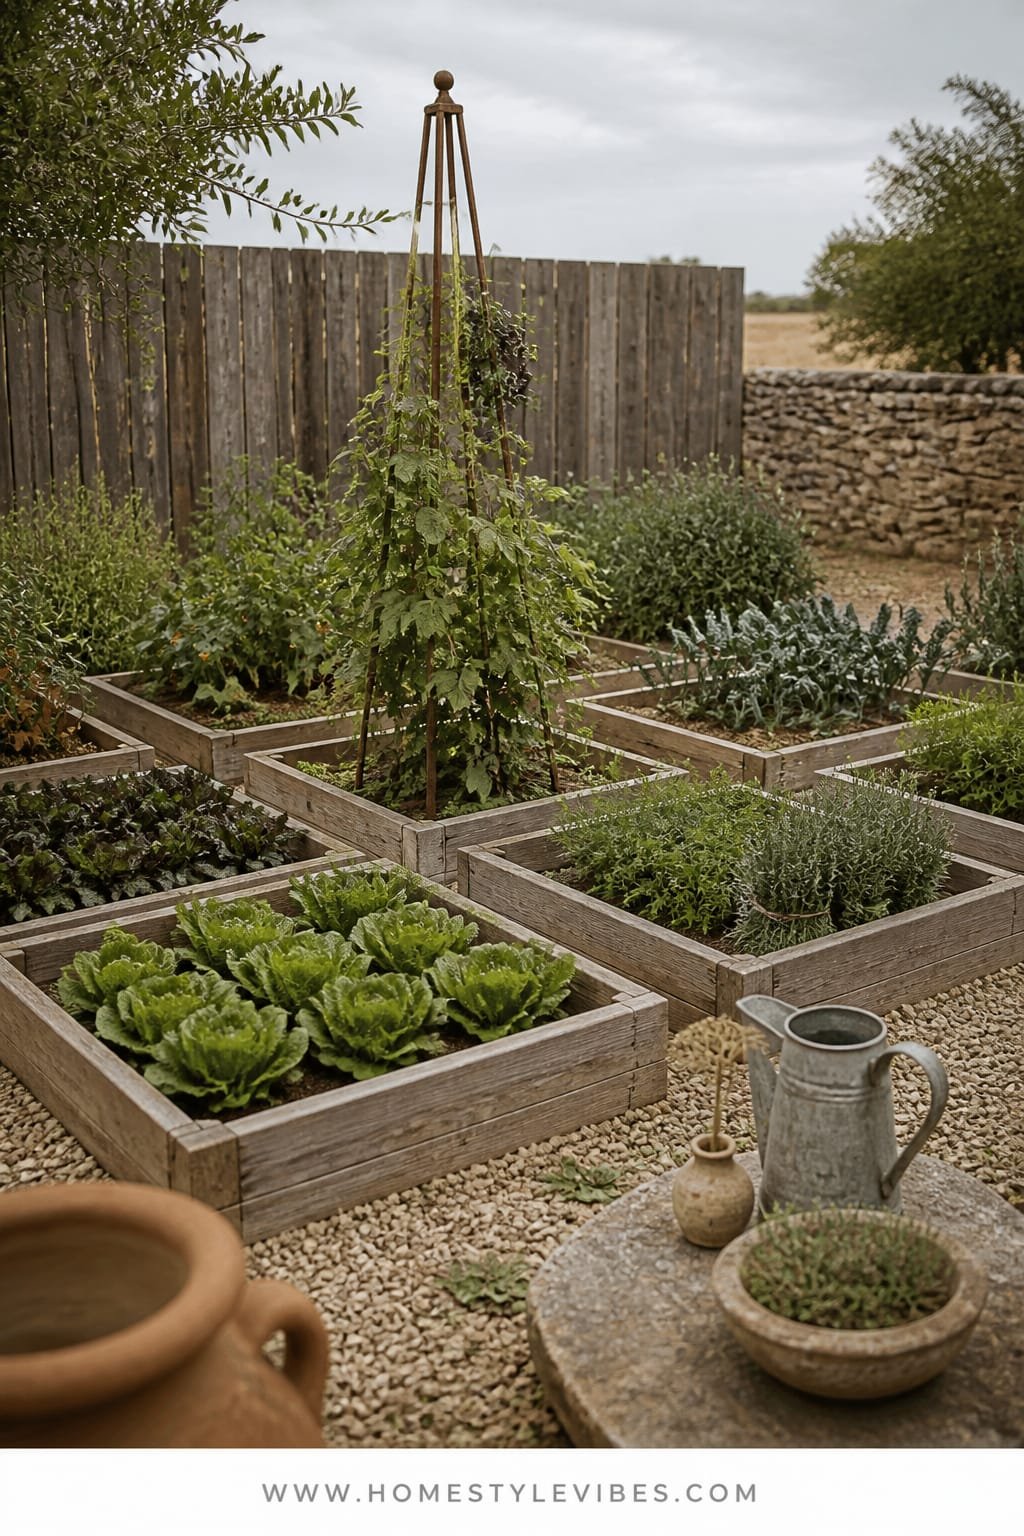
Every season, the layout drifts. You forget where you planted the carrots. The beans invade. This classic potager grid brings order and charm, with weathered teak frames dividing the garden into neat squares. Add one tall copper obelisk in the center and you’ve got a living sundial wrapped in climbing beans or blackberries.
The mood is French countryside—symmetry, gravel, bundles of herbs hanging to dry. Overcast or diffused light keeps everything even-toned for photos, and the grid reads beautifully from above if you like drone shots or second-story windows. It works for families and beginners because beds are small and reachable from all sides—less soil compaction, better yields. Teak ages gracefully, and the copper obelisk develops a soft patina that pairs with greens like jewelry.
Variations: budget version uses cedar with gray stain and a painted wood obelisk; small-space uses four squares around a birdbath; renter-friendly uses modular crates with a freestanding obelisk staked through a big planter.
Budget Breakdown:
- Teak or cedar frames for 4–8 squares: $300–$900
- Copper obelisk: $180–$400
- Gravel and edging: $150–$350
- Plant supports and twine: $20–$60
- Seeds/starts: $60–$120
Total Estimated Cost: $710 – $1,830
Best For: Level yards, cottage-style homes, and those who love cut-and-come-again harvests. Looks best spring through fall.
Key Design Elements:
- Main materials: weathered teak/cedar, copper, pea gravel
- Color palette: silvery wood, verdant green, copper blush, soft taupe
- Lighting strategy: diffuse—use a sail shade or wait for cloudy days to photograph
- Furniture silhouettes: backless wood bench; narrow potting shelf
- Texture layers: aged wood grain, crunchy gravel, soft herbs, metallic patina
- Accent details: linen ties, slate markers, woven trug basket
How To Recreate This Look:
- Mark a square or rectangle and divide into 4–8 equal beds with teak or cedar borders.
- Set the copper obelisk in the center bed; plant climbers at its base.
- Fill paths with gravel and define edges with steel or wood strips.
- Plant by leaf shape: frilly lettuces, spiky chives, rounded basil for visual rhythm.
- Style with a small bench and a basket for morning harvests.
Why This Feels Designer: Perfectly repeated shapes and a single vertical accent create hierarchy. When everything has a place, harvests look like styled still-lifes.
One Thing To Avoid: Planting too tall on the perimeter. Keep taller crops to the center so the grid lines stay visible and organized.
Pro Styling Tip: Shoot from a step ladder for a soft overhead grid; include your feet at the edge of the frame for a human, editorial touch.
Story time: I once laid out a grid without measuring (overconfident much?). The paths ended up different widths and it drove me nuts all season. Spend 20 minutes with a tape measure—it’s the difference between “cozy” and “crooked.”
7. Black-Stained Pergola Canopy With Warm Lantern Glow and a Built-In Herb Banquette
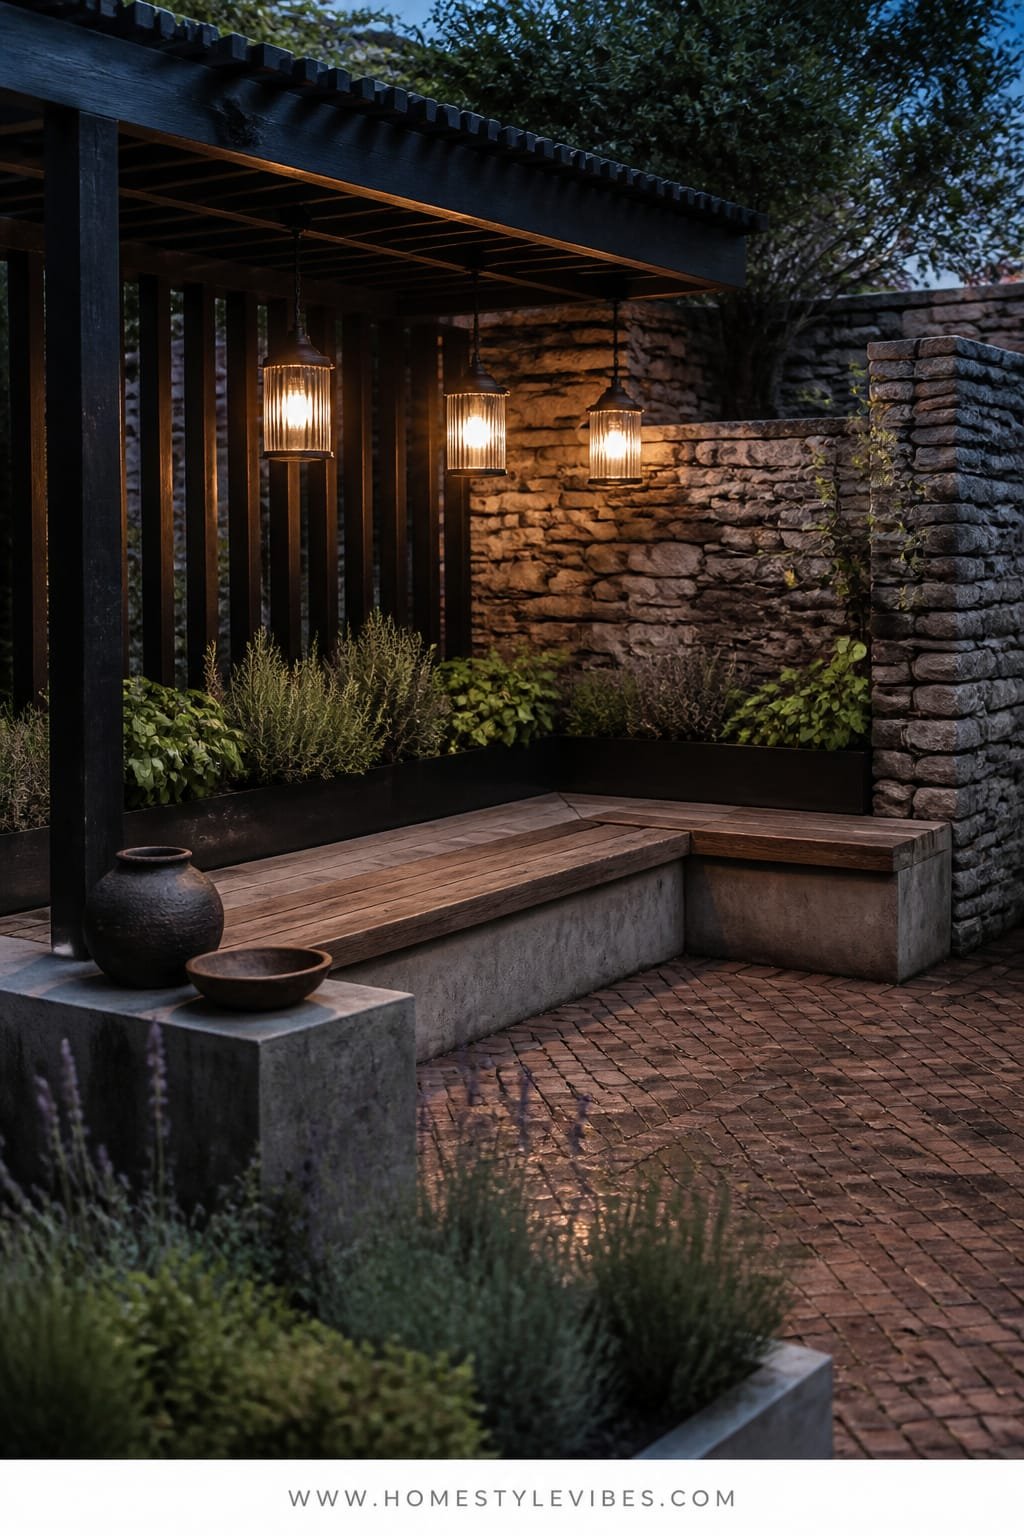
That patio by the back door? It’s the most-used spot—and somehow the ugliest. You’ve shuffled chairs, you’ve added a rug, but it still feels like a catchall. A slim black-stained pergola instantly frames the space, while a built-in banquette doubles as seating and an herb trough. Hang warm lanterns, and suddenly dinners feel like a bistro under vines.
This delivers a cozy, urban courtyard mood that’s wildly photogenic at night. Black pergola slats make the greens pop and hide dust. The banquette solves seating and raises herbs to nose level, which is fun and practical for cooking. Kids can help snip; you can sip wine and pluck mint for spritzes. Maintenance stays reasonable: stain the pergola every couple of years; keep herbs refreshed by season.
Variations: budget version with a freestanding pergola kit and a storage bench plus long trough planters; small-space with a corner L-bench and single lantern; renter-friendly uses bamboo screens, string lights, and a moveable bench with planters behind.
Key Design Elements:
- Main materials: black-stained wood, outdoor-grade cushions, galvanized trough planters
- Color palette: matte black, deep green, sand, brass or cane lanterns
- Lighting strategy: warm lanterns at mixed heights; a dimmer for string lights
- Furniture silhouettes: low L-shaped banquette; round or oval table for flow
- Texture layers: matte stain, soft cushions, feathery herbs, woven lanterns
- Accent details: striped throw, brass candle cups, slim metal plant labels
Budget Breakdown:
- Pergola kit or custom build: $400–$2,000
- Built-in banquette materials: $250–$700
- Lanterns and dimmable string lights: $60–$200
- Trough planters and soil: $120–$280
- Outdoor cushions and fabric: $100–$350
Total Estimated Cost: $930 – $3,530
Best For: Patios near the kitchen, evening entertainers, and renters needing a vibe without permanent landscaping.
Why This Looks Expensive: Black structures look tailored. Integrated seating feels custom, and the layered lighting reads like a boutique restaurant.
How To Recreate This Look:
- Assemble a slim pergola or stain an existing one matte black.
- Build or place an L-shaped bench; tuck a long trough planter directly behind the backrest.
- Plant herbs with contrasting shapes: upright rosemary, trailing thyme, mounding basil.
- Hang lanterns at two heights; add a dimmer to your string lights.
- Style with neutral cushions, one patterned pillow, and a small tray for salt and shears.
The Most Common Mistake: Oversized tables that kill circulation. Choose a round or narrow oval so you can slide through easily with a platter.
Pro Styling Tip: For night photos, kill overhead floodlights; let lanterns do the work. Warm tones against black make foliage read velvety and rich.
If one idea becomes your anchor (like this pergola moment), let the rest of the garden serve it. A strong focal point simplifies every other choice.
8. Crushed Granite Courtyard With Soft Moonlight Silvers and a Tapered Concrete Planter Trio
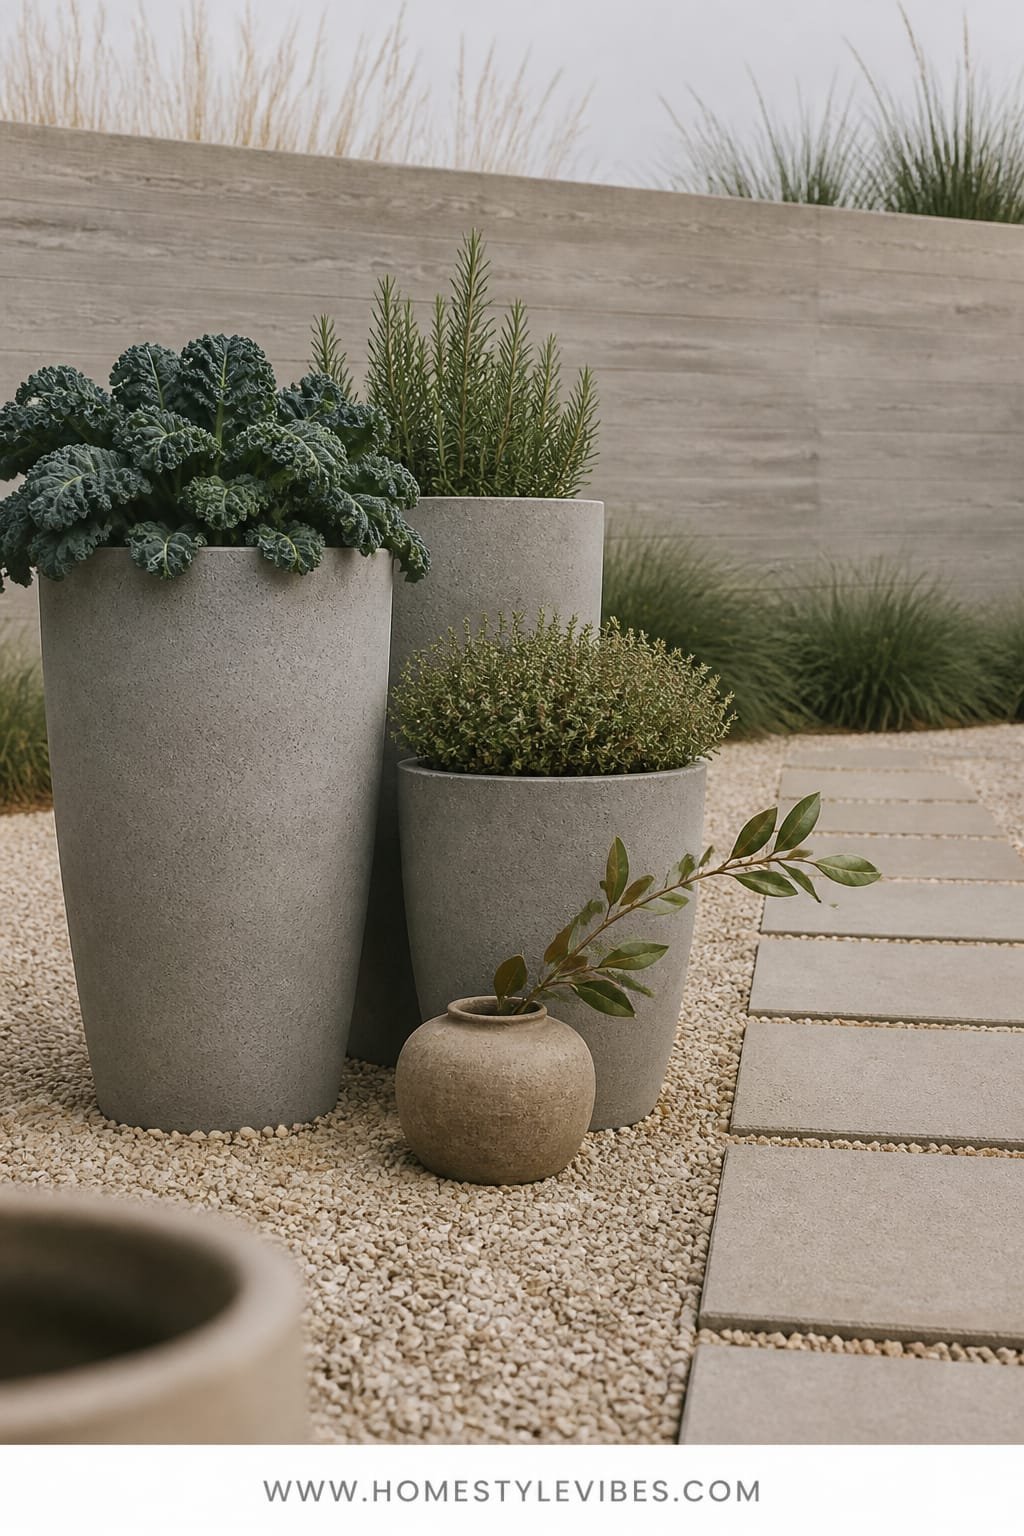
Some gardens feel cluttered no matter what. Too many small pots, too many colors, no rest for the eyes. A crushed granite courtyard acts like a calming canvas, especially paired with a trio of tapered concrete planters. The mood is serene Japandi-meets-Modern—zen lines, silvery moonlight tones, and edible plants that read sculptural.
Why it works: granite provides a uniform ground that drains well and photographs like a dream—no patchy grass. Concrete planters anchor the space and make even kale look chic. Soft moonlight silvers come from cool-toned lights or just the way dusk hits gray textures. This is low maintenance: sweep the granite, water deeply but less often, and prune for shape. Great for renters too: everything can move, yet feels permanent.
Variations: budget version uses faux-concrete resin planters; small-space uses a single large planter flanked by two low bowls; darker version uses charcoal granite and deep green planters for moody elegance; renter-friendly lays landscape fabric and loose granite that lifts easily later.
Key Design Elements:
- Main materials: crushed granite, smooth concrete/resin, cool white pebbles
- Color palette: mist gray, charcoal, blue-green foliage, pale silver accents
- Lighting strategy: cool-dim path markers or no added light—embrace twilight
- Furniture silhouettes: simple teak or black metal bench with clean lines
- Texture layers: gritty granite, sleek planters, waxy leaves, soft ornamental grasses
- Accent details: minimal steel edging, single sculptural boulder, subtle zinc watering can
Budget Breakdown:
- Crushed granite and edging: $300–$900
- Concrete or resin planters (3): $180–$600
- Cool-toned solar markers: $40–$120
- Bench: $120–$350
- Plants (architectural edibles like artichoke, lacinato kale, rosemary): $60–$150
Total Estimated Cost: $700 – $2,120
Best For: Courtyards, hot climates, and minimalists who still want to eat from the garden. Works year-round with evergreen herbs and winter brassicas.
How To Recreate This Look:
- Clear the area and lay landscape fabric; frame with steel or composite edging.
- Spread crushed granite evenly; compact lightly for a firm walking surface.
- Place three tapered planters in a triangle; vary heights for rhythm.
- Plant sculptural edibles and a tuft of ornamental grass for movement.
- Add a simple bench and two cool-toned path markers for a lunar glow.
Why This Reads High-End: Restraint. Limited palette, repeated forms, and negative space. It’s confident and calm, the way boutique courtyards feel.
Watch Out: Too many small accessories kill the serenity. Limit decor to one bench, one boulder, and the trio of planters—full stop.
Pro Styling Tip: Capture at blue hour; let the planters silhouette slightly against the sky for architectural drama without harsh shadows.
A tiny confession: I used to hate gravel because I pictured messy driveways. Then I tried a small granite pad under three planters by my kitchen door. It instantly looked “finished,” and I stopped tripping on muddy shoes. Sometimes the ground plane is the real problem.
Quick Checklist
- Choose one anchoring material: cedar, terracotta, brick, Corten, limewash, teak, black-stained wood, or concrete
- Commit to one dominant light quality: morning glow, golden hour, sunset ember, overcast diffusion, or moonlit cool
- Pick a single statement feature: arch trellis, olive jar fountain, potting bench, espalier frame, pizza oven, copper obelisk, lantern cluster, or planter trio
- Define the ground plane: gravel, decomposed granite, brick, terrace steps, or granite courtyard
- Repeat forms or colors at least three times for cohesion
- Control height: one tall element, mid-height beds, and low ground cover
- Install warm or cool lights to match the chosen palette
- Use consistent hardware finishes: matte black, brass, zinc, or copper
- Label plants with a single material style for polish
- Edit accessories—leave intentional negative space
Frequently Asked Questions
How much should I budget to make my vegetable and fruit garden look high-end without going custom?
Plan on $600–$1,500 for a focused zone with one statement feature and consistent materials. If you’re tackling terraces or a pergola, earmark $1,500–$3,500. Start with one area and add annually.
My yard is tiny. Which idea works best in a small space?
Go for the fluted terracotta nook with a fountain or the concrete planter trio on crushed granite. Both deliver strong visuals and real harvests without eating square footage or requiring permanent builds.
I’m renting—what can I do that won’t upset my landlord?
Use modular raised beds, resin “concrete” planters, freestanding trellises, and clip-on solar lights. Lay landscape fabric with loose gravel that lifts easily. Take photos of the original space and restore it when you leave.
Will these designs be hard to maintain during peak summer?
No, if you choose materials wisely. Terracotta and deep beds help regulate moisture. Mulch, drip irrigation, and grouping planters reduce daily watering. Pick one zone to prioritize on the hottest days.
What’s the most common design mistake with edible gardens?
Mixing too many materials and heights without a focal point. Choose one hero feature, keep edges consistent, and repeat a color or texture at least three times so it looks cohesive rather than chaotic.
Conclusion
Pick one idea from this list and give it a weekend. Maybe it’s the arch trellis that greets you at sunset, or the little terracotta courtyard that turns morning coffee into a ritual. You don’t need a massive overhaul to make your vegetable and fruit garden feel beautiful—you need clarity, texture, and light.
The truth is, luxury in a garden comes from restraint, repeated materials, and thoughtful lighting. Texture holds the story; lighting tells it. Keep your palette simple, your lines clean, and let the plants be the drama. Start small, stay consistent, and your garden will look finished sooner than you think.
You’ve got this. Tie on the apron, grab the pruners, and build the one corner that makes you smile every day. The rest will follow—one ripe tomato and one pretty path at a time.
About the Author

Krisztina P.Rendes, Founder of Home Style Vibes
Founder of Home Style Vibes
Krisztina Puskásné Rendes created Home Style Vibes as a cozy-modern lifestyle space where homemaking meets inspiration. Her goal is to help women create beautiful, organized, and peaceful homes they truly love — without overwhelm. You’ll find here heart-driven content on home decor, cleaning tips, easy family recipes, organization and decluttering, DIY home projects, plants, and seasonal ideas — all designed to bring more calm, comfort, and style into everyday life.