6 Home Garden Aesthetic Ideas That Make Your Backyard Look Like A Dream
You want a backyard that looks like a soft summer evening feels—glowy, lush, and impossibly photogenic. But the weeds, the mismatched patio set, and that one harsh floodlight are killing the mood. Picture textured stone, warm light pooling under trees, gentle shadows, and a space that looks styled but still lived-in. These 6 home garden aesthetic ideas fix the friction—fast—with materials you can source this month, smart lighting tweaks, and styling details that cap out under a realistic budget so you’re not spiraling. They’re ultra-Pinterest-worthy and designed for real life, not a showroom. If you crave a backyard that feels like a breath out, you’ll find your vibe here.
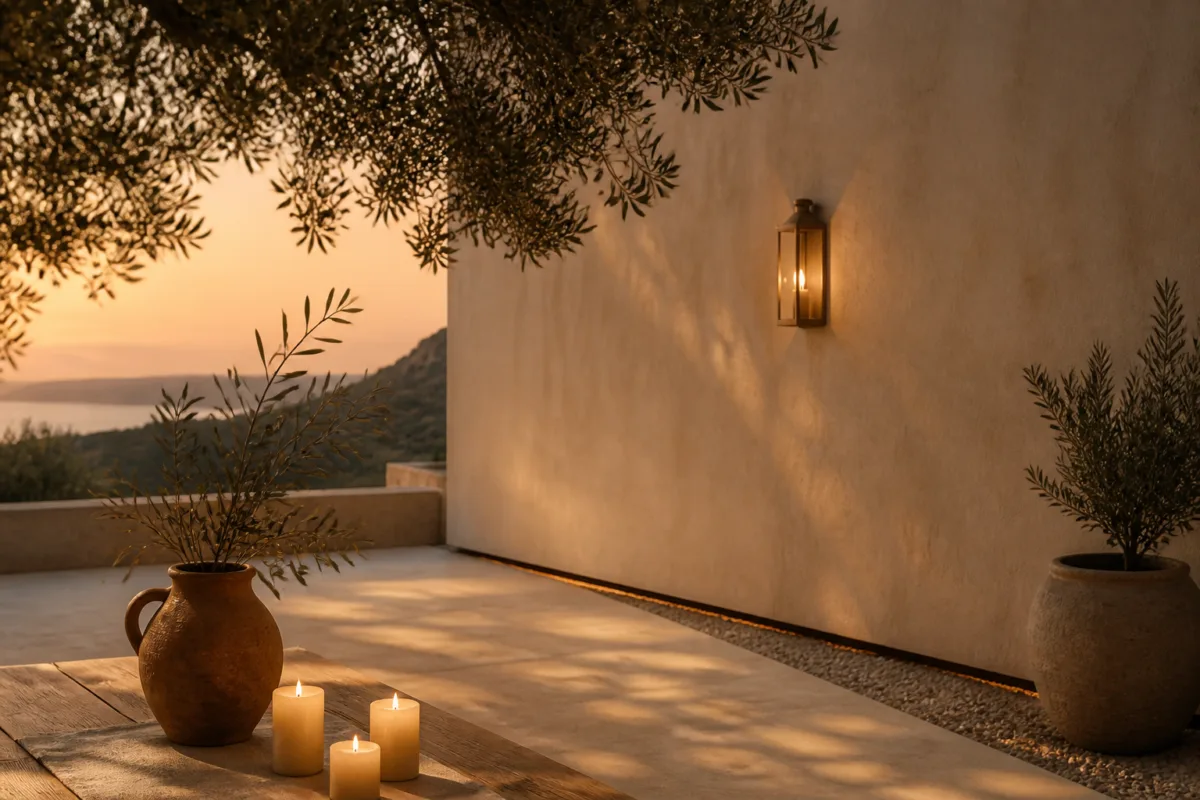
1. Limestone Terrace with Dappled Candlelight and a Low-Slung Teak Dining Table
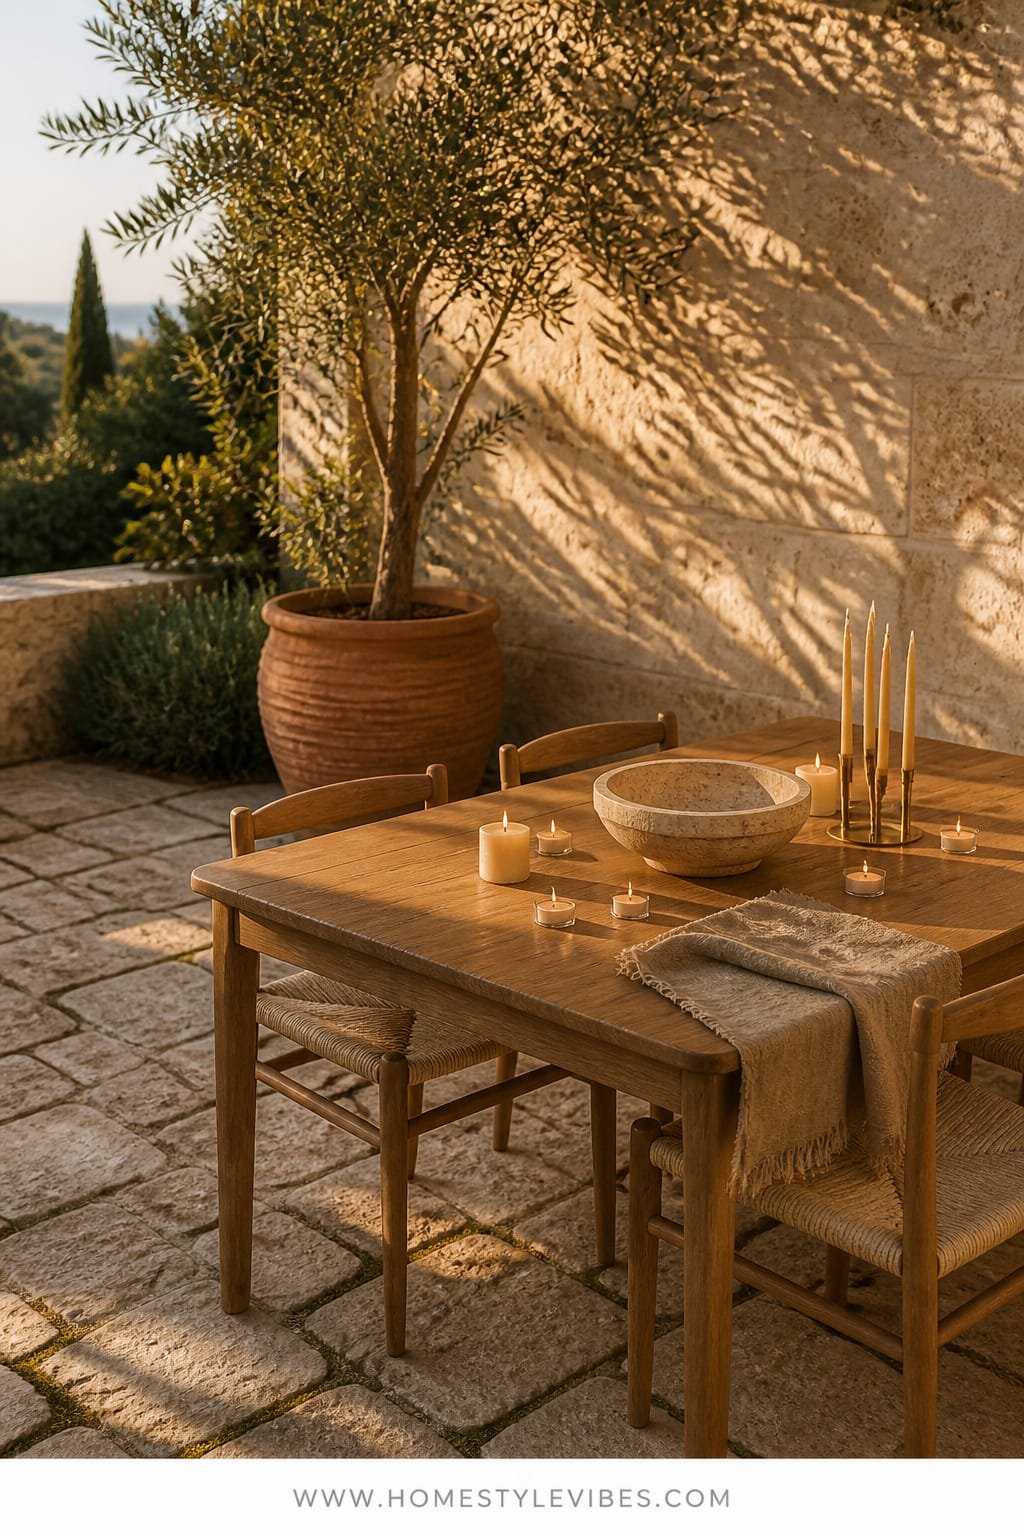
We’ve all been there: you planned one dinner outside and realized your patio feels like a parking lot—echoey, too bright, zero intimacy. This limestone-and-candlelit setup creates that warm, late-summer dinner energy any night of the week. It reads modern Mediterranean: sun-soft neutrals, natural textures, and a table that anchors conversation. The magic is the dappled candlelight, which breaks up flatness and makes faces glow (yes, even on a Tuesday). Limestone brings a quietly grand texture without being fussy, and the low-slung teak table invites people to linger. Comfort is the point. Photographs? Stunning. Limestone has a matte, chalky surface that loves shadows and glows at dusk.
Why it works in real homes: it’s layerable. If you’re not ready to tile an entire patio, start with a dedicated terrace zone. Lighting becomes your depth tool: skip floodlights and go for multiple candle sizes in hurricane glass to concentrate soft light on the table plane. The palette—sand, biscuit, wheat—keeps visuals calm and forgiving. It looks great in small yards and scales up easily in larger ones. Bonus: limestone stays cool under bare feet and we love that in July.
Variations to try: For a budget-friendly version, use limestone-look porcelain pavers with polymeric sand joints. For small spaces, pick a 60–72-inch oval teak table to keep traffic flowing. For renters, lay 24-inch porcelain pavers over gravel as a floating platform and add removable lantern stakes for light. Want a moodier spin? Swap white candles for smoky grey and add rust-toned linen napkins for contrast.
Budget Breakdown:
- Limestone or limestone-look porcelain pavers: $6–$18/sq ft
- Low-slung teak dining table (72–96 inches): $700–$2,200
- Mixed-height hurricane candle holders + outdoor candles: $80–$250
- Linen table runner + seat cushions: $120–$300
- Planter olives or bay laurel (2–3): $120–$450
Total Estimated Cost: $1,100 – $3,200
Best For: Medium patios, sun-washed backyards, or side-yard dining nooks. Hosts who love slow dinners and textural neutrals.
Key Design Elements:
- Main materials: limestone or porcelain pavers, solid teak, linen
- Color palette: sand, biscuit, oat, soft olive leaf
- Lighting strategy: layered candlelight plus one warm 2700K sconce nearby
- Furniture silhouettes: low, long, simple edges; armless chairs for easy flow
- Texture layers: chalky stone, oiled teak grain, rumpled linen
- Accent details: matte black lanterns, olive trees in terra-cotta, brass candle snuffers
How To Recreate This Look:
- Start with a defined terrace area; dry-lay pavers first to test spacing and flow.
- Add a low-slung teak table and armless chairs to keep sightlines open.
- Layer hurricane candles in three heights along the table centerline.
- Install one warm sconce or stake light behind foliage for ambient backlight.
- Style with a rumpled linen runner, trim olives in terra-cotta, and neutral seat pads.
Why This Looks Expensive: Limestone’s matte, mineral surface creates soft highlights and no harsh reflections. The low profile table reads custom, and the candle glow hides any small imperfections—like paver cuts or a stain you haven’t sealed yet.
Watch Out: Don’t use cool white candles or LED flames that lean blue; they flatten skin tones and clash with limestone. Also, avoid ultra-glossy planters—they reflect candle flames like car headlights.
Pro Styling Tip: For photos, light candles 15 minutes before dusk and mist the table runner lightly so the fabric drapes with gentle waves that catch the glow.
2. Charcoal Shou Sugi Ban Fence with Golden Hour String Lights and a Curved Wicker Lounge
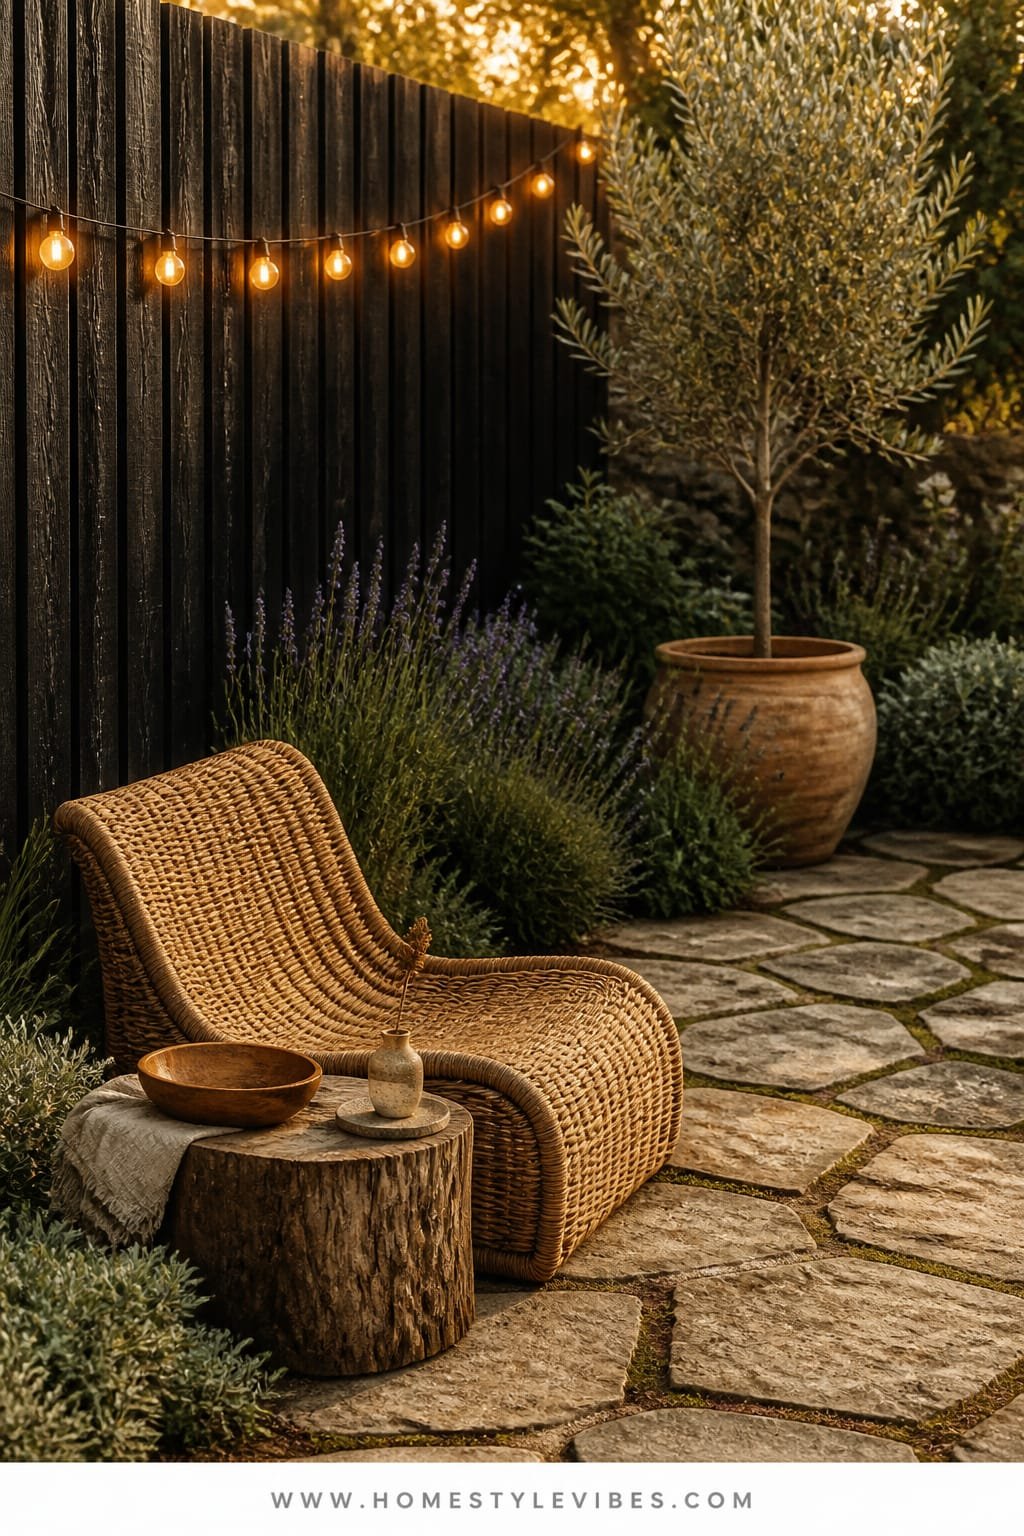
It’s that one corner that always feels off—noisy neighbor sightlines, a fence you pretend not to see, and zero reason to sit there. You’ve tried an outdoor sofa, but it still looks flat and awkward. This concept leans into contrast: a charred wood backdrop, warm globe lights, and a sculptural curved wicker lounge that softens everything. The mood is modern coastal-meets-urban hideout. High contrast means strong depth in photos, the string lights add that golden-hour glimmer even after dark, and the curved piece makes it feel like a nook, not just a corner.
Why it works: dark surfaces recede. That means your eyes read more depth, and plants pop like jewelry. The shou sugi ban (charred wood) fence looks artful, lasts ages, and makes greenery look editorial-level lush. Maintenance stays easy: a quick brush-off and occasional oiling. Renter? You can fake the look with dark-stained privacy screens on planters and removable light strings on hooks. Family-friendly too: the lounge invites pile-on movie nights with an outdoor projector.
Variations: Smaller spaces can use a half-round wicker loveseat. For a softer version, choose espresso-stained cedar instead of full char. For a luxe twist, add two slate cube side tables; for a budget move, paint existing fence in matte black and layer string lights with a central plug-in dimmer.
Budget Breakdown:
- Shou sugi ban cladding or stain/paint for existing fence: $200–$1,200
- Warm globe string lights (commercial-grade): $60–$180
- Curved wicker lounge or loveseat: $350–$1,400
- Outdoor rug in mineral stripe: $120–$400
- Potted ferns and grasses (4–6): $60–$240
Total Estimated Cost: $790 – $3,420
Best For: Small patios, urban balconies with privacy needs, night-owl hangouts, renters willing to DIY mounting.
Key Design Elements:
- Main materials: charred wood, resin wicker, striped flatweave
- Color palette: charcoal, warm white, sage, umber
- Lighting strategy: string lights on dimmer plus a single lantern at floor level
- Furniture silhouettes: curved lounge, low cubes, round planters
- Texture layers: braided wicker, matte wood grain, soft rug underfoot
- Accent details: linen throw in tobacco or rust, oversized fern fronds, matte black hooks
How To Recreate This Look:
- Start by darkening the backdrop: char, stain, or paint the fence in matte charcoal.
- Add commercial-grade string lights on a zig-zag pattern for depth; use a dimmer.
- Layer a striped outdoor rug to define the lounge zone.
- Place the curved wicker sofa against the darkest span to exaggerate contrast.
- Style with two planters of tall grasses and one lantern on the ground for low glow.
Why This Feels Designer: The curve-meets-contrast formula is a stylist’s trick: dark background + rounded seating + one rhythmic light source. It’s sculptural without shouting, and it photographs like a magazine spread.
One Thing To Avoid: Don’t hang string lights too high or too taut. Slight swoops soften the geometry and keep the bulbs from throwing harsh, weird shadows on faces.
Pro Styling Tip: For photos, turn off any cool-white porch lights nearby and let the string lights lead; your wicker texture will read richer and shadows will fall softer.
Pause here. Can you already see your future Friday night? Keep scrolling—our next idea solves the “nothing grows here” zone with quiet drama.
Remember, this isn’t about copying a catalog. It’s about building an outdoor room that feels like your life—your routines, your people, your seasons. If one idea pulls at you, start there. Edit later.
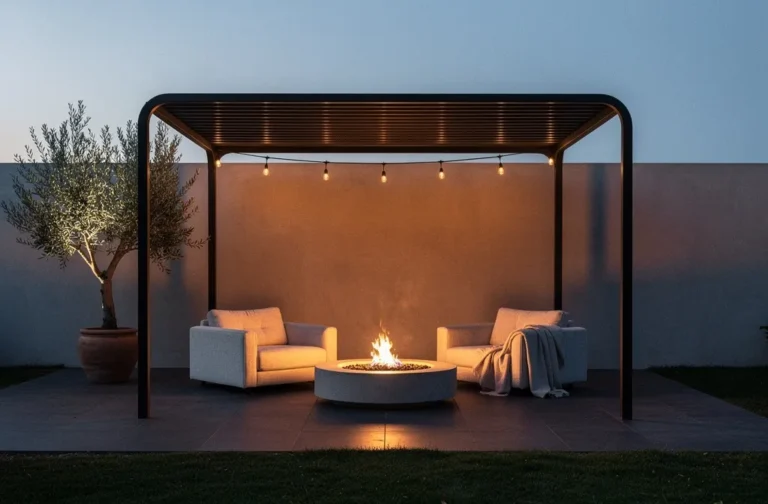
3. Honed Concrete Patio with Soft Uplighting and a Sculptural Fire Bowl
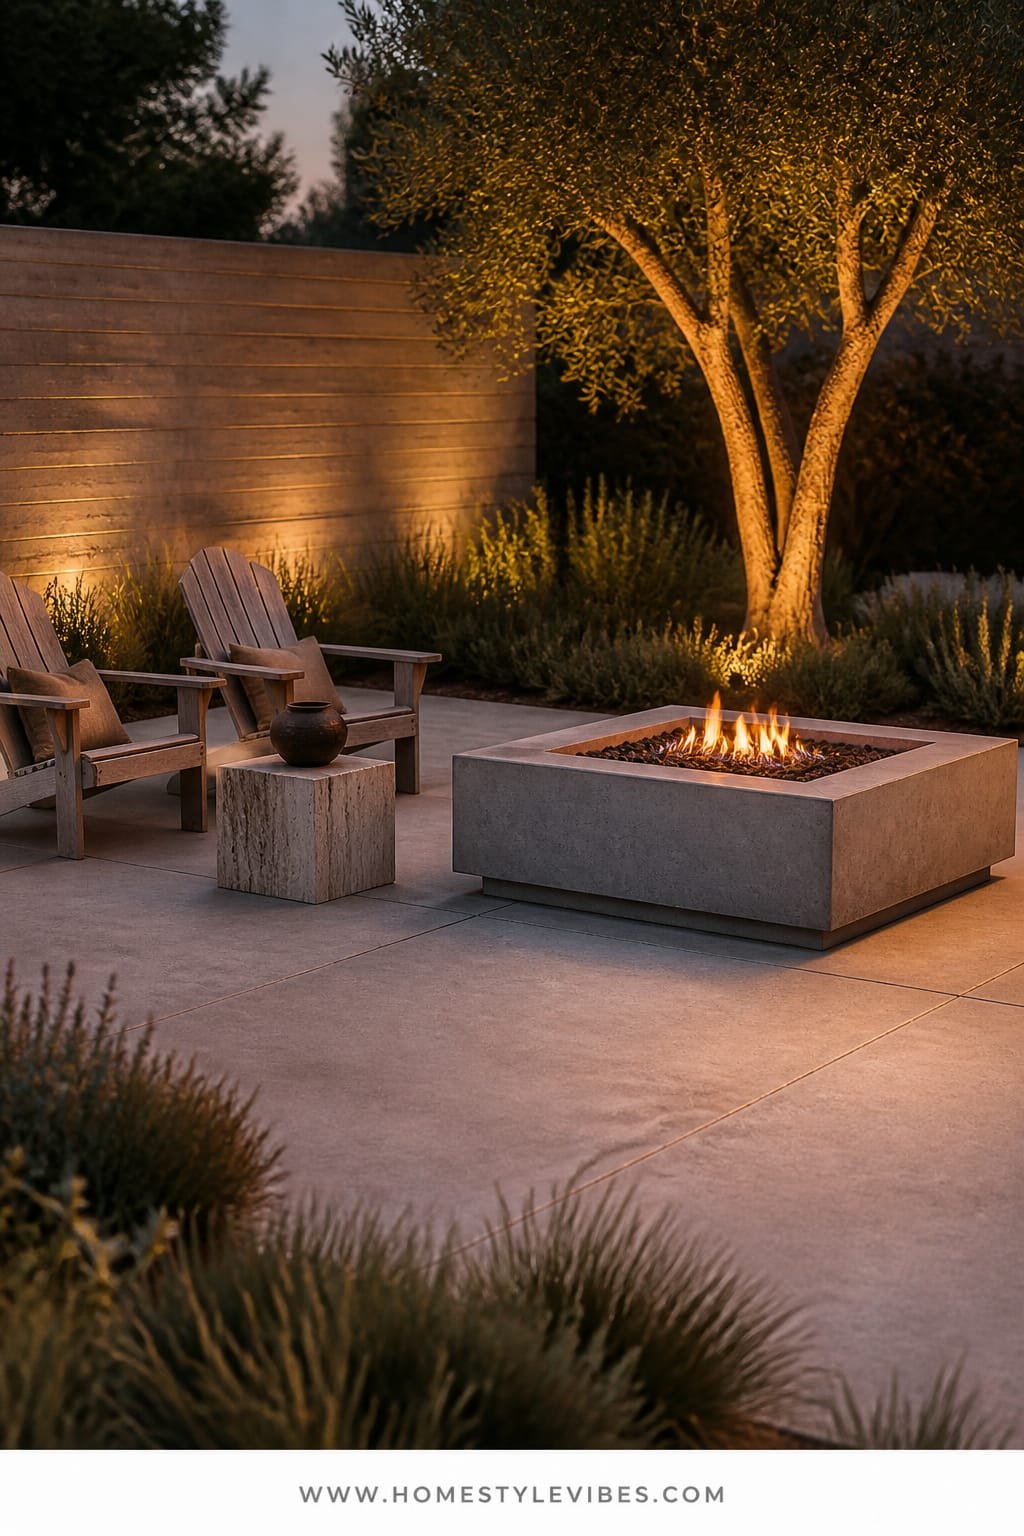
You want the outdoor spot that finally feels finished, but everything you do looks pieced together. The solution: a strong, quiet base material that behaves like a gallery floor. Honed concrete does that. Pair it with soft uplighting against a tree or feature wall and one sculptural fire bowl at the center. The vibe lands somewhere between spa and boutique hotel—elegant but relaxed, barefoot-friendly, and extremely photogenic because the surfaces stay calm while the light does the performance.
Here’s why it works at home: concrete offers a seamless plane that unifies everything on top of it, which makes smaller yards feel larger. Uplighting creates vertical interest; your eye travels upward to leaves, branches, and architecture, which adds drama without clutter. The fire bowl brings a focal point and a cozy ritual. Use a narrow palette—think warm gray, creamy putty, and herb greens—so the firelight becomes the color highlight. This setup also plays nicely with resale because it’s timeless and durable.
Variations: For a budget build, use large concrete-look pavers with tight joints. For rental patios, a modular deck tile plus a portable propane fire bowl gets a similar mood. If you want a darker read, choose charcoal aggregate and bronze fixtures; if your yard is blazing hot, go mid-gray to avoid heat build-up.
Budget Breakdown:
- Honed concrete slab or large-format pavers: $8–$18/sq ft
- Low-voltage uplights (2–4) + transformer: $220–$500
- Cast concrete or steel fire bowl: $350–$1,600
- Outdoor lounge chairs (2–4): $300–$1,200
- Planter trio in matte stone: $180–$450
Total Estimated Cost: $1,400 – $4,800
Best For: Moderate to large patios, clean-lined homes, and anyone who loves minimalism with warmth.
Key Design Elements:
- Main materials: honed concrete, cast stone, powder-coated steel
- Color palette: warm gray, putty, olive, ember
- Lighting strategy: tree or wall uplights on a timer at 2700K
- Furniture silhouettes: low sling chairs, slim arms, circular fire bowl
- Texture layers: smooth concrete, soft cushions, leafy canopy above
- Accent details: bronze match striker, linen throws, low bowls of river rock
Why This Reads High-End: Professional projects often rely on restraint: uninterrupted flooring, one strong focal, and quiet color blocking. Your eye isn’t busy—so the light show and flames feel cinematic.
How To Recreate This Look:
- Start by creating a unified floor plane: pour a slab or use large-format pavers.
- Add two uplights aimed at a tree or textured wall; hide the wires cleanly.
- Place a circular fire bowl at center or offset it for a lounge vignette.
- Layer two to four low lounge chairs with seat pads in warm neutrals.
- Style with three planters at staggered heights and a single soft throw per chair.
The Most Common Mistake: Oversizing the chairs so they crowd the fire bowl. Leave 30–36 inches around the bowl so people can move comfortably without singeing their shins.
Pro Styling Tip: For photos, sweep the concrete and lightly dampen it—moisture deepens the tone and gives you that subtle gallery-floor sheen without glare.
Real talk: I tried a version of this on my own slab last fall, and honestly the difference was wild. We went from “concrete square nobody uses” to “grab a throw, I’m making tea, meet me outside.” That’s the power of a strong focal and the right light.
4. Weathered Brick Path with Morning Mist Light and a Painted Iron Bistro Set
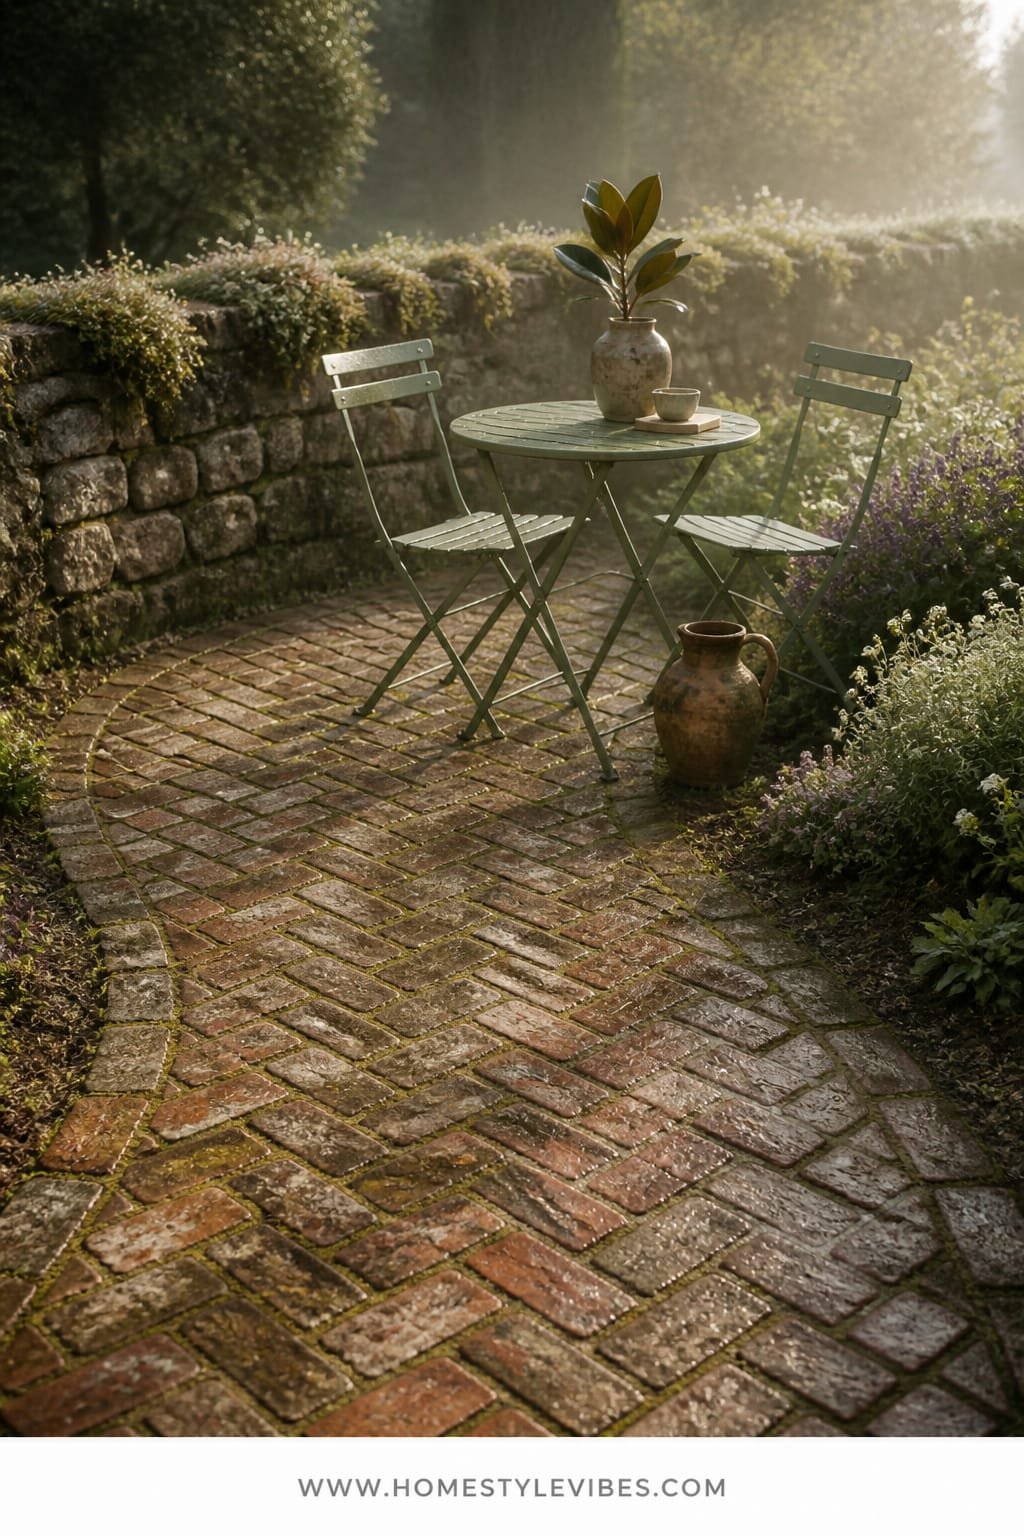
You love cottage gardens, but your yard feels like a patchy rectangle with nowhere charming to land. The fix isn’t ten more plants—it’s a path that creates a story. A weathered brick path with soft, misty morning light rolling across it changes how you move through the yard. Add a petite painted iron bistro set at a curve and suddenly you’ve got a destination. The feel is European courtyard: a bit romantic, a bit imperfect, always photogenic. Brick shoots beautifully because the joints and color variations create micro-shadows that cameras eat up.
Why it works: paths shape behavior. They make small yards feel like they have chapters. Brick—especially reclaimed or tumbled—looks cozy right away and handles foot traffic like a champ. The painted bistro set adds a crisp note; pick black for classic or soft sage if you want dreamy. Morning light slants low and picks up the brick relief for gentle contrast, so this is a breakfast spot as much as a sunset one.
Variations: Use clay pavers on a sand base for easy DIY. For renters, lay stepping bricks over pea gravel to suggest a path without heavy install. Small yard? Go narrower and gently serpentine to create a sense of discovery. For shade gardens, plant moss and ferns alongside; for sun, mix thyme and low sedums between bricks.
Key Design Elements:
- Main materials: tumbled brick, iron, gravel/sand base
- Color palette: terracotta, soot black or sage, thyme green
- Lighting strategy: capitalize on early light; add one discrete path light at the bend
- Furniture silhouettes: delicate, round bistro table and airy chairs
- Texture layers: rough brick, powder-coated metal, tufted cushions
- Accent details: striped cafe cushions, enamel mugs, vintage-style watering can
Budget Breakdown:
- Reclaimed or tumbled brick: $2–$6 each (100–300 pieces depending on length)
- Base materials (gravel/sand/edging): $120–$380
- Painted iron bistro set: $130–$450
- Low path light and transformer (optional): $120–$260
- Planting (thyme/sedum/fern mix): $60–$220
Total Estimated Cost: $650 – $2,100
Best For: Small-to-medium yards, cottage or traditional homes, anyone who wants instant charm and morning coffee rituals.
How To Recreate This Look:
- Start by mapping a gentle curve with a hose; mark edges with spray paint.
- Excavate 4–6 inches; add gravel and a sand layer, then edge for clean lines.
- Lay brick in a herringbone or running bond; tamp and fill joints with sand.
- Place the bistro set where the path pauses; add thin cushions for comfort.
- Style with a low pot of thyme, a linen tea towel, and one discreet path light.
Why This Looks Intentional: The path turns your yard into a story. You’re not just “putting a table outside”—you’re giving it a reason to be there. The gentle curve says, “Pause here.”
Don’t Do This: Avoid perfectly straight, tight-brick lines unless your architecture is very formal. Slight irregularities feel human, and they age well.
Pro Styling Tip: Sweep the bricks diagonally before shooting; the dust catches in the crevices and adds that cobbled, timeworn vibe.
Take a breath. You don’t need a massive yard, just a clear moment. If a bistro set and a curve make you smile, that’s your sign.
5. Whitewashed Pergola with Moonlit Fairy Lights and a Deep Seat Built-In Bench
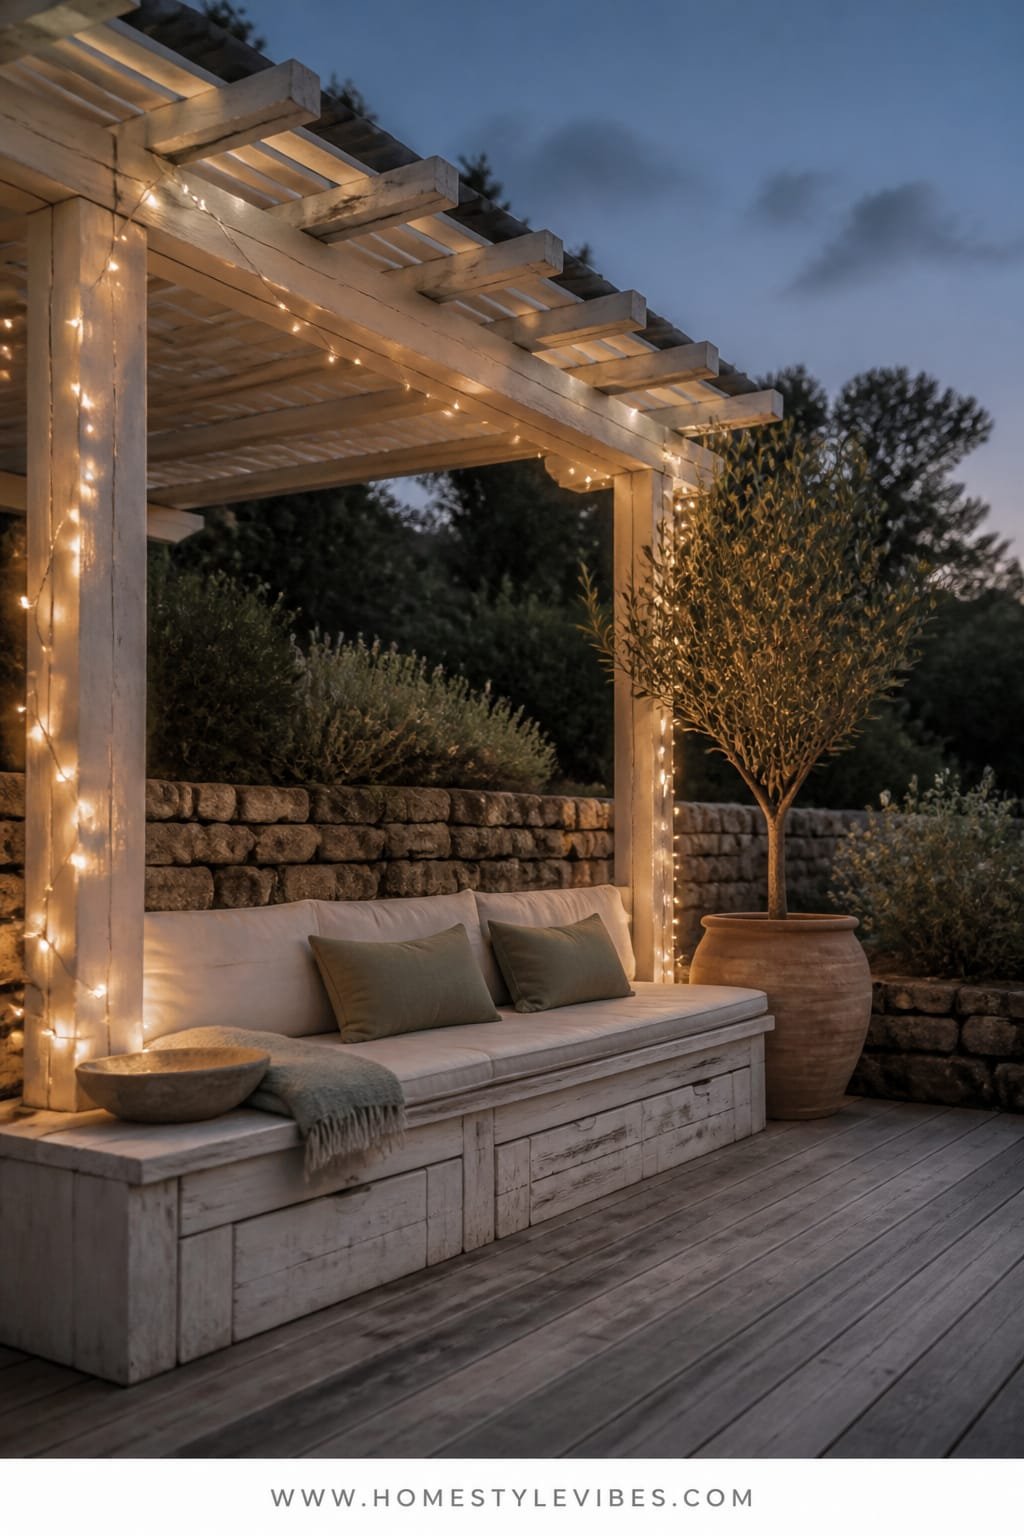
You’ve got a back deck that bakes at noon and feels exposed at night. You’ve tried umbrellas. They spin and squeak, and somehow still don’t make the space feel cozy. A whitewashed pergola reframes everything: filtered daylight, instant architecture, and a spot to wrap in gentle fairy lights that glow like moonbeams after sunset. Build in a deep seat bench along one side—cushions that you can actually nap on, with storage under the seat for throws and citronella. The look lands between breezy coastal and updated farmhouse. It’s ultra-flexible: host a birthday, read alone, do nothing but sip something cold.
Here’s why it works: vertical structure adds privacy without feeling boxed in. Whitewash bounces ambient light like a dream, so evenings feel twilit and calm. The deep bench solves tricky seating math and keeps the layout tight. Photographing it is easy: the slatted light pattern through the pergola gives you natural stripe shadows that feel artsy but not busy. For families, nothing beats a built-in bench—you control cushion depth and material, and you can wipe down paint and bins in minutes.
Variations: On a budget, use a prefabricated pergola kit and paint it yourself. For small spaces, do a corner pergola and an L-shaped bench to maximize seating. For renters, use a freestanding metal pergola and add tie-on curtains instead of lights. Go moodier by choosing warm white fairy lights with larger bulbs and add indigo or olive cushions.
Budget Breakdown:
- Pergola kit or custom build: $600–$3,500
- Exterior whitewash paint/stain: $60–$180
- Fairy lights or micro-string canopy + dimmer: $50–$200
- Built-in bench lumber, paint, and hardware: $250–$800
- Outdoor cushions and covers: $180–$600
Total Estimated Cost: $1,140 – $5,280
Best For: Decks or patios with harsh sun, sociable households, and anyone craving a defined “outdoor living room.”
Key Design Elements:
- Main materials: painted wood, performance fabric, powder-coated hardware
- Color palette: whitewash, sea salt, indigo, driftwood
- Lighting strategy: layered micro-string canopy with dimmer for “moonlight” quality
- Furniture silhouettes: deep bench, slim coffee table, poufs for flexible seating
- Texture layers: washed wood grain, nubby cushion covers, airy curtains (optional)
- Accent details: striped lumbar pillows, ceramic lanterns, eucalyptus stems
How To Recreate This Look:
- Start by measuring the zone and selecting a pergola size that fits traffic paths.
- Assemble and whitewash; leave some grain visible for texture.
- Add a built-in bench at 24–26 inches deep with under-seat storage.
- Install micro-string lights in a soft crisscross canopy and add a dimmer.
- Style with cushy pillows, a low table, and one plant per corner for balance.
Why This Looks Expensive: Architecture equals perceived value. A pergola frames the view and adds rhythm. The deep bench reads custom, and the light canopy suggests event design—on a Tuesday.
Watch Out: Don’t pick cool-blue string lights. They can turn skin tones grey and make whitewash look chalky. Aim for 2200–2700K warm white. Also, ensure bench cushions fit exactly—gaps make everything look sloppy.
Pro Styling Tip: Photograph at blue hour with the lights dimmed to 60%; your whites will stay creamy and the bulbs will halo beautifully without blowing out.
Side note: a friend of mine spent weeks agonizing over cushion colors before realizing the real problem was her lighting. Once we swapped her cold rope lights for warm fairy strands and added two dimmers, suddenly the whole zone looked lush and welcoming—same cushions, different glow.
Let’s take a beat. If you’re feeling pulled in two directions—minimal and romantic—you’re not wrong. Good gardens hold both. The next idea is for the plant lovers who still want a clean canvas.
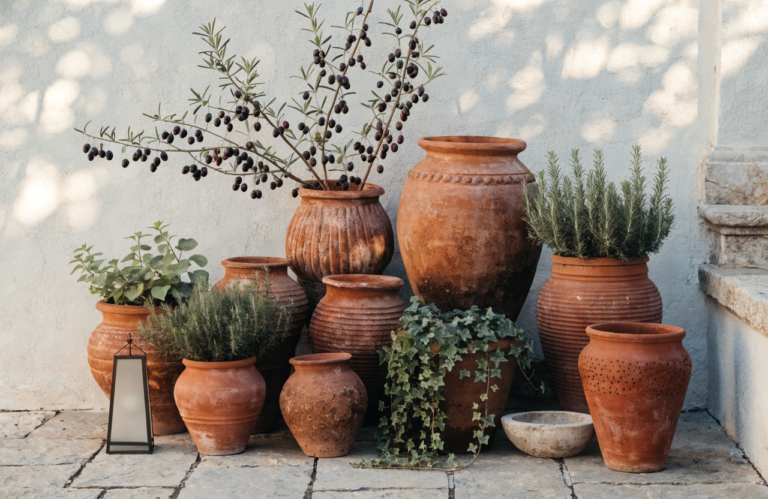
6. Terracotta Pot Cluster with Warm Uplighting and a Slatted Cedar Daybed
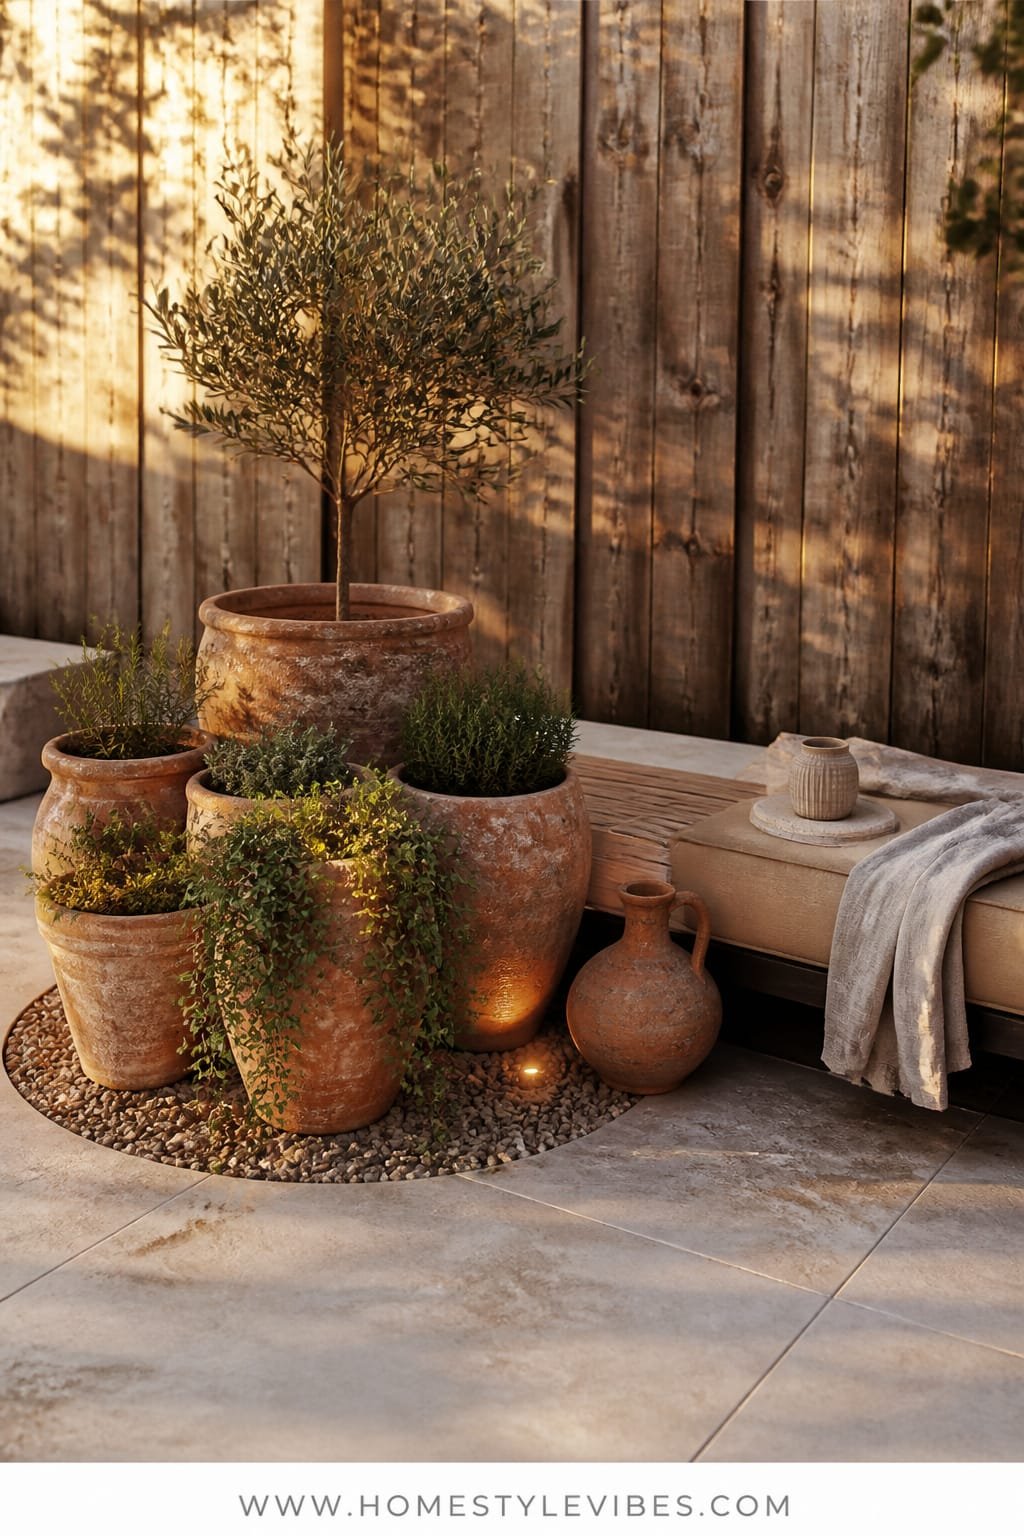
You collect plants like souvenirs, but they’re scattered. The patio looks busy yet somehow empty. The antidote is curation: group terracotta pots of varying sizes into one statement cluster, give them warm uplighting from the ground, and park a slatted cedar daybed just off-center. The daybed acts like a quiet stage—your plants become the cast. This reads like an artist’s courtyard: earthy, sun-kissed, and intentionally undone. Terracotta loves light; it blushes in the evening and makes greens feel richer than they are.
Why it works: repetition with variation. Using the same material (terracotta) in multiple sizes looks thoughtful, not random. The cedar daybed is low and linear, so your eye slides along it and lands on the plants. Warm uplights skim the pots and hit leaves from below for drama you can’t get during the day. Maintenance stays friendly—water in one place, replace ailing plants easily, and shuffle pots seasonally to keep the tableau fresh.
Variations: Budget-friendly plastic “terra-look” pots at a distance mixed with a few real terracotta up front. Small-space version uses three pots and a narrow bench. For renters, use a folding slatted bench that stores flat. If you want moodier, pick aged terracotta with white bloom and a darker, oiled cedar finish.
Budget Breakdown:
- Terracotta pots (6–9 various sizes): $10–$80 each
- Warm LED ground lights (2–3): $90–$240
- Slatted cedar daybed or bench: $220–$900
- Plant mix (olives, rosemary, grasses, geraniums): $120–$380
- Outdoor linen bolster pillows: $60–$180
Total Estimated Cost: $600 – $1,780
Best For: Plant lovers, patios that need a focal wall, renters who want a flexible, mobile “garden” look.
Key Design Elements:
- Main materials: terracotta, cedar, linen
- Color palette: clay, sage, deep green, honeyed wood
- Lighting strategy: low, warm uplights angled to graze pot edges
- Furniture silhouettes: low daybed, simple rectangular lines
- Texture layers: porous clay, slatted wood, soft washed linen
- Accent details: copper plant labels, patina saucers, herb scissors
Why This Feels Designer: Professionals repeat materials to calm the view and then add one sculptural silhouette for tension. Clay + cedar + a strong horizontal line is a foolproof trio.
How To Recreate This Look:
- Start by picking a backdrop: fence, wall, or hedge to stage the cluster.
- Add 6–9 terracotta pots in three heights; keep shapes simple and classic.
- Place the slatted daybed slightly offset so the composition feels dynamic.
- Install two to three ground lights; aim at pot edges to catch texture.
- Style with herb-heavy planting and one long linen bolster on the daybed.
The Most Common Mistake: Mixing too many pot styles—ribbed, glazed, painted—until the grouping looks like a yard sale. Stick to one finish with subtle size shifts for impact.
Pro Styling Tip: For photos, mist the terracotta lightly so the clay darkens and the texture reads; keep foliage slightly asymmetrical for a lived-in feel.
Zooming out: pick your anchor—stone, wood, clay, or concrete—and let the light do the “wow.” Editing is the real luxury. Fewer, better elements carry further than ten trend pieces.
Quick Checklist
- Choose one anchor material (limestone, charred wood, concrete, brick, painted wood, terracotta)
- Commit to a warm light temperature (2200–2700K)
- Create one clear focal point (table, fire bowl, bistro curve, bench, daybed)
- Use repetition for calm (matching pots, consistent cushions, single wood tone)
- Layer textures (matte stone, woven seats, linen, leafy plants)
- Control height variation (low seating, mid-height plants, overhead lights)
- Define zones with rugs, paths, or benches
- Edit color palette to 3–4 tones max
- Hide cords and transformers for a clean look
- Add dimmers to every light source you can
Frequently Asked Questions
How much should I budget to make my backyard look like a dream without overspending?
Pick one zone and one idea from above. Most single-zone projects land between $700 and $3,000 depending on materials. Spend the most on flooring or structure (pavers, pergola) and lighting—those give the biggest visual payoff. Style the rest slowly.
My yard is tiny. Which idea works best for small spaces?
Try the charcoal fence with a curved lounge or the brick path with a petite bistro set. Curves and dark backdrops make small spaces feel deeper. Keep furniture armless and low-profile so you can actually move around.
I’m a renter—what can I do that won’t risk my deposit?
Use freestanding privacy screens, porcelain deck tiles, portable fire bowls, and string lights on removable hooks. Terracotta pot clusters with a narrow bench create a “garden room” that packs up when you move.
How do I keep everything looking good with minimal maintenance?
Choose durable materials: porcelain pavers, resin wicker, powder-coated metal, and performance fabrics. Install drip irrigation for pots or set a watering schedule. Wipe lights and lanterns monthly, and store cushions in a deck box when not in use.
What’s the most common design mistake in backyard makeovers?
Too many “hero” elements competing. Pick one star (fire bowl, pergola, or dining table) and let everything else support it. Also, avoid cool-white lighting—it flattens textures and kills the cozy mood.
Closing Thoughts
Start with one idea and commit. Maybe it’s a limestone dinner terrace, maybe it’s a moody lounge with string lights, or a simple terracotta cluster that finally corrals your plant obsession. You don’t need to do all six. One focused, well-lit zone will change how your whole backyard feels.
The truth is, the lush, magazine-style look comes from texture, lighting, and restraint. Not fancy labels. Soft stone or wood underfoot, a warm glow at face height, and a limited color palette will make the space feel finished. Then layer in a few lived-in touches: a rumpled linen throw, a slightly overgrown pot of thyme, the candle drips you forgot to scrape. That’s the soul.
You can do this. Pick your anchor material, set your lighting to warm, and give yourself one weekend. Your backyard isn’t a project anymore—it’s your favorite room under the sky.
About the Author

Krisztina P.Rendes, Founder of Home Style Vibes
Founder of Home Style Vibes
Krisztina Puskásné Rendes created Home Style Vibes as a cozy-modern lifestyle space where homemaking meets inspiration. Her goal is to help women create beautiful, organized, and peaceful homes they truly love — without overwhelm. You’ll find here heart-driven content on home decor, cleaning tips, easy family recipes, organization and decluttering, DIY home projects, plants, and seasonal ideas — all designed to bring more calm, comfort, and style into everyday life.