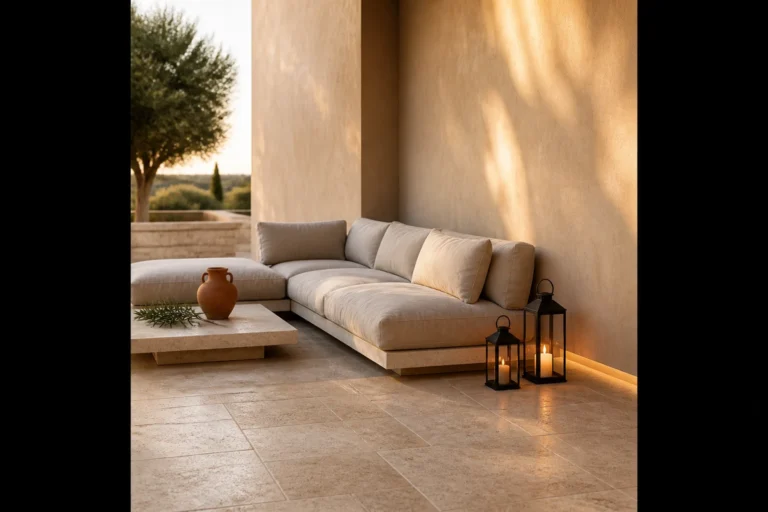
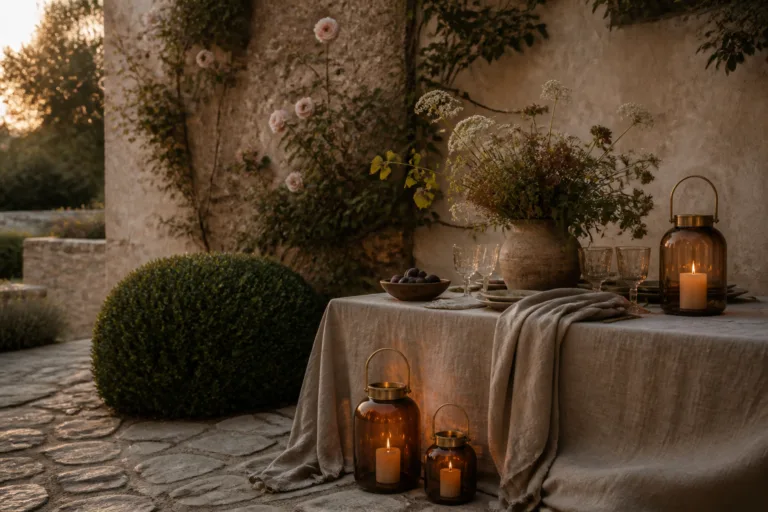
6 Vintage Garden Aesthetic Ideas That Look Like A Real-Life Secret Garden
You want a lush, vintage garden that feels like stepping into a storybook—ivy-draped arches, dappled sunlight, and that hush that happens when the world slows down. You hate the patchy lawn, the random pots, and the way everything looks flat in photos. Picture chipped terracotta, candlelit evenings, soft moss underfoot, and the scent of old roses at twilight. These six vintage garden aesthetic ideas fix the mess and give you layered, photogenic charm you can build in weekends, with design moves that cap out under $2,500 per area if you prioritize the right materials.
This is for the person who craves texture, romance, and those little lived-in details that make guests whisper, “How did you do this?” Expect subtle color shifts, patina-rich metals, and light that feels like morning every time it hits your stone path. These ideas are secret-garden meets real life: family-friendly, renter-conscious in parts, and fully swoon-worthy on camera.
1. Limewashed Brick Courtyard With Dappled Morning Light and an Iron Bistro Set
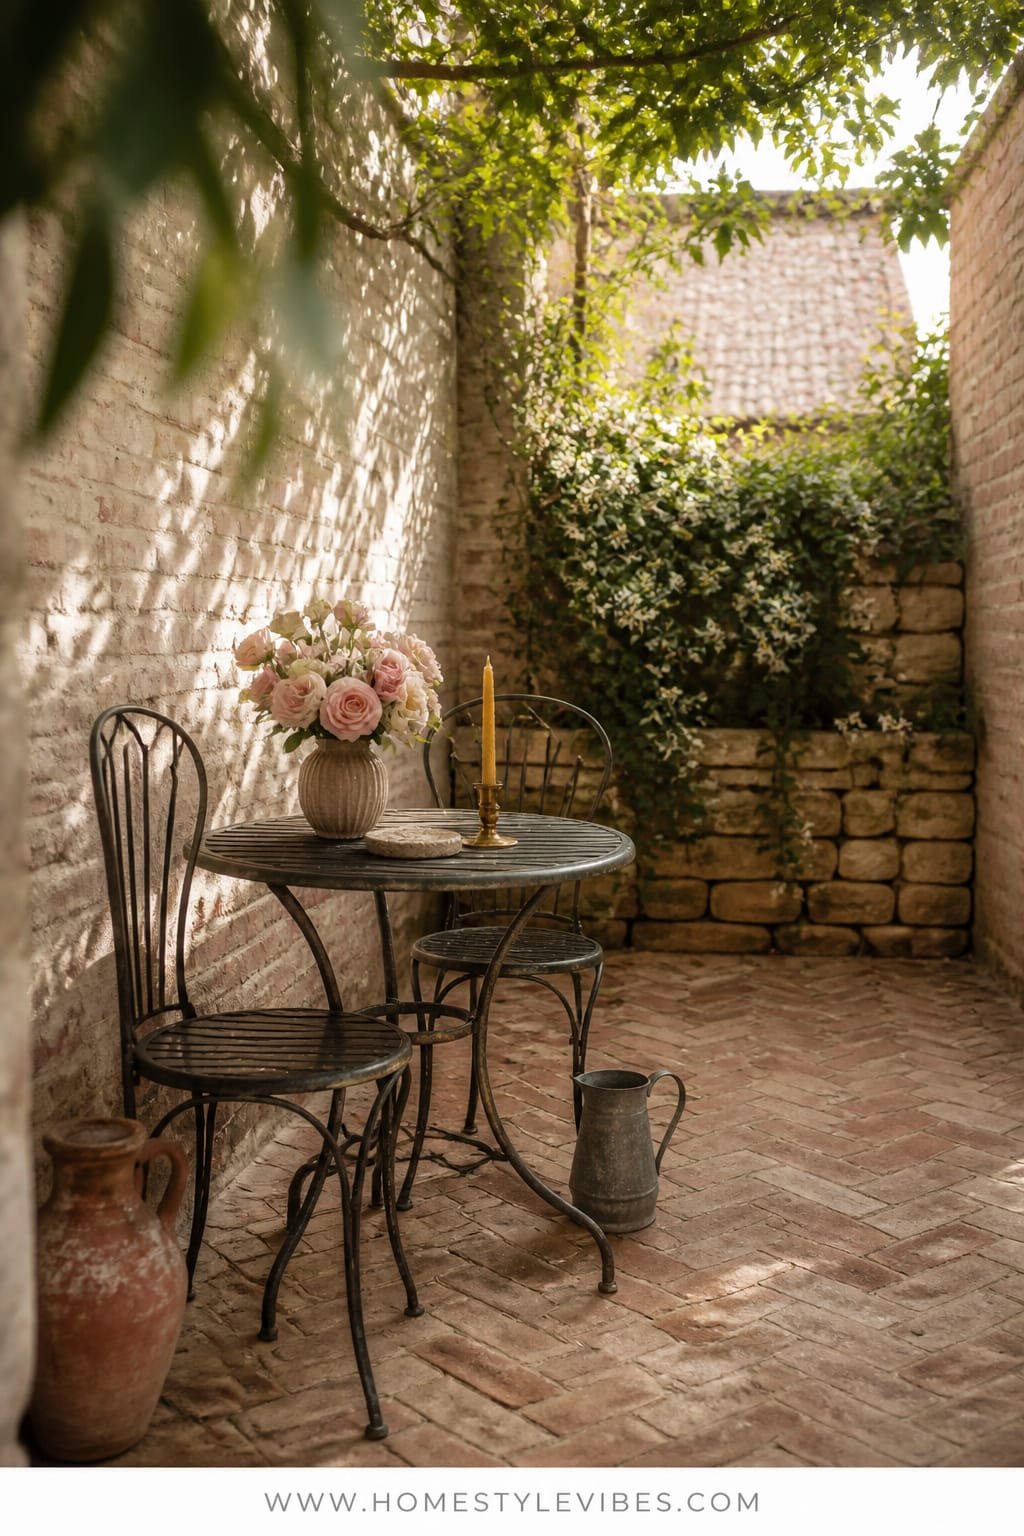
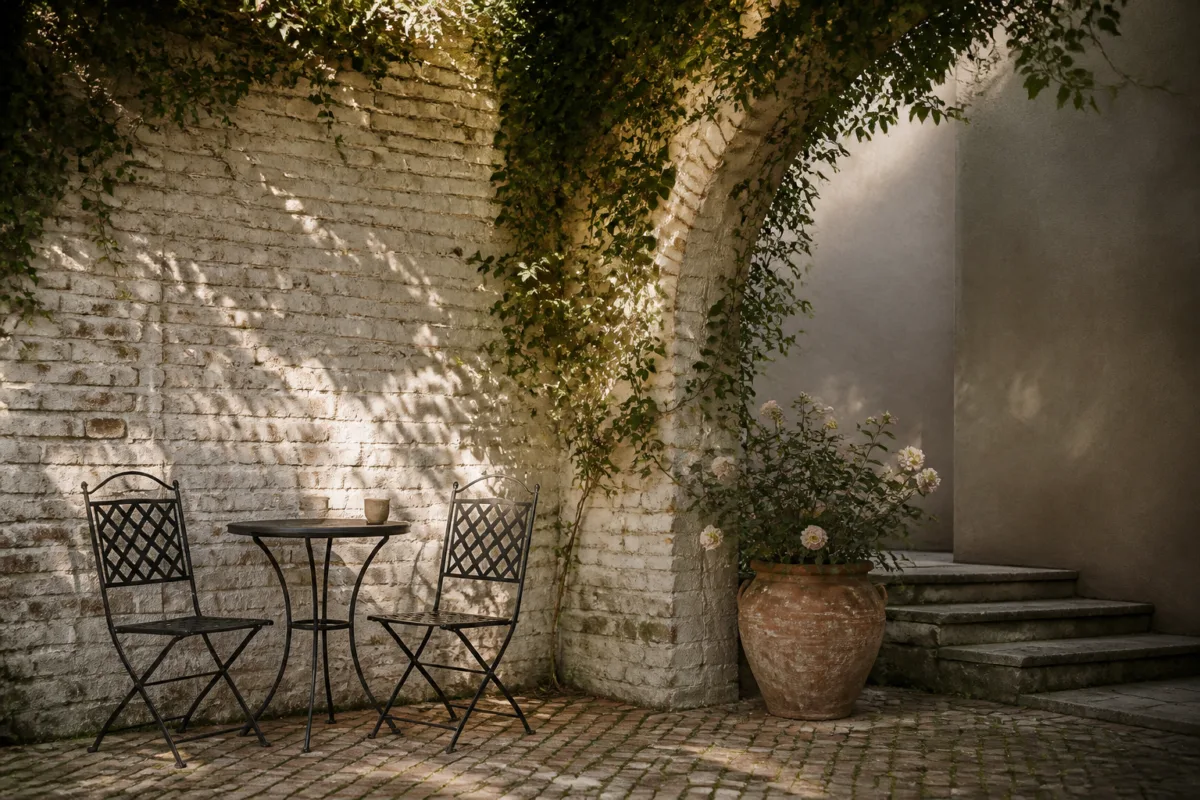
We’ve all been there: a bare patio that looks like a driveway and feels just as welcoming. You’ve tried potted plants and a rug, but it still reads “utility zone” instead of “vintage hideaway.” This concept sets the scene like a tucked-away Parisian courtyard—soft, chalky limewash over brick, slender iron furniture, and filtered light that makes vines glow.
Moody-romantic is the vibe. The limewash knocks back harsh red brick into a dusty blush or warm stone shade and softens everything. Iron bistro seating adds graceful lines without bulk, so even a tiny patio feels roomy. Real homes win here because limewash is breathable, easy to refresh, and incredibly forgiving. Morning light brings the texture to life; as it brushes over the limewashed surface, you get depth and shadow instead of glare, which is why it photographs beautifully.
Variations: On a budget, limewash only the feature wall and leave other surfaces raw. For small spaces, choose a round, foldable two-seat bistro that tucks away. Go darker with a charcoal limewash for dramatic contrast against pale roses. Renter? Use peel-and-stick brick panels on a freestanding screen, then faux-limewash with mineral paint.
Budget Breakdown:
- Limewash paint and primer: $60–$180
<li<Iron bistro set (2 chairs + table): $120–$350
- Climbing rose or jasmine with trellis: $50–$180
- Outdoor lanterns and candles: $30–$120
- Terracotta pots with herbs: $40–$120
Total Estimated Cost: $300 – $950
Best For: Small patios, side yards, or townhouse courtyards. Morning tea people who love quiet, gentle elegance and simple maintenance.
Key Design Elements:
- Main materials: Limewashed brick, wrought iron, terracotta
- Color palette: Dusty blush, warm cream, soot black, leaf green
- Lighting strategy: Gentle, indirect light; string lights at low wattage for dusk
- Furniture silhouettes: Slim, curved, foldable iron forms
- Texture layers: Rough brick, chipped terracotta, soft cotton cushions
- Accent details: Climbing vines, vintage lanterns, linen napkins for the table
How To Recreate This Look:
- Start with cleaning the brick and brushing on limewash in thin, streaky layers for an aged effect.
- Add a metal trellis and train a climbing rose or jasmine to frame one side.
- Layer in a foldable iron bistro set with slim cushions in a neutral stripe.
- Install a single strand of warm-white fairy lights overhead or along a fence, keeping them dim.
- Style with terracotta pots of thyme and rosemary, plus a couple of lanterns for low flicker.
Why This Looks Expensive: The chalky limewash creates natural variation that mimics historic masonry; paired with slender iron lines, it reads collected, not purchased-in-one-go.
Watch Out: Don’t choose glaring cool-white bulbs. They kill the patina and make everything look flat and new in a bad way. Warm bulbs only, ideally 2200–2700K.
Pro Styling Tip: Shoot in early morning or golden hour—angle the camera to catch light grazing the limewash for dimensional shadows and a soft glow.
2. Aged Terracotta Path With Golden Hour Glow and a Weathered Stone Bench
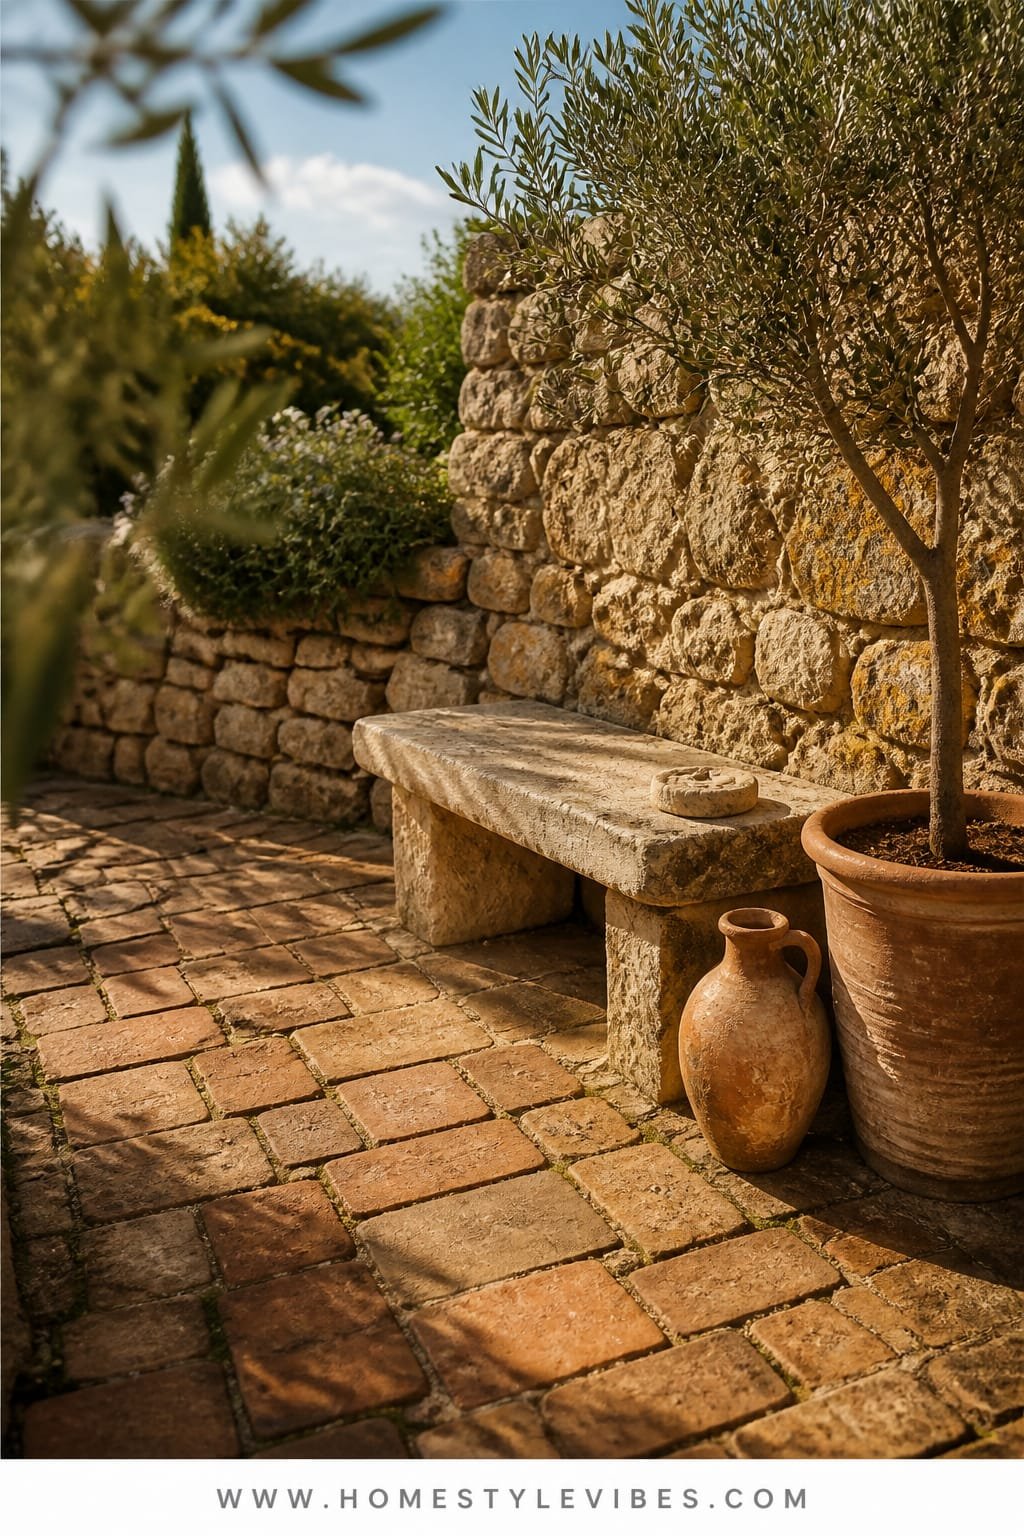
It’s that one corner that always feels off—mud, weeds, and a path that dissolves after the first rain. You’ve tried stepping stones, but it looks like a game of hopscotch, not a secret path. Enter aged terracotta pavers, a soft golden light, and a low stone bench that begs you to pause and breathe.
This mood leans old-world Mediterranean: sun-warm, a little scruffy, endlessly charming. Terracotta brings a natural warmth and matte finish that photographs softer than concrete. The path guides the eye and avoids visual clutter; the bench creates a destination, which always reads better on camera. In real life, compacted base and easy-to-source pavers mean weekend-friendly installation and long-term stability.
Variations: Budget route—mix reclaimed brick with a few terracotta pieces for a patchwork path. Small space—use a meandering line of half-moon pavers leading to one large planter. Shadier gardens—swap golden light for dappled shade and add moss in the joints. Renter-friendly—create a temporary path with gravel and terracotta chips edged by wood stakes.
Why This Feels Designer: The path, bench, and a single sculptural shrub form a trio that looks intentionally composed. Restraint wins every time.
Key Design Elements:
- Main materials: Terracotta pavers, river gravel, weathered stone
- Color palette: Burnt clay, soft sand, olive green, antique white
- Lighting strategy: Low, warm path lights that graze texture at dusk
- Furniture silhouettes: Low, curved stone bench; rounded urns
- Texture layers: Coarse gravel, matte clay, soft foliage, lichen
- Accent details: A single urn with an olive tree or bay laurel, iron plant labels
Budget Breakdown:
- Terracotta or clay pavers: $2–$5 per piece; $150–$600 total
- Compacted base and sand: $80–$180
- Weathered stone bench or cast-stone alternative: $180–$600
- Path lights (2–4 fixtures): $60–$240
- Gravel for edging: $50–$120
Total Estimated Cost: $520 – $1,740
Best For: Side yards, connecting patios to back gates, and sunny routes that need a focal point. Great if you love evening strolls with a drink in hand.
How To Recreate This Look:
- Map a gently curved path with garden hose to avoid straight, suburban lines.
- Add a compacted base and sand bed; set pavers with 1/2-inch gaps.
- Sweep in sand or fine gravel; plant woolly thyme or Irish moss in the joints if you have sun.
- Place a stone bench at the path’s end and anchor with one dramatic urn.
- Install low-voltage path lights and keep them warm-toned for that golden hour feel.
One Thing To Avoid: Don’t alternate paver colors in a predictable checkerboard. It reads theme-park instead of timeworn. Blend tones randomly.
Pro Styling Tip: For photos, lightly mist the terracotta before sunset—the color deepens, and shadows sharpen for magazine-level depth.
Keep scrolling—next we soften hard edges with living walls and old glass that catches light like a secret.
Remember, this isn’t about recreating a showroom. It’s about building a tiny world that actually feels like yours. If one idea hums in your chest, that’s the one to start with—ignore the rest for now.
3. Weathered Wood Pergola With Soft Twilight String Lights and a Vintage Daybed Swing
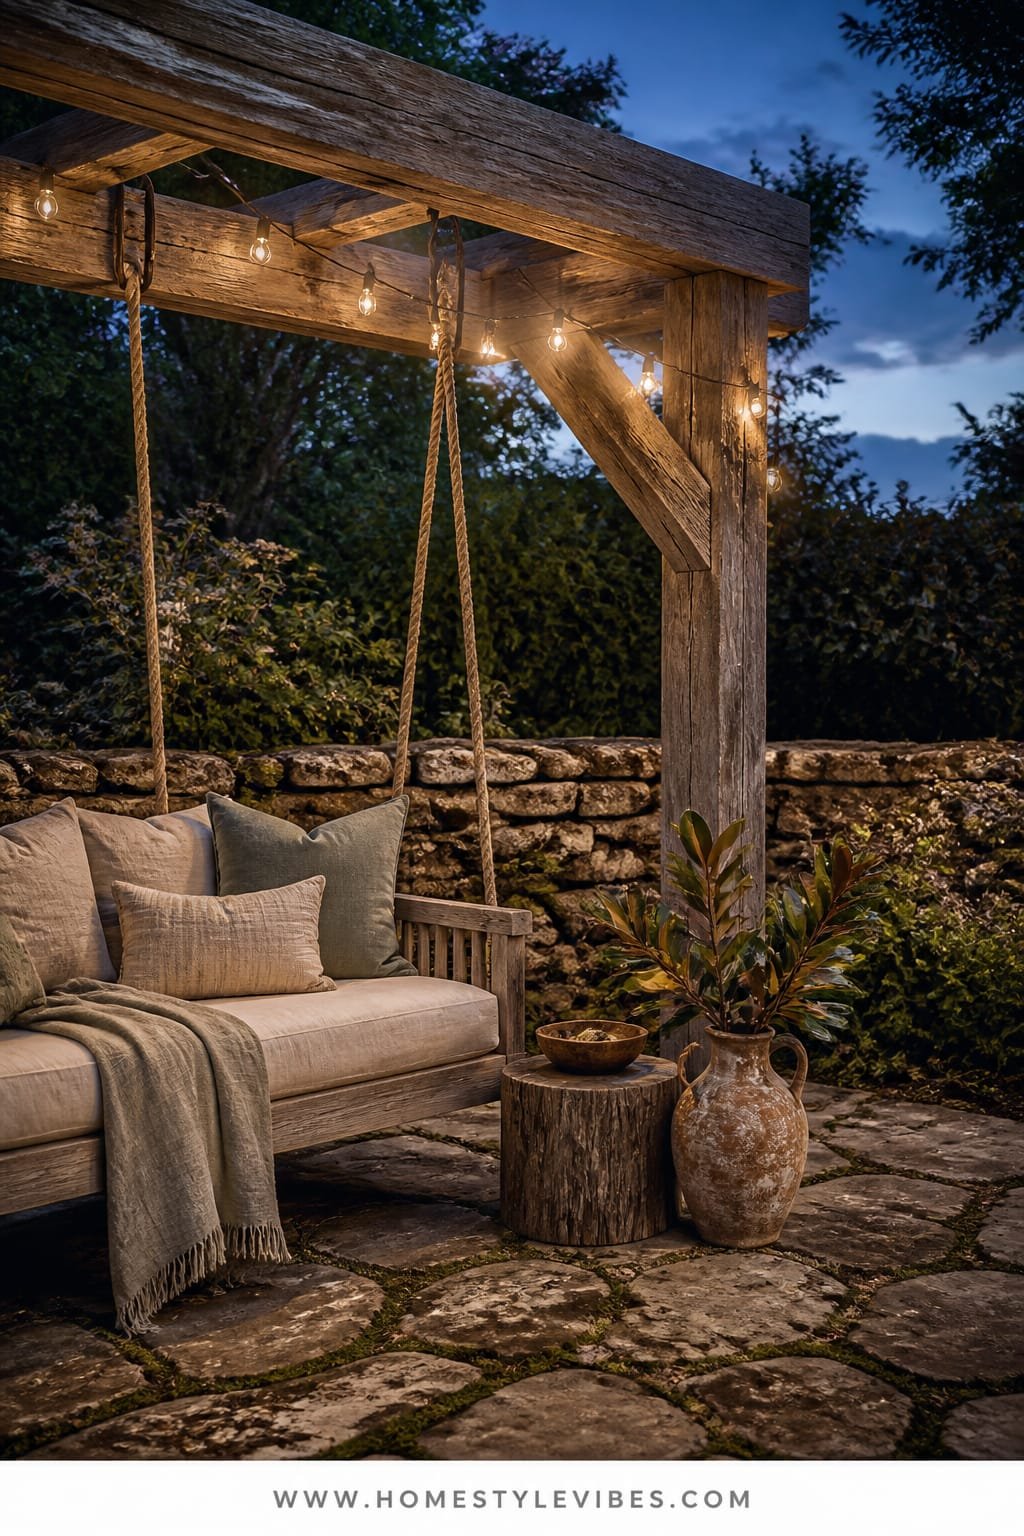
You want a shady nook that feels like a hush in the afternoon, but your deck is blindingly bright and furniture floats without purpose. You’ve tried an umbrella; it flaps, it breaks, and somehow it never feels intimate. A simple, weathered wood pergola with soft twilight string lights gives bones to the space, while a vintage-inspired daybed swing turns it into a cloud you can nap on.
The mood lands somewhere between Southern porch romance and countryside retreat. Wood beams introduce grain and rhythm overhead, which frames the garden and improves scale—ideal for small yards that need a ceiling. Twinkle lights strung low and warm add atmosphere, not glare. The daybed swing steals the show and looks luxurious because it’s a single, big gesture.
Variations: Budget—build a slim pergola with 4×4 posts and 2×6 rafters, stain in driftwood gray, swap the daybed for a rope-hung chair. Small space—half-pergola against a wall with a narrow bench swing. Darker vibe—use smoked stain, add linen drapes for drama. Renter—freestanding pergola kit plus a stationary daybed on casters, draped with vintage quilts.
Budget Breakdown:
- DIY pergola lumber and hardware: $350–$1,100
- String lights (commercial grade): $80–$220
- Daybed swing or kit: $250–$900
- Outdoor mattress + linen covers: $120–$350
- Sheer outdoor curtains (optional): $60–$180
Total Estimated Cost: $860 – $2,750
Best For: Decks or patios that feel too open. Families who want a nap spot, reading fort, or a romantic evening perch.
Key Design Elements:
- Main materials: Weathered wood, rope, linen
- Color palette: Driftwood gray, cream, soft green, warm bronze
- Lighting strategy: Low, warm café bulbs; layered with candles on side tables
- Furniture silhouettes: Low, long daybed; slim side tables; woven poufs
- Texture layers: Rough wood, nubby linen, knotted rope, worn metal
- Accent details: Vintage quilts, botanical prints, trailing ivy in hanging baskets
Why This Reads High-End: The pergola and daybed create architecture and comfort in one move. When you combine structure with softness, it looks custom, not store-bought.
How To Recreate This Look:
- Mark pergola footprint; set posts securely or opt for a freestanding kit if you’re not digging.
- Stain wood in a driftwood or silver-gray tone for instant “been here forever.”
- Hang commercial-grade string lights under rafters to avoid harsh top-lighting.
- Install the daybed swing with proper anchors; use outdoor-rated rope or chain.
- Style with a linen-wrapped mattress, toss quilts, and a few potted ferns at varied heights.
The Most Common Mistake: Mounting lights too high or too bright. Keep them just below eye level and choose warm bulbs under 2700K to avoid the harsh carnival effect.
Pro Styling Tip: For photos, tuck a candle behind a sheer curtain panel—the glow through fabric adds depth and a romantic flare on camera.
4. Antique Glass Cold Frame With Morning Dew Light and a Carved Teak Potting Table
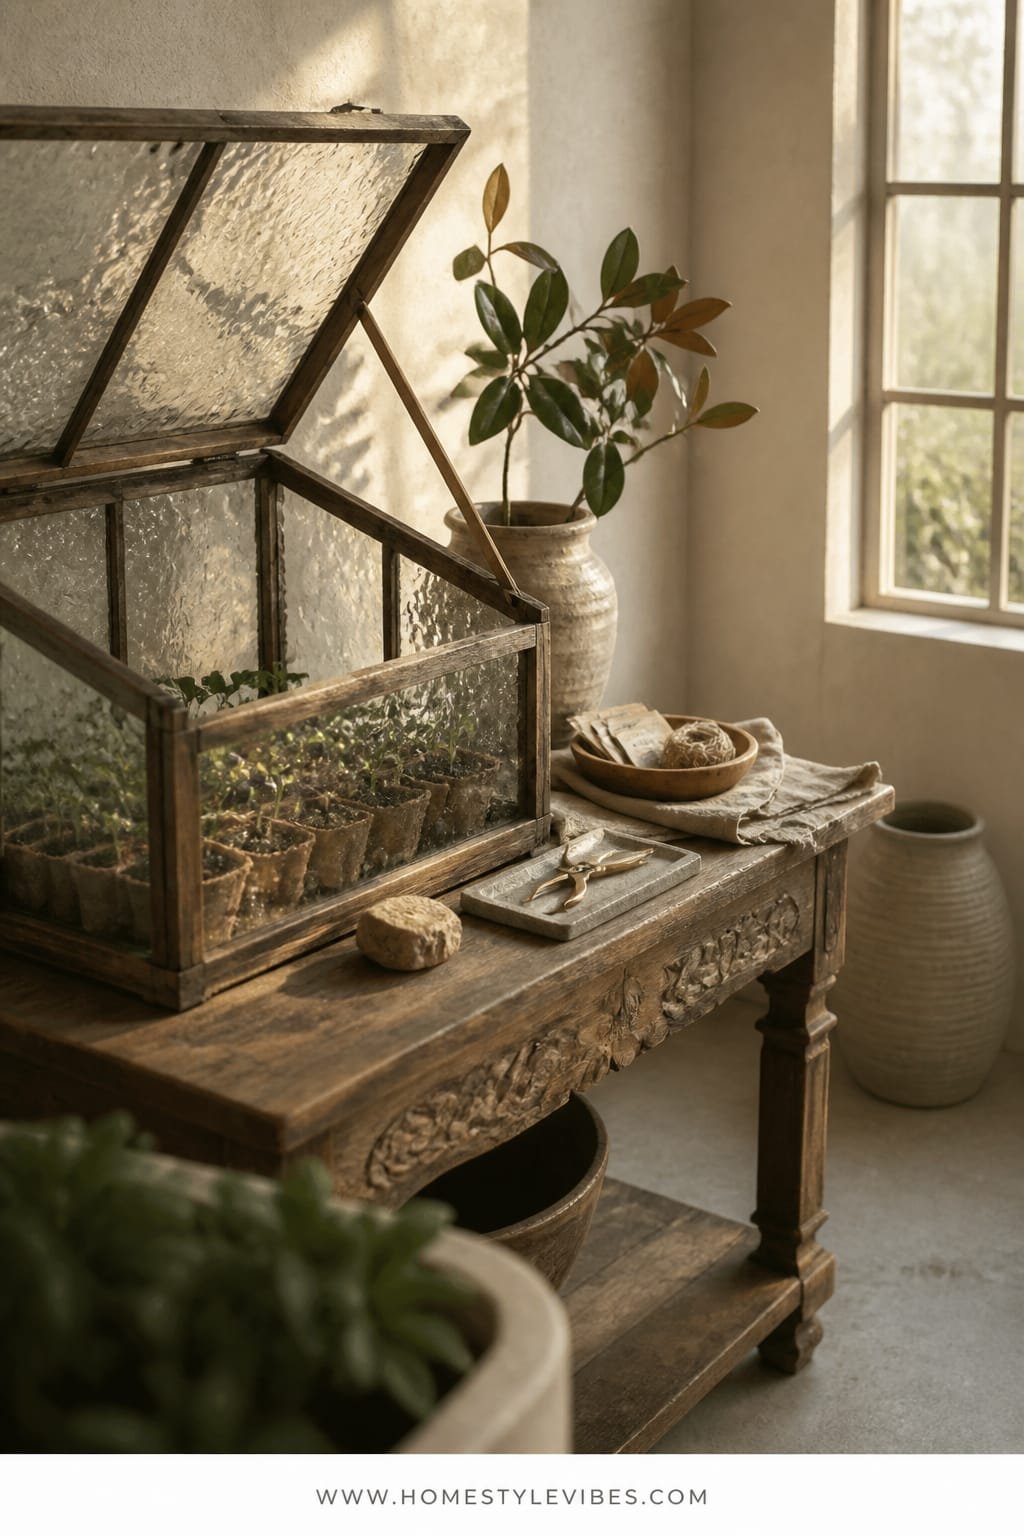
You’ve got seedlings on a windowsill and soil on the kitchen counter. It’s charming until it’s chaos. An antique glass cold frame and a carved teak potting table turn garden chores into ritual—gentle, slow, and pretty enough to leave out.
The mood is functional nostalgia: think Edwardian greenhouse energy scaled for a small yard. Antique or salvaged glass catches morning dew and creates that prismatic light you can’t fake. Teak or teak-look wood stands up to moisture and ages gracefully. Together, they make a still life every morning, which is why your photos will sing—glass reflections plus wood grain equals depth.
Variations: Budget—use reclaimed windows to build a DIY cold frame on a brick base. Small space—opt for a narrow console-height potting table with a slatted shelf beneath. Shady yard—add a mirror behind the potting table to bounce light. Renter—freestanding cold frame and a foldable potting station you can bring indoors off-season.
Key Design Elements:
- Main materials: Antique glass, teak, brick base
- Color palette: Honey teak, moss green, cloud white, oxidized metal
- Lighting strategy: Early light from the east; reflective surfaces to multiply brightness
- Furniture silhouettes: Console-depth work table; low-lidded cold frame
- Texture layers: Worn wood, rippled glass, earthen pots, hemp twine
- Accent details: Brass mister, herb markers, wire baskets, seed packets in a jar
Budget Breakdown:
- Antique or salvaged sash windows: $20–$80 each; $80–$250 total
- Teak potting table or acacia alternative: $180–$600
- Brick or paver base: $80–$200
- Glass cleaner, brass mister, storage baskets: $40–$120
- Hooks and peg rail: $20–$60
Total Estimated Cost: $400 – $1,230
Best For: Gardeners who want order and beauty. Works in courtyards, balconies with sun, or even against a garage wall.
Why This Looks Intentional: Repeating materials—glass, warm wood, brick—creates a visual loop. The eye recognizes the pattern and reads it as curated, not cluttered.
How To Recreate This Look:
- Place your potting table where it catches morning light but stays shaded by noon.
- Build or buy a cold frame; set it on a simple brick base for stability and charm.
- Add a peg rail above the table for tools and twine; keep it sparse.
- Group terracotta pots by size on the lower shelf; add a single brass mister up top.
- Keep cloths and soil in a wire basket for quick tidying—no stray bags in photos.
Don’t Do This: Don’t overload the table with décor. Three to five items, tops. Let negative space give the eye somewhere to rest.
Pro Styling Tip: Photograph when there’s condensation on the glass—those tiny droplets sparkle and make even a simple setup look cinematic.
Pause here: if the potting table speaks to you, ignore the pergola for now. One finished corner changes your whole outdoor routine. Start small; let joy snowball.
5. Climbing Ivy Archway With Shadowy Afternoon Light and a Patinated Copper Fountain
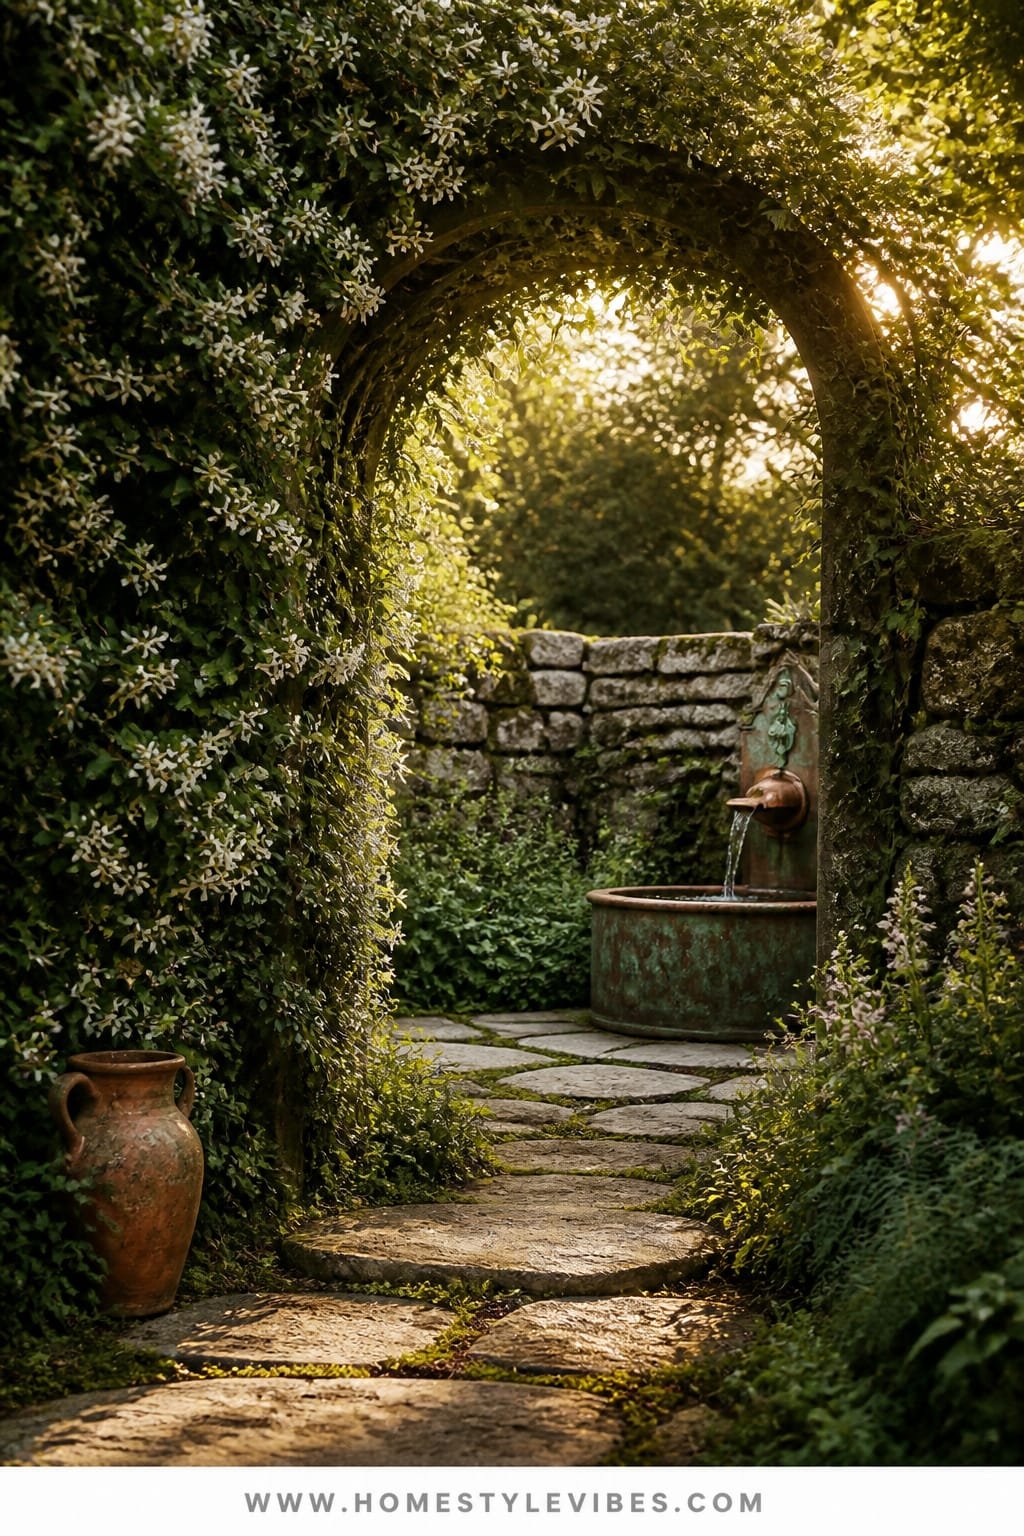
You’ve tried to add drama, but the yard still feels like a rectangle with plants. You want an entrance, a reveal. A living archway covered in ivy or star jasmine turns a blank boundary into a whispered invitation, and a small patinated copper fountain nearby gives you that hush of water that makes the day slow down.
The mood is enchanted—a true vintage garden aesthetic moment that makes even a weekday afternoon feel like a holiday. The arch leads the eye and frames your view, so pictures have depth and a clear subject. The copper, left to weather, develops that poet’s green no paint can mimic. Afternoon light works wonders here; the arch throws soft shadows and the copper glows.
Variations: Budget—use two t-posts with a flexible cattle panel to create an affordable arch, then wrap in vine. Small space—half-arch against a wall plus a wall-mounted spout fountain. Shady yard—opt for evergreen ivy and add uplighting for drama. Renter—freestanding metal arch and a self-contained fountain bowl that doesn’t require plumbing.
Key Design Elements:
- Main materials: Living vine, copper, wrought iron
- Color palette: Deep green, verdigris, soot black, stone gray
- Lighting strategy: Side lighting to catch leaf edges; subtle uplight on the fountain
- Furniture silhouettes: Slender arch; low, rounded fountain basin
- Texture layers: Glossy leaves, aged metal, pebbled base, matte stone
- Accent details: Moss stones, antique key hung on the arch, soft chime bell
Budget Breakdown:
- Metal arch or DIY cattle panel: $60–$220
- Vines (ivy, jasmine, or honeysuckle): $30–$120
- Patinated copper fountain or copper-look resin: $180–$700
- Pump and tubing: $40–$120
- Gravel or flagstone base: $60–$180
Total Estimated Cost: $370 – $1,340
Best For: Creating an entry to a veggie patch or “secret” seating area. Ideal for medium yards or side passages that need charisma.
Why This Feels Designer: Arches create story. They suggest there’s something beyond, which adds narrative tension. Pairing living green with aged copper nails the old-world vibe.
How To Recreate This Look:
- Set your arch slightly off-center to avoid symmetry fatigue; anchor feet securely.
- Plant vines on both sides and train with soft ties; prune early for density.
- Position the fountain near the arch but not dead center—leave negative space for a path.
- Place flat stones or gravel around the basin to prevent splash mud.
- Set a warm side light on a timer to graze leaves and highlight the verdigris at dusk.
One Thing To Avoid: Don’t overplant the base with tall flowers that block the reveal. Keep understory low and airy so the arch reads as the star.
Pro Styling Tip: For photos, crouch low and shoot through the arch framing a bench or urn—instant depth and that “come further” energy.
6. Reclaimed Stone Herb Parterre With Soft Overcast Light and a Cane-Back Garden Chair
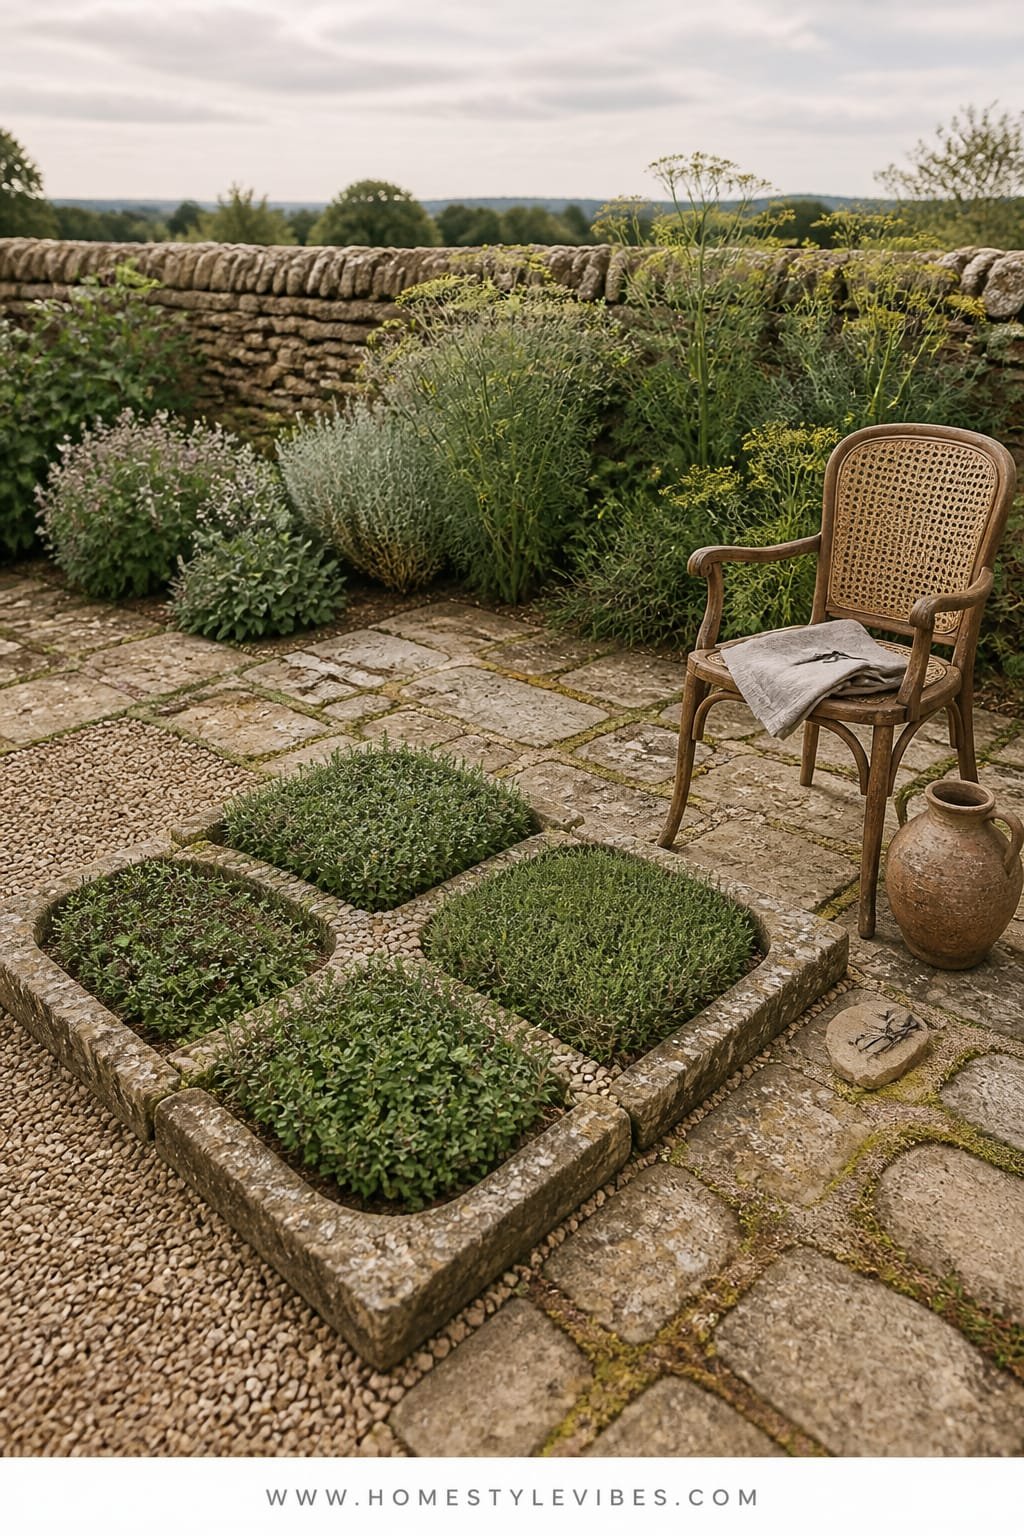
You crave order but also romance. Raised beds felt too boxy, and the random herb pots look like an afterthought. A petite parterre—low clipped herbs in patterned beds edged with reclaimed stone—gives you geometry that feels historic, and a vintage cane-back chair tucked to one side invites lingering between snips of thyme and sips of tea.
The mood is French kitchen garden meets storybook. Parterres look fancy, but small ones are simple to map and maintain. The reclaimed stone edge gives instant history; herbs like thyme, lavender, and savory keep it textural and fragrant. Overcast light actually helps here—greens photograph rich and even, and the cane texture reads beautifully without glare.
Variations: Budget—use broken concrete or bricks as edging. Small spaces—do a single diamond-shaped bed with a tiny gravel border. Shady yards—swap in boxwood edging with mint in containers nearby. Renter—lay out a parterre with hemp rope over gravel and drop in planters inside the “beds.”
Budget Breakdown:
- Reclaimed stone or brick edging: $120–$480
- Topsoil and compost: $80–$180
- Herb starts (12–24 plants): $48–$160
- Gravel for paths: $70–$200
- Cane-back chair (vintage or reproduction): $60–$220
Total Estimated Cost: $378 – $1,240
Best For: Small to medium yards that want structure without a fence. Ideal for cooks, tea lovers, and anyone who loves a clipped, tidy look with scent.
Key Design Elements:
- Main materials: Reclaimed stone, pea gravel, cane
- Color palette: Sage, silvery green, limestone, honey cane
- Lighting strategy: Soft, even light; optional low bollard lights for evening
- Furniture silhouettes: Lightweight cane-back chair, small circular side table
- Texture layers: Clipped herbs, crunchy gravel, woven cane, soft linen cushion
- Accent details: Iron herb markers, copper snips, a petite terracotta birdbath
Why This Looks Expensive: Geometry + patina. Reclaimed stone edges and crisp herb lines say “heritage garden” even if you started last weekend.
How To Recreate This Look:
- Sketch a simple pattern—two squares and a diamond—then mark it with string lines.
- Dig shallow trenches and set stone edging level; fill beds with compost-rich soil.
- Plant low herbs on the edges, taller herbs toward the centers; keep spacing tight.
- Fill paths with pea gravel and compact lightly for a neat crunch underfoot.
- Place the cane-back chair where a path meets a corner; add a linen cushion and small table.
The Most Common Mistake: Planting too sparsely. Gaps read messy and never fill evenly. Buy a few more plants than you think you need; dense is the secret.
Pro Styling Tip: Snip a few herbs and scatter lightly on the gravel before a photo—instant sensory cue and lived-in charm.
Honest moment: I once built a parterre too big for my small yard and spent all season grumbling while trimming. Scale down and you’ll actually enjoy it—promise. The secret isn’t size; it’s proportion, texture, and clean lines.
Quick breather—if you feel a little overwhelmed, that’s normal. Choose one corner and one material to commit to this month. Limewash a wall, hang a single string of lights, or plant one arch. Done beats perfect.
Quick Checklist
- Limewash for chalky, timeworn walls
- Iron bistro set with slim silhouettes
- Terracotta pavers for a warm, matte path
- Weathered wood pergola for structure
- Daybed swing as the hero piece
- Commercial-grade warm string lights
- Antique glass cold frame for sparkle
- Teak potting table with peg rail
- Living vine archway as an entry moment
- Patinated copper fountain for hush and glow
- Reclaimed stone edging for a parterre
- Pea gravel paths for crunch and contrast
- Warm 2200–2700K bulbs for evening ambiance
- Cane-back chair for delicate texture
- Terracotta pots grouped by size
- One dramatic urn to anchor a view
- Soft linens and vintage quilts to finish
- Low, side-lit fixtures to graze texture
Frequently Asked Questions
How do I keep the vintage garden aesthetic affordable without it looking cheap?
Choose one hero material per area and repeat it. For example, invest in terracotta for your path and pots, then keep furniture simple. Avoid mixing too many finishes. Patina and restraint read expensive—random variety reads chaotic.
I have a tiny courtyard. Which idea works best without crowding it?
Go for the limewashed brick courtyard with an iron bistro set. Foldable furniture keeps it light, and limewash adds instant depth without taking up space. Add one vine on a trellis; skip bulky planters.
Maintenance scares me—how do I keep this looking good over time?
Use materials that age gracefully: limewash, terracotta, reclaimed stone, and teak. Sweep gravel paths weekly, give vines a light monthly prune, and refresh limewash every 2–3 years. Low warm lighting hides minor wear at night while still looking cozy.
What if I’m renting and can’t do permanent changes?
Freestanding pergolas, foldable bistro sets, self-contained fountains, and peel-and-stick brick panels on a portable screen let you build the look without drilling. Use planters with trellises and rope-defined borders to suggest structure without digging.
My garden looks flat in photos—what am I doing wrong?
Most likely lighting and scale. Shoot during golden hour or overcast mornings, add one taller element (arch, tree in an urn), and layer textures: rough stone, soft leaves, woven cane. Keep bulbs warm and aim light across surfaces, not straight down.
Closing Thoughts
Pick one corner and one idea that makes you smile—maybe it’s the ivy arch, maybe it’s that little bistro moment with limewash. Start there, finish it fully, and live with it for a week. You’ll see exactly what your space wants next because the story will begin to tell itself.
Luxury in a vintage garden aesthetic doesn’t come from price tags. It comes from texture, warm light, and the confidence to repeat a few materials. Keep your palette tight, your lighting soft, and your gestures bold but few. That’s the sweet spot.
You’ve got this. Brew a tea, grab a brush, and give your garden a tiny dose of magic today. The secret garden you keep daydreaming about? It’s a handful of choices away—and honestly, it’s going to be beautiful.
About the Author

Krisztina P.Rendes, Founder of Home Style Vibes
Founder of Home Style Vibes
Krisztina Puskásné Rendes created Home Style Vibes as a cozy-modern lifestyle space where homemaking meets inspiration. Her goal is to help women create beautiful, organized, and peaceful homes they truly love — without overwhelm. You’ll find here heart-driven content on home decor, cleaning tips, easy family recipes, organization and decluttering, DIY home projects, plants, and seasonal ideas — all designed to bring more calm, comfort, and style into everyday life.