7 Home Party Decor Ideas For A Birthday That Are Easy DIY And Pinterest-Worthy
You want a birthday at home that looks wildly photogenic and feels like pure joy. You hate when it turns into a tangled mess of balloon strings, weak lighting, and centerpieces that shed glitter for weeks. Imagine warm candlelight catching on brushed brass, layered textures that look luxe in photos, and guests saying, “Wait, you did this yourself?” These 7 home party decor ideas fix the exact things that usually go wrong—lighting, scale, clutter, and color—so you can create a party that’s easy DIY and fully Pinterest-worthy within a weekend and under a realistic budget cap.
We’ll work with what your space already does well, then add smart layers: cohesive color palettes, sculptural shapes, and renter-friendly swaps that photograph beautifully. Expect intentional details—linen, soft-edged ceramics, grounded neutrals with one bold hit—and clever tricks that solve lifestyle frustrations, like sticky messes and low ceilings. Each idea gives you a complete design concept with budget options and styling steps. Consider this your house tour, but make it party-ready.
1. Soft Citrus Tablescape With Ribbon-Drift Balloons
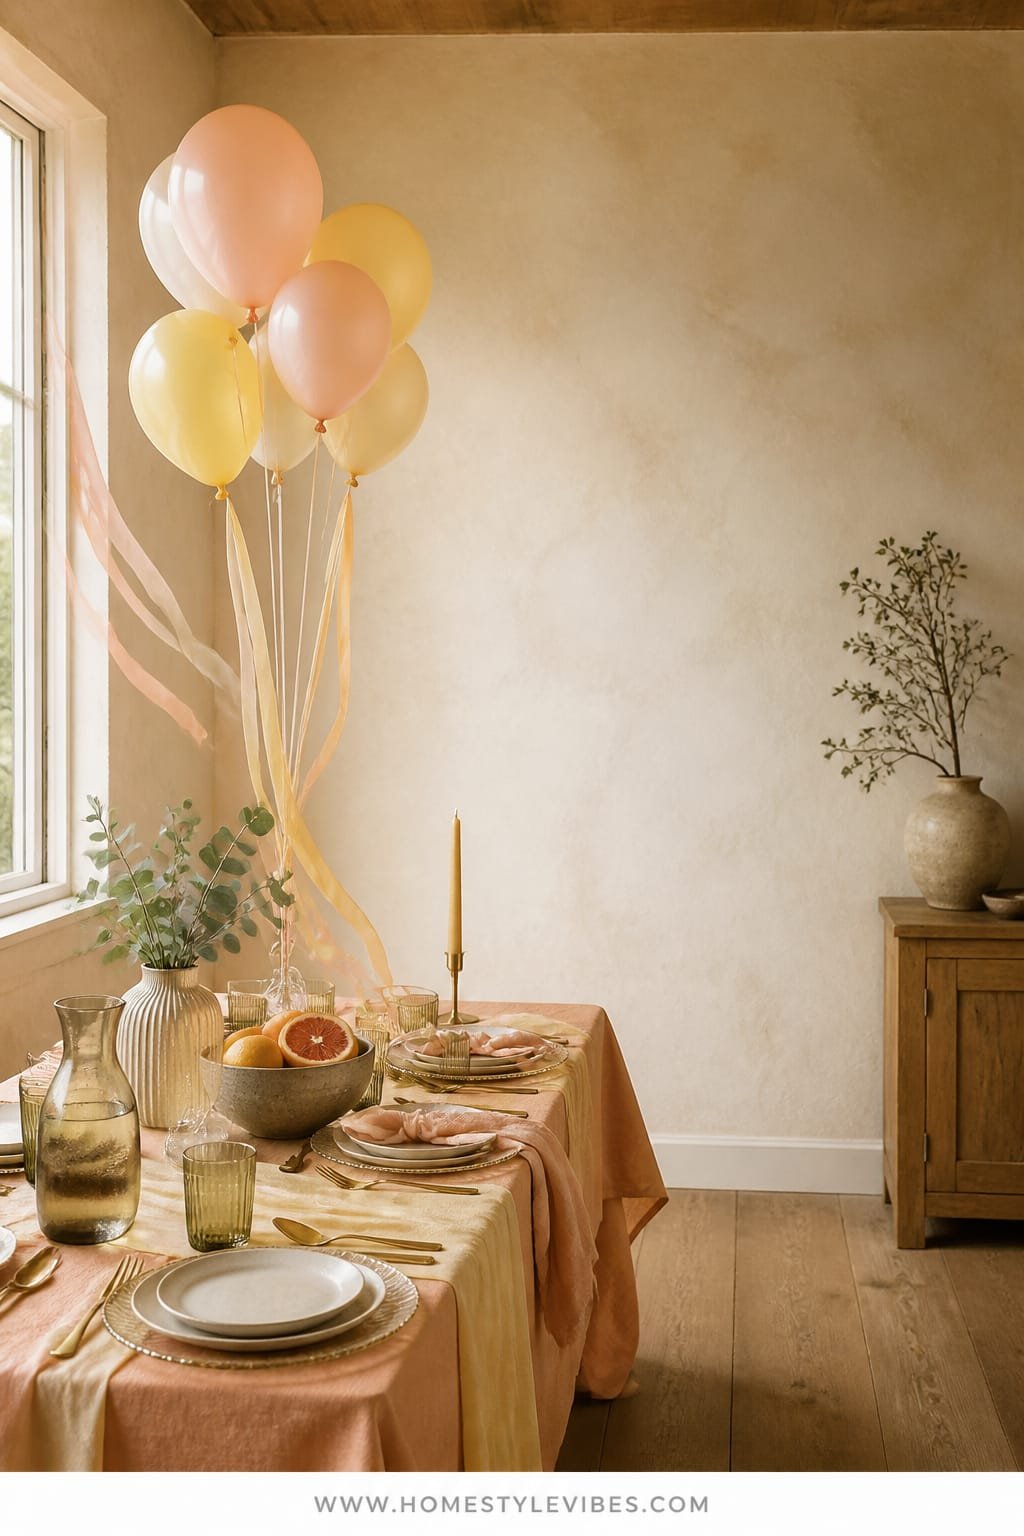
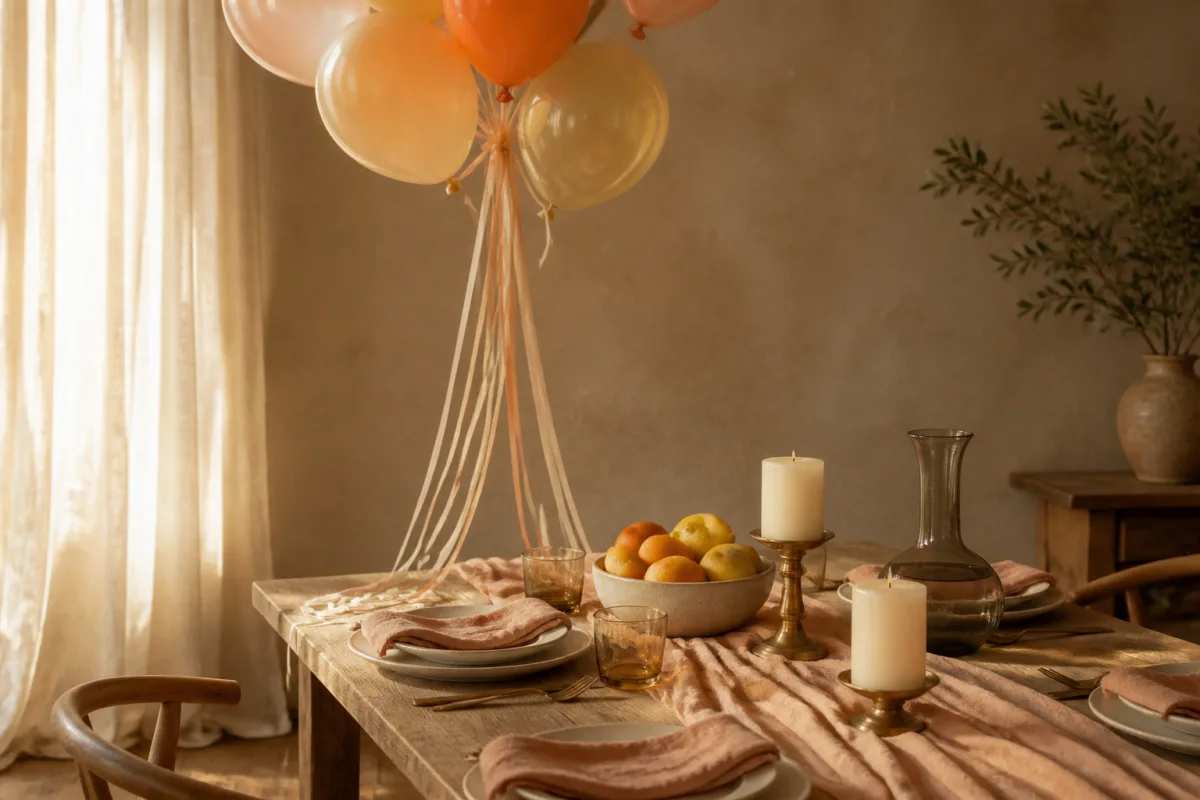
We’ve all been there: the table looks okay, but something’s off. It reads a little flat, a little “I just threw this together.” This design creates a fresh, sunlit mood that’s elegant without being formal—think apricot, blush, and pale lemon layers with airy ribbons catching the breeze from a cracked window. It works beautifully in real homes because the palette lifts even a dim dining area, and the materials—washed linen, matte ceramics, and rippled glass—hide small imperfections. Lighting does the heavy lift here: low votives and a few frosted bulbs turn citrus into soft jewelry for your table.
Dominant materials include crinkled linen, softly tinted glass, and brushed brass. It photographs beautifully because of the interplay of textures (linen grain next to smooth citrus skin is editorial-level contrast), a constrained palette, and height layering. A matte ceramic pitcher with ranunculus stems becomes your anchor. For small spaces, shrink the runner width and do a mini citrus cluster on a single tray to avoid clutter. Renter-friendly? Absolutely—no nails or permanent fixtures needed. Dark apartment? Use cream linen, pale lemon taper candles, and lean into reflective surfaces.
Budget Breakdown:
- Linen table runner: $18–$45
- Assorted citrus (grapefruit, lemons, clementines): $10–$25
- Matte ceramic pitcher + 2 bud vases: $20–$60
- Taper candles + holders (brass or stone): $15–$45
- Rippled drinking glasses or coupe set: $25–$80
- Latex balloons + silk ribbons: $10–$35
Total Estimated Cost: $98 – $290
Best For: Dining rooms or kitchen nooks that need a lift; afternoon parties that roll into golden hour. Great for spring and summer birthdays or anyone who loves a fresh, feminine vibe without going full pastel.
Key Design Elements:
- Main materials: Washed linen, tinted glass, matte ceramic, brushed brass
- Color palette: Apricot, pale lemon, blush, warm white, micro accents of olive
- Lighting strategy: Low candles, frosted bulbs, avoid overhead glare
- Furniture silhouettes: Rounded edges, soft lines, no sharp angular chairs
- Texture layers: Linen grain, citrus peel, rippled glass, powdery candles
- Accent details: Silk ribbons drifting off balloon tails, tiny herb sprigs (thyme or rosemary)
How To Recreate This Look:
- Start with a washed linen runner in cream or blush that hangs 8–10 inches off each end for a tailored drape.
- Add a central ceramic pitcher with 5–7 stems of ranunculus or poppies; flank with two bud vases at different heights.
- Layer a scattered citrus cluster: 3 grapefruit, 6 lemons, 10 clementines—odd numbers only for a natural rhythm.
- Install taper candles in brushed brass holders along the runner, alternating heights for a subtle skyline effect.
- Style with 8–10 balloons tied with silk ribbon; trim ribbons so they graze chair backs and feel intentional, not messy.
Why This Looks Expensive: The controlled palette and mixed matte-gloss textures mimic high-end editorial styling. The silk ribbons and brushed brass add quiet shine without shouting.
Watch Out: Don’t overpack citrus. When every inch is covered, it reads like a grocery display. Leave breathing room for the linen to show; negative space is your friend.
Pro Styling Tip: Photograph from chair height at a 45-degree angle so candlelight hits the citrus and ribbons, creating soft shadows and a glow line on the rippled glass.
Keep scrolling—next up is a look that solves the “blank wall, big yawn” problem in under an hour.
2. Renter-Friendly Streamer Canopy With Micro-Lanterns
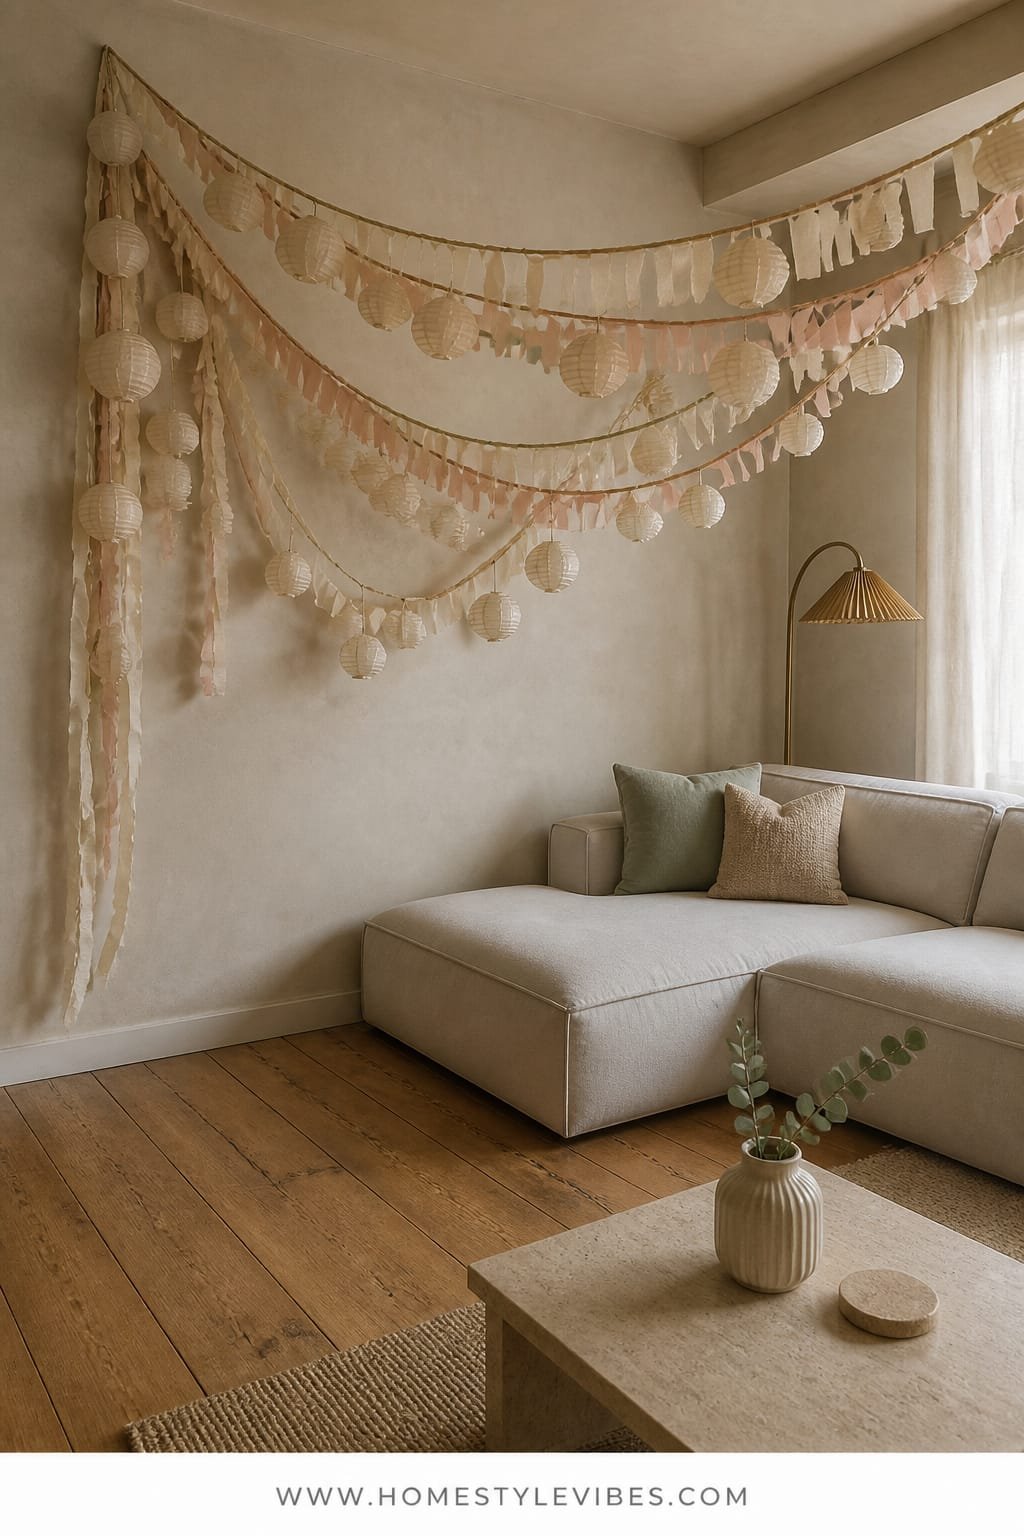
It’s that one corner that always feels off—the big blank wall behind your sofa or dining table that swallows decor. You’ve tried a banner, but it still looks skimpy and… temporary. This canopy design turns a boring wall into an immersive backdrop using pinned streamers and paper micro-lanterns that float overhead. The mood lands somewhere between modern boho and playful boutique hotel. Even in small apartments, it frames the action and hides awkward proportions.
Why it works: it shifts the focal line up, which makes low ceilings read taller. Lighting becomes part of the decor through tiny lanterns or fairy lights woven in. Materials lean matte—crepe streamers, rice paper lanterns—so the shadows look soft and the color reads saturated on camera. It photographs beautifully because you get movement, depth, and repeated lines converging into a soft canopy. Variation ideas: go monochrome for sophistication; try ombré tones for a teen party; or do a muted combo like clay, terracotta, and blush for adults. Renter-friendly hacks: use clear removable hooks and painter’s tape; cluster lanterns where the ceiling fixture sits to hide a not-so-pretty base.
Key Design Elements:
- Main materials: Crepe paper streamers, rice paper mini-lanterns, clear hooks
- Color palette: Monochrome or ombré (e.g., blush-rose-berry, or taupe-clay-terracotta)
- Lighting strategy: Warm fairy lights threaded through the canopy; one dim overhead bulb
- Furniture silhouettes: Keep low; avoid tall shelving that competes with the canopy lines
- Texture layers: Matte crepe, soft rice paper, twinkle string lights
- Accent details: Mini pom tassels, ribbon ties at streamer ends, a fabric banner in coordinating hues
Budget Breakdown:
- Crepe streamers (6–8 rolls): $12–$24
- Mini paper lanterns (8–12 pack): $15–$30
- Fairy lights (battery-operated): $10–$25
- Removable hooks + painter’s tape: $8–$18
- Fabric banner or DIY letters: $10–$30
Total Estimated Cost: $55 – $127
Best For: Renters, studio apartments, awkward nooks. Ideal when you want maximum visual impact for low cost and minimal tools.
How To Recreate This Look:
- Start with 3 anchor points on the ceiling using clear hooks—left, center, right—above the wall you want to frame.
- Add streamers from each anchor down to the top third of the wall, taping the ends to create a soft scallop line.
- Layer additional streamers between anchors for density; keep spacing consistent at 2–3 inches.
- Install micro-lanterns in clusters of three; stagger heights for dimension. Thread fairy lights through 2–3 lanterns.
- Style with a fabric banner centered at eye level; let two streamer tails dip lower for a casual, not-too-perfect finish.
Why This Feels Designer: The ceiling treatment reframes the entire room, borrowing a trick from boutique retail displays—vertical emphasis, repeated lines, and warm points of light.
One Thing To Avoid: Don’t mix more than three colors unless you go full rainbow on purpose. Too many near-matches read muddy in photos.
Pro Styling Tip: Pull one lantern 6–8 inches in front of the others to catch light and create a natural focal point for party photos.
Deep breath. This doesn’t have to be perfect; it just needs rhythm and light. Ready for a moody, grown-up moment that still feels fun?
3. Candlelit Dessert Bar With Charcoal Linen and Brass Accents
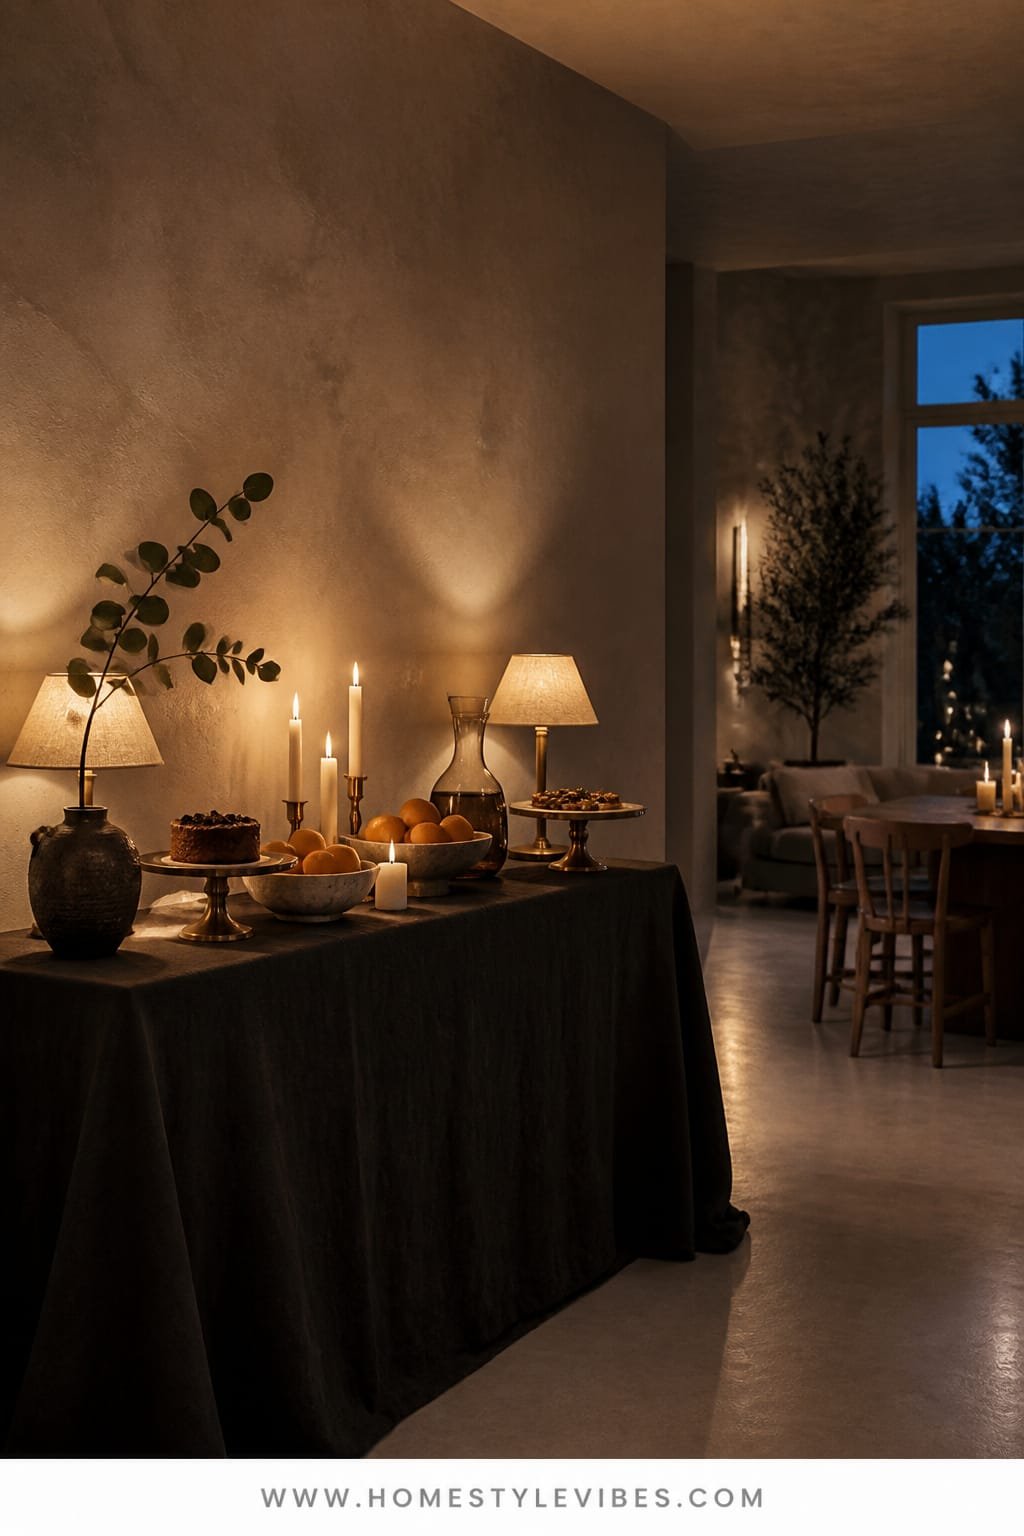
You’ve tried a dessert table before, but it felt like a bake sale instead of a birthday. The secret is contrast. This setup uses a deep charcoal or espresso linen as the base, then layers brass accents, low candlelight, and sculptural cake stands. The mood is modern supper club: sultry, cozy, and meant for late-night slices and clinking glasses. Lighting carries the entire look—candles and two small lamps beat overhead glare every time.
Why it works in real homes: it corrals sweets in one dedicated zone (less mess, fewer crumbs touring the living room) and looks intentional even with store-bought treats. Materials like stoneware, marble, and brushed metal add weight, so the table reads serious but celebratory. It photographs beautifully because dark backdrops make icing and glass sparkle. Small-space version: a bar cart with one tier for desserts, one for plates and napkins. Budget-friendly version: thrift candleholders and use a black twin-size sheet as your “linen” with crisp ironed edges.
Budget Breakdown:
- Charcoal tablecloth or sheet: $15–$45
- Assorted candleholders + candles: $20–$80
- Two cake stands (mix marble and matte black): $30–$100
- Small table lamps with warm bulbs: $40–$120
- Stoneware plates and gold flatware (disposable or reusable): $15–$60
- Eucalyptus or olive branches: $8–$18
Total Estimated Cost: $128 – $423
Best For: Evening birthdays, adults, and teens who want “cool over cute.” Works in dining rooms, wide hallways, or a clear stretch of kitchen counter.
Key Design Elements:
- Main materials: Charcoal linen, marble, stoneware, brushed brass
- Color palette: Charcoal, cream, brass, olive green
- Lighting strategy: Candles in multiples and two dimmable table lamps
- Furniture silhouettes: Clean, minimal, no fussy skirts or ornate legs
- Texture layers: Linen slub, matte stoneware, glossy icing, metallic glints
- Accent details: Olive branches, black ribbon around cake knife, linen napkins
How To Recreate This Look:
- Start with the darkest cloth you can find; press it well so edges look crisp on camera.
- Add your tallest element—usually the cake—slightly off-center; flank with a second stand for a staggered skyline.
- Layer candles in three heights: tea lights, tapers, and a few pillar candles in brass or black holders.
- Install two small lamps at either end of the table; tilt shades slightly inward to graze the desserts with light.
- Style with a simple olive branch garland; tuck ends under cake stands to look anchored, not tossed.
Why This Reads High-End: Dark-to-light contrast with controlled metallic shine signals intention. The lamps remove the harsh shadows cheap pendants throw on walls and faces.
The Most Common Mistake: Overcrowding the table. Leave plate space in front of each platter so guests can serve without jostling candles.
Pro Styling Tip: Dust cocoa powder through a fine sieve on a plain cake slice for instant editorial texture in photos.
Remember, this isn’t about recreating a showroom. It’s about building a party that feels like yours. If one idea tugs at you more than the others, start there and ignore the rest—for now.
4. Living Room Lounge With Floor Cushions, Low Tables, and Twinkle Grid
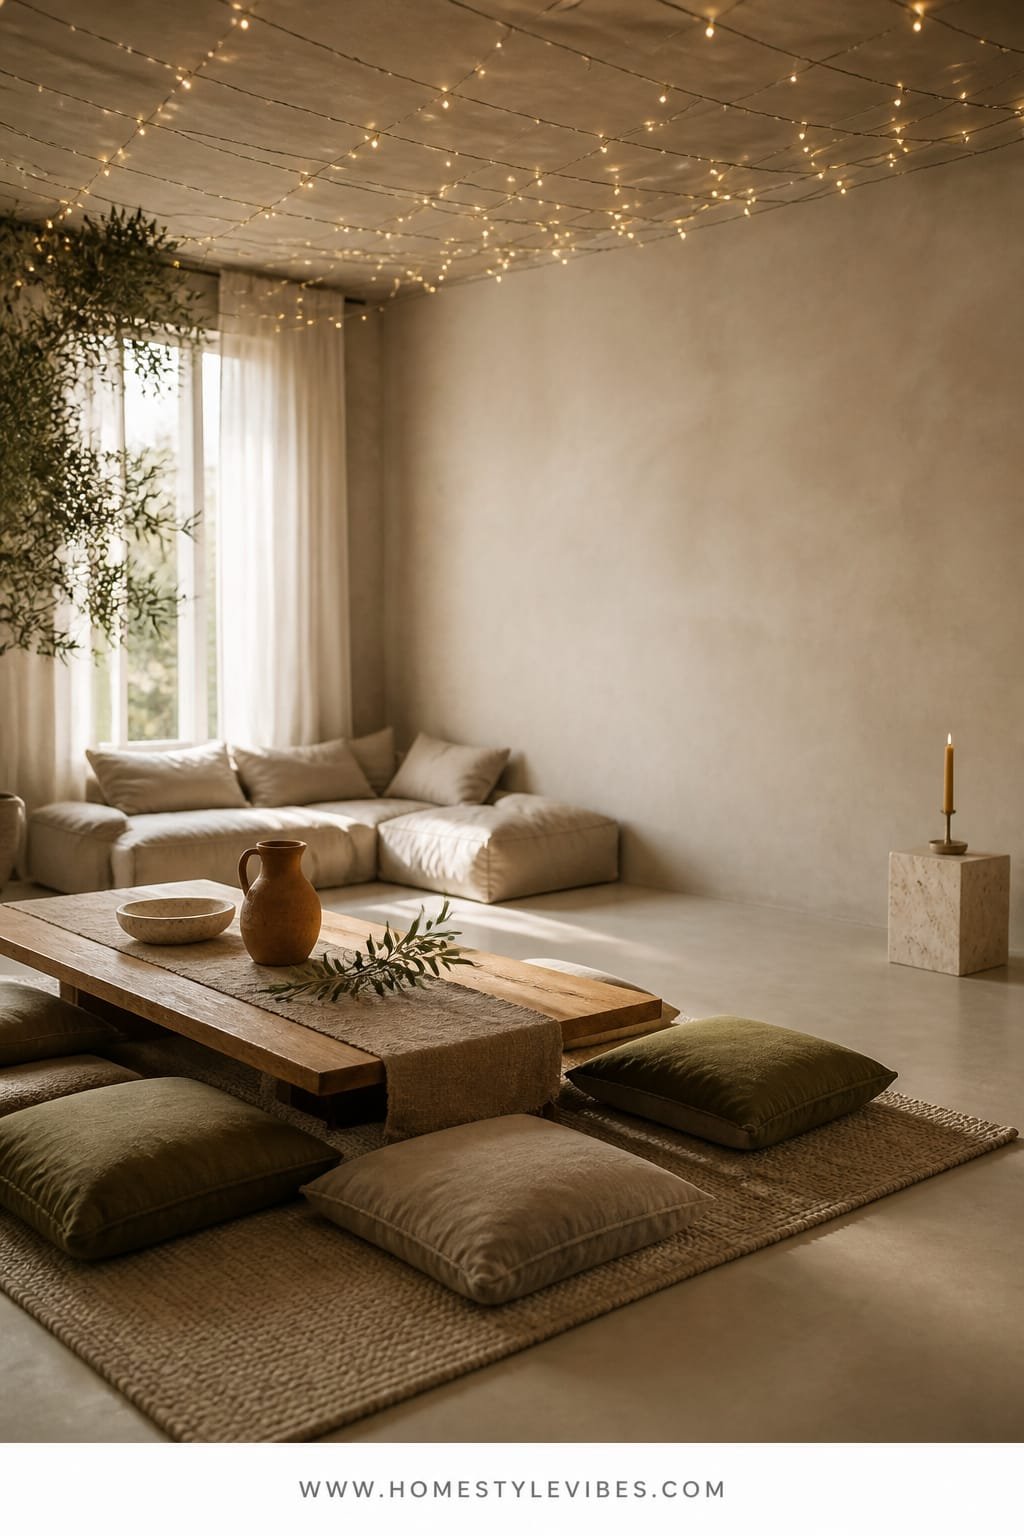
You want cozy conversation zones, but your sofa swallows people and your coffee table is always in the way. I tried this in my own living room last fall and honestly couldn’t believe the difference: I cleared the coffee table, layered a large rug with floor cushions, and set a low, picnic-style table. Suddenly, everyone sat close and stayed longer. The vibe is modern Mediterranean meets laid-back boho—tile-inspired prints, linen textures, olive and sand tones, and a canopy of twinkle lights arranged in a soft grid.
It works in real homes because it forgives. Scratched floors? Hide them with a big rug. Not enough seating? Floor pillows fix it. Lighting transforms the room; turn off overheads and let grid-string lights plus two lanterns do the lift. Materials: jute or flatweave rugs, linen, mango wood, raffia. Photographs beautifully thanks to strong horizontal layering—rug, table, cushions—and cozy pools of light. Variations: small space version with two clusters of three cushions each around nesting tables; darker palette with tobacco, slate, and camel; renter swap using removable hooks or tension rods for the light grid.
Budget Breakdown:
- Large jute or flatweave rug: $70–$180
- Floor cushions (4–8): $60–$200
- Low folding table or two pallet-style platforms: $40–$120
- String lights (warm white): $15–$40
- Lanterns or LED candles: $20–$60
- Throw blankets and small trays: $25–$80
Total Estimated Cost: $230 – $680
Best For: Living rooms and dens. Ideal for casual birthdays, pizza nights, and no-shoes households where lounging is the point.
Key Design Elements:
- Main materials: Jute, linen, mango wood, raffia
- Color palette: Sand, olive, cream, soft charcoal accents
- Lighting strategy: Overhead lights off; warm grid of string lights plus lanterns
- Furniture silhouettes: Low, rounded edges, flexible pieces
- Texture layers: Nubby rugs, soft throws, smooth trays, matte ceramics
- Accent details: Olive branches in a jug, tile-print napkins, carved wood candleholders
How To Recreate This Look:
- Start by rolling out your biggest rug. Align it parallel to your longest wall.
- Add a low table in the center; if DIY, stack two pallets and top with a plywood sheet and a neutral runner.
- Layer 4–8 floor cushions around, mixing solid linens and one pattern for interest.
- Install a soft grid of string lights across the ceiling using clear hooks; drape gently for a slight wave.
- Style trays with snacks, coasters, and a single vase with olive stems; add two lanterns at opposite corners.
Why This Looks Intentional: The low plane pulls the eye sideways and invites group connection. A repeated tone-on-tone palette unifies the scene while the grid lights add a subtle architectural feel.
Don’t Do This: Don’t push all cushions against walls. Leave at least two “floaters” near the table to keep the layout from feeling like a waiting room.
Pro Styling Tip: Snap photos from slightly above the table so cushion height, tray edges, and twinkle reflections stack into layers.
Keep going—next we’re tackling the “where do I put drinks?” conundrum with a palette that practically photographs itself.
5. Monochrome Drinks Nook With DIY Color-Dipped Bottles
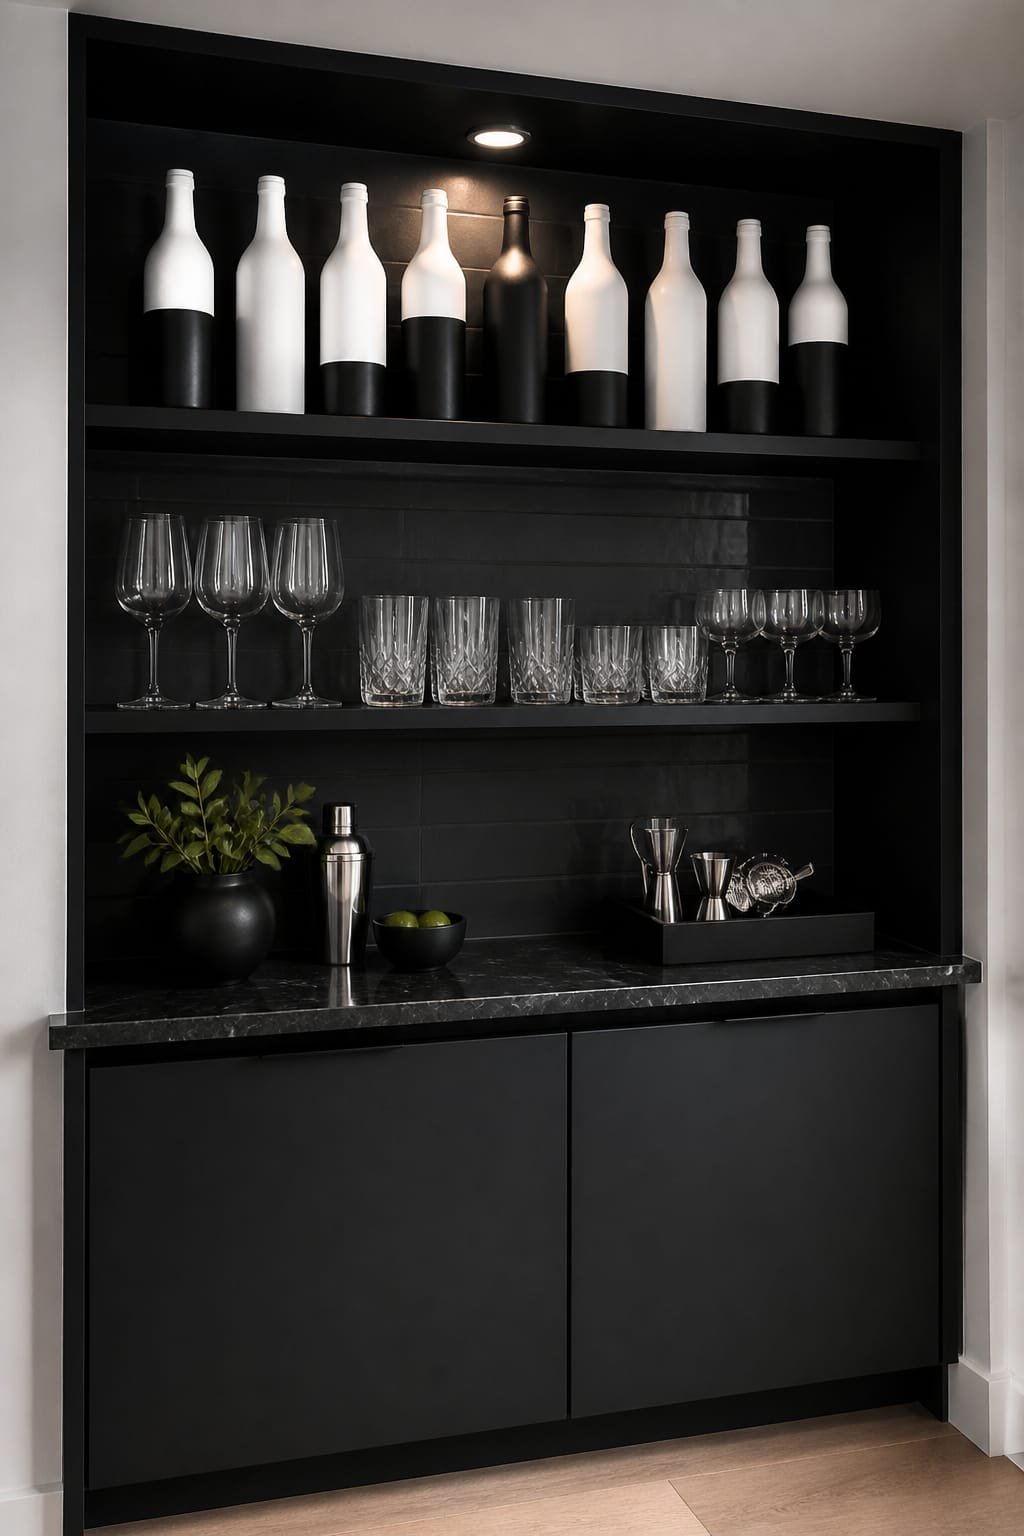
You love a signature drink moment, but the cluttered counter isn’t cute. Bottles, random cups, and the world’s stickiest lemon wedge. This monochrome drinks nook solves that with a single-color story and a clever DIY: dip-cleaned bottles and jars in paint (or wrap in colored contact paper) for seamless styling. The result feels like a design store install—graphic, tidy, and surprisingly easy to refresh.
It works in real homes because it consolidates mess into one zone that’s both self-serve and photogenic. Lighting should be even and warm; add under-cabinet puck lights or a narrow table lamp for that cozy glow. Materials: matte latex paint or contact paper, simple acrylic trays, linen tea towels, and clear glass for contrast. It photographs well because of tonal consistency and vertical repetition—group bottles by height for a sculptural lineup. Variations: budget-friendly with thrifted jars; small-space with a rolling cart; darker version in deep forest or navy for night parties; renter-friendly using removable vinyl instead of paint.
Budget Breakdown:
- Acrylic tray or narrow bar tray: $15–$50
- Matte latex paint sample pots or contact paper: $10–$25
- Glass bottles/jars (thrifted): $8–$25
- Under-cabinet puck lights or mini lamp: $15–$45
- Matching napkins/tea towels: $10–$20
- Label clips or tiny hang tags: $6–$12
Total Estimated Cost: $64 – $177
Best For: Kitchen counters, sideboards, or a bookshelf niche. Ideal for hosts who prefer tidy stations and love a styled color story.
Key Design Elements:
- Main materials: Matte paint/vinyl, clear glass, acrylic trays, linen
- Color palette: One hue in three tones (e.g., sage light/medium/dark) plus clear glass
- Lighting strategy: Warm, even light; avoid spotty overheads that create harsh bottle shadows
- Furniture silhouettes: Slim profile cart or console; no chunky legs
- Texture layers: Matte bottles, glossy glass, slubby linen, acrylic shine
- Accent details: Tiny label tags, one sculptural branch in a tall bottle
How To Recreate This Look:
- Start by cleaning and drying glass bottles/jars. Mask a clean diagonal or straight line with tape.
- Add paint below the tape line or wrap contact paper smoothly; let cure fully to avoid smudges.
- Layer bottles by height on an acrylic tray; alternate painted and clear to keep the eye moving.
- Install warm puck lights beneath cabinets or place a slim lamp to wash light across labels.
- Style matching napkins in a low stack, add a single tall branch to punctuate the lineup, and clip tiny drink labels.
Why This Looks Expensive: Monochrome reads curated. The matte finish against glass gloss gives museum vibes without the fuss.
Watch Out: Don’t mix wildly different bottle shapes in the same row. Keep to 2–3 silhouette families so it doesn’t look chaotic.
Pro Styling Tip: Shoot straight-on with a shallow depth of field so the front labels are crisp and the back row melts into a soft blur.
Pause for perspective: Your party doesn’t need twenty ideas layered on top of each other. One strong color story, one clear focal wall, and good light will carry the entire night.
6. Fabric Photo Booth With Layered Curtains and Neon Word Light
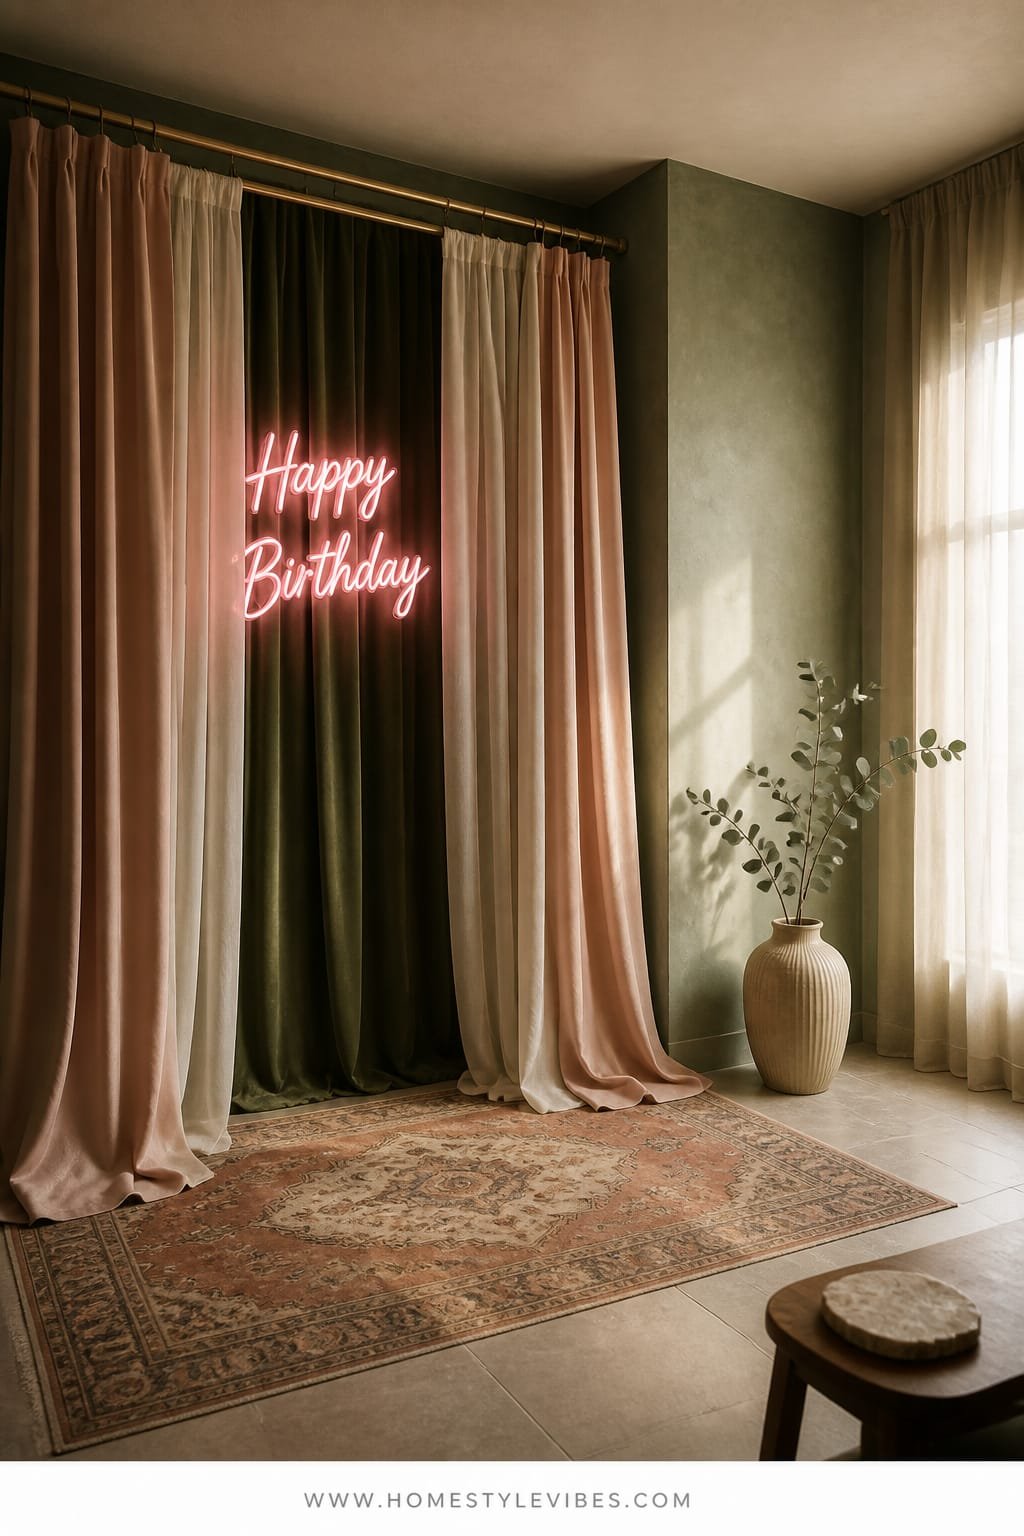
You want those “we actually look amazing” photos, but your background always gives away real life—appliances, clutter, that pile of mail. A fabric photo booth hides all of it, creates a dedicated moment, and sets the tone for your birthday. The mood is editorial-meets-playful: layered curtains, a neon word light (real or LED sign), and a rug that frames your feet so the full-body shots feel finished.
It works in homes because curtains are forgiving and renter-friendly. Lighting is critical: aim for two soft sources from the sides instead of one blinding overhead. Materials: velvet or heavy linen curtains in two tones, spring-tension rods, a mid-pile rug, and a simple stool or ottoman. It photographs beautifully thanks to intentional color blocking and soft fabric shadows. Variations: glam with jewel-tone velvet and gold neon; minimal with cream-on-cream and a cursive “cheers”; micro-space version using a doorway with a single rod and a small bench.
Budget Breakdown:
- Two curtain panels (velvet or linen): $40–$140
- Spring-tension rods or removable hooks: $12–$30
- Neon word light (plug-in or battery): $35–$120
- Mid-pile rug (3×5 or 4×6): $35–$120
- Stool or ottoman: $30–$90
- Two softbox lights or clamp lights with diffusion: $40–$120
Total Estimated Cost: $192 – $620
Best For: Hallways, living room corners, or bedrooms with a clean wall. Great for guests who love to document and for birthdays where the photos matter.
Key Design Elements:
- Main materials: Velvet/linen curtains, neon LED, mid-pile rug
- Color palette: Two-tone scheme (e.g., emerald + teal or cream + sand)
- Lighting strategy: Soft side lights at 45 degrees; neon as accent, not key light
- Furniture silhouettes: Rounded ottoman or low stool
- Texture layers: Plush curtain folds, soft rug, glossy neon
- Accent details: A bouquet on a stool, a tiny disco ball tucked in a corner for sparkle
How To Recreate This Look:
- Start by installing a tension rod or two stacked rods to get double layers of curtains; overlap them in the middle for depth.
- Add a rug that contrasts the curtain color so outfits don’t blend into the floor.
- Layer in the neon sign at head height; if wiring looks messy, hide with a curtain fold.
- Install two side lights angled slightly down for flattering shadow blur; use warm diffusion.
- Style with a stool or ottoman centered; place a small bouquet on it for tactile interest in close-ups.
Why This Feels Designer: Editorial photos rely on controlled backdrops and layered light. The double curtain build gives that gentle stage effect without any construction.
One Thing To Avoid: Avoid curtains that are too thin. Sheers show wall texture and cords in photos. If you must use them, double them up.
Pro Styling Tip: Angle the neon slightly to one side so it catches a fold and creates a subtle glow gradient instead of a flat glare.
Almost there. The last idea pulls everything together with scent, sound, and movement—plus the most saved Pinterest look of the season.
7. Garden-At-Home Tablescape With Branchy Centerpiece and Taper Meadow
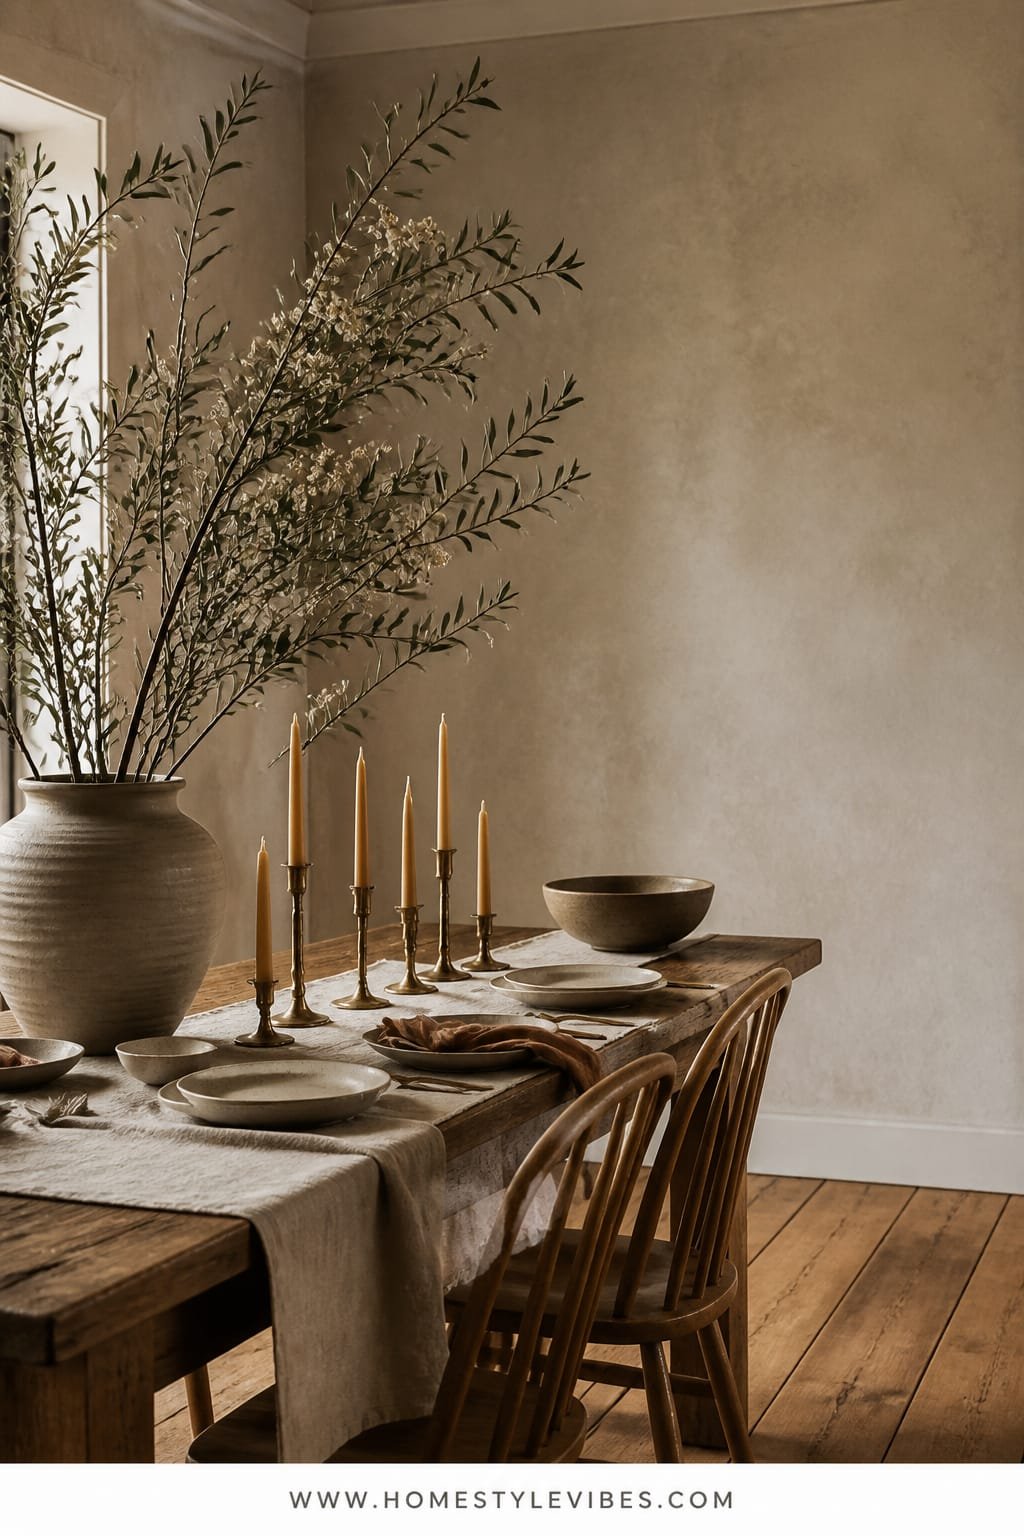
You’ve got a dining table, but it never feels like a moment. You scatter flowers and hope for the best. Here’s the fix: a sculptural branchy centerpiece (think flowering branches or eucalyptus) anchored in a heavy vessel, flanked by a “taper meadow” of candles in mismatched holders. The vibe is modern rustic meets soft European countryside—linen, raw wood, pale stoneware—and it sings in photos because of its vertical drama and layered negative space.
Why it works in real homes: branches give scale without needing a florist, and mismatched holders look intentional if they share a finish family (stone, brass, or blackened metal). Lighting is everything: flickering tapers create depth on faces and food. Materials: linen tablecloth, raw-edge napkins, stoneware plates, a big ceramic vase, and 8–12 candles. Variations: budget-friendly with foraged branches and thrifted holders; small table version with a single tall branch cluster and 4 candles; dark palette with inky navy linen and bone plates for serious mood.
Budget Breakdown:
- Linen tablecloth: $25–$80
- Large ceramic vase: $30–$120
- Branch stems (foraged or market): $0–$30
- Assorted taper holders (thrift or new): $20–$90
- Taper candles (10–12): $15–$40
- Stoneware plates + cloth napkins: $40–$140
Total Estimated Cost: $130 – $500
Best For: Dining rooms and patios. Ideal for adult birthdays, brunch parties, and anyone who loves the feeling of an elegant dinner that doesn’t try too hard.
Key Design Elements:
- Main materials: Linen, stoneware, ceramic, brass or iron
- Color palette: Warm white, soft taupe, olive, brass or black accents
- Lighting strategy: Taper meadow down the center; dim any overhead fixtures
- Furniture silhouettes: Simple, sturdy table; chairs with soft curves or slipcovers
- Texture layers: Linen folds, matte plates, glossy candle drips, knotted napkins
- Accent details: Single place cards, a salt cellar at mid-table, small bowl of seasonal fruit
How To Recreate This Look:
- Start with a linen cloth that touches just above chair seats—too long looks fussy, too short reads like a picnic.
- Add a large vase with tall branches; trim stems at angles so they drink and hold shape.
- Layer holders down the runner line; alternate heights in an imperfect rhythm (high-low-medium-repeat).
- Install unscented tapers; light them 15 minutes before guests arrive so wax softens and flames settle.
- Style place settings with a soft knot in each napkin; tuck a tiny herb sprig for scent and detail.
Why This Looks Expensive: Height and restraint. Branches give you scale that reads custom floral, and the candle meadow adds shimmering depth that cameras love.
Don’t Do This: Don’t use strong floral scents near food. Save perfumed blooms for the entry and bathroom. Keep the table neutral and appetite-friendly.
Pro Styling Tip: Take a low-angle shot from the table edge so candle flames layer in front of and behind the branches—the bokeh looks cinematic.
Real talk moment: A friend of mine spent weeks agonizing over paint colors before realizing the real problem was her lighting. One $30 dimmer and a few tapered candles later, her dining room looked like a bistro. Sometimes the fix is the thing you can’t see until you turn something else off.
Quick Checklist
- 2700K warm bulbs swapped in before the party
- One tight color palette chosen and repeated
- Linen runner or tablecloth pressed and ready
- Tall focal element placed slightly off-center
- At least two lighting layers beyond overhead
- Negative space left on tables for serving
- Texture mix: matte + gloss + soft fabric
- Removable hooks and tape stocked for installs
- Unscented candles for dining zones
- One styled photo area with a clean floor/rug
- Extra trash bag hidden under the bar cart
- Portable speaker queued at low volume
Frequently Asked Questions
How do I keep the budget under $150 but still get a Pinterest-worthy look?
Pick one idea and do it fully. For example, try the renter-friendly streamer canopy with lanterns and a small fabric banner. Borrow candleholders, use a sheet as a tablecloth, and thrift glassware. Consistency and lighting beat expensive props every time.
My apartment is tiny. Which idea works best without making it feel crowded?
The monochrome drinks nook on a rolling cart and the fabric photo booth in a doorway are both compact. Keep traffic flow clear by placing the cart near the kitchen or entry and the photo booth in a low-use corner.
I’m not crafty. Which DIY steps are actually realistic?
Color-dipped bottles with contact paper, tension-rod curtains for the photo booth, and citrus tablescapes. They only need tape, scissors, and a steady hand. Skip anything requiring ladders if that stresses you out—stick to table-level wins.
How do I prevent the party from feeling dark if I turn off overhead lights?
Layer multiple small light sources: 2–3 table lamps, a string light grid, and 8–12 candles spread around. Aim for light from different heights so faces glow and shadows feel soft instead of cave-like.
What mistakes make home parties look messy in photos?
Too many colors, random glassware styles mixed together, and no clear focal point. Choose a palette, repeat it, and style one or two strong areas (dessert bar + photo booth). Also, hide cords and extra clutter—under a tablecloth is fair game.
Conclusion
Pick one idea that makes your shoulders drop in relief. Start there. Maybe it’s the candlelit dessert bar that turns store-bought sweets into a moody moment, or the citrus tablescape that smells like sunshine. You don’t need to do everything; you need one cohesive story with good light.
The truth is, “luxury” at home comes from texture, lighting, and restraint. Linen instead of plastic. Warm bulbs instead of overhead glare. One intentional color story repeated confidently. Do those three things and your birthday party will look and feel like the photos you save for months.
You’ve got this. Clear a surface, press the cloth, place the tall piece slightly off-center, and light the candles. When your guests walk in and say, “Wait—did you do all this?” just smile and pour the drinks. Seriously, you’re about to host the birthday that lives in everyone’s camera roll.
About the Author

Krisztina P.Rendes, Founder of Home Style Vibes
Founder of Home Style Vibes
Krisztina Puskásné Rendes created Home Style Vibes as a cozy-modern lifestyle space where homemaking meets inspiration. Her goal is to help women create beautiful, organized, and peaceful homes they truly love — without overwhelm. You’ll find here heart-driven content on home decor, cleaning tips, easy family recipes, organization and decluttering, DIY home projects, plants, and seasonal ideas — all designed to bring more calm, comfort, and style into everyday life.