7 Scandinavian Bathroom Ideas for a Bright and Airy Look Now
You want a bathroom that greets you with soft daylight and calm, not a dim cave of clutter. You crave that crisp, Scandinavian bathroom glow—white that feels warm, wood that feels soft underfoot, and a sink area that actually stays tidy. But harsh overhead bulbs, mismatched finishes, and bulky storage keep getting in the way. These seven Scandinavian bathroom ideas fix exactly that: layered lighting, smarter layouts, and tactile materials that photograph beautifully and feel even better in person. If you’re willing to spend a weekend or two and keep your budget capped per section, you can get to that bright-and-airy look—no gut renovation required. Expect Pinterest-worthy corners, less visual noise, and a vibe that works on weekday mornings and Sunday baths alike.
1. Cloud-White Bath With Blonde Oak Rhythm
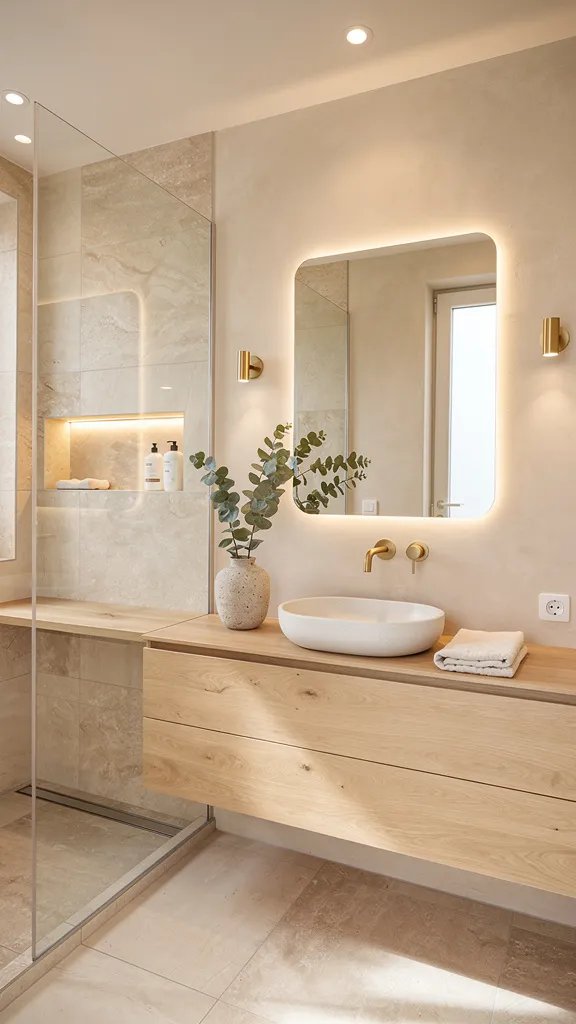
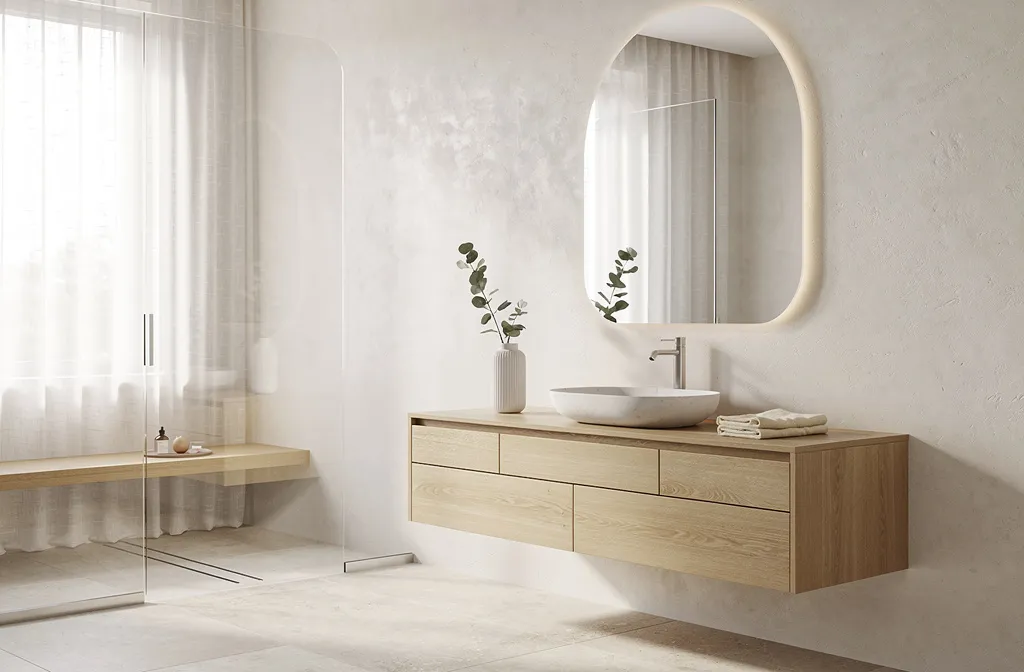
We’ve all been there—you paint the room white expecting “spa,” but it looks chilly and sterile instead. The problem isn’t the white; it’s that the surfaces and light don’t harmonize. This Scandinavian bathroom idea balances a creamy white envelope with rhythmic bands of blonde oak: a floating vanity, a slim shelf, and a shallow wood ledge in the shower. The result? An airy, hotel-spa calm that still reads warm and human.
This look thrives in small spaces because it uses contrast intentionally: warm wood against a soft-white backdrop. Light bounces around the room without glare, and the oak introduces subtle grain that reads as texture on camera. It’s easy to maintain when you seal the wood properly and choose a satin wall finish. Family-friendly and resale-friendly, it leans classic rather than trendy.
Lighting matters here. Swap a single harsh ceiling light for a layered approach: one recessed can for overall illumination, a pair of warm 2700–3000K sconces flanking the mirror for faces, and a dimmer to keep mornings bright and evenings soft. The oak surfaces absorb and mellow the light, so everything looks expensive and glow-y rather than washed out.
Budget Breakdown:
- Floating oak vanity (36–48 inches): $600–$1,800
- Quartz or porcelain slab countertop: $400–$900
- Wall paint (soft white, high-quality): $60–$120
- Warm white sconces (pair): $150–$500
- Matte black or brushed brass faucet: $120–$450
- Oak shelf/ledges and sealing products: $120–$300
Total Estimated Cost: $1,450 – $4,070
Best For: Small to mid-size baths that feel cold. Homeowners craving a warm minimal look that photographs well and plays nicely with existing white tile.
Key Design Elements:
- Main materials: blonde oak, quartz, soft-sheen wall paint
- Color palette: creamy white, honey wood, matte black or brushed brass
- Lighting strategy: layered sconces + dimmable ceiling light
- Furniture silhouettes: floating vanity, slim shelf
- Texture layers: subtle wood grain, cotton hand towels, matte ceramics
- Accent details: low-profile hardware, a single leafy branch, ribbed glass soap dispenser
How To Recreate This Look:
- Start with the walls: choose a soft white with a hint of warmth, then paint ceiling and trim the same color for a seamless feel.
- Add a floating oak vanity and seal it for humidity. Keep the profile slim to visually widen the floor.
- Layer a quartz or porcelain slab counter with a simple undermount sink for clean lines.
- Install pair of warm-white sconces at eye level and a dimmer switch.
- Style with one leafy branch, matte tumblers, and folded white towels for calm texture.
Why This Looks Expensive: Continuous color on walls, ceiling, and trim erases visual breaks, and the floating vanity introduces shadow lines that add depth. The restrained metal palette keeps your eye on shape and light rather than on shiny distractions.
Watch Out: Don’t pick a stark blue-white paint; it reads cold. Also avoid too many oak tones—match within a close shade or it looks piecemeal.
Pro Styling Tip: For photos, angle a floor lamp or window light toward the vanity to catch that shadow line under the floating cabinet—instant magazine depth.
Craving something softer? Or maybe a tactile wall that doesn’t need a lot of art? Keep scrolling.
2. Soft Stone Shower With Linen-Curtain Ease
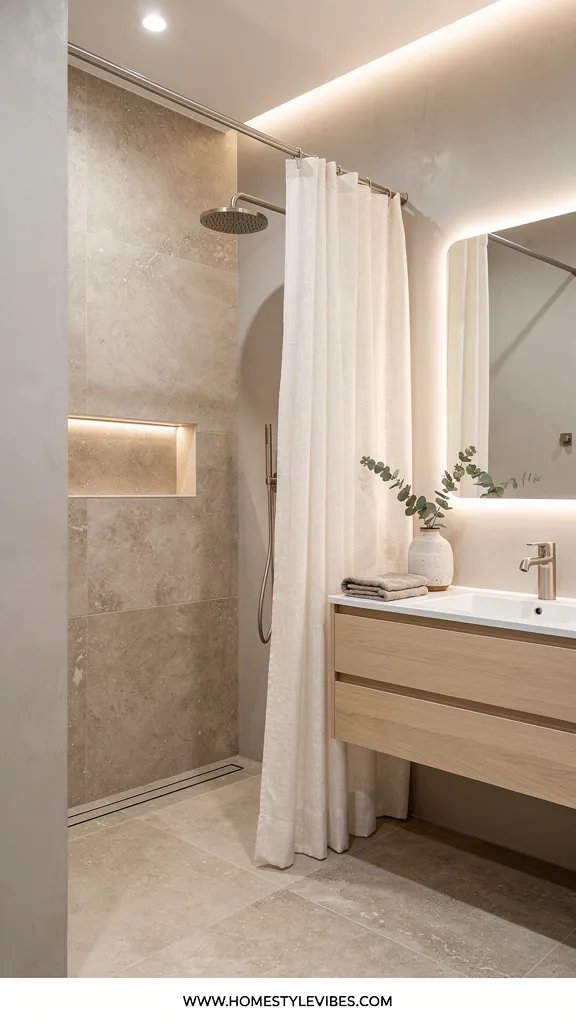
It’s that one corner that always feels off: the shower area. Tile looks busy, the glass spots, and the curtain feels messy. Here’s the clean, Scandinavian bathroom approach: oversized porcelain slabs in a soft stone look with minimal grout lines, paired with a relaxed, linen-textured shower curtain that skims just above the floor. You get a serene, almost spa-like envelope without the maintenance of real stone or fussy glass doors.
This design sets a calm, tactile mood—modern Mediterranean meets Nordic restraint. Fewer grout lines mean faster cleaning and a smoother backdrop for the rest of the room. Light slides along the slab surface, creating gentle highlights that photograph as airy rather than glossy. You’ll notice shower steam moving more softly around a curtain than behind a sealed glass panel, which helps small baths feel less boxy.
Materials carry this one: soft stone-look slabs in warm greige, a linen or linen-blend curtain, and a brushed nickel or tumbled brass shower set. It’s renter-adjacent if you install tension rods and opt for peel-and-stick stone-look panels on just one wall. Budget-friendly version? Tile only the wet wall and paint the rest in a wipeable satin finish.
Budget Breakdown:
- Porcelain stone-look slabs or large-format tile: $600–$1,400
- Quality shower system (brushed nickel or brass): $250–$600
- Linen-textured curtain + matte rod/rings: $80–$180
- Shower niche insert or shelf: $60–$200
- Sealants and grout (if tiling): $80–$150
Total Estimated Cost: $1,070 – $2,530
Best For: Small or medium baths needing a lower-maintenance shower. Perfect if you hate glass-water spots and want a soft, photo-ready backdrop.
Key Design Elements:
- Main materials: large-format porcelain, linen-textured curtain
- Color palette: warm greige, cloud white, softened metal
- Lighting strategy: dimmable overhead with indirect glow for evening showers
- Furniture silhouettes: minimal ledges, linear niche
- Texture layers: stone veining, linen weaves, matte metal
- Accent details: matching rings/rod, discreet hooks, single eucalyptus stem
Why This Feels Designer: The scale of the slabs reads custom, and the linen texture diffuses light. Minimal hardware and one tone of metal keep the sightline calm, so the shower becomes a cohesive, quiet statement.
How To Recreate This Look:
- Plan the shower wall: choose large-format tiles or slabs with subtle veining in a warm neutral.
- Add a linear niche, align grout lines, and opt for a mitered corner if possible.
- Install a matte-finish shower fixture and match it to the curtain rod finish.
- Hang a linen-textured curtain extra high to visually stretch the room.
- Style a single shower product set in neutral bottles on the niche for a cleaner look.
One Thing To Avoid: Don’t hang the curtain too short; that “high-water pants” gap makes everything look cheaper. Aim for 1–2 inches above the floor for hotel-level polish.
Pro Styling Tip: For photos, pull the curtain slightly to one side so the folds frame the stone surface—instant texture contrast.
Remember, this isn’t about recreating a showroom. It’s about creating a bathroom that works with your morning routine and feels like your version of calm. If one detail—the linen curtain or the warm greige tile—hits you right, start there.
3. Japandi Vanity Wall With Fluted Timber and Round Mirror Glow
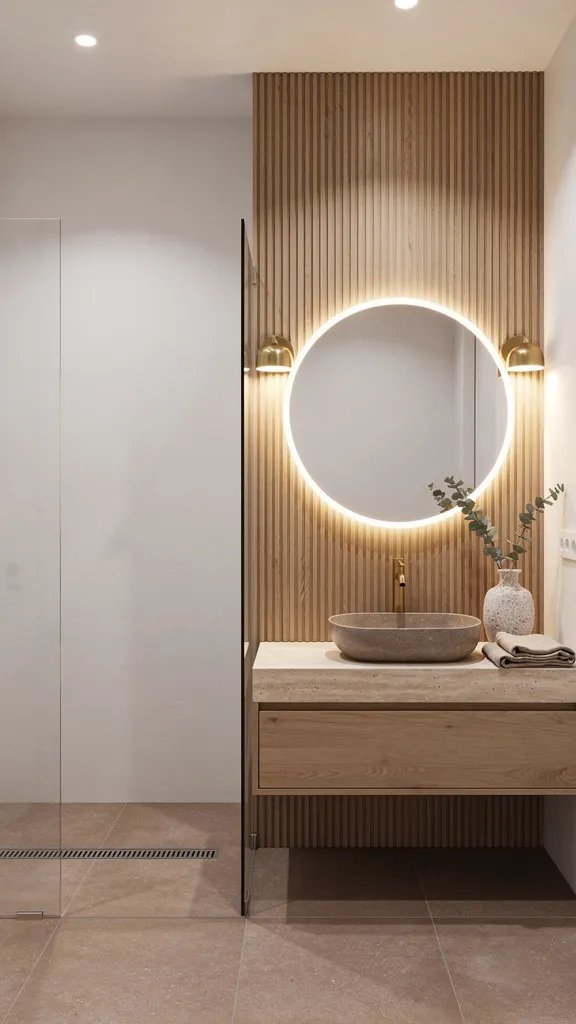
You’ve tried swapping mirrors and still the vanity wall looks flat. Here’s why: you need structure and curve. A narrow band of fluted timber behind a simple round mirror creates shadow play that looks editorial and adds a subtle rhythm to the space. This is a Japandi-meets-Scandinavian bathroom moment: warm wood, perfect circle, and low-contrast finishes that stay serene.
This design reads cozy but minimal. It works in compact rooms because the vertical flutes draw the eye up, and the round mirror interrupts all the hard bathroom lines. Under softer lighting, the flutes catch micro-shadows that add depth on camera, which makes the whole wall feel more expensive than it is. Budget version? Use fluted PVC panels painted in your wall color. Renter-friendly? Mount a peel-and-stick ribbed panel and a lightweight mirror into studs.
Maintenance stays simple: sealed wood or paintable fluted panels wipe clean. Style flexibility stays high: swap in a different sconce shape and the whole wall shifts from Scandi calm to mid-century cool.
Key Design Elements:
- Main materials: fluted timber or PVC panels, round mirror, matte sconce
- Color palette: pale oak or warm white, soft brass or black, milky neutrals
- Lighting strategy: dimmable sconce above or flanking the round mirror
- Furniture silhouettes: slim vanity, cylindrical or globe sconces
- Texture layers: vertical fluting, soft linen hand towel, matte ceramics
- Accent details: bowl for daily jewelry, tray for soap and lotion
Budget Breakdown:
- Fluted panels (timber or PVC): $180–$500
- Round mirror (28–34 inches): $120–$320
- Wall sconce (single or pair): $120–$500
- Slim vanity or refresh: $350–$1,200
- Accessories (tray, soap pump, towels): $60–$150
Total Estimated Cost: $830 – $2,670
Best For: Vanity walls that feel flat or busy. Great in condos or rentals where you need impact without full renovation.
How To Recreate This Look:
- Measure the vanity width; order enough fluted panels to span the mirror width plus 6–8 inches each side.
- Install panels from counter to just above sconce height for a tidy frame.
- Mount a round mirror centered, then add a single sconce above or a pair to the sides.
- Keep the faucet minimal and match metals to the sconce.
- Style one tray, one bowl, and a single bud vase—stop there.
Why This Reads High-End: The combination of vertical texture and a perfect circle creates a designed focal point. Even inexpensive materials look considered when you line them up with clean edges and keep the accessory count low.
The Most Common Mistake: Going too narrow on the mirror. Choose one that covers at least two-thirds the width of your vanity for proper proportion.
Pro Styling Tip: Photograph from a slight angle so the flutes cast delicate stripes of shadow—subtle drama without heavy contrast.
Feeling the rhythm? Next, let’s tackle layout and storage so your bathroom actually stays clutter-free on a Tuesday morning.
4. Hidden-Storage Niche With Towel-Warm Wood and Stone Ledge
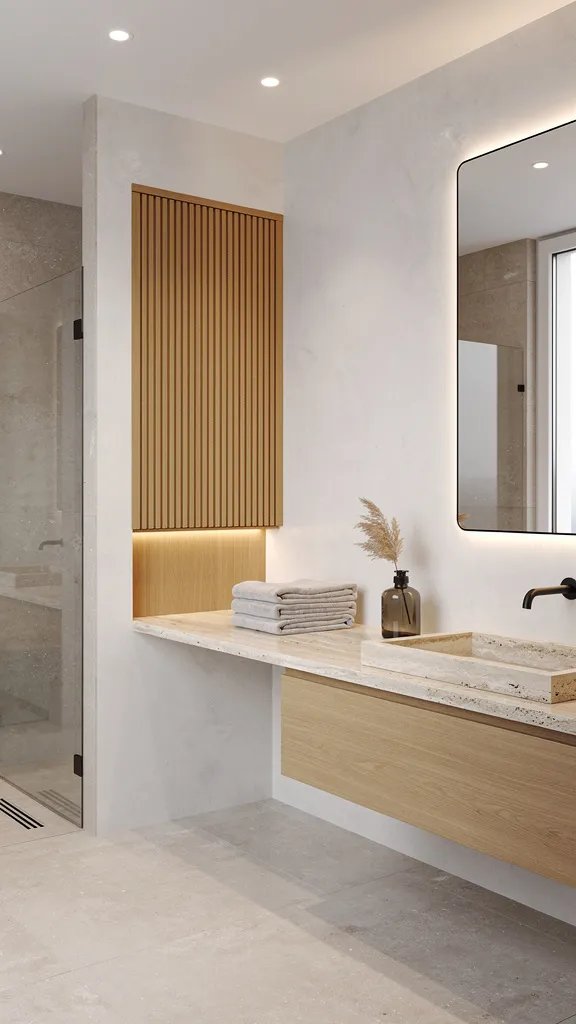
You hide products under the sink and they still spill out. You buy baskets and suddenly your bathroom looks like a storage aisle. This setup takes a Scandinavian bathroom’s love of calm surfaces and makes it practical: a recessed storage niche with a tambour or wood-slat door and an integrated stone ledge below. It’s sleek, not sterile. You control visual noise without losing access to daily stuff.
Imagine a warm wood panel nestling into the wall, flush and quiet, while a slim ledge runs beneath your mirror. You keep everyday items on the ledge—one toothbrush tumbler, one lotion—while everything else tucks behind the niche door. Lighting grazes the wood slats, creating texture that photographs with depth instead of clutter.
Why this works in real homes: it suits small baths that need every inch, keeps kid-friendly essentials reachable, and adds resale value because it looks built-in. Budget-friendly option? Use a shallow medicine cabinet with a flat-front wood veneer and mount a separate stone or quartz shelf under the mirror. Renter swap? Hang a wall cabinet with flat slab doors and a peel-and-stick stone-look ledge underneath for the same visual rhythm.
Budget Breakdown:
- Recessed cabinet or medicine cabinet: $180–$800
- Tambour or wood-slat door kit: $120–$350
- Stone/quartz ledge (custom cut): $180–$400
- Minimal hardware (push-latch or tab pulls): $20–$80
- Labor for recessing (optional): $200–$600
Total Estimated Cost: $700 – $2,230
Best For: Narrow bathrooms and shared family baths. Homeowners who want clean counters and fast morning routines.
Key Design Elements:
- Main materials: warm wood cabinet face, stone ledge, push-latch hardware
- Color palette: pale wood, soft white, matte metal accents
- Lighting strategy: LED strip grazing the slats for dimension
- Furniture silhouettes: flush cabinet, linear shelf
- Texture layers: slatted wood, honed stone, cotton towels
- Accent details: one small plant or ceramic, consistent dispensers
Why This Looks Intentional: The niche aligns with mirror edges and vanity width so everything stacks in clean lines. Repeated horizontals (ledge) and verticals (slats) create a quiet rhythm that reads designed, not improvised.
How To Recreate This Look:
- Map out the wall: center the niche on the vanity and check for studs and plumbing.
- Install or mount the cabinet; choose push-latches to avoid extra hardware visual noise.
- Add a honed stone or quartz ledge below the mirror, aligned to cabinet width.
- Attach a thin LED strip under the ledge or above the cabinet to graze surfaces.
- Decant daily products into matching bottles; store bulk items inside the niche.
Don’t Do This: Avoid glossy stone on the ledge; fingerprints will drive you nuts and glare ruins the soft effect.
Pro Styling Tip: Leave one empty section of ledge in frame when shooting—it gives the eye a place to rest and makes the storage feel purposeful.
Little reminder: you don’t need to install every feature to “earn” a beautiful bath. If the ledge alone solves your clutter, that’s a win. Perfection isn’t the goal; ease is.
5. Monochrome Micro-Grid With Warm Wood Bench and Spa Hooks
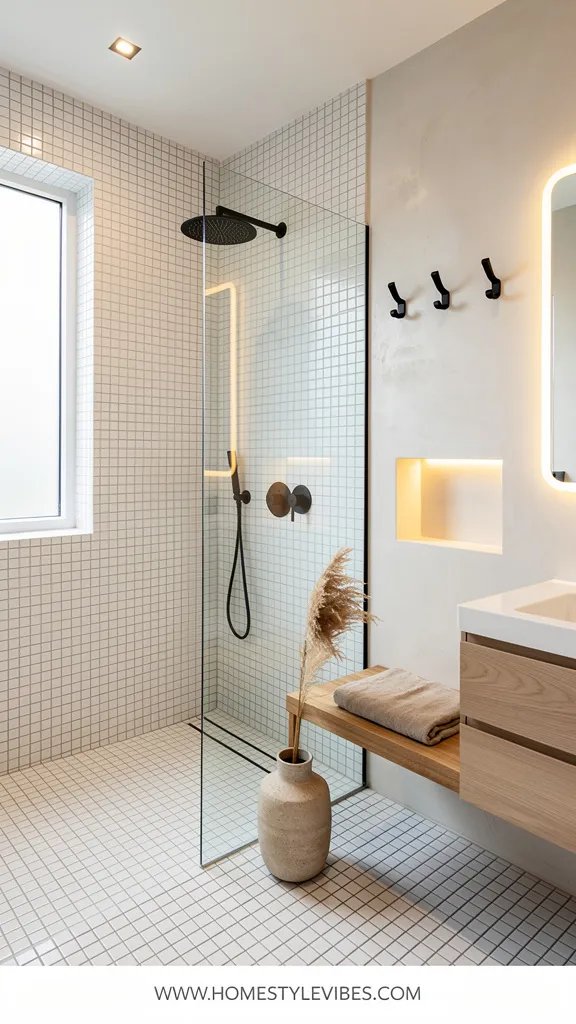
Small bathroom, big personality—yet you’re afraid pattern will shrink the room. I get it. I once tried a busy encaustic in a powder room and it felt like the walls were leaning in. The fix for that claustrophobic feeling: a tiny-scale, monochrome grid tile (think 2×2 or 1×3 mosaic) with plenty of white grout and a warm wood bench plus sturdy spa-like hooks. The grid reads clean and architectural, not noisy.
This Scandinavian bathroom idea leans modern and precise, but the wood bench warms it up. Grid tiles catch light in miniature highlights so the room looks bright in photos, and the uniformity simplifies maintenance because grout lines align neatly. It’s family-friendly, easy to clean, and surprisingly timeless. Budget? Use a simple 2×2 porcelain square. Darker version? Try pale gray tile with white grout for subtle contrast.
Lighting should be even. A diffused overhead fixture and a simple LED mirror keep lines crisp. The bench becomes your texture anchor—toss a waffle towel over the corner and you’ve added softness without clutter.
Budget Breakdown:
- Micro-grid tile (floor or feature wall): $250–$700
- Grout and leveling system: $80–$180
- Wall hooks (set of four, solid metal or wood): $60–$160
- Wood bench (teak or oak, moisture-safe): $150–$450
- LED mirror or simple mirror + light: $150–$500
Total Estimated Cost: $690 – $1,990
Best For: Tiny baths and powder rooms, minimalists who still want pattern, and busy households that need durable finishes.
Key Design Elements:
- Main materials: porcelain micro-tile, wood bench, matte fixtures
- Color palette: white, soft gray, blonde wood, black or chrome accents
- Lighting strategy: even diffusion; consider backlit mirror
- Furniture silhouettes: compact bench, straight-lined hooks
- Texture layers: waffle towels, matte ceramic tray, soft bath mat
- Accent details: uniform bottles, one framed line drawing
How To Recreate This Look:
- Pick one surface for the grid: floor, vanity wall, or shower wall—keep the rest plain.
- Use white or very light grout and align the grid with edges, notches, and corners.
- Bring in a warm wood bench opposite the grid to balance all the straight lines.
- Install a row of sturdy hooks at a consistent height for robes and towels.
- Style minimally: one art piece, matching towels, no extra patterns.
Why This Looks Expensive: Consistent grout lines and aligned edges make budget tile read architectural. The wood bench adds a single, high-quality material note that suggests custom design choices rather than a tile sale bin.
Watch Out: Don’t mix too many metals here. One metal for fixtures and hook hardware keeps the grid from feeling busy.
Pro Styling Tip: For photos, angle the camera low to capture grid lines marching into the distance—instant depth and a larger-feeling floor.
At this point you might be thinking: I love the calm, but I need personality. Next up, a color-forward Scandi look that still feels like daylight.
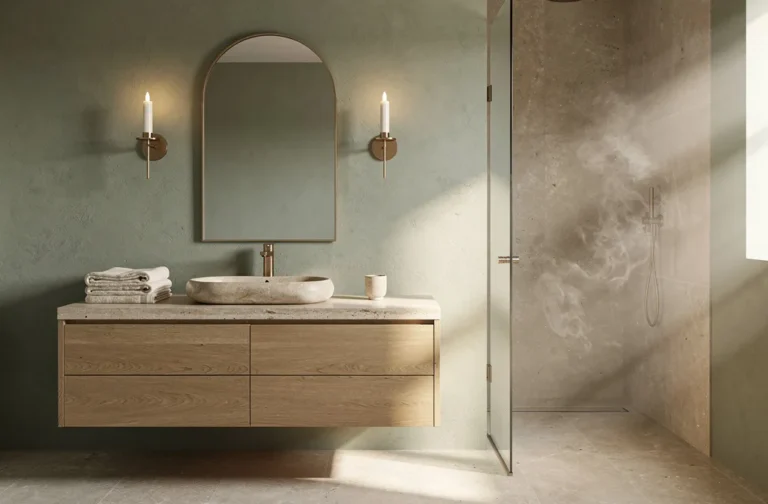
6. Misty Sage and Sand: Color-Washed Walls With Natural Stone Sink
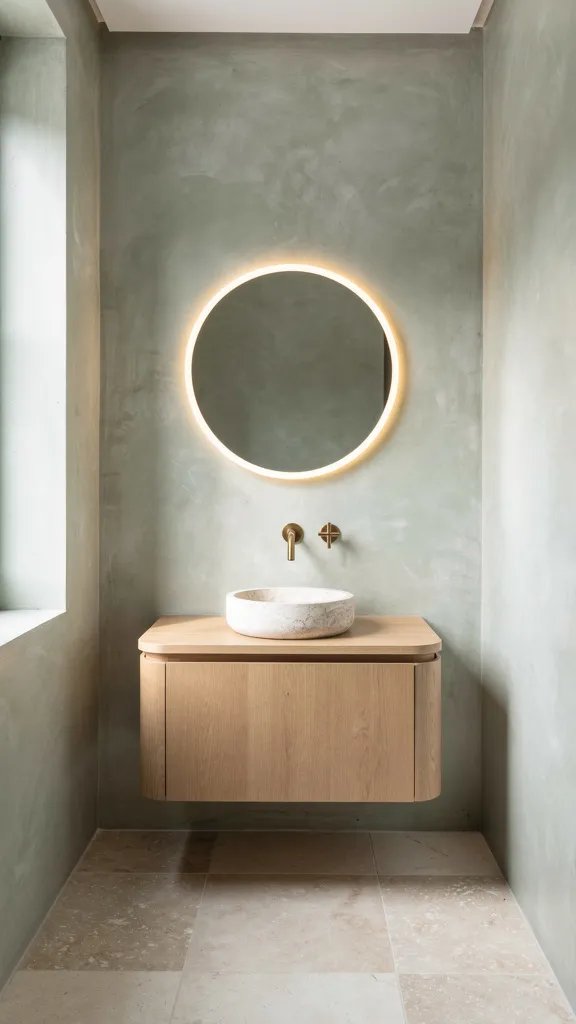
You want color, but every swatch looks too bold under your bathroom bulbs. A misty sage wash—think gray-green softened with white—gives Scandinavian bathrooms a nature-forward hush. Pair it with a small, honed natural stone sink (or a stone-look vessel) and sand-toned towels for a palette that feels like morning fog and beach grass.
This approach works because you’re still chasing light. The sage holds warmth without turning yellow, and the honed stone absorbs glare. Together they create luminous instead of shiny. Photographing this setup delivers a subtle gradient where light hits the wall and deepens toward corners—soft, cinematic, never flat. It helps resale too: buyers see “spa” not “trend color.”
Variations keep it flexible: renter-friendly washable paint in a calm sage; a console sink with stone-look top rather than a full stone basin; darker version with a deeper olive and brushed brass. Small-space tweak? Half-paint the lower wall in sage and keep the upper in warm white to lighten the room’s top half.
Budget Breakdown:
- Washable interior paint (sage): $60–$120
- Honed stone sink or vessel: $250–$1,000
- Simple wall-mounted faucet: $180–$500
- Sand-toned towels and bath mat: $80–$200
- Art print or photo in natural wood frame: $60–$180
Total Estimated Cost: $630 – $2,000
Best For: Color-curious homeowners who want serenity, not saturation; bathrooms with some natural light; spaces that feel stark in all-white.
Key Design Elements:
- Main materials: honed stone, cotton-linen textiles, low-sheen paint
- Color palette: misty sage, sand, warm white, softened metal
- Lighting strategy: one diffused ceiling light plus a single sconce with frosted shade
- Furniture silhouettes: slim console or wall-mounted vanity
- Texture layers: honed stone, woven towels, raw-edge ceramic
- Accent details: sea grass basket, small driftwood or branch, soft-brass hardware
Why This Feels Designer: High-end bathrooms lean into restraint, not brights. The honed finish and muted green mimic natural landscapes, which humans instinctively read as calming and considered.
How To Recreate This Look:
- Test sage samples in morning and evening light; choose the one that stays gray-green, not mint.
- Paint walls in eggshell or matte; keep trim and ceiling warm white in the same family.
- Install a honed stone sink or a stone-look vessel on a simple console.
- Add one frosted-glass sconce; switch bulbs to 2700–3000K.
- Style with sand-colored towels and a single beachy accessory—no seashells, just texture.
The Most Common Mistake: Picking a glossy stone sink. It reflects hotspots and makes the wall color look off. Stick to honed or matte.
Pro Styling Tip: Shoot with the sconce dimmed slightly so the sage reads velvety; a too-bright sconce can bleach the color on camera.
Quick mindset check: you don’t need maximal effort to get a fresh, Scandinavian bathroom glow. Choose one material story—wood, stone, or a single calm color—and let that lead. Everything else becomes support.
7. Light-Washed Ceiling, Skylight Illusion, and Shelf-Ladder Storage
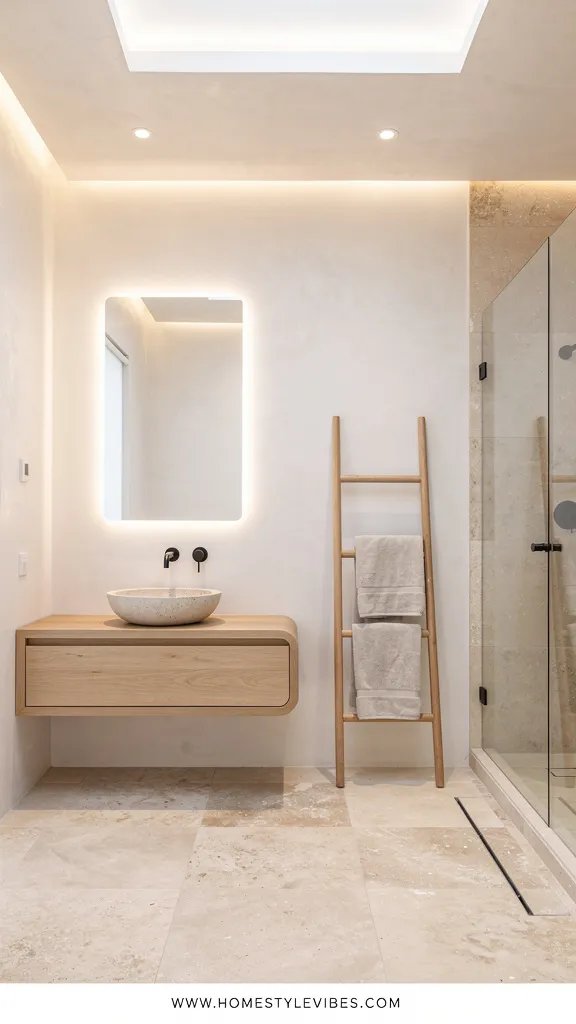
Low ceilings make bathrooms feel heavy. You repaint and still feel like you’re showering in a box. The trick isn’t just lighter walls; it’s orchestrating the top third of the room. This Scandinavian bathroom idea uses a bright, light-washed ceiling color, a faux-skylight effect with hidden LED cove lighting, and a slender shelf-ladder for vertical storage. The result feels taller, brighter, and incredibly photogenic.
Here’s why it works: lifting the eye with a lighter, slightly reflective ceiling finish increases perceived height, while concealed LEDs create the illusion of daylight spilling from above. A slim ladder shelf hugs the wall, offering towels and a plant without heavy cabinetry. In photos, you get that glow at the crown of the room and a ladder that reads as sculptural, not cluttered.
In real life this is renter-friendly (use a plug-in LED strip tucked into a perimeter molding) and budget-friendly if you keep your walls simple. Darker version? Choose a barely-there mushroom on the walls and a bright white ceiling for contrast. Small-space version? Go for a half-ladder or a wall-mounted peg ladder to keep the floor clear.
Budget Breakdown:
- Ceiling paint (bright, warm white, satin): $40–$90
- LED strip and cove trim or molding: $120–$380
- Shelf-ladder (oak or painted): $120–$350
- Plug-in dimmer and cord management: $30–$60
- Accessories (matching baskets, trailing plant): $50–$120
Total Estimated Cost: $360 – $1,000
Best For: Low-ceiling bathrooms, rentals, and anyone craving “daylight” vibes in an interior room.
Key Design Elements:
- Main materials: painted ceiling, LED cove light, slim wood ladder
- Color palette: bright ceiling white, warm neutral walls, blonde wood
- Lighting strategy: concealed perimeter LEDs on a dimmer, plus existing task lights
- Furniture silhouettes: slender ladder, narrow baskets
- Texture layers: woven baskets, soft towels, trailing greenery
- Accent details: small ceramic tray, framed print high on the wall
Why This Looks Expensive: Indirect light equals instant luxury. The faux-skylight effect mimics architectural upgrades without opening the roof, and the clean ladder silhouette reads custom when styled lightly.
How To Recreate This Look:
- Paint the ceiling a bright, warm white in satin; keep walls a shade deeper for gentle contrast.
- Install simple cove molding around the perimeter and hide a warm LED strip inside, pointing upward.
- Add a plug-in dimmer so you can adjust the glow from morning bright to evening soft.
- Bring in a slim shelf-ladder; use the top rungs for towels and lower shelf for a plant.
- Style sparingly: two baskets, one plant, a single high-placed frame to draw the eye up.
One Thing To Avoid: Don’t use cool-blue LEDs. They make skin tones and wood look sallow. Aim for 2700–3000K warm white strips labeled “high CRI.”
Pro Styling Tip: Turn off other lights for one photo and let only the cove glow—your ceiling will look taller and the image will feel like early morning.
Mini confession: I once installed a cove light and forgot cord management. That dangling white cord? It photobombed every single shot until I tucked it into paintable raceways. Little details carry the whole vibe.
Quick Checklist
- Soft, warm white paint that doesn’t go blue at night
- Floating vanity to create shadow lines and floor visibility
- Linen-textured shower curtain hung high
- Large-format porcelain or stone-look slabs with minimal grout
- Fluted panel accent behind a round mirror
- Dimmable sconces at face level
- Hidden storage niche with push-latch door
- Honed stone sink or vessel for glare-free texture
- Micro-grid tile in a single feature area
- Consistent metal finish across fixtures
- Wood bench or ladder for warmth and vertical interest
- Concealed LED cove lighting for a faux-skylight effect
- Sand-toned towels and a neutral bath mat
- Single leafy branch or trailing plant for life
- One tray, one bowl, and uniform dispensers for calm counters
Frequently Asked Questions
How can I get a bright Scandinavian bathroom look on a small budget?
Pick one high-impact swap: paint walls a warm white, add a linen-textured curtain, and switch to warm LED bulbs. Then choose either a floating vanity or a round mirror with a single sconce. Limiting upgrades to one wall keeps costs down and still reads polished.
My bathroom has no natural light—can I still get that airy feel?
Yes. Use indirect lighting like LED cove strips near the ceiling, warm-white bulbs with high CRI, and matte finishes that diffuse rather than reflect. Keep surfaces light, add one natural wood element, and avoid dark floors that absorb what little light you create.
I rent—what’s realistic without drilling everywhere?
Use a tension rod with a linen curtain, a plug-in sconce or backlit mirror, peel-and-stick fluted panels behind the vanity, and a ladder shelf for storage. Choose accessories in one metal finish so the room feels cohesive even with the landlord’s fixtures.
Will warm wood hold up in a humid bathroom?
Yes if you seal it. Choose sealed oak or teak, wipe standing water, and run ventilation. For low-maintenance, use wood-look laminates or PVC fluted panels painted to match your palette.
What’s the most common mistake when aiming for a Scandinavian bathroom look?
Mixing too many finishes and colors. Keep a tight palette: one wood tone, one metal, and two neutrals max. The minute you reduce visual noise, the room feels calmer and brighter.
Your Next Step
Pick the idea that fixes your biggest frustration and start there. If your shower steals light, go for large-format tile and a linen curtain. If clutter trips you up every morning, install that stone ledge and hidden niche. One thoughtful change beats five scattered ones.
The truth is, luxury in a Scandinavian bathroom comes from texture, lighting, and restraint. It’s the soft oak against cloud-white walls, the honed stone that absorbs glare, the cove light that pretends you cut a new window. Get those right, and the rest becomes easy.
You’ve got this. Choose one material story, swap your bulbs to warm-white, and give yourself a Saturday with a drop cloth. By Sunday night, you’ll step into a bathroom that breathes—calm, bright, and so quietly beautiful you’ll wonder why you waited.

About the Author

Krisztina P.Rendes, Founder of Home Style Vibes
Founder of Home Style Vibes
Krisztina Puskásné Rendes created Home Style Vibes as a cozy-modern lifestyle space where homemaking meets inspiration. Her goal is to help women create beautiful, organized, and peaceful homes they truly love — without overwhelm. You’ll find here heart-driven content on home decor, cleaning tips, easy family recipes, organization and decluttering, DIY home projects, plants, and seasonal ideas — all designed to bring more calm, comfort, and style into everyday life.