6 Walk-in Shower Bathroom Ideas for a Modern, Clean Look Now
You want a walk-in shower that feels fresh, light, and hotel-spa clean. You hate the clutter, the water spots that never seem to go away, and that awkward corner that always looks… unfinished. Picture warm morning light bouncing off glazed tile, streamlined fixtures that don’t scream for attention, and zero visual noise. These six walk-in shower bathroom ideas solve the exact pain points that make bathrooms feel chaotic—poor layout, flat lighting, too many busy materials—and turn them into a modern, photogenic space you’ll actually love walking into daily. We’re talking achievable upgrades (several under $4,000) and weekend-level swaps that make the room look finished and serene.
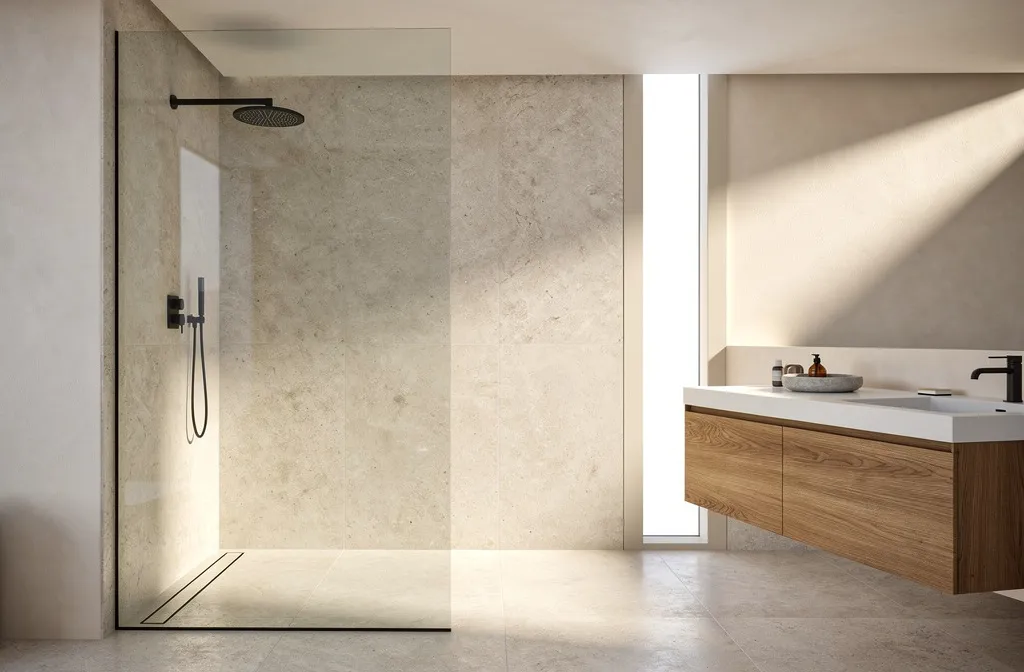
Every idea below gives you a different vibe—Japandi calm, modern Mediterranean warmth, minimalist luxe, and more—so you can pick the one that fits your home and your life. These are highly Instagrammable, Pinterest-ready bathrooms that also earn their keep in real life. If you crave fewer decisions and more clean lines, you’re in the right place.
1. Streamlined Spa: Continuous Tile, Low-Iron Glass, and a Quiet Palette
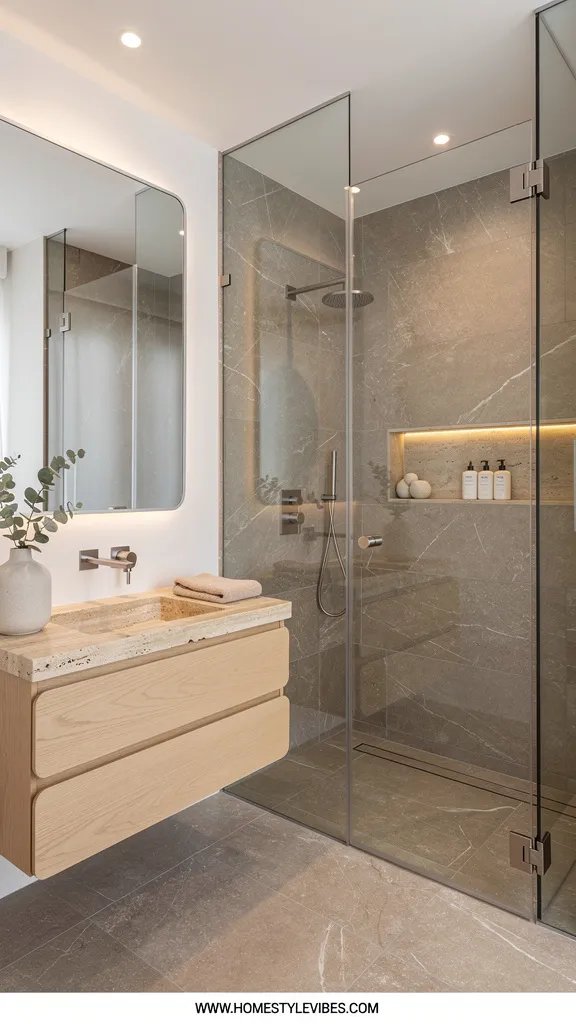
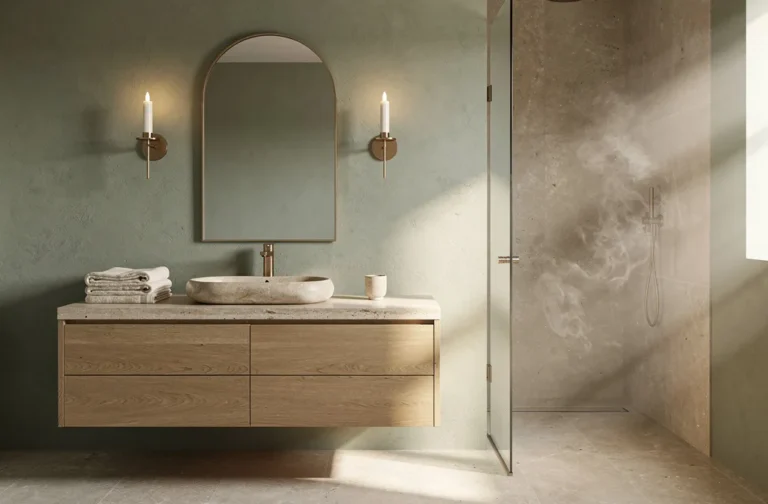
We’ve all been there: you love the idea of a “spa bath,” but yours feels loud—too many grout lines, choppy color changes, and shower glass that throws a green tint over everything. This design dials down the visual noise with continuous tile and ultra-clear glass so the space reads calm and modern from the second you open the door. The mood is hotel-spa meets Scandinavian calm: muted neutrals, soft light, and a sense of order.
It works because it reduces contrast in the right places and adds it selectively where it photographs best—think a single ribbed stool or a black shower trim line for definition. Continuous tile on floor and walls visually widens the room, and low-iron glass eliminates that murky green edge you see in cheaper panels. Lighting matters here: wash the walls with a dimmable LED cove or hidden strip above the shower niche so the tile glows instead of glares. This concept is brilliant for small spaces, easy to clean, and resale-friendly because it’s timeless and uncluttered.
Materials do the heavy lifting: large-format porcelain or a soft vein-cut limestone-look tile, matte white walls, quiet brushed nickel or light champagne fixtures, and a fluted stone bench or stool for subtle texture. It photographs beautifully because there’s depth without busyness: elongated shadows from ribbed elements, soft reflectivity from the glazed tile, and a gentle gradient of whites and taupes.
Variations you can try: a budget-friendly version uses high-quality ceramic in 12×24 instead of pricey stone, with standard clear tempered glass; a small-space version skips the door entirely and uses a fixed panel; a darker reading substitutes warm gray tile with a single oak accent shelf to keep it from feeling cold.
Budget Breakdown:
- Large-format porcelain tile: $3–$10/sq.ft.
- Low-iron shower glass panel/door: $700–$2,000
- Brushed nickel shower system: $250–$900
- LED cove or strip lighting with dimmer: $120–$450
- Fluted stool or bench (stone/resin/wood): $150–$600
- Minimalist niche trim kit: $50–$200
Total Estimated Cost: $1,800 – $6,000
Best For: Compact to mid-size bathrooms that need visual calm, homeowners who want a truly easy-clean setup, and anyone eyeing broad resale appeal.
Key Design Elements:
- Main materials: Large-format porcelain, low-iron glass, brushed nickel
- Color palette: Soft whites, taupe, warm gray
- Lighting strategy: Hidden LED wall wash plus warm backlit mirror
- Furniture silhouettes: Low, cylindrical bench; thin-framed glass
- Texture layers: Subtle ribbing, lightly variegated tile glaze
- Accent details: Minimalist niche trim, eucalyptus sprig, small linen bundle
How To Recreate This Look:
- Start with continuous tile from floor into shower walls in the same tone to reduce visual breaks.
- Add a low-iron glass panel or door with minimal hardware to keep the sightlines clean.
- Layer warm LED strip lighting above the shower niche or ceiling cove to soften edges.
- Install a brushed nickel shower system with a slim rain head and handheld for function.
- Style with a fluted stool, one soft towel stack, and a small plant in a neutral pot.
Why This Looks Expensive: The continuity tricks the eye into thinking the room is larger, and the low-iron glass reads crystal-clear—no green tint. One tonal family, layered in textures, signals restraint and confidence.
Watch Out: Don’t choose a tile with heavy pattern variation across the entire space; it can create visual chaos. Keep the loud moment tiny—one ribbed element is enough.
Pro Styling Tip: For photos, slightly dim the overheads and let the wall-wash lighting carry the scene; it deepens shadows and makes the tile glow.
If you love calm and clarity, keep scrolling—the next one leans tactile, warm, and sunlight-kissed.
2. Modern Mediterranean Rinse: Tadelakt Texture and Warm Brass
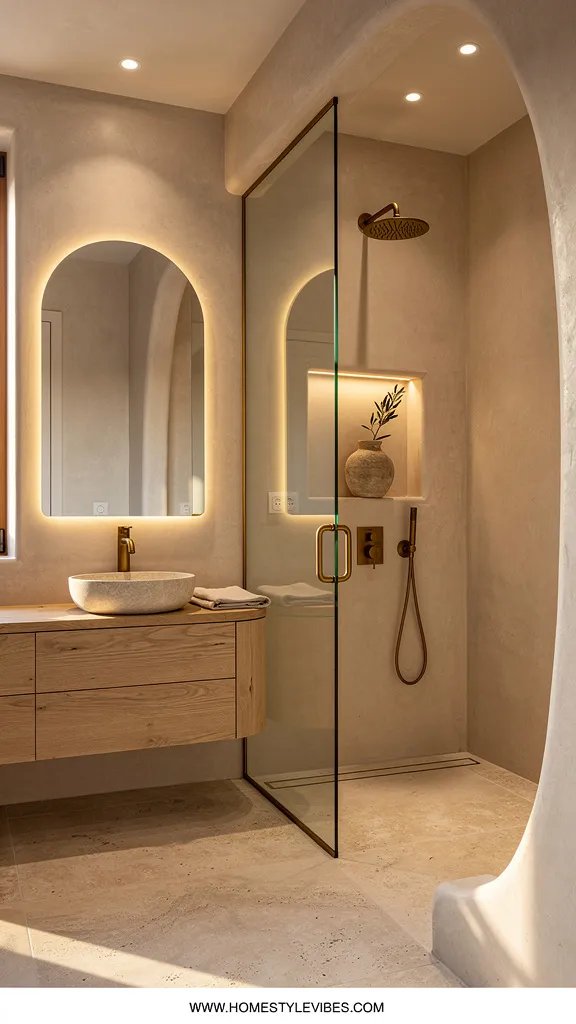
It’s that one corner that always feels off: you added pretty tile, but the room still reads flat and cold. You’ve tried rugs, you’ve tried plants, but it never feels warm. This design solves that with texture you can feel—tadelakt or microcement walls in the walk-in shower, soft curves, and warm brass that patinas in the best possible way. The mood lands somewhere between Greek-island bathhouse and modern farmhouse sophistication.
Why it works in real homes: curved plaster-like walls and a gentle radius at the shower entry soften hard lines without needing massive square footage. The microcement or tadelakt finish is continuous and waterproof when applied correctly, which means fewer grout lines and easier cleaning. Lighting glows off the surface rather than bouncing harshly—use a warm 2700K sconce pair and a recessed wet-rated downlight inside the shower. Families love the non-slick texture; resale appreciates the craftsmanship vibe.
Materials dominate here: troweled plaster finish in a warm almond or pale sand, honed travertine shower floor, and unlacquered brass fixtures that age gracefully. It photographs beautifully because of the matte-to-matte transitions—plaster to stone to linen—plus a gentle sparkle from brushed brass. Add a shallow arch niche for soaps and a lidded olive jar for storage to keep clutter low.
Variations: budget-friendly uses microcement over existing tile; renter-friendly swaps include a peel-and-stick limewash-effect wallpaper outside the wet zone and brushed brass hardware caps; a darker version uses smoky taupe walls and aged bronze fixtures for cocoon energy.
Key Design Elements:
- Main materials: Tadelakt/microcement, honed travertine, unlacquered brass
- Color palette: Almond, sand, honey, soft white
- Lighting strategy: Warm sconces by the mirror + one wet-rated recessed in shower
- Furniture silhouettes: Rounded stool, arched niche, pill-shaped mirror
- Texture layers: Plaster, honed stone, linen, woven hamper
- Accent details: Olive jar, Turkish towel, sprig of rosemary
Budget Breakdown:
- Microcement/tadelakt materials + pro application: $1,500–$4,000 (area dependent)
- Honed travertine mosaic floor: $8–$20/sq.ft.
- Unlacquered brass shower set: $450–$1,200
- Arched mirror and sconces: $250–$900
- Rounded stool and woven hamper: $120–$450
Total Estimated Cost: $2,800 – $6,500
Best For: Medium baths, lovers of warm minimalism, anyone who wants fewer grout lines and rich texture.
How To Recreate This Look:
- Start with a microcement or tadelakt finish in the shower zone and carry the color outside for continuity.
- Add honed stone on the floor for grip and a tonal shift underfoot.
- Layer unlacquered brass fixtures and a pill-shaped mirror with warm sconces.
- Install a simple arched niche and a small rounded stool for bathing essentials.
- Style with linen towels, a woven hamper, and one earthy vessel.
Why This Feels Designer: Curves and texture signal custom work. Brass that actually ages suggests long-term quality, not a quick refresh.
One Thing To Avoid: High-gloss paint or sealer over the plaster look—it kills the soft diffusion and makes water spots hyper-visible.
Pro Styling Tip: Photograph at a slight angle to catch the side-light grazing the plaster; it creates soft, editorial shadows that make the finish sing.
Quick breather. Remember, this isn’t about recreating a showroom. It’s about building a bathroom you’ll actually enjoy at 6 a.m. when you’re half-awake and the tile is cool underfoot. If one idea is pulling at you more than the others, that’s your starting point.
3. Monochrome Graphite: Matte Black Tile with Light-Bounce Niches
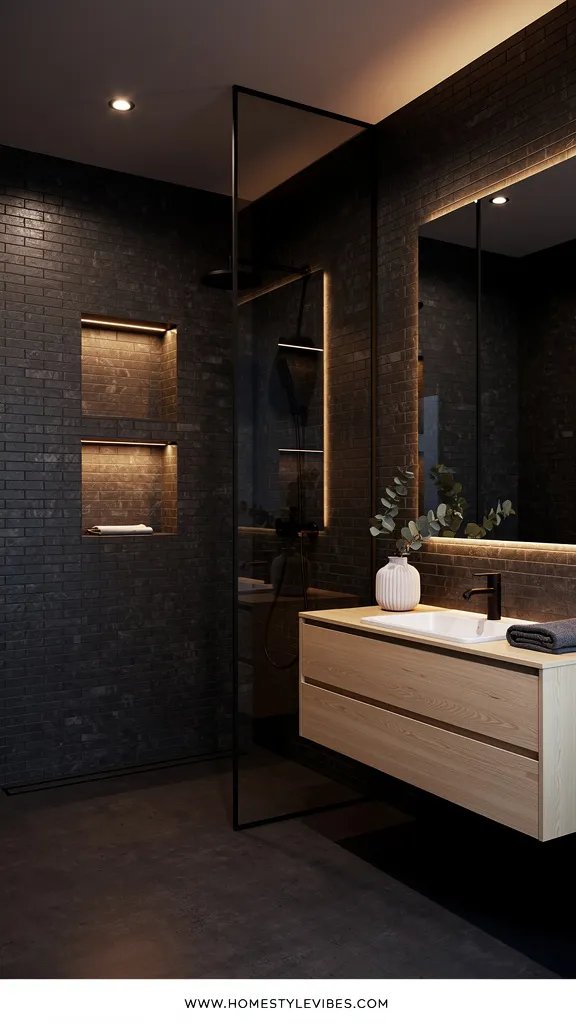
You want drama, but you’re worried it’ll read “gloomy cave.” Dark bathrooms can go wrong fast: uneven lighting, shiny black that shows every water spot, and fixtures that disappear. This design leans into depth using matte graphite tile with strategic light-bounce niches and a pale oak vanity to keep contrast where you need it. The vibe is urban, tailored, and quietly moody—more boutique hotel than bachelor pad.
Why it works: matte black reduces glare and smudging, while smaller-format stacked tile adds a subtle grid that looks crisp in photos. The trick is layered lighting—think one overhead wet-rated pinspot for sparkle, linear LED under the niche lip, and a soft backlit mirror. That balance makes shadows look luxurious instead of heavy. It’s perfect for medium-to-large spaces or windowless baths where you can control light; also solid for resale in urban markets where edgy reads premium.
Materials set the tone: matte black or charcoal porcelain (2×8 or 3×12 stacked), satin black fixtures with a sculptural profile, pale white oak vanity, and a single brushed steel accent shelf for reflectivity. It photographs beautifully thanks to high contrast: black tile, crisp white ceiling, and a warm wood anchor. Add a single glossy element—like a lacquered tray—to catch highlights.
Variations: budget-friendly uses a charcoal mosaic floor with white walls and one black shower feature wall; small-space version sticks to black in the shower only and keeps the rest pale; a warmer version uses deep espresso tile and aged brass fixtures.
Budget Breakdown:
- Matte charcoal/black porcelain tile: $4–$12/sq.ft.
- Satin black shower fixtures: $300–$1,100
- White oak vanity (prefab): $600–$1,800
- LED niche lighting + transformer: $120–$350
- Backlit mirror: $200–$800
- Fixed glass panel with black channel: $450–$1,100
Total Estimated Cost: $2,200 – $5,800
Best For: Windowless or evening-shower households, design lovers who want strong lines and a moody feel.
Key Design Elements:
- Main materials: Matte black porcelain, white oak, satin black metal
- Color palette: Graphite, ebony, pale oak, crisp white
- Lighting strategy: Pinspot overhead + linear LED in niche + backlit mirror
- Furniture silhouettes: Minimal slab-front vanity, slim shelf, thin glass panel
- Texture layers: Matte tile, soft-grain wood, a single polished accent
- Accent details: Black channel glass, steel shelf, dark-stem greens
How To Recreate This Look:
- Start with a matte charcoal or black stacked tile in the shower; keep the ceiling white for lift.
- Add a white oak vanity to warm the palette and break the darkness.
- Layer a wet-rated pinspot over the shower and linear LED in the niche for glow.
- Install satin black fixtures with a strong silhouette for presence.
- Style with one glossy tray and a single green cutting for contrast.
Why This Reads High-End: Controlled contrast feels intentional. The mix of matte and selective gloss introduces dimension without clutter.
The Most Common Mistake: Using glossy black everywhere. It shows streaks, makes shadows harsh, and photographs like a mirror. Mix finishes.
Pro Styling Tip: Wipe the tile dry before shooting; matte black loves a clean surface and reads velvety on camera.
Still curious? The next idea is the opposite of moody—sunny, efficient, and tiny-bath friendly.
4. Light-Lift Layout: Doorless Walk-In with Channel Drain and Ledge Shelf
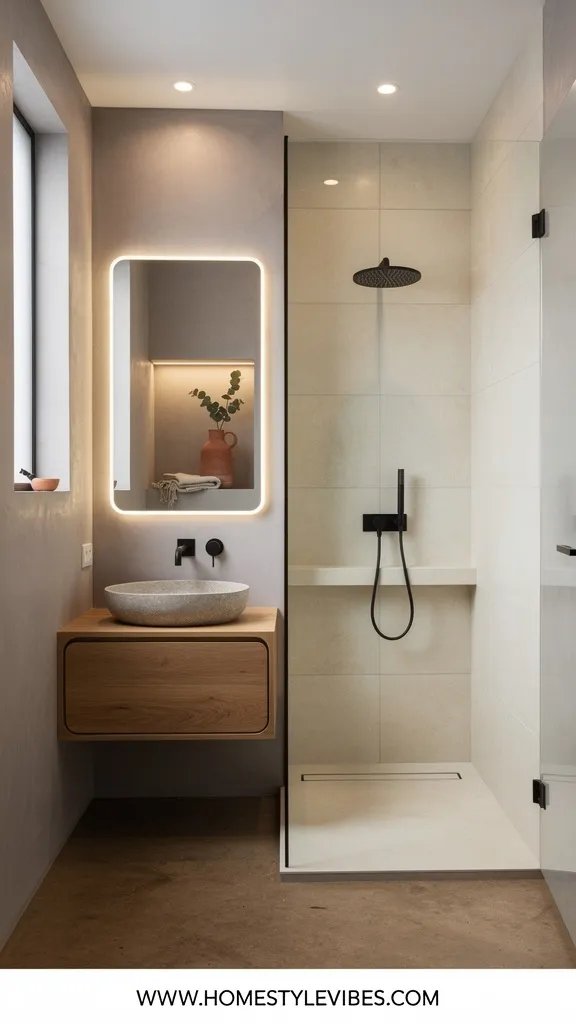
You crave a clean, open shower but your bathroom is small and the door swing steals precious inches. You’ve tried a frameless door and it still fogs and crowds the room. This design removes the door entirely and uses a fixed glass panel with a channel drain to keep water where it belongs. The mood is light, airy, and easy-breezy—like a studio apartment that finally figured out its flow.
Here’s why it works in real homes: a curbless entry (or low curb) plus a linear channel drain at the far wall sets the water path. A built-in ledge shelf (5–7 inches deep) runs the shower length at waist height, replacing bulky niches and acting as a visual line that lengthens the room. Lighting hits under the ledge for a floating effect; add a high-CRI ceiling light near the vanity so skin tones look human, not zombie. Great for small baths, aging-in-place, and families with kids who treat bath time like splash mountain.
Materials stay friendly: light porcelain in 24×24 or 24×48 for fewer grout lines, stainless channel drain, clear glass panel, and a quartz or porcelain ledge top. It photographs well because the ledge introduces a strong linear moment, which gives your eye a resting line in a tiny space. Also, less hardware equals fewer visual breaks.
Variations include a budget version with a standard center drain but repositioned shower head to minimize spray; a renter-friendly “fake ledge” using a freestanding slim bench just outside the wet zone; a coastal version with pale sand tile and brushed stainless.
Budget Breakdown:
- 24×24 or 24×48 porcelain tile: $3–$9/sq.ft.
- Linear channel drain + waterproofing kit: $300–$900
- Fixed glass panel: $350–$900
- Shower fixtures in stainless or chrome: $200–$750
- Quartz/porcelain ledge top fabrication: $200–$600
- High-CRI ceiling light + dimmer: $150–$400
Total Estimated Cost: $1,800 – $4,500
Best For: Small bathrooms, speed-cleaners, and people who want maximum openness and minimal hardware.
How To Recreate This Look:
- Start by planning slope to a linear drain at the far wall; confirm with a pro for waterproofing details.
- Add a continuous 5–7 inch ledge at waist height inside the shower for products and visual length.
- Layer light-toned large-format tile for fewer grout lines and a brighter read.
- Install a fixed glass panel positioned to block splash without enclosing the space.
- Style with two matching pump bottles and a small teak tray—keep it minimal.
Why This Looks Intentional: The ledge and drain work together like a tailored suit. Every line has a purpose, and the room reads crisp because of it.
Don’t Do This: Skimp on slope calculations. A gorgeous doorless shower with poor drainage will haunt you every single day.
Pro Styling Tip: For photos, place two identical bottles at thirds along the ledge—your eye loves that rhythm, and the shot feels balanced.
Perspective shift: start with function. If the layout flows and the lighting flatters, almost any material palette will look expensive. Texture and color are the jewelry; drainage and light are the foundation.
5. Wood-and-Stone Serenity: Japandi Shower with Slatted Bench and Soft Gray Veins
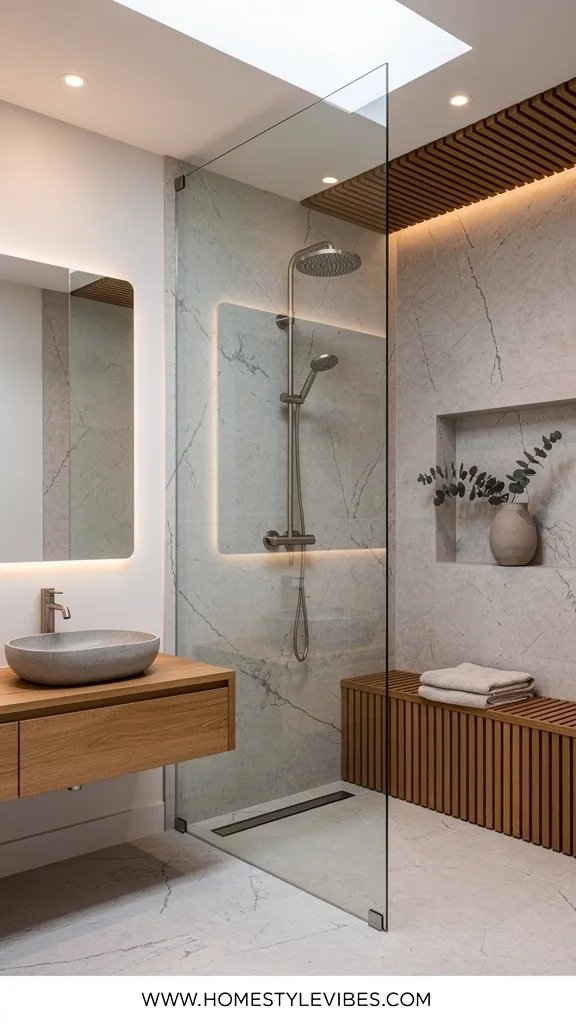
You love the idea of wood in the bath, but you’re scared of upkeep and water marks. Maybe you added a wood mat once and it went orangey and weird. This design uses moisture-smart materials—thermally treated wood, teak, or composite slats—and pairs them with soft-veined porcelain that looks like honed marble without the anxiety. The mood is Zen hotel: whisper-quiet, natural, and restorative.
It works because it balances warmth and coolness: warm wood slats echo in a bench or ceiling accent; cool gray porcelain and brushed stainless anchor the palette. Lighting is calm and indirect: a strip under the bench for a floating effect and a ceiling cove with 3000K warmth. For real homes, this is easy maintenance—sealed teak or thermowood ages handsomely, and porcelain shrugs off stains. Resale-minded? Japandi reads highly curated and suits a wide range of interiors.
In photos, the slatted pattern creates directional shadows that feel graphic without overwhelming. A single branch in a narrow vase on the vanity repeats those vertical lines, pulling the eye across the space in a subtle way. Texture is the star: silky tile, satiny wood grain, and a soft cotton waffle towel waiting on the bench.
Variations: budget version uses a teak shower mat and a simple wall-mount shelf instead of a built-in bench; small-space approach uses a fold-down slatted bench; a winter-cozy version switches to darker wood slats and a deeper gray tile for a cocoon vibe.
Budget Breakdown:
- Soft-veined porcelain (marble-look): $4–$14/sq.ft.
- Teak/thermowood bench or slats: $180–$900
- Brushed stainless or chrome fixtures: $250–$850
- LED strip for under-bench lighting: $80–$250
- Fixed panel or door: $350–$1,200
- Narrow vase + tray + towel set: $60–$200
Total Estimated Cost: $1,900 – $5,000
Best For: Anyone craving a calm, natural feel; condos or homes where moisture control matters; people who want spa energy without fussy stone care.
Key Design Elements:
- Main materials: Marble-look porcelain, teak/thermowood, brushed stainless
- Color palette: Soft gray, warm honey wood, crisp white
- Lighting strategy: Under-bench LED + ceiling cove in 3000K
- Furniture silhouettes: Slatted bench, thin-edge ledge, round vessel accents
- Texture layers: Silk-matte tile, oiled wood grain, waffle cotton
- Accent details: Narrow branch vase, stone soap dish, amber glass bottle
How To Recreate This Look:
- Start with a marble-look porcelain in a soft gray vein for walls and floor.
- Add a teak or thermowood slatted bench; if space is tight, use a fold-down version.
- Layer indirect lighting under the bench and a mellow ceiling cove.
- Install simple brushed fixtures and keep hardware lines minimal.
- Style with a narrow vase and one amber bottle—edit like a stylist, not a stockroom.
Why This Feels Designer: The controlled material count—stone, wood, metal—looks curated. The under-bench glow adds dimension that reads custom.
Watch Out: Don’t mix too many wood tones. If your vanity is oak, echo that tone in the bench; competing hues make the room look pieced together.
Pro Styling Tip: Angle the bench slightly in photos so the slat shadows rake across the floor—they’ll add quiet drama and depth.
Real talk: I once spent two weeks choosing a marble slab for a client, only to realize the issue wasn’t the stone—it was the icy overhead light flattening everything. We swapped bulbs to 3000K with a higher CRI and the “marble” suddenly looked twice the price. File that under: the secret isn’t materials—it’s lighting placement and temperature.
6. Minimalist Luxe: Fluted Stone Feature Wall and Hidden Storage
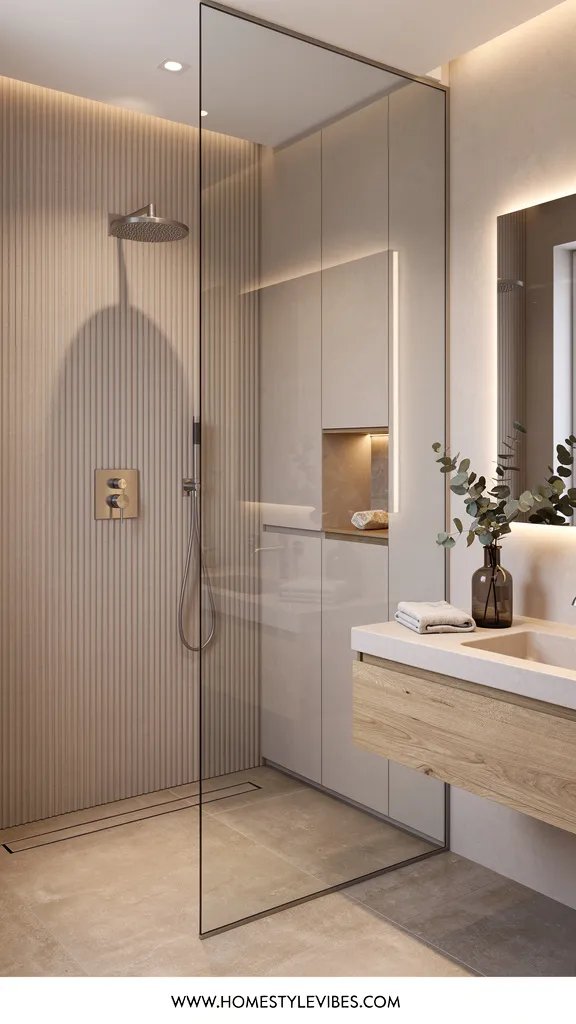
You’ve got good taste, but clutter ambushes you—razors on the sill, shampoo chaos, and too many mismatched bottles. You’ve tried baskets and trays, but it still looks messy. This design cheats the problem: a fluted stone or porcelain feature wall draws the eye, while hidden storage handles the rest. The mood is minimalist luxe—quiet, confident, and immaculate without feeling sterile.
Here’s why it works in everyday life: you keep the shower footprint open and dedicate one wall to vertical flutes that catch soft light. Next to it, a full-height cabinet with push-latch doors swallows everything. Inside the shower, a double-length niche with sliding stone-faced panels hides the daily lineup. Lighting is subtle—two recessed pinspots aimed to graze the fluted wall and a backlit shelf lip—so the textures play center stage. This is high on resale value because it reads custom and solution-oriented.
Materials matter: fluted porcelain or reeded stone slab as the feature, satin chrome or champagne brass fixtures, and slab-front cabinetry in a tone that matches the wall tile. It photographs beautifully because the flutes create gentle shadow play and a single hero texture. No visual clutter means the lines read crisp and editorial.
Variations: budget-friendly uses fluted MDF panels outside the wet zone and a smaller reeded-tile insert inside the shower; a renter version fakes the look with a removable slatted panel behind the vanity; a dramatic version uses deep walnut flutes outside the shower and warm brass hardware.
Budget Breakdown:
- Fluted porcelain/reeded stone: $12–$40/sq.ft. (stone higher)
- Shower fixtures (champagne brass or chrome): $350–$1,200
- Custom niche with sliding panels: $300–$1,000
- Full-height cabinet with push latches: $700–$2,200
- Grazing recessed lights + drivers: $200–$600
- Glass panel/door: $400–$1,200
Total Estimated Cost: $2,900 – $7,200
Best For: People who crave a clutter-free, magazine-clean bathroom; medium to large spaces where a feature wall can breathe.
Key Design Elements:
- Main materials: Fluted porcelain/stone, slab cabinetry, satin metal
- Color palette: Warm white, pale greige, champagne or chrome
- Lighting strategy: Grazing pinspots on flutes + backlit shelf lip
- Furniture silhouettes: Slab-front cabinets, thin glass panel, long linear niche
- Texture layers: Reeded/fluted feature, smooth slab tile, soft terry towels
- Accent details: Single sculptural vase, matching dispensers, hidden hooks
How To Recreate This Look:
- Start with a single fluted feature wall inside the shower or directly opposite.
- Add concealed storage: a full-height cabinet and a long niche with sliding panels.
- Layer grazing recessed lighting to create vertical shadow play on the flutes.
- Install satin-finish fixtures and a thin-framed glass panel to keep lines slim.
- Style with one sculptural object and uniform bottles; edit out anything extra.
Why This Looks Expensive: One hero texture plus hidden storage communicates restraint and intention. The grazed light reads like boutique retail design—quiet and precise.
One Thing To Avoid: Overusing flutes. Limit them to one surface; repeating the motif everywhere turns special into theme park.
Pro Styling Tip: For photos, aim light to skim the flutes from one side; it creates a gradient that makes the wall look deeper than it is.
Small confession: I once insisted on three different “special” materials in a single shower. It looked busy and, frankly, twitchy. Editing down to one feature changed everything. If you’ve been layering trend on trend and wondering why it still doesn’t feel calm, reduce your palette and let one texture lead.
Quick Checklist
- Choose one hero texture and support it with quiet surfaces
- Install dimmable, layered lighting with at least one indirect source
- Use low-iron glass for true whites and neutral tones
- Commit to a consistent metal finish across fixtures
- Add a ledge or double-length niche for functional, minimal storage
- Plan drainage early—linear or center, but with proper slope
- Pick large-format tile to reduce grout lines in small baths
- Consider a doorless fixed panel to open sightlines
- Treat wood surfaces seasonally if used in wet zones
- Style with uniform bottles and one sculptural accent
Frequently Asked Questions
How much should I budget for a modern walk-in shower if I keep the layout?
For a clean, modern look with quality materials, plan on $2,000–$6,000 if you’re not moving plumbing. That range covers tile, a fixed glass panel, new fixtures, lighting, and basic waterproofing. Custom features like tadelakt, fluted stone, or built-in cabinetry push it higher.
My bathroom is small. Will a walk-in shower make it feel cramped?
No—if you keep visual breaks to a minimum. Use the same floor tile into the shower, choose a fixed glass panel instead of a swinging door, and consider a ledge shelf that runs the length of the wall. Those moves make small rooms feel wider and calmer.
I rent. Are there renter-friendly versions of these ideas?
Yes. Try a teak mat, uniform refillable bottles, a tension rod shelf for products, and plug-in backlit mirrors for glow. Use peel-and-stick tile or limewash-effect wallpaper outside wet zones, and swap existing hardware for matching metal finishes you can reinstall later.
How do I keep dark showers from showing every water spot?
Go matte instead of glossy, use a squeegee habit (30 seconds after each shower), and install a water softener if your area runs hard. A small splash of warm light on a niche helps dark tile read velvety rather than streaky.
What’s the biggest design mistake with walk-in showers?
Ignoring slope and lighting. Poor drainage ruins daily life, and flat, cold lighting makes even expensive materials look cheap. Plan the drain early and layer warm, dimmable light so textures show up the way you imagined.
Wrap-Up: Your Clean, Modern Walk-In Starts With One Choice
Pick one idea that solves your biggest frustration—doorless layout for flow, fluted feature for focus, tadelakt for texture, or matte monochrome for drama. Start there. You don’t need every upgrade at once; you need the right sequence: layout and lighting first, then materials, then styling.
The truth is, luxury in a walk-in shower comes from texture you can actually feel, light that flatters skin and stone, and the restraint to stop at the right moment. When you edit your palette and give each surface a job, the room looks finished, calm, and quietly stunning.
You’ve got this. Choose your hero move, sketch the plan, and order the samples. That modern, clean look you’ve been saving on Pinterest? It’s a weekend away from feeling real, and you’ll notice it every single morning when the light hits just right—seriously.

About the Author

Krisztina P.Rendes, Founder of Home Style Vibes
Founder of Home Style Vibes
Krisztina Puskásné Rendes created Home Style Vibes as a cozy-modern lifestyle space where homemaking meets inspiration. Her goal is to help women create beautiful, organized, and peaceful homes they truly love — without overwhelm. You’ll find here heart-driven content on home decor, cleaning tips, easy family recipes, organization and decluttering, DIY home projects, plants, and seasonal ideas — all designed to bring more calm, comfort, and style into everyday life.