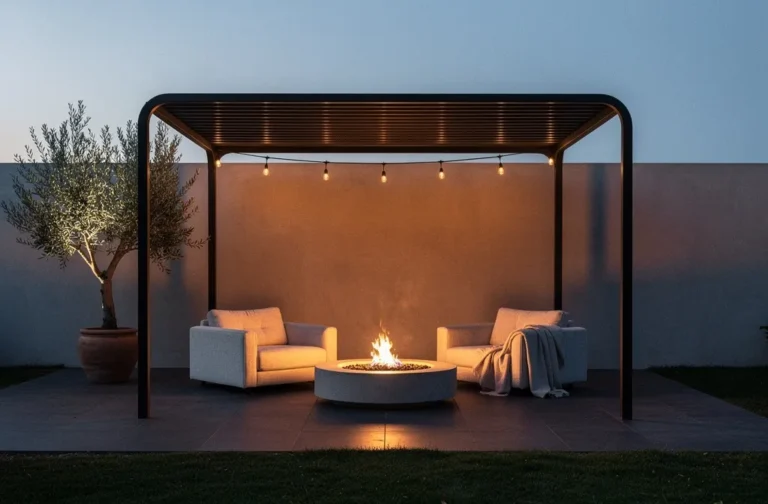
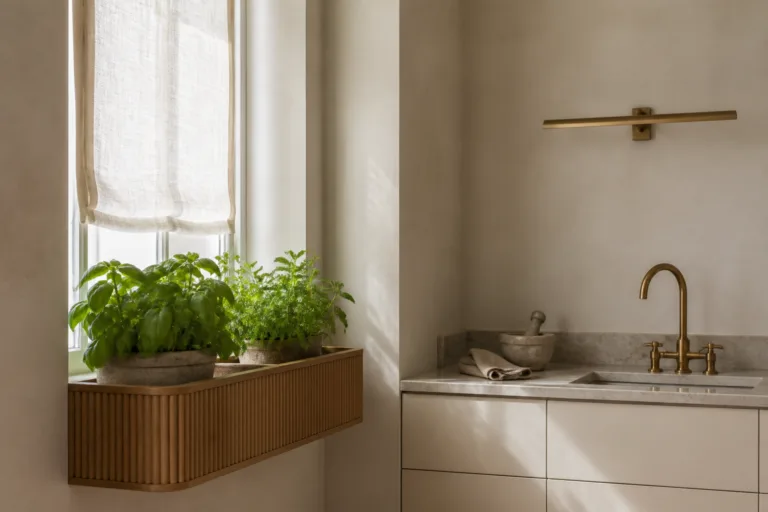
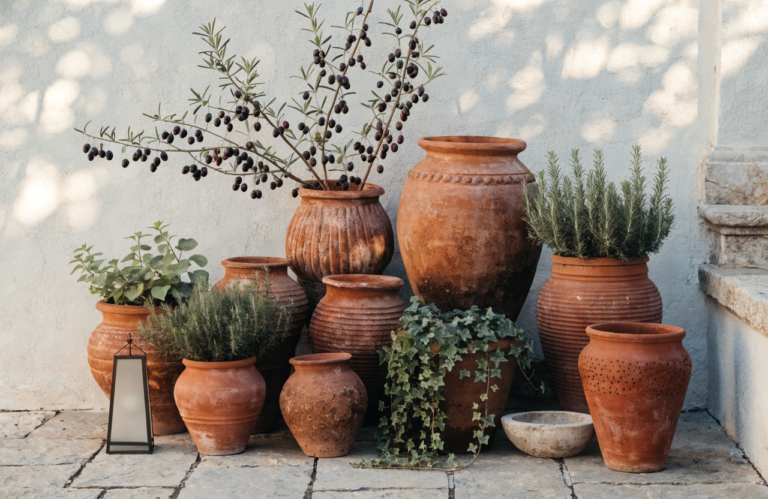
6 Home Garden Design Ideas For Small Backyards That Maximize Every Inch
You want a backyard that feels like a private retreat: twinkle lights, layered greenery, a spot for that first coffee where the steam curls into the morning sun. You hate the clutter, the awkward corners, and the way every chair scrape seems to echo off a fence that’s way too close. Picture this: crisp, dappled light across textured stone, pale limewashed planters, and smart vertical lines that pull your eye up instead of out. These 6 home garden design ideas for small backyards solve the “not enough space” problem with layouts and materials that feel luxe and photogenic, without blowing past a modest budget or your weekend bandwidth.
In two weekends and under $2,500 each (with options to go much lower), you’ll reshape how your small yard works and looks. Expect layered textures, smart lighting, clean storage, and strong silhouettes that read beautifully on camera and, more importantly, in real life. If you love mood-lifting outdoor spaces that actually function for weeknight grilling, solo reading sessions, and low-stress hosting, you’re in the right spot. These ideas are Pinterest-worthy and sanity-saving.
1. Slatted Sanctuary Courtyard with Climbing Canopy
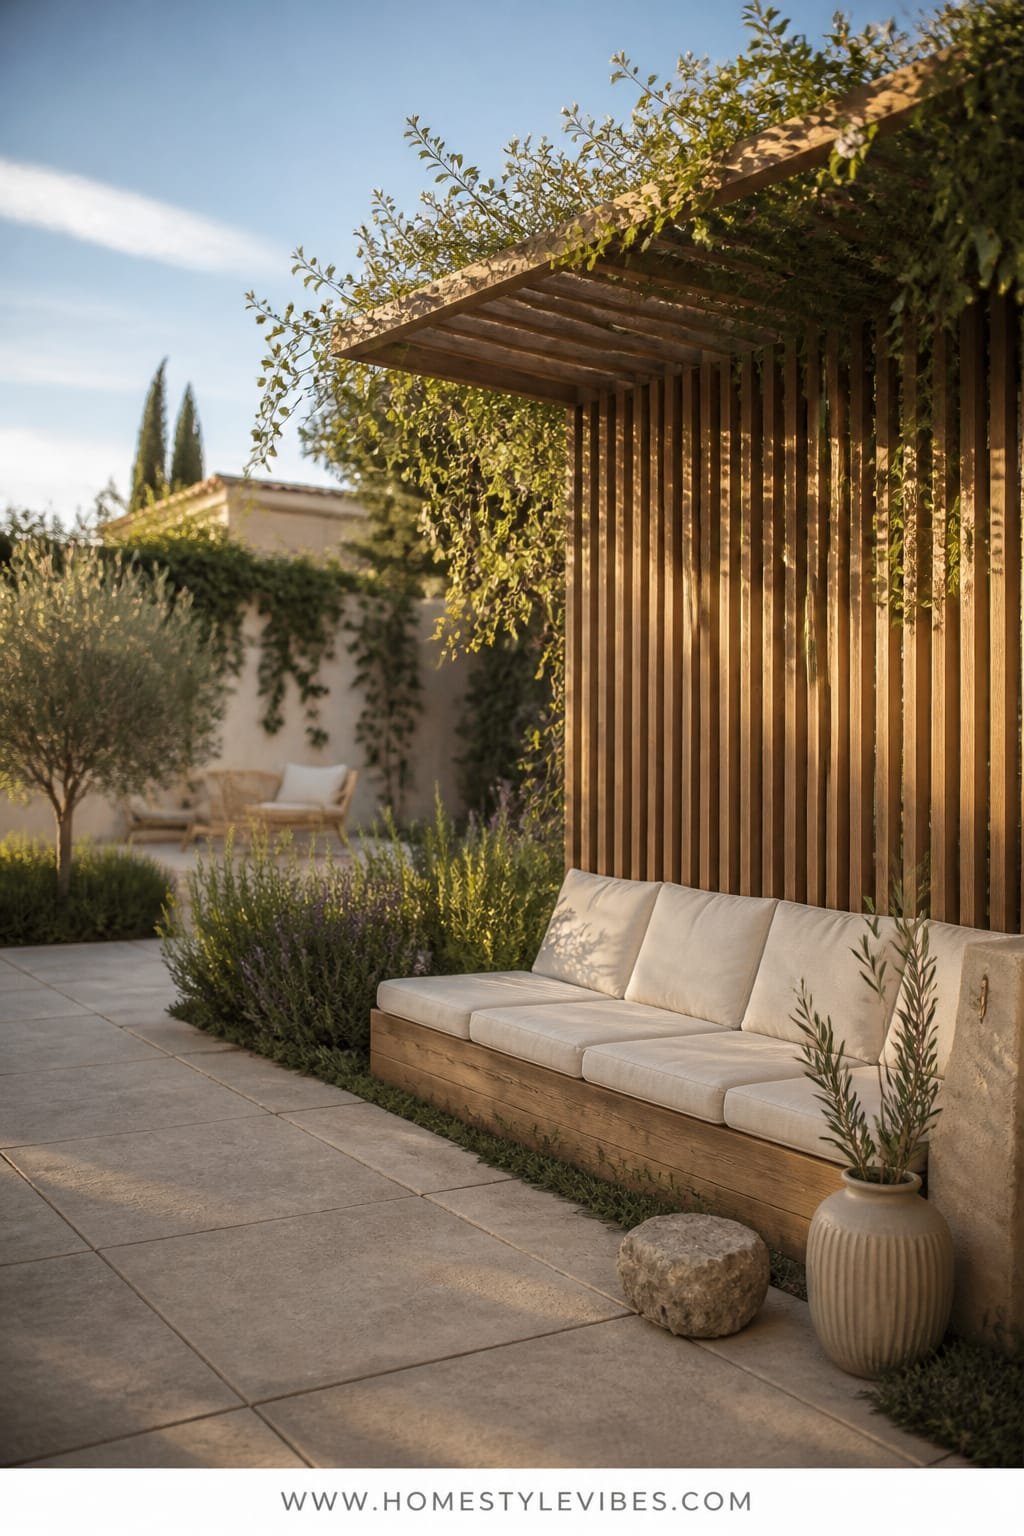
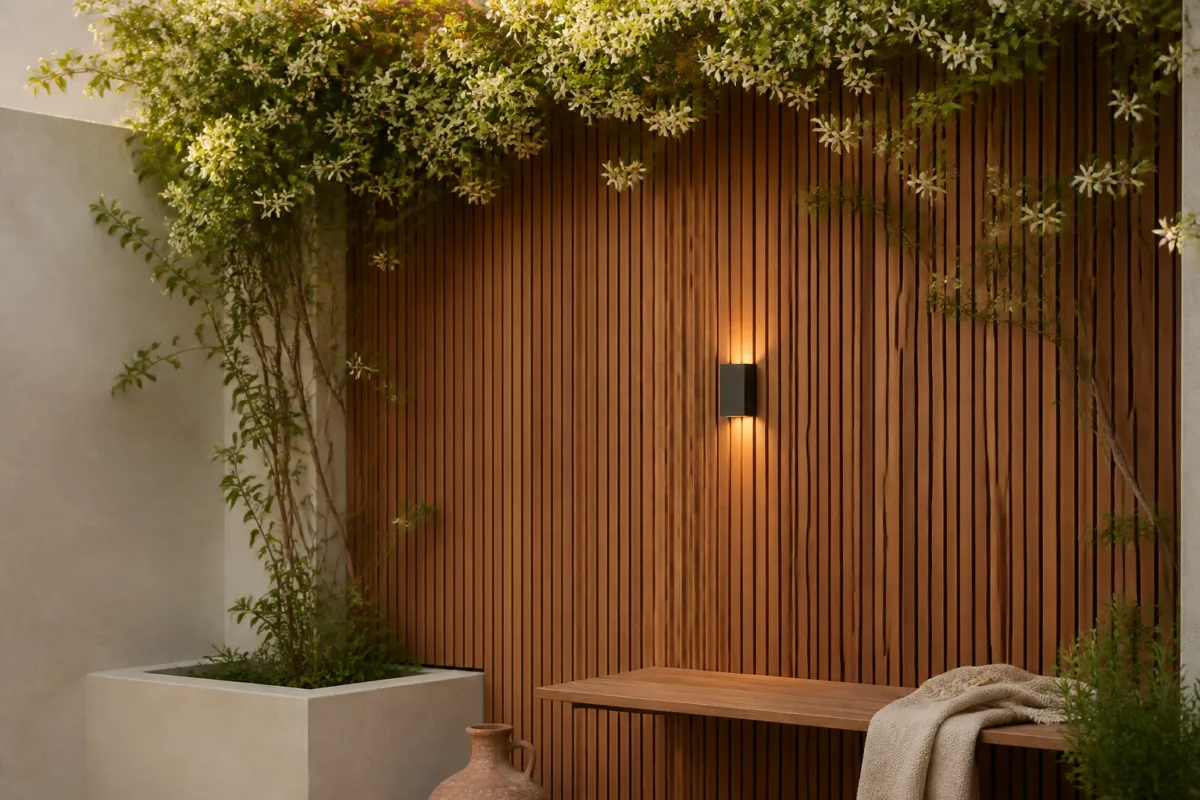
We’ve all been there: you step outside, and it’s just… fence, chair, grill, chaos. The yard feels flat and a little exposed, like the neighbors can see your socks. This design creates a pocket-sized courtyard with a warm, slatted wood backdrop and a living canopy that climbs overhead. The mood leans modern Mediterranean-meets-urban courtyard: soft shadows, leafy arcs, and a feeling of gentle privacy even if your lot line is 12 feet from your back door.
It works in small backyards because it stacks function vertically. A slim slatted screen defines a “room,” offers support for climbers, and throws beautiful striped shadows that make the space feel bigger. Layer in a bench with hidden storage and a compact café table, and you’ve got zones without clutter. Lighting matters here: run a low-voltage uplight at the base of the vine, add a warm LED strip under the bench lip, and let string lights drape lightly across the top. The scene glows without glare.
Material-wise, think oiled cedar or heat-treated pine slats, limestone gravel, black powder-coated brackets, and a simple steel trellis arch. The combination photographs like a dream thanks to contrast (light wood against dark green) and these lovely, repeatable vertical lines. Variations: budget-friendly swap pressure-treated wood for cedar and stain it a honey tone; darker version uses charred shou sugi ban slats with crisp white planters; renter-friendly option uses freestanding planters with integrated lattice screens that move with you.
Budget Breakdown:
- Cedar or treated lumber slats: $200–$600
- Metal trellis arch or wire kit: $60–$180
- Climbing plants (star jasmine, clematis, ivy): $40–$120
- Bench with storage or DIY build: $150–$500
- Limestone or pea gravel base: $100–$300
- Low-voltage lighting + string lights: $80–$250
- Outdoor café set: $120–$350
Total Estimated Cost: $750 – $2,300
Best For: Narrow patios and small rectangular yards that need privacy and a single, cozy seating zone. Ideal for morning coffee people and evening soft-light readers.
Key Design Elements:
- Main materials: cedar slats, limestone gravel, black steel
- Color palette: warm wood, soft greens, matte black accents, cream textiles
- Lighting strategy: uplight the vine, under-bench LED strip, single warm string light
- Furniture silhouettes: slim, curved café chairs, a simple storage bench
- Texture layers: wood grain, crushed stone crunch, lush leaves, nubby outdoor cushions
- Accent details: terracotta pots, linen-look throw pillows, black lanterns
How To Recreate This Look:
- Start with a gravel base: weed barrier down, 2–3 inches of gravel raked level.
- Add a slatted screen: mount to posts or attach to an existing fence for depth.
- Layer a lightweight trellis arch or vertical wire system for vines.
- Install soft lighting: one uplight at the vine base, a dimmable LED strip under the bench lip.
- Style with a café set, one tall terracotta pot, and two cushions for color and comfort.
Why This Looks Expensive: The consistent vertical lines read custom, and the layered lighting adds depth like a boutique hotel courtyard. Repeating materials in three spots (wood, black metal, limestone) makes the design feel intentional and calm.
Watch Out: Don’t overload the trellis with heavy planters right away. Young vines need gentle support, and too much weight can warp your structure. Also, keep slat spacing consistent—uneven gaps cheapen the look instantly.
Pro Styling Tip: Photograph at golden hour with the string lights barely on; the striped shadows from the slats will add instant depth and drama.
Ready for something with maximum hosting power and minimal footprint? Keep scrolling.
2. Foldaway Dining Deck with Built-In Planter Rail
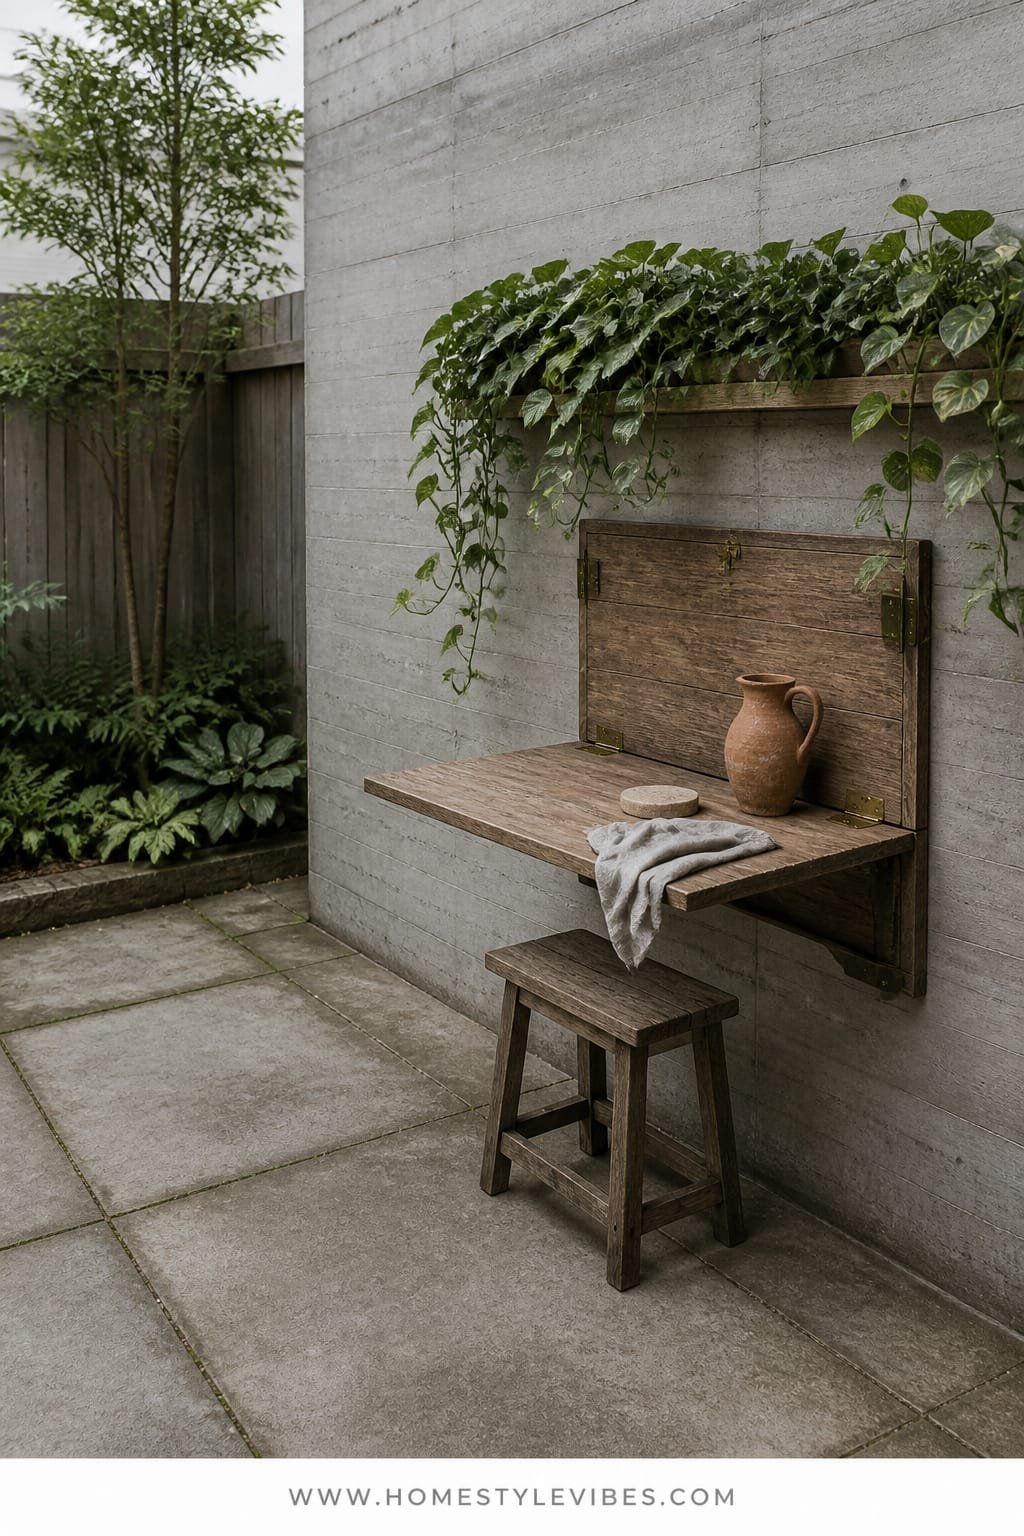
It’s that one corner that always feels off: too small for a real table, too big to ignore. You’ve tried a bistro set that wobbled and a picnic bench that ate the whole patio. This design leans into clever mechanics: a fold-down table mounted to a sturdy wall or screen with a planter rail above it, so you get a dining area when you need it and clear space when you don’t. The vibe is urban terrace meets summer cabin—casual, organized, and quietly clever.
Why it works in small backyards: every inch serves two jobs. The planter rail doubles as a privacy band and a scent bar (think mint, thyme, basil), while the fold-down table creates instant seating for two to four without committing to bulky furniture. Lighting should be precise: one sconce centered above the rail for task light and two low solar stakes at table corners to ground the composition. Photographs shine thanks to the horizontal rail that frames your shot and the tight, repeating greens.
Materials lead with sealed oak or acacia for the table, powder-coated brackets, composite planter boxes, and smooth pavers or deck tiles to define the “dining mat.” Variations: budget version uses a DIY plywood table sealed with marine varnish; small-space version narrows the table depth to 14 inches; renter-friendly approach mounts the table bracket to a freestanding slatted panel with planter hooks so you never touch the property’s fence.
Key Design Elements:
- Main materials: sealed hardwood or marine-grade plywood, powder-coated steel, composite planters
- Color palette: sage and soft greens, natural wood, matte black, off-white linens
- Lighting strategy: single downlight sconce + two low glows at the ground plane
- Furniture silhouettes: slim folding chairs or stools with curved backs
- Texture layers: ribbed planters, smooth deck tiles, linen napkins, glossy herb leaves
- Accent details: a narrow runner, a single stoneware pitcher, beeswax candles
Budget Breakdown:
- Fold-down table hardware/brackets: $40–$120
- Table surface (hardwood/plywood): $70–$240
- Planter rail + boxes: $80–$250
- Folding chairs or stools: $70–$250
- Lighting (sconce + solar stakes): $80–$180
- Deck tiles/pavers: $120–$400
Total Estimated Cost: $460 – $1,440
Best For: Tiny patios and balconies that need a dinner spot a few times a week. Works beautifully for renters and small families who love herbs and weekend brunch at home.
How To Recreate This Look:
- Define the dining zone with a 6×6-foot grid of deck tiles or pavers.
- Mount a slatted panel or rail at 36–42 inches high and add slim planters.
- Install fold-down table hardware into studs or a reinforced panel.
- Plant a tight palette: rosemary, basil, thyme—one plant per 10 inches for fullness.
- Style with two foldable chairs, a linen runner, and a small stool as an end table.
Why This Feels Designer: Function hides in plain sight. The table disappears, but the rail stays styled, so the area never looks empty. That visual continuity equals polish.
One Thing To Avoid: Don’t cram too many small planters across the rail. Fewer, longer boxes feel calmer and upscale. Also, keep the sconce at a warm 2700K—any bluer, and dinner feels like a dentist appointment.
Pro Styling Tip: When shooting, place a folded napkin and a cut lemon near the edge—your eye lands on the texture and color, making the table feel lived-in but not messy.
If storage and play space fight for turf in your yard, the next idea quietly solves both problems.
3. Modular Gravel Grid with Pocket Beds and Hidden Storage Bench
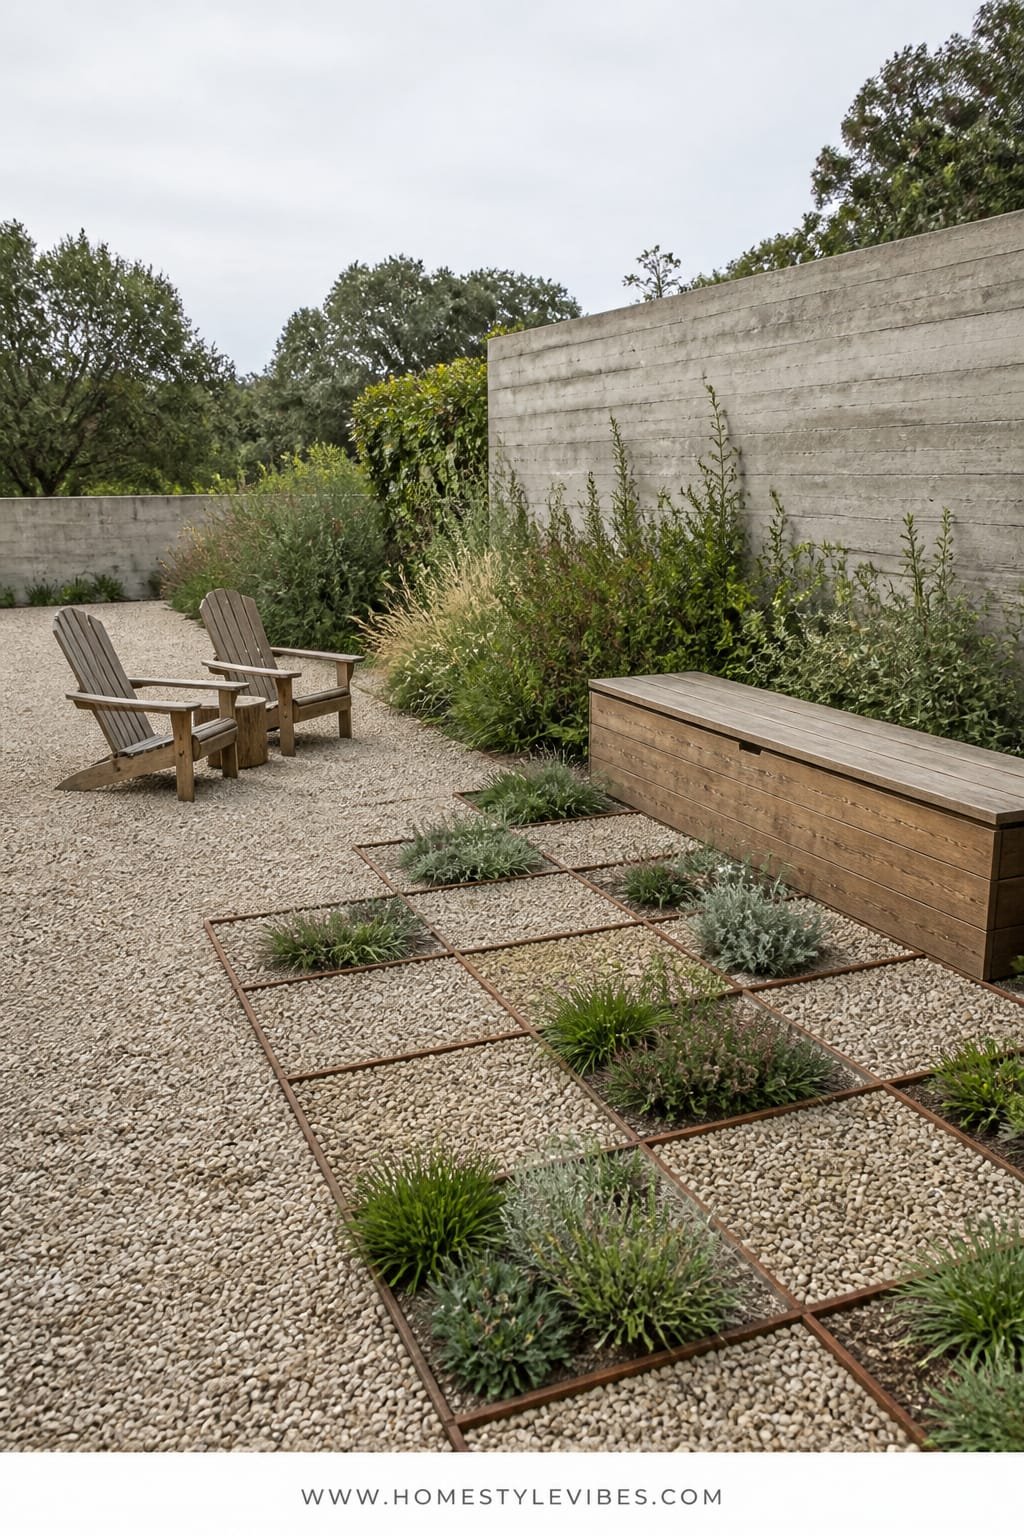
You want a yard that can handle actual life: kids’ shoes, a dog zoomie, Friday night takeout. But clutter creeps in, and the ground never feels even. We’ve all been there, stepping onto a wobbly paver and sloshing a drink. This design lays a stable gravel grid—think tidy, crunch-underfoot pathways—with modular pocket beds for perennials and a deep storage bench that swallows cushions and garden gear. The mood is Scandinavian-meets-rustic: clean lines, warm wood, soft greens, and crisp geometry.
This setup works because it’s forgiving. Gravel drains well and looks great even if leaves fall. The pocket beds let you edit your planting palette without committing to a big overhaul, and the bench provides that elusive place to hide the mess. Lighting plays low and cozy here—spike lights to graze the bed edges and a lantern cluster near the bench. The look photographs beautifully because of repeating squares and layered heights: ground, bench, plant canopies.
Materials: stabilizing honeycomb gravel grids, light gray granite chips, corten-like powder-coated planter boxes (or cedar), and a slatted storage bench with hydraulic hinges. Variations: budget-friendly uses simple landscape edging and untreated gravel (seal later), darker version swaps gray gravel for black basalt, renter-friendly pivots to freestanding planters and a storage trunk on casters.
Budget Breakdown:
- Gravel grid system + gravel: $300–$900
- Edging/planter boxes: $120–$500
- Storage bench materials or purchase: $180–$700
- Low spike lights/lanterns: $80–$220
- Planting (grasses, lavender, compact shrubs): $120–$380
Total Estimated Cost: $800 – $2,700
Best For: Family backyards, pet owners, and anyone who wants minimal maintenance with flexible planting. Great in sun to part shade.
Key Design Elements:
- Main materials: gravel grid, gray gravel, cedar or powder-coated planters, slatted bench
- Color palette: soft gray, warm wood, olive green, matte black accents
- Lighting strategy: low grazing spikes and a lantern cluster near seating
- Furniture silhouettes: boxy bench with a smooth top, low-profile stools
- Texture layers: crisp gravel, feathery ornamental grasses, smooth wood, woven throws
- Accent details: ribbed outdoor pots, a single oversized olive jar, minimalist hose pot
How To Recreate This Look:
- Grade the area lightly and install the gravel grid for stability.
- Pour and rake gravel, then compact with a hand tamper for a firm surface.
- Create two or three pocket beds using planters or steel edging for clean lines.
- Assemble or place a storage bench along the longest edge, with waterproof cushions inside.
- Plant textural perennials in drifts: 3–5 of the same plant per pocket for visual calm.
Why This Reads High-End: Repetition. Same gravel, same edging profile, same plant types in clusters. The uniformity looks considered and custom.
The Most Common Mistake: Mixing too many plant varieties. Aim for three heroes and repeat them. Also, keep the gravel cleaned with a leaf blower on low—debris buildup ruins the tidy grid lines.
Pro Styling Tip: Place a single chunky knit throw on the bench and a closed book on a low stool; it signals comfort without cluttering the shot.
Remember, this isn’t about recreating a showroom. It’s about building a backyard that fits your life. If one idea resonates more than the others, that’s your starting point. You don’t need all six.
4. Mini Med Spa: Plunge Tub Nook with Limewash and Laurel
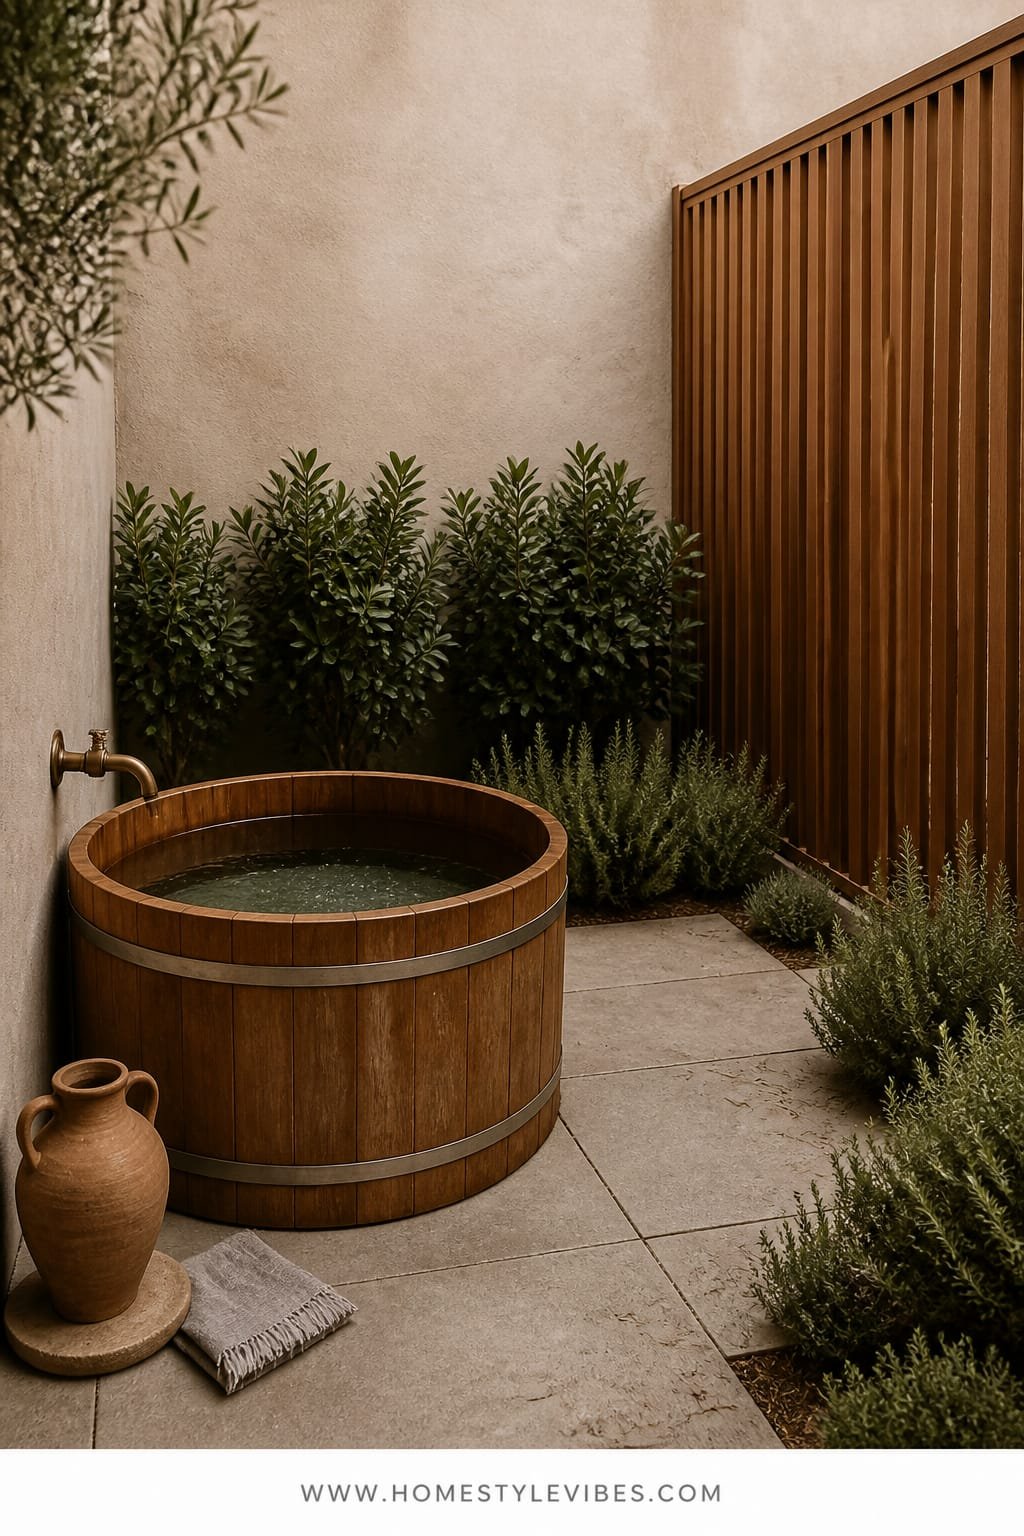
You crave spa vibes, but your yard laughs at you because there’s barely room for two chairs and a grill. You’ve tried a plastic tub situation once and immediately regretted it. This concept centers on a compact, cold-or-hot plunge tub tucked into a limewashed corner with evergreen laurel, fragrant rosemary, and a cedar privacy screen. Think boutique-hotel courtyard in Tuscany but scaled for a townhouse.
Here’s why it works in small backyards: you only need a 6×8-foot footprint to feel like you’ve “gone somewhere.” The limewash brightens shade, the cedar screen blocks views without turning the corner into a cave, and the tub’s round silhouette softens all the hard lines. Lighting should be low, soft, and layered: one wall sconce with a frosted globe and two ground-level path lights that catch steam in colder months. The materials—limewash plaster, raw cedar, aged brass hose bib, and smooth river stones—create high-contrast texture that photographs like a spa brochure.
Variations: budget-friendly uses a stock tank tub with an exterior wrap of cedar slats; darker version paints the screen deep olive and pairs with off-white stones; renter-friendly swaps the fixed screen for freestanding planter walls and an inflatable hot tub with a tailored cover. A quick personal note: I installed a stock tank tub in my own postage-stamp yard last fall and honestly couldn’t believe the difference in how I used the space. Ten-minute evening dips have a way of unclenching your shoulders and your brain.
Budget Breakdown:
- Plunge tub or stock tank: $180–$1,200
- Cedar privacy screen materials: $150–$500
- Limewash kit and primer: $80–$220
- River stones or pavers: $120–$400
- Lighting (sconce + two path lights): $120–$300
- Planting (laurel, rosemary, jasmine): $100–$350
- Optional heating/chiller accessories: $150–$600
Total Estimated Cost: $800 – $3,570
Best For: Shade-challenged corners and privacy-needy yards. Perfect for wellness lovers and anyone who wants a “vacation at home” ritual without building a full deck.
Key Design Elements:
- Main materials: limewashed wall, cedar slats, river stone pad, brass details
- Color palette: chalky white, warm cedar, deep green, soft stone gray
- Lighting strategy: one dimmable sconce + two low path lights for glow and safety
- Furniture silhouettes: round tub, low teak stool, tiny side table for tea
- Texture layers: chalky limewash, smooth stone, knotted towel, waxy laurel leaves
- Accent details: Turkish towels, a brass hook, a ceramic bowl for bath salts
How To Recreate This Look:
- Pick the sun/shade balance you like and limewash the adjacent wall for brightness.
- Lay a river stone or paver pad wide enough for stepping in and out safely.
- Build or place a cedar privacy screen, leaving 1–2 inches between slats for air flow.
- Set the tub, connect a hose bib or simple fill/drain system, and add a teak step.
- Style with evergreens, a small stool, two towels on a brass hook, and low lighting.
Why This Looks Intentional: Curves against lines. The round tub breaks up all the rectangles, so the nook feels designed, not accidental. The limewash also diffuses light and hides micro-imperfections, which is clutch in small spaces.
Don’t Do This: Avoid bright blue inflatable tubs unless that’s your exact vibe. If you go inflatable, wrap or screen it so the color story stays calm. Also, plan drainage before filling—mucky exits kill the mood fast.
Pro Styling Tip: For photos, mist the limewash wall lightly; the moisture deepens tones and adds a subtle gradient that reads editorial.
Craving more greenery but out of ground space? The next design builds up, not out.
5. Tiered Green Wall with Micro Deck and Daybed
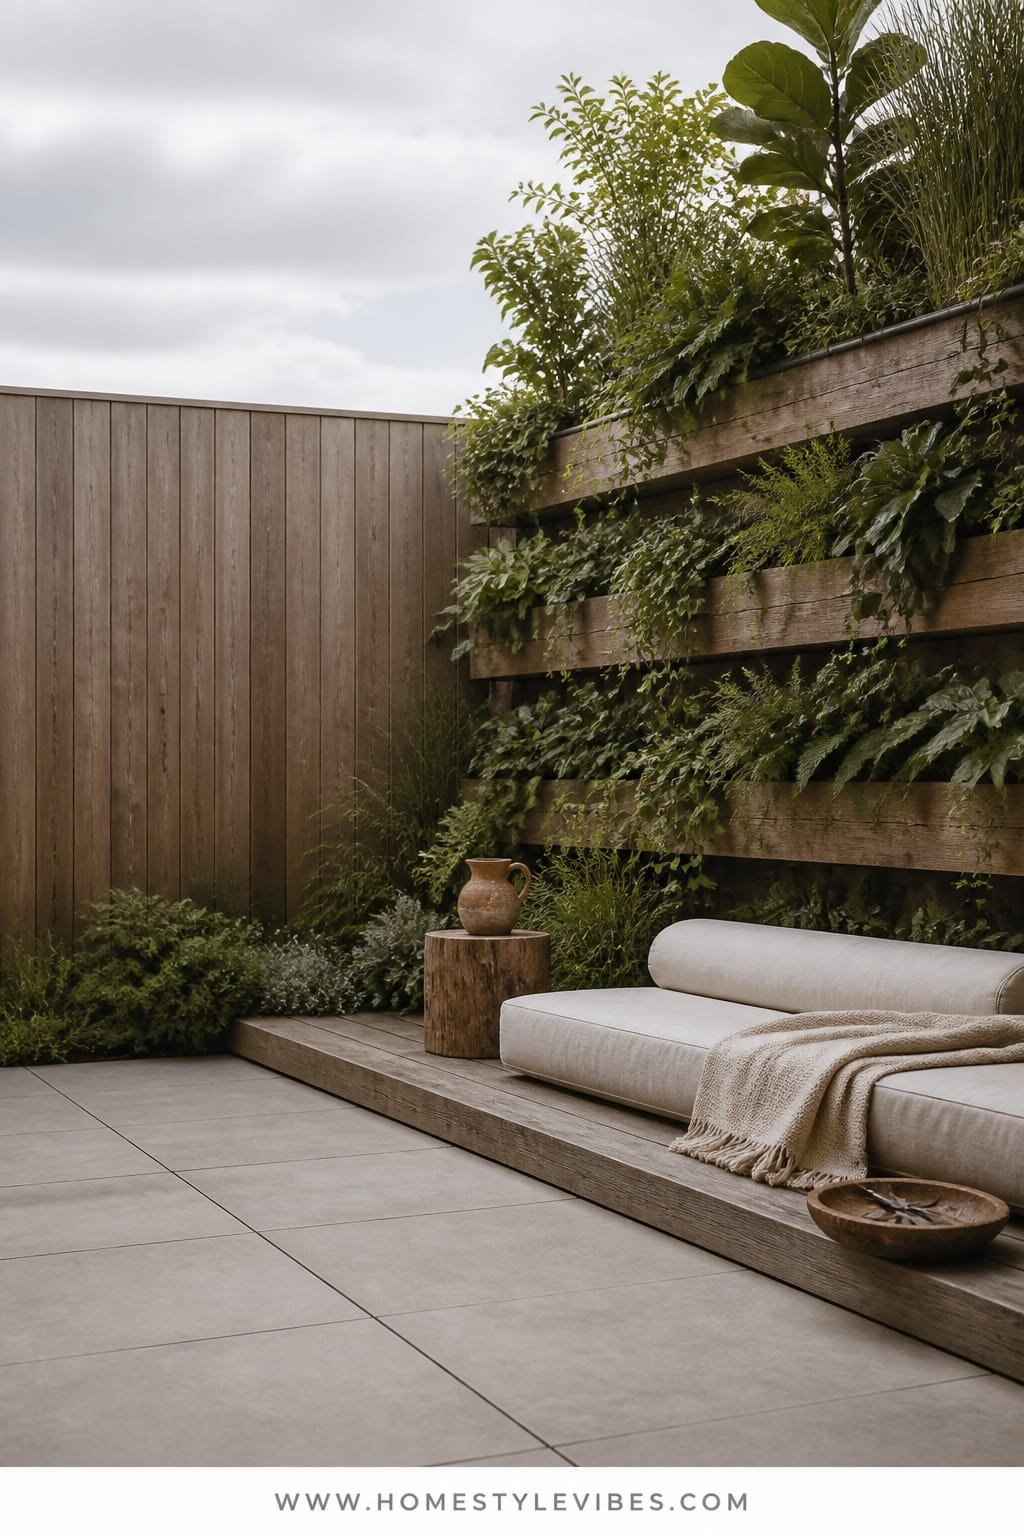
You’ve got a blank fence that feels like a billboard for boredom. Plants at ground level help, but you still see all the wood. This design turns that vertical plane into a lush, layered backdrop using tiered planters and a slim micro deck just deep enough for a low daybed. Mood-wise, it’s urban jungle meets lounge: restorative, leafy, and made for slow Saturday afternoons.
It works because the eye reads vertical height as spaciousness. A tiered green wall stacks foliage from knee to overhead while the low daybed keeps sightlines clear. Lighting should aim for drama without glare: two narrow-beam spots to highlight the highest shelf and one soft flood across the daybed. Materials favor matte finishes to avoid reflective chaos—composite planters, black irrigation lines, and a hardwood or composite deck in a mid-tone plank. Photos pop thanks to the plant texture play: glossy philodendron next to fern fronds, with a hero plant trailing down the side.
Variations: budget-friendly uses pallet-style planters sealed and painted charcoal; shade version builds with ferns, hostas, and trailing ivy; renter version mounts planters to a freestanding frame that rests on deck feet. A tiny micro-story: a friend of mine spent weeks agonizing over which plants to buy before realizing her real problem was lighting. Once we adjusted the angle and warmth, even her simplest pothos looked sculptural.
Budget Breakdown:
- Freestanding or wall-mounted tiered planter system: $120–$600
- Micro deck materials (4×8 feet): $200–$800
- Low daybed or outdoor twin: $180–$700
- Irrigation drip kit + timer: $60–$200
- Lighting (two spots + one flood): $120–$280
- Plants (mix of trailing, upright, and textural): $120–$400
Total Estimated Cost: $800 – $2,980
Best For: Tall fences, narrow yards, and anyone who wants a legit lounge spot. Great for renters if you use a freestanding frame.
Key Design Elements:
- Main materials: composite planters, hardwood/composite decking, matte black irrigation
- Color palette: deep greens, charcoal, mid-tone wood, cream textiles
- Lighting strategy: narrow-beam uplights on upper tiers, soft wash at seating
- Furniture silhouettes: low-slung daybed, cylinder side table
- Texture layers: ribbed planters, leafy gloss, slatted deck, linen cushion covers
- Accent details: a single sculptural pot, a striped outdoor throw, small wind chimes
How To Recreate This Look:
- Build or buy a tiered planter wall; secure it safely to studs or a freestanding frame.
- Lay a compact deck platform to define the lounge zone and lift furniture off wet ground.
- Install a simple drip irrigation with a timer for fuss-free watering.
- Plant in bands by texture and height: tallest mid-tier, trailing at edges, ferns near the base.
- Place a low daybed with two large pillows and aim two spotlights up through leaves.
Why This Feels Designer: It layers three planes—vertical foliage, mid-height furniture, low deck—so the composition has depth from every angle. Consistent matte finishes keep it polished.
Watch Out: Don’t push the daybed right up against the planter wall. Leave 8–10 inches so airflow prevents mildew on cushions. Also, avoid too many plant species; repeat colors and leaf shapes for cohesion.
Pro Styling Tip: For photos, cluster three plants with different leaf sizes in one tier; the scale contrast reads instantly on camera.
Take a breath. If you feel decision fatigue creeping in, step outside and look for one surface you can upgrade this weekend—wall, floor, or lighting. Start there. Momentum beats perfection.
6. Narrow Chef’s Lane: Raised Bed Ribbon with Built-In Grill Ledge
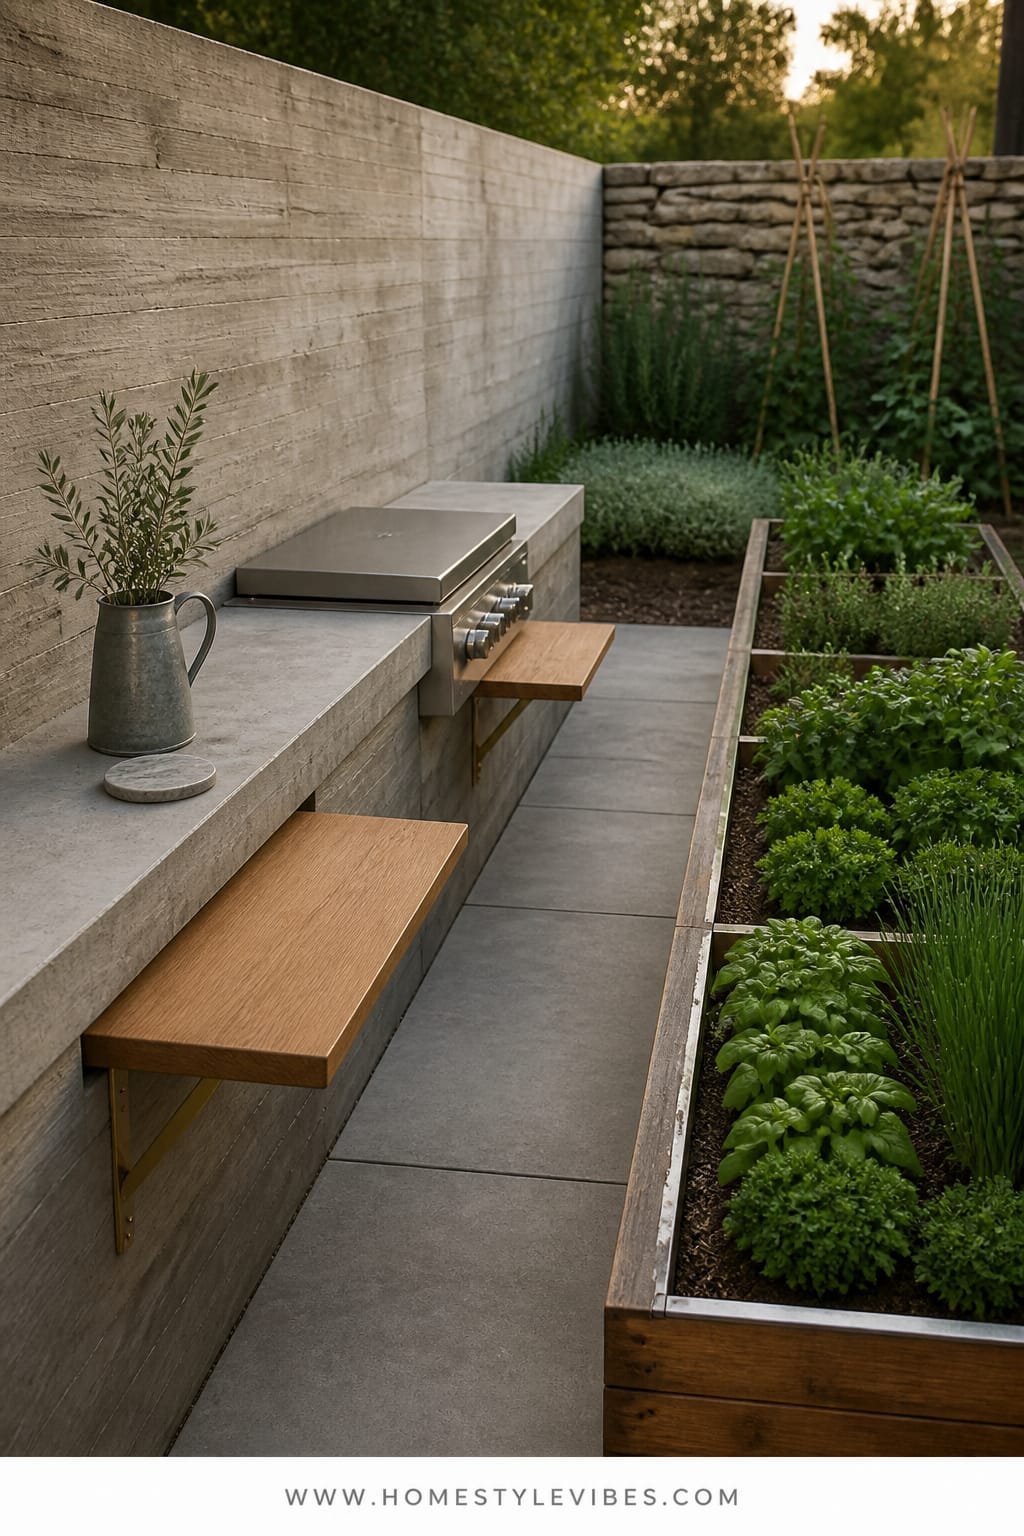
Love to cook outside but stuck with a skinny side yard or an alley of a backyard? You want herbs you can snip with one hand while flipping salmon with the other, but grills hog space and hoses trip you. This design creates a linear “chef’s lane”: a ribbon of raised beds opposite a slim grill ledge with fold-out prep shelves. The mood is streamlined and purposeful—think modern farmhouse meets city terrace, with crisp edges and edible greens as the decor.
Why it works in small backyards: everything aligns to the long axis. Raised beds run at 12–16 inches tall to save your back and keep soil tidy; the grill ledge stays flush to the fence with fold-outs only when you need them. Lighting is straightforward but effective: two fence-mounted LEDs downwash onto the prep area, and tiny marker lights along the raised bed front for safe nighttime snips. It photographs beautifully because of the rhythm—bed, path, ledge—plus the color of herbs against soft stone.
Materials lead with powder-coated aluminum or cedar for the beds, smooth concrete or porcelain pavers underfoot, and a compact grill with a cover that actually fits. For styling flexibility, keep accents simple: a black metal tool bar, a ceramic salt cellar, and a single terracotta pot with thyme trailing over the edge. Variations: budget option uses stock trough planters framed with wood; darker scheme swaps pavers for charcoal and bed edges for black steel; renter-friendly sets beds on pavers with no digging and uses a rolling grill cart.
Budget Breakdown:
- Raised beds (2–3 units): $180–$700
- Pavers or path upgrade: $200–$800
- Compact grill or plancha: $120–$700
- Fold-out shelf hardware + ledge materials: $60–$240
- Lighting (2 LEDs + markers): $100–$260
- Plants and soil mix: $120–$350
Total Estimated Cost: $780 – $3,050
Best For: Side yards and narrow patios, home cooks, and container gardeners who value easy harvests. Spring through fall heavy use.
Key Design Elements:
- Main materials: cedar or coated aluminum beds, porcelain pavers, matte black hardware
- Color palette: herb greens, light gray stone, natural wood, black accents
- Lighting strategy: fence downlights + subtle path markers for safe, moody nights
- Furniture silhouettes: slim grill ledge, fold-out shelves, narrow bench
- Texture layers: smooth paver, leafy herbs, brushed metal, coarse linen towel
- Accent details: magnetic grill tools, terracotta catch-all, zinc plant markers
How To Recreate This Look:
- Measure your lane and set a consistent 30–36-inch clear path for movement.
- Install raised beds opposite the fence line; cap with a 2-inch ledge for resting shears.
- Lay pavers in a linear pattern that matches the direction of travel for a “runway” effect.
- Mount a grill ledge with fold-out shelves and a heat-safe backsplash panel.
- Plant herbs in groups by flavor family; install modest lighting and a hose reel to tame lines.
Why This Looks Expensive: The controlled geometry and consistent materials scream custom build. The fold-out shelves feel clever and tailor-made, even when DIY.
One Thing To Avoid: Don’t buy oversized grills for narrow spaces. A smaller, higher-quality unit works better and looks intentional. Also, avoid plastic edging—it undermines the crispness instantly.
Pro Styling Tip: For photos, lay a wooden cutting board with a small pile of clipped herbs and a lemon wedge—color, texture, and a story in one frame.
Last thought before we wrap: perfection is a moving target. Some weekends you’ll swap a plant that sulked or repaint a rail because the shade didn’t hit right. The point isn’t flawless—it’s a backyard that shows up for your life.
Quick Checklist
- Choose one focal wall or screen to define your small backyard
- Repeat 2–3 materials across furniture and planters for cohesion
- Invest in warm, layered lighting at three levels
- Add hidden storage to keep surfaces clear
- Use vertical planting to stretch sightlines upward
- Limit plant varieties and repeat in clusters
- Set a consistent path width for flow
- Introduce one curved element to soften all the rectangles
- Pick matte finishes for planters and metals
- Anchor zones with deck tiles, pavers, or gravel grids
- Plan drainage and hose management early
- Style sparingly: one pitcher, two pillows, one lantern
Frequently Asked Questions
How much should I budget to refresh a small backyard using one of these designs?
Most of these small backyard ideas land between $500 and $2,500 depending on materials and lighting. Start with the structure (screens, planters, ground surface), then add furniture and plants. You can phase the lighting and accessories over time.
I rent—what can I do without drilling into the fence or patio?
Use freestanding slatted panels, planter walls with deck feet, and interlocking deck tiles. Fold-down tables can mount to a freestanding panel. Choose planters with integrated trellis and rolling storage benches so everything comes with you.
My yard barely gets sun. Will these designs still work?
Yes—lean on limewash or light paint to brighten shady corners, use shade-loving plants (ferns, hostas, ivy), and focus on texture and lighting. Uplights and warm sconces create the mood even when the sun doesn’t show up.
How do I keep gravel or deck tiles from looking messy over time?
Install a stabilizing grid under gravel and use a leaf blower on low once a week. For deck tiles, keep a rubber underlayment and re-oil wood seasonally. Consistent edges and quick maintenance keep everything crisp.
What’s the biggest design mistake in small backyards?
Too many materials and too many plants. Pick a tight palette, repeat elements, and leave breathing space. The truth is, restraint makes small spaces feel intentional and calm.
Bring It Home
Pick one small backyard idea that made your shoulders drop a little and start there. Maybe it’s a slatted screen with a single vine, or a fold-down dining rail that finally gives you a place for Sunday waffles. Start with the bones, then add lighting, then layer texture. You don’t need permission, and you don’t need to do it all at once.
Luxury outside isn’t about a giant footprint; it’s about texture, warm light, and restraint. Choose two main materials, repeat them, and light the plants you love. Suddenly, the space feels finished—and very you.
When the first evening arrives and your string lights hum and the herbs nod in a soft breeze, you’ll know you did it right. Seriously, you’ve got this. Your small backyard is about to work harder and feel better than ever.
About the Author

Krisztina P.Rendes, Founder of Home Style Vibes
Founder of Home Style Vibes
Krisztina Puskásné Rendes created Home Style Vibes as a cozy-modern lifestyle space where homemaking meets inspiration. Her goal is to help women create beautiful, organized, and peaceful homes they truly love — without overwhelm. You’ll find here heart-driven content on home decor, cleaning tips, easy family recipes, organization and decluttering, DIY home projects, plants, and seasonal ideas — all designed to bring more calm, comfort, and style into everyday life.