Genius 5 Rain Gutter Drainage Ideas That Protect Your Foundation (Diy-Friendly & Budget Solutions
You want a clean, dry perimeter around your home—no swampy beds, no sneaky basement mustiness. You hate the way heavy rain turns your yard into a water park for worms and your foundation into a silent stress test. Think dappled sunlight on tidy gravel, crisp edging, and water that moves where you tell it to. These five rain gutter drainage ideas are DIY-friendly, photogenic, and designed to protect your foundation fast—most under $500 and a weekend of work.
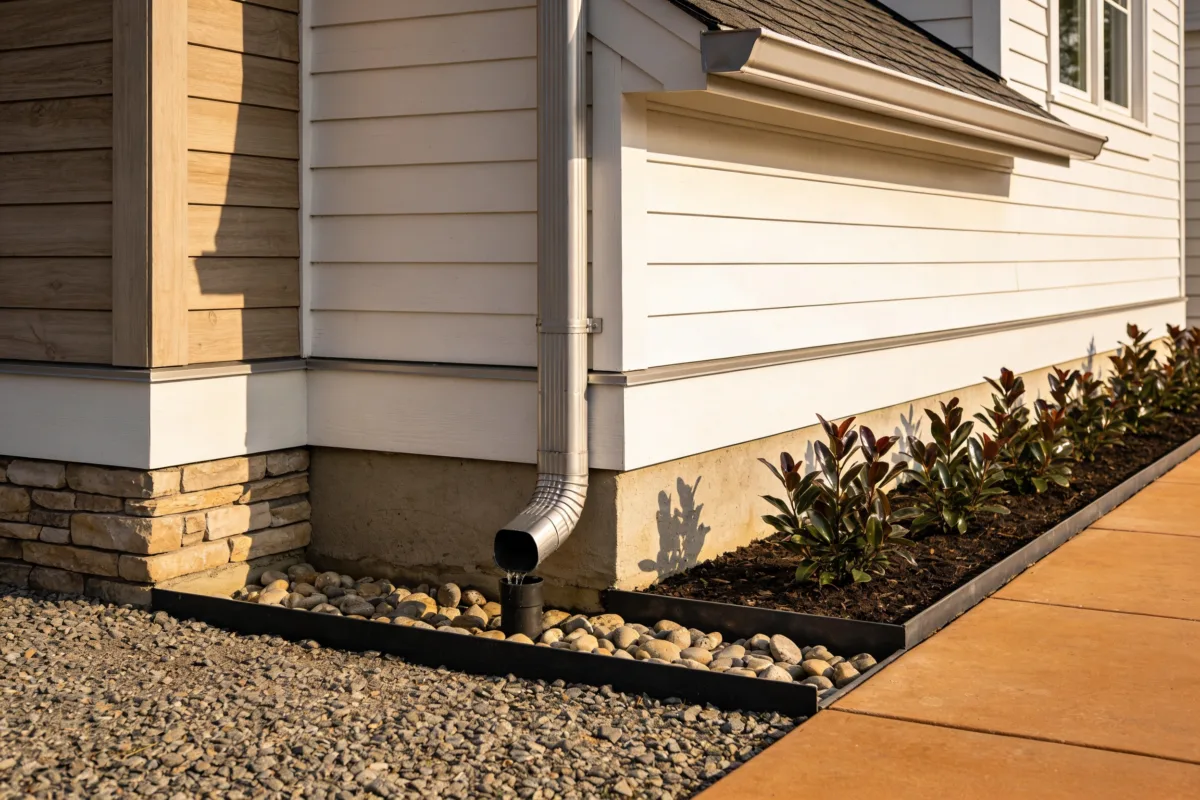
We’re talking practical beauty: muted stone, warm concrete, glossy plants that love a good soak (in the right spot), and crisp lines that frame your home like it was always meant to be here. Expect small transformations with big visual payoff. If you’re dreaming of clean, magazine-worthy curb appeal and a house that stays bone-dry during a storm, you’re in the right place.
Let’s build curb charm that also keeps your foundation safe. The vibe? Calm, collected, and clever—perfect for anyone who appreciates thoughtful design and smart drainage that looks intentional from the sidewalk.
1. Modern French Drain With River Stone Ribbon
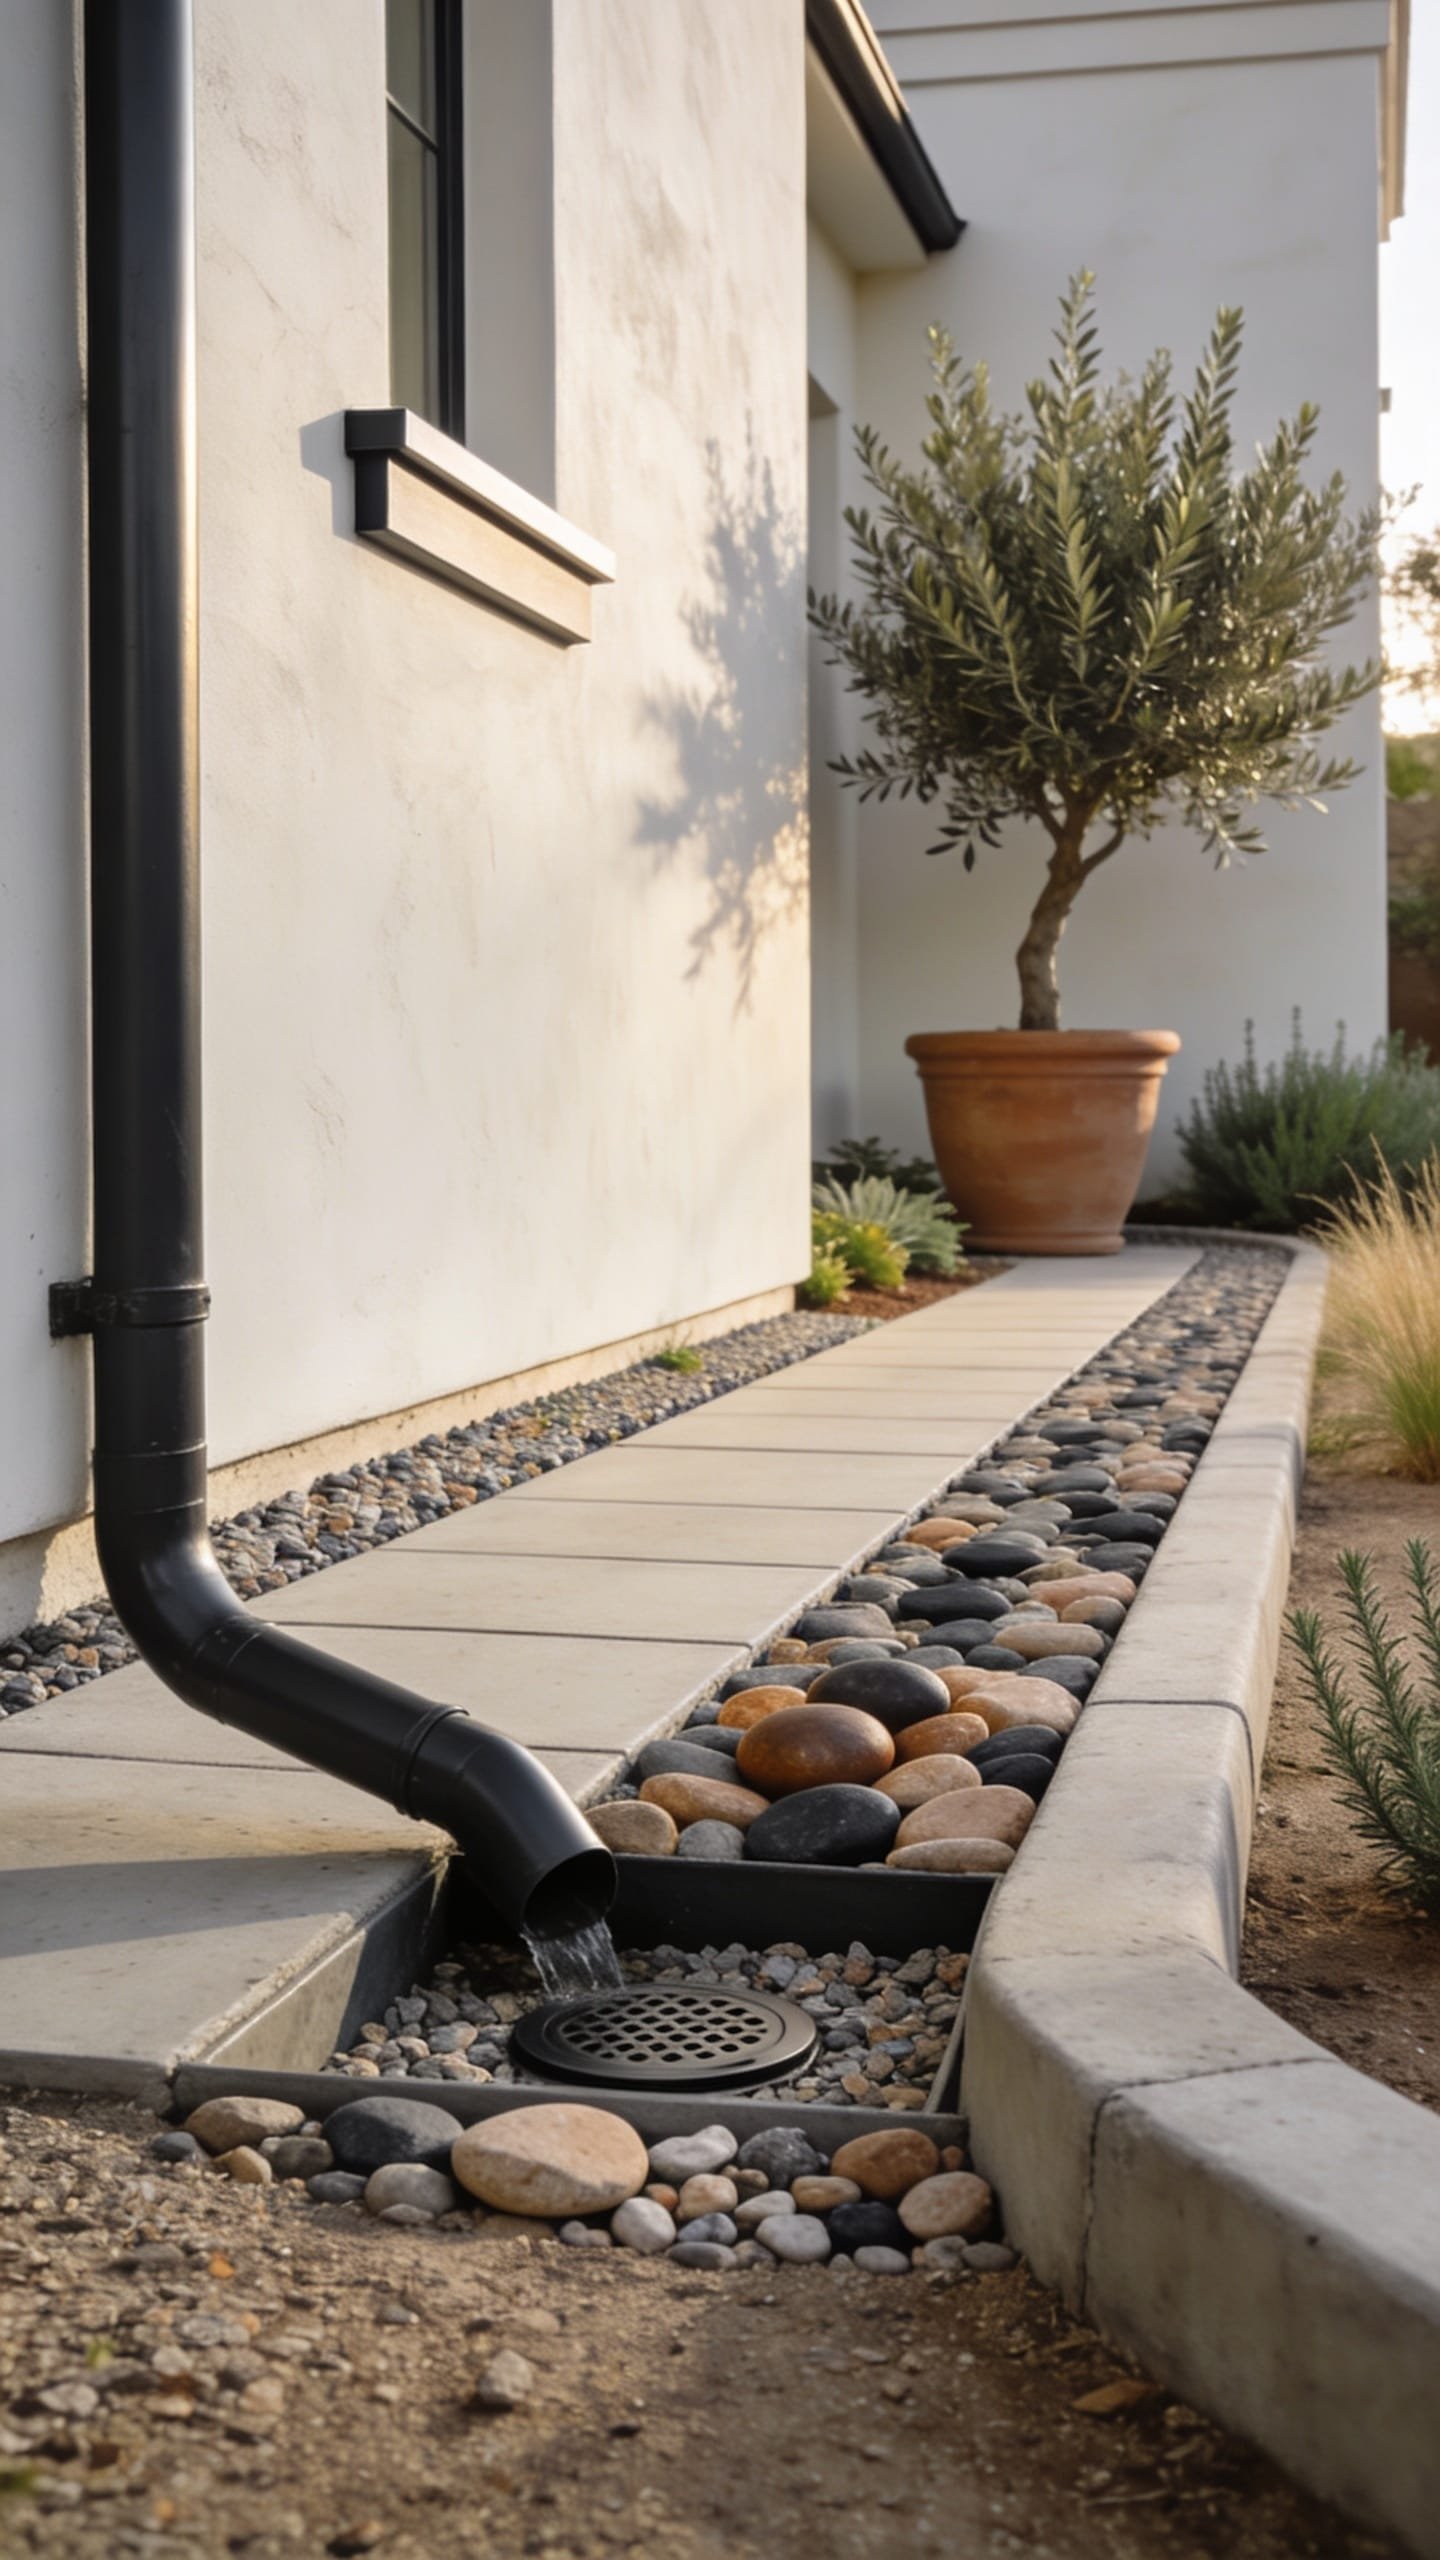
We’ve all been there: the downspout is spitting water like an angry llama, and the soil near your foundation stays soggy for days. You’ve tried those ugly black splash blocks, but they wander like flip-flops in a flood. This Modern French Drain design solves the overflow while giving you a clean, architectural ribbon of river stone that photographs gorgeously and works hard under the surface.
The mood is modern Mediterranean meets quiet luxury—a long, linear stone river that feels sculptural and calm. It thrives in real homes because it requires minimal upkeep, hides function under beauty, and adapts to lots of soil types. The lighting plays with the stones at golden hour, creating soft shadows and poppy highlights that make everything look crisp and expensive. Materials lean tactile: smooth river stones, perforated pipe, landscape fabric, crushed rock, and a touch of metal edging for definition.
Here’s why this rain gutter drainage idea reads high-end: contrast and order. The gentle swoop of stone against structural edging creates depth and shadow, and the layered textures (fine gravel base, graduated stone sizes) look incredibly intentional. Variations? On a tight budget, skip the metal edging and use a hand-tamped soil berm to keep stones contained. For small-space sides of the house, narrow the ribbon to 12 inches and switch to smaller 1/2-inch stones for a finer, jewelry-like look. In darker exterior palettes, choose charcoal lava rock mixed with river stone for moodier contrast. Renter-friendly swap: use a surface “dry stream” without trenching—just grade the surface away from the foundation and build the stone ribbon on top.
Budget Breakdown:
- Perforated drain pipe with sock: $30–$60 per 10 ft
- Landscape fabric (heavy-duty): $25–$50 per roll
- Crushed rock (base layer): $40–$80 per yard
- River stones (2–3 inches): $80–$150 per yard
- Steel or aluminum landscape edging: $60–$120 for 40–60 ft
- Downspout adapter and couplers: $15–$35
- Shovel, trenching tool, hand tamper rental: $0–$40
Total Estimated Cost: $250 – $600
Best For: Homes with pooling near the foundation, slightly sloped yards that need controlled flow, homeowners who want a clean, architectural look with real drainage power.
Key Design Elements:
- Main materials: perforated pipe, crushed rock, river stones, landscape fabric, metal edging
- Color palette: soft grays, warm taupes, charcoal accents
- Lighting strategy: low, warm exterior sconces to graze the stone texture at dusk
- Furniture silhouettes: none, but consider a simple matte planter as a visual endpoint
- Texture layers: fine gravel base, smooth stone tops, crisp metal edges
- Accent details: minimal native grasses at edges, matte black downspout adapter, subtle groundcover to soften transition
How To Recreate This Look:
- Mark a gentle, continuous path from your downspout to a safe discharge area at least 10 feet from the foundation.
- Dig a trench 6–8 inches wide and 12–18 inches deep with a slight slope away from the house (about 1 inch drop per 10 feet).
- Line the trench with landscape fabric, then add 2–3 inches of crushed rock.
- Lay perforated pipe (holes down if using pipe without a sock; holes up if specified by manufacturer), connect to downspout adapter, and secure joints.
- Backfill with crushed rock to just below grade, wrap fabric over top, then finish with 2–3 inches of river stones.
- Install metal edging to keep the ribbon crisp and in line, then rinse stones to remove dust for a clean finish.
Why This Looks Expensive: The linear stone river with tight edging delivers gallery-level polish. Even the way light scatters over wet stones after a storm feels curated. It’s the restraint—limited colors, precise edges, and layered texture—that creates the high-end effect.
Watch Out: Don’t forget slope. A flat French drain is a bathtub. Keep at least 1 inch of fall per 10 feet and never terminate the pipe where water will flow back toward your house.
Pro Styling Tip: For photos, mist the stones lightly so the colors deepen and the highlights pop against the metal edging—instant editorial depth.
2. Hidden Downspout Extension With a Discreet Stepping Path
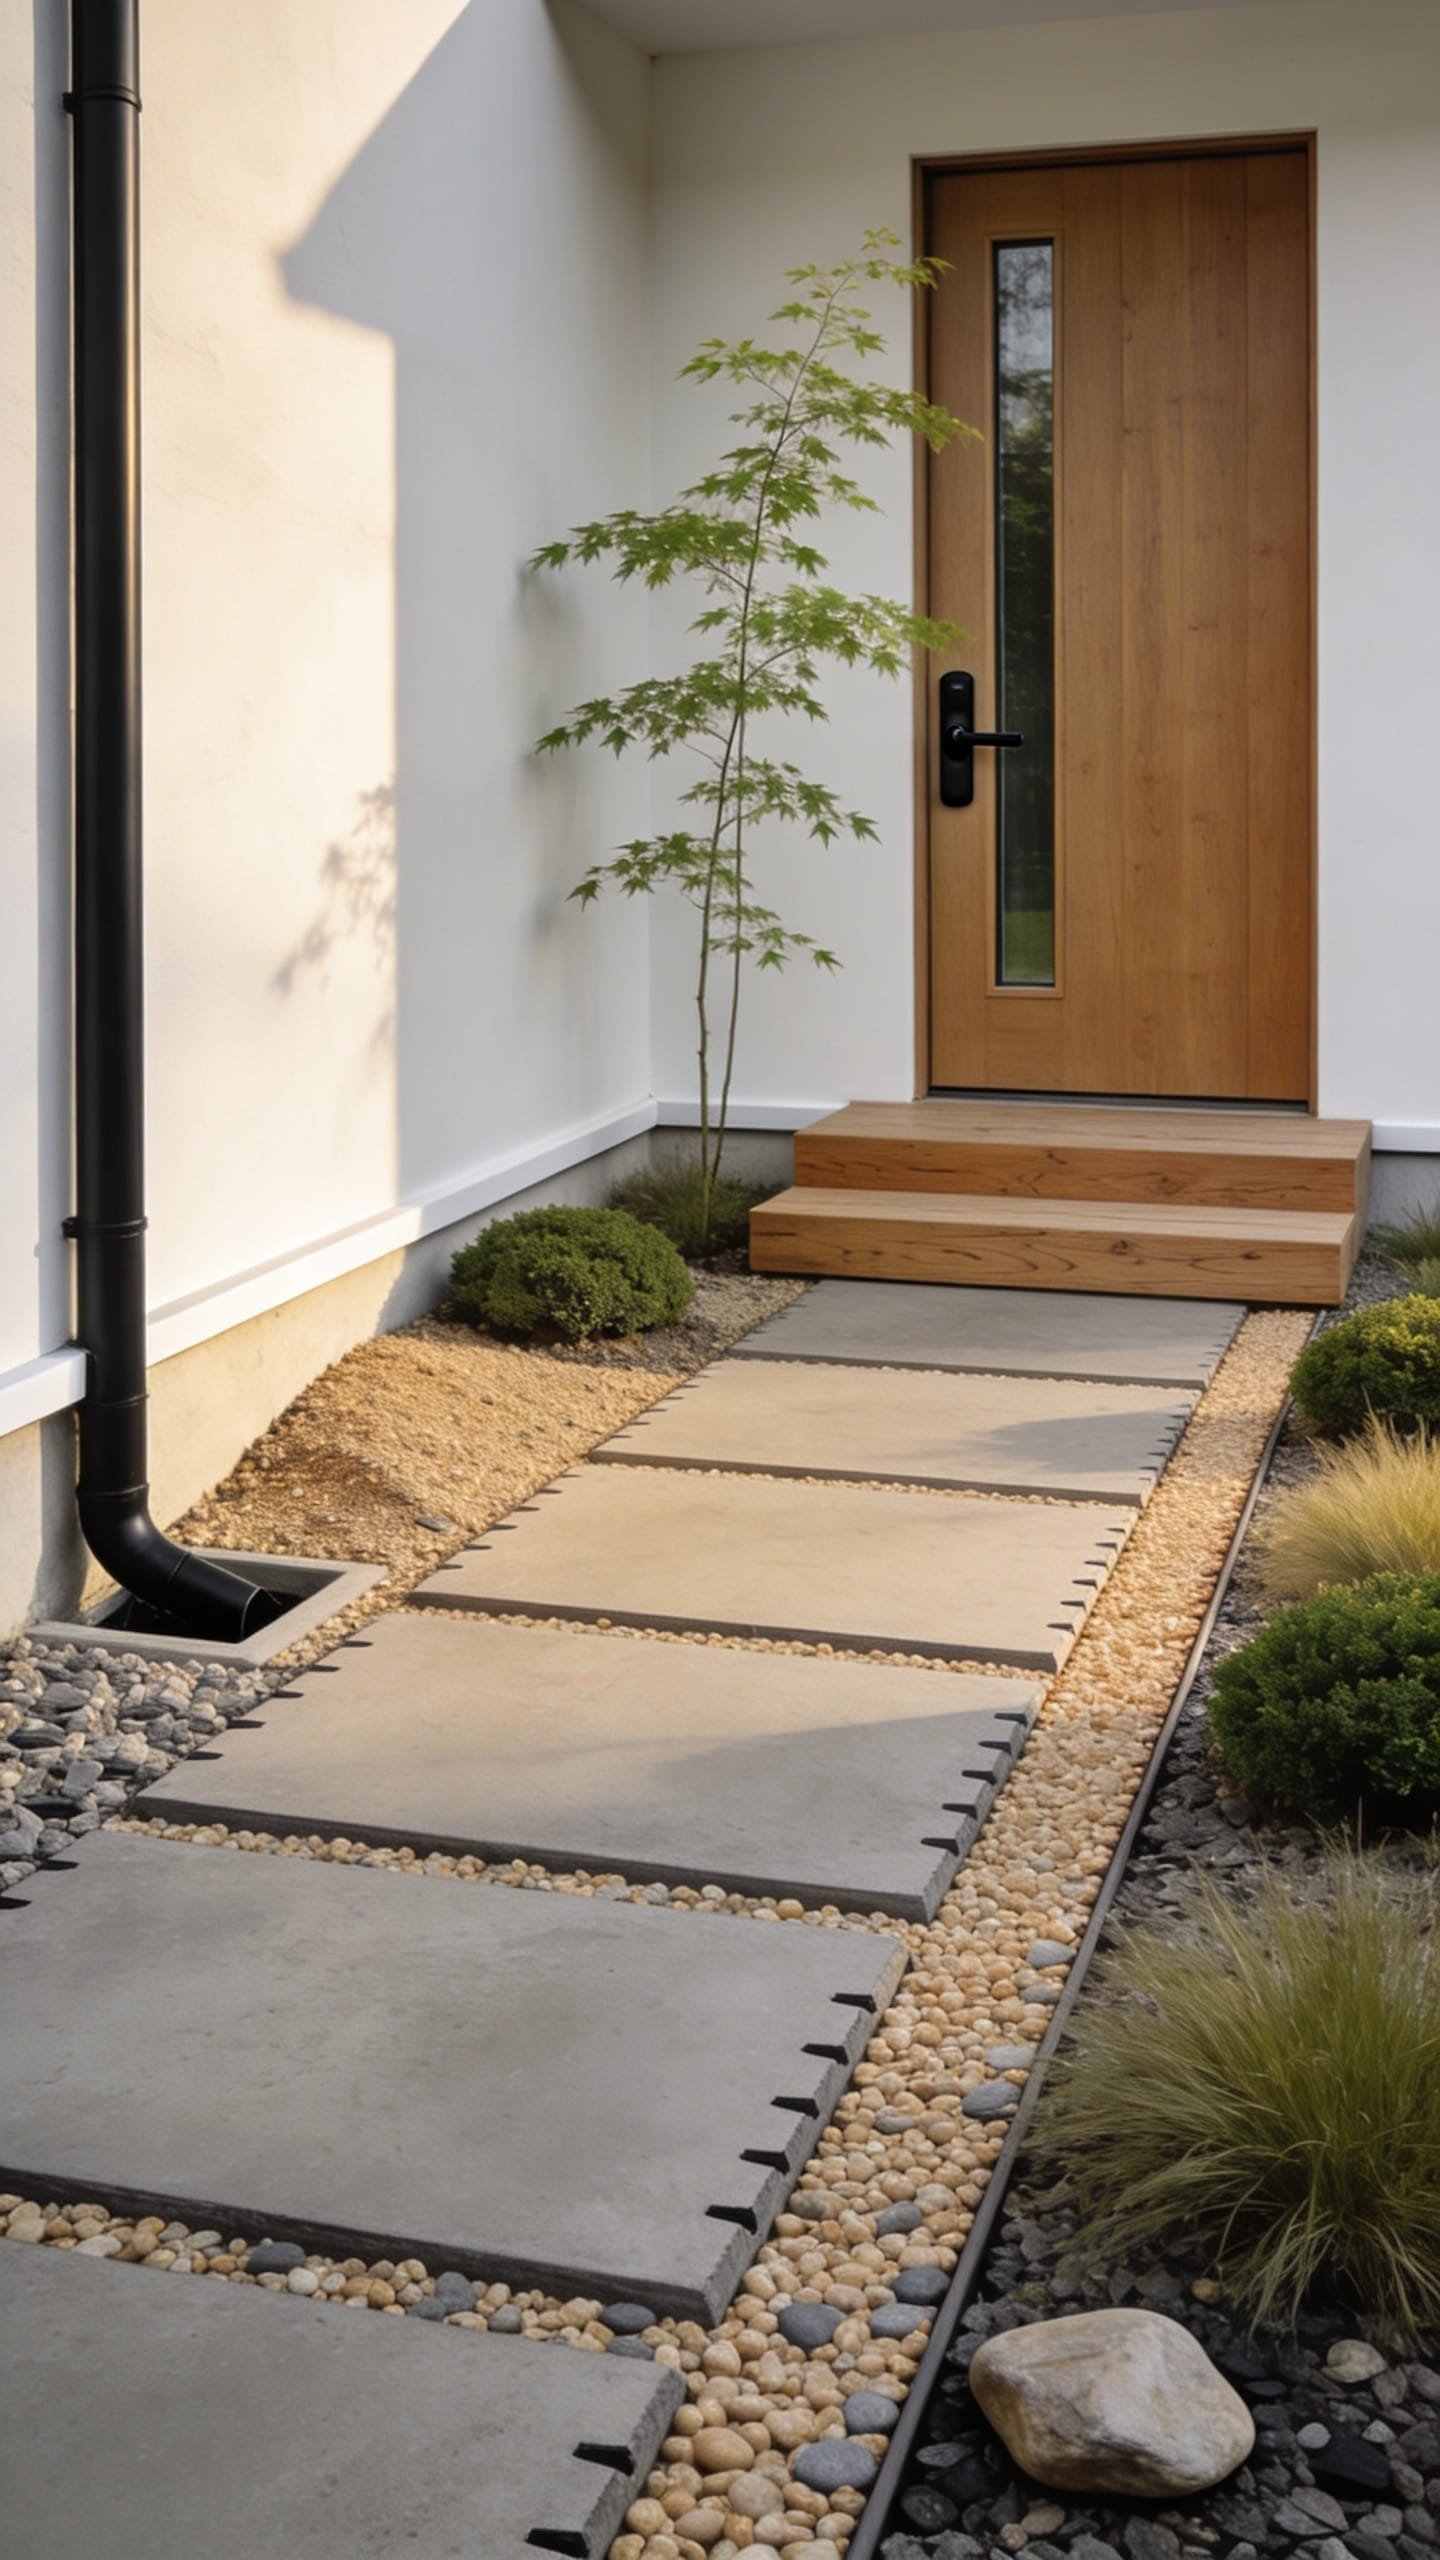
It’s that one corner that always feels off—your downspout ends in a plastic tongue that ruins the vibe of your front path. You’ve tried moving it before photos, but it always creeps back. This design hides a long downspout extension under a slim gravel bed that doubles as a stepping path—sleek, tidy, and built for everyday function.
The mood is warm minimal with a hint of Japandi. You get a calm ribbon of pea gravel set between stepping pavers, camouflaging a solid drain line beneath. It works for real homes because it directs water far from your foundation without screaming “plumbing.” It’s family-friendly too—no tripping over a floppy extension. Lighting matters here: edge lights along the path create tiny shadows between stones for that subtle, high-contrast finish at night.
Materials keep it grounded—smooth pea gravel, large-format pavers, a rigid or flexible solid-core drain pipe, and matte black connectors that disappear into the background. In photos, the negative space between stepping stones reads like quiet luxury. Small space version: shift to 12×24 pavers, tighter spacing. Budget version: skip the pavers and do a raked pea gravel path with timber edging. For a darker look, choose basalt or slate chips instead of pea gravel.
Key Design Elements:
- Main materials: solid drain pipe (not perforated), pea gravel, large pavers, landscape fabric, edging
- Color palette: warm beige gravel, soft concrete gray, matte black accents
- Lighting strategy: slim path lights set low to rake across gravel texture
- Furniture silhouettes: none, but a bench near the path can balance the form
- Texture layers: fine gravel, smooth concrete, matte metal
- Accent details: low groundcovers like thyme between stones for softness
Budget Breakdown:
- Solid drain pipe (25–50 ft): $40–$120
- Downspout connector and elbow: $15–$30
- Pea gravel: $50–$120 per yard
- Pavers (large-format): $6–$12 each, 8–12 pieces
- Landscape fabric: $20–$40
- Plastic or metal edging: $20–$80
- Path lights (optional): $60–$200 per set
Total Estimated Cost: $250 – $650
Best For: Front entries and side yards where a visible extension would kill the vibe. Great for homes that want subtle drainage, clean lines, and easy mowing.
How To Recreate This Look:
- Map your path at least 10 feet from the foundation with a gentle curve for flow.
- Excavate a shallow trench (6 inches deep) for the pipe, keeping slope consistent away from the house.
- Lay solid drain pipe, connect to the downspout, and test with a hose before backfilling.
- Cover the pipe with compacted soil, then lay landscape fabric across the full path width.
- Set pavers first, level and spaced for your stride; then fill between with pea gravel.
- Edge the path to keep gravel neat and add subtle path lights if you want nighttime drama.
Why This Feels Designer: Disguised function is chic. The controlled gaps, low contrast, and purposeful spacing feel like intentional landscaping instead of a last-minute fix.
One Thing To Avoid: Don’t use perforated pipe here. You want the water carried away, not seeping into the soil near your walkway or foundation.
Pro Styling Tip: For photos, brush the pavers clean and gently rake the gravel in one direction—the linear rake lines add polish and shadow play.
Keep scrolling—next up is the backyard-friendly solution that invites rain to put on a show rather than a mess.
Remember, this isn’t about recreating a showroom. It’s about building a yard that actually works for you—even in a downpour. If one idea has you nodding, start there and ignore the rest for now.
3. Rain Chain to Rock Basin With Native Plant Pocket
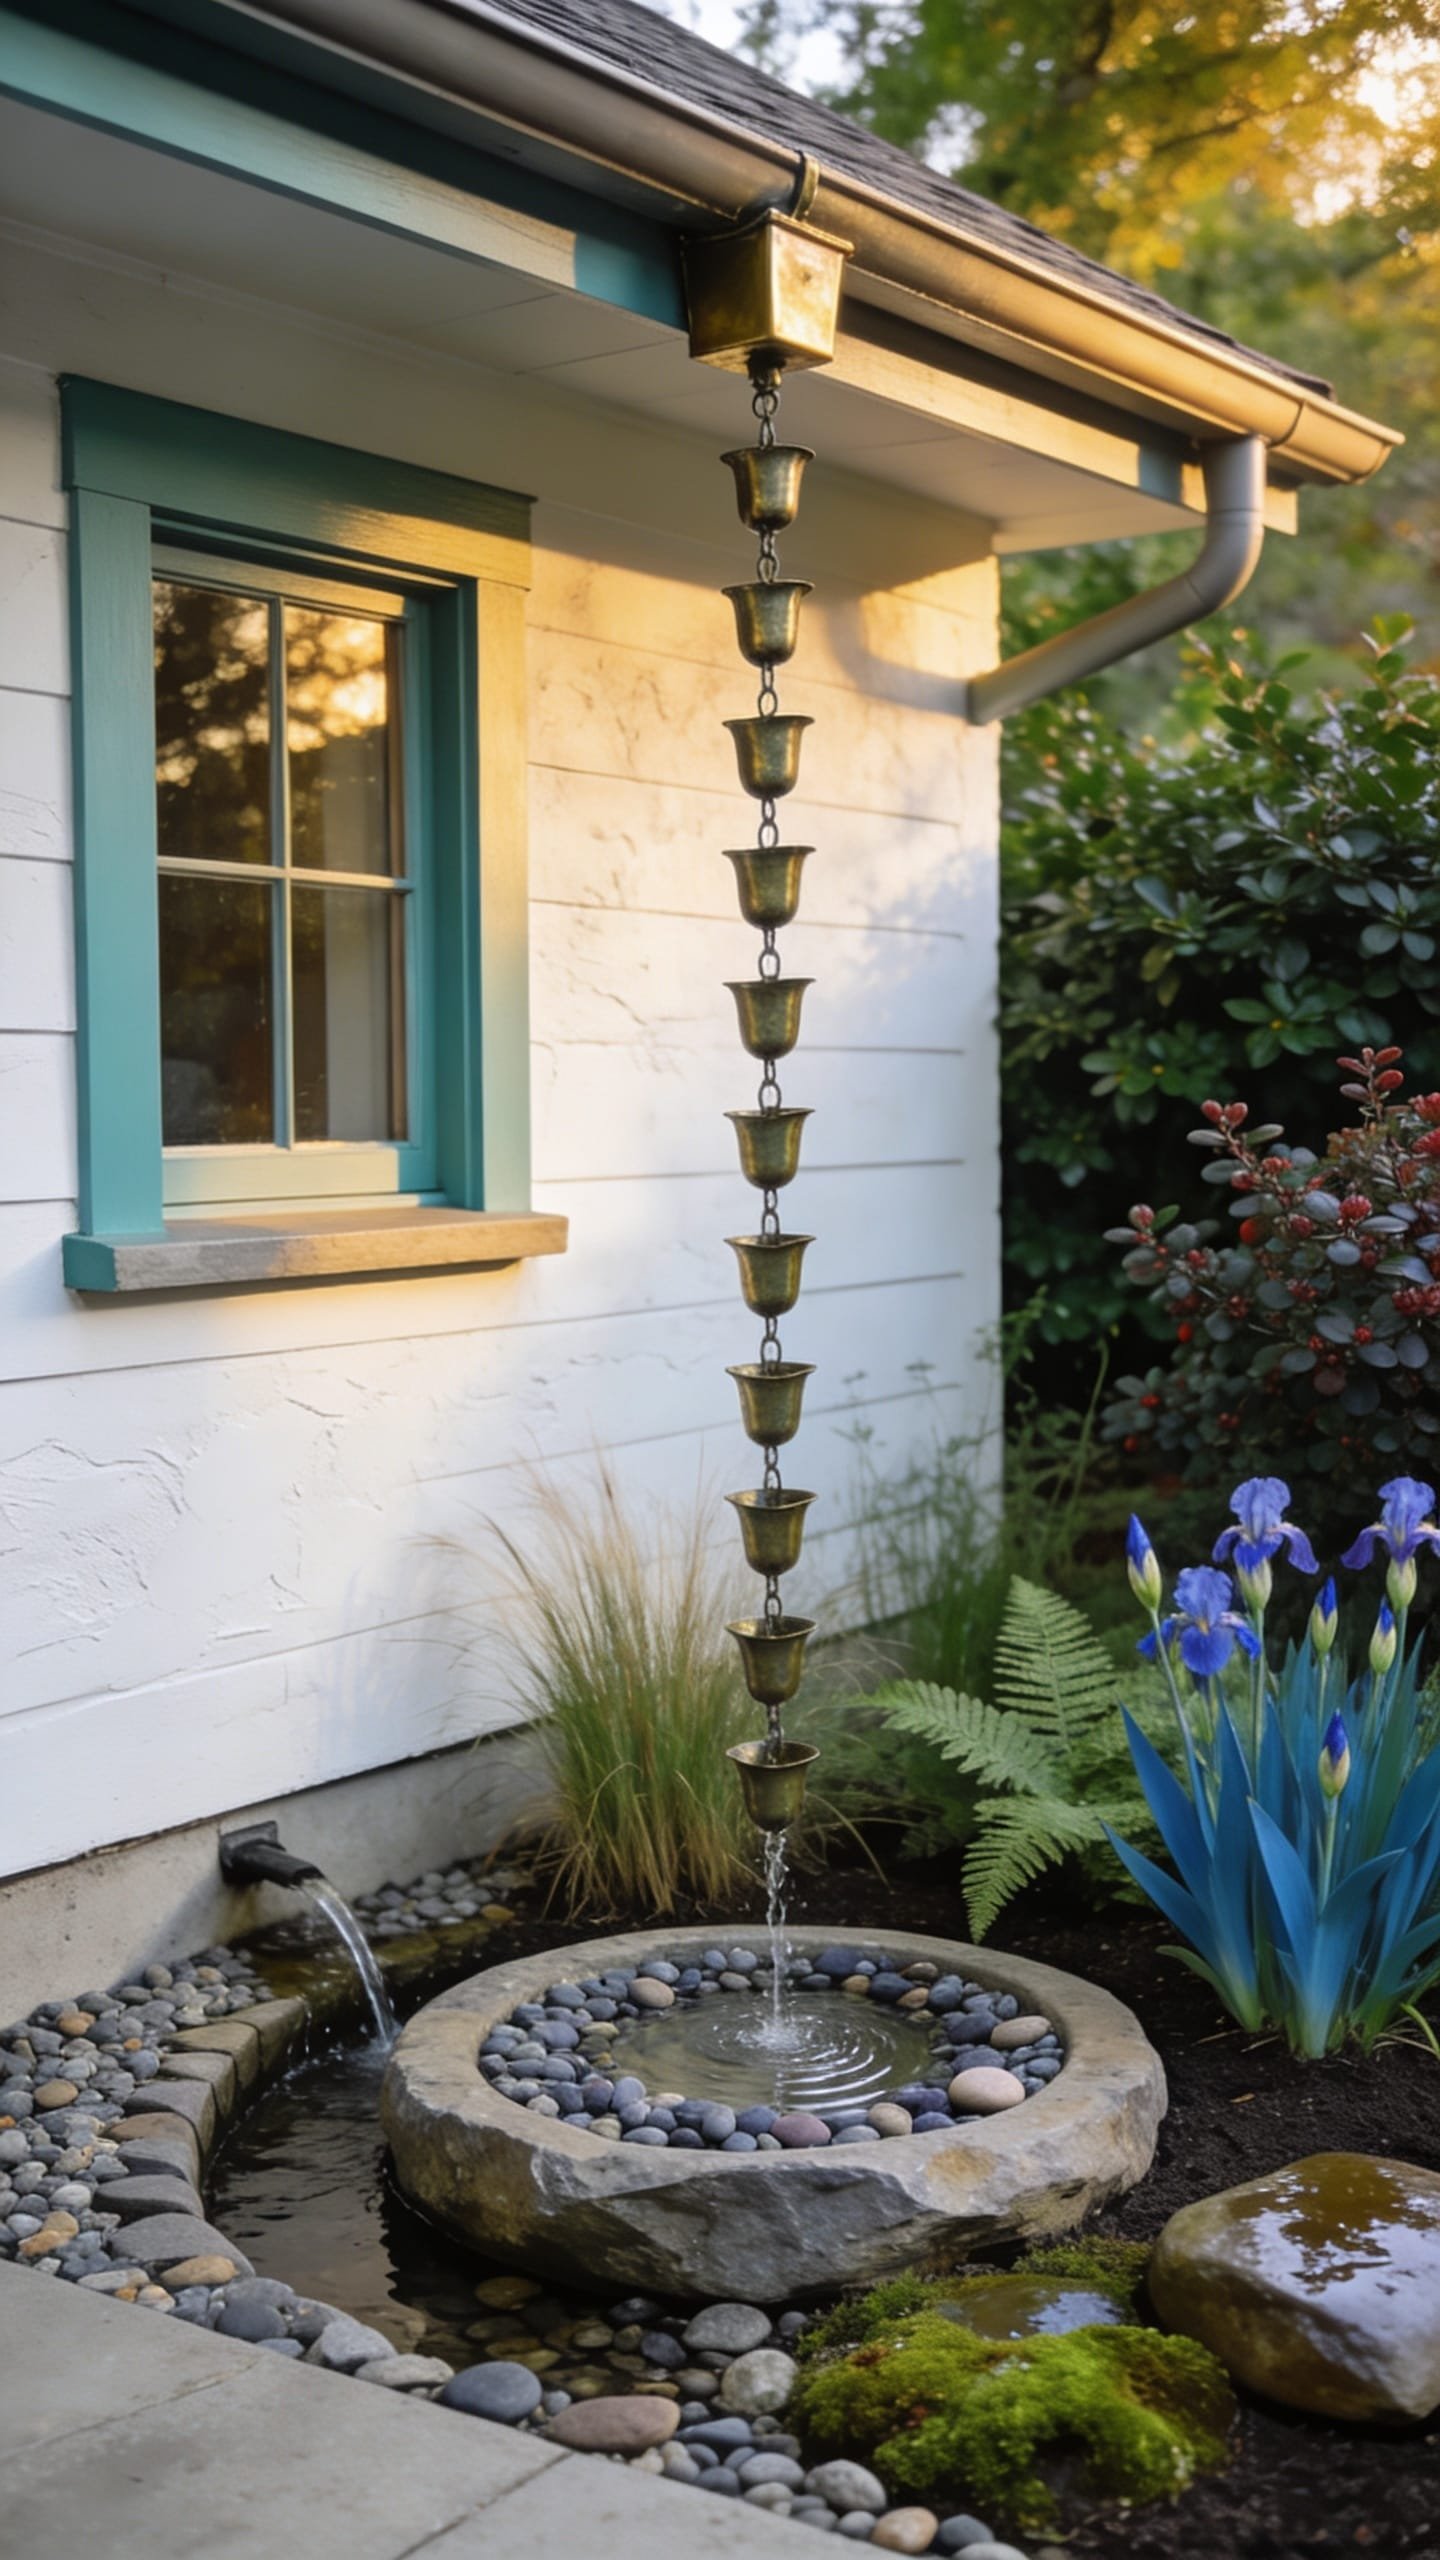
You love the romance of rain, the soft ping and ripple. But you hate your clunky downspout that kills the vibe of that pretty corner bed. You’ve tried a decorative splash block, but it never looks quite finished. A rain chain feeding into a shallow rock basin, edged by native plants that actually like wet feet, turns water into a feature while protecting your foundation.
The mood is modern cottage with a whisper of spa courtyard. Rain trickles down the chain into a rock-filled bowl, then slowly drains through a hidden pipe or percolates into a gravel sump. Real homes love it because it’s low-maintenance, easy to retrofit, and renter-flexible if you use a portable basin. Lighting transforms it—aim a warm spotlight at the chain so raindrops sparkle at dusk. Materials feel luscious: hammered copper or matte black rain chain, smooth tumbled rock, decomposed granite surround, and soft, movement-rich grasses.
It photographs beautifully thanks to layered heights (chain, plants, basin), varied sheens (metal, wet rock, matte gravel), and clear focal points. Budget-friendly variation: choose a galvanized chain and a large ceramic bowl with a drilled drain hole. Small-space version: do a mini basin and use compact natives like sedges or heuchera. Darker version: black chain, slate chips, and purple fountain grass for moody drama. Renter swap: freestanding basin with a hidden flexible hose that runs under mulch to your drain zone.
Budget Breakdown:
- Rain chain (8–12 ft): $35–$180
- Chain installer/adapter: $10–$25
- Rock basin or large bowl: $40–$150
- Gravel and decorative stones: $40–$120
- Optional solid pipe to carry overflow: $30–$60
- Native plants (4–6): $40–$90
- Spotlight (low-voltage or solar): $30–$120
Total Estimated Cost: $225 – $650
Best For: Front corners, courtyards, and garden beds near a downspout; homeowners who want the soothing sound of water and a sculptural moment at the foundation line.
Key Design Elements:
- Main materials: rain chain, rock basin, gravel sump or pipe, decomposed granite
- Color palette: warm metal, soft gray stones, fresh greens
- Lighting strategy: a single warm spotlight on the chain and basin
- Furniture silhouettes: consider a low garden stool nearby for balance
- Texture layers: hammered metal, smooth stone, feathery grasses
- Accent details: mossy accents, small boulders framing the basin, low-signature plant markers
Why This Reads High-End: It’s ceremonial. Instead of hiding the rain, you choreograph it. The chain becomes jewelry for your eaves, and the basin anchors the composition like a sculptural plinth.
How To Recreate This Look:
- Remove the existing downspout section and install a rain chain adapter in the gutter outlet.
- Hang the rain chain to just above your basin height; test the length with a light hose flow.
- Set a shallow basin on compacted gravel; drill a drain hole if needed and line underneath with more gravel.
- Optional: run a short solid pipe from beneath the basin to carry overflow 8–10 feet away.
- Backfill around the basin with decorative stones and decomposed granite, then tuck native plants at the edge.
- Aim a warm spotlight at the chain for evening sparkle.
The Most Common Mistake: Undersizing the basin or not planning for overflow. Always include a gravel sump or discreet pipe so water doesn’t linger near your foundation.
Pro Styling Tip: Arrange stones from largest at the basin edge to smallest farther out; this gradient reads elegant in photos and guides the eye naturally.
Confession time: I installed a rain chain at my own back door last fall, and during the first storm I literally stood there in slippers watching water bead down like a string of pearls. The big surprise? The area stayed drier than with the old downspout because the basin managed splash brilliantly. Cozy soundtrack, zero soggy mulch.
4. Gravel Swale With Driftwood-Edge Planting Belt
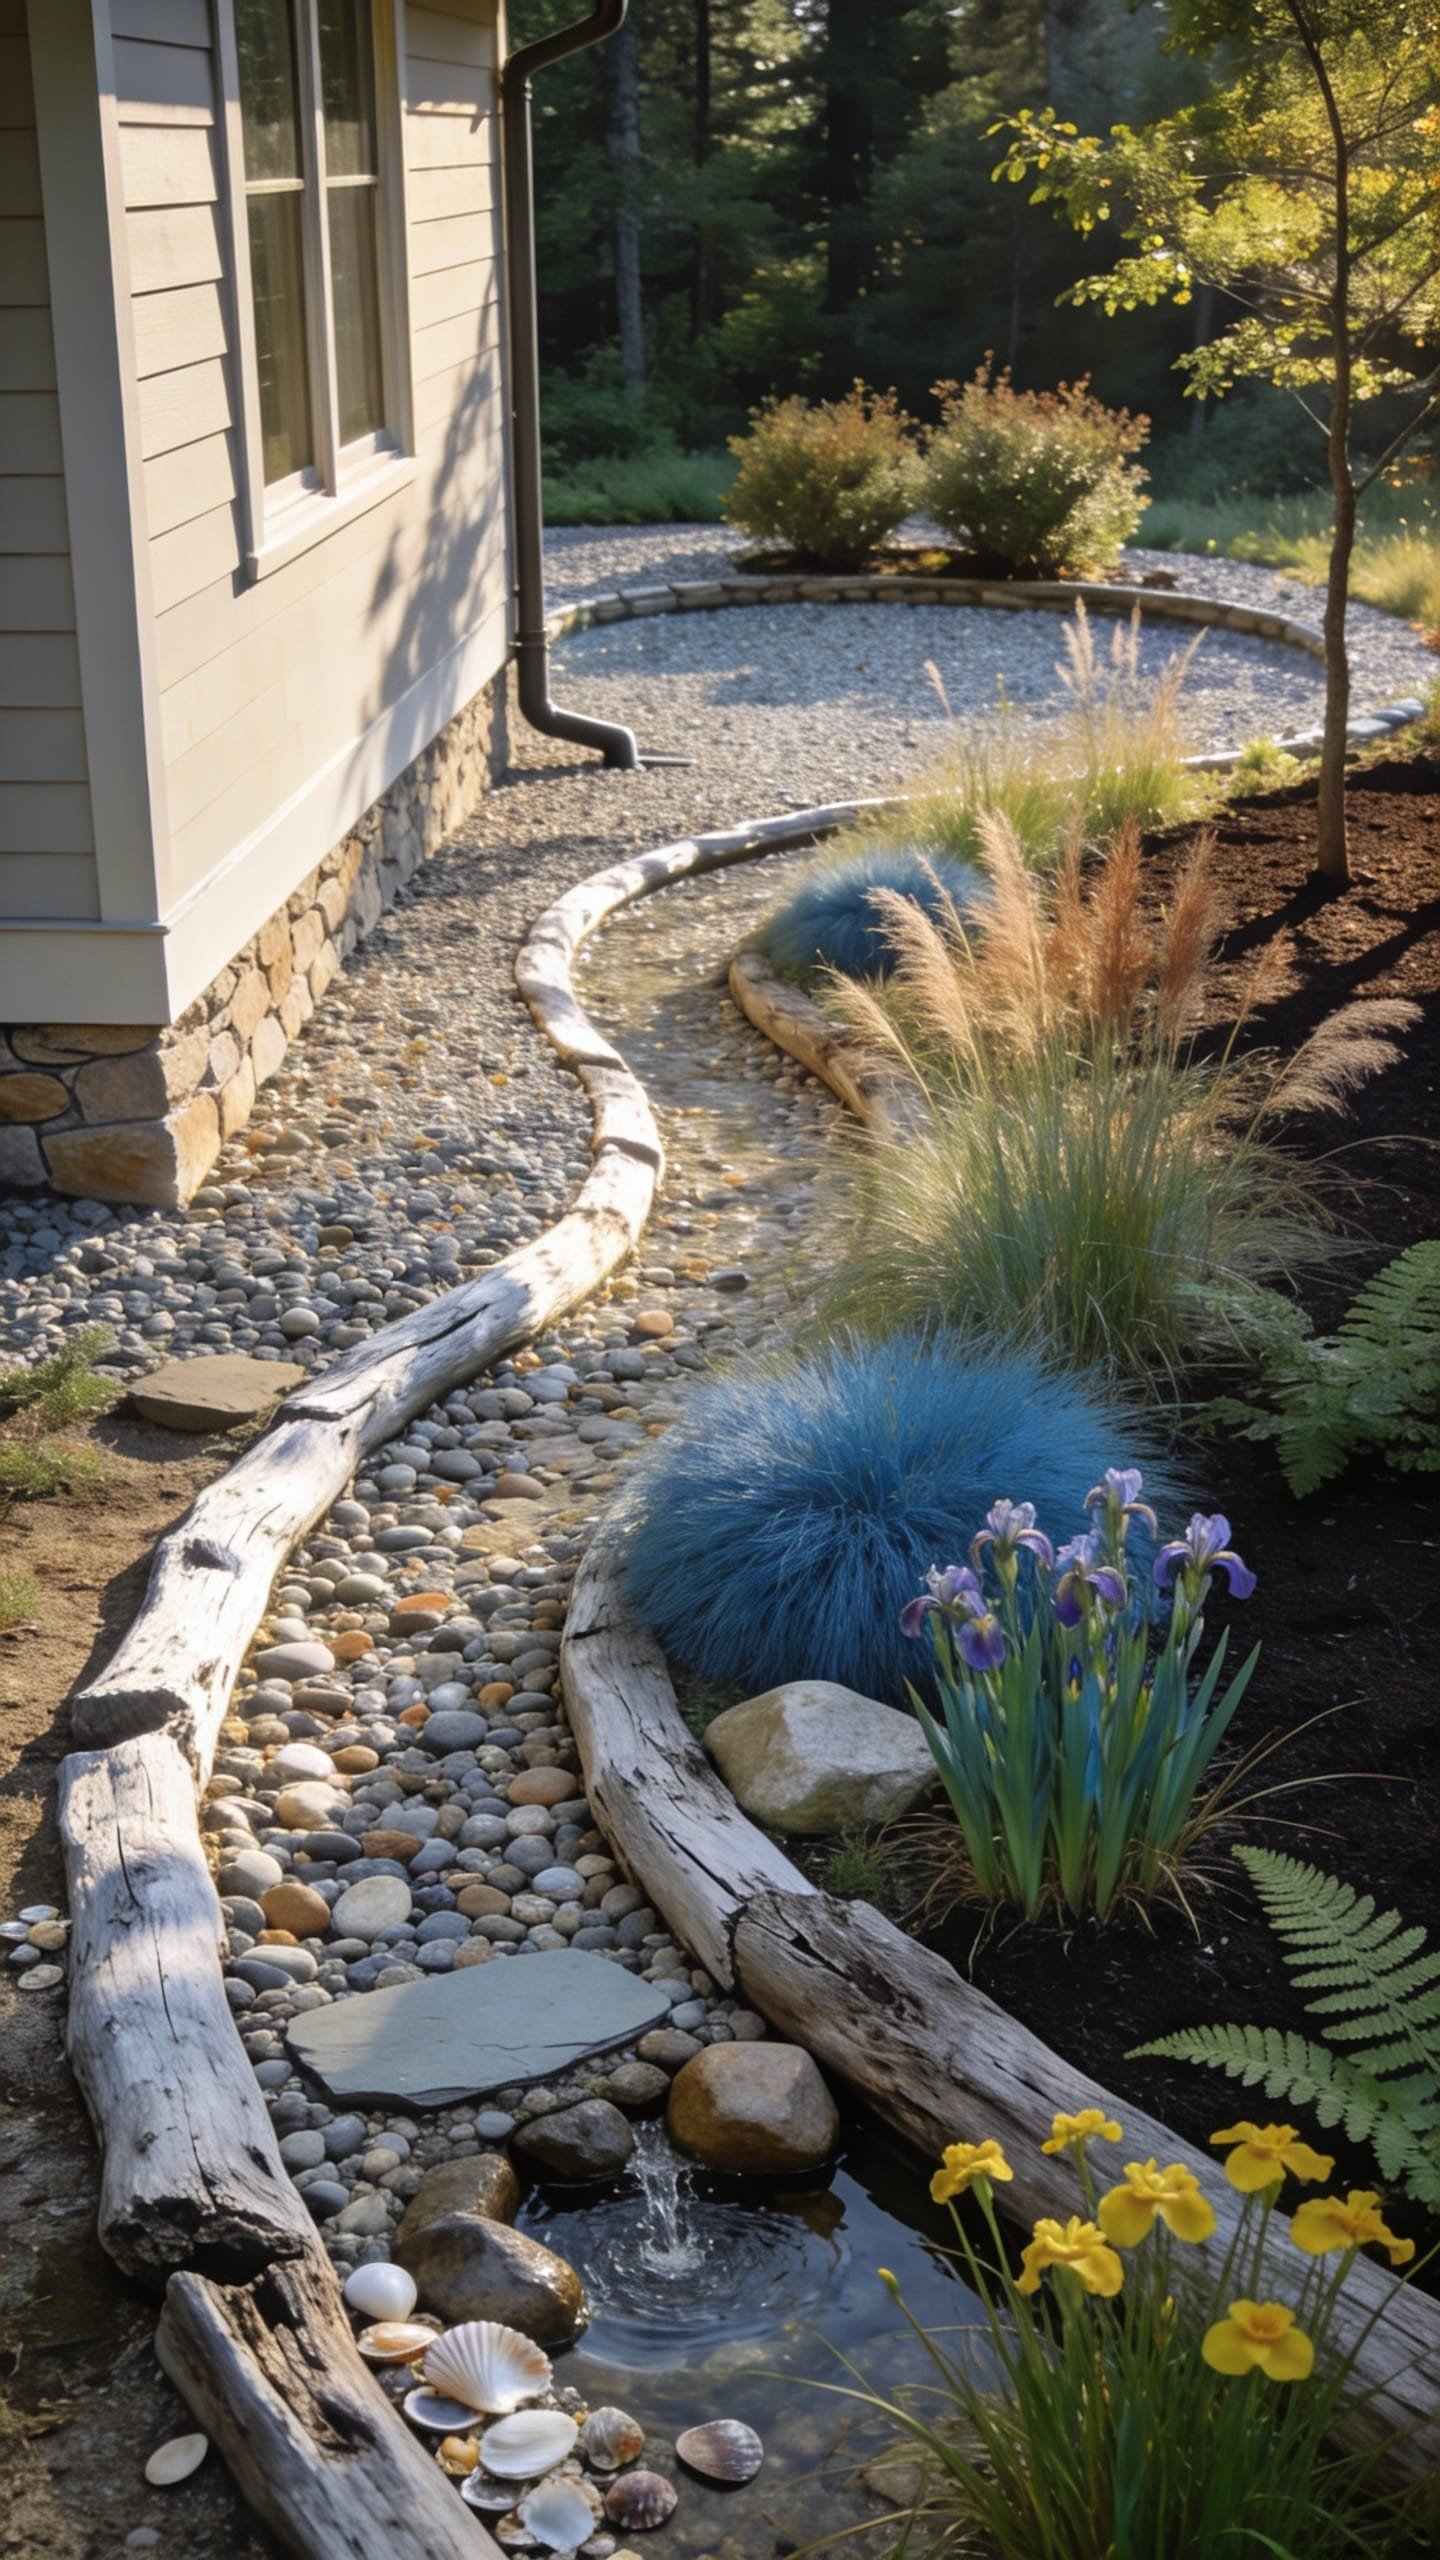
You want your yard to look natural, not engineered. But you’re tired of water carving little rivers through your mulch. You’ve tried random edging and mulch top-ups, but the flow keeps winning. A shallow gravel swale, bordered by driftwood or weathered timber and planted with water-loving perennials, guides stormwater like a secret garden path—far from your foundation and into a safe absorption zone.
The vibe is coastal meadow meets woodland edge. Think soft curves, feathery grasses, and a dry stream that only wakes up in a storm. This works beautifully for real homes because it handles large volumes gently and doubles as a landscaping feature. Maintenance stays low: occasional raking and weeding, that’s it. Light matters here—morning light catches grass plumes and turns them into tiny lanterns. Materials read organic: river gravel, decomposed granite, driftwood or reclaimed sleepers, and a varied plant mix that can handle intermittent wet feet.
Photographing this is a dream because of the S-curve flow, layered heights, and multiple textures. It feels like nature did the work, not a contractor. Variations: Budget version uses reclaimed wood from a salvage yard. Small yards can keep the swale just 12 inches wide, using miniature sedges for scale. For a darker, moody palette, use slate chips, black mondo grass, and burgundy ajuga. Renter-friendly adaptation: a surface-only, shallow swale filled with stone and edged with movable timbers.
Key Design Elements:
- Main materials: river gravel, decomposed granite, driftwood or reclaimed timber, native grasses and perennials
- Color palette: soft grays, sandy tans, weathered wood, fresh greens
- Lighting strategy: low path stakes or hidden well lights to graze plant textures
- Furniture silhouettes: a simple wood bench set well above the swale for a contemplative spot
- Texture layers: fine DG, medium gravel, coarse driftwood, soft foliage
- Accent details: smooth boulders at curves, mossy stepping stones near crossing points
Budget Breakdown:
- River gravel/DG: $100–$250
- Driftwood/salvaged timbers: $40–$150
- Plants (8–14): $80–$220
- Landscape fabric (optional): $20–$40
- Shovel, rake, wheelbarrow: $0–$40
Total Estimated Cost: $240 – $700
Best For: Long side yards, gentle slopes, and properties where a naturalistic look suits the architecture. Ideal if you want drainage that doesn’t scream “drainage.”
How To Recreate This Look:
- Map a shallow S-curve path from the downspout discharge to a safe infiltration area. Keep it 10+ feet from the foundation.
- Scoop a shallow trench, 4–6 inches deep and 12–24 inches wide, sloped gently away from the house.
- Line with DG or a thin layer of gravel; add driftwood or timbers to define the edge and prevent mulch creep.
- Place a few larger boulders on the outside of bends to slow water and add structure.
- Plant water-tolerant grasses and perennials along the edges; mulch sparingly to avoid float-away.
- Test with a hose to confirm flow direction and make minor grade tweaks.
Why This Looks Intentional: Curves with purpose. The swale reads like a designed watercourse—you direct the drama, set the stage with materials, and let storms do their thing without chaos.
Don’t Do This: Don’t make the swale too deep right away. Start shallow and test with water. Over-excavation creates unstable edges and awkward proportions.
Pro Styling Tip: On photo day, clip any stray grass blades that cross the gravel line; that razor-clean edge makes the curve sing in pictures.
If one idea resonates more than the others, that’s your starting point. You don’t need all five. Choose the design that feels like a relief to imagine on your wettest day.
5. Subsurface Dry Well With Clean Gravel Apron and Utility Planter
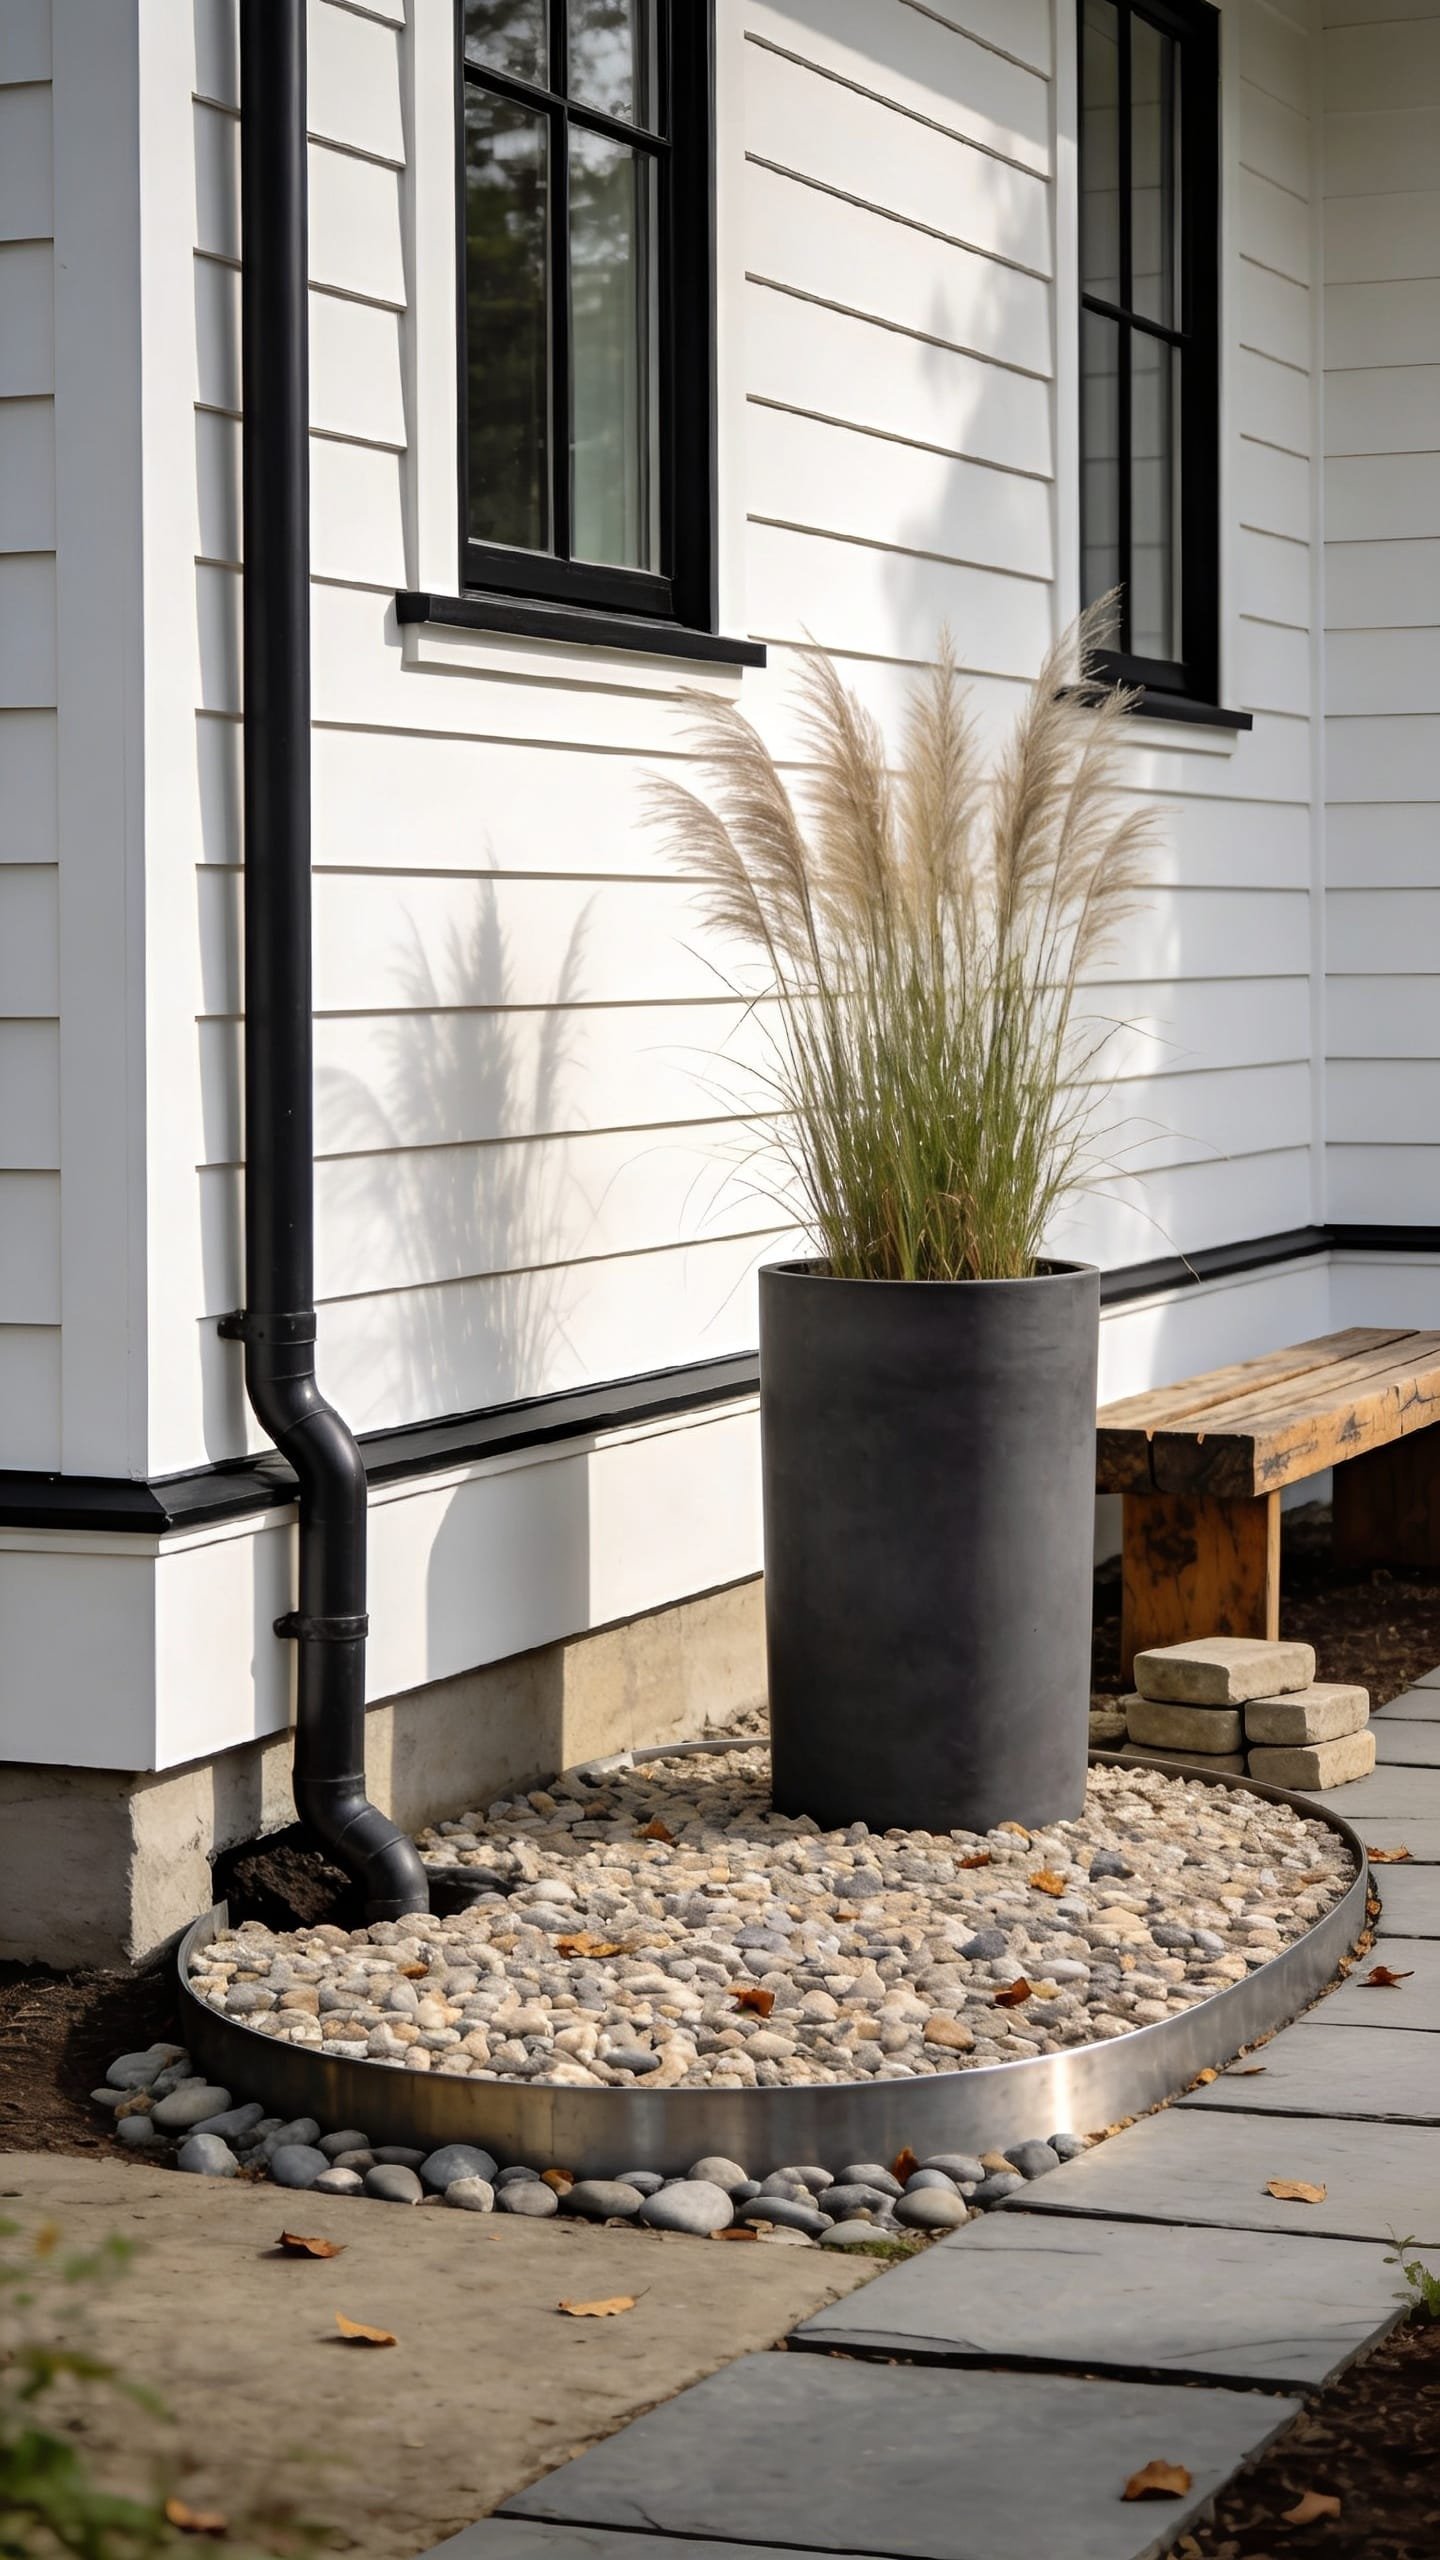
You’ve tried extensions, splash blocks, even a stone bed—and water still finds its way back to your foundation after a big storm. The truth is, your soil may need extra help. A subsurface dry well tucked 10–15 feet from the house gives excess water a place to sit and slowly soak, hidden under a clean gravel “apron” that looks like intentional hardscape. Add a tall utility planter to anchor the spot and it stops reading like “drainage” and starts reading like design.
The mood lands in modern farmhouse meets city courtyard—spare, sturdy, and functional with neat lines. This works in real homes where clay soil overwhelms typical solutions or where you want to keep the yard visually quiet. Lighting is simple here; one bollard light grazing the gravel provides soft glow and shadow texture. The dominant materials: dry well basin (store-bought or a DIY gravel pit), solid pipe feed, landscape fabric, large clean gravel, and a single substantial planter to claim the space.
Photography-wise, it’s pleasingly minimal. Big stone texture. One hero planter. No clutter. If you want to keep it budget-conscious, skip the manufactured basin and build a pit lined with fabric and filled with 3/4-inch clean stone. Small yard version: a micro dry well with a 10–15 gallon drum and a 3×3 gravel pad. Darker aesthetic: charcoal gravel with a matte black planter and burgundy foliage for instant mood.
Budget Breakdown:
- Manufactured dry well kit or drum: $80–$220
- Solid drain pipe (25–50 ft): $40–$120
- Clean gravel (1–2 yards): $80–$200
- Landscape fabric: $20–$40
- Bollard light or low-voltage spotlight: $60–$180
- Tall planter (fiberstone or concrete): $60–$200
- Plant/soil for planter: $25–$60
Total Estimated Cost: $345 – $1,020
Best For: Yards with poor percolation near the foundation, homeowners needing a beefier solution that still looks tidy and minimal.
Key Design Elements:
- Main materials: dry well, solid pipe, clean gravel, landscape fabric, one substantial planter
- Color palette: light gray or charcoal gravel, matte black or stone planter, fresh green foliage
- Lighting strategy: a single bollard for quiet drama and safety
- Furniture silhouettes: none; let the planter be the vertical interest
- Texture layers: crisp gravel field, smooth planter, soft foliage
- Accent details: discreet vent cap if required, steel edging to keep lines straight
Why This Looks Expensive: The scale and restraint do the heavy lifting. A broad gravel apron with a single sculptural planter feels like a landscaped courtyard you meant to build, not a last-minute drainage bandage.
How To Recreate This Look:
- Identify a spot at least 10–15 feet from your foundation for the dry well and call 811 to mark utilities before digging.
- Excavate the dry well cavity per the kit instructions (or dig a pit about 3–4 feet deep and 3 feet wide for a DIY version).
- Line the cavity with landscape fabric, set the well or drum, and connect a solid drain pipe from your downspout discharge to the well with a consistent slope.
- Backfill around the well with clean gravel, wrap fabric over the top to keep soil out, then top with 3–4 inches of decorative gravel to form a neat apron.
- Define the edges with steel or aluminum edging for a crisp outline.
- Place a tall planter slightly off-center on the apron; plant something architectural like a dwarf olive or upright rosemary.
- Add a low bollard light to wash the gravel with a soft glow for evening texture.
Watch Out: Don’t send your overflow onto a neighbor’s property or city sidewalk. Always plan an emergency spillway toward lawn or a rain garden area where water can safely spread.
Pro Styling Tip: Use a planter with a matte finish; glossy planters reflect harshly and can look cheap in photos, especially against high-contrast gravel.
Real-talk moment: digging for a dry well is legit work. I helped a friend on a clay-heavy lot last spring and we both swore the shovel hit rubber. But once installed, the mystery puddles at her back steps disappeared, and her hydrangeas stopped doing that sad, droopy “we’re too wet” performance. Worth it.
Perspective shift: drainage is design. When you treat water like a material—just like stone, wood, and light—you get a yard that behaves better and looks finished.
Quick Checklist
- Confirm at least 6–10 feet of discharge away from the foundation
- Use solid pipe for carry lines; perforated only where you want water to seep
- Maintain a consistent slope of about 1 inch per 10 feet
- Terminations must flow away from structures, not toward them
- Layer landscape fabric to keep soil out of gravel systems
- Choose stone size intentionally based on scale and vibe
- Anchor edges with steel, timber, or planted borders for clean lines
- Plan for overflow in heavy storms—sump, spillway, or dry well
- Test with a hose before backfilling
- Add lighting to graze texture and create nighttime depth
Frequently Asked Questions
How much should I budget for a basic rain gutter drainage fix that still looks good?
Plan for $200–$600 for most DIY-friendly solutions like a French drain ribbon or hidden extension with gravel path. That covers pipe, stone, fabric, edging, and connectors. Add lighting or premium edging and you’ll land on the higher end.
I’m nervous about digging near my foundation—what’s safe for beginners?
Start with surface solutions first: graded stone beds, hidden extensions routed along the surface, or rain chains into basins. If you dig, keep trenches shallow near the house and always maintain slope away from the foundation. For deep work like dry wells, call 811 to mark utilities and keep a respectful distance from footings.
My yard is tiny. Which idea works best without eating up space?
The hidden downspout extension under a narrow stepping path is perfect. Use 12×24 pavers with tight pea gravel joints and route a solid pipe beneath. You’ll move water 10 feet out while keeping a slim footprint that reads intentional.
Will these drainage ideas be high-maintenance?
Not if you build them right. Expect seasonal leaf cleanup, a quick hose test after big storms, and occasional raking of gravel. Rain chains may need a once-a-year check for kinks. Dry wells require the least visible upkeep if sized correctly.
I rent—can I do anything that’s reversible and still helps my foundation?
Yes. Try a rain chain into a portable basin with a hidden hose running under mulch to a safe discharge point, or build a surface dry stream bed with stone and timber edging that lifts out when you move. Avoid deep digging and keep everything modular.
Closing Thoughts
Pick one idea and start. You don’t need to redesign your whole yard—just guide the water like you mean it. When you choose materials that feel good underfoot and look calm in every season, you protect your foundation and make your exterior feel finished.
Remember: luxury outdoors comes from texture, lighting, and restraint. Stone that actually belongs, light that hits at the right angle, and lines that stay clean after a storm. That’s the secret—less clutter, more intention.
Trust yourself. You already know which corner of your house needs this most. Tackle it this weekend, hose-test it, and enjoy the quiet satisfaction when the next storm rolls through and everything stays exactly where it should. Seriously—you’ve got this.

About the Author

Krisztina P.Rendes, Founder of Home Style Vibes
Founder of Home Style Vibes
Krisztina Puskásné Rendes created Home Style Vibes as a cozy-modern lifestyle space where homemaking meets inspiration. Her goal is to help women create beautiful, organized, and peaceful homes they truly love — without overwhelm. You’ll find here heart-driven content on home decor, cleaning tips, easy family recipes, organization and decluttering, DIY home projects, plants, and seasonal ideas — all designed to bring more calm, comfort, and style into everyday life.