
6 Easy DIY Fall Front Porch Decor Ideas You Can Finish In One Afternoon
You want a cozy, welcoming fall front porch that glows at golden hour and makes neighbors slow down. You hate the scramble—half-baked decor, a doormat that never looks right, and pumpkins that somehow feel… random. This guide fixes that. These 6 easy DIY fall front porch decor ideas are designed for real homes and real Saturdays—each one finishable in one afternoon, each one photo-friendly, and each one steeped in cozy bright autumn: warm string lights, saturated rust and burgundy, plaid textiles, natural pumpkins, and a little harvest abundance you can practically smell. Spend less time second-guessing and more time enjoying the cinnamon-in-the-air season.
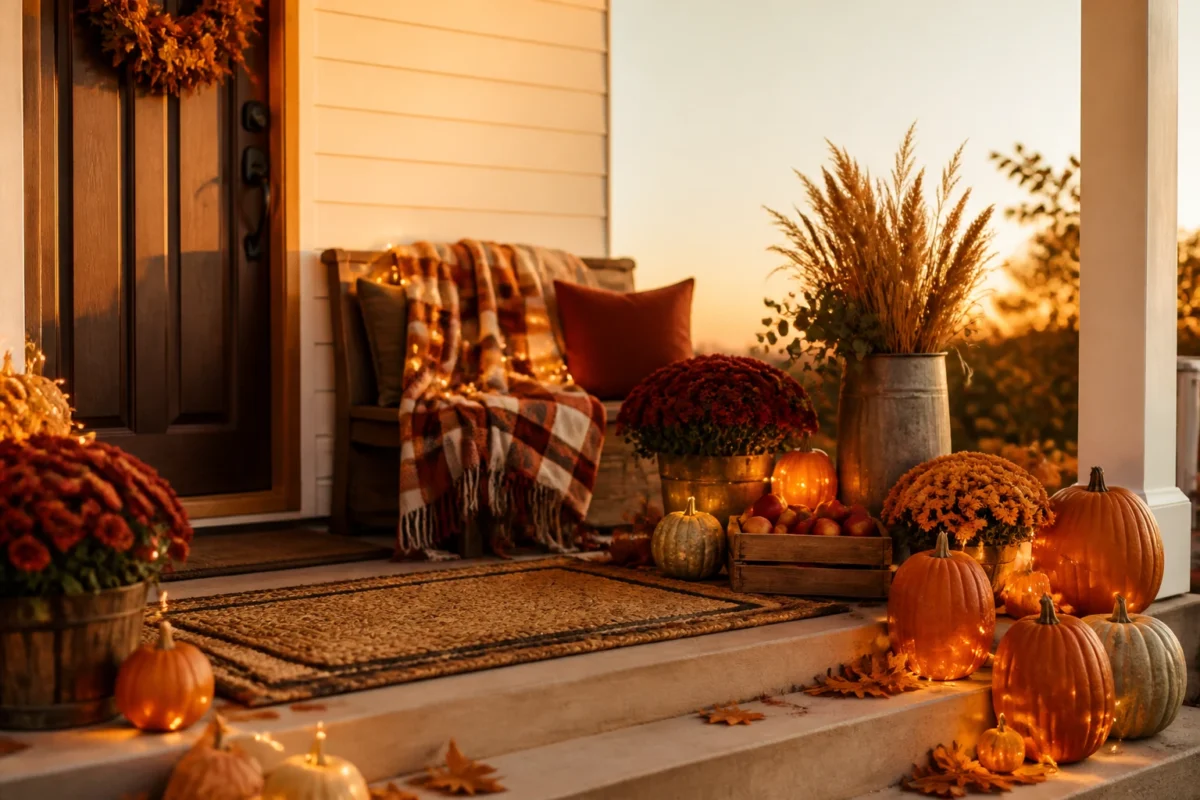
Expect rich color, soft textures, warm light, and ideas that flex from early September through Thanksgiving. If you’re into warm welcomes, pumpkin stacks, and front steps that look like a page out of your fall Pinterest board, you’re in the right place.
1) Pumpkin-Lined Steps With Amber String Lights on the Front Stair
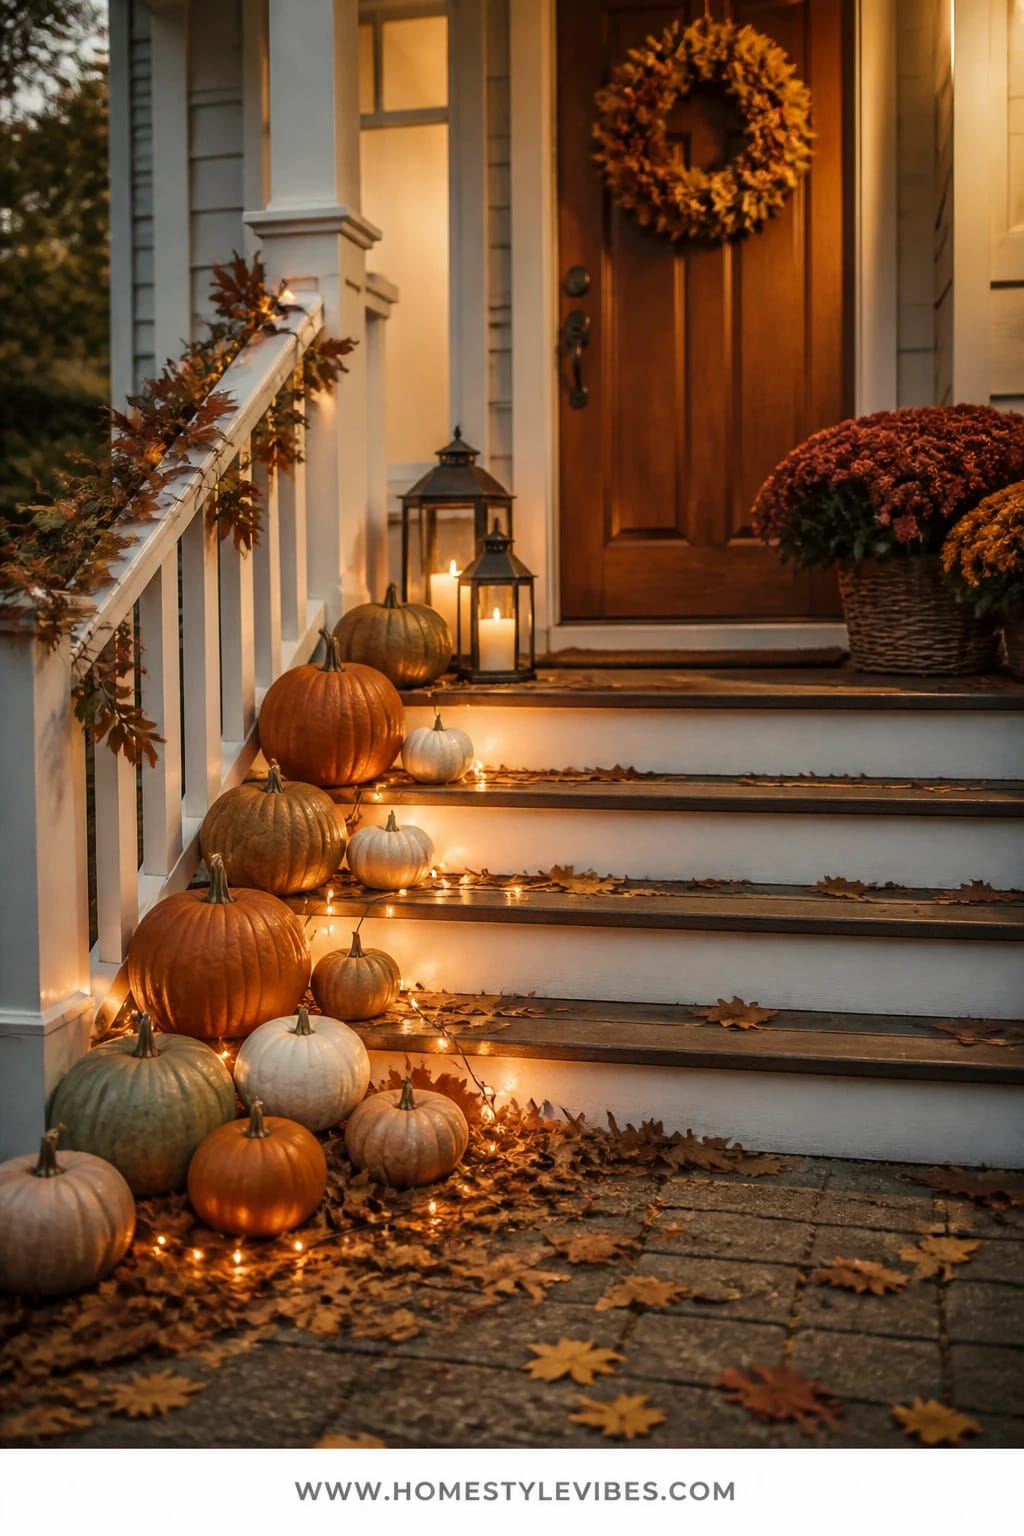
We’ve all been there: you grab a few pumpkins, scatter them on the steps, and somehow it still looks skimpy. The secret isn’t more pumpkins—it’s rhythm and warm light. This design builds a glowing pathway up your front steps using staggered pumpkin sizes and one strand of amber string lights tucked invisibly along the edges. The effect reads like a soft runway of fall color at dusk, and it photographs beautifully—think saturated orange and warm highlights cushioned by shadow.
What you get is classic cozy bright autumn: real pumpkins in mixed varieties, warm string lights (practically a filter IRL), and natural greenery that can carry you from September to late November. It works because steps act like built-in pedestals; you just need a repeating pattern of tall-medium-small to create movement. Bonus: it’s totally kid- and pet-friendly if you skip candles and choose shatterproof lights.
Lighting matters here. Aim for amber/warm white (2200K–2700K) so the pumpkins glow, not glare. As the sun sets, the steps pick up a candle-adjacent warmth without dealing with real flames. And yes, this look stores easily—you’ll repurpose the lights for winter and compost the pumpkins later.
Style variations: For a small stoop, use just five pumpkins in a symmetrical formation and run the lights around the handrail. Prefer a softer palette? Mix in white and pale green pumpkins to cool the palette while keeping the warmth in the lighting.
Budget Breakdown:
- Real pumpkins (6–12 mixed sizes): $25–$70
- Warm/amber outdoor string lights (1–2 strands): $18–$40
- Greenery (eucalyptus, magnolia clippings, or fall branches): $0–$20 (free if you forage responsibly)
- Outdoor extension cord + timer: $10–$25
Total Estimated Cost: $53 – $155
Best For: Homes with front steps or a tiered entry. Great from early September through Thanksgiving, especially if you want maximum curb appeal with minimum fuss.
Key Design Elements:
- Main seasonal props: Mixed pumpkins (cinderella, sugar pie, white ghost), trailing eucalyptus or magnolia
- Color palette: Saturated orange, rust, creamy white, pops of deep green
- Lighting strategy: Amber string lights tucked along step edges for a runway glow
- Textile layers: Optional outdoor plaid blanket folded on top step for softness
- Natural elements: Real leaves, branches, and stems for movement
- Accent details: Discreet black cable clips, an outdoor timer for auto-on at dusk
How To Recreate This Look:
- Start with a quick sweep of your steps; the pumpkins need a clean base to sit flat.
- Add two larger pumpkins on the bottom step’s left and right corners for anchors.
- Layer medium pumpkins up the steps, alternating sides for a zig-zag rhythm.
- Place smaller gourds to fill the gaps and create clusters of three (eye-pleasing triads).
- Style with amber string lights: clip or tuck along the step edges so the bulb faces outward, then weave a few bulbs lightly behind pumpkins for backlight.
Why This Looks Expensive: The repetition and scale feel intentional, while the concealed lighting mimics professional event styling. Your eye reads glow first, then color, then shape—it’s layered like a magazine shot.
Watch Out: Don’t mix cool white lights with warm pumpkins. It flattens color and makes everything look harsh. Also, avoid placing pumpkins on uneven treads—wobbles happen right when your guests arrive.
Pro Styling Tip: Shoot photos at blue hour (right after sunset) when the string lights read brighter and the pumpkins hold their saturated color without glare.
2) Harvest Crate Tower With Golden Lanterns by the Front Door
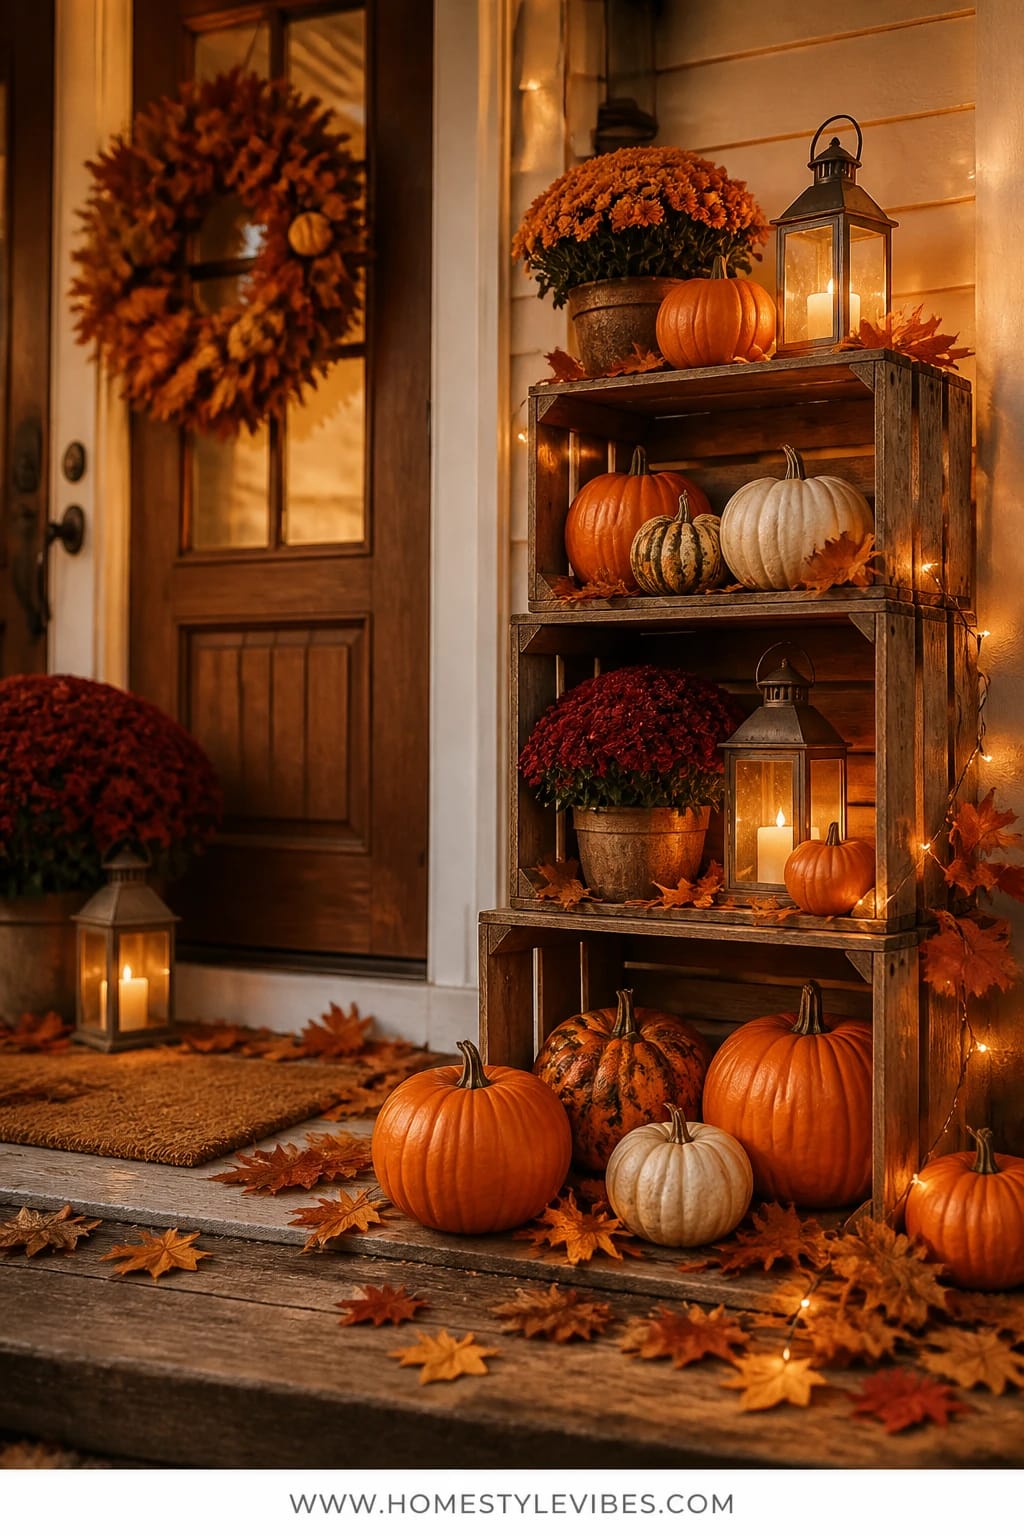
It’s that one corner next to the door that always feels off—too empty, or too cluttered. A vertical harvest crate tower solves it fast. Stack two or three wooden crates, angle them slightly, and fill each “shelf” with pumpkins, mums, and one or two golden lanterns. You’ll create height, texture, and a clear focal point that reads like an intentional display instead of a seasonal yard sale.
What’s lovely about this setup is how forgiving it is. Crates hide any uneven porch boards, lanterns bring the glow, and the mix of mums and pumpkins adds that classic harvest abundance. In the afternoon, sunlight skims the wood texture; by evening, lanterns pulse with warmth. Use flameless candles if you’ve got kids darting around at bedtime—zero stress, all the ambience.
I tried a version of this on my own porch last October and honestly couldn’t believe how pulled-together my entry felt. It’s the furniture effect: the crates act like an instant console table for your porch, without buying new furniture. Storage after the season? Crates go in the garage, lanterns move indoors for winter coziness. Easy.
Variations: Keep it neutral with white pumpkins and cream mums in galvanized buckets. Or go bold with burgundy mums, rust pumpkins, and marigold lantern candles for a classic cozy bright fall front porch look.
Budget Breakdown:
- Wood crates (2–3): $24–$60 total
- Lanterns (2 medium, 1 large) + flameless candles: $35–$90
- Mums (2–3 pots): $15–$30
- Pumpkins (4–6): $18–$40
- Optional metal house numbers or plaque accent: $10–$30
Total Estimated Cost: $92 – $250
Best For: Any size porch with a blank spot near the door. Perfect for families who want impact without a mess of tiny knick-knacks.
Key Design Elements:
- Main seasonal props: Wooden crates, lanterns, mums, mid-sized pumpkins
- Color palette: Warm wood, brass/gold, rust, burgundy, creamy white
- Lighting strategy: Clustered lanterns at mixed heights for layered glow
- Textile layers: Optional small plaid throw tucked into a crate
- Natural elements: Mums, eucalyptus, dried seed pods for texture
- Accent details: Galvanized buckets, brass lantern handles, a painted house number
How To Recreate This Look:
- Start with your crates: stack two vertically and place one horizontally on top or beside for a staggered silhouette.
- Add lanterns: put the largest on the ground for weight, then a medium on the middle crate, and a small tucked beside a mum.
- Layer mums in front-facing positions where buds are just opening for longevity.
- Place pumpkins in negative spaces—one inside a crate, one beside the base, and one on top for height.
- Style with a small bundle of dried stems or a plaid throw for softness and color repeat.
Why This Feels Designer: You’ve created a vertical vignette with clear sightlines and repeated materials (wood + brass + botanicals). It reads as curated, not collected.
One Thing To Avoid: Don’t cram every crate full. Leave some negative space so each item has breathing room—your eye needs places to rest.
Pro Styling Tip: Angle the crates 5–10 degrees toward the street for curb appeal—your display will “face” guests and passersby, not just your front door.
Pause and breathe. This isn’t about chasing a trend; it’s about a front porch that makes you smile when you pull into the driveway. If one idea is calling your name, start there. You don’t need all six—pick the one that solves your biggest “something’s missing” feeling.
3) Plaid Layered Doormat with White Pumpkins at the Threshold
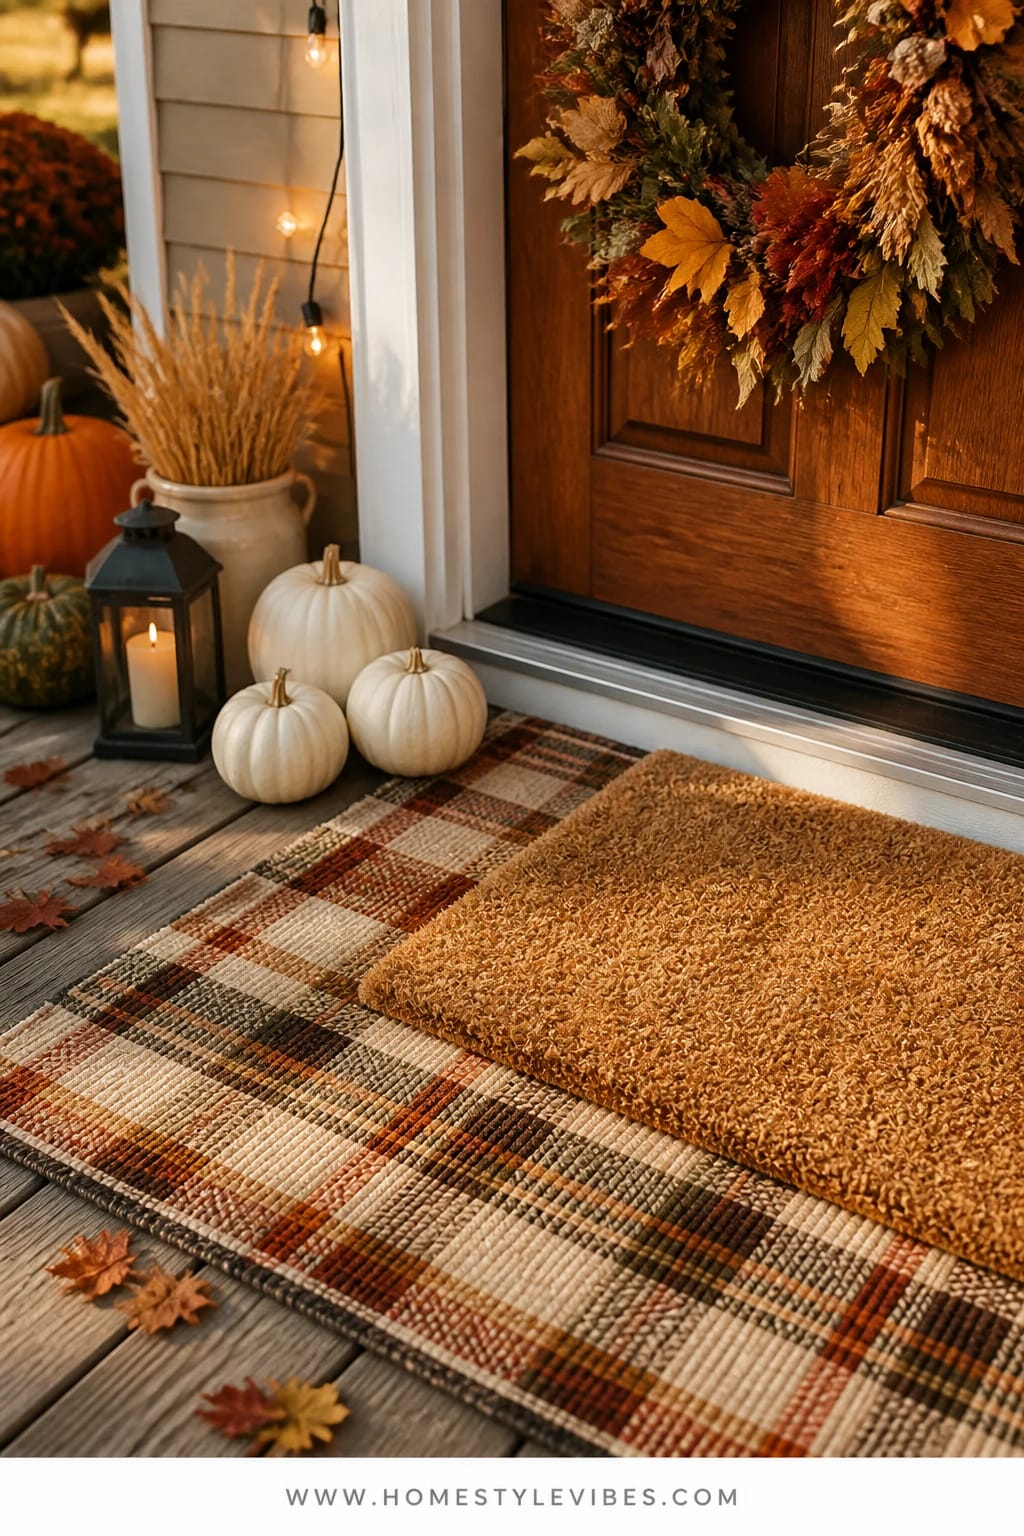
You’ve tried swapping your doormat for fall, but it still looks flat. The secret is layering: a plaid outdoor rug under your coir doormat creates instant texture and scale so the door area feels finished. Add a trio of white pumpkins to the hinge side of the door for balance and that crisp, bright contrast we love in cozy bright autumn.
This simple move works for every porch because it respects traffic flow—still functional, just prettier. It also photographs like a dream: the plaid gives you a bold graphic to play off your pumpkins, and the white pumpkins bounce warm light back at dusk. Do it in one errand run and call it done.
Prefer subtle? Choose a cream-and-taupe plaid and a natural coconut-fiber mat with a small welcome script. Want more color? Pull in rust or burgundy in the plaid to echo nearby mums or wreaths.
Budget Breakdown:
- Outdoor plaid rug (2×3′ or 3×5′ depending on porch size): $20–$45
- Coir doormat: $12–$30
- White pumpkins (3): $9–$18
- Anti-slip rug pad (optional): $10–$15
Total Estimated Cost: $41 – $108
Best For: Small to medium porches and busy households—high impact with zero crowding.
Key Design Elements:
- Main seasonal props: Plaid rug, coir mat, white pumpkins
- Color palette: Cream, taupe, black, white with optional rust accents
- Lighting strategy: Indirect glow from nearby lanterns or overhead sconce
- Textile layers: Plaid outdoor rug as the base layer
- Natural elements: Real white pumpkins for shape and sheen
- Accent details: Simple wreath that repeats one color from the plaid
Why This Reads High-End: Scale. Most porches need a larger base rug to make the doormat feel right-sized. The layered look signals intention, not impulse buy.
How To Recreate This Look:
- Start with a quick sweep and dry the area if it’s damp—rugs need traction.
- Add the plaid base rug centered on the door, aligned to your porch boards.
- Layer the coir mat on top, leaving 2–4 inches of plaid visible on all sides.
- Place three white pumpkins on the hinge side of the door in a staggered triangle.
- Style with a coordinating wreath or door hanger that repeats one plaid color.
The Most Common Mistake: Choosing a base rug too small. If you have a 36-inch door, aim for at least a 3×5 base rug so the composition feels grounded.
Pro Styling Tip: When you shoot this, step back and include the doorframe in the photo. The frame acts like a natural border that makes the plaid pattern pop.
4) Cornstalk Bundle With Warm Brass Sconces by the Entry Pillar
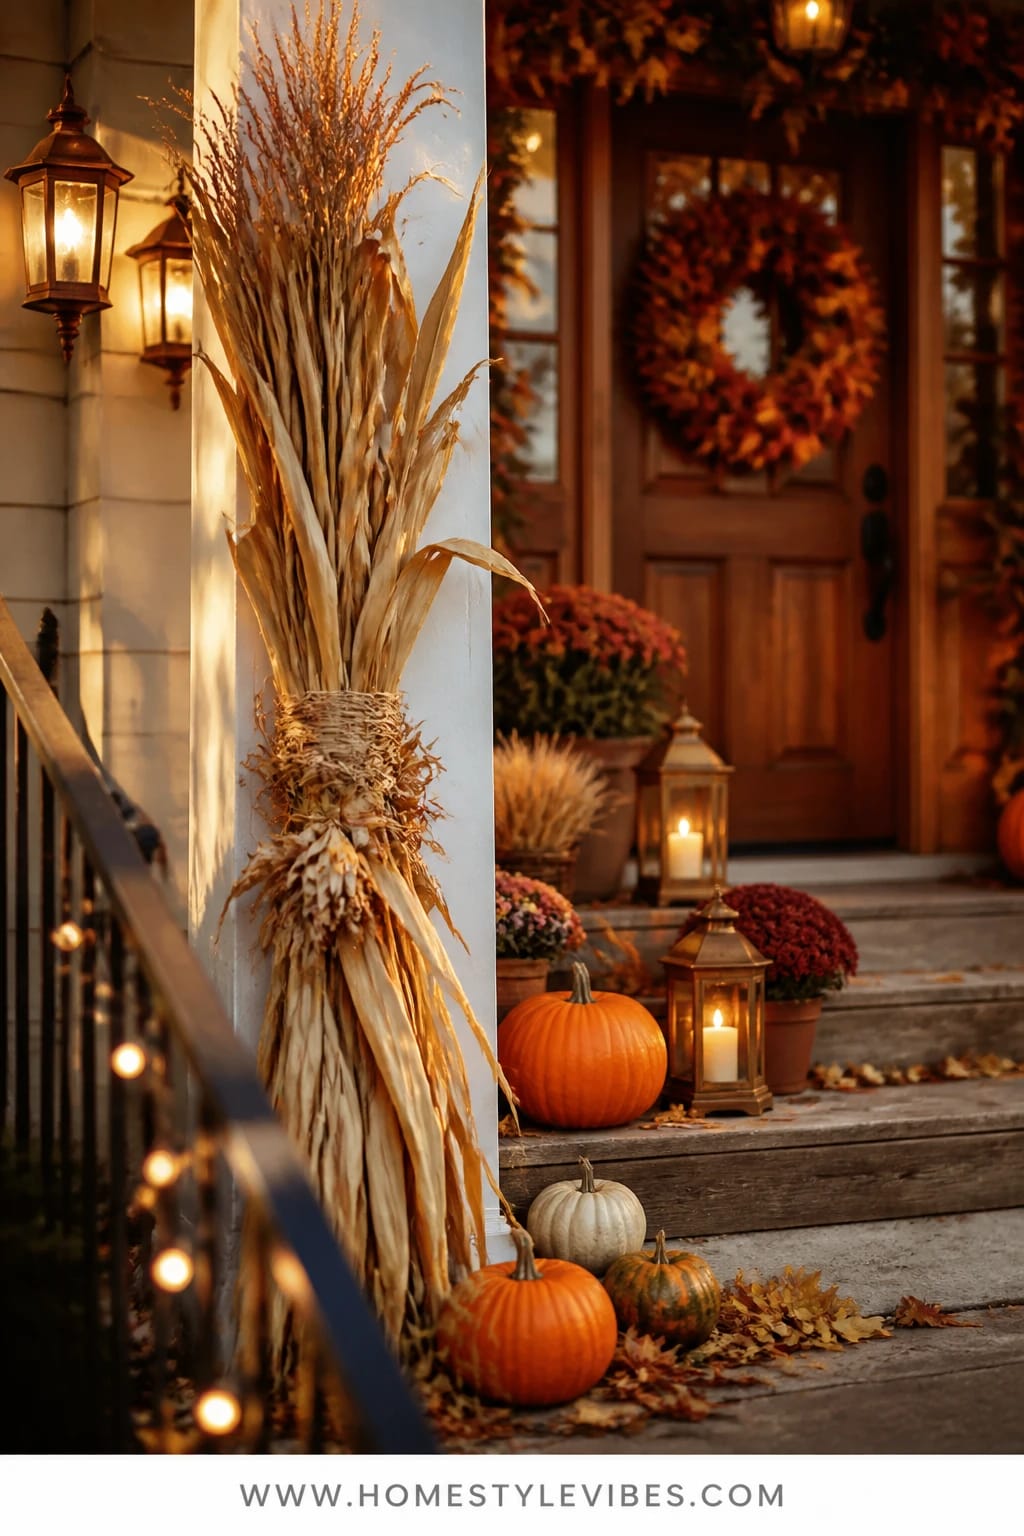
Big porches with tall pillars can feel like a lot of blank space. You’ve tried a wreath and some pumpkins, but the verticals still look bare. Tie two to three cornstalks into a tidy bundle and lean or secure them to your entry pillar or post. Pair the setup with warm brass wall sconces or clip-on lanterns, and suddenly your porch has that timeless, harvest-farmhouse moment—clean lines, warm light, gorgeous shadows.
This creates a calm, confident vibe: classic amber glow, tactile natural textures, and plenty of height. Because the cornstalks are neutral, they never clash with pumpkins or mums. They also transition effortlessly from September through Thanksgiving. In the evenings, the sconces cast a halo that brings out every papery leaf; it’s one of those small luxuries that always feels special when you come home after dark.
If you can’t wire new sconces, use battery-powered wall lanterns rated for outdoors or shepherd’s hook lanterns planted into planters by the pillar. And if wind is an issue, tie the bundle at three points—base, middle, top—with natural jute and add a hidden zip tie to the post.
Budget Breakdown:
- Cornstalk bundle (2–3 stalks): $10–$20
- Outdoor brass-style lanterns or sconces (wired or battery): $35–$120
- Jute rope or twine: $5–$10
- Zip ties and removable hooks: $5–$12
Total Estimated Cost: $55 – $162
Best For: Homes with pillars, posts, or a tall blank wall near the entry. Great if you want drama without cluttering the floor area.
Key Design Elements:
- Main seasonal props: Cornstalk bundle, warm brass lanterns/sconces
- Color palette: Wheat, brass, soft black, hints of rust
- Lighting strategy: Wall-mounted or clip-on warm lights at eye level
- Textile layers: Jute ties that read as natural ribbon
- Natural elements: Dried cornstalks, optional dried wheat sprays
- Accent details: A small brass house number or mail slot as a repeat metal note
How To Recreate This Look:
- Start by bundling 2–3 cornstalks and tie at three points with jute for a neat silhouette.
- Add removable outdoor hooks or discreet zip ties to secure the bundle to your pillar or post.
- Layer a lantern or sconce at about 60–66 inches from the floor to light faces and the bundle evenly.
- Place a pumpkin or two at the base for a grounded look.
- Style with a small ribbon in a rust or burgundy tone if you want a pop of color.
Why This Looks Intentional: Verticality. Your eye goes up, reads the light, and then lands on the base pumpkins—a clean Z-pattern that architects love because it feels balanced and calm.
Don’t Do This: Skip the flimsy ribbon. Wind tears it fast. Jute or wired ribbon holds shape and doesn’t look sad by week two.
Pro Styling Tip: Photograph this from a slight angle so the cornstalk layers cast visible shadows—that dimensionality is what makes it read like a styled shoot.
Remember, this isn’t about recreating a showroom. It’s about creating a front porch that fits your life and your light. If a porch pillar isn’t your reality, skip it and keep scrolling—there’s a good idea with your name on it below.
5) Rustic Bench With Burgundy Plaid Throw and Pumpkin Basket Seating Zone
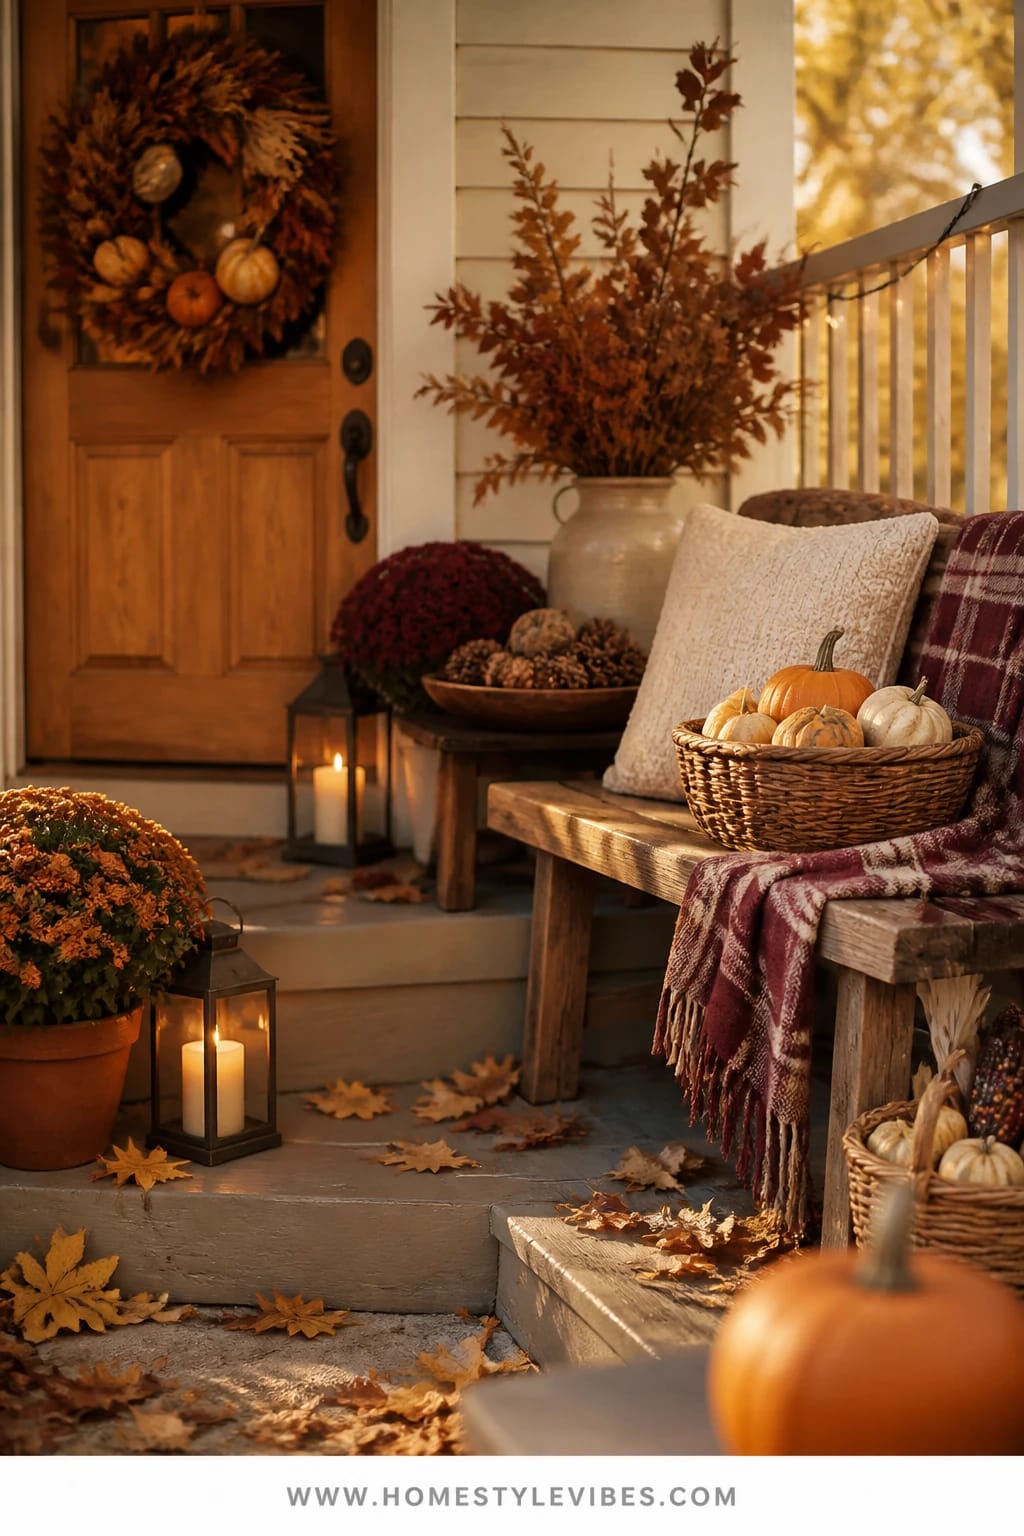
Big open porches often feel empty, while small ones feel like you can’t add anything without creating a tripping hazard. A slim rustic bench solves both problems. It adds a defined seating moment without blocking the door, and it gives you a surface for textural fall layers: a burgundy plaid throw, a woven basket full of small pumpkins, and a single cushion in a soft, tactile fabric.
The mood here is cozy bright autumn lounge: warm textiles, saturated color, and a harvest still-life that invites you to sit and tie your shoes. By late afternoon, the bench catches that soft golden slant of sunlight; by evening, a lantern beside it turns the setup into a magazine-worthy vignette. It also stores easily—the basket goes indoors in December, throw becomes a lap blanket, and the bench works year-round.
One of my friends tried this after buying three different garlands that never looked right. The real issue? No “furniture” to anchor the decor. Once the bench arrived, everything else finally had a home. IMO, a bench is the quiet MVP of porch styling.
Variations: Go neutral with an oatmeal throw and white pumpkins. Prefer bold? Mix burgundy and rust pillows, but keep the bench wood tone subdued so it doesn’t compete.
Budget Breakdown:
- Rustic or farmhouse-style outdoor bench: $80–$180
- Plaid outdoor-safe throw: $20–$45
- Outdoor pillow (1–2): $15–$40
- Woven basket: $15–$30
- Mini pumpkins/gourds (6–10): $6–$20
- Lantern (optional): $18–$45
Total Estimated Cost: $134 – $360
Best For: Medium porches or long narrow stoops where a small seating element adds function and style.
Key Design Elements:
- Main seasonal props: Plaid throw, mini pumpkins in a basket, lantern
- Color palette: Burgundy, rust, cream, natural wood
- Lighting strategy: Single lantern at bench height for soft face-level glow
- Textile layers: Woven plaid, nubby pillow cover, optional seat cushion
- Natural elements: Real pumpkins and dried stems tucked in the basket
- Accent details: Leather pillow piping, brass lantern handle, wooden bench slats
Why This Looks Expensive: Mixed textures with restraint—wood, woolly plaid, woven basket, smooth pumpkin skins. It’s a tactile story that feels considered, not busy.
How To Recreate This Look:
- Start by placing the bench parallel to the door but out of the main traffic line.
- Add the throw folded lengthwise and draped over one side to reveal plaid lines.
- Layer a single outdoor pillow in a solid tone pulled from the throw (burgundy or cream).
- Place a woven basket on the bench corner or floor, fill with mini pumpkins and a few dried stems for height.
- Style with a lantern next to the bench, keeping the flame or bulb level with the seating for a warm, flattering glow.
Watch Out: Avoid piling on too many pillows—it becomes fussy and weather-prone. One is enough for a tidy, calm look.
Pro Styling Tip: For photos, fluff the throw so one corner softly puddles onto the floorboard—adds a little motion and warmth without chaos.
6) Wheat Garland Arch With Warm Edison Bulbs on the Porch Railing
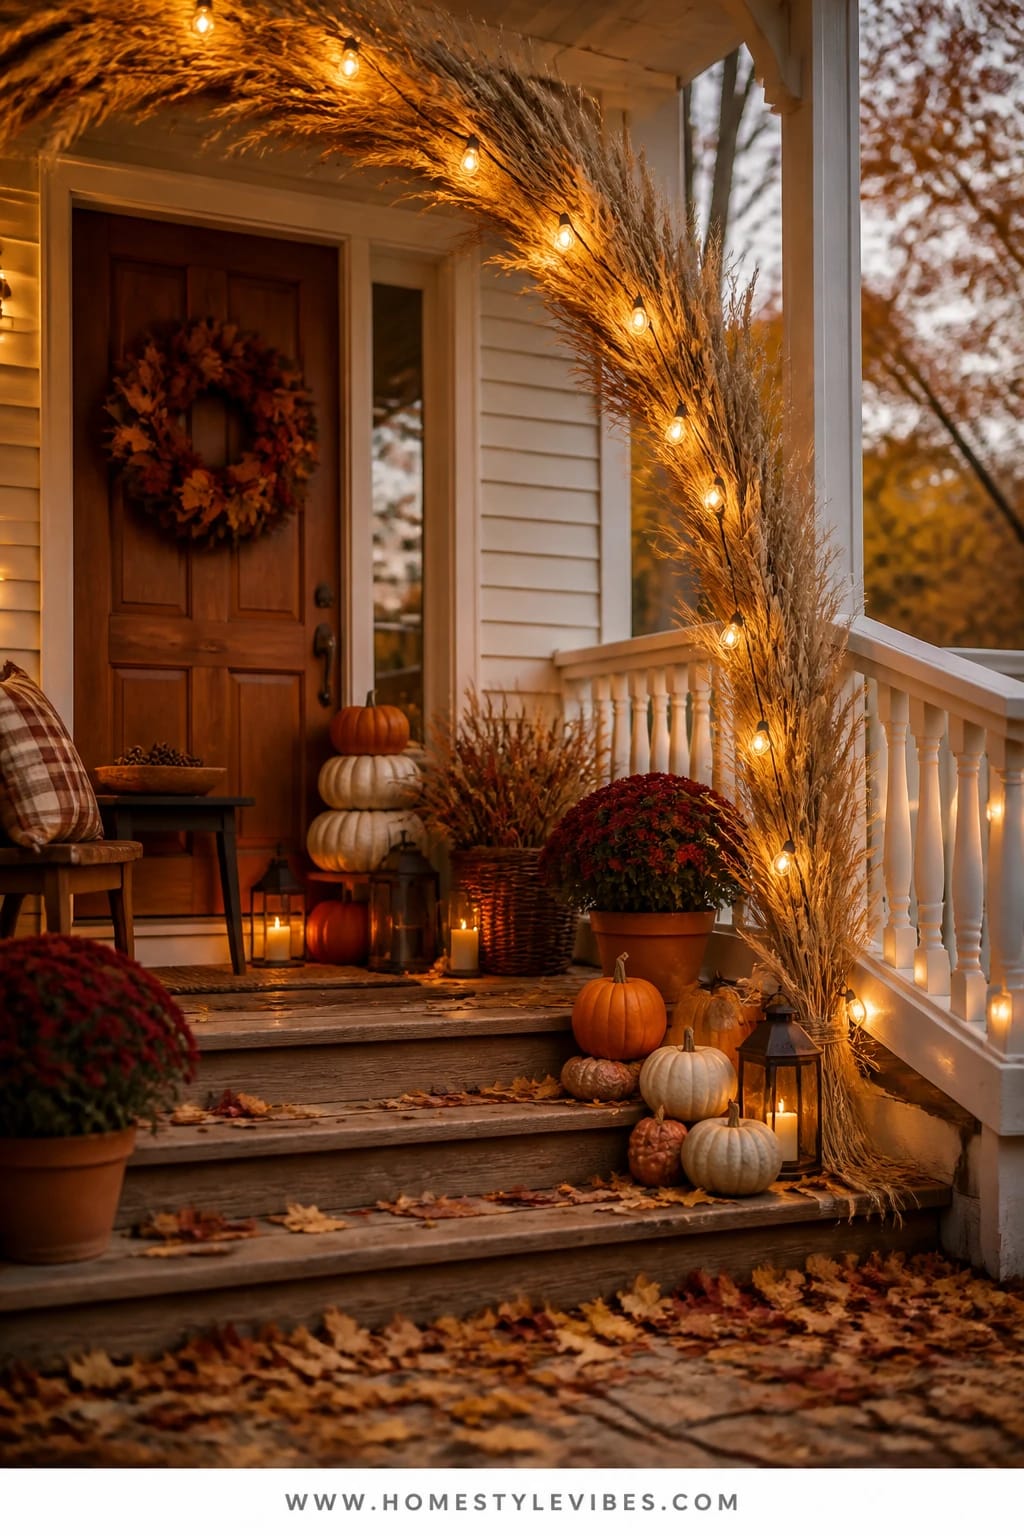
Garlands look incredible in photos, but in real life they sag, shed, or feel skimpy. The fix? Build a wheat garland arch along your porch railing or around the door and lace a single strand of warm Edison bulbs through it. Wheat reads soft and neutral with a hint of glow when the bulbs kick on at dusk—no cheesy vibe, just an elegant halo of fall texture.
This setup gives you that festive, “we’re hosting” feeling without a lot of visual noise. It’s also easier than you think. Pre-made wheat garlands exist, or you can tie small sheaves side by side on a natural rope. Edison bulbs add old-fashioned warmth that flatters every paint color from navy to brick red.
Small porch? Just do the top rail or the door header. Windy spot? Use floral wire at 12-inch intervals and anchor the ends with removable outdoor hooks. It stays put, looks full, and lights automatically with a timer. As a bonus, the arch becomes the perfect backdrop for welcome photos on Thanksgiving Day.
Budget Breakdown:
- Wheat garlands (2–3 strands or DIY sheaves and rope): $30–$90
- Warm Edison bulb string lights (outdoor-rated): $25–$60
- Floral wire and removable hooks: $8–$15
- Optional satin ribbon tails in rust or burgundy: $6–$12
Total Estimated Cost: $69 – $177
Best For: Porches with railings or a defined doorway. Great for those who want a clean, neutral-but-warm aesthetic from early October through Thanksgiving.
Key Design Elements:
- Main seasonal props: Wheat garlands, Edison bulb string lights
- Color palette: Pale wheat, warm amber light, soft black cord, optional rust ribbon
- Lighting strategy: Evenly spaced bulbs at 8–12 inches for consistent glow
- Textile layers: Narrow satin or velvet ribbon tails for movement
- Natural elements: Dried wheat heads with subtle texture
- Accent details: Matte black hooks, discreet green floral wire
How To Recreate This Look:
- Start by measuring your railing or doorframe so you know how many garland strands you need.
- Add removable hooks at corners and midpoint for support.
- Layer your wheat garland along the hooks, letting it gently drape; secure with floral wire every 12 inches.
- Place the Edison lights along the same path, nestling the bulbs just in front of the wheat for soft backlight.
- Style with two ribbon tails at the corners for a subtle, celebratory finish.
Why This Looks Expensive: Monochrome texture with warm light always reads luxe. Wheat is sculptural without shouting, and Edison bulbs give that heritage glow that says, “we thought about this.”
The Most Common Mistake: Hanging lights too low. Keep bulbs above eye level to avoid glare and make the whole scene feel gentle and inviting.
Pro Styling Tip: Photograph just after lights turn on—set your timer for 15 minutes before sunset. The bulbs pop, the wheat still registers detail, and the sky turns painterly.
Quick reality check: You don’t need professional tools or endless Saturdays. Pick the idea that solves your porch’s specific pain point—bare steps, empty corner, flat doormat—and give yourself one afternoon to finish it. That’s the whole point.
Quick Checklist
- Warm/amber outdoor string lights or Edison bulbs
- Mixed real pumpkins in 3 sizes
- Wood crates for stacking
- Lanterns with flameless candles
- Plaid outdoor rug for layering under a coir mat
- Cornstalk bundle and jute twine
- Rustic bench and one outdoor pillow
- Woven basket for mini pumpkins
- Wheat garland and floral wire
- Removable outdoor hooks and zip ties
- Outdoor-rated timer and extension cord
- Neutral ribbon in rust or burgundy for finishing touches
Frequently Asked Questions
How much should I realistically budget to update my fall front porch in one afternoon?
Plan on $75–$200 for a solid impact, depending on what you already have. A layered doormat setup and a pumpkin-lined step can come in around $100 total. Add lanterns or a bench and you’ll land closer to $200–$300, but those pieces work for winter and spring too.
Are real or faux pumpkins better for outdoor steps?
Real pumpkins win outdoors, IMO. They photograph better, have that soft matte finish, and feel authentic. If temps are warm, keep them in the shade and wipe them with a vinegar-water mix to extend life. Save faux pumpkins for spots that get heavy rain or where you need very specific colors year after year.
My porch is tiny—what’s the best small-space idea from this list?
The plaid layered doormat with white pumpkins is perfect for a small stoop. If you have one clear corner, try a single crate with a lantern on top and a mum beside it—vertical impact without blocking the door swing. Keep pathways 36 inches clear so it still feels open.
How do I store everything when fall ends?
Crates stack. Lanterns and string lights go in a clear bin with their cords wound and labeled. Wash the plaid rug if it’s indoor/outdoor, shake out the coir mat, and compost real pumpkins (remove any paint first). Wheat garlands store flat in a garment bag so they don’t crush. Future-you will thank present-you.
What about candles—are they safe with kids and pets?
Use flameless candles outdoors. Today’s versions flicker and warm-tone beautifully. If you love real flames, place them inside closed lanterns, use tall stable surfaces, and keep them away from costumes, scarves, and cornstalks on breezy nights.
When should I start decorating my fall front porch?
Early September for a harvest-forward look (wheat, cornstalks, neutral pumpkins). Add richer color and more pumpkins in October. Keep it going through Thanksgiving by refreshing mums and swapping in a winter-friendly ribbon or two by mid-November.
I rent and can’t permanently attach anything. Any workarounds?
Use removable outdoor hooks, clip-on light holders, and zip ties around railings that you can snip later. Lean crates, secure cornstalks with soft ties, and choose battery lanterns. Everything here can be installed and removed in under an hour without drilling.
Final Thoughts
Start with one corner, one focus. If your steps feel empty, go for the pumpkin-and-amber-lights runway. If your door zone feels flat, layer that plaid under your mat and add three white pumpkins. Each of these easy DIY fall front porch decor ideas is built to finish in one afternoon, look beautiful in photos, and handle real-life traffic without fuss.
Cozy bright autumn is all about warmth and abundance: stacked textures, saturated color, and that soft glow that makes your house look like it’s giving everyone a friendly nod at dusk. You don’t need a truckload of decor—just a few well-placed pieces, a thoughtful lighting plan, and a touch of natural texture.
Pick your favorite idea, pour a mug of cider, and step outside with confidence. By tonight, your porch can feel finished—welcoming, warm, and wildly photogenic. You’ve got this, and your front door is ready to prove it.

About the Author

Krisztina P.Rendes, Founder of Home Style Vibes
Founder of Home Style Vibes
Krisztina Puskásné Rendes created Home Style Vibes as a cozy-modern lifestyle space where homemaking meets inspiration. Her goal is to help women create beautiful, organized, and peaceful homes they truly love — without overwhelm. You’ll find here heart-driven content on home decor, cleaning tips, easy family recipes, organization and decluttering, DIY home projects, plants, and seasonal ideas — all designed to bring more calm, comfort, and style into everyday life.





