
5 Farmhouse Fall Front Porch Decor Ideas With Rustic Country Charm
You want that instant cozy welcome that feels like a cinnamon hug the second someone steps onto your porch. You hate the scattered, “I grabbed a couple pumpkins and hoped for the best” look. This farmhouse fall front porch guide leans hard into cozy, bright autumn—think saturated rust, barnwood textures, plaid throws, warm string lights, and bushel baskets brimming with mums. These 5 farmhouse fall front porch decor ideas will fix the most common frustrations—empty corners, flat color stories, awkward scale—so you can create a rustic country entry that’s guest-ready in one weekend for under $300 per idea.
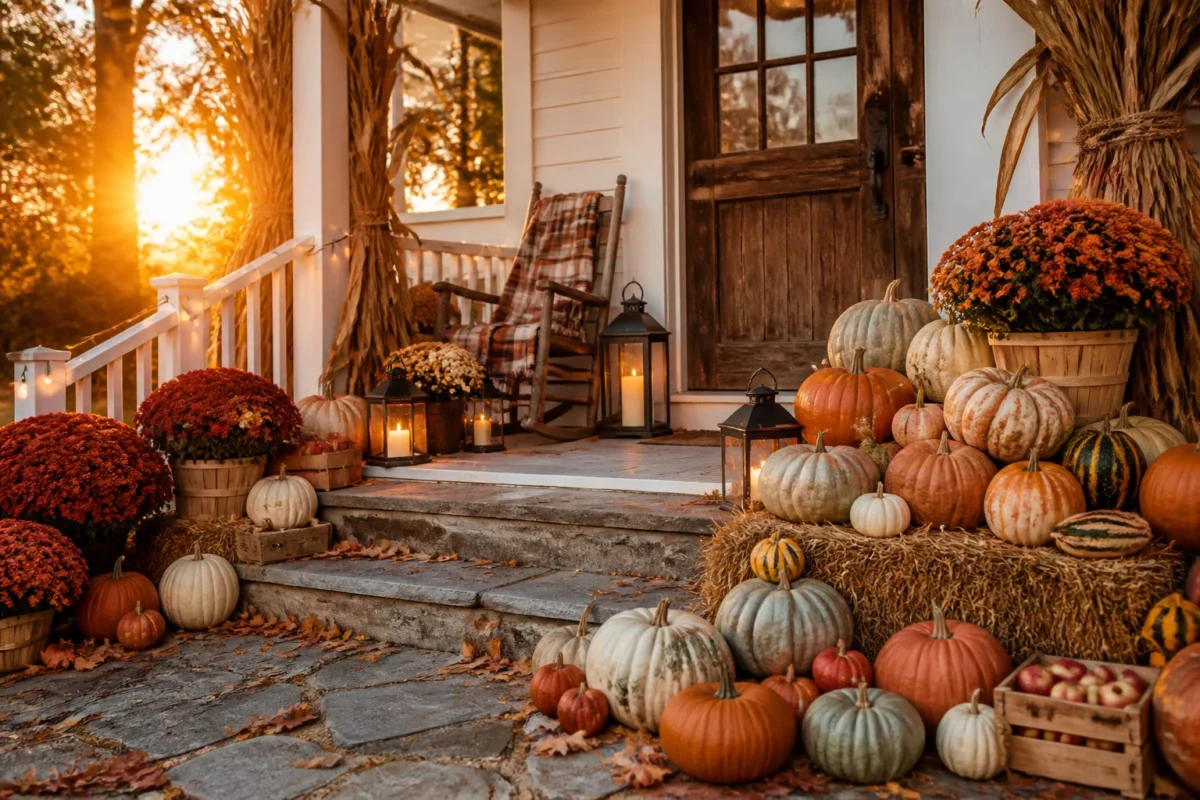
We’ll layer pumpkins, lanterns, apple crates, and hay bales (the pretty kind, not the itchy kind) to build depth, warmth, and that harvest abundance your camera loves. Each design is a complete concept—no guesswork—so your porch reads finished from September through Thanksgiving. If you love that saturated glow at sunset, the crackle of a woodwick candle, and the papery rustle of dried cornstalks when the wind picks up, you’re in the right place. These ideas are wildly photogenic, deeply practical, and made for real homes with real families and muddy boots. Ready to make your farmhouse fall front porch a moment?
1) Pumpkin Pile Harvest Steps With Amber Lantern Glow On the Front Stoop
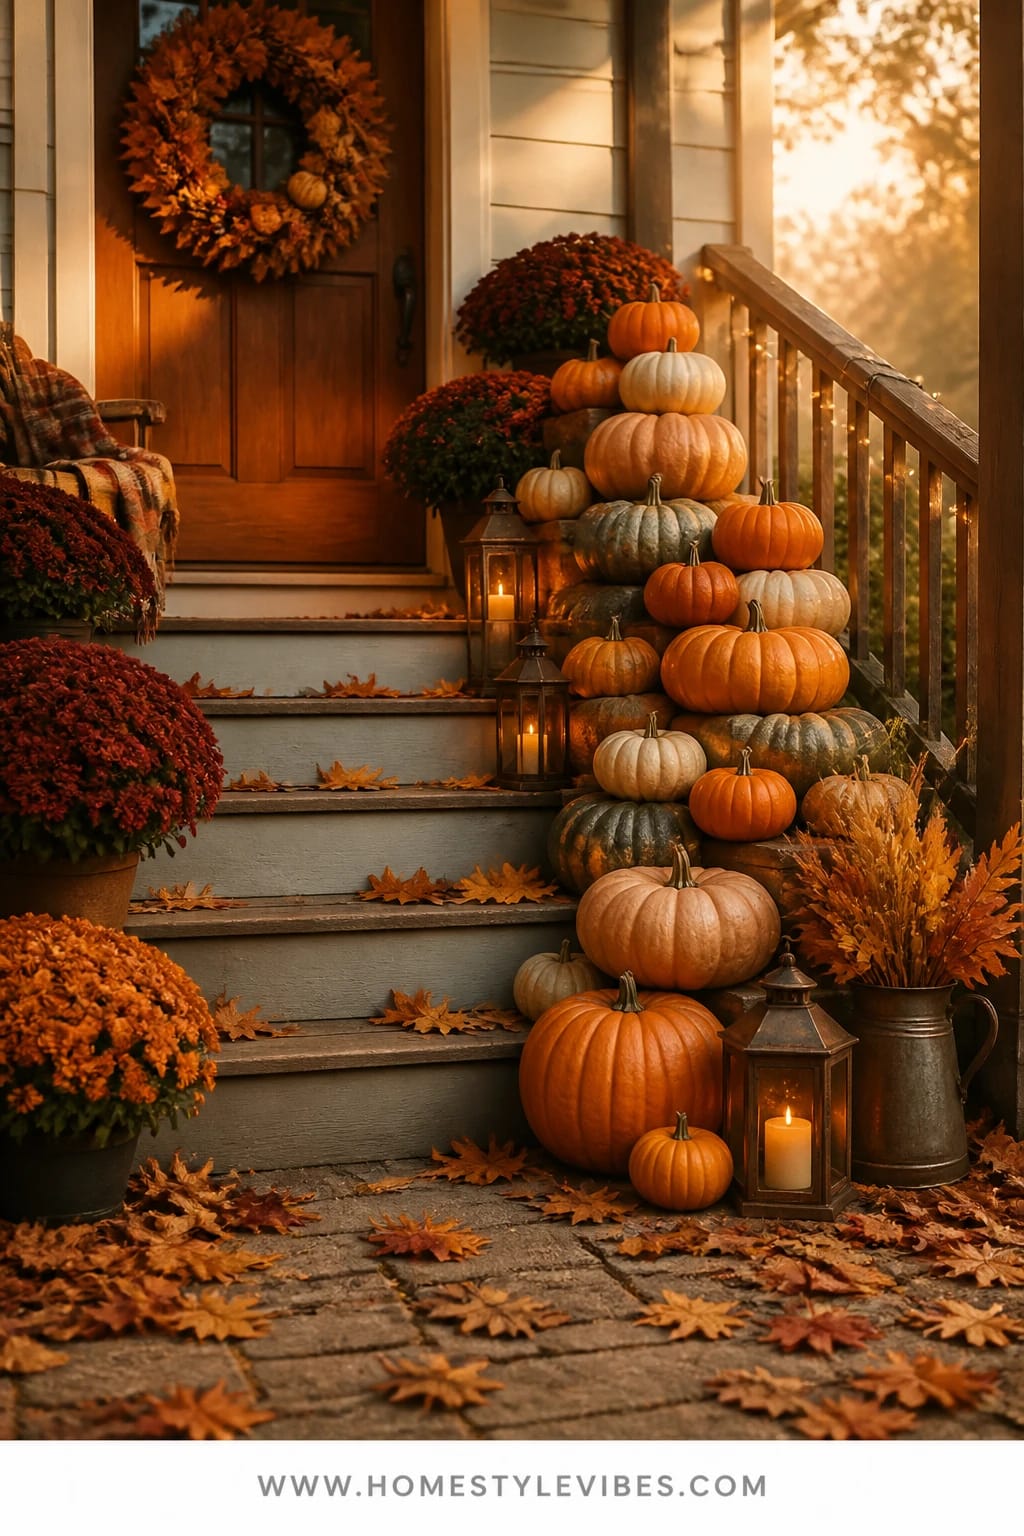
We’ve all been there: you buy three pretty pumpkins and line them up, but your steps still look sparse and awkward. This idea fixes it with abundance, scale, and that farmhouse harvest vibe—staggered pumpkin piles marching up your steps, anchored by weathered lanterns casting a warm amber glow at dusk. The mood is cheerful and generous: a classic cozy bright autumn hello layered in warm rusts, creamy whites, and touches of green-gray heirloom pumpkins for depth.
It works because it uses the vertical real estate you already have. Steps become shelves, and pumpkins become your styling building blocks. You’ll add in lanterns with real or faux candles, a couple hay slices (half bales are easier to manage), and a short stack of apple crates for height. Golden light from lanterns and a string of cafe lights overhead transforms everything at sunset—seriously, this is the moment your porch turns magazine-ready.
Photographs love this setup because it has foreground interest (the first pumpkin pile), a golden light source, and repeating shapes marching into the frame. Kids and pets can weave through it without wrecking the display. And it transitions effortlessly from early September sunflowers to mid-October mums and straight through Thanksgiving with a few eucalyptus sprigs and a bronze ribbon.
Variations: On a small stoop, do a mini version with five carefully sized pumpkins and one hero lantern. On a tighter budget, mix in faux pumpkins on the back row and use real ones in the front for authenticity where it counts.
Budget Breakdown:
- Assorted real pumpkins (8–14 pieces in varied sizes): $40–$90
- Two to four metal or wood lanterns with candles: $40–$120
- Two half hay bales or straw slices: $12–$30
- Two apple crates or wood boxes: $24–$50
- String lights (warm white): $15–$40
- One or two fall mums (6–10”): $12–$30
Total Estimated Cost: $143 – $360
Best For: Classic farmhouse and traditional homes with at least two steps; perfect for early September through Thanksgiving when you want that generous, neighborly welcome.
Key Design Elements:
- Main seasonal props: Mixed pumpkin piles, hay slices, lanterns
- Color palette: Rust, deep orange, creamy white, sage green
- Lighting strategy: Low, warm lantern glow plus one overhead string light run
- Textile layers: Optional plaid throw over a crate or on a bench if you have one
- Natural elements: Mums, eucalyptus sprigs, corn husks
- Accent details: Jute rope, metal lantern handles, weathered wood crates
How To Recreate This Look:
- Start with a sweep: hose off the steps and door threshold so dirt doesn’t steal the show.
- Add two hay slices at the outer edges of your bottom step as anchor platforms.
- Layer apple crates on their sides near the rail or wall for vertical interest.
- Place your largest pumpkins first at the base of the steps; taper sizes as you climb.
- Style with lanterns tucked into the negative spaces, then run one strand of cafe lights along the top rail or eave.
Why This Looks Expensive: Repetition and scale say “intentional.” The pumpkins are grouped in generous numbers, heights are varied, and the warm lighting softens edges so everything reads cohesive, not random.
Watch Out: Don’t line pumpkins like soldiers on a single step. Stagger sizes and let them overlap a bit so the display feels organic, not choreographed.
Pro Styling Tip: For photos at dusk, light all lanterns and angle one slightly toward the camera so that warm glow kisses the pumpkins in the foreground.
2) Plaid Blanket Bundle In Warm String Lights On a Vintage Rocker
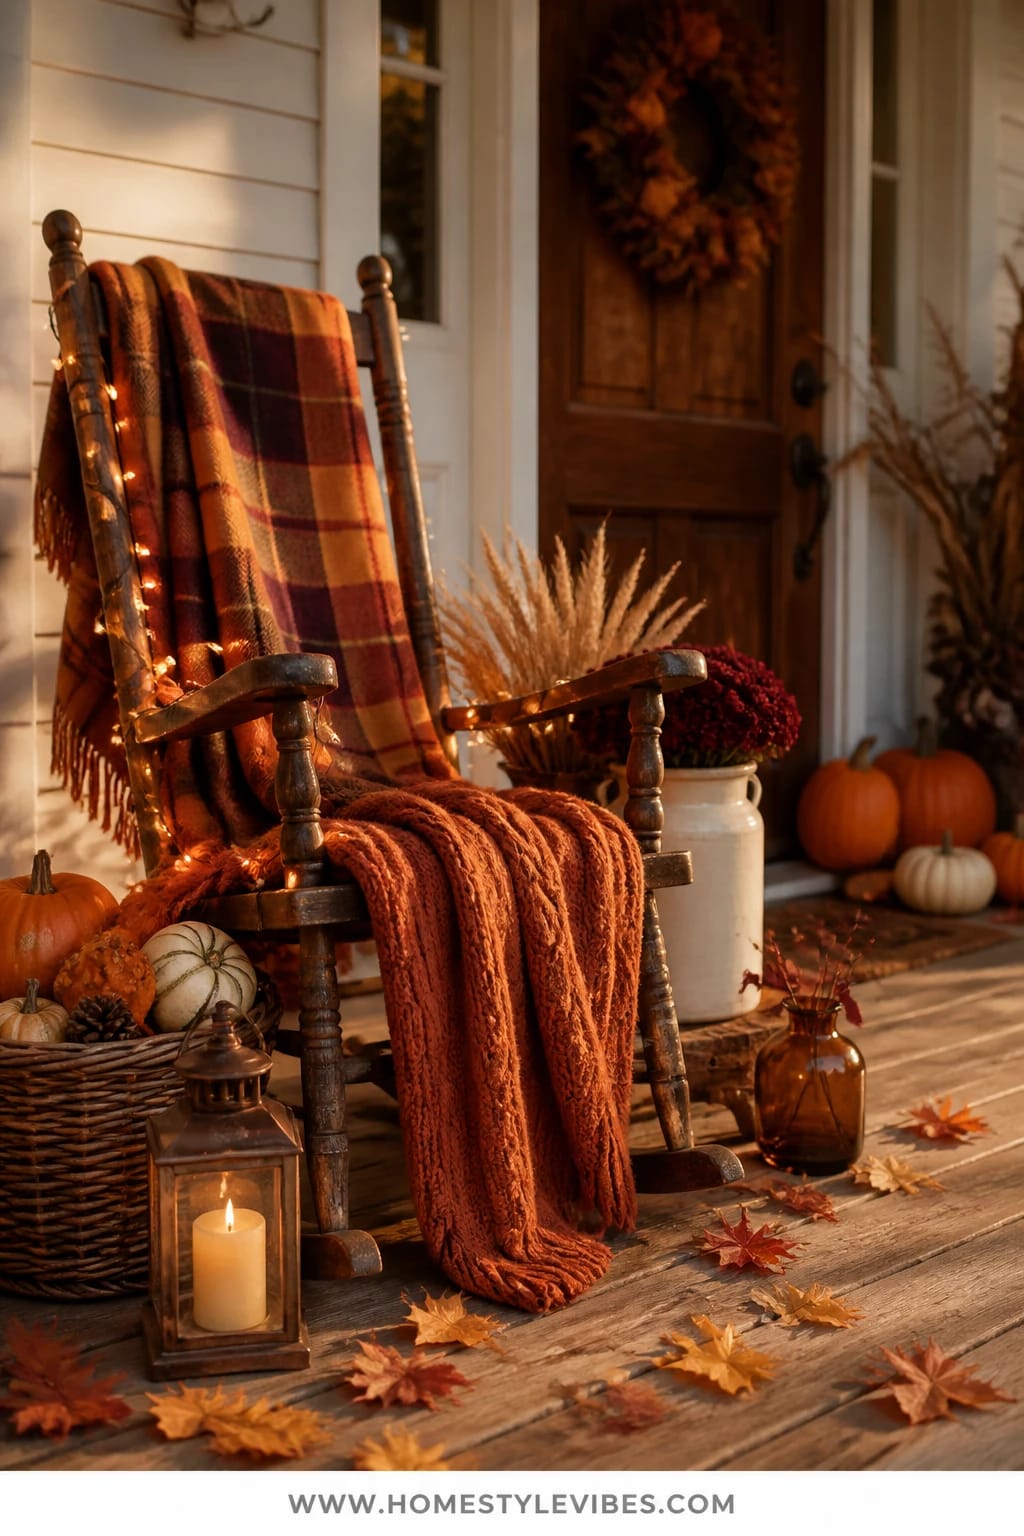
It’s that one corner that always feels off: a lonely chair by the door that looks cute in June but feels cold in October. This concept turns a single vintage rocker or wooden chair into a seasonal statement with layered plaid throws, a chunky knit pillow, and a gentle halo of warm string lights. The vibe is cozy-lodge-meets-front-porch-storytime. It reads friendly, approachable, and so very farmhouse.
Why it works in real life: chairs are natural focal points. You’re dressing one hero piece deeply rather than spreading effort thin across the porch. String lights draped like a scarf around the back add subtle glow without the commitment of hardwired fixtures. And because everything’s textiles and battery lights, you can clear it fast during a rainy snap.
Lighting matters here: warm white bulbs (2200–2700K) give you that buttery, candle-adjacent glow. Flip them on at golden hour and watch your plaid come alive with saturated threads of rust and amber. Trust me, I tried this on my own porch last October, and neighbors actually asked if I’d had a professional stylist come by. Nope—just a $20 string and a plaid blanket I’ve had since college.
Variations: Go bold with bright rust and cranberry plaid, or soften it with oatmeal, wheat, and warm gray. No rocker? Use a small wooden bench or a vintage metal bistro chair—just layer the textiles thicker for comfort.
Key Design Elements:
- Main seasonal props: Plaid throws, knit pillow, string lights
- Color palette: Rust, cranberry, wheat, cream
- Lighting strategy: One battery string light draped around the chair back and arm
- Textile layers: Two throws (one plaid, one neutral), one knit pillow
- Natural elements: Small basket of pinecones or mini pumpkins beside the chair
- Accent details: Woven basket, leather strap on a folded blanket, vintage thermos if you have it
Budget Breakdown:
- Vintage or thrifted rocker (or use your own chair): $0–$120
- Plaid throw: $18–$45
- Knit pillow: $15–$35
- Warm string lights (battery): $12–$25
- Small woven basket + pinecones or minis: $10–$25
Total Estimated Cost: $55 – $250
Best For: Porches with a single seating piece or a small landing; homeowners who want a contained, low-lift display that still photographs like a catalog cover.
How To Recreate This Look:
- Start with a clean chair and tuck a neutral throw over the seat as a base layer.
- Add the plaid blanket across the back with a casual diagonal fold to show the pattern.
- Place the knit pillow at an angle so the texture pops.
- Drape a short battery string light around the chair back and one arm; hide the battery pack under the pillow.
- Style a small basket with pinecones or mini pumpkins beside the legs to finish the vignette.
Why This Feels Designer: It’s the texture-on-texture moment—plaid, then knit, then warm light. High-end styling often relies on a tight palette layered across touchable materials.
One Thing To Avoid: Don’t use cool white lights. They flatten the cozy color story and make the plaid feel harsh. Warm only.
Pro Styling Tip: Angle the chair 10–15 degrees toward the door so your photos catch the fabric folds and the light strand sparkle rather than a flat front view.
Remember, this isn’t about replicating a showroom. It’s about creating a porch that makes your family exhale when they come home. If one idea feels like “you,” that’s your starting point—no need to do all five.
3) Cornstalk Bundles And Golden String Lights Framing a Barnwood Door
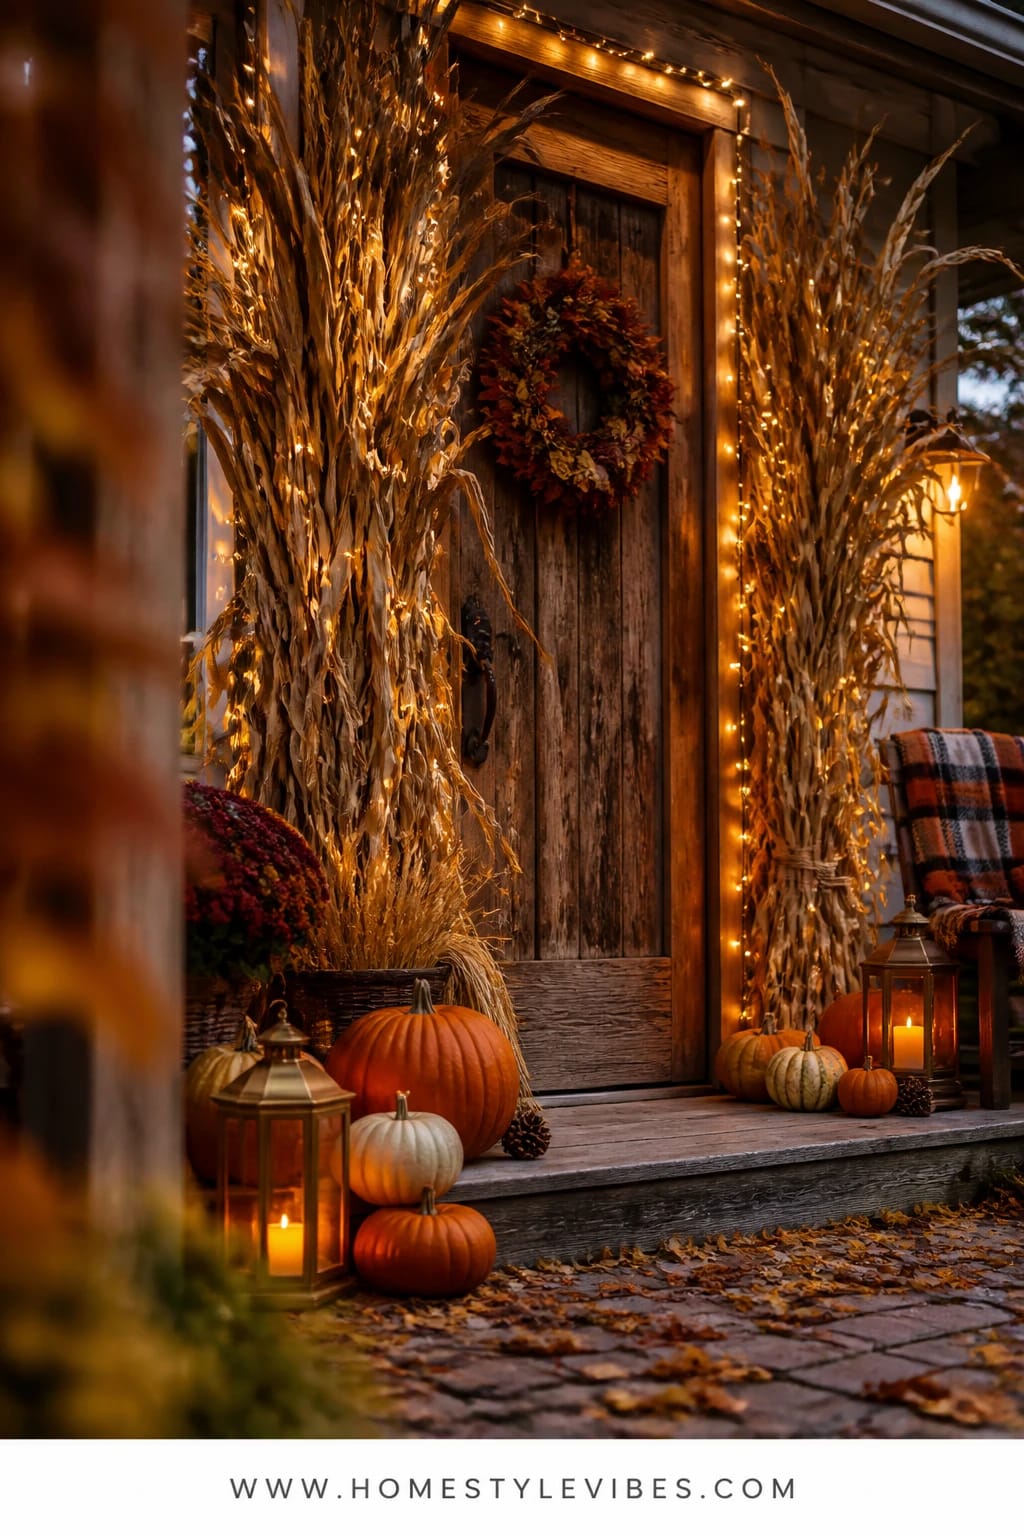
You’ve tried a wreath, but the entry still feels flat from the street. Framing your door with textural cornstalk bundles cinched in jute is the farmhouse move that adds height, coziness, and that satisfying harvest rustle when the breeze hits. Add one discreet run of golden string lights tucked into the stalks, and your door glows like a country market stand at twilight.
The mood here is friendly and abundant, anchored by the natural, toasty tones of dried corn leaves and warm wood. It works especially well for homes with a basic builder-grade door—cornstalks add softness and scale fast. Lighting hides inside the texture, so at night the doorway gets a gentle halo, not a carnival blaze. And yes, this photographs beautifully from the sidewalk thanks to the vertical lines that draw the eye to your wreath.
One honest note: tying cornstalks can be prickly. Wear gloves and use strong jute or zip ties covered with ribbon. I learned the hard way with a flimsy twine that snapped the minute a cold front blew through. Not fun to re-tie at 9 p.m. with numb fingers.
Variations: For a smaller door, use single bundles; for a wide double door, do pairs on each side. If you live in a windy area, secure the bundles to sturdy planters or discreet wall hooks so they don’t topple.
Budget Breakdown:
- Cornstalk bundles (2–4): $12–$40
- Jute rope or burlap ribbon: $6–$15
- Warm mini string lights (outdoor-safe): $15–$35
- Simple wreath (wheat or eucalyptus): $20–$60
- Weighted planters or hooks (optional): $15–$45
Total Estimated Cost: $53 – $195
Best For: Any farmhouse or country-style front entry, especially those visible from the road. Great from late September through Thanksgiving.
Key Design Elements:
- Main seasonal props: Cornstalk bundles, wheat or eucalyptus wreath
- Color palette: Golden wheat, toffee, warm brown, soft green
- Lighting strategy: Mini lights tucked into stalks, soft glow only
- Textile layers: Burlap ribbon or jute ties with optional plaid bow
- Natural elements: Dried gourds or mini pumpkins at the base
- Accent details: Vintage nailhead tacks or metal hooks, barnwood door texture
How To Recreate This Look:
- Start by measuring the door height to decide on single vs double bundles per side.
- Add sturdy hooks or place heavy planters to support the bundles.
- Secure the cornstalks with jute about one-third from the bottom; fan the tops slightly.
- Tuck a strand of warm mini lights up one side and down the other, hiding wires within the stalks.
- Hang a simple wheat wreath centered on the door to finish the frame.
Why This Reads High-End: Tall vertical elements and a restrained color story signal confidence. You’re not throwing everything at the door—you’re composing a frame that lets the wreath breathe.
The Most Common Mistake: Over-lighting. If you can see the bulbs during the day, you’ve used too many or placed them too shallow. Bury them deeper in the stalks.
Pro Styling Tip: For photos, crack the door a couple inches to let indoor warm light spill into the frame—it adds depth and an inviting glow line down the jamb.
If your porch is starting to feel layered, that’s on purpose. Texture first, color second, glow last. Stack those, and even the simplest door starts to sing.
4) Apple Crate Planters With Burnished Mums Beside a Weathered Bench
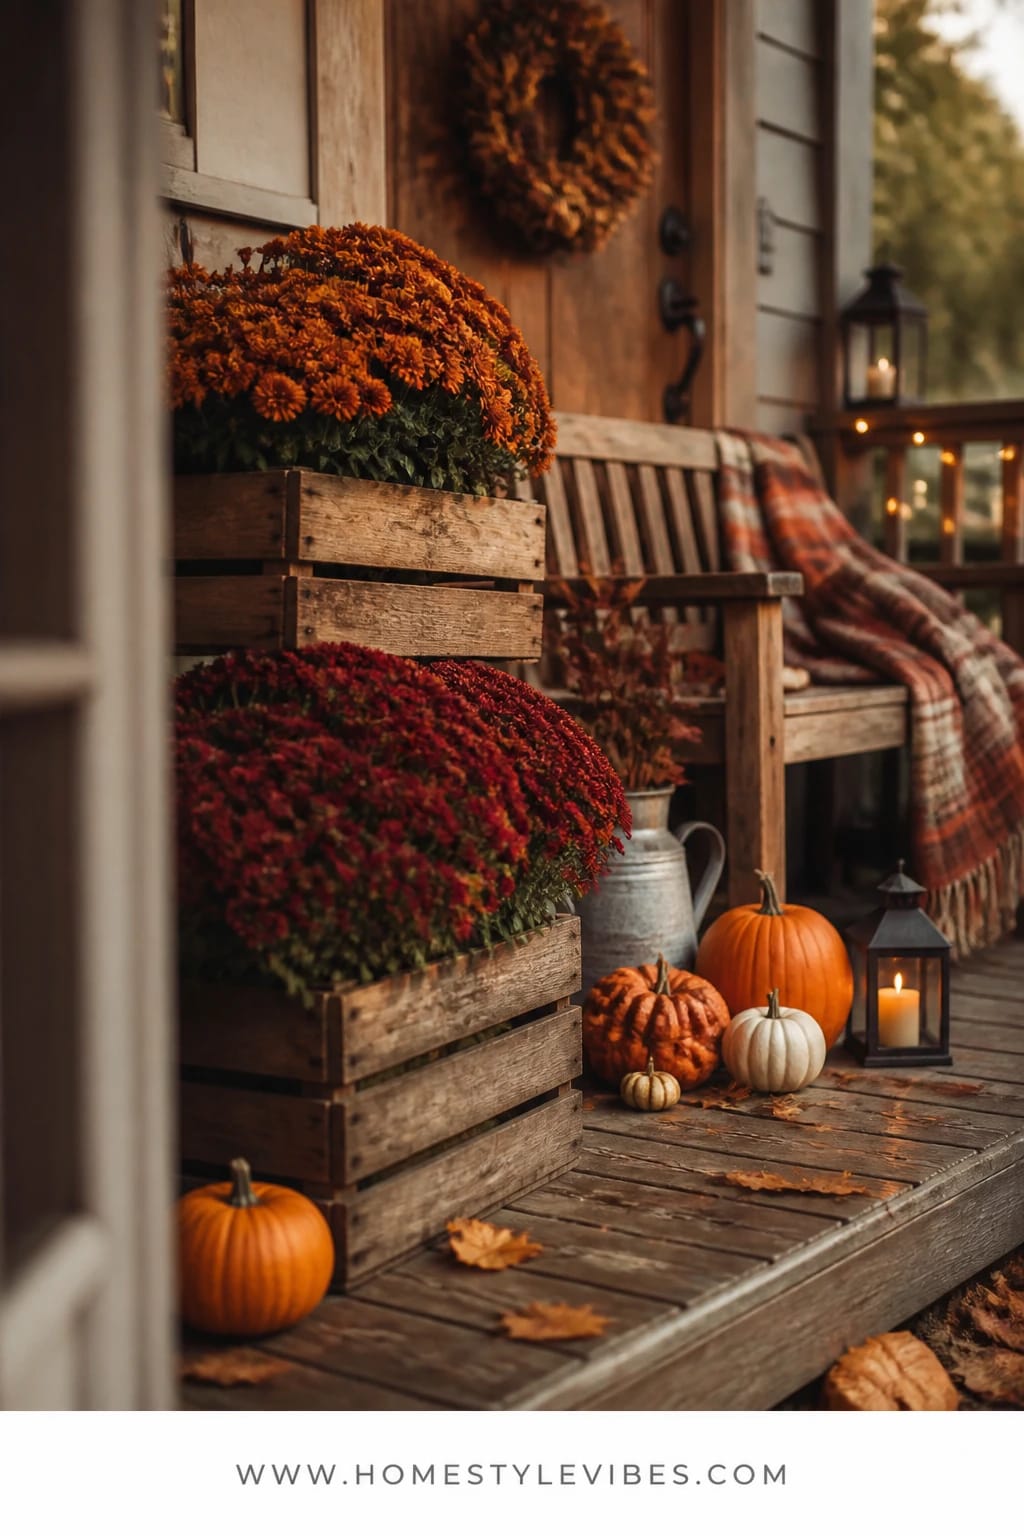
Do your porch corners feel empty, like the eye just drifts past them? Apple crate planters filled with burnished mums fix that in one move. You get height, warmth, and structure, with a very “farm stand on a Saturday morning” vibe. Park them beside a weathered bench or under a window to anchor the scene and watch the whole porch feel fuller.
This concept leans on texture and color saturation. Crates bring grain and age, mums bring the juicy rust and burgundy tones, and a bench gives it a horizontal line to rest the eye. It’s family-friendly and pet-approved—no delicate glass here, just sturdy wood and living color. Plus, apple crates stack and store so easily when the season ends.
Lighting isn’t the star here; the flowers do the heavy lifting. But add a single lantern or a pair of solar stake lights at ground level and you’ll get a quiet evening sparkle that outlines the blooms. Photographs love the grid of the crates contrasted with the fluff of the mums. It’s structured abundance, which is basically the fall sweet spot.
Variations: If you prefer neutrals, use white mums with soft sage kale and dusty miller. For a long porch, space crates in odd numbers—1, 3, or 5—and tilt a couple slightly toward the path.
Budget Breakdown:
- Apple crates (2–4): $24–$80
- Mums (8–12” pots, 2–4 plants): $16–$80
- Potting soil liners or nursery pots (if needed): $8–$20
- Weathered bench (use your own or thrift): $0–$120
- Optional lantern or solar stakes: $12–$35
Total Estimated Cost: $60 – $335
Best For: Wide porches or those with a bench or railing; homeowners who want long-lasting color into late fall without fussy watering schedules.
Key Design Elements:
- Main seasonal props: Apple crates, mums in rust, burgundy, or white
- Color palette: Burnt orange, wine, mustard, cream
- Lighting strategy: Minimal; accent lantern or two at ground level
- Textile layers: Optional plaid pillow on the bench or a neutral lumbar cushion
- Natural elements: Ornamental kale, dusty miller, trailing ivy
- Accent details: Twine-wrapped pot rims, small chalkboard plant labels
How To Recreate This Look:
- Start by placing your bench or choosing the corner you want to fill.
- Set the crates with one stacked on its side for height and one flat for stability.
- Drop mums (still in nursery pots) into the crates; hide plastic with moss or burlap.
- Add a trailing plant or kale to break up the mum domes.
- Finish with a lantern or stake light near the base for dusk definition.
Why This Looks Intentional: Repeating the crate texture creates rhythm. The bench acts as a visual underline, and the mums deliver the color punch right where you need it.
Don’t Do This: Avoid mixing too many bloom colors in a tight cluster. Pick two complementary shades and repeat them—chaos creeps in fast with mums.
Pro Styling Tip: For photos, water mums an hour before shooting; hydrated blooms look plumper and leaves go glossy instead of dusty.
Feeling tempted to mix pieces from multiple ideas? That’s the fun of it. Borrow the crates from this section and pair them with the lantern layout from Section 1—you’ll get instant depth without starting from scratch.
5) Harvest Hay Bale Buffet With Rustic Lanterns Beside the Porch Rail
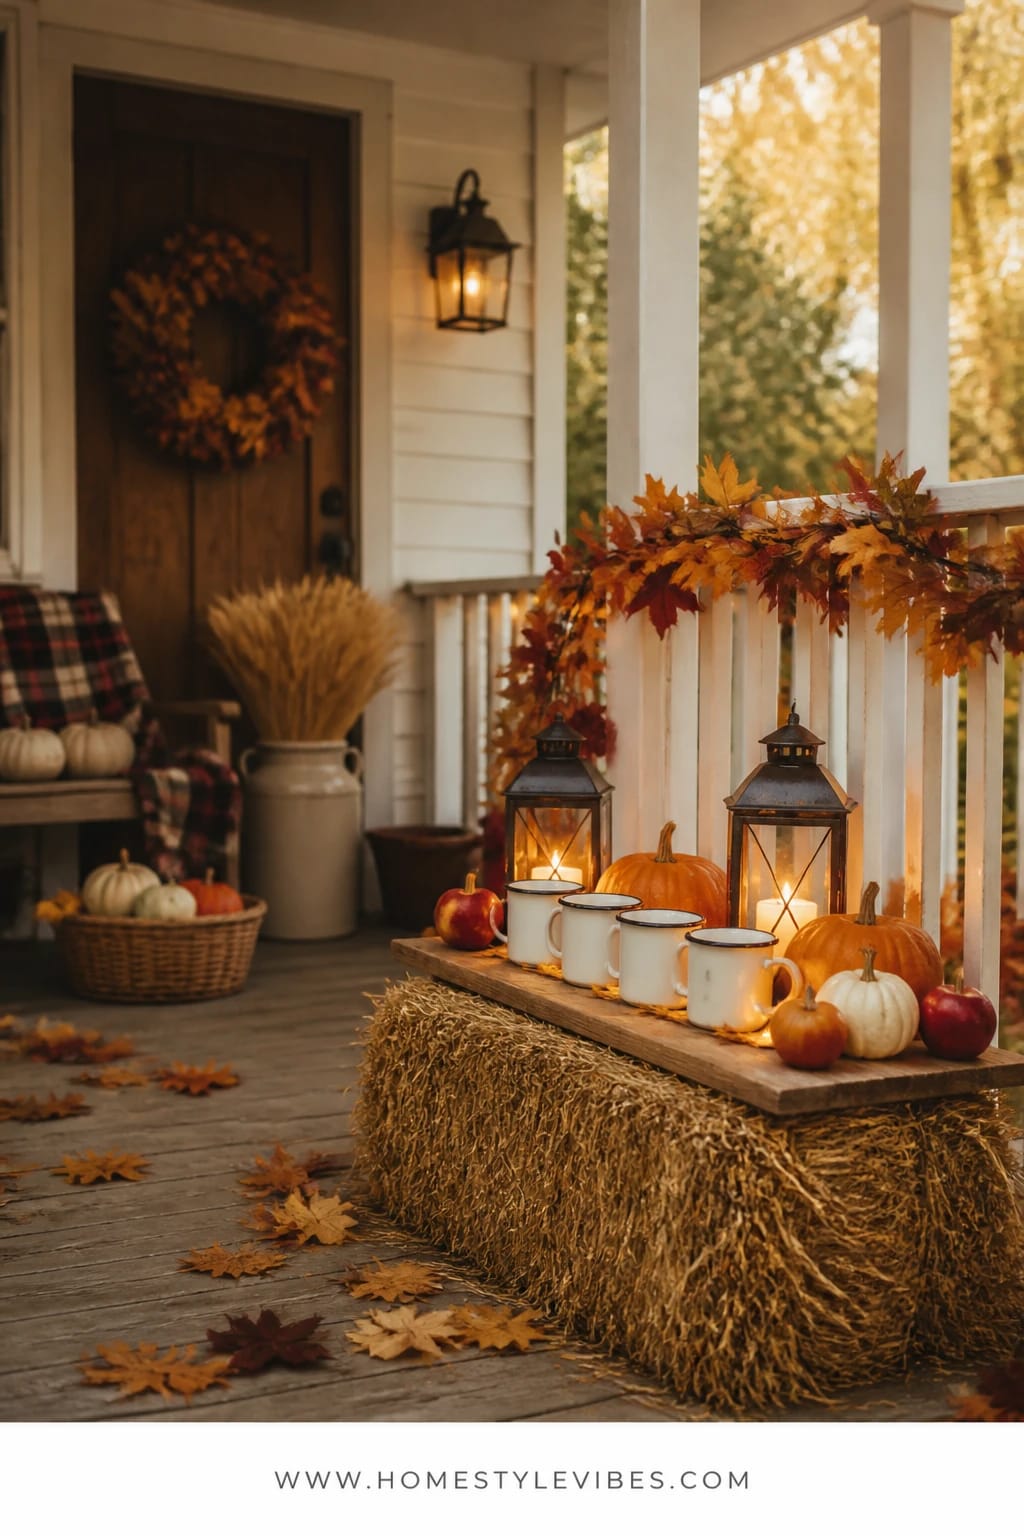
Ever host a casual cider hour on the porch and realize there’s nowhere to set the mugs? A hay bale “buffet” turns your porch rail into a mini harvest station with rugged charm. Top a sturdy straw or hay bale with a wood board, line up enamel mugs, nestle in a couple of lanterns, and tuck small pumpkins and apples along the edge. The whole thing reads like a farmers market pop-up—with function.
The mood is lively and communal, perfect for Saturday afternoons when neighbors wander by. It works because a bale is the perfect height for a temporary console table and has that unmistakable fall texture. Keep the color story warm and simple: russet apples, deep orange pumpkins, and aged wood. Add a wool scarf as a runner if you want softness without a fussy tablecloth.
Light is practical here. Two lanterns (one at either end) make the station usable at dusk and cast that beautiful glow across the wood grain. It photographs like a lifestyle spread thanks to the mix of shapes: round mugs, squat pumpkins, tall lanterns, and the rough weave of straw. Tiny detail, big result: a little cinnamon stick in each mug looks adorable and smells amazing.
Variations: If you’re not into hay, use two stacked crates with a wood board as the top. For small porches, scale down to a single crate “bar” with one lantern and three mugs.
Budget Breakdown:
- Straw/hay bale or two crates: $8–$30
- Reclaimed wood board (2–3 ft): $10–$35
- Two lanterns with candles: $40–$80
- Set of enamel mugs (4–6): $15–$40
- Decor filler (mini pumpkins, apples): $10–$25
- Optional wool scarf runner: $12–$30
Total Estimated Cost: $95 – $240
Best For: Social porches with a rail or open side; families who love casual hosting in October and early November.
Key Design Elements:
- Main seasonal props: Hay bale or crates, pumpkins, lanterns
- Color palette: Warm caramel, pumpkin orange, deep red apple
- Lighting strategy: Two lanterns placed at either end for balanced glow
- Textile layers: Wool scarf or plaid runner
- Natural elements: Apples, mini pumpkins, dried wheat stems
- Accent details: Enamelware, wood board with live edge if you can find it
How To Recreate This Look:
- Start by positioning your bale or stacked crates beside the rail for stability.
- Add the wood board on top to create a flat surface.
- Place a lantern at each end to define the station.
- Line up mugs and slide a small bowl of cinnamon sticks between them.
- Tuck mini pumpkins and wheat stems into gaps for a finished look.
Why This Looks Expensive: Purposeful styling. You created a function (serving) and dressed it with consistent materials—wood, straw, enamel, metal—so it feels curated rather than random.
Watch Out: Don’t overload the board. Leave negative space so guests can actually set things down; clutter reads messy, not festive.
Pro Styling Tip: For photos, angle one lantern slightly inward to bounce light across the board and catch the enamel mug rims with a warm highlight.
One honest truth before we close: not every idea works for every porch. I once tried a double-bale bar on a narrow stoop and spent the season bruising my shins. Scale to your space and be ruthless about editing. The best farmhouse front porches feel generous, not jammed.
Quick Checklist
- Mix at least three pumpkin varieties for color and stem interest
- Use warm white lights only (2200–2700K) for that amber glow
- Tuck string lights into texture—cornstalks, wreaths, or around a chair back
- Layer textiles: plaid throw plus a knit pillow for touchable depth
- Anchor tall elements (cornstalks, crates) for wind stability
- Repeat materials (wood, metal, straw) to create a cohesive story
- Leave negative space on steps and tabletops for balance
- Water mums before guests arrive so blooms look full in photos
- Hide wires and battery packs under pillows or inside crates
- Edit color to two or three main shades across the whole porch
Frequently Asked Questions
How can I keep costs down for a farmhouse fall front porch without it looking sparse?
Focus on one hero area—either the steps or the door—and style it generously. Use a mix of real and faux pumpkins (real in front, faux in back), thrift your crates and lanterns, and buy mums in 6” pots, then group them for impact. Repetition of affordable items looks richer than a bunch of one-offs.
Are real or faux pumpkins better for outdoor porch styling?
IMO, real pumpkins win for texture and stems. They photograph better and feel authentic. That said, tuck a few quality faux pumpkins into the back rows or higher stacks for height and longevity. If you get direct sun, rotate real pumpkins weekly to avoid soft spots—no one loves the sad, deflated side by week three.
My porch is tiny. Which idea should I try first?
Go with the plaid blanket rocker (Section 2) or a mini pumpkin pile with one lantern (Section 1). Keep it tight and layered rather than spread thin. A single hero vignette near the door reads finished even on a small stoop.
What do I do with all these items after fall? Storage is limited.
Choose collapsible or nestable pieces: string lights coil, crates stack, and lanterns store inside each other if sizes vary. Keep faux stems and ribbons in a clear bin with silica packs. Compost real pumpkins and cornstalks, and repot mums into the yard if your climate allows.
Are candles safe on a family porch with kids and pets?
Use enclosed lanterns with latched doors or switch to battery pillars with a warm flicker setting. Place lanterns into negative spaces (against a wall or crate) so tails and elbows don’t bump them. Save real flame for evenings when you’re outside supervising.
When should I start decorating a farmhouse fall front porch?
Late September is perfect for most climates. Start with crates, lanterns, and faux elements, then layer in fresh mums and real pumpkins once nights cool. If you decorate Labor Day weekend, expect to refresh real pumpkins mid-October.
Bring It Home
Pick one idea and set it up this weekend. That’s all you need for your porch to feel like fall actually lives here, not just visits on Thanksgiving. Start with pumpkins and lanterns if you crave glow, or cornstalks if you love texture. When you’re ready, layer in plaid, a few burnished mums, and a small hay bale station for function and charm.
The secret to rustic country charm isn’t complication. It’s repetition, warm light, touchable textures, and a little harvest abundance. Keep your palette tight, your lights warm, and your styling generous but not crowded. You’ll hear it in the first “wow” from a friend at the door—the farmhouse fall front porch you’ve imagined is real now.
You’ve got this. Grab a plaid throw, stack those crates, strike a match (or flip a switch), and let the season glow right up to your threshold. Seriously—five steps, one afternoon, and your porch will feel like a story you can’t wait to come home to.

About the Author

Krisztina P.Rendes, Founder of Home Style Vibes
Founder of Home Style Vibes
Krisztina Puskásné Rendes created Home Style Vibes as a cozy-modern lifestyle space where homemaking meets inspiration. Her goal is to help women create beautiful, organized, and peaceful homes they truly love — without overwhelm. You’ll find here heart-driven content on home decor, cleaning tips, easy family recipes, organization and decluttering, DIY home projects, plants, and seasonal ideas — all designed to bring more calm, comfort, and style into everyday life.





