6 Diy Flower Home Decor Ideas You Can Make in an Afternoon
You want a home that feels like fresh air: soft petals on a coffee table, sunlight catching a glass vase, a hallway that whispers “you’re doing great.” But you hate how fast flowers wilt, how arrangements look messy, and how your rooms still feel… unfinished. Think linen textures, warm wood, diffused light, and little floral moments that feel intentional, not fussy. These six DIY flower home decor ideas fix all that in one afternoon each, with a max budget of $85 per project, and they’re insanely photogenic—Pinterest-board energy without the pressure. If you love a modern, soulful vibe with subtle romance, this is your weekend lineup.
1. Soft Cloud Pressed-Flower Gallery Wall With Linen Mats
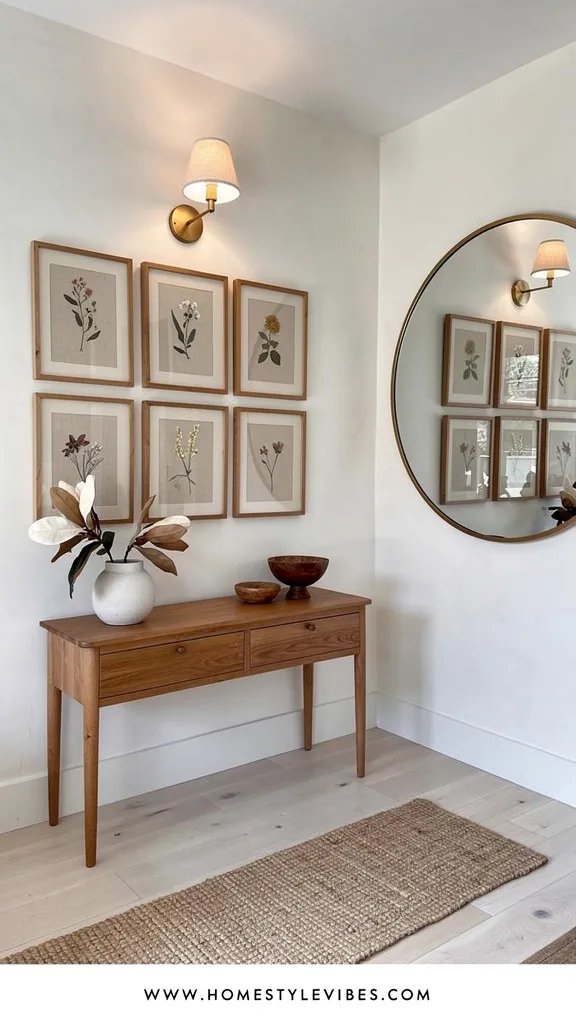
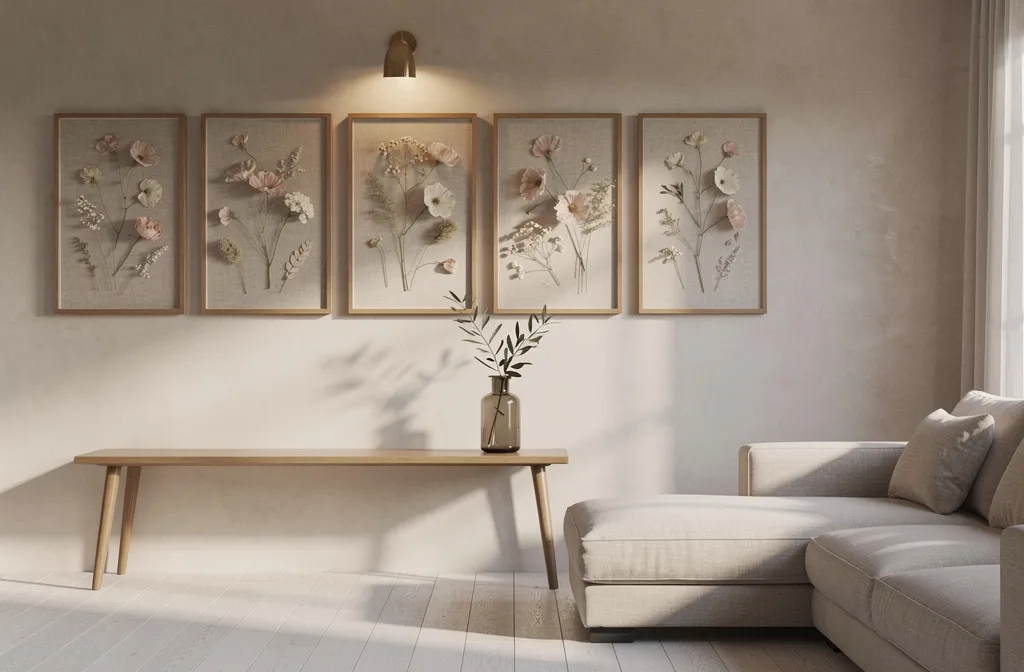
We’ve all been there: you bring home a stunning bouquet, it has a great weekend, and by Tuesday it’s chaos. Petals everywhere. Water rings. Your console table looks like a crime scene. This pressed-flower gallery wall solves the mess by freezing your favorite blooms in time and framing them like art—clean, crisp, and ridiculously pretty.
The mood is calm and editorial: think Japandi-light meets cottagecore grown up. It works in real homes because it’s flat (small-space friendly), renter-safe (no hammer drill required if you use adhesive hooks), and low maintenance (dust it and you’re done). Lighting matters here: pressed petals glow under side lighting and look museum-level under a simple picture light. Materials lean natural—linen mats, raw wood frames, matte paper—so the flowers feel like a whisper instead of a scream. The photographs come out beautifully thanks to tight contrast—pale mats, delicate shapes, shadows that give each piece dimension.
Two variations? Budget-friendly: thrift frames and use white card stock as mats. Small-space version: hang a trio vertically near a mirror for a tall, elegant moment. Renter-friendly swap: use Command strips and lightweight acrylic frames. Darker version: use charcoal or deep green linen mats for moody drama with white or blush petals.
Budget Breakdown:
- Assorted blooms to press: $10–$20
- Flower press or heavy books + parchment: $0–$18
- Frames (set of 3–6): $18–$60
- Linen-textured mats or card stock: $6–$15
- Adhesive hooks/strips: $6–$12
Total Estimated Cost: $40 – $85
Best For: Narrow hallways, entry consoles, or over-the-sofa areas where real florals feel cluttered. Ideal for anyone craving gentle, artful texture with very little upkeep.
Key Design Elements:
- Main materials: pressed petals, matte paper, linen mats, thin wood or black metal frames
- Color palette: soft white, oatmeal, blush, olive, dusty lavender
- Lighting strategy: side-lit from a nearby lamp, or a small picture light for evening warmth
- Furniture silhouettes: clean-lined console, cane sideboard, or minimal bench
- Texture layers: linen, matte paper, raw wood grain
- Accent details: brass picture light, small ceramic catchall, a single sculptural vase
How To Recreate This Look:
- Start with blooms that press well (anemone, ranunculus, pansies, ferns, eucalyptus). Press between parchment and pages under heavy books for 5–7 days, or use a flower press for faster results.
- Cut card stock or linen mats to size. Arrange petals off-center on the mat to create negative space.
- Secure petals with clear-drying craft glue using a light touch—dot the back of thicker areas only.
- Assemble frames and lay them out on the floor to test your grid or salon arrangement.
- Install with adhesive strips. Add a tiny lamp or picture light to catch the texture at dusk.
Why This Looks Expensive: Museum-style spacing and generous negative space make everything feel curated. Linen mats add quiet luxury, and the repetition of thin frames reads intentional, not random.
Watch Out: Don’t overcrowd each frame. Keep petals spaced and avoid mixing too many colors in one piece—3 shades max looks refined. Also, wipe the inside of the glass to avoid those annoying specks that show up in photos.
Pro Styling Tip: Angle a table lamp so light grazes the frames from the side—shadows along the mat edges add depth on camera.
Keep scrolling. The next idea smells like Saturday morning and sunlight on tile.
2. Wild Meadow Kitchen Jar Cluster With Herbal Stems
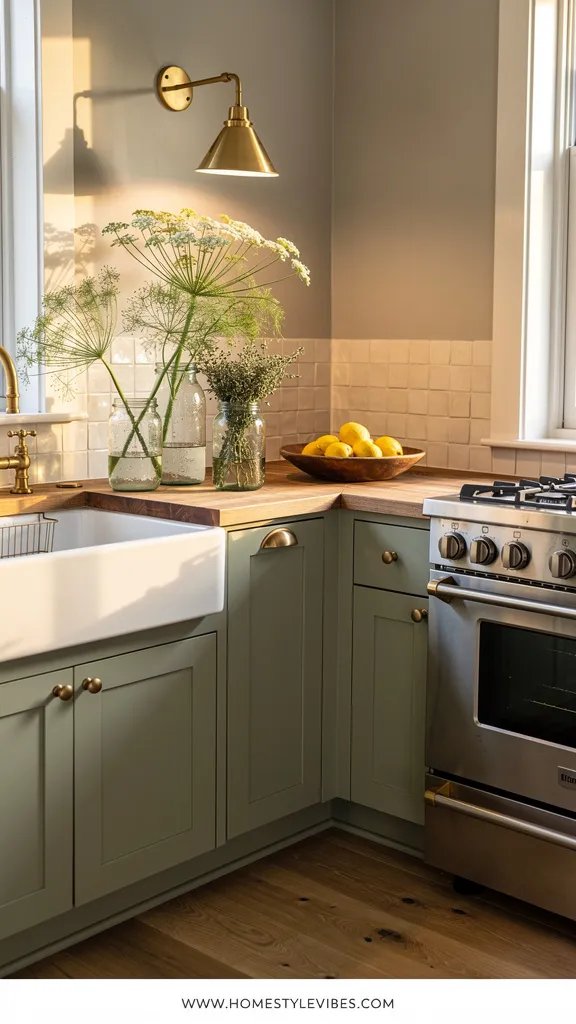
It’s that one corner that always feels off—the space between the sink and the stove that becomes a catchall for mail, rubber bands, mystery lids. You’ve tried a single vase, but it looks lonely. The “wild meadow” jar cluster fills that void with height, movement, and scent. It’s casual and country-fresh without a rooster figurine in sight.
The mood leans modern farmhouse meets Paris apartment kitchen. It works because jars are practical and modular. You can wash them, rearrange them, and move the whole lineup for a deep clean. Lighting plays a huge role: morning light through a window makes herb stems glow. Under-cabinet lighting adds a soft wash at night. Materials are simple—clear glass, stoneware crock, twine—and the camera loves the glint of water and shadows on tile.
Variations to try: Budget-friendly? Reuse pasta sauce jars and old jam jars; peel labels with hot soapy water and a little cooking oil. Small-space version? Just three jars, varied heights. Darker version? Use amber apothecary bottles with white or pale flowers for moody, old-world depth. Renter-friendly swap: corral the jars on a small tray so one footprint looks tidy and easy to move.
Key Design Elements:
- Main materials: glass jars, apothecary bottles, twine, a small tray
- Color palette: clear glass, bright green stems, white blooms, neutral tray
- Lighting strategy: natural window light by day, under-cabinet LED strip by night
- Furniture silhouettes: simple countertops, open shelf above if you have it
- Texture layers: glass gloss, leafy matte, rough twine
- Accent details: small citrus bowl, salt cellar, wooden pepper mill
Budget Breakdown:
- Jars/bottles (set of 5): $0–$20
- Tray or small board: $8–$25
- Herbs and stems (mix of eucalyptus, dill flowers, chamomile): $8–$18
- Under-cabinet LED strip (optional): $12–$20
Total Estimated Cost: $16 – $65
Best For: Everyday kitchens that need a soft, living moment without a giant arrangement. Great if you cook often and like snipping herbs as you go.
How To Recreate This Look:
- Gather 5 jars in mixed heights—one tall, two medium, two short. Place them tight together on a small tray or cutting board.
- Fill with a mix of herbal stems (rosemary, mint, dill, parsley), a few delicate flowers (waxflower, chamomile), and filler greens (eucalyptus).
- Twine-wrap the neck of 1–2 jars for texture. Tie a very small bow or a simple knot.
- Slide the cluster near a window, but not directly by a heat source. If you have under-cabinet lights, switch them on at night for that café glow.
- Refresh water every 2–3 days and rotate stems as needed. Nothing should feel too perfect—aim for airy and a little wild.
Why This Feels Designer: Repetition with variation. The jars unify the scene, while slight differences in height and bloom type create rhythm. That tension feels curated and lived-in at once.
One Thing To Avoid: Don’t use overly thick, heavy flowers that crowd the jars. Skip red roses here; they’ll look dated next to herbs. Go light and lacy.
Pro Styling Tip: Tuck a lemon or two in front for a pop of color and an easy size contrast—tiny detail, big photo payoff.
Ready for something bolder? The next one adds architectural drama with almost-zero commitment.
Remember, this isn’t about recreating a showroom. It’s about building a space that actually feels like yours. If one idea resonates more than the others, that’s your starting point. You only need one beautiful moment to change the room’s mood.
3. Oversized Branch & Bloom Statement In A Floor Vase
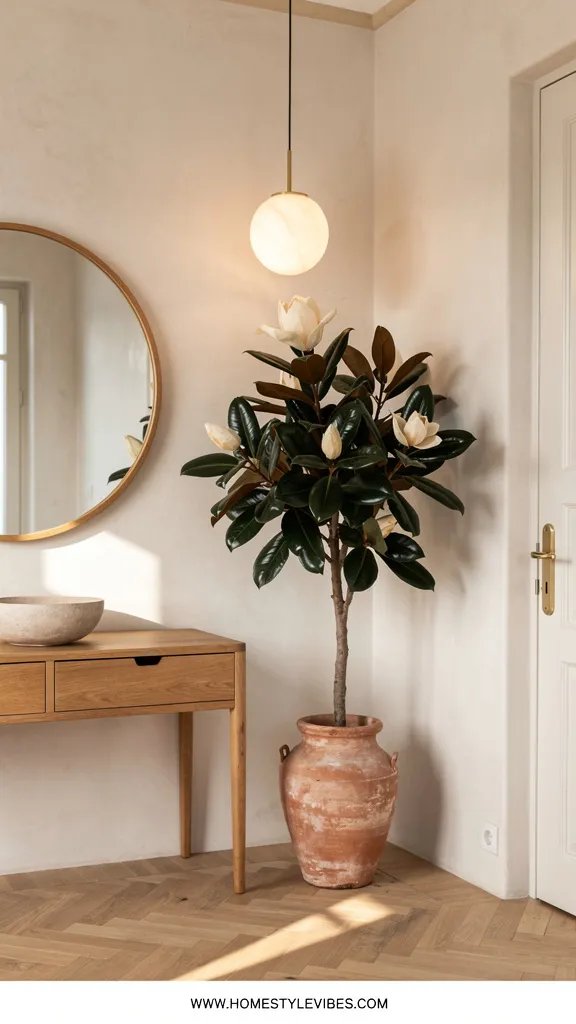
You want that “designer dropped by” energy in your entry or living corner, but furniture rearrangements feel exhausting. A single, oversized floral branch display fixes the scale problem instantly. We’ve all tried a small vase with a polite arrangement, and it just disappears. Big branches say: this is a choice, not an afterthought.
The mood is modern Mediterranean meets gallery loft. It works in real homes because it takes up vertical space without adding clutter on surfaces. Lighting is key: place it near a window where light can side-sculpt the branches. In the evening, a floor lamp or uplight behind the vase throws dramatic shadows that look expensive in photos. Materials skew elemental—ceramic, plaster, or stoneware vase; real or faux blooming branches; maybe a touch of moss to anchor stems.
For variations, do a budget-friendly supermarket hack: buy a simple bunch of eucalyptus and one statement bloom stem (like protea or amaryllis) and pair with clipped backyard branches. Small-space version: use a mid-height vase on a stool instead of floor-level. Darker vibe: charcoal vase with white magnolia branches. Renter-friendly: faux branches you can bend and shape, so no water spills on floors.
Budget Breakdown:
- Oversized floor vase: $25–$70
- Real or faux branches: $12–$35
- Moss/pebbles for weight: $4–$10
- Small spotlight or uplight (optional): $12–$20
Total Estimated Cost: $41 – $135 (skip the light and choose a thrifted vase to stay under $85)
Best For: Empty corners, entries, and spaces that need vertical interest. Great for minimalists who still want romance and movement.
Key Design Elements:
- Main materials: plaster or ceramic vase, tall branches, moss/pebbles
- Color palette: chalky white, stone beige, olive green, soft pink/white blooms
- Lighting strategy: side day light; evening uplight from the floor for sculptural shadows
- Furniture silhouettes: clean, low-slung sofa; slim console; simple bench
- Texture layers: matte vase, glossy leaves, soft petals
- Accent details: stacked art books nearby, woven basket for umbrellas or throws
Why This Reads High-End: Scale. Most homes underestimate height. A tall branch arrangement aligned with a lamp or window top line brings architectural presence and sets the tone the second you walk in.
How To Recreate This Look:
- Choose a matte, textural floor vase. If it’s lightweight, add pebbles first for stability.
- Layer in branches, letting them splay naturally. Add 2–3 floral stems near eye level for softness.
- Tuck preserved moss at the base to hide mechanics and add a natural finish.
- Place the vase 6–12 inches from the wall so light can create shadows behind it.
- Optional: Add a small spotlight on the floor behind the vase angled up for drama at night.
The Most Common Mistake: Cutting branches too short. Let them breathe. You want at least one stem that reaches two-thirds the height between the floor and the ceiling line for a true statement.
Pro Styling Tip: Rotate the arrangement a quarter turn when photographing—branches read differently from each angle, and you’ll find the most elegant silhouette fast.
Short on time? The next idea is pure instant-gratification and doubles as a party trick.
4. Citrus Bloom Sink-Side Bouquet Bar For Guests
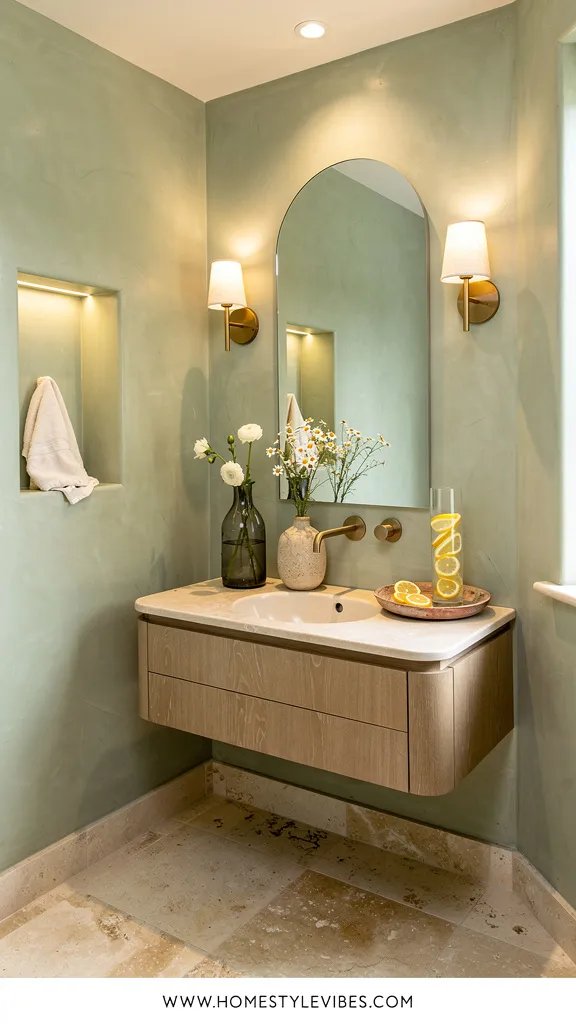
You want your bathroom to whisper “spa,” but fancy tile isn’t happening this year. I get it. I once spent weeks choosing paint for a powder room before I realized the problem wasn’t the color—it was the flat, lifeless counter. Enter the sink-side bouquet bar: a mini arrangement station that feels like a boutique hotel moment.
The mood is boutique-spa chic with a hint of coastal. It works because it’s both attractive and functional—small blooms, a few bud vases, and a citrus slice or two in water. Lighting transforms the whole setup: warm bulbs (2700K) flatter skin and petals; a flickering candle in the reflection multiplies the glow. Materials? Think clear or frosted glass, a tiny rattan tray, and pale towels. On camera, the curved vase lines catch highlights, while citrus adds that pop of saturated color.
Variations you’ll love: Budget-friendly? Use a single clear bottle and three backyard snips. Small-space version? Put everything on a 5-inch coaster so it fits even on pedestal sinks. Darker mood? Use smoky glass vases and white petals with a bergamot candle. Renter-friendly? No wall changes—just layer the tray and swap in a temporary peel-and-stick backsplash behind the sink if you’re feeling spicy.
Key Design Elements:
- Main materials: small bud vases, citrus slices, delicate blooms, rattan or stone tray
- Color palette: white, soft green, pale yellow, natural tan
- Lighting strategy: warm overheads plus a small candle for reflection play
- Furniture silhouettes: round mirrors, curved faucet lines, simple vanity
- Texture layers: glass, rattan weave, plush towel pile
- Accent details: tiny hand cream, room spray, a slim match striker
Budget Breakdown:
- Bud vases (3–5): $9–$25
- Tray or coaster: $6–$20
- Flowers (mini mums, spray roses, baby’s breath): $6–$15
- Fresh citrus: $2–$5
- Candle (optional): $8–$18
Total Estimated Cost: $23 – $83
Best For: Powder rooms or guest baths. Perfect before hosting—five minutes and your space looks intentional and smells great.
Why This Looks Intentional: The tray creates a boundary. It turns random items into a vignette. Limiting the color palette to soft whites and one punchy accent keeps the whole thing cohesive and calm.
How To Recreate This Look:
- Place a small tray by the sink and cluster 3–5 bud vases with varying heights.
- Fill with water and add one bloom per vase—keep stems short and perky.
- Float a thin citrus wheel in one vase for scent and color.
- Roll a hand towel and tuck it against the tray. Add a candle behind the vases.
- Dim the lights slightly and light the candle for evening guests.
Don’t Do This: Don’t mix too many bloom types. Pick one or two to avoid a cluttered look. Also, avoid overly fragrant flowers in tiny bathrooms—they can read “perfumey” fast.
Pro Styling Tip: Angle the mirror so it captures the candle flame and doubles your glow in photos—instant atmosphere.
Take a breath. The next project is for your sofa corner, and it’s quietly stunning when the afternoon sun hits.
If one section made you smile, pin it—literally or digitally. Start there. Consistency beats complexity every time.
5. Velvet Ribbon Floral Pillow Sprigs For the Sofa
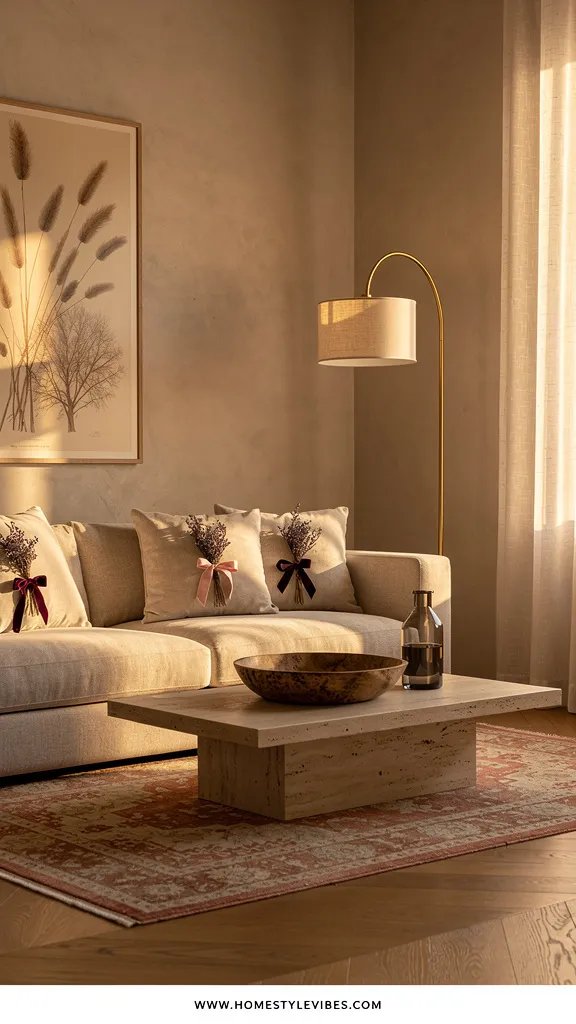
You’ve fluffed the pillows a hundred times, but the sofa still looks like it’s waiting for a delivery. The truth is, pillows need personality, not just more filling. Adding small dried floral sprigs tied with velvet ribbon to your throw pillows brings texture, movement, and that editorial “why does this look so finished?” feeling.
The mood reads romantic-modern: a little Paris apartment, a little indie boutique lounge. It works in real homes because you can tie and untie the sprigs in minutes, and it’s kid-and-pet friendly if you choose sturdy dried stems (bunny tails, ruscus, bleached fern). Lighting? Afternoon rays hit the velvet and create that low-lustre sheen that looks luxurious even on camera. Materials include velvet ribbon, dried sprigs, safety pins, and pillows you already own. The contrast between soft fabric and delicate botanical shapes photographs with beautiful shadow play.
Budget-friendly route: use grosgrain or twine instead of velvet. Small-space version: do just one pillow on an accent chair to keep it from feeling too sweet. Darker version: black velvet ribbon with pale, bleached florals for moody minimalism. Renter-friendly? No commitment at all—untie and store when you’re over it.
Budget Breakdown:
- Velvet ribbon (2–3 yards): $6–$12
- Dried floral pack: $8–$20
- Safety pins or tiny brooch pins: $3–$8
- Throw pillows (use what you have): $0
Total Estimated Cost: $17 – $40
Best For: Sofas and accent chairs that need a soft, romantic detail. Lovely for fall and winter, or any time you want a cozy vibe without heavy blankets.
Key Design Elements:
- Main materials: velvet ribbon, dried bunny tails, ruscus, bleached fern
- Color palette: warm neutrals, blush, camel, sage, or black-and-cream for edge
- Lighting strategy: indirect sunlight to bring out velvet sheen; lamp light in the evening
- Furniture silhouettes: low-profile sofa, rounded or channel-tufted chair
- Texture layers: velvet, linen, dried botanicals
- Accent details: small boucle throw, ceramic side table, thin brass floor lamp
How To Recreate This Look:
- Cut 8–12-inch lengths of velvet ribbon and tie small bundles of 2–3 dried stems.
- Use a safety pin on the pillow’s back seam to secure the ribbon knot so it sits slightly off-center front.
- Angle the sprig downward or sideways so it feels like a corsage for your pillow.
- Repeat on 2–3 pillows, varying placement and size. Keep at least one pillow plain for balance.
- Fluff pillows and rotate so the ribbons catch the side light.
Why This Looks Expensive: Velvet’s micro-nap picks up light like a finely tailored jacket. Paired with monochrome pillows, the floral detail reads like couture stitching—small, but intentional.
Watch Out: Skip delicate, crumbly florals that shed. Avoid heavy bunches that collapse the pillow shape. And don’t center every ribbon—off-center is the detail that feels designed.
Pro Styling Tip: Create height variation by propping one pillow upright and leaning another. The zig-zag skyline looks better on camera than a straight row.
Next up: a coffee-table idea that makes flowers last weeks, not days, and photographs like a magazine spread.
6. Low-Lying Ikebana Coffee Table Bowl With Pebbles
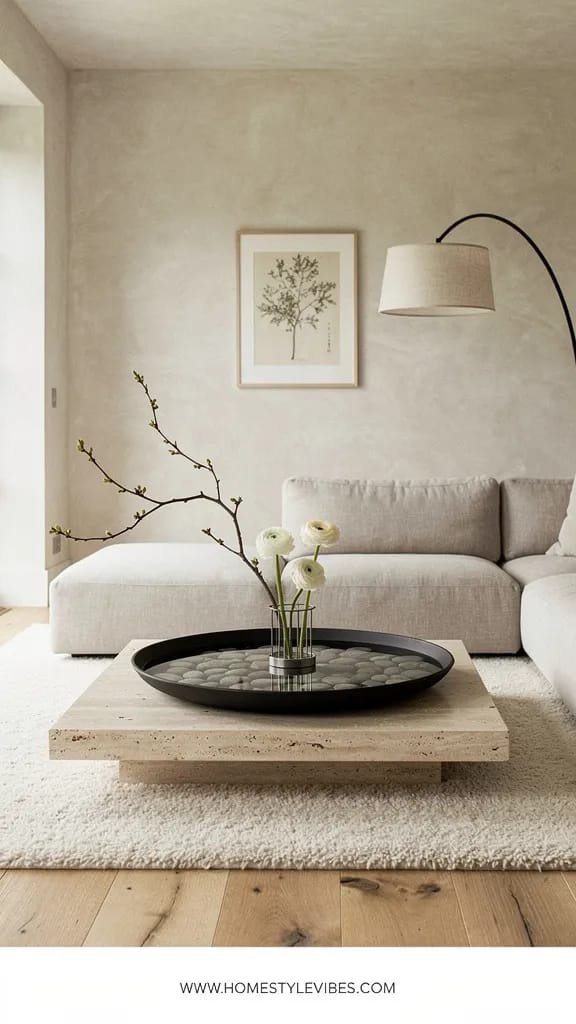
You love fresh flowers, but you hate the short lifespan and constant rearranging. I tried this Ikebana-inspired bowl in my own living room last fall and honestly couldn’t believe the difference—simple stems, minimal water, and it stayed artful for nearly two weeks with a couple of tiny refreshes. It’s sculptural and quiet, like a deep breath in the middle of the room.
The mood is Japanese minimal meets modern organic. It works for real life because it sits low, so you can still see over it to the TV or your conversation partner. Lighting creates poetry here: morning light throws gentle shadows across the pebbles; evening lamplight reflects off water for a subtle glimmer. Materials are tactile—matte ceramic bowl, smooth river stones, slender stems (ranunculus, tulips, cosmos), and a kenzan/frog or a hidden grid to hold them in place. The camera loves the negative space and the reflective water; it lets the eye rest.
Variations: Budget-friendly? Use a cereal bowl, florist tape grid, and backyard clippings. Small-space? A mini bowl on a nightstand looks like boutique-hotel calm. Darker version? Charcoal bowl, inky pebbles, and pale orchids or white ranunculus. Renter-friendly is built in—you’re not modifying anything.
Key Design Elements:
- Main materials: shallow ceramic bowl, river stones, kenzan or tape grid
- Color palette: soft gray, charcoal, pale blush, creamy white, fresh green
- Lighting strategy: diffuse daylight plus a side lamp; avoid harsh overheads
- Furniture silhouettes: low coffee table, clean sofa lines, maybe a boucle ottoman nearby
- Texture layers: matte bowl, glossy stones, delicate petals, reflective water
- Accent details: linen coaster stack, slim remote tray, single art book
Budget Breakdown:
- Shallow bowl: $10–$30
- River stones: $5–$12
- Kenzan/frog or florist tape: $6–$18
- Stems (5–7 total): $8–$20
Total Estimated Cost: $29 – $80
Best For: Coffee tables or dining tables where you want something low-profile and poetic. Great for anyone who prefers artful restraint over big bouquets.
Why This Feels Designer: Restraint. Using fewer stems with intentional spacing telegraphs confidence. It says you trust the negative space to do its job—and it does.
How To Recreate This Look:
- Place the kenzan in the bowl or create a tape grid across the opening.
- Add a single layer of river stones to hide mechanics and weight the base.
- Pour in a shallow amount of water—just enough to cover the stones.
- Insert stems one by one, varying height and angle. Keep odd numbers—it’s visually calmer.
- Step back and remove one stem. That last subtraction is often the difference between pretty and breathtaking.
The Most Common Mistake: Overfilling. Ikebana is about intention. Leave airy gaps between stems so each one reads as a gesture, not clutter.
Pro Styling Tip: Photograph from a slightly lower angle so the bowl’s rim lines frame the composition—this creates depth and draws the viewer’s eye inward.
A quick perspective reset: your home doesn’t need twelve arrangements. It needs one or two that tell your story. Start light, tweak slowly, and watch how the room softens when you stop trying to fill every corner.
Quick Checklist
- Press blooms for a linen-mat gallery wall
- Cluster jars with herbs and delicate stems on a tray
- Anchor an empty corner with tall branches in a floor vase
- Set a sink-side bouquet bar with bud vases and citrus
- Tie velvet-ribbon floral sprigs to pillows
- Create a low Ikebana bowl with stones and a kenzan
- Use warm 2700K bulbs near floral vignettes
- Keep palettes restrained—3 hues per setup
- Leverage negative space and off-center placement
- Add a small spotlight or picture light for evening drama
Frequently Asked Questions
How do I keep these floral projects under budget if flowers are pricey where I live?
Buy one “hero” stem and support it with greens like eucalyptus or backyard clippings. Use fewer stems with more intention. Pressed flowers stretch value too—one bouquet can become months of art.
I’m new to DIY—what’s the easiest project to start with from this list?
Start with the kitchen jar cluster. It’s low-stakes, flexible, and you can build it from jars you already have. Add stems gradually and adjust until it feels right.
My apartment is tiny. Which idea won’t crowd my space?
Go for the pressed-flower mini gallery (just three frames) or the small Ikebana bowl. Both stay flat or low, add elegance, and won’t block sightlines.
How do I make these arrangements last longer?
Change water every 2–3 days, trim stems at an angle, and keep flowers away from direct heat or strong sun. For Ikebana bowls, top up water lightly and remove anything that starts to wilt.
I rent and can’t drill holes—how do I hang the gallery wall safely?
Use adhesive hanging strips rated for your frame weight. Test one frame first, press firmly for 30 seconds, then hang after the recommended set time for best hold.
Closing Thoughts
Pick one idea and do it today. A pressed-flower frame, a jar cluster by the sink, or that elegant low bowl on your coffee table—each can be done in under an hour and for less than $85. Once you place it, you’ll feel that tiny click: this corner finally makes sense.
The secret to luxury at home isn’t price tags. It’s texture, lighting, and restraint. Natural materials, warm bulbs, and space between objects—that’s the trio that makes rooms feel calm and considered. Flowers are the soft note that ties it all together.
Trust your eye, edit once, and let the light do the rest. You’ve got this—seriously. Your home is about to feel like fresh air.

About the Author

Krisztina P.Rendes, Founder of Home Style Vibes
Founder of Home Style Vibes
Krisztina Puskásné Rendes created Home Style Vibes as a cozy-modern lifestyle space where homemaking meets inspiration. Her goal is to help women create beautiful, organized, and peaceful homes they truly love — without overwhelm. You’ll find here heart-driven content on home decor, cleaning tips, easy family recipes, organization and decluttering, DIY home projects, plants, and seasonal ideas — all designed to bring more calm, comfort, and style into everyday life.