
6 DIY Halloween Garland Ideas To Take You From Spooky To Thanksgiving
You want a home that glows with October magic and rolls right into Thanksgiving without a frantic decor swap. You hate the wastey-feeling clutter, the plastic bin chaos, and that nagging “it still looks half-finished” corner. Think playful Halloween shadows and crows, then rich harvest warmth — black taper candles and jack-o’-lantern grins giving way to burnished leaves and amber light. These 6 DIY Halloween garland ideas solve the style whiplash, keep your budget under control, and look genuinely photo-ready in real living rooms, dining tables, mantels, and bookcases. They’re intentional, flexible, and built to last from a spooky movie night in mid-October to your pie-and-leftovers glow on Thanksgiving weekend. If you love a chic Halloween that’s more candlelit than gory — you’ll feel right at home here.
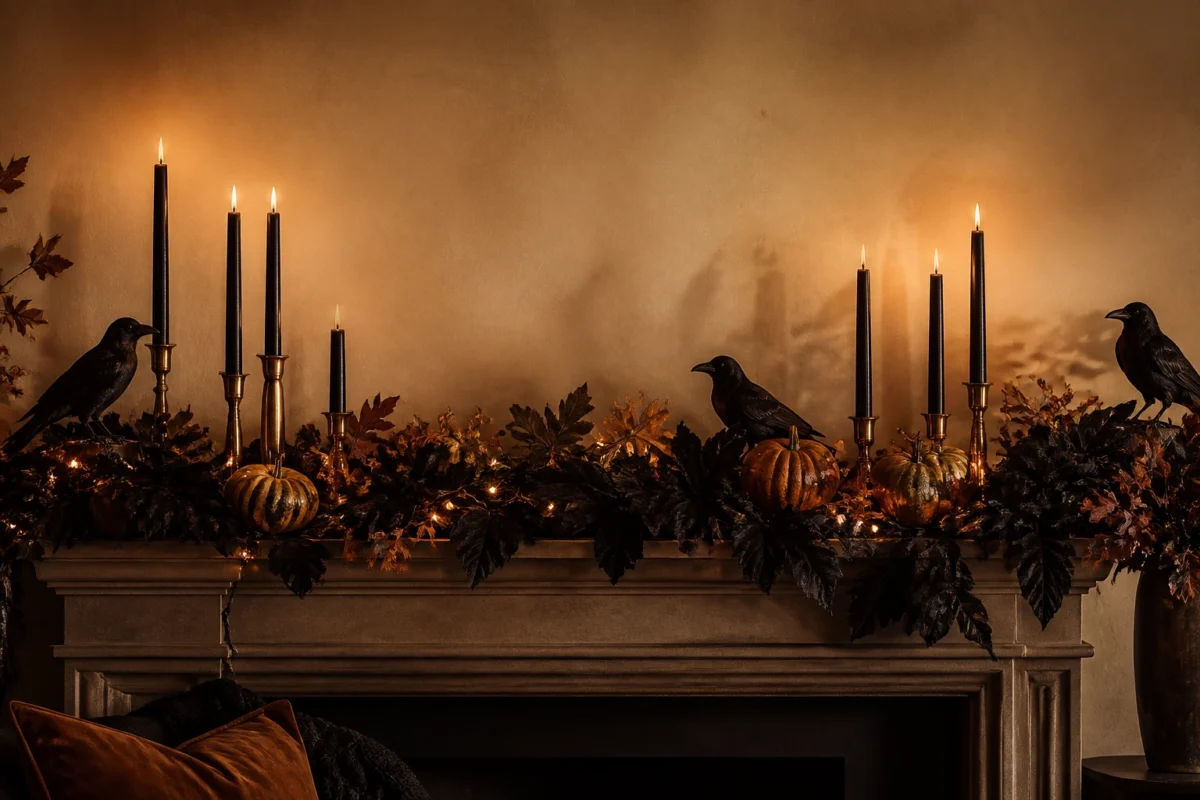
1) Crows And Velvet Leaves With Candlelit Shadows On The Mantel
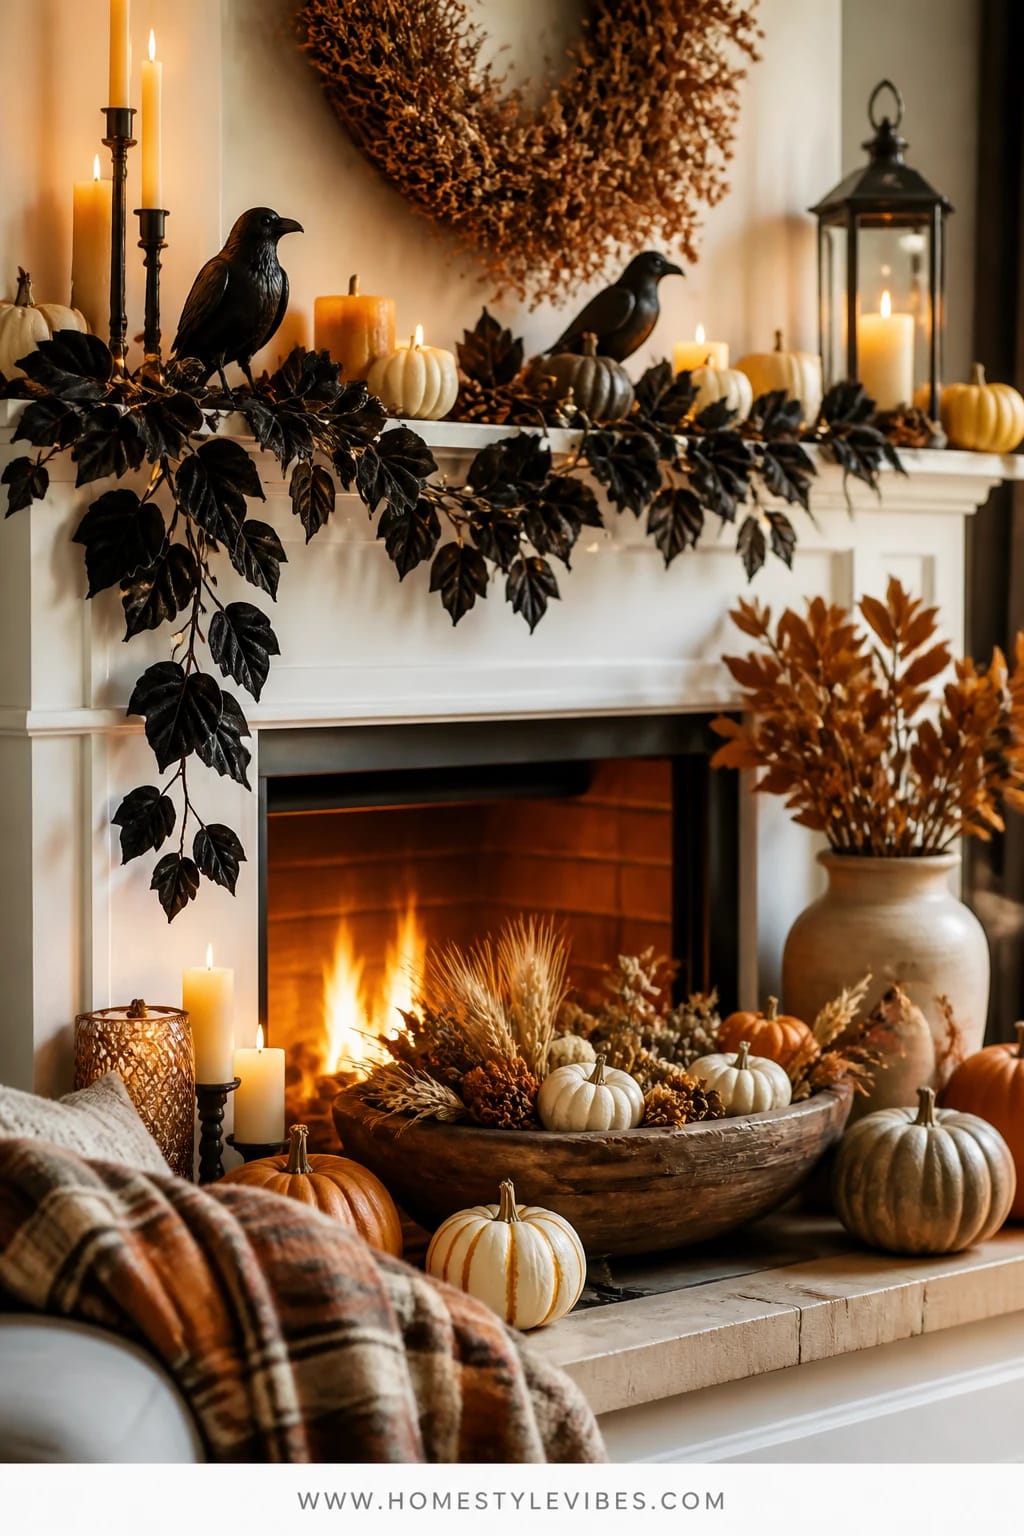
We’ve all been there: You place a plastic “boo” sign on the mantel and it still looks like August with a costume on. This garland solves the “too literal” Halloween issue with mood and movement — think black velvet leaves, a thin strand of twinkle lights, and a few perched crows. The effect is stylishly spooky for October, then effortlessly shifts to late-fall abundance by swapping two elements later. The look reads “haunted library chic” on Halloween night and “harvest hearth” by Thanksgiving week.
Here’s why it works: rich textures and dramatic contrast. Velvet leaves absorb light and push the candle glow forward. Subtle wire-twined twinkle lights offer a low, ember-like sparkle that warms the black palette so it never falls flat. The crows add just enough Halloween without tipping into kitsch. For real homes, it’s practical — lightweight, easy to store, safe to drape high, and totally reusable next year. In evening light, those black tapers throw gorgeous shadows across the velvet leaves, which photograph beautifully with layered depth and a moody, intimate feel.
Two easy variations: for a budget-friendly take, swap velvet leaves for matte black paper leaves you cut yourself; for a small-space version, make a half-garland focused over one mantel corner and stack two candlesticks opposite to balance the asymmetry. When November hits, remove the crows, tuck in russet faux maple leaves, and add two brass vessels — done.
Budget Breakdown:
- Faux black velvet leaf garland: $18–$36
- Battery micro lights (warm white): $8–$15
- Set of 2–3 lightweight crows: $10–$20
- Black taper candles: $8–$16
- Antique brass candlesticks (thrift or repro): $15–$40
Total Estimated Cost: $59 – $127
Best For: Standard living room mantels in family homes that want Halloween style without gore. Perfect for mid-October through Thanksgiving with a 5-minute swap-out.
Key Design Elements:
- Main seasonal props: black velvet leaf garland, small crows, black tapers
- Color palette: black, deep bronze, warm amber light
- Lighting strategy: candle clusters at each end plus a thin run of micro lights through the garland
- Textile layers: velvet leaves paired with a knit throw on the hearth stool
- Natural elements: a few dried seed pods or bare twigs tucked in
- Accent details: antique brass candlesticks, a small gilt-framed portrait leaning on the mantel
How To Recreate This Look:
- Start with a clean mantel and place your largest art or mirror as a backdrop.
- Add a strand of velvet leaves, letting them dip slightly in the center for movement.
- Layer a warm micro light strand through the leaves, hiding the battery pack behind a candlestick.
- Place 2–3 black taper candles in brass holders at varied heights on both ends.
- Style with two lightweight crows — one perched near the center dip, one at the far end for that watchful vibe.
Why This Looks Expensive: The matte velvet against brass reads bespoke, not big-box, and the restraint — just a few crows, not a flock — signals confidence.
Watch Out: Don’t use cool-white lights here; they’ll kill the moody warmth and clash with the brass. Warm white only.
Pro Styling Tip: For photos, light only the tapers and your lamps — turn off overheads so the tiny micro lights glow like embers and shadows pool around the crows.
2) Jack-O’-Lantern Cutouts With Warm Amber Glow On The Dining Table Runner
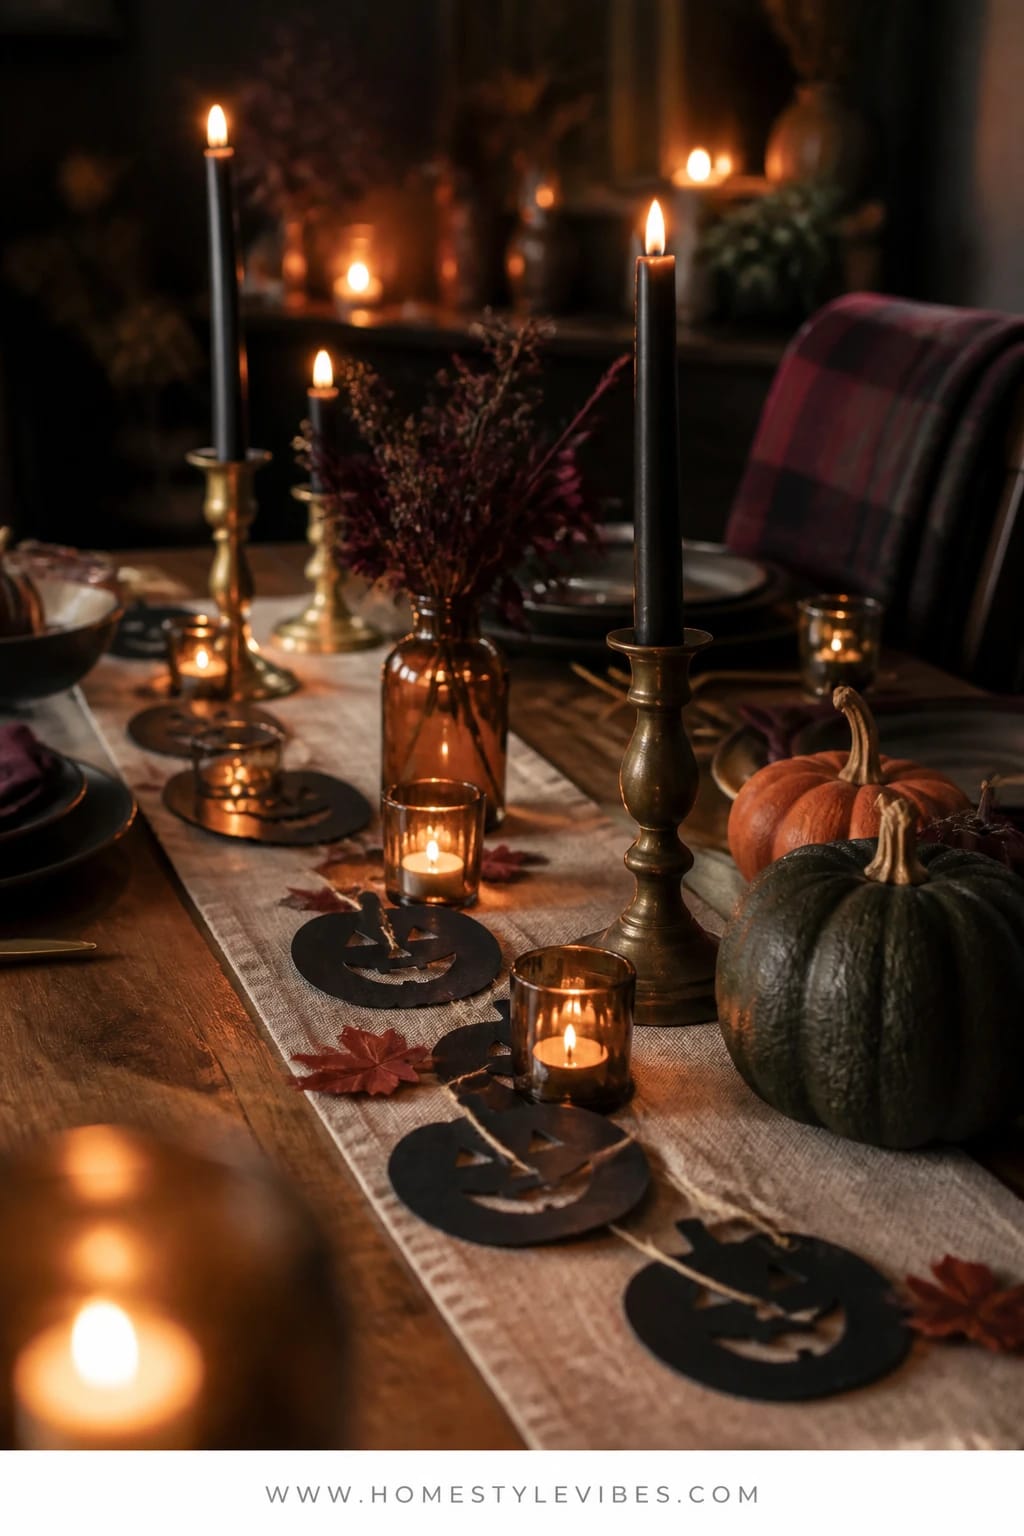
It’s that one surface that always feels off: your dining table. You toss a few pumpkins on a runner and it still looks sparse. This DIY garland uses matte black paper jack-o’-lantern cutouts strung along twine with amber votives tucked between. It’s playful enough for Halloween dinner but, with two simple swaps, transitions to a candlelit late-fall table that feels gathered and grown-up.
The mood skews “spooky supper club” in October — flickering smiles, black accents, and warm amber glass. In November, remove the faces (flip the cutouts or replace with plain pumpkin silhouettes), mix in russet maple leaves, and keep the candlelight. It works because paper elements are lightweight and easy to fine-tune for scale, and the low garland shape keeps sightlines open for conversation. The glow ricochets off matte black in a soft, elegant way that photographs with gorgeous warmth and saturated highlights.
Variations: for a budget-slim version, use kraft paper pumpkins with a black marker outline and tea lights in recycled jars; for a luxe version, add smoked glass votive holders and a dark linen runner beneath for extra depth.
Budget Breakdown:
- Black cardstock for cutouts: $4–$10
- Twine or black cotton string: $3–$8
- Amber votive holders (6–8): $18–$40
- Unscented votive candles or LED: $6–$15
- Dark linen table runner: $20–$40 (optional but impactful)
Total Estimated Cost: $31 – $113
Best For: Medium to long dining tables that host a Halloween dinner and a late-fall gathering. Family-friendly and easy to clear for serving.
Key Design Elements:
- Main seasonal props: jack-o’-lantern cutouts, amber votives
- Color palette: black, amber, touches of russet in November
- Lighting strategy: low, dense candle clusters along the centerline
- Textile layers: dark linen runner or black cotton over the table
- Natural elements: dried oak leaves or wheat sprigs added in late fall
- Accent details: matte black flatware or napkin rings for cohesion
Why This Feels Designer: Repeating motifs at consistent intervals (pumpkin, candle, pumpkin, candle) reads intentional and lets your eye glide down the table.
How To Recreate This Look:
- Start by cutting 10–14 pumpkin shapes; for Halloween week, add simple face cutouts.
- Add twine and space the pumpkins 4–6 inches apart; lay the garland down the table center.
- Layer amber votives between each pumpkin, alternating left-right for movement.
- Place the runner beneath for grounding; it frames the glow and catches wax drips.
- Style with a pair of low bowls of seasonal fruit (pears or apples) at either end in November.
One Thing To Avoid: Don’t make the garland too tall. Keep everything low so plates and passing dishes don’t feel pinched.
Pro Styling Tip: Photograph at dusk with curtains open just a touch so candle flames star in the image but you still catch a hint of window blue for contrast.
If your brain’s already spinning with options, breathe. You only need one idea to start. Build one garland this weekend, live with it, and let it tell you what the rest of the room wants next.
3) Subtle Cobwebs And Black Candles With Oxblood Accents On The Bookcase
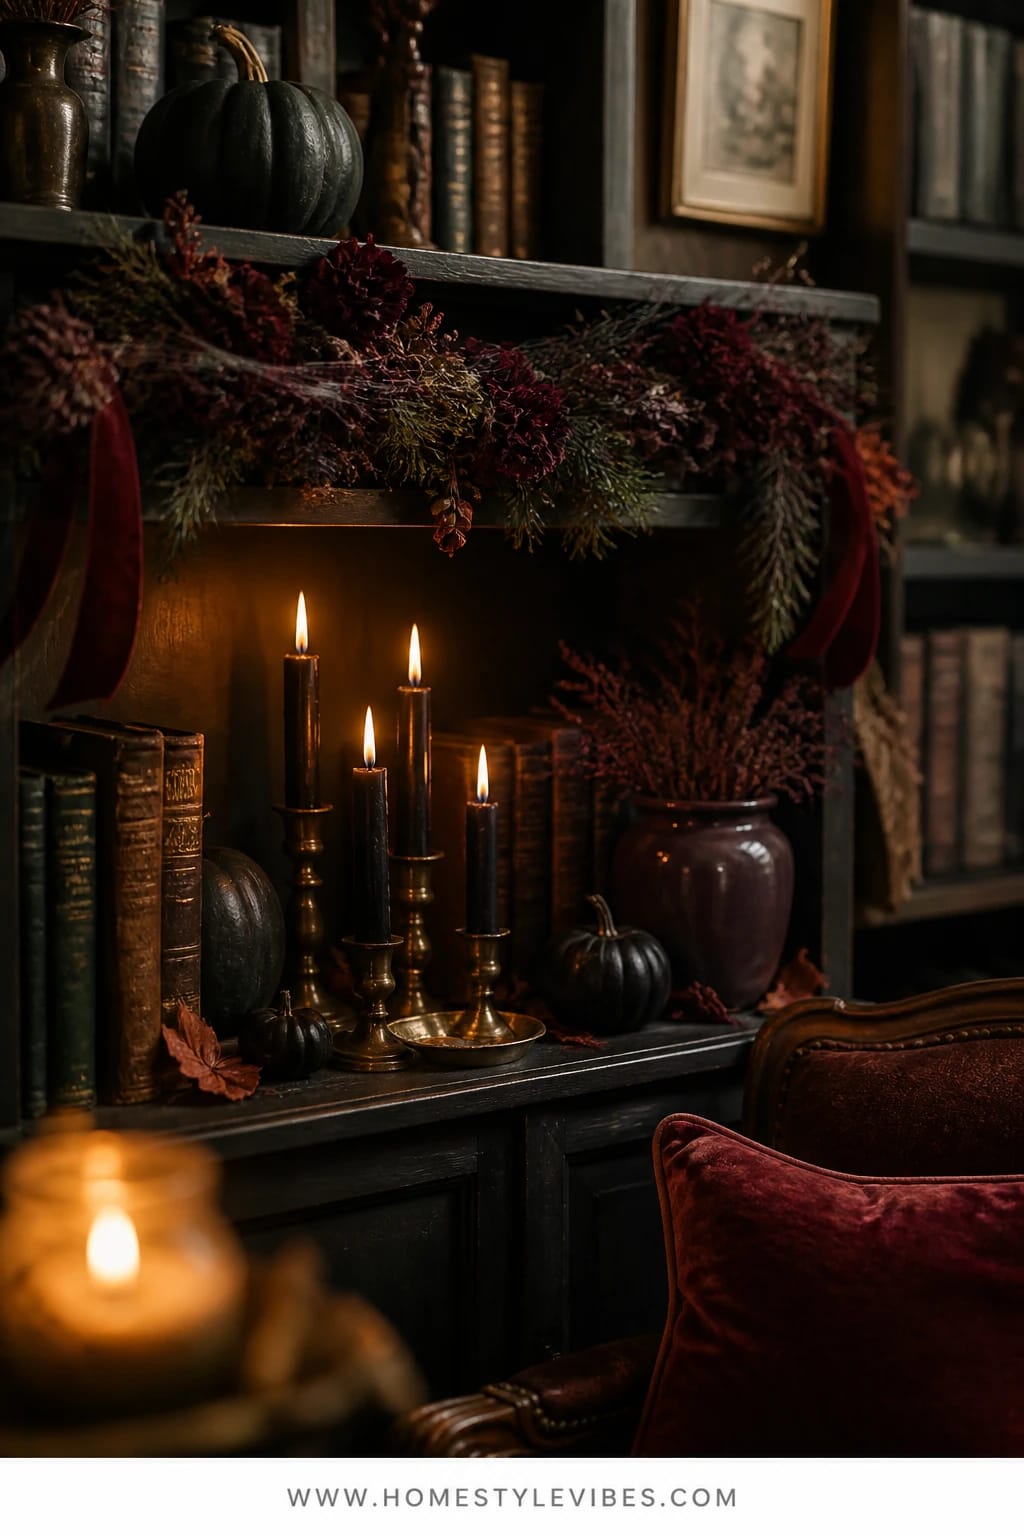
You’ve tried popping a pumpkin on the shelf, but it still reads like July with a pumpkin. The fix? A restrained, layered garland that drapes across a shelf edge with just a whisper of cobwebbing, a few black candles on the shelf below, and oxblood ribbon ties. It’s sophisticated Halloween without the “party store” vibe, and it slides into November by swapping the cobwebs for dried burgundy eucalyptus and tiny brass acorns.
The mood is candlelit and cerebral — think dark academia with a friendly wink. A bookcase gives you vertical rhythm: garland high, candles mid-level, a dark art print leaning behind. Why it works in real homes: the pieces store flat, they’re safe up high away from small hands, and they look chic against a mix of colorful spines or neutral bindings. Lighting is everything here — one lamp on the adjacent table and a trio of black candles give you that slow, cozy sparkle perfect for reading or a moody movie night. On camera, the textures — soft cobwebs, satin ribbon, matte wax — make a layered, touchable story.
Two variations: go budget with faux webbing and black washi-taped paper bats; or push luxe with velvet ribbon in oxblood and a small cluster of dried burgundy roses tucked into the garland for Thanksgiving week.
Budget Breakdown:
- Simple leafy garland base (black or deep green): $12–$28
- Faux cobwebs: $3–$6
- Black pillar or taper candles: $8–$20
- Oxblood satin or velvet ribbon: $6–$12
- Small brass accents (acorns, mini bells): $10–$18
Total Estimated Cost: $39 – $84
Best For: Living room or study bookcases where you want Halloween to feel grown-up and literary, not loud.
Key Design Elements:
- Main seasonal props: leafy garland, light cobwebbing, black candles
- Color palette: black, oxblood, antique brass
- Lighting strategy: one shaded table lamp plus a candle trio on the shelf below the garland
- Textile layers: velvet or satin ribbons trailing off the shelf edge
- Natural elements: dried eucalyptus or roses swapped in for November
- Accent details: a gilt-framed vintage print, a small crow figurine on a stack of books
How To Recreate This Look:
- Start by anchoring two clear hooks inside the shelf lip; drape the garland so it scoops once.
- Add a whisper of cobwebbing — think “barely-there” — along the top edge.
- Layer in oxblood ribbon bows at both ends and one center tie for balance.
- Place black candles on the shelf below and a small brass accent on a book stack.
- Style with a dark art postcard or family photo in a brass frame behind the candles.
Why This Reads High-End: The limited palette and textures (matte, satin, brass) make it feel curated, not cluttered.
The Most Common Mistake: Over-webbing. Less is scary-chic; more is dust bunny cosplay. Keep it restrained.
Pro Styling Tip: For pictures, pull one ribbon tail longer than the other — asymmetry adds that “caught mid-moment” editorial feel.
4) Paper Bats And Gilded Leaves With Warm String Lights On The Entry Console
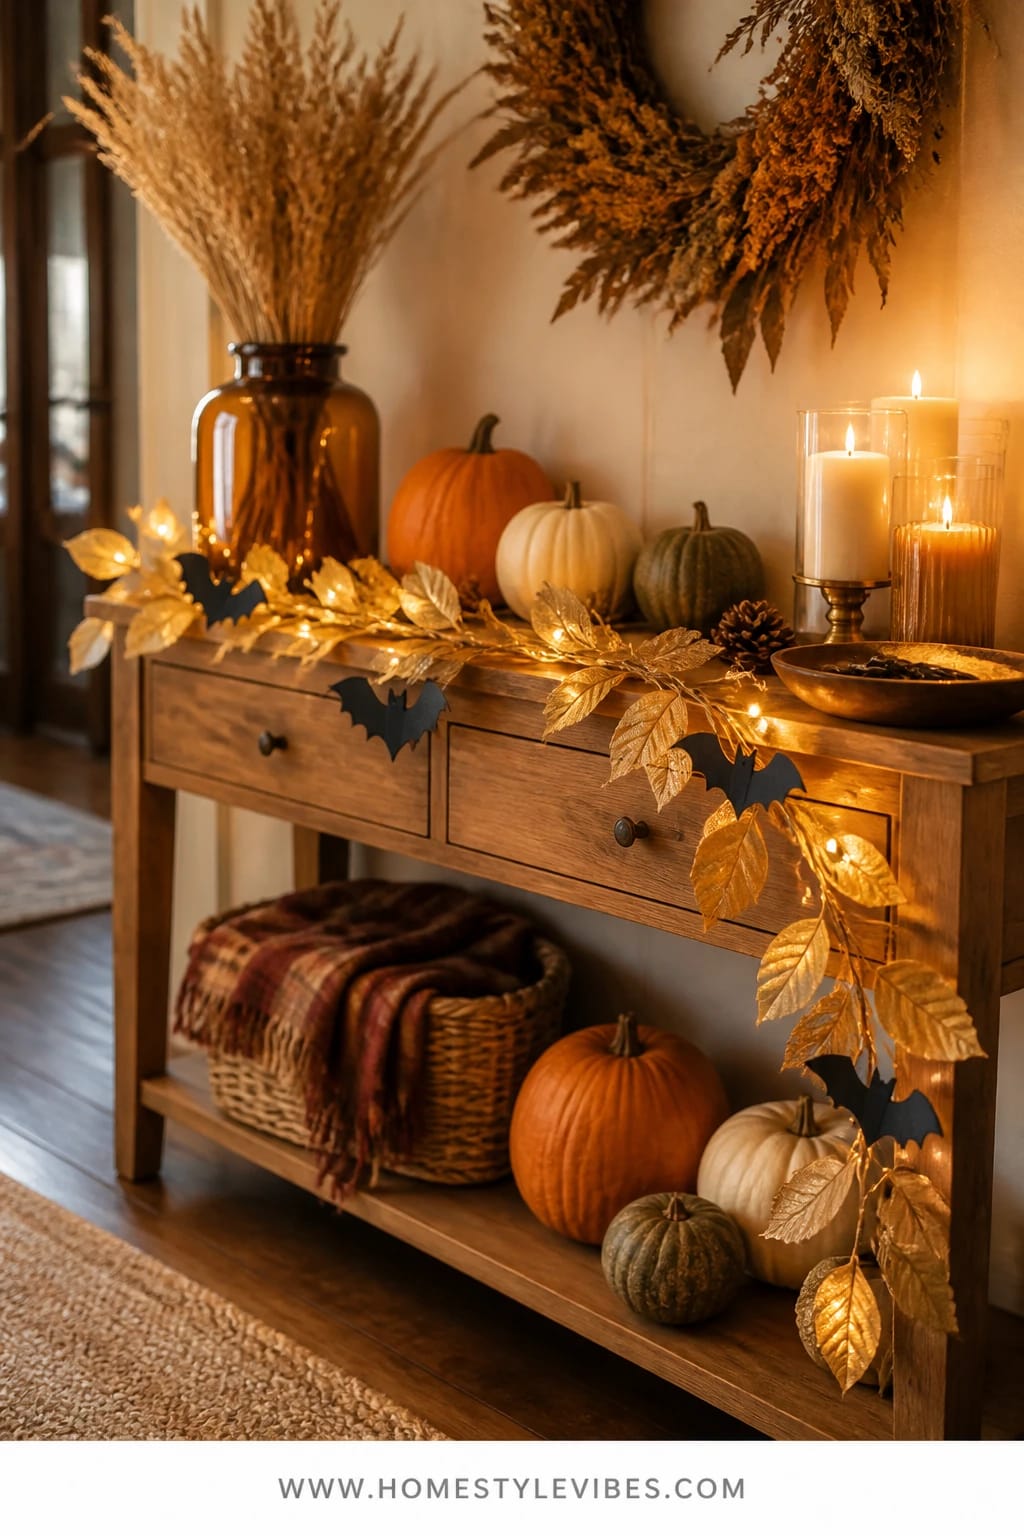
First impressions matter, and the entry console is usually where chaos piles up. Keys, mail, random hair ties — you know the scene. This DIY garland makes the landing zone feel intentional: a strand of simple paper bats interlaced with gilded faux leaves, anchored under a slim bowl for keys. Warm string lights wind through the leaves, catching the gold, and the bats add just enough Halloween. After October, remove the bats and add small pinecones or wheat for a softly gilded November look.
The mood: chic, mischievous, and welcoming. Functionally, it’s great for family life — shallow, easy to dust around, and the warm lights make coming home at dusk feel special. Because we’re mixing matte paper with a little metallic, the garland throws gentle highlights that photograph beautifully and make small entryways feel more considered. This is a spot where you can get away with smaller elements; the eye reads them quickly as you pass through.
Variations: for a tight budget, skip gilding and keep the leaves matte brown with one metallic ribbon; for more drama, spray a few leaves black and keep the bats clustered to one side, like they’re lifting off the console.
Budget Breakdown:
- Paper bats (DIY or pre-cut): $4–$12
- Faux leaves (matte or pre-gilded): $10–$22
- Warm micro string lights: $8–$15
- Narrow tray or bowl for keys: $12–$30
- Double-sided tape/mini hooks: $4–$8
Total Estimated Cost: $38 – $87
Best For: Entry consoles or sideboards near the front door — high-traffic zones that need decorative order plus soft light for evening arrivals.
Key Design Elements:
- Main seasonal props: paper bats, gilded leaves
- Color palette: black, gold, warm amber light
- Lighting strategy: micro lights tucked along the back edge to halo the leaves
- Textile layers: none needed; keep surfaces simple for function
- Natural elements: a few dried seed pods or mini pinecones swapped in for November
- Accent details: a dark-framed mirror catching the lights, a black ceramic dish
Why This Looks Intentional: The garland does double-duty: it visually frames practical items (keys, tray) so the whole surface reads styled, not just “stuffed.”
How To Recreate This Look:
- Start by placing a narrow tray or bowl and decide your key drop spot.
- Add a base of faux leaves along the console’s back edge, lightly securing with tape.
- Layer the micro lights through the leaves, keeping the cord hidden behind the tray.
- Place paper bats at varied angles along the leaves; cluster a few near the mirror.
- Style with a single black candle in a hurricane for safety, or an LED taper for nightly use.
Don’t Do This: Don’t run the lights straight across like runway lights. Weave them loosely with soft bends; it reads warmer and more natural.
Pro Styling Tip: Shoot a quick phone photo and adjust — if the bats look flat, tilt a couple so the wings cast small shadows on the wall for dimension.
Remember, this isn’t about recreating a showroom. It’s about building a home that tells your fall story — a little spooky in October, heartwarmingly abundant in November.
5) Skeleton Keys And Black Ribbon With Burnt Orange Pumpkins On The Bar Cart
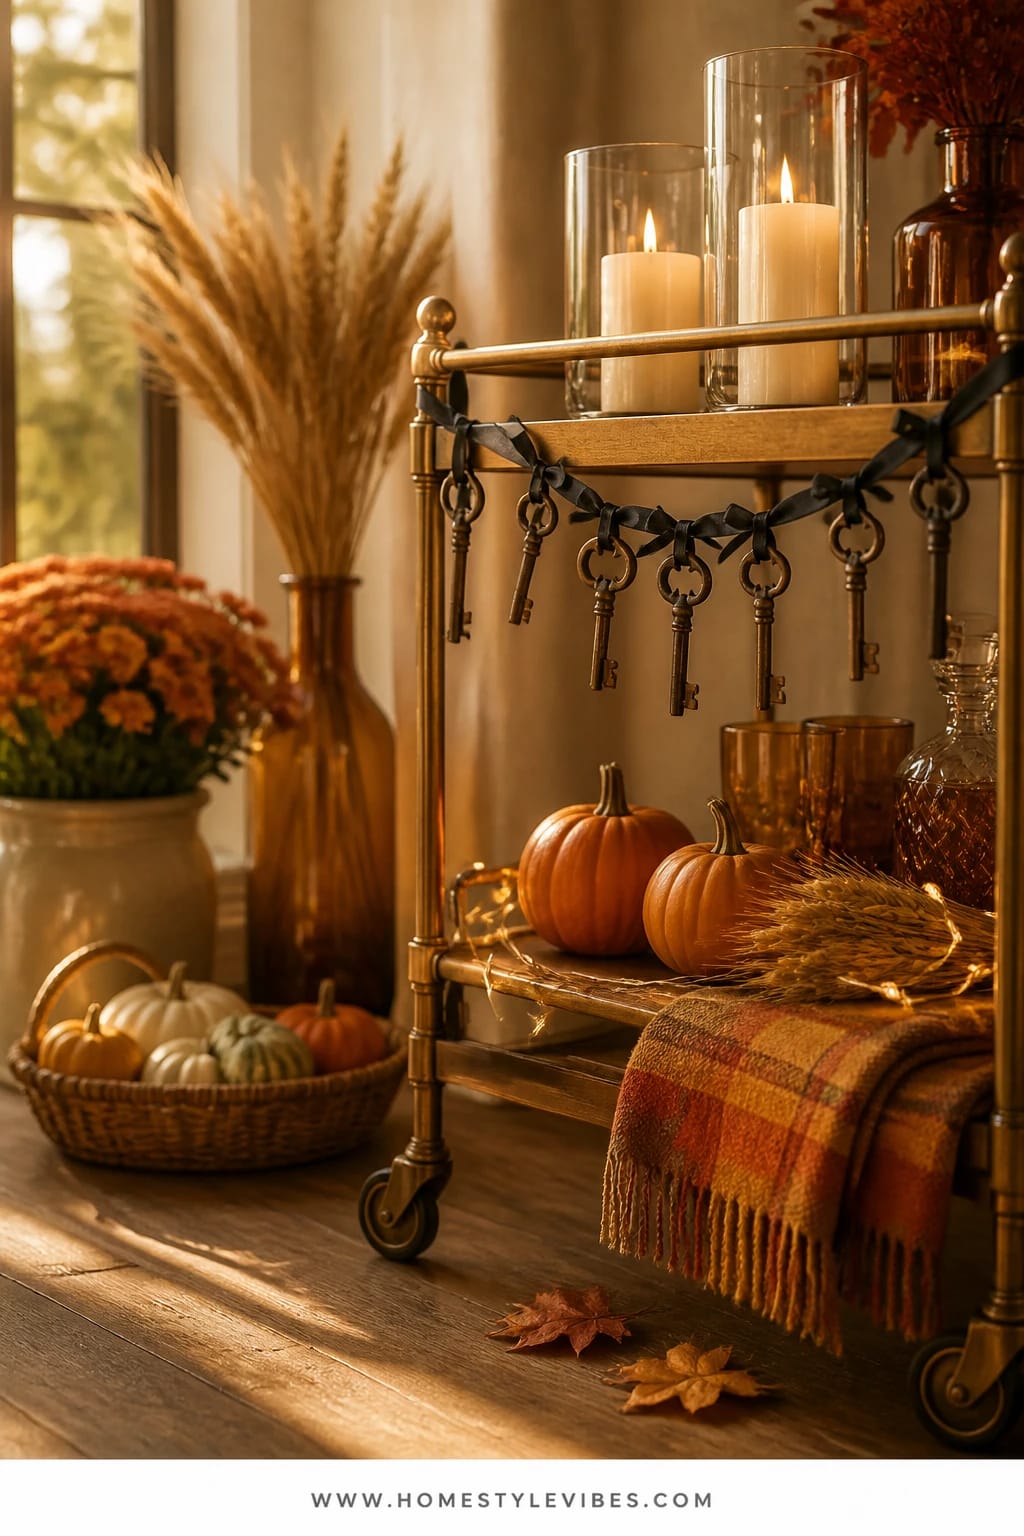
Bar carts can feel like mini storage units by October — bottles, corkscrews, and a rogue lime. This garland corrals the chaos with mood: a strand of vintage-style skeleton keys tied onto a length of black grosgrain ribbon, draped along the top rail. Tuck in two or three small burnt orange pumpkins on the shelves below, and you’ve got a chic Halloween vignette that pivots to Thanksgiving simply by swapping the pumpkins for russet pears and adding a sprig of dried wheat.
The mood is playful and a bit mysterious — keys hint at hidden doors and old stories. Black ribbon anchors the look and repeats the Halloween language without plastic gimmicks. For real homes, this works because the garland takes zero shelf space, you can still pour drinks easily, and everything stores in a single shoebox later. Candlelight reflects beautifully on bottle glass; just add one LED taper in a hurricane to keep it safe around clumsy guests or pets. In photos, the metallic keys catch warm light like tiny stars, and the hit of orange reads juicy and alive.
Variations: skip real pumpkins and go with matte faux minis if your cart sits near a heat vent (we’ve all dealt with the sad half-deflated gourd look by week three). If you’re short on bottles, stack two black-bound books as risers and perch a pumpkin on top to build height.
Budget Breakdown:
- Set of vintage-style skeleton keys (10–20): $12–$24
- Black grosgrain ribbon (2–3 yards): $4–$10
- Mini pumpkins (real or faux, 3–5): $5–$20
- LED taper with hurricane: $12–$28
- Small bundle of dried wheat (for November): $6–$12
Total Estimated Cost: $39 – $94
Best For: Bar carts or small sideboards in living or dining rooms; perfect for hosts who love a seasonal cocktail night and a mellow Thanksgiving sip session.
Key Design Elements:
- Main seasonal props: skeleton keys, black ribbon, mini pumpkins
- Color palette: black, burnt orange, warm metallic glints
- Lighting strategy: one LED taper in a hurricane to bounce warm light off glassware
- Textile layers: a black linen bar towel folded neatly on the top shelf
- Natural elements: dried wheat or a sprig of rosemary in a rocks glass for scent
- Accent details: matte black bottle opener, brass jigger for mixed metals
How To Recreate This Look:
- Start by tying skeleton keys onto the ribbon at irregular intervals (2–3 inches apart).
- Add the ribbon to the top cart rail, letting it sag slightly in the center.
- Layer a folded black bar towel on the top shelf to visually ground the glassware.
- Place 2–3 mini pumpkins on the lower shelves near bottles for bursts of color.
- Style with a single LED taper in a hurricane on the top shelf for evening glow.
Why This Looks Expensive: Restraint and repetition — one dominant color (black), one accent (burnt orange), one metallic (keys). It feels curated, not crammed.
Watch Out: Avoid multiple ribbon types. One width and finish keeps the look tailored.
Pro Styling Tip: Tilt one key forward and one back so the light catches both faces — it adds sparkle and movement in photos.
6) Moon Phases And Dried Leaves With Black Tapers On The Coffee Table
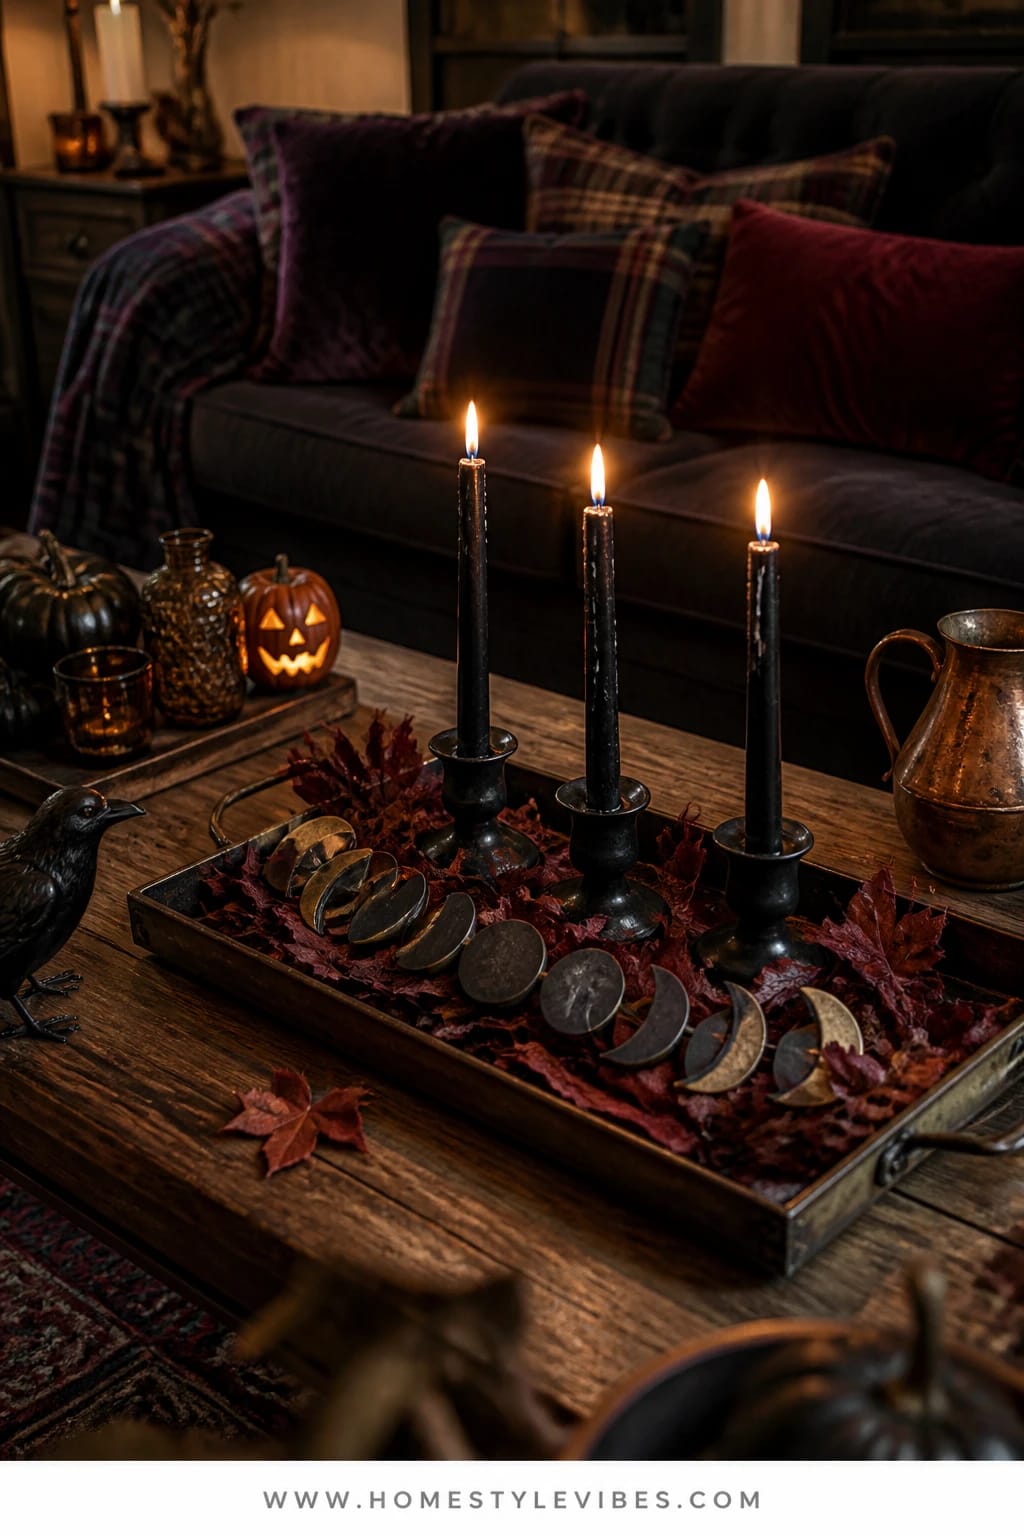
Coffee tables are notorious clutter magnets. Remotes, coasters, LEGO guy missing a hand — the usual suspects. Here’s a garland that feels like a ritual: a simple moon-phase strand (black-painted wood or stiff paper discs) laid across a low tray, threaded with dried leaves and anchored by black taper candles in squat holders. It whispers Halloween with lunar magic, then leans into late-fall serenity by swapping the moons for matte acorn caps or keeping just the waning/waxing crescents for a subtle November nod.
The mood aims for intimate, moody, and quietly witchy — no jump scares, just rhythm and shadow. Practicality matters: keep everything within a tray so you can slide it out for board games or pumpkin pie plates. Lighting is crucial; black tapers in low holders keep flames below eye level for safe conversation, while still casting delicious, dappled shadows over the moons and leaves. This setup photographs beautifully thanks to the circular repetition and the tactile texture of dried leaves — that papery rustle is a total fall ASMR moment.
Two variations: for a family-friendly version, use LED tapers and laminated paper moons (wipeable — trust me, hot chocolate finds everything). For a luxe November edit, swap dried leaves for burgundy preserved beech leaves and add a small brass sphere or bell to echo the moon theme in a warmer key.
Budget Breakdown:
- Moon-phase strand (DIY paper or wood): $6–$24
- Dried leaves (collected or bought): $0–$10
- Black tapers with low holders: $10–$24
- Low tray or shallow bowl: $14–$40
- LED option (if needed): add $12–$28
Total Estimated Cost: $30 – $98
Best For: Living room coffee tables where you want a seasonal focal point that’s easy to move for movie night or snacks.
Key Design Elements:
- Main seasonal props: moon-phase garland, dried leaves, black tapers
- Color palette: black, deep brown, warm amber candlelight
- Lighting strategy: low tapers plus one side lamp for soft shadow play
- Textile layers: a dark wool or velvet coaster stack for texture
- Natural elements: gathered leaves, a small twig with interesting form
- Accent details: a brass sphere, a matte black match striker
Why This Feels Designer: Repetition with a story — the phases march in order, giving structure and meaning instead of random bits.
How To Recreate This Look:
- Start with a low tray centered on the coffee table; it sets boundaries.
- Add the moon-phase strand in a lazy curve, not straight — curves feel more organic.
- Layer dried leaves around the moons, leaving small breathing spaces.
- Place two black tapers in low holders at opposite ends of the curve.
- Style with a single brass accent to echo the lunar theme and catch light.
One Thing To Avoid: Don’t overload the tray. Leave negative space so each element can breathe — crowded moons lose their magic.
Pro Styling Tip: Take a low-angle photo so the candle flames crown the moons — instant drama with minimal props.
Quick mindset reset: your garland doesn’t need to scream to be seen. Subtle layers, warm light, and a confident color story do the heavy lifting, especially as you glide from Halloween to Thanksgiving.
Quick Checklist
- Warm white micro lights
- Black taper candles and sturdy holders
- Matte black paper or cardstock for cutouts
- Faux or dried leaves (velvet, preserved, or gathered)
- Antique brass accents (candlesticks, bells, acorns)
- Crows or bat silhouettes for Halloween week
- Oxblood or black velvet ribbon
- Low tray or runner to anchor tabletop garlands
- LED tapers or hurricanes for kid- and pet-safe zones
- Small seasonal swaps for November (wheat, pinecones, pears)
Frequently Asked Questions
How can I keep the budget manageable for these DIY Halloween garland ideas?
Pick one primary surface (mantel, table, or cart) and invest there. Use paper for silhouettes, mix thrifted brass with one or two new candles, and choose garlands that transition with tiny swaps so you’re not buying a second set for November. Most looks here land between $30 and $120 and reuse basics year to year.
Should I use real or faux pumpkins and leaves for indoor garlands?
IMO, real pumpkins are gorgeous but watch heat vents — they slump fast. For leaves, preserved or faux keep their shape and are easier indoors, especially above fireplaces and near lights. Mix real on tables and faux up high so you get the best of both worlds.
What if I live small and don’t have a mantel or big dining table?
Go for the bookcase, entry console, or bar cart ideas. They’re purposely shallow and scale well. A single corner garland with good candlelight will read more impactful than a big spread crammed into a tiny space.
How do I store these pieces after Thanksgiving without more clutter?
Keep a “Garlands & Glow” bin: one lidded box with a zip pouch for ribbon, a small divider for brass bits, and a flat folder for paper cutouts. Coil lights around a cardboard rectangle so they don’t tangle. Label one envelope “November add-ins” so next year you can transition faster.
Are candles safe with kids and pets around these setups?
Use LED tapers or place real candles in hurricanes and out of tail zone. For coffee tables and lower shelves, LED only. Keep matches and lighters in a high cabinet. You still get the moody glow without the worry.
When should I start decorating if I want it to last through Thanksgiving?
Set the base garlands in early to mid-October with the Halloween accents (crows, bats, faces). The first week of November, remove the spooky bits, add warm harvest elements (wheat, pears, brass), and keep the candlelight steady through the holiday.
Final Thoughts
Pick one surface that bugs you the most — the mantel that never feels finished, the table that reads bare, the cart that looks utilitarian — and try one of these DIY Halloween garland ideas. Start with a warm light source, add one dark element for depth, and then a seasonal layer you can swap in November. That’s the rhythm. It’s less about more stuff and more about the right layers in the right order.
From spooky to Thanksgiving, your home deserves that candlelit, story-rich season: small shadows, warm glints of brass, and the soft rustle of leaves when you pass. I tried the moon-phase coffee table last October and, honestly, we never turned the lamp off — it just felt right every evening. Let this be easy. Trust your eye, follow the glow, and enjoy the slow slide from jack-o’-lantern grins to harvest calm.
You’ve got this — one garland, one swap, one cozy night at a time. Seriously, light the candle.

About the Author

Krisztina P.Rendes, Founder of Home Style Vibes
Founder of Home Style Vibes
Krisztina Puskásné Rendes created Home Style Vibes as a cozy-modern lifestyle space where homemaking meets inspiration. Her goal is to help women create beautiful, organized, and peaceful homes they truly love — without overwhelm. You’ll find here heart-driven content on home decor, cleaning tips, easy family recipes, organization and decluttering, DIY home projects, plants, and seasonal ideas — all designed to bring more calm, comfort, and style into everyday life.





