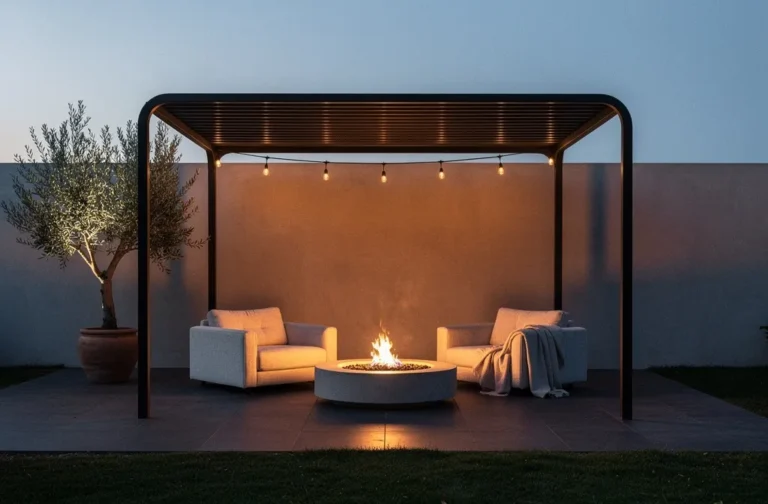
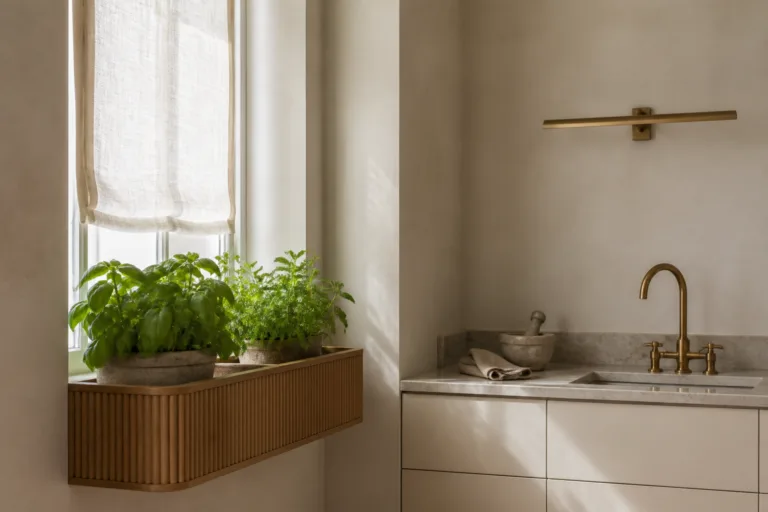
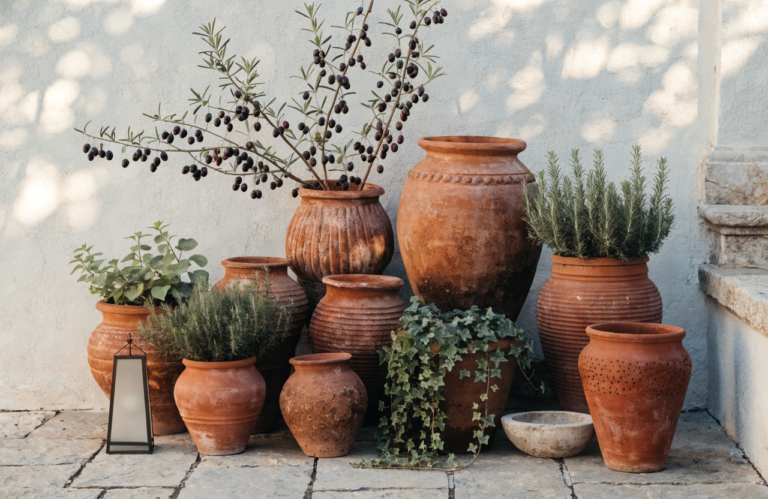
6 Creative Home Garden Decor Ideas For Small Spaces On Any Budget
You want a lush, soulful little garden that feels like a breath of fresh air every time you pass it. You hate the cluttered pots, the sad herbs, the way everything looks flat by 4 p.m. Light matters. Texture matters. And yes, your “small space” can absolutely hold gorgeous garden style. These 6 ideas fix the exact frustration you’re feeling: cramped, unphotogenic corners that never quite come together. We’ll build editorial-worthy moments that look good in person and on Pinterest, with plans you can finish in a weekend and budgets that start under $100. If you crave that sunlight dappling over terracotta, soft greens against warm wood, and one statement piece that earns compliments, this is your blueprint. Perfect for porches, balconies, renters, and anyone who wants their home garden decor to feel intentional, calm, and actually low-maintenance.
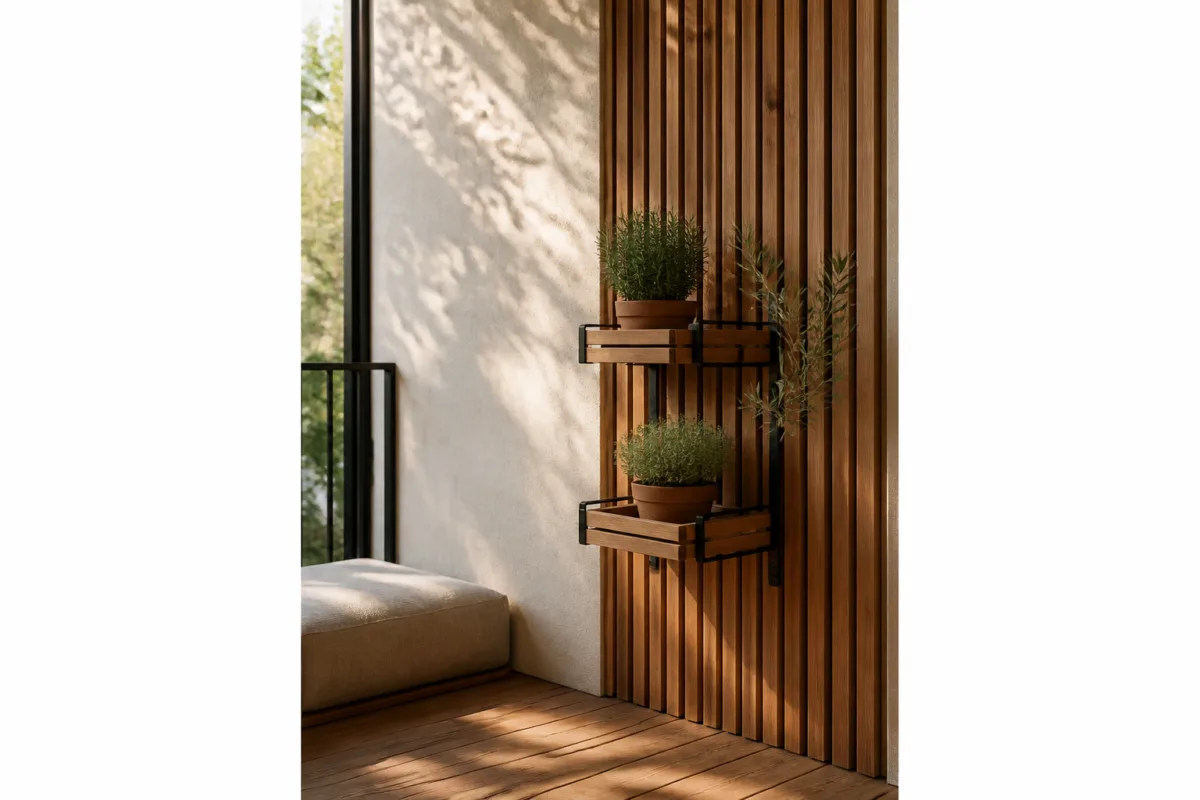
1. Vertical Cedar Slat Wall With Dappled Morning Light And Tiered Planter Ledge
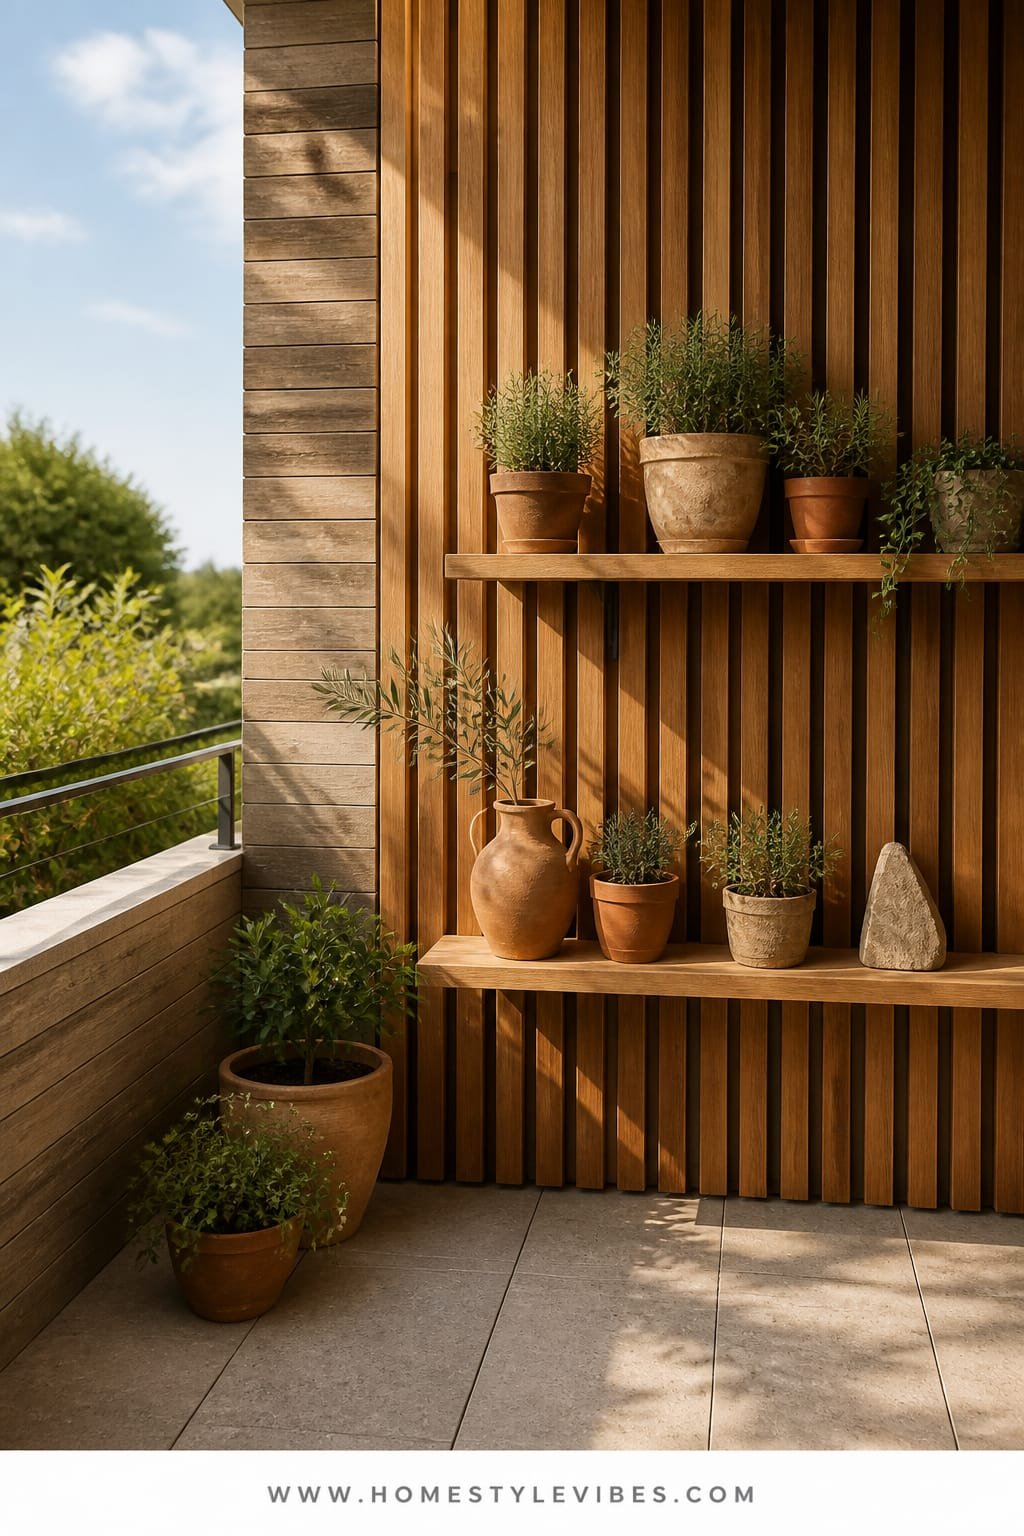
We’ve all been there—one narrow balcony or that awkward exterior wall that makes plants look like a crowded checkout line. You’ve tried hanging baskets, but it still looks random and messy. This design turns a flat wall into a living backdrop: warm cedar slats, simple black brackets, and a tiered ledge that stages your plants at different heights so every leaf gets its moment. The mood reads warm minimal Mediterranean—relaxed, natural, and quietly sculptural.
Why this works in real homes: cedar slats bring warmth and a clean linear texture that instantly makes small spaces feel finished. The tiered ledges pull plants off the floor, which frees walking space and lets light slip between pots. Morning light flickers through the slats, creating depth and shadow—a dream for photos. Maintenance stays easy because you’re not dealing with heavy planters on the ground or a complicated irrigation setup. It also boosts resale appeal by adding a custom-looking feature you can remove or leave as a value add.
Lighting is everything here. If your wall gets dappled morning light, herbs and trailing vines thrive. In lower light, choose shade-lovers like philodendron or pothos. The hero material—cedar—ages to a soft silver if left unfinished, or stays honeyed if oiled. Either way, the vertical rhythm creates that designer “my-space-is-organized” energy you’ve been chasing.
For variations, try a renter-friendly version using removable outdoor-rated Command hooks and lightweight pine slats. Or go budget-tight with a single lower ledge and one upper rail. Prefer a moodier vibe? Stain the wood a deep espresso and use matte charcoal planters for a lush, gallery-like effect.
Budget Breakdown:
- Cedar slats or cedar fence pickets: $60–$150
- Matte black shelf brackets (6–10): $30–$80
- Pine board for ledge (sealed): $20–$60
- Lightweight planters (set of 6): $40–$120
- Outdoor-rated screws and anchors: $10–$20
- Herbs and trailing plants: $25–$75
Total Estimated Cost: $185 – $505
Best For: Small balconies or patio walls that feel bland; homeowners or renters with a vertical surface and partial sun. Great spring-through-fall staging wall that reads “custom” without heavy construction.
Key Design Elements:
- Main materials: cedar slats, sealed pine ledge, matte black metal
- Color palette: honeyed wood, charcoal accents, fresh greens
- Lighting strategy: morning light or diffused afternoon shade
- Furniture silhouettes: slim ledges, low-profile stools or foldable bistro chair
- Texture layers: linear wood grain, leafy vines, terra-cotta grit
- Accent details: black hooks, simple watering can, linen cushion on a slim bench
How To Recreate This Look:
- Measure your wall and cut cedar slats or pickets to run vertically from floor to top line.
- Secure slats with outdoor anchors, leaving a small gap between boards for light and ventilation.
- Install two or three tiered ledges using pine boards on matte black brackets—stagger heights for depth.
- Place herbs on the top for best sun access; put trailing vines mid-level to cascade.
- Style with a slim bistro chair, a neutral cushion, and one sculptural planter for a focal point.
Why This Looks Expensive: The consistent vertical rhythm and restrained color palette read custom and calm. Matching black hardware and lined-up planters create order—no chaos, all intention.
Watch Out: Don’t overload the top shelf. Heavy pots above eye line make spaces feel top-heavy and unsafe. Start light, then add more once you trust the anchors.
Pro Styling Tip: Photograph in morning light—angle the camera slightly side-on so the slats cast soft linear shadows that make the greenery pop.
Pause for a second. You don’t need every wall covered. One well-styled slat moment beats a crowded mishmash. If one idea here clicks, start there and skip the rest for now.
2. Terracotta Grid Nook With Golden Hour Glow And Low Bench Planter
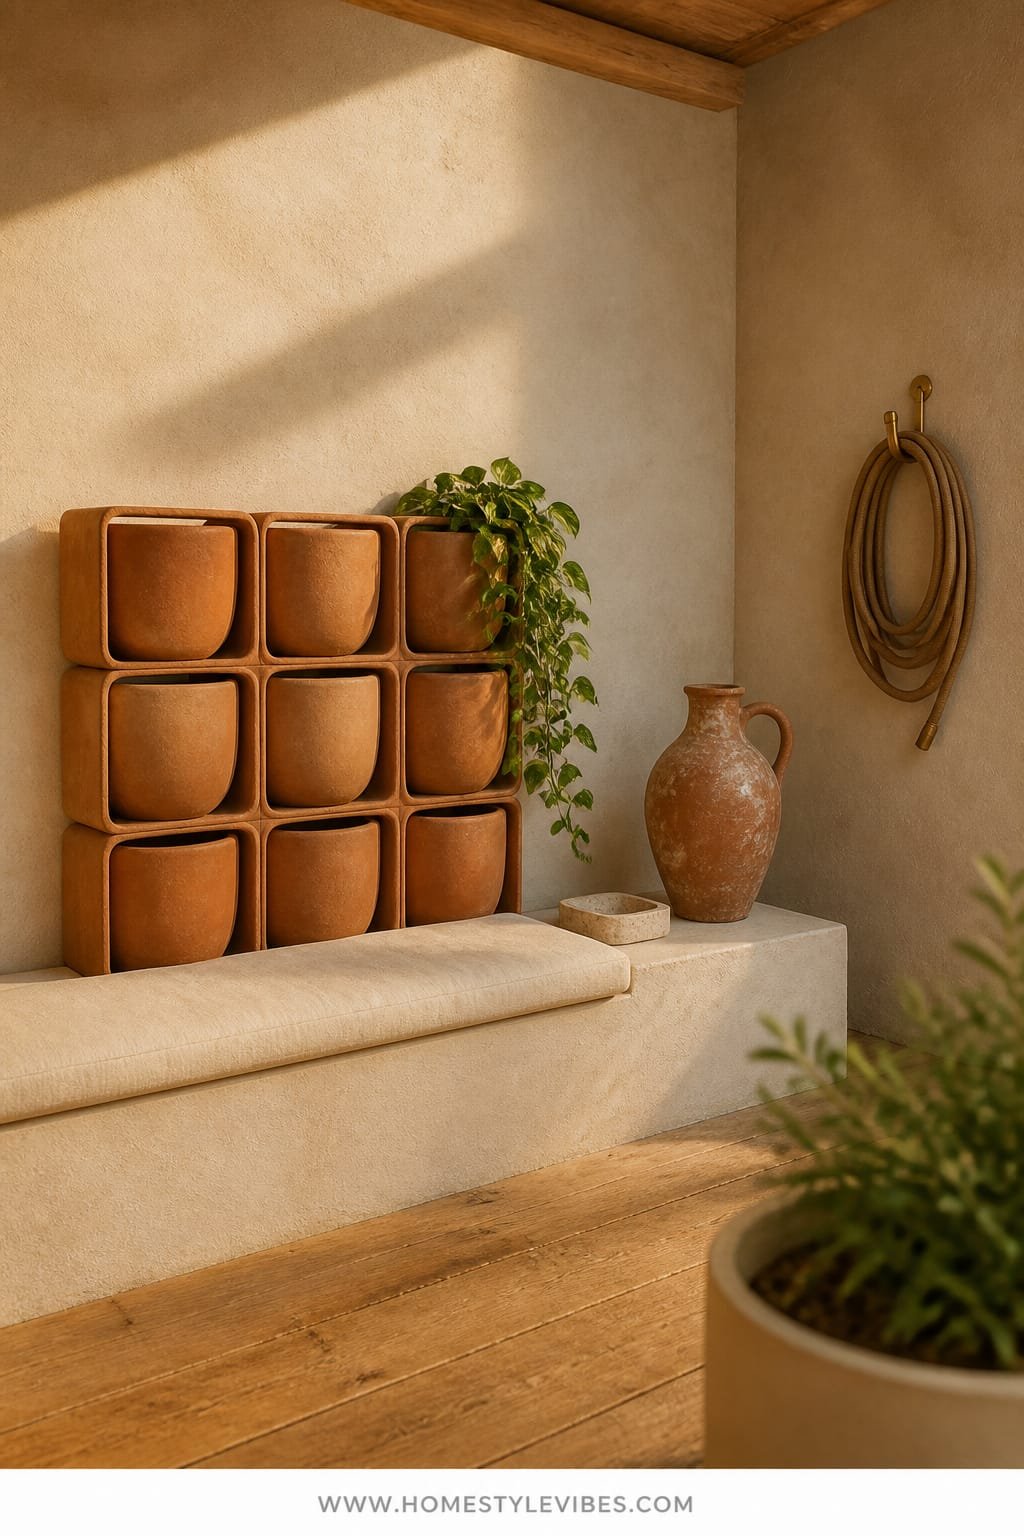
It’s that one corner that always feels off—piles of plastic pots, a garden hose doing its worst impression of art, and nowhere to sit. Sound familiar? This setup builds a compact, photo-friendly nook using terracotta as the hero material. The mood is warm Mediterranean courtyard: sun-toasted pots, curved profiles, and a cushioned low bench that doubles as a planter stand.
Here’s why it works in small spaces: clusters read calmer than scattered singles. A terracotta grid (think 3×3 or 4×4) groups your pots into a tidy composition and invites golden hour to paint everything with warmth. The low bench becomes both seating and a display ledge for trailing plants. Choose a cushion in natural canvas or ochre linen to tie the palette together.
Terracotta loves heat and drains well, so your plants stay happier with less fuss. It also photographs beautifully—those matte, clay tones pull green forward and diffuse glare. Maintenance stays easy: one corner to water, one cushion to shake out, and done. For renters, the entire setup is portable. For homeowners, the bench can be a permanent, built-in look by skirting the front with a simple wood slat panel.
Variations include a budget-friendly thrift hunt for mismatched terracotta—seal with a clear matte sealer to unify tone. Or swap the cushion for outdoor floor pillows if the bench budget feels tight. Prefer a moodier palette? Use charcoal-stained wood for the bench and olive-green cushion for a coastal-European vibe.
Key Design Elements:
- Main materials: terracotta, natural canvas, warm wood
- Color palette: clay, olive, cream, and soft black
- Lighting strategy: aim for late afternoon/golden hour placement
- Furniture silhouettes: low bench, rounded pots, one tall cylinder planter
- Texture layers: matte clay, nubby linen, woven jute mat
- Accent details: brass watering can, candle lantern, olive branches
Budget Breakdown:
- Terracotta pots (8–12 mixed sizes): $60–$180
- Simple wood bench or DIY cinder block/wood top: $40–$150
- Outdoor cushion or two floor pillows: $35–$120
- Jute or coir doormat: $20–$50
- Lantern or solar candle: $15–$40
- Plants: $40–$120
Total Estimated Cost: $210 – $660
Best For: Patio corners, balcony ends, or by a sunny window. Ideal for those who want one cozy landing spot to sip coffee and pretend they’re in Tuscany.
How To Recreate This Look:
- Pick a corner with afternoon light; clean and clear the floor area.
- Set your bench slightly off-center to avoid a too-symmetrical look.
- Create a terracotta grid: tallest pots in back corners, medium in the middle, smalls up front.
- Layer greenery: one tall olive or ficus, trailing ivy on the bench, herbs up front.
- Add cushion, lantern, and a small jute mat to ground the vignette.
Why This Feels Designer: Cohesive materials, a clear focal point (the bench), and a curated mix of heights give the scene structure. The clay-and-cream palette looks styled, not accidental.
One Thing To Avoid: Skipping saucers. Terracotta sweats; get matching saucers to protect floors and keep the grid tidy.
Pro Styling Tip: For photos, tuck the bench cushion seam to the back and angle one pot 10 degrees—tiny asymmetry adds life.
Real talk: This doesn’t need to be perfect. My friend agonized over matching pots for weeks before realizing the issue was lighting. Once she moved the nook to catch golden hour, the whole scene finally looked alive.
3. Matte Black Metal Rail With Soft Edison Glow And Hanging Herb Tiers
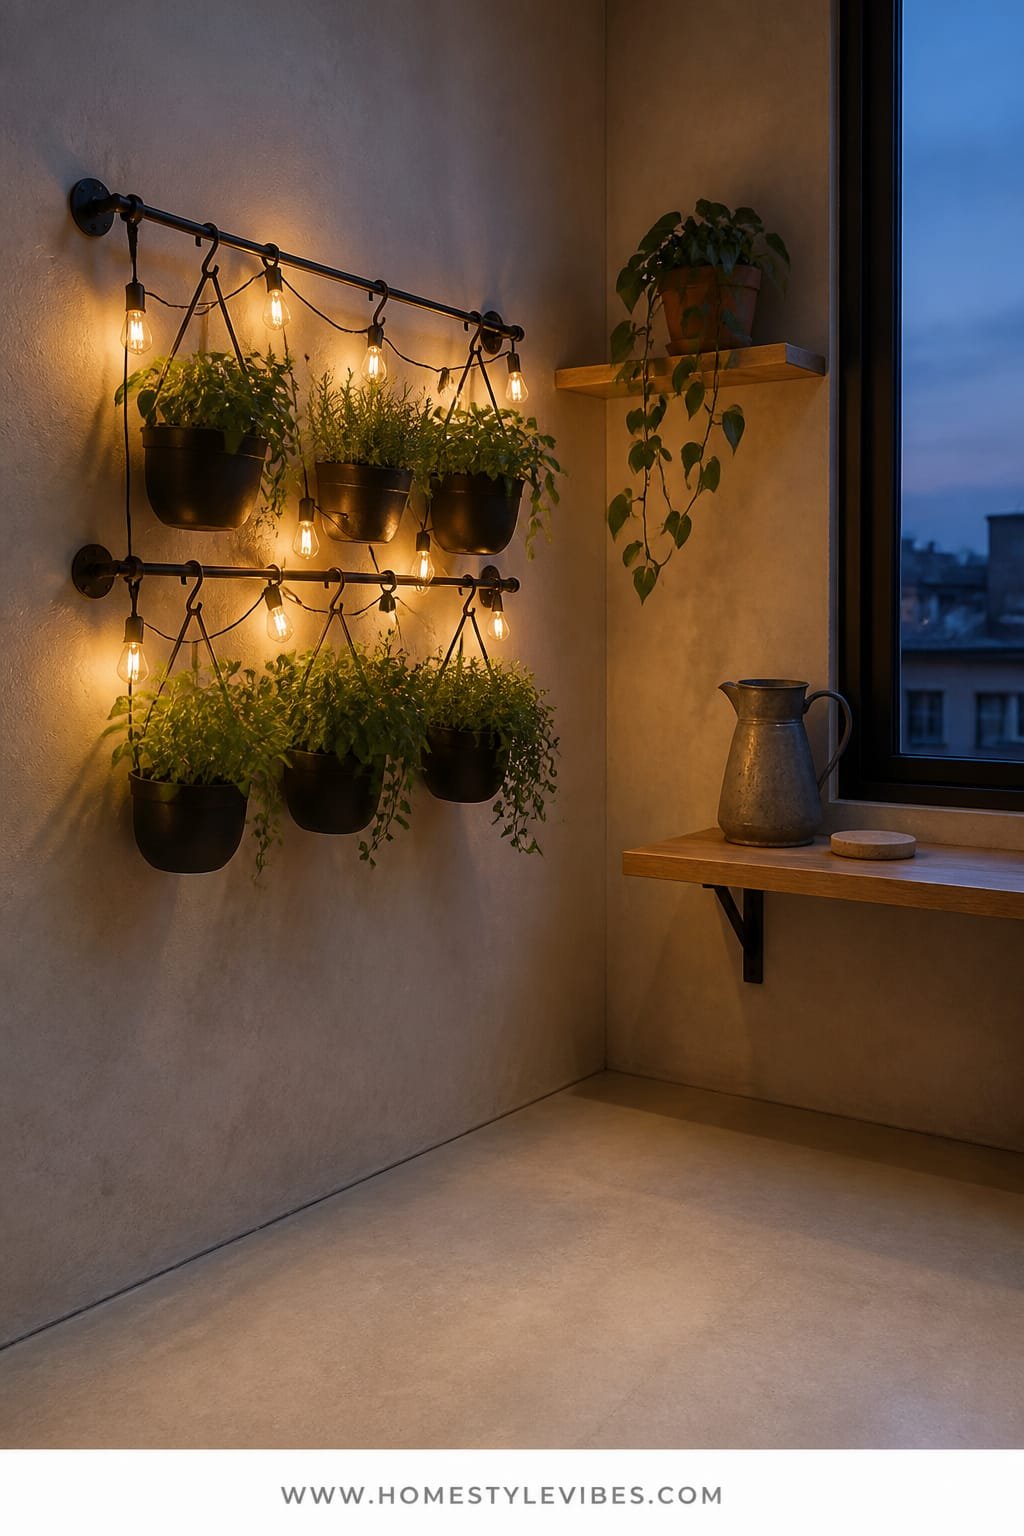
You want fresh herbs, but your kitchen window ledge is full and your patio table is permanently sticky from soil. Hanging tiers solve it. This look uses a matte black metal rail as the anchor, a string of soft Edison-style LED bulbs, and lightweight hanging herb planters in staggered lengths. The vibe reads urban-cottage: practical, a little moody, and casually romantic at night.
This works for small spaces because it lifts the action up and out of the way, leaving floors open. Your herbs get even light coverage, plus bulbs add ambient glow for dinner. Matte black is the hero material here—it gives a clean outline that shapes the space and frames the green. Photos love contrast, and black against green creates strong edges that don’t blur into the background.
Maintenance stays reasonable: install a drip saucer liner in each planter and water slowly. Renter? Use removable railing clamps or a tension rod inside a window frame. For a budget-friendly twist, repurpose metal S-hooks and tin pails. For a darker version, choose bronze bulbs and deep green planters for a cozy speakeasy vibe on the balcony.
Budget Breakdown:
- Matte black metal rail or tension rod: $25–$80
- Hanging herb planters with liners (4–6): $30–$120
- S-hooks and chains/cord: $10–$30
- LED Edison string lights (outdoor-rated): $25–$60
- Herb starters: $15–$40
Total Estimated Cost: $105 – $330
Best For: Balconies, kitchen windows, or across a patio nook where you want dinner lighting and easy herb access.
Key Design Elements:
- Main materials: matte black metal, lightweight clay or enamel planters
- Color palette: black, deep green, soft white light
- Lighting strategy: warm LED string at eye level, dimmable if possible
- Furniture silhouettes: slim rail, round planters in staggered heights
- Texture layers: matte metal, glossy leaves, woven placemats on nearby table
- Accent details: brass misting bottle, small wood cutting board for photos
How To Recreate This Look:
- Mount a rail at eye level; confirm anchors suit your wall or railing type.
- Hang planters with mixed drop lengths—shorter near the center, longer at the sides.
- Weave LED string around the rail, leaving a small slack loop near each planter.
- Plant herbs: basil and mint up top, thyme and oregano lower where they get more air.
- Style a small adjacent table with two plates and a linen napkin to complete the scene.
Why This Reads High-End: The disciplined black line and warm light signal intention. Layered heights and restrained materials look curated, not cobbled together.
The Most Common Mistake: Overwatering. Hanging planters drain faster—water less but more frequently. Keep a saucer or catch basin nearby for easy cleanup.
Pro Styling Tip: For night shots, turn off bright overheads and let the Edison bulbs carry the scene—your greens will glow instead of glare.
Remember, this isn’t about recreating a showroom. It’s about a garden setup you’ll use on a Tuesday night when you’re tossing pasta and clipping basil in your slippers.
4. Limewash Accent Wall With Soft North Light And Arched Fountain Planter
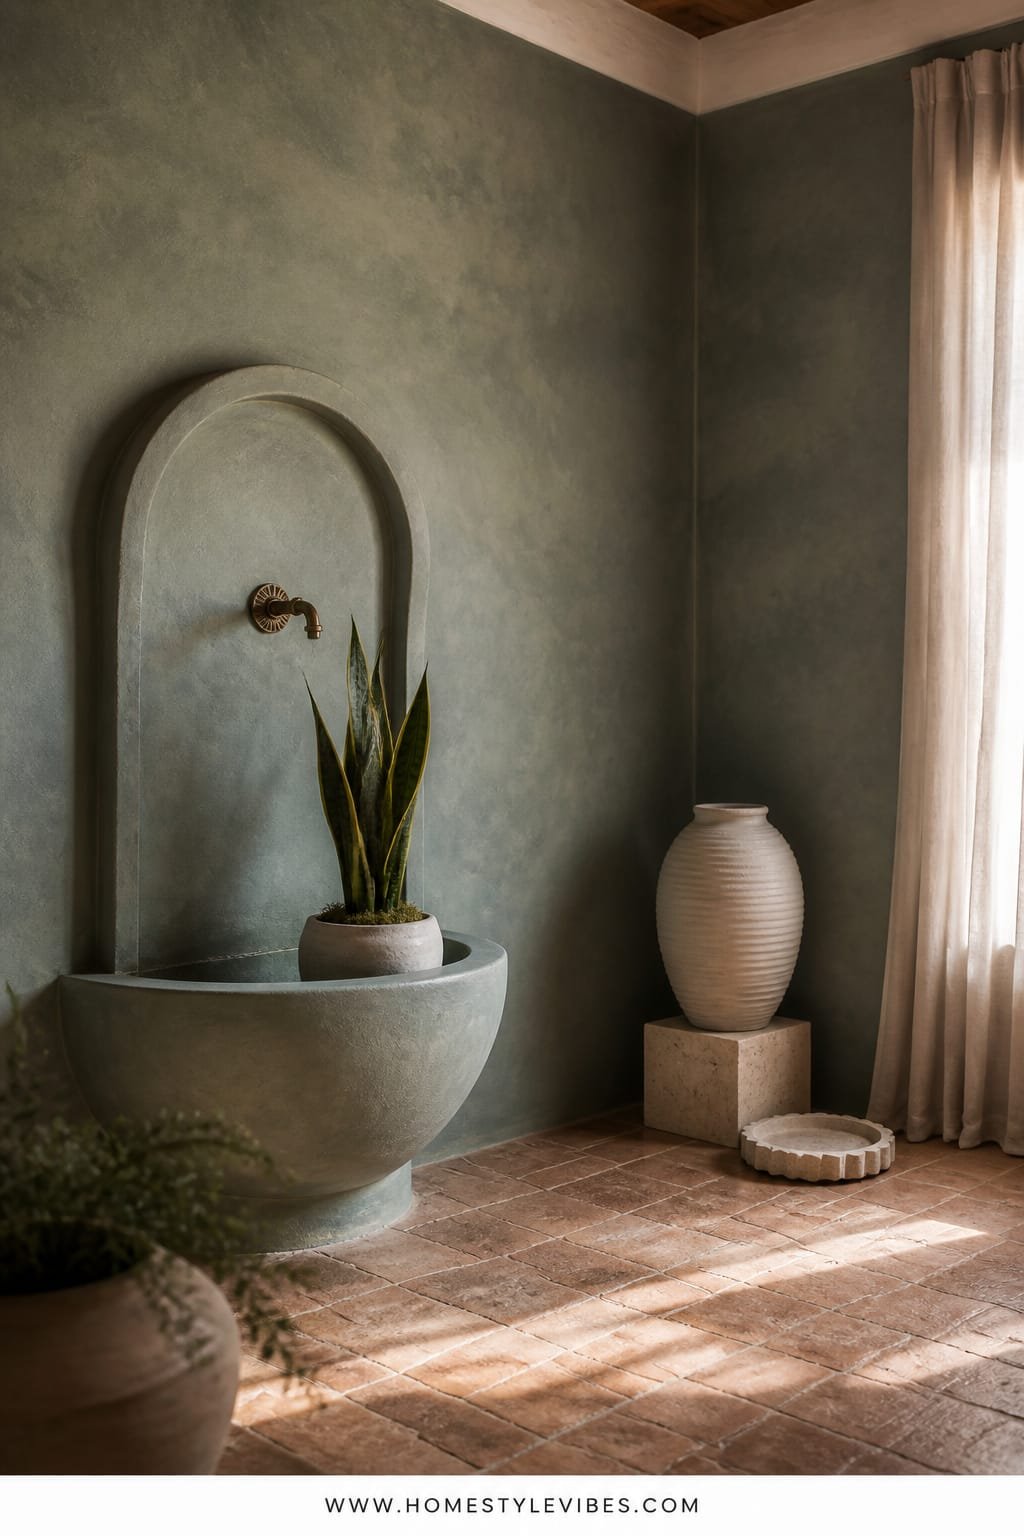
Sometimes the problem isn’t your plants—it’s the backdrop. You’ve moved pots around a hundred times and it still looks… meh. Enter a limewash accent wall paired with an arched fountain-style planter or faux fountain frame. The mood leans quiet European courtyard: timeworn texture, cool tones, and a sculptural focal point that makes everything else feel composed.
Limewash brings soft movement to walls—no flat rental-white glare. In small spaces, it creates instant depth without big furniture. Pair it with a simple arched planter or a faux fountain niche to give your eyes a singular place to land. Even in north light, the limewash softly reflects and makes greens feel richer. Photography loves this: you get a delicate gradient behind leaves, not a flat billboard of white.
Real home perks? Limewash is incredibly forgiving; brush strokes add character and little scuffs read intentional. Renter-friendly? Use peel-and-stick textured wallpaper in a limewash effect, or apply limewash to a large plywood panel you can lean. For a moodier version, choose a soft taupe-gray limewash and a charcoal arch outline for alluring shadow play.
Key Design Elements:
- Main materials: limewash finish or limewash-effect wallpaper, stone or concrete planter
- Color palette: stone, chalky white, muted sage, aged bronze
- Lighting strategy: indirect north light or diffused afternoon light
- Furniture silhouettes: arched focal planter, low round side table
- Texture layers: chalky wall, smooth leaves, aged metal watering can
- Accent details: vintage-look house numbers or plaque, single wrought-iron hook
Budget Breakdown:
- Limewash paint or peel-and-stick: $45–$150
- Arched planter or faux fountain frame: $90–$350
- Secondary planters (2–3): $40–$120
- Low side table: $30–$90
- Plants (fern, ivy, philodendron): $30–$90
Total Estimated Cost: $235 – $800
Best For: Shady patios, entry alcoves, or a balcony wall that needs presence without more furniture. Great if you love old-world textures.
How To Recreate This Look:
- Prep the wall: wipe down, then apply limewash in cross-hatch strokes for depth.
- Center your arched planter or faux fountain; leave 6–8 inches space on each side.
- Add soft-leaf plants that drape; avoid spiky varieties that fight the curve.
- Place a small round table to one side for scale and a spot to set a drink.
- Hang one small aged metal detail—keep it minimal so the arch stays the star.
Why This Looks Intentional: A strong focal point (the arch) plus a textured, tonal backdrop means everything else supports the story. You’re editing, not piling.
Don’t Do This: Don’t clutter the base of the arch with too many small pots. Two to three is enough. Let negative space breathe.
Pro Styling Tip: Shoot slightly off-center so the arch edge catches light and casts a faint crescent shadow. That curve reads expensive in photos.
Confession: limewash took me two tries the first time I used it. My strokes were too uniform and it looked like flat paint. The fix? Cross-hatch, step back, then feather any hard edges. Imperfection is the point.
5. Warm Teak Cart With Sunset Backlight And Modular Micro-Green Drawers
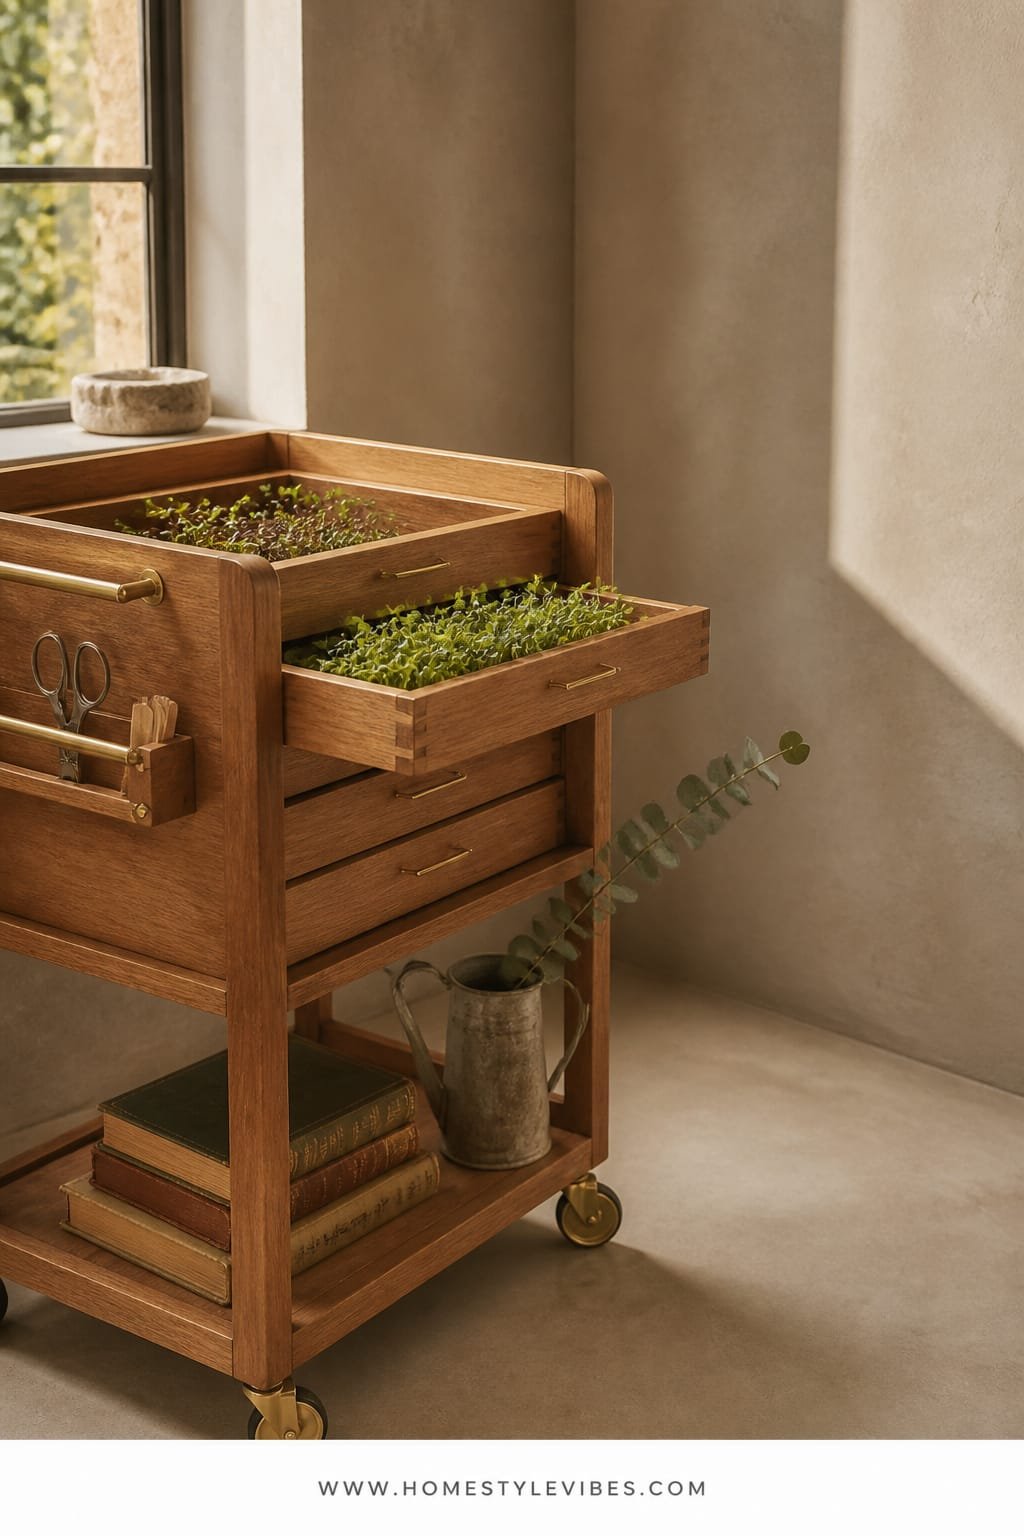
Raise your hand if your countertops are full of seed trays and that one glass jar sprouting scallions. It’s cute for a week, then chaos. This design corrals your micro-greens and small tools onto a warm teak garden cart with shallow modular drawers. Park it by a window or roll it onto the balcony at sunset. The light skims across the wood grain and makes those tiny leaves look like a chef’s-garden moment.
Why it works: mobility and containment. In compact homes, the ability to move the garden to the light—then out of the way—saves sanity. Teak handles moisture beautifully, and the shallow drawers keep micro-greens near the surface for easy clipping. Photography win: the horizontal slats and clean lines frame lush trays, while backlight adds a halo to delicate sprouts.
Make it renter-friendly with a compact, foldable cart. On a budget? Use a thrifted bar cart with a waterproof liner. Prefer a darker mood? Choose a walnut-stained cart and matte brass handles. You can also swap drawers for stackable shallow bins with clear lids to control humidity for fussier greens.
Budget Breakdown:
- Teak or acacia rolling cart: $120–$350
- Modular shallow trays/drawers (4–6): $25–$90
- LED grow strip (if light is low): $20–$60
- Mister and small shears: $15–$35
- Seed packets and soil: $20–$45
Total Estimated Cost: $200 – $580
Best For: Apartment kitchens, balcony doors, or as a companion to a grill station. Perfect for cooks who like fresh toppings without a full garden bed.
Key Design Elements:
- Main materials: teak, clear or white plastic drawers, stainless accents
- Color palette: warm wood, crisp greens, soft brass or chrome
- Lighting strategy: sunset backlight, supplemental grow strip under top shelf
- Furniture silhouettes: slim cart, shallow trays, small hooks for tools
- Texture layers: oiled wood, glossy leaves, woven towel, smooth metal
- Accent details: labeled seed jars, small cutting board, linen tea towel
Why This Feels Designer: Purpose-built storage and tactile materials look like a chef’s mise en place—everything in its spot. The restrained palette keeps it editorial, not crafty.
How To Recreate This Look:
- Choose a cart with slatted shelves; oil it for a rich glow.
- Arrange shallow trays on the middle shelf for easy reach and good light.
- Install a grow strip under the top shelf if your space is dim.
- Hang shears and mister on side hooks; keep labels minimal and neat.
- Position the cart where it catches sunset for that golden rim light on greens.
Watch Out: Overcrowding trays. Micro-greens need airflow. Leave space between bins to prevent damping-off and to keep the cart from looking like a science project.
Pro Styling Tip: For photos, place a single slice of lemon or a tiny bowl of flaky salt on the cart—context hints that this garden feeds your table.
If one idea resonates more than the others, that’s your starting point. You don’t need all six. One strong vignette beats a dozen half-finished projects, every time.
6. Weathered Brick Mat With Cool Shade Light And Sculptural Bistro Table
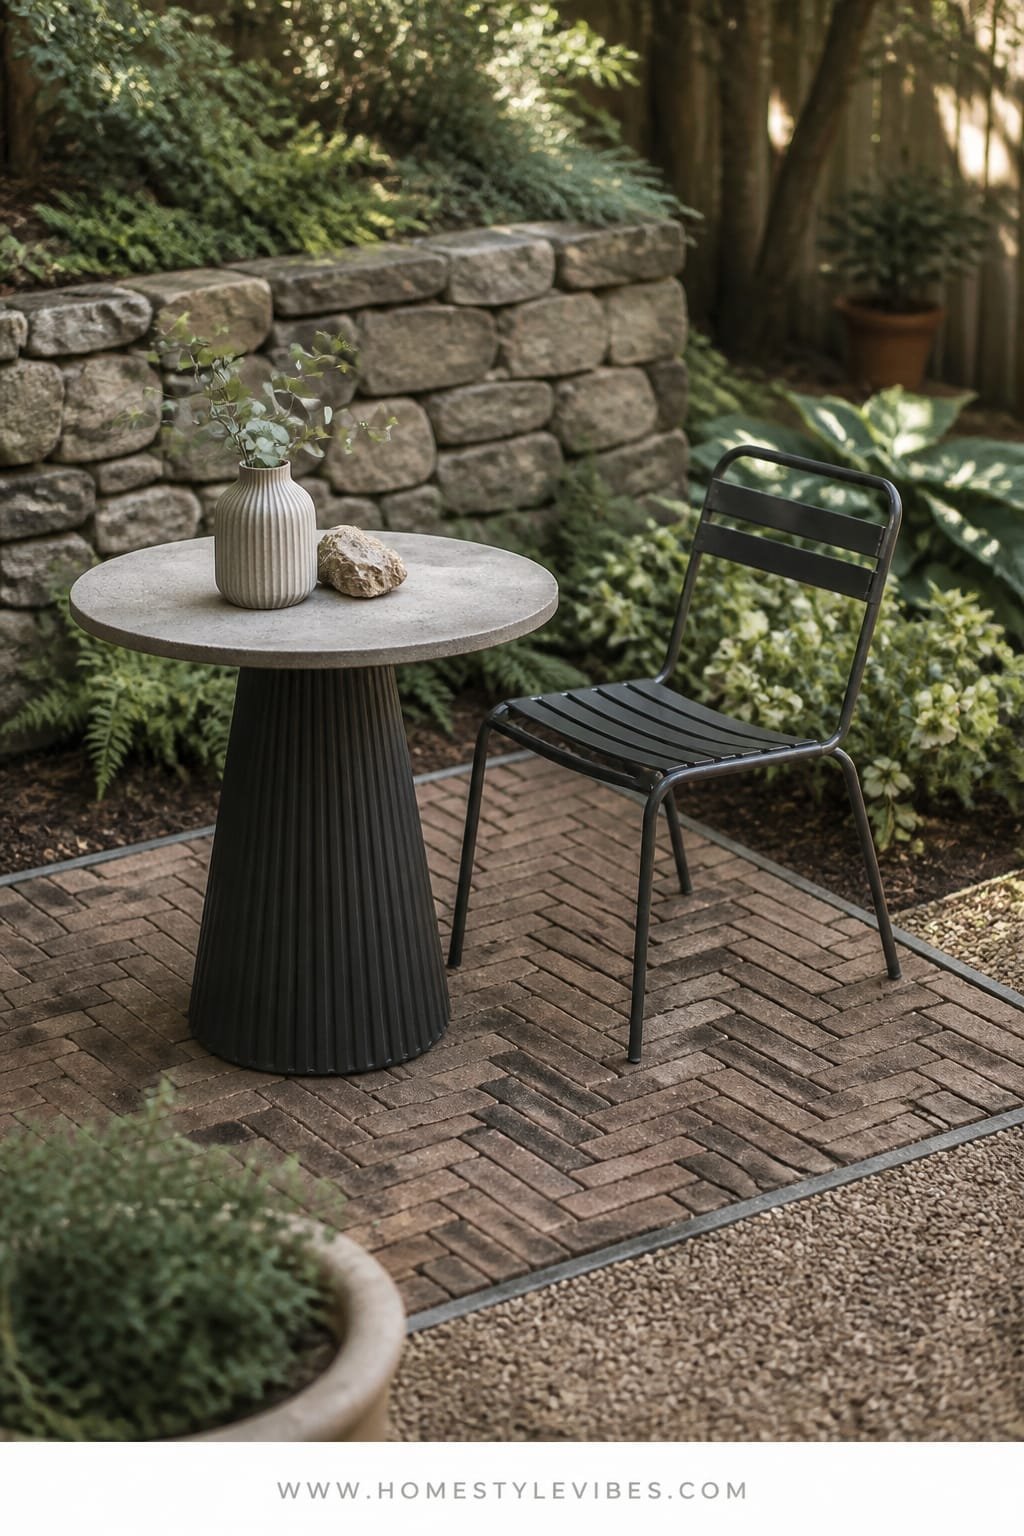
You’ve got a small slab or patch of gravel that never feels charming. Chairs wobble, pots tilt, and the whole area screams “temporary.” This look creates a defined mini-terrace using interlocking brick mats or thin pavers to fake a weathered brick base. Add a sculptural bistro table—think fluted pedestal or tripod base—and suddenly the space says café, not catchall. The light quality leans cool shade or soft morning sun, which brings out the brick texture and makes metal details gleam.
Why it works: a clear boundary. In tight footprints, a change in flooring reads like another “room,” which visually expands your space. Brick texture adds instant history, and a single standout table anchors the scene. Your plants become supporting actors—two taller pots to flank the table, one low bowl for herbs—while the base does the heavy lifting.
For maintenance, choose interlocking mats if you rent or want zero-commitment setup; real thin pavers if you own and want longevity. Sweep occasionally and mist the bricks before guests arrive—the color deepens and photographs beautifully. Prefer a darker palette? Use charcoal pavers and a stone-look pedestal with deep green planters. Budget version: thrift a table base and add a round wood top sealed with spar urethane.
Budget Breakdown:
- Interlocking brick mat or thin pavers: $80–$250
- Bistro table with sculptural base: $90–$320
- Two tall planters + one low bowl: $70–$220
- Outdoor chairs (folding or café style): $60–$180
- Shade-loving plants or morning-sun mix: $30–$100
Total Estimated Cost: $330 – $1,070
Best For: Small patios, gravel zones, or as a defined landing pad near a back door. Great for breakfast people and lazy Sunday readers.
Key Design Elements:
- Main materials: brick or stone-look pavers, powder-coated metal
- Color palette: warm brick, cool gray grout lines, deep green foliage
- Lighting strategy: soft shade or early sun to avoid glare
- Furniture silhouettes: pedestal bistro table, slim café chairs
- Texture layers: rough brick, smooth metal, leafy gloss
- Accent details: striped linen napkin, small marble coaster, enamel mug
How To Recreate This Look:
- Measure a 3×4 or 4×5 area and clear debris; level lightly with sand if needed.
- Lay interlocking brick mats or thin pavers; tap into place for a snug fit.
- Center the bistro table; add two chairs angled inward for an inviting look.
- Flank with two tall planters; place a shallow herb bowl on the table or at the base.
- Add a small outdoor-safe cushion or throw for softness; keep patterns subtle.
Why This Looks Expensive: Defined flooring plus one sculptural piece reads like a professionally planned zone. Brick’s patina boosts everything around it, even simple café chairs.
One Thing To Avoid: Too many small accessories. Keep the tabletop almost bare. Clutter shrinks small spaces in real life and in photos.
Pro Styling Tip: Mist the brick lightly before shooting; the deeper tone increases contrast with greenery and makes metal edges crisp.
Micro-story time: I tried a similar brick mat setup last fall. The area was barely big enough for a table and two chairs, but once I laid the mats and added a single pedestal, neighbors constantly asked who designed my “new patio.” It took two hours and a broom.
Quick Checklist
- Cedar slats for a vertical planting wall
- Matte black brackets and a tiered ledge
- Terracotta pots in mixed sizes and matching saucers
- Low bench with a neutral outdoor cushion
- Matte black rail or tension rod for hanging planters
- Warm LED Edison string lights
- Limewash or limewash-effect wallpaper for a textured backdrop
- Arched planter or faux fountain frame
- Teak or acacia rolling cart for micro-greens
- Shallow modular trays with a grow strip
- Interlocking brick mats or thin pavers
- Sculptural pedestal bistro table
- Two tall planters and one shallow herb bowl
- Minimal, matching hardware and hooks
- Neutral textiles: canvas, linen, jute
Frequently Asked Questions
How do I keep a small garden from looking cluttered when I only have a balcony?
Pick a single anchor—either a vertical wall, a bench, or a bistro table—and build around it. Group plants by height on ledges or in a tight cluster. Matching saucers and two main planter colors keep it tidy. Edit weekly: if a plant looks tired, move it out of the vignette.
What’s the most budget-friendly option from these ideas?
The vertical cedar look can be hacked with pine slats and two shelves, or try the matte black rail with thrifted tins and S-hooks. You can start under $100 if you already have some planters and just need hardware and a rail.
I’m a renter—what can I install without risking my deposit?
Use removable hooks for the vertical wall, a tension rod for hanging planters, peel-and-stick limewash-effect wallpaper, and interlocking brick mats you can lift when you move. Everything here can be done without drilling into structural elements.
How do I handle low light for herbs and greens?
Choose shade-tolerant plants like mint, parsley, and chives, and use reflective backdrops like limewash or a light wall to bounce light. Add a small LED grow strip under a shelf or on a cart—aim for 12–14 hours on a timer for micro-greens.
What common mistakes make small garden decor look cheap?
Too many planter styles, visible cords, and random heights. Keep colors consistent, hide cables along rails or behind pots, and set clear tiers for plants. Also, mind the gap between the top shelf and the ceiling or railing—leave breathing room so it doesn’t feel crammed.
Conclusion
Pick one idea—just one—and start this weekend. Maybe it’s the cedar slat wall that finally organizes your balcony, or the terracotta grid that turns a dead corner into a sun-warmed coffee spot. Set a budget cap, gather your materials, and keep your palette tight. You don’t need more stuff; you need the right anchors, a little texture, and light that flatters what you already love.
The truth is, luxury in small-space garden decor comes from three things: texture that catches light, lighting that creates depth, and restraint in how many elements you show at once. When you dial those in, your home garden stops feeling like a collection of pots and starts feeling like a place.
Start small, be bold, and trust your eye. You’re closer than you think—and seriously, that first morning you sip coffee next to your new vignette will feel like a tiny vacation you built yourself. You’ve got this.
About the Author

Krisztina P.Rendes, Founder of Home Style Vibes
Founder of Home Style Vibes
Krisztina Puskásné Rendes created Home Style Vibes as a cozy-modern lifestyle space where homemaking meets inspiration. Her goal is to help women create beautiful, organized, and peaceful homes they truly love — without overwhelm. You’ll find here heart-driven content on home decor, cleaning tips, easy family recipes, organization and decluttering, DIY home projects, plants, and seasonal ideas — all designed to bring more calm, comfort, and style into everyday life.