7 Vintage Wall Shelf Decor Ideas That Add Character To Any Room
You want shelves that tell a story. You hate that your wall looks like a storage unit or a messy afterthought. Imagine soft morning light brushing over aged wood, little brass glints catching your eye, and styled vignettes that actually look lived-in, not staged. These 7 vintage wall shelf decor ideas fix the “pretty but cluttered” problem with intention, texture, and balance—so your home looks photogenic and personal in under two weekends and for less than $600 per idea, depending on what you already own.
We’re talking character—patina, curves, quiet color, moody shadows. These ideas don’t just organize your stuff; they rewrite the mood of your room. Expect vintage shelf styling that’s Pinterest-friendly, renter-smart, and surprisingly easy to maintain. If you love pieces with stories, sunlit corners, and cozy, grown-up vibes, you’re in the right place.
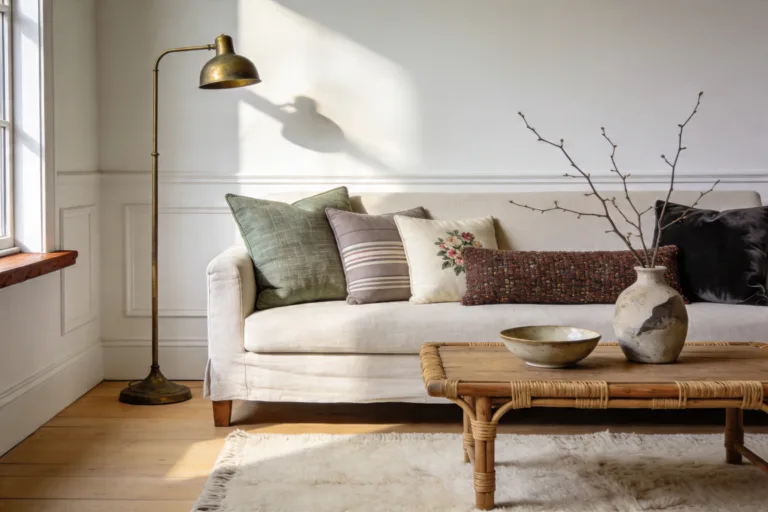
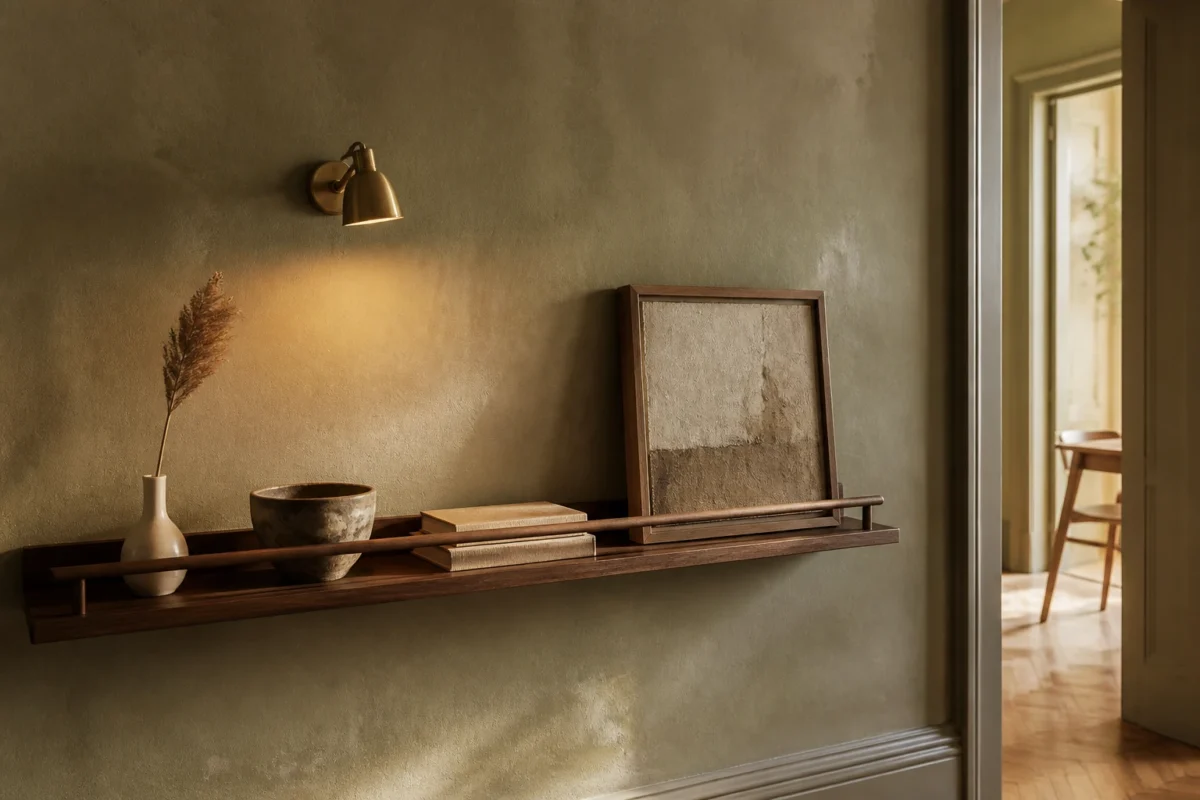
1. Walnut Rail-Ledge with Dappled Morning Light and a Brass Library Sconce
We’ve all been there: a pretty wooden shelf that somehow reads flat and a little “college apartment.” You want warmth without heaviness. This look layers a slim walnut rail-ledge with a petite brass library sconce and milk-glass shade. The result: a reading-nook mood with subtle museum energy. It works because walnut gives depth, the rail keeps objects corralled, and the warm brass throws soft halos that make objects feel important.
In real homes, this is magic for small spaces—hallways, above a sofa, over a desk. It’s forgiving: the rail edge prevents frames from slipping, and the shallow depth avoids elbow bumps. Lighting makes the moment. Dappled morning light across walnut grain gives that editorial photo feel and turns the simplest ceramic into art. You’ll get shadow play, cozy contrast, and a layered feeling that photographs clean and intentional.
Variations help it fit different lives. On a budget, use a stained pine picture ledge and a plug-in brass-look sconce. In rentals, command strips under frames stop sliding. For darker rooms, choose a frosted bulb for low glare; for airy spaces, try an opal bulb to glow like candlelight. Family-friendly? Keep heavier pieces to the back and use museum putty for security.
Budget Breakdown:
- Walnut rail ledge (36–48 in): $80–$180
- Brass library sconce (plug-in or hardwired): $70–$220
- Milk-glass shade or opal bulb: $10–$30
- Mix of vintage frames/ceramics: $30–$120
- Museum putty + mounting hardware: $10–$20
Total Estimated Cost: $200 – $570
Best For: Narrow hallways, over a small sofa, reading corners; anyone who wants a soft-lit, grown-up vibe without heavy shelving.
Key Design Elements:
- Main materials: Walnut, brass, milk-glass
- Color palette: Warm wood, cream, antique gold, inky black accents
- Lighting strategy: Single warm sconce with 2700K bulb, plus natural morning light
- Furniture silhouettes: Slim ledge, petite metal sconce, delicate ceramics
- Texture layers: Wood grain, matte paper in frames, glass gloss
- Accent details: Linen-wrapped frames, vintage postcards, pressed botanicals
How To Recreate This Look:
- Start with a 36–48 inch walnut rail ledge at eye level or just above.
- Add a brass library sconce centered above or offset by 4–6 inches for asymmetry.
- Layer 2–3 frames, tallest at the back, smallest at the front; mix black and gilded frames.
- Install an opal bulb at 2700K and aim the light to softly graze your items.
- Style with a ceramic bud vase, a small stack of linen-bound books, and one quirky vintage object.
Why This Looks Expensive: The rail ledge and library sconce nod to built-in millwork and old-world study rooms. Limited color and a few quality materials read calm and curated, not chaotic.
Watch Out: Don’t overcrowd the ledge. Leave breathing room between items—at least two fingers of air around each piece keeps it from feeling like a souvenir shop.
Pro Styling Tip: Angle one frame slightly and let the sconce light skim across it to create a soft vignette shadow on the wall.
Keep scrolling—next up is for anyone with white walls and the “my room feels flat” problem.
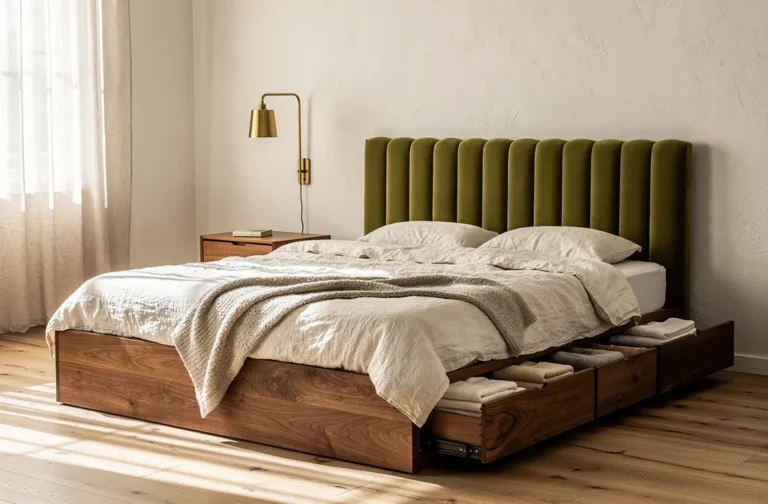
2. Aged Oak Picture Rail with Overcast Grey Light and a Sculptural Bust
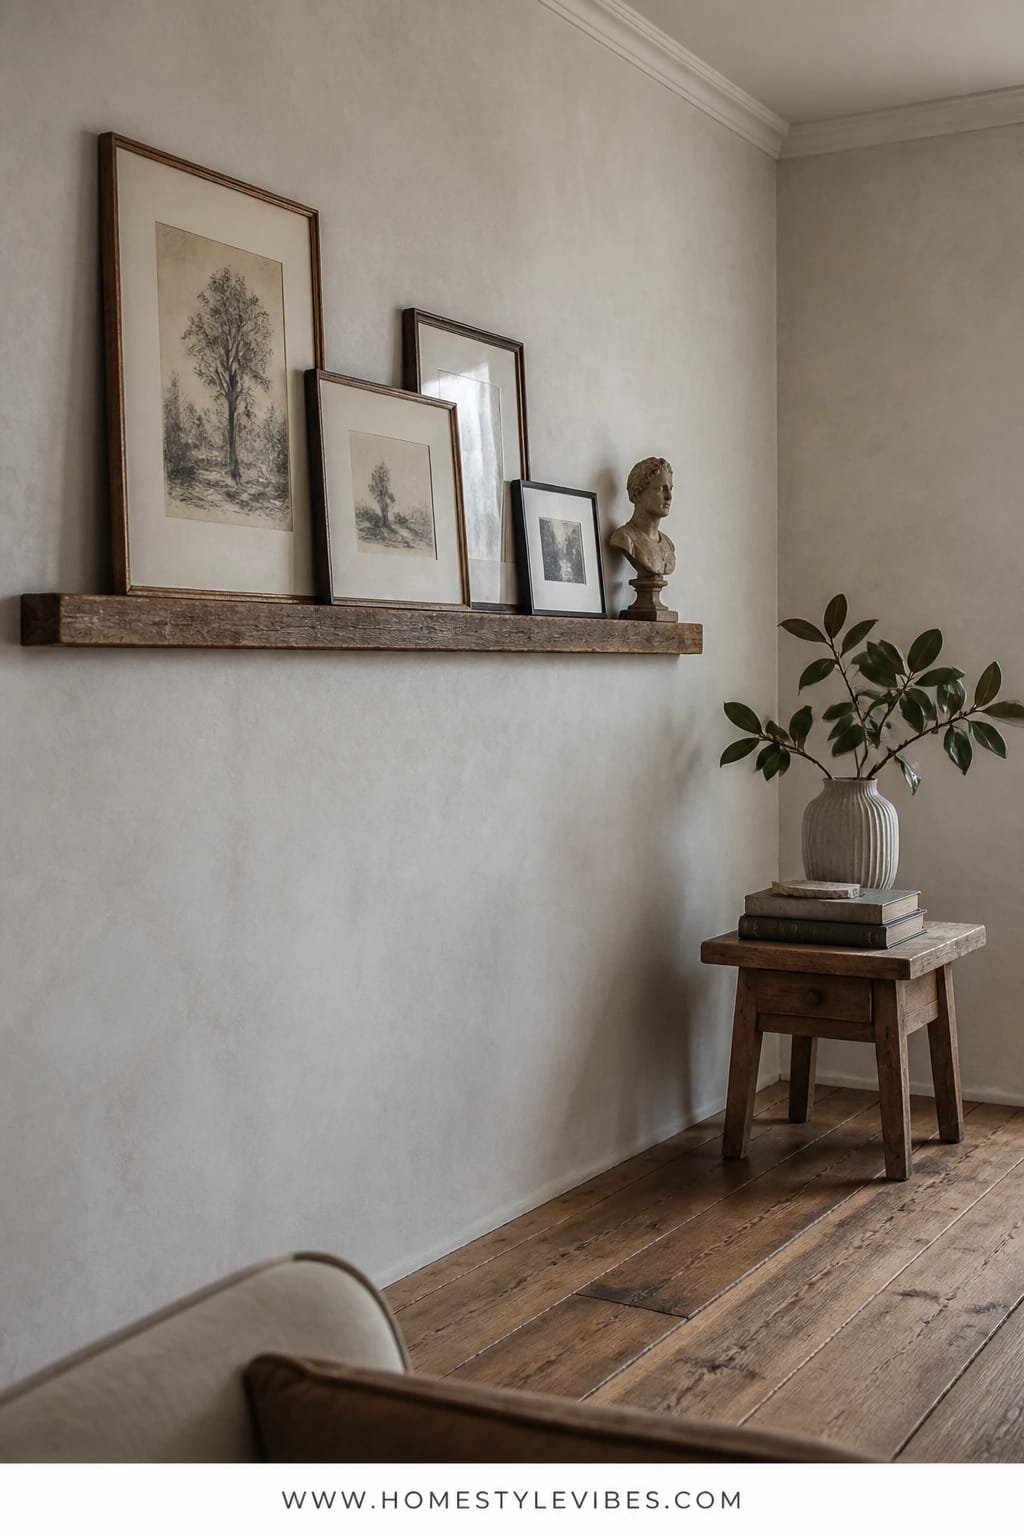
It’s that one corner that always feels off: you add art, it still feels thin. Here, the fix is form and texture. An aged oak picture rail holds layered art under cool, overcast-grey light, punctuated by a small sculptural bust. The bust adds height and personality; the oak adds gravity without bulk. The overall mood is “quiet European apartment,” calm but soulful.
Why this works at home: oak plays well with both modern and traditional pieces, and the rail keeps holes out of your plaster. Overcast lighting (or a cool north-facing wall) supports black-and-white photography and charcoal sketches, giving clean contrast. Photographs beautifully because matte art papers and chalky finishes soak light, while the bust throws gentle shadows that add depth.
For small spaces, keep the art monochrome and let the bust be your texture moment. On a budget, thrift frames and repaint them in matte black. Renter-friendly swap: command hooks for the bust base or choose a lightweight resin version. For a moodier version, tint the wall a whisper of French grey and use heavy linen mats in the frames.
Key Design Elements:
- Main materials: Aged oak, plaster/resin, matte paper
- Color palette: Black, white, grey, warm oak
- Lighting strategy: Indirect, cool natural light or a diffused lamp off to the side
- Furniture silhouettes: Slender rail, classical bust, thin picture frames
- Texture layers: Chalky plaster, linen mats, oxidized brass pins
- Accent details: Vintage letter openers, fountain pens, a single dried stem
Budget Breakdown:
- Aged oak picture rail: $60–$140
- Sculptural bust (plaster/resin): $40–$150
- Frames with linen mats: $50–$180
- Mounting hardware/command strips: $10–$25
Total Estimated Cost: $160 – $495
Best For: Apartment living rooms, home offices, renters who want flexible art display and refined texture.
How To Recreate This Look:
- Start by installing the oak rail 6–8 inches above midpoint between ceiling and furniture top for balance.
- Add two medium frames and one small, all with generous mats.
- Layer the bust at one end; place a small linen-bound book under it for lift.
- Install a dimmable lamp nearby with a cool-white shade to mimic overcast light.
- Style with a single dried stem in a clear bottle to break the symmetry.
Why This Feels Designer: Monochrome art + aged wood + one sculptural object looks edited. The restrained palette makes even thrifted frames look gallery-level.
One Thing To Avoid: Shiny glass glare. Choose non-glare acrylic or angle frames slightly forward to dodge reflections that cheapen the whole scene.
Pro Styling Tip: Tilt the bust 5 degrees toward the light to catch cheekbone shadows—instant drama in photos.
Remember, this isn’t about recreating a showroom. It’s about building a space that feels like you on a really good day. If one idea clicks, that’s your starting point—you don’t need all seven.
3. Reclaimed Pine Peg Shelf with Golden Hour Glow and a Woven Cane Chair
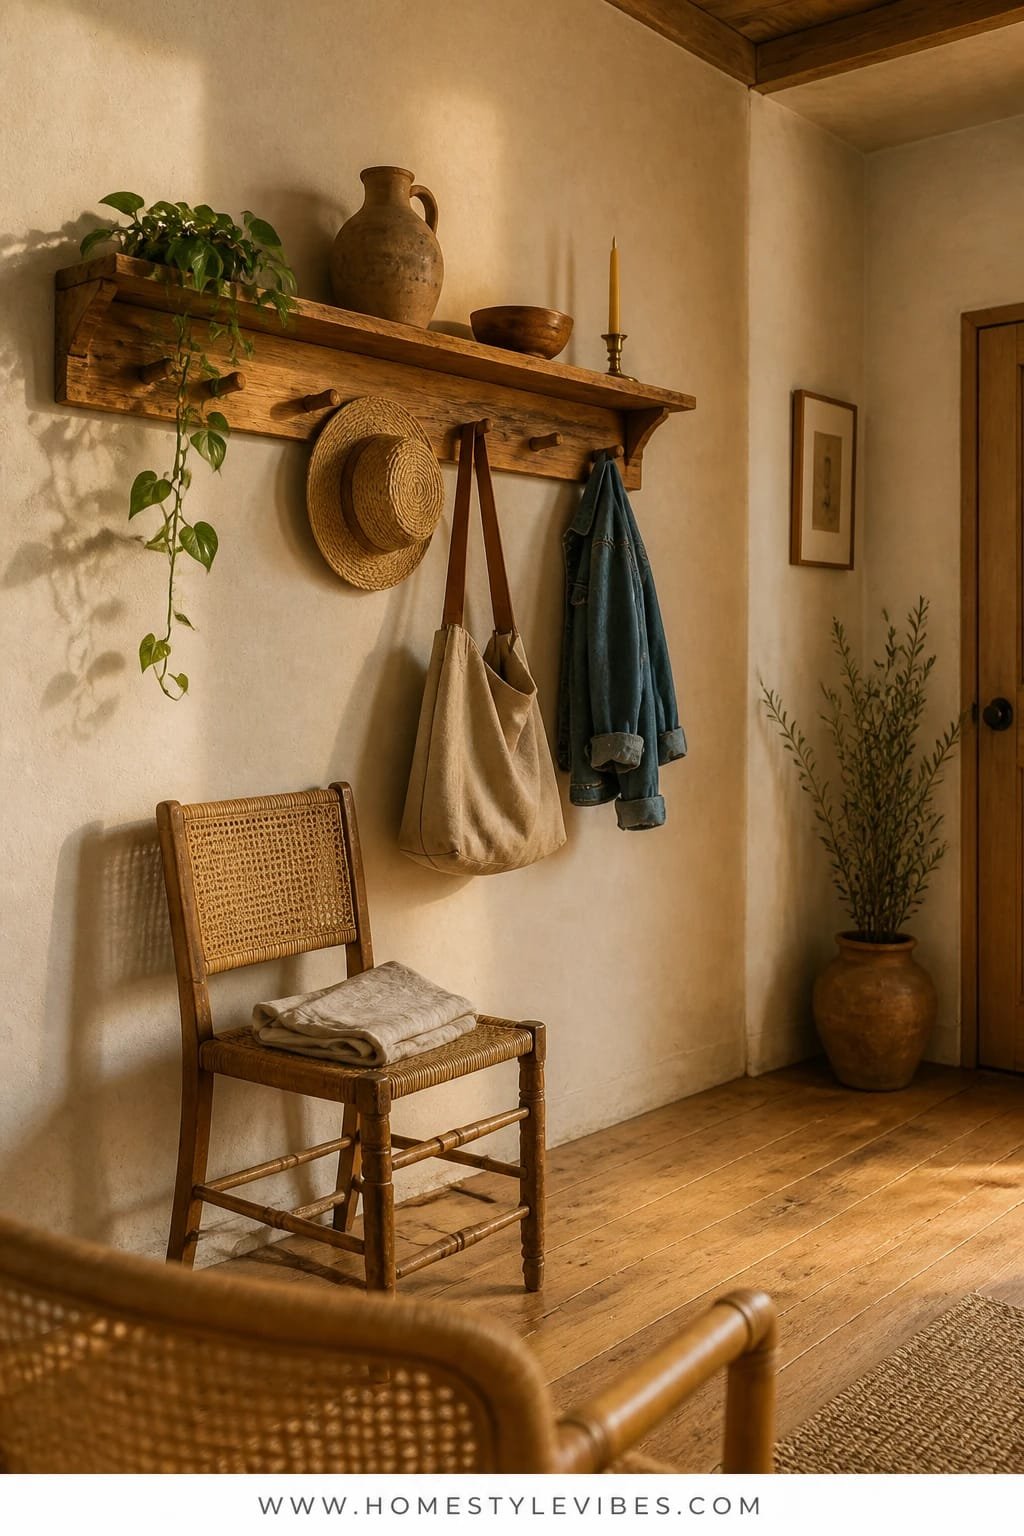
You’ve tried hooks, baskets, and that one too-cute tray, but the entry still looks messy. Here’s the fix: a reclaimed pine shelf with wooden pegs and a woven cane chair stationed below. The vibe is cottage-meets-studio, easygoing and sun-warmed. Golden hour glow across pine highlights knots and imperfections in the best way. It’s family-friendly, too—pegs catch bags and hats, and the chair invites you to pause (and actually put shoes on properly).
In real homes, this solves the “dump zone” without ugly cubbies. Reclaimed pine adds authentic patina that hides scuffs. Warm lamplight or late-day sunlight turns functional hang-ups into a styled moment. Photographs beautifully because of the mix: matte pine, tender cane pattern, metal basket detail, and one leafy plant for life.
Small-space version: cut the shelf to 24 inches and choose 3 pegs max. Budget version: sand and stain a basic pine board and add shaker pegs. Renter-friendly swap: over-the-door peg bar and a narrow wall-mounted ledge with command strips. Darker version: walnut stain and a black rattan chair for moody depth.
Budget Breakdown:
- Reclaimed pine shelf + pegs: $50–$160
- Woven cane chair: $90–$250
- Metal wire basket: $20–$50
- Small accent lamp or battery puck light: $15–$60
- Plant + pot: $25–$60
Total Estimated Cost: $200 – $580
Best For: Entryways, mudrooms, or the awkward wall by the kitchen door; households that juggle bags and hats daily.
Key Design Elements:
- Main materials: Reclaimed pine, natural cane, matte metal
- Color palette: Honey wood, sage/olive greens, soft cream, charcoal accents
- Lighting strategy: Warm task lamp or west-facing sunlight for golden hour
- Furniture silhouettes: Shaker pegs, airy cane chair, slim wire basket
- Texture layers: Woven seat, grainy pine, canvas tote, ribbed planter
- Accent details: Leather key loop, straw hat, vintage scarf
How To Recreate This Look:
- Start by mounting the pine shelf at 60–66 inches so pegs sit torso-height for easy reach.
- Add a cane chair centered below; place a low wire basket to one side.
- Layer a canvas tote, a scarf, and one straw hat—no more than three items on pegs.
- Install a small lamp on the shelf or a puck light underneath for warm pools of light.
- Style with a simple plant and one framed print leaning on the shelf.
Why This Reads High-End: Mixing utilitarian pegs with refined cane gives tension and balance—like a boutique hotel lobby, but real-life friendly.
The Most Common Mistake: Too many pegs, too many things. Cap it at three hanging pieces and rotate seasonally to keep it charming, not chaotic.
Pro Styling Tip: Let one scarf drape to create a soft line that leads the eye downward in photos.
Ready for something moodier? The next one adds patina and polish without an inch of clutter.
4. Blackened Steel Floating Ledge with Candlelit Shadows and a Vintage Bar Mirror
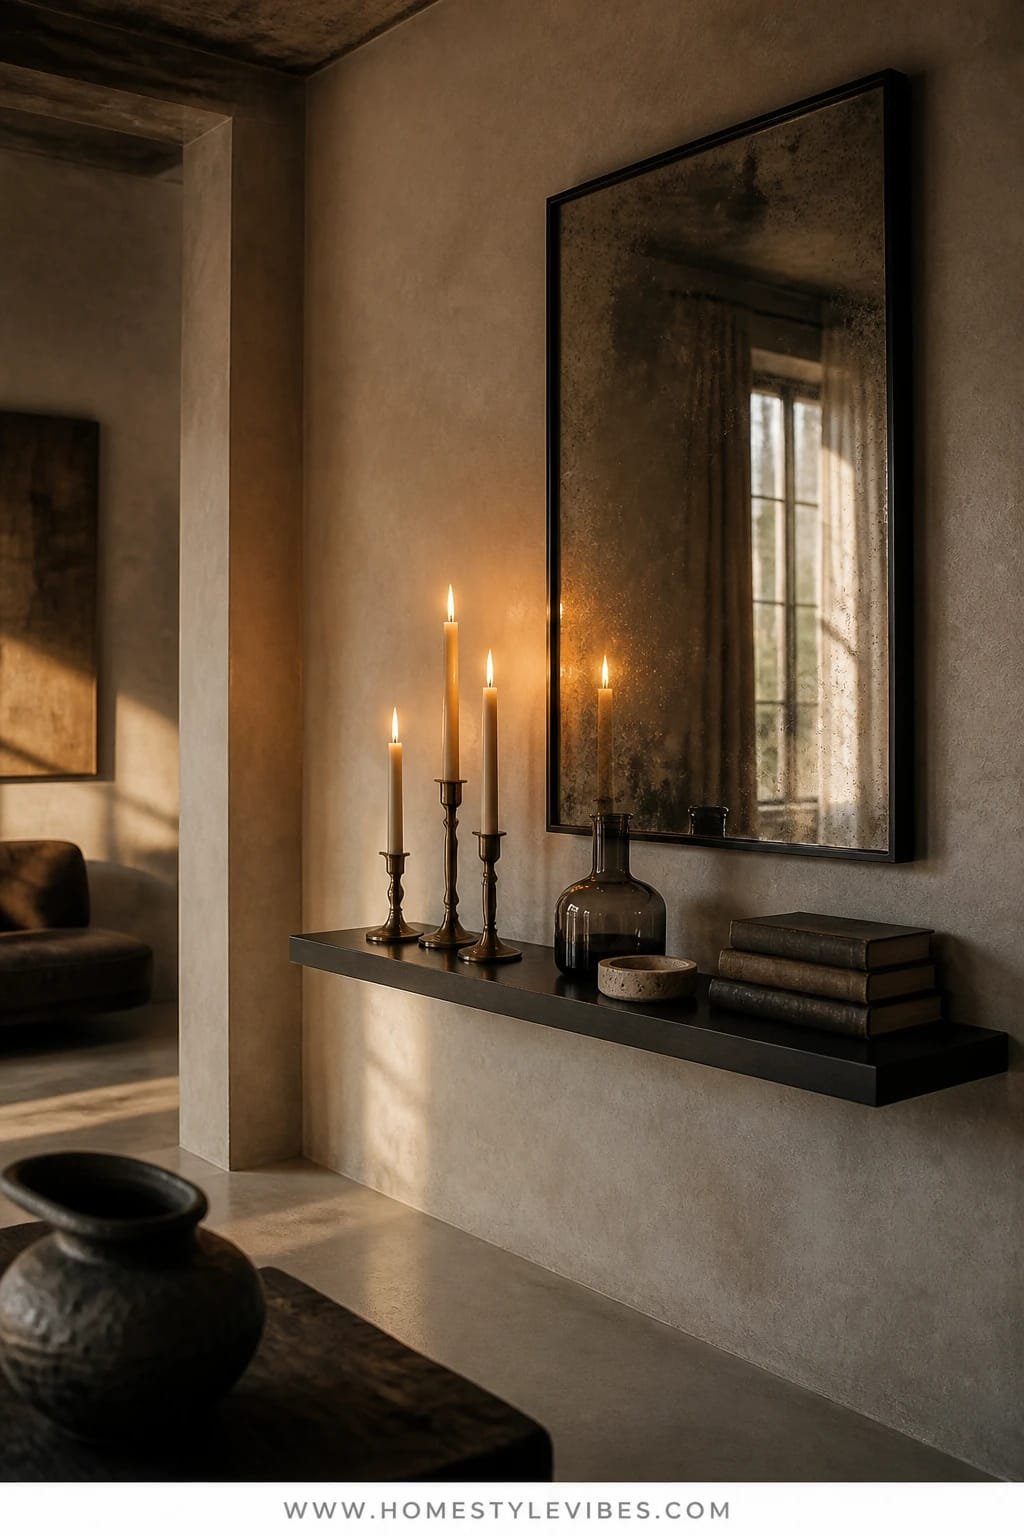
You love a moody corner, but it keeps looking like a storage shelf for mismatched bottles. The move: a slim blackened steel ledge with a vintage bar mirror as the anchor, plus a few candleholders for sculptural height. The mood is speakeasy-meets-art gallery. Candlelit shadows over steel and mirror produce that “old soul” ambiance and it’s incredibly photogenic at night.
Why it works: the steel adds a clean, industrial line that reins in the romance. The mirror bounces light, doubling the glow and making small rooms feel deeper. In real homes, this is compact and easy to maintain—wipe, polish glass, done. Looks expensive because reflections create layers that read as depth and luxury.
Variations: For budget, use matte-black painted wood and a thrifted mirror with foxing. Renter-friendly? Lean the mirror on a console and mount a shallow ledge above with command brackets. For a darker palette, use smoked glass candleholders and oxblood taper candles. If kids or pets are around, choose LED candles for the same glow without risk.
Budget Breakdown:
- Blackened steel ledge: $90–$220
- Vintage bar mirror: $60–$300
- Candleholders + tapers (LED or wax): $20–$80
- One or two cut-glass decanters (optional): $30–$100
Total Estimated Cost: $200 – $700
Best For: Dining rooms, living corners, or above a bar cart; anyone who hosts at night or loves low light and conversation.
Key Design Elements:
- Main materials: Blackened steel, antique mirror glass, cut glass
- Color palette: Charcoal, smoke, bronze, deep reds
- Lighting strategy: Candle clusters plus dimmable accent light nearby
- Furniture silhouettes: Razor-thin ledge, arched/rectangular mirror, tapered candles
- Texture layers: Reflective glass, matte metal, waxy tapers
- Accent details: Small brass match striker, vintage cocktail picks, linen bar towel
How To Recreate This Look:
- Start with the mirror centered; hang or lean securely and at least 10 inches above any countertop.
- Add the steel ledge 3–6 inches below the mirror bottom to frame it.
- Layer candleholders in heights of 5, 7, and 9 inches for rhythm.
- Install a dimmable sconce or keep a small lamp nearby for a gentle backlight.
- Style with one decanter and a low dish for matches or picks—edit hard.
Why This Looks Intentional: A strict palette, repetition in candle heights, and the interplay of matte steel with glossy glass make this feel curated, not random.
Don’t Do This: Avoid scented candles during meals—they fight with food aromas. Unscented tapers keep the vibe elegant.
Pro Styling Tip: In photos, shoot slightly off-center so the mirror reflects candle flames at an angle, doubling the glow.
Little mindset reset: you’re allowed to keep it simple. One strong idea done well beats five half-finished DIYs every time.
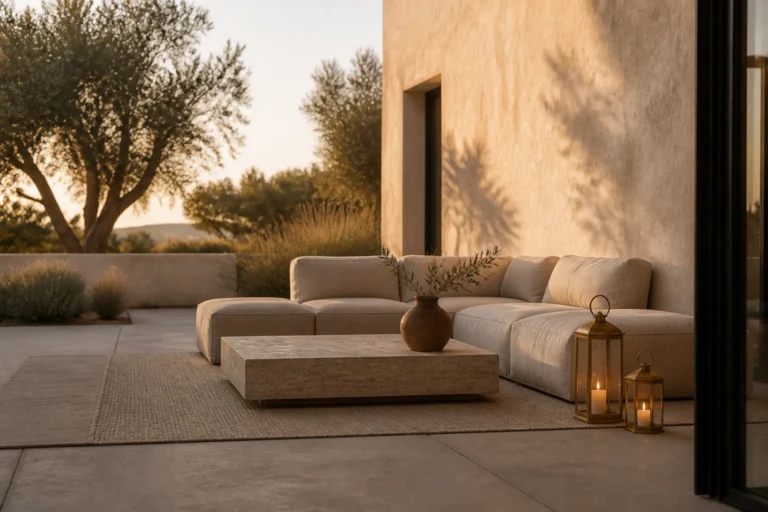
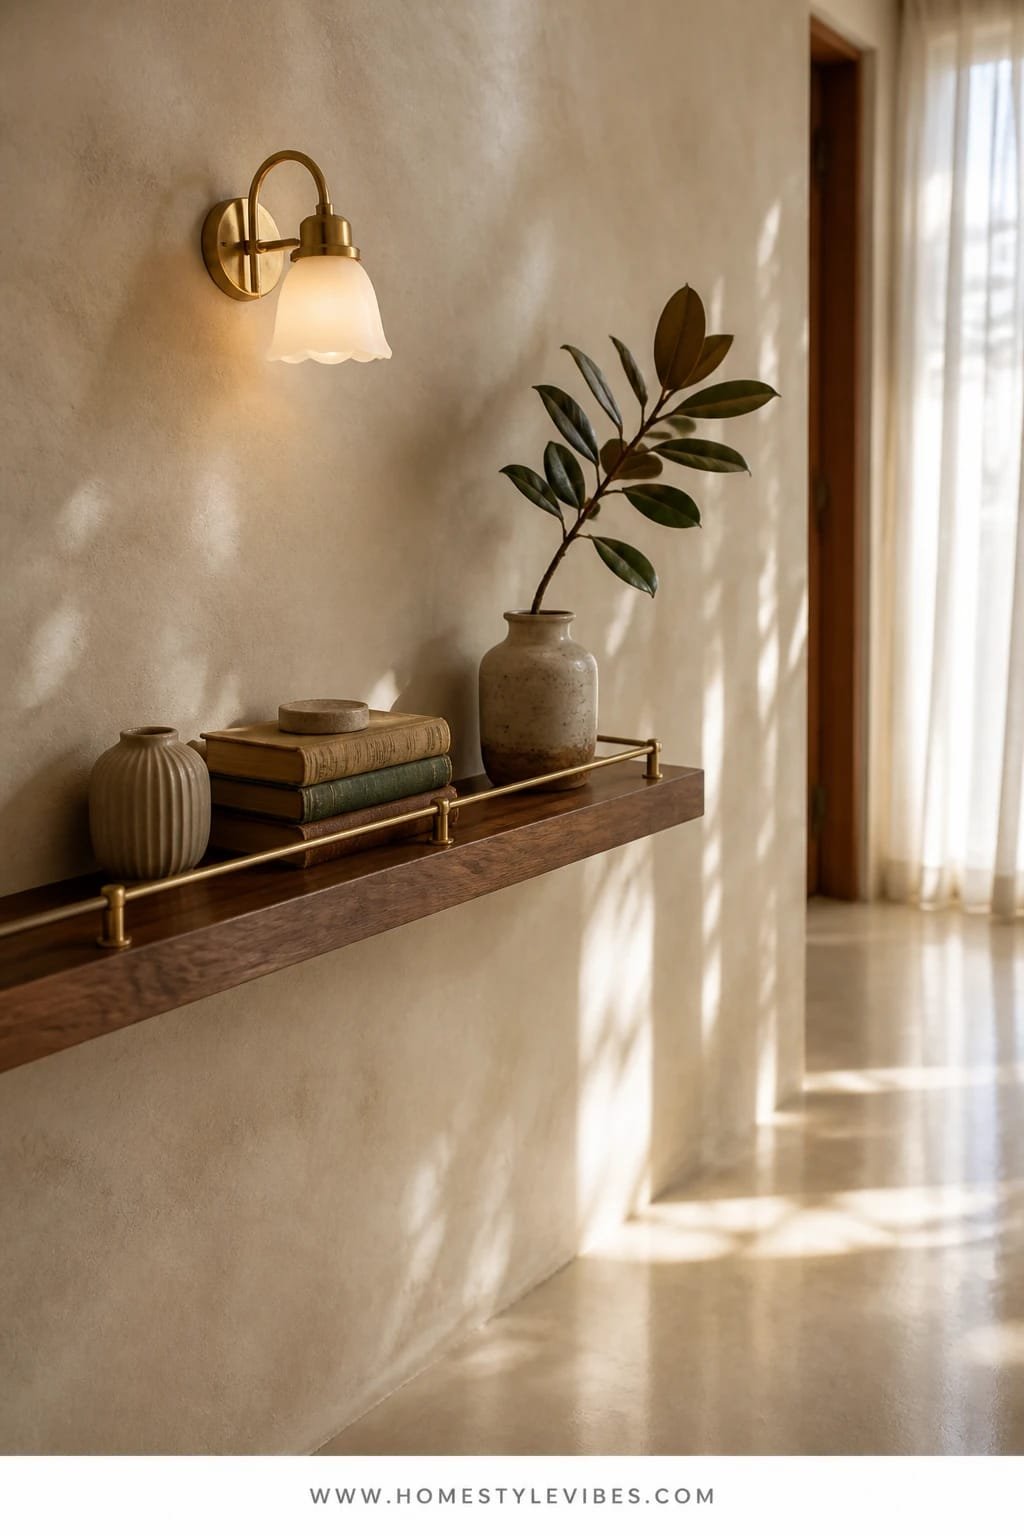
5. Limewash Plaster Shelf Niche with Soft Diffused Light and an Oversized Earthenware Vase
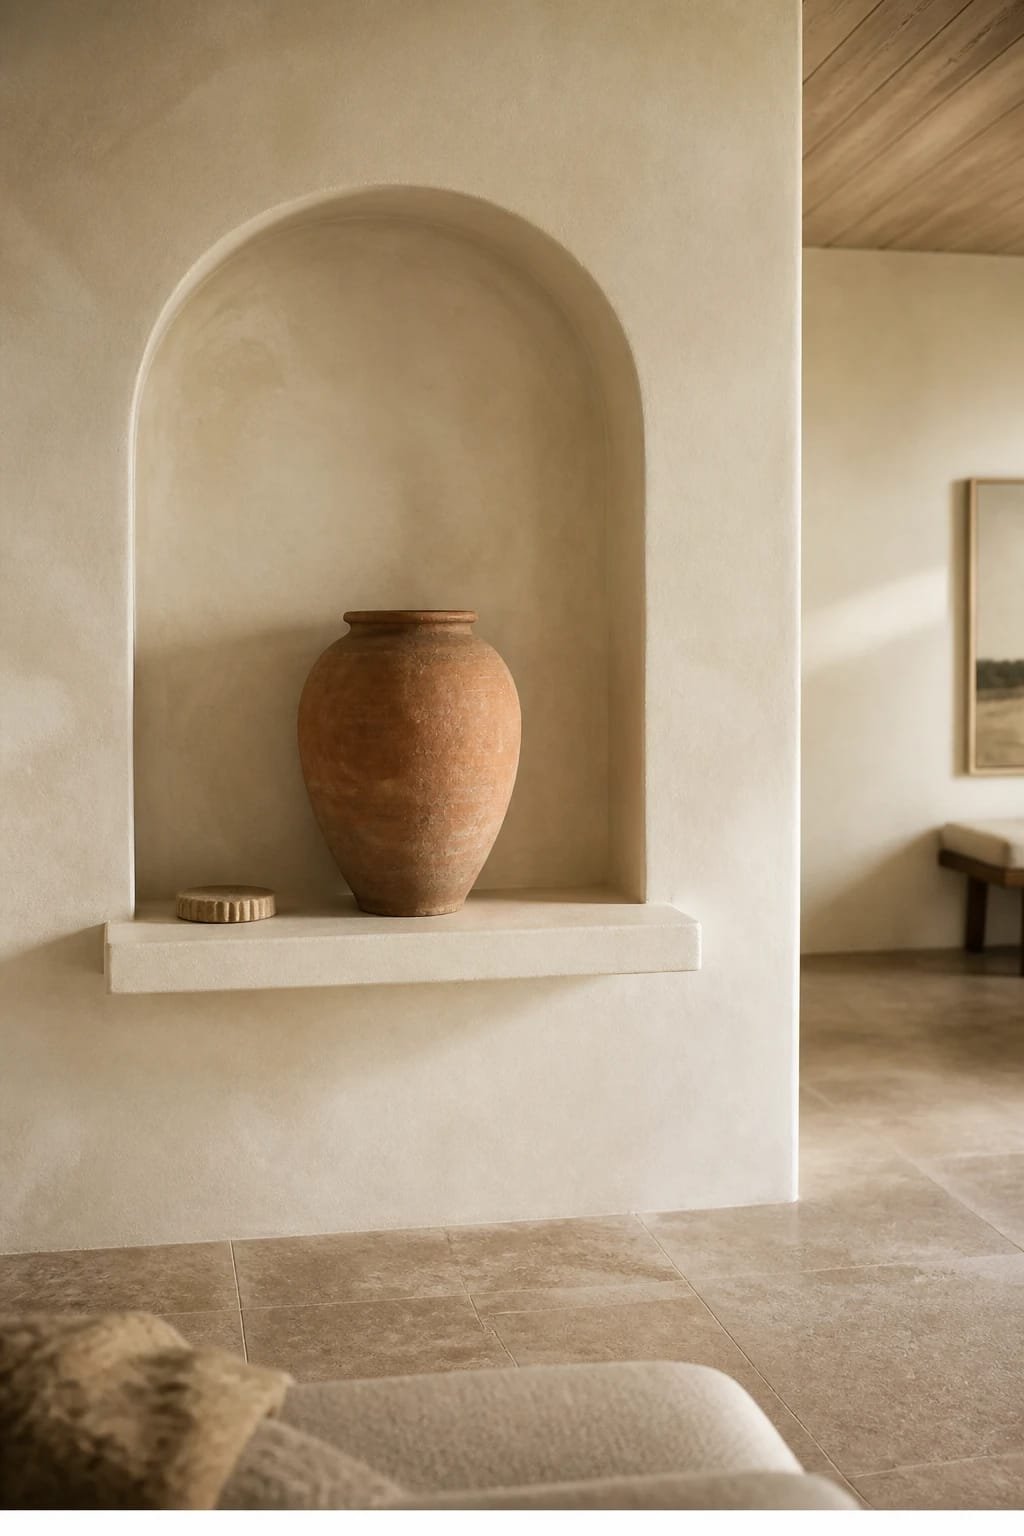
You’ve got a blank wall that feels sterile. Limewash brings life. Create or fake a shallow niche with a wall-mounted shelf, finish the back in limewash, and ground it with one oversized earthenware vase. The mood is modern Mediterranean: sun-faded, textural, and calm. Soft diffused light grazes the limewash, turning brushstrokes into a quiet backdrop for your statement piece.
This works in real homes because it looks custom without major construction. Limewash forgives imperfect walls and reads like sculpture. In photos, the matte finish eats light and makes your vase silhouette pop—no glare, no noise. It’s renter-friendly if you use removable limewash-style paint or a peel-and-stick plaster effect on foam board placed behind the shelf.
Variations: On a budget, paint a faux arch behind the shelf in two tones of warm beige. Small-space version: choose a 10–12 inch vase instead of oversized and keep everything else minimal. Darker option: olive or clay-toned limewash with a black terracotta vase. If dust is your nemesis, choose a glazed earthenware piece for easy wipe-downs.
Budget Breakdown:
- Wall shelf (plaster-look or painted wood): $40–$120
- Limewash or mineral paint: $35–$90
- Oversized earthenware vase: $60–$220
- Removable options (peel-and-stick, foam board): $15–$40
Total Estimated Cost: $150 – $470
Best For: Blank living room walls, dining rooms, bedrooms needing a focal point without artwork clutter.
Key Design Elements:
- Main materials: Limewash plaster, earthenware, painted wood
- Color palette: Sand, oat, ivory, terracotta
- Lighting strategy: Diffused light—sheer curtains by day, linen-shaded lamp by night
- Furniture silhouettes: Chunky vase, slim shelf, rounded arch shapes
- Texture layers: Chalky limewash, raw clay, linen
- Accent details: One sprig of olive or eucalyptus, stone bead garland
Why This Looks Expensive: Single large-scale object, artisanal texture, and restraint. The secret isn’t more accessories—it’s bigger scale and fewer pieces.
How To Recreate This Look:
- Start by mapping a 30–36 inch wide area on the wall; paint limewash in gentle X-strokes.
- Add a simple 24–36 inch shelf centered in the painted field.
- Layer an oversized vase slightly off-center—leave negative space.
- Install soft lighting: a linen-shaded lamp placed to the side for grazing.
- Style with one branch or keep the vase empty for strong silhouette.
One Thing To Avoid: Don’t fill the shelf with trinkets. One bold piece keeps the mood serene and prevents dust build-up that kills the look.
Pro Styling Tip: Shoot from the side so light texture on the limewash shows up as delicate tonal shifts—very editorial.
I tried a version of this in my own living room last fall, and honestly, the limewash did more for the vibe than any art print I’d hung before. It solved the “blank white wall” feeling overnight.
6. Patinated Brass Wall Brackets with Warm Filament Glow and a Stacked Vintage Books Display
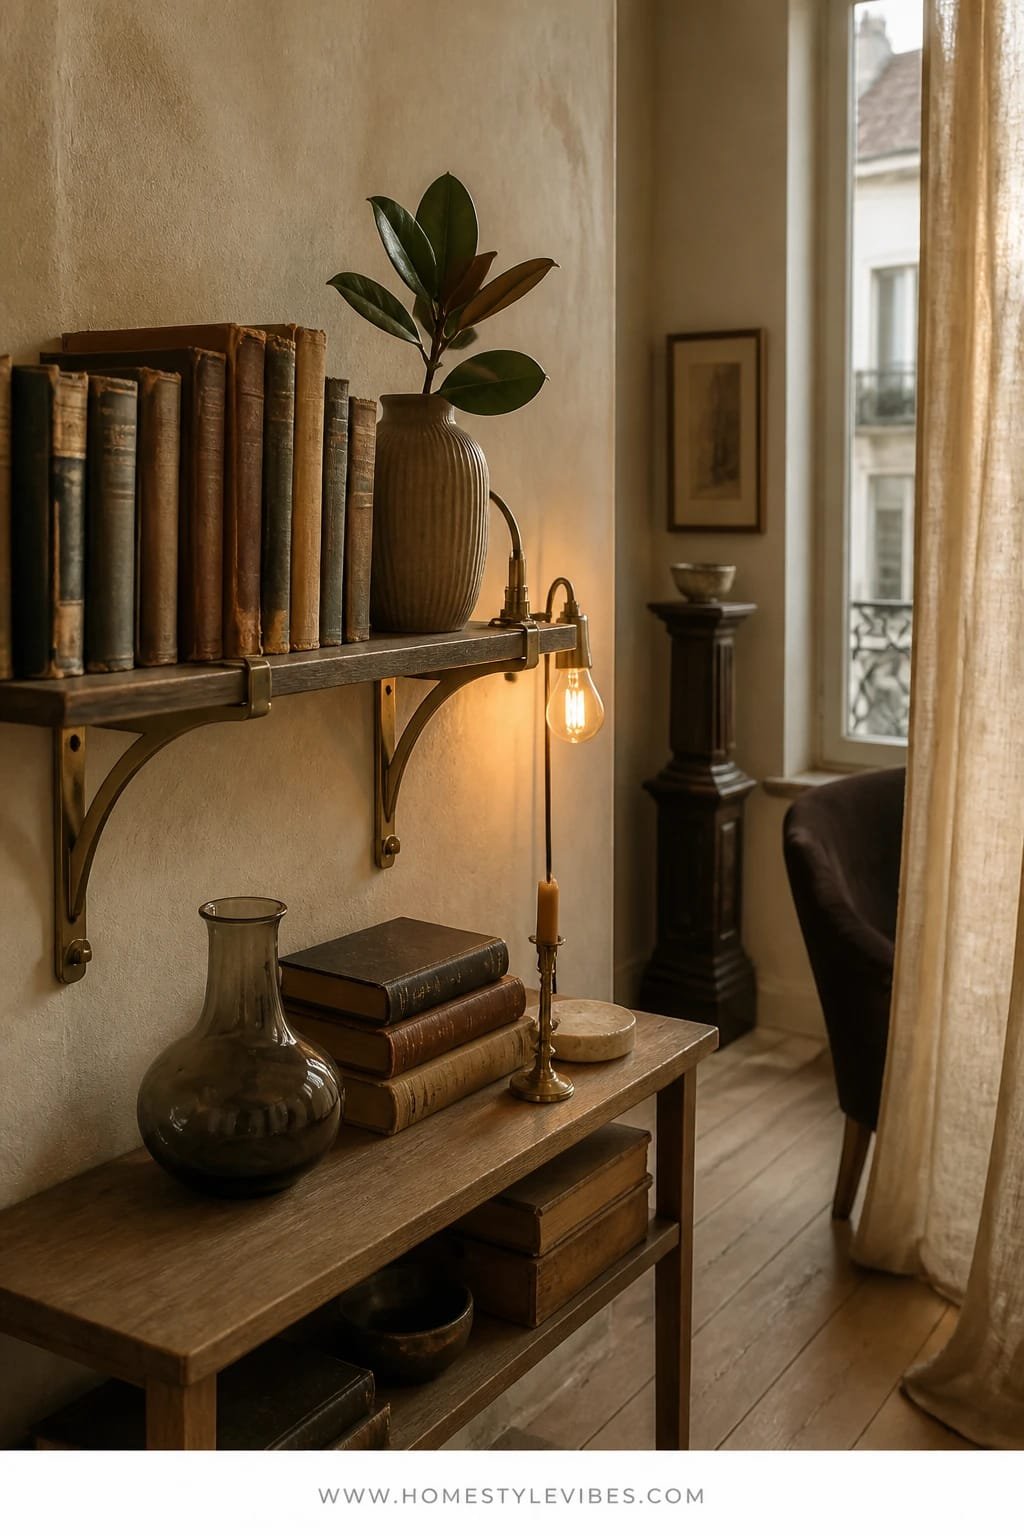
You love collecting old books, but on regular shelves they look like clutter. Patinated brass brackets with a simple stained plank transform them into a literary still life. Add a warm filament bulb nearby—think a small clamp lamp or a pendant off to the side—and suddenly those frayed spines feel intentional and storied. The mood: eclectic study with a hint of Paris flea market.
In real homes, this wins because brass brackets are slim yet strong, giving an “installed forever” energy even if you DIY’d it on a Sunday. Warm bulbs make the leather and cloth spines glow. Photos come out rich because of the interplay of matte papers, small gilt lettering, and that tiny kiss of light that kisses the dust jacket edges. FYI: dust the top edges with a clean paintbrush—way easier than paper towels.
Variations: Budget approach—spray standard steel brackets with aged brass paint, then scuff lightly. Renter version—use a freestanding narrow bookcase below a short wall-mounted ledge, so fewer holes. Darker palette—espresso plank, black brackets, and cool-tone bulb for a moody library. Minimalist take—display only 8–10 books in tonal browns and remove busy dust jackets.
Budget Breakdown:
- Patinated brass brackets (pair): $30–$110
- Stained wood plank: $20–$60
- Vintage books set (thrifted): $20–$80
- Filament bulb lamp/pendant: $25–$100
- Bookends (stone or iron): $20–$70
Total Estimated Cost: $115 – $420
Best For: Home offices, reading nooks, above a sideboard; book lovers who want display, not just storage.
Key Design Elements:
- Main materials: Patinated brass, stained wood, paper/leather
- Color palette: Tobacco, caramel, walnut, antique gold
- Lighting strategy: Single warm 2200–2700K filament bulb placed to one side
- Furniture silhouettes: Slim plank, delicate bracket swoop, blocky book stacks
- Texture layers: Grainy wood, linen dust jackets, embossed spines
- Accent details: Marble or iron bookends, tiny brass magnifying glass
How To Recreate This Look:
- Start by installing brackets at least 16 inches apart and hit studs if possible.
- Add the plank and secure from below to keep the top clean.
- Layer books by color family and height; keep tallest at the ends for natural bookends.
- Install a small lamp or pendant to the left or right to create side lighting.
- Style with one small brass object centered on a low stack.
Why This Feels Designer: Controlled palette, subtle metallics, and side-lit texture transform ordinary books into artful objects. The composition looks intentional, not random.
Watch Out: Over-tilting stacks. Keep vertical lines mostly straight so it reads tidy. A tiny lean is charming; a toppling tower isn’t.
Pro Styling Tip: Pull one book forward by half an inch to create a visual “breath” line that reads beautifully in photos.
Here’s a little honesty: styling shelves takes a few rounds. I’ve spent an hour moving one vase a single inch. It’s normal. Give yourself permission to tweak over a week.
7. Rough-Cut Stone Ledge with Cool Skylight Wash and a Mid-Century Pottery Lamp
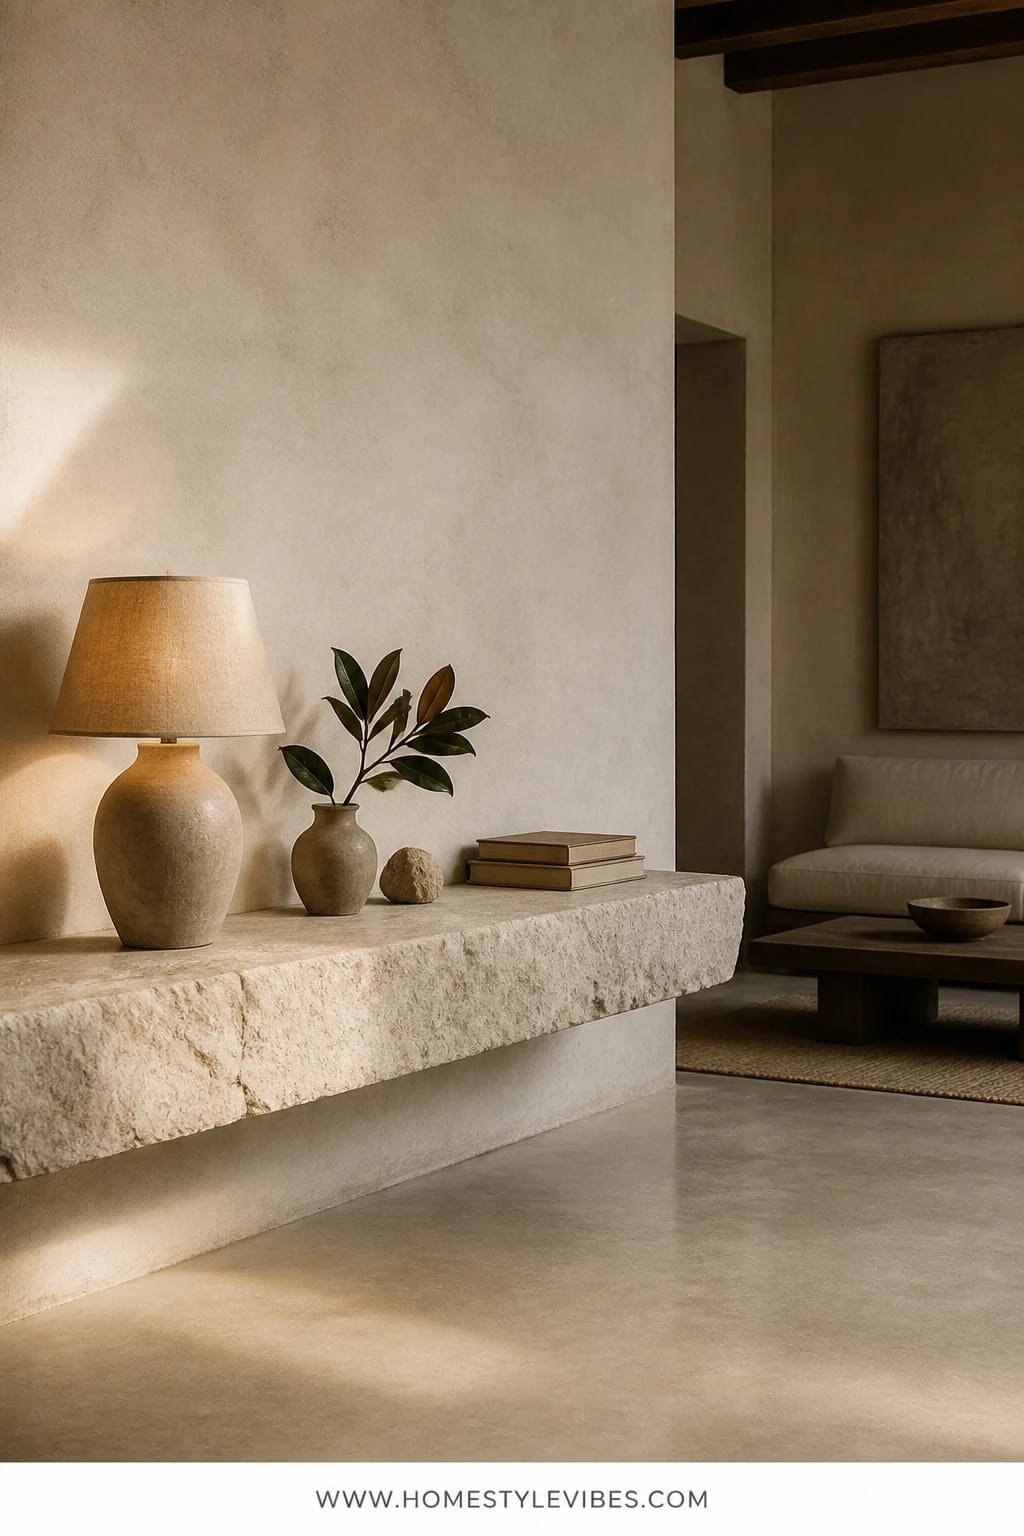
Minimalists, this one’s for you. Your shelf always ends up over-styled, even when you try to keep it sparse. A rough-cut stone ledge fixes that by bringing natural texture you can’t overwork. Pair it with cool skylight or a daylight bulb and a mid-century pottery lamp for a grounded, art-gallery feel. The mood is serene and slightly austere—in the best way.
Why it works in real homes: stone carries presence, so you can do less. The pottery lamp adds a soft curve and a practical glow without clutter. Cool light brings out the stone’s grain; at night the lamp warms it just enough. It photographs beautifully because of high-contrast surfaces—matte stone against a smooth lamp glaze—giving the image crisp edges and a calm palette.
Variations: Budget—use a faux-stone painted shelf or a quartz remnant. Renter-friendly—place a stone slab on heavy-duty brackets you can later patch, or rest a stone console slab on legs below a narrow mounted shelf. Darker version—soapstone or honed black granite with a tan ceramic lamp. Small space—24-inch ledge, one lamp, one small vessel, full stop.
Budget Breakdown:
- Rough-cut stone slab or remnant: $100–$350
- Heavy-duty brackets: $25–$70
- Mid-century style pottery lamp: $80–$250
- Daylight bulb (5000K) + warm bulb (2700K) for night swap: $10–$25
- Small vessel (stone or ceramic): $20–$70
Total Estimated Cost: $235 – $765
Best For: Living rooms or bedrooms that need a single strong line; lovers of minimal styling and natural materials.
Key Design Elements:
- Main materials: Rough-cut stone, ceramic glaze, painted wall
- Color palette: Greige, charcoal flecks, soft white, tan
- Lighting strategy: Daylight wash from skylight or 5000K bulb by day, warm 2700K at night
- Furniture silhouettes: Chunky ledge, rounded lamp, tiny bowl
- Texture layers: Honed stone, smooth glaze, matte wall paint
- Accent details: Linen cord cover, small graphite bowl for rings/keys
Why This Looks Expensive: Stone reads architectural. The restraint—one lamp, one vessel—screams confidence. When you do less with high-quality materials, it looks custom.
How To Recreate This Look:
- Start by sourcing a 30–36 inch stone remnant and have edges lightly eased.
- Add heavy-duty brackets into studs; keep the shelf depth 6–8 inches to avoid droop.
- Layer the pottery lamp on one end and a small vessel on the other for quiet balance.
- Install a daylight bulb for daytime clarity; swap to warm at night or use a tunable smart bulb.
- Style the wall above bare—let the stone line speak.
The Most Common Mistake: Mixing too many small items with stone. You’ll lose the clean line. Resist the urge. Let negative space be your luxury.
Pro Styling Tip: For photos, shoot from a lower angle so the stone thickness reads strong and the lamp curve breaks the horizon line.
A micro-story to leave you smiling: a friend agonized over paint swatches for weeks. Turned out, the real culprit was her cool LED bulbs fighting her warm oak shelves. We swapped three bulbs to 2700K. Instantly, it looked like she hired a designer.
Quick Checklist
- Choose one dominant material per shelf concept
- Commit to a tight color palette of 3–4 tones
- Use one statement object at larger scale
- Add one light source positioned to graze, not blast
- Leave negative space between objects
- Mix matte and gloss textures for depth
- Secure items with museum gel or putty
- Dust with a soft paintbrush for delicate objects
- Photograph from an angle to capture shadows
- Edit seasonally—swap one item, not the whole shelf
Frequently Asked Questions
How do I style vintage wall shelves on a small budget without it looking cheap?
Pick one material to hero—stained pine, matte black metal, or aged brass spray. Limit color to three tones and use one statement piece, like a thrifted vase or mirror. Clean lines and fewer items always look pricier than a crowded display.
I’m a renter—how can I try these ideas without drilling lots of holes?
Use picture ledges with removable anchors, command strips for lighter frames, and plug-in sconces. You can also lean a large mirror and mount a very shallow shelf above using minimal holes that patch easily.
My room is tiny. Won’t shelves make it feel crowded?
Choose narrow depths (4–6 inches), keep items low-profile, and use a single large piece instead of many small ones. Add lighting that grazes the wall; shadows create depth so the room reads larger.
How do I keep vintage shelf displays from getting dusty and messy?
Style fewer items, dust weekly with a soft paintbrush, and choose glazed ceramics over porous ones in high-dust zones. Group items on a small tray so you can lift and wipe fast.
What’s the most common mistake with vintage wall shelf decor?
Mixing too many styles and colors at once. Decide on one spine—wood and brass, or stone and ceramic—and repeat it. Consistency reads intentional; variety without a plan reads cluttered.
Closing Thoughts
Pick one idea from these vintage wall shelf decor ideas and try it this weekend. Start with the material that makes your heart do a little leap—walnut, stone, brass, or limewash—and add one great light source. Don’t chase more stuff; chase better texture, kinder light, and space to breathe.
The truth is, luxury comes from texture plus lighting plus restraint. When you control those three, even thrifted pieces look heirloom. Curate slowly, edit often, and trust your eye. If something feels a hair off, it probably is—nudge it an inch, swap a bulb, remove one object.
You’ve got this. Your shelves are about to stop holding things and start telling stories—and you’ll smile every time the light hits just right. Seriously, go hang that ledge.