6 Cozy Reading Nook Ideas For A Vintage-Inspired Corner At Home
You want a cozy reading nook that feels like an old-world bookshop tucked into your home. You hate that your “corner” still looks like a sad chair under a too-bright bulb. Picture instead: nubby tweeds, carved wood, mellow brass, and that soft afternoon glow that makes the pages look creamy and warm. These 6 vintage-inspired reading nook ideas fix the real problem—awkward layout, flat lighting, and lifeless textures—so you can build a corner that looks magazine-ready in a weekend with a $150–$1,200 budget range per idea. If you crave a nook that photographs beautifully and actually feels like you, these designs deliver depth, mood, and a story-rich vibe. Perfect for fall nesting, Sunday essays, or anyone who dreams in linen, leather, and timeworn detail.
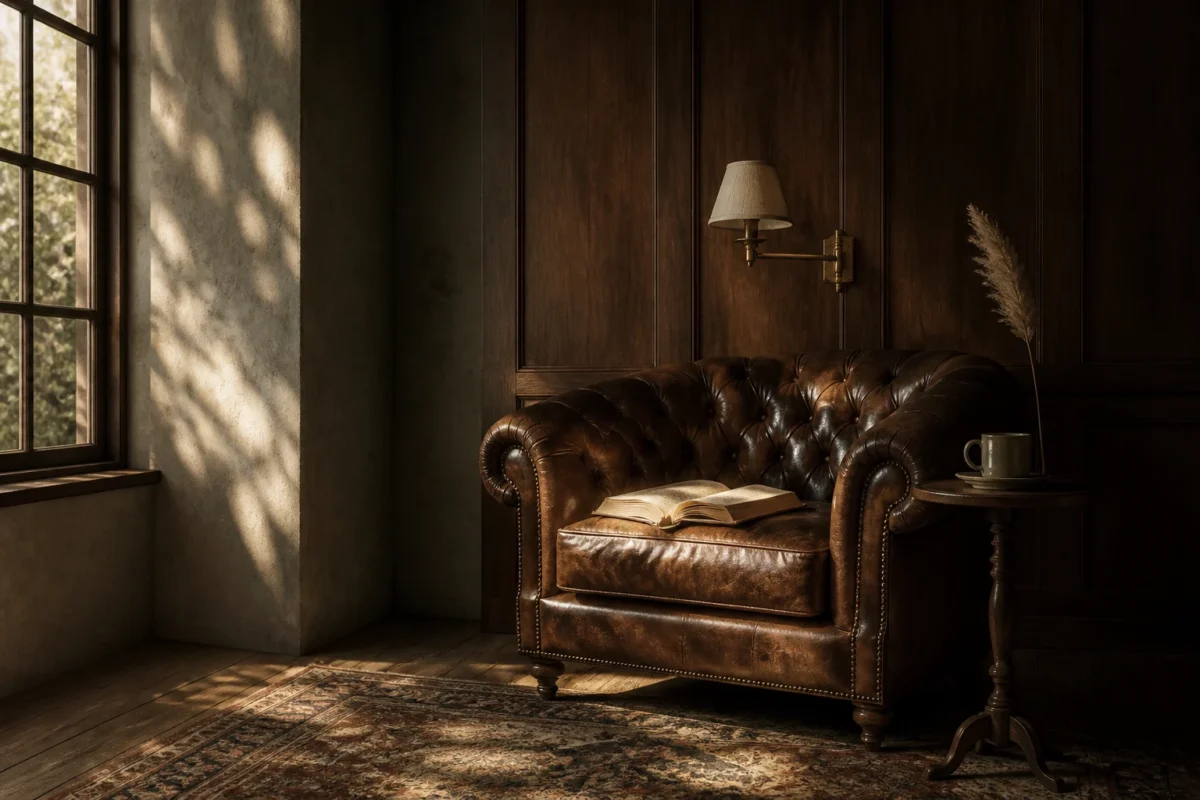
1. Walnut Paneling, Dappled Afternoon Light, And A Tufted Chesterfield Chair
It’s that one corner that always feels off: you’ve tried a side chair and a floor lamp, but the space still reads “waiting room.” This design builds a cocooned study vibe—cozy, moody, and a little literary—with warm walnut tones and dappled light that filters like late-day sun in a library window. It works in real homes because you can fake the paneling with peel-and-stick slats, and a single tufted chair becomes the hero piece that instantly reads intentional, not accidental.
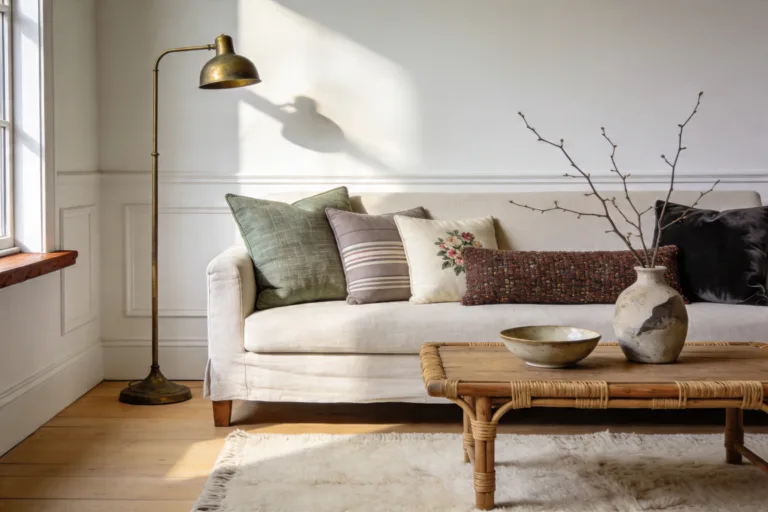
Lighting does the heavy lifting here. A small-shade adjustable sconce or swing-arm lamp throws targeted pools of light that make the pages glow, while walnut’s natural depth swallows glare and adds shadow play. Walnut, aged brass, and linen are your material trio. The result? Photographs like an editorial shoot: matte-wood contrast against a textured rug, and the pin-dot reflections on brass hardware add just enough sparkle.
Try a budget version with a faux-walnut peel-and-stick panel behind the chair and a thrifted tufted chair reupholstered in a waxed cotton. In tight spaces, scale down to a club chair and a petite martini table. For renters, swap drilled sconces for a plug-in picture light perched over a framed print behind the chair—same mood, less commitment.
Budget Breakdown:
- Faux walnut paneling or slat wall: $120–$400
- Tufted Chesterfield chair (velvet or leather): $300–$900
- Swing-arm or picture light (plug-in): $60–$180
- Small side table (pedestal or brass): $70–$200
- Wool or jute rug (3×5): $100–$250
- Linen pillow and throw: $40–$120
Total Estimated Cost: $690 – $2,050
Best For: Corners with at least 4×4 feet of clearance, traditional or transitional homes, anyone who loves a study-like vibe and reads at dusk.
Key Design Elements:
- Main materials: walnut, aged brass, linen
- Color palette: tobacco, camel, ivory, oil-rubbed bronze
- Lighting strategy: one focused task light; keep ambient light low
- Furniture silhouettes: tufted, rolled arms, turned legs
- Texture layers: wool rug, linen throw, leather-bound books
- Accent details: brass bookmark, framed landscape, ceramic match striker
How To Recreate This Look:
- Start with a walnut anchor wall—real slats or peel-and-stick panels.
- Add a tufted chair angled 10–15 degrees toward your light source for shadow depth.
- Layer a small wool or jute rug to ground the vignette and define the zone.
- Install a plug-in swing-arm light about 55–60 inches off the floor.
- Style with a brass side table, a linen pillow, and two old books stacked spine-out.
Why This Looks Expensive: The combination of rich wood and tufting signals craftsmanship. Brass warms the palette and introduces a subtle gleam that photographs like jewelry—small but potent.
Watch Out: Don’t center the chair dead-on to the wall; angle it and pull it forward at least 6 inches. Flat placement kills the “library corner” story and flattens the photo.
Pro Styling Tip: Tuck the throw casually with one corner draped to the floor—soft, asymmetrical lines keep the scene human and camera-friendly.
Quick Tip: If your bulb reads harsh, switch to a 2700K LED with a high CRI (90+). Skin tones and paper look warmer, and walnut stops skewing orange.
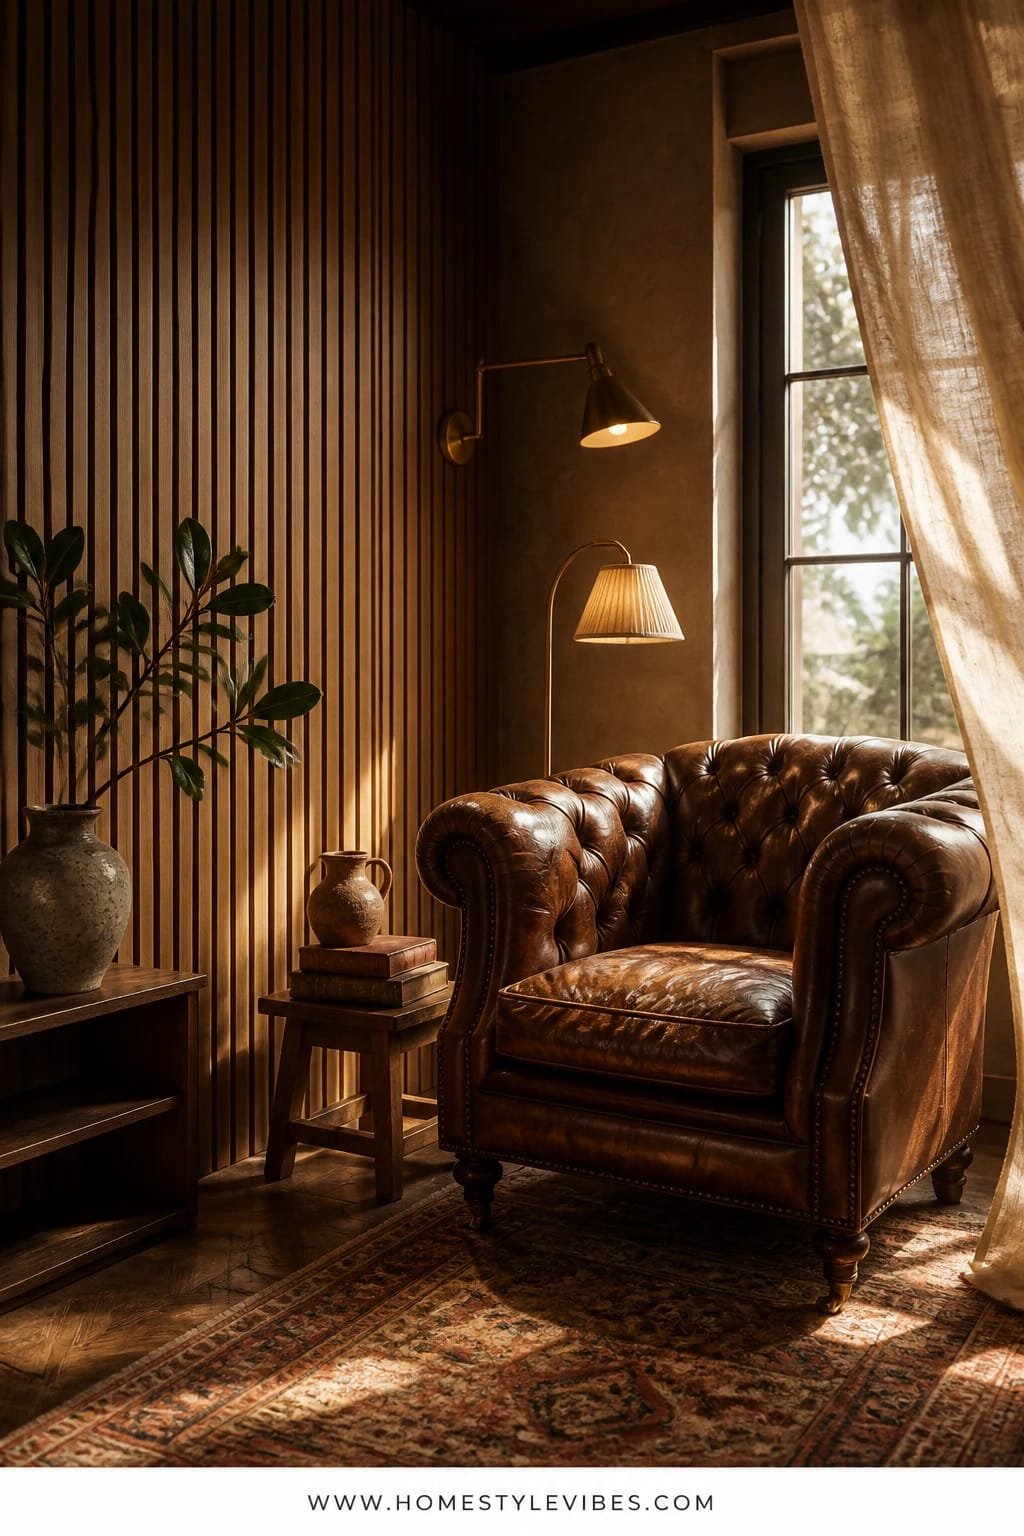
2. Worn Leather, Golden Hour Glow, And An Apothecary Drawer Side Table
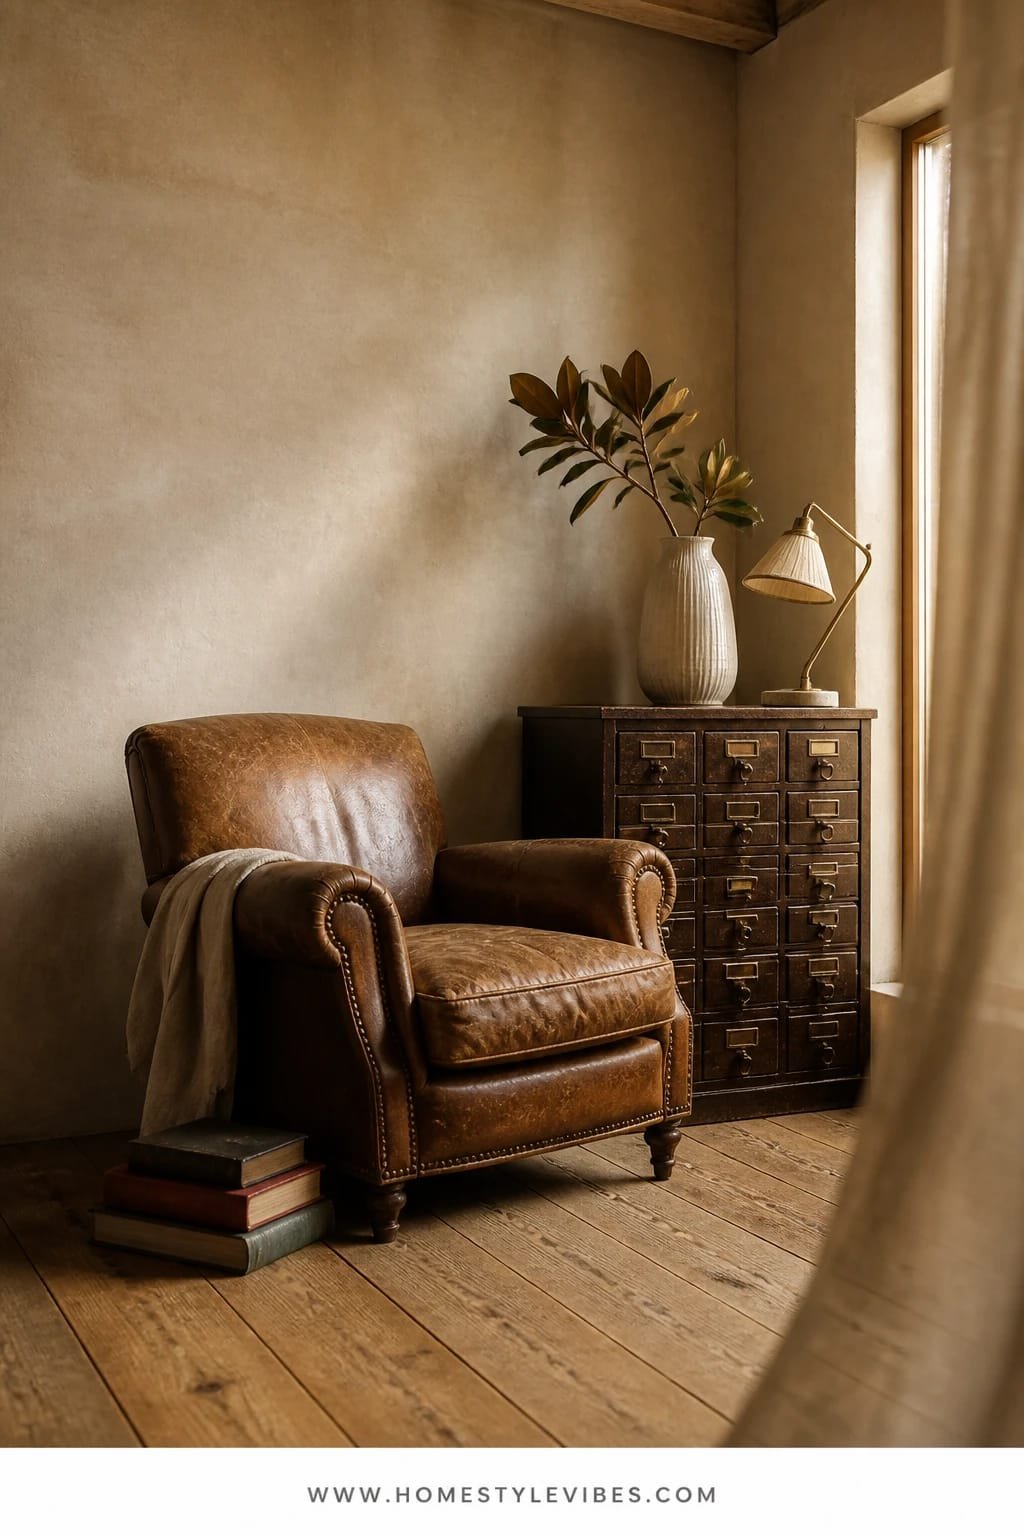
We’ve all been there: you finally snag a vintage leather chair, but it looks heavy and flat in your corner. This nook leans into patina with a worn leather seat, then lightens the mood using golden-hour lighting and a quirky apothecary drawer cabinet as the side table. It feels collected, not staged. And it works in small homes because the mini drawers add secret storage for bookmarks, chargers, and highlighters—no clutter piles.
Why it sings: the contrast of lived-in leather with small-scale wood grain and antique brass label pulls. Task lighting doesn’t need to be fussy; a small-shade brass desk lamp on that mini cabinet creates a cinematic pool of light. Photos love the micro-shadows around the drawer pulls and the broken-in creases of leather—texture you can almost hear.
Variations include a vegan leather or waxed canvas chair for a softer price point, a vintage card catalog drawer as a side table, or a darker, moodier version with an amber-tinted bulb for smoky warmth. Renters can lean a vintage oil portrait instead of hanging art to avoid patching walls.
Key Design Elements:
- Main materials: distressed leather, oak, antique brass
- Color palette: cognac, whiskey, olive, parchment
- Lighting strategy: tabletop pool of light plus candle-level accent
- Furniture silhouettes: mid-height arms, slightly reclined back, boxy side cabinet
- Texture layers: wool kilim, canvas pillow, cotton knit throw
- Accent details: brass label pulls, old magnifier, dried stems in a stoneware vase
Budget Breakdown:
- Vintage or faux-leather chair: $200–$800
- Apothecary drawer cabinet: $120–$350
- Brass table lamp: $60–$180
- Kilim or flatweave rug (3×5): $120–$260
- Vintage art or portrait: $40–$180
- Throw/pillow set: $40–$110
Total Estimated Cost: $560 – $1,880
Best For: Narrow corners, lofts with industrial bones, readers who like marginalia and cozy nighttime chapters.
How To Recreate This Look:
- Position the leather chair near a wall but leave 4 inches of breathing room.
- Place the apothecary cabinet to the dominant hand side with lamp centered on top.
- Roll out a kilim to add color and make the leather pop.
- Lean a portrait or landscape for depth; don’t over-center.
- Add dried stems and a magnifier for character—small, story-rich details.
Why This Feels Designer: Scale contrast. Big chair, small drawers. Hard leather, soft weave. The push-pull adds sophistication without extra pieces.
One Thing To Avoid: Shiny new leather that reflects like vinyl. If it’s new, knock back the gloss with a neutral leather balm and use matte textiles around it.
Pro Styling Tip: Rotate the lamp shade slightly off-axis—like 10 degrees—to dodge the “catalog” look and create asymmetric light falloff for photos.
Remember, this isn’t about recreating a showroom. It’s about the corner where you dog-ear pages and sip tea that cools too quickly because you got lost in a paragraph. If one idea grabs your gut, start there and ignore everything else until that corner makes you exhale.
3. Painted Beadboard, Soft North Light, And A Cane-Back Rocking Chair
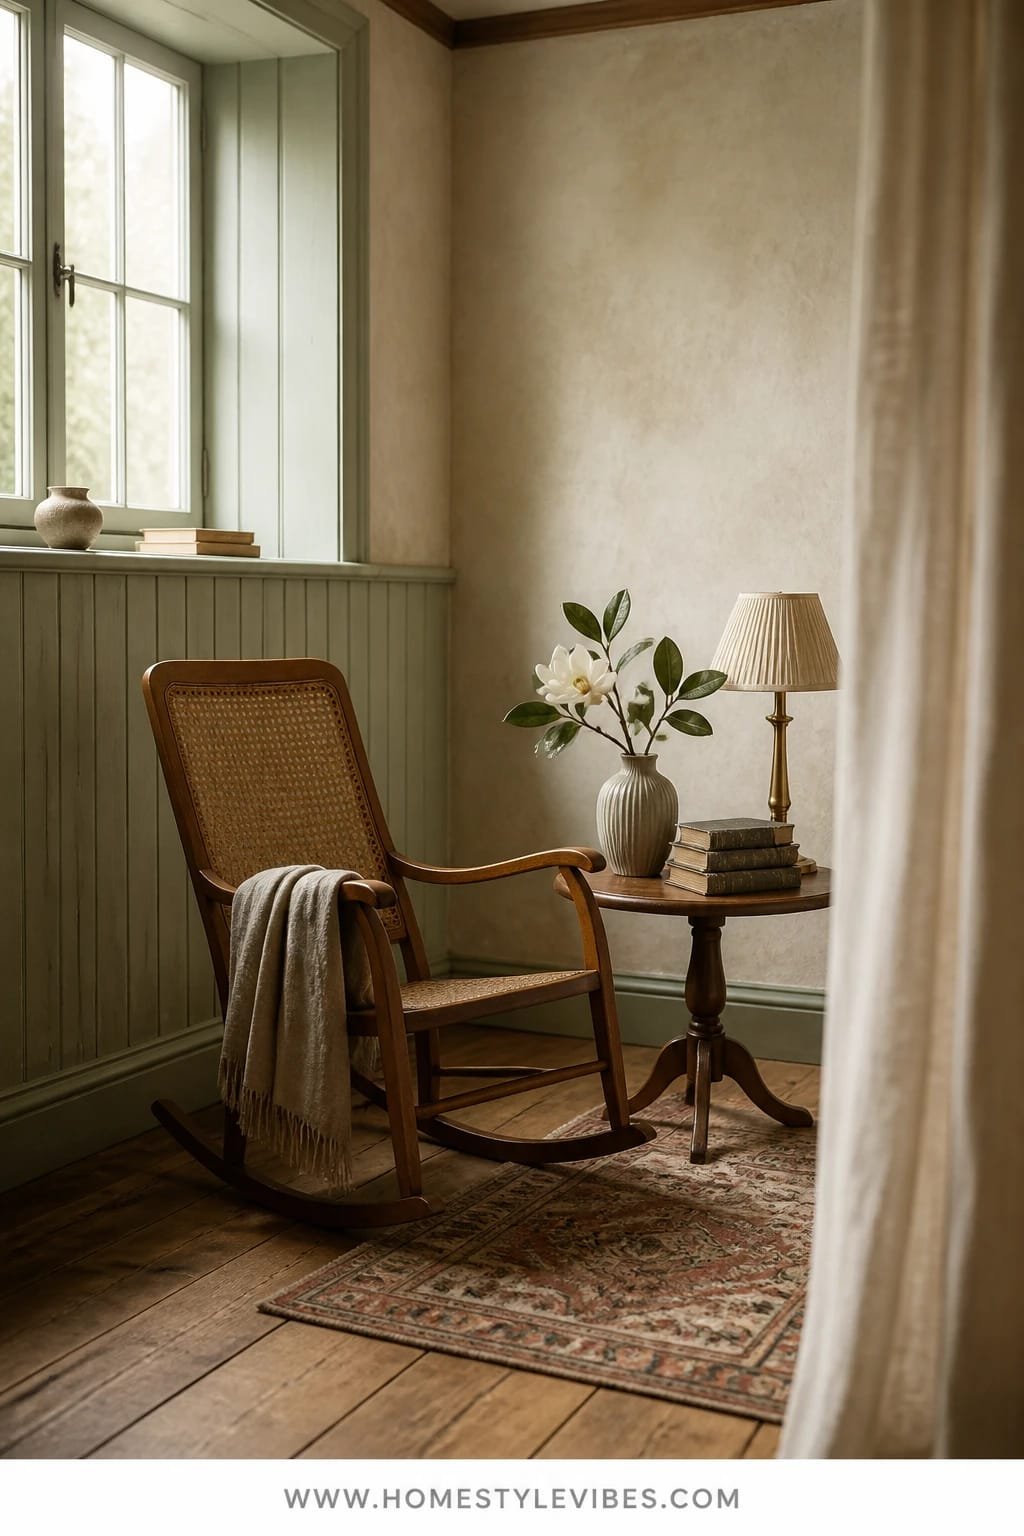
It’s the awkward nook under the window that never feels finished. You’ve painted it twice, but it still reads chilly. This design leans into vintage-cottage comfort: beadboard adds quiet rhythm, soft north light makes colors honest, and a cane-back rocker brings motion and nostalgia. For real homes, beadboard is forgiving, family-friendly, and renter-viable with panels cut to size and removable trim tape.
Soft northern exposure diffuses light without glare, so pages are easy on the eyes. Painted beadboard (try a muslin or tea-stain white) adds dimension that photographs crisply—tiny shadows between grooves create depth without visual busyness. Cane gives breathability (no sweaty back), and its tiny lattice pattern always looks great on camera.
Small-space version: half-height beadboard with a thin ledge cap to hold a slim vase and a timer candle. Darker-room version: creamy paint plus a biscuit-colored cushion and a gingham throw for lightness. Budget-friendly swap: a bentwood chair with a cane seat and a small footstool to mimic the rocker’s ease.
Budget Breakdown:
- Beadboard panels + trim: $120–$280
- Cane-back rocking chair: $150–$450
- Cushion + lumbar pillow: $50–$120
- Timer candle lantern: $20–$60
- Cotton curtain panel (sheer): $30–$90
- Small footstool or pouf: $40–$120
Total Estimated Cost: $410 – $1,120
Best For: Bay windows and dormers, farmhouse or cottage-style homes, morning readers and gentle rockers.
How To Recreate This Look:
- Install beadboard up to 48 inches; cap with a narrow shelf rail.
- Paint in a warm off-white with an eggshell sheen to catch light subtly.
- Place the rocker at an angle to the window; add a thin cushion for comfort.
- Hang a sheer curtain high to reduce the gap between rod and ceiling—cheap gap equals cheap look.
- Set a lantern on the ledge and keep a small basket for blankets nearby.
Why This Reads High-End: The beadboard’s vertical rhythm feels architectural, like the house “grew” this nook on purpose. The cane pattern introduces airy craftsmanship that hints at bespoke.
The Most Common Mistake: Using bright white paint that goes sterile in soft light. Choose a warm white with a touch of yellow undertone so morning light reads cozy, not clinical.
Pro Styling Tip: For photos, pull the sheer curtain 6 inches past the window frame so fabric stacks in generous folds—those shadows look luxe.
Did You Know? North-facing rooms love warmer whites and low-sheen paints. Satin can bounce too much light and flatten beadboard grooves in photos.
4. Antiqued Mirror, Candlelit Warmth, And A Wingback Chair With Nailhead Trim
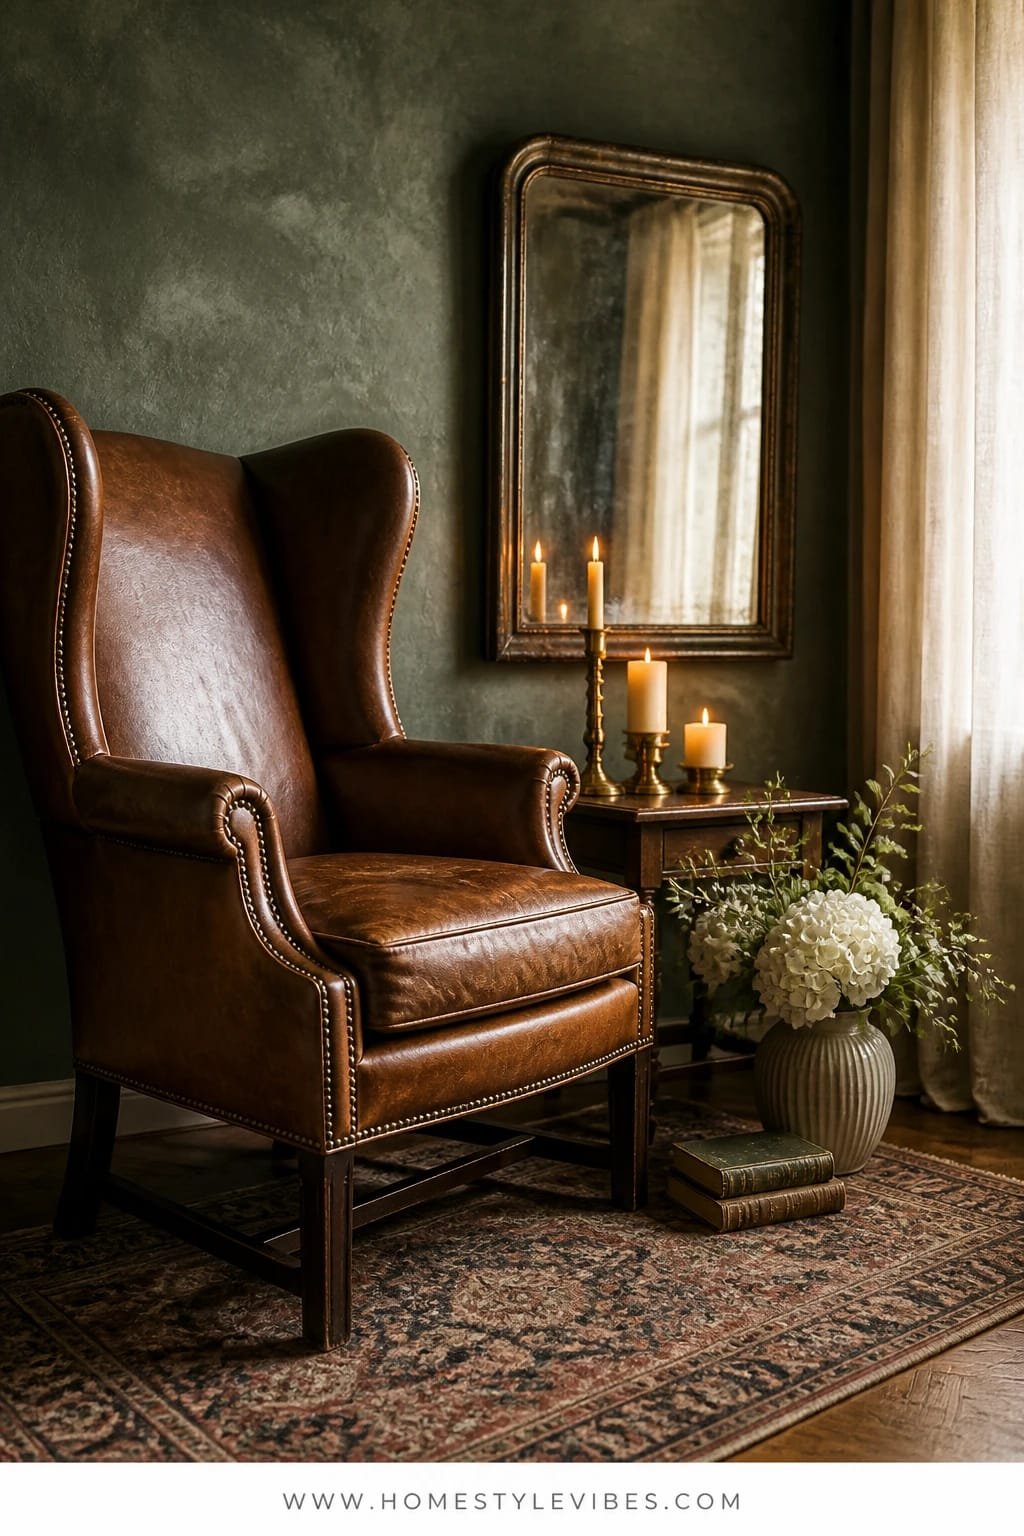
You’ve tried to make a moody corner, but it slides into gloomy instead. This idea wins when you want romance: an antiqued mirror bounces candlelit warmth, and a wingback chair gives that fireside silhouette—even without a fireplace. It’s dramatic but practical; the high sides of the chair block distractions, creating a natural reading cocoon. Also, great for resale—classic wingback shapes never go out of style.
Lighting matters most. Cluster two or three varying-height candles (or realistic flameless options) on a tray in front of the antiqued mirror. The hazy reflection multiplies the glow without harsh hotspots. Materials lean luxe: linen or tweed upholstery, bronzed nailheads, bleached oak table. On camera, the interplay of sharp nailhead lines and soft candle halos delivers instant old-world glamour.
Prefer renter-safe options? Use removable mirror film to “antique” a basic mirror. Tight on space? Pick a compact wingback with slim arms and pair it with a tulip-base table to keep visual footprint light. Darker palette fans can do ink-blue upholstery and etch the mirror effect deeper for smoky drama.
Key Design Elements:
- Main materials: antiqued mirror, tweed or linen upholstery, bronzed metal
- Color palette: inky blue, warm ivory, bronze, soft gold
- Lighting strategy: layered candle clusters reflected in mirror; minimal overhead
- Furniture silhouettes: high-back wing, delicate round side table
- Texture layers: tweed, silk-trim pillow, soft mohair throw
- Accent details: match cloche, vintage poetry book, small floral in bud vase
Budget Breakdown:
- Wingback chair: $280–$900
- Antiqued mirror or DIY film: $60–$250
- Candle set + tray: $30–$120
- Round side table: $80–$220
- Pillow + mohair-style throw: $70–$180
- Rug (sheepskin or faux): $40–$150
Total Estimated Cost: $560 – $1,820
Best For: Evening readers, city apartments with low natural light, lovers of classic, slightly dramatic interiors.
Why This Looks Intentional: The mirror-candle duet doesn’t feel random; it’s a deliberate light engine that softens every surface. The wingback’s exaggerated silhouette makes the corner feel designed, not accidental.
How To Recreate This Look:
- Hang or lean an antiqued mirror at seated eye level behind or beside the chair.
- Place a candle tray on the table so flames sit within the mirror’s reflected area.
- Choose a wingback with visible nailhead trim for crisp detail.
- Keep the palette tight—two main colors, one metal finish.
- Style a bud vase low so it doesn’t block the candlelight reflection.
Don’t Do This: Mixing too many light sources. Candles plus a bright overhead will feel chaotic; dim the ceiling, let the candles work.
Pro Styling Tip: For photos, light the candles 15 minutes early so wax pools form—tiny highlights read as luxury.
I tried a version of this in my own living room last fall—swapped the big lamp for three candles and an antiqued mirror I found at a flea market. Honestly, I couldn’t believe the difference. The whole corner exhaled, and the book spines looked like artwork.
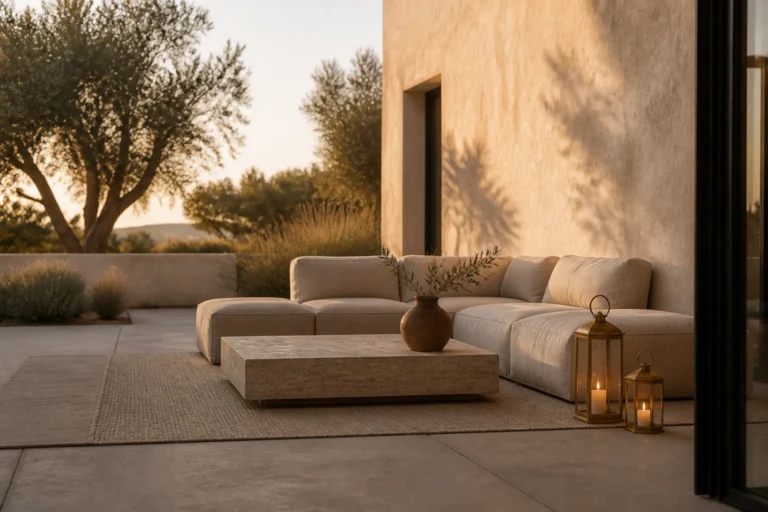
5. Limewash Plaster, Pool-of-Light Floor Lamp, And A Slipper Chair With Skirt
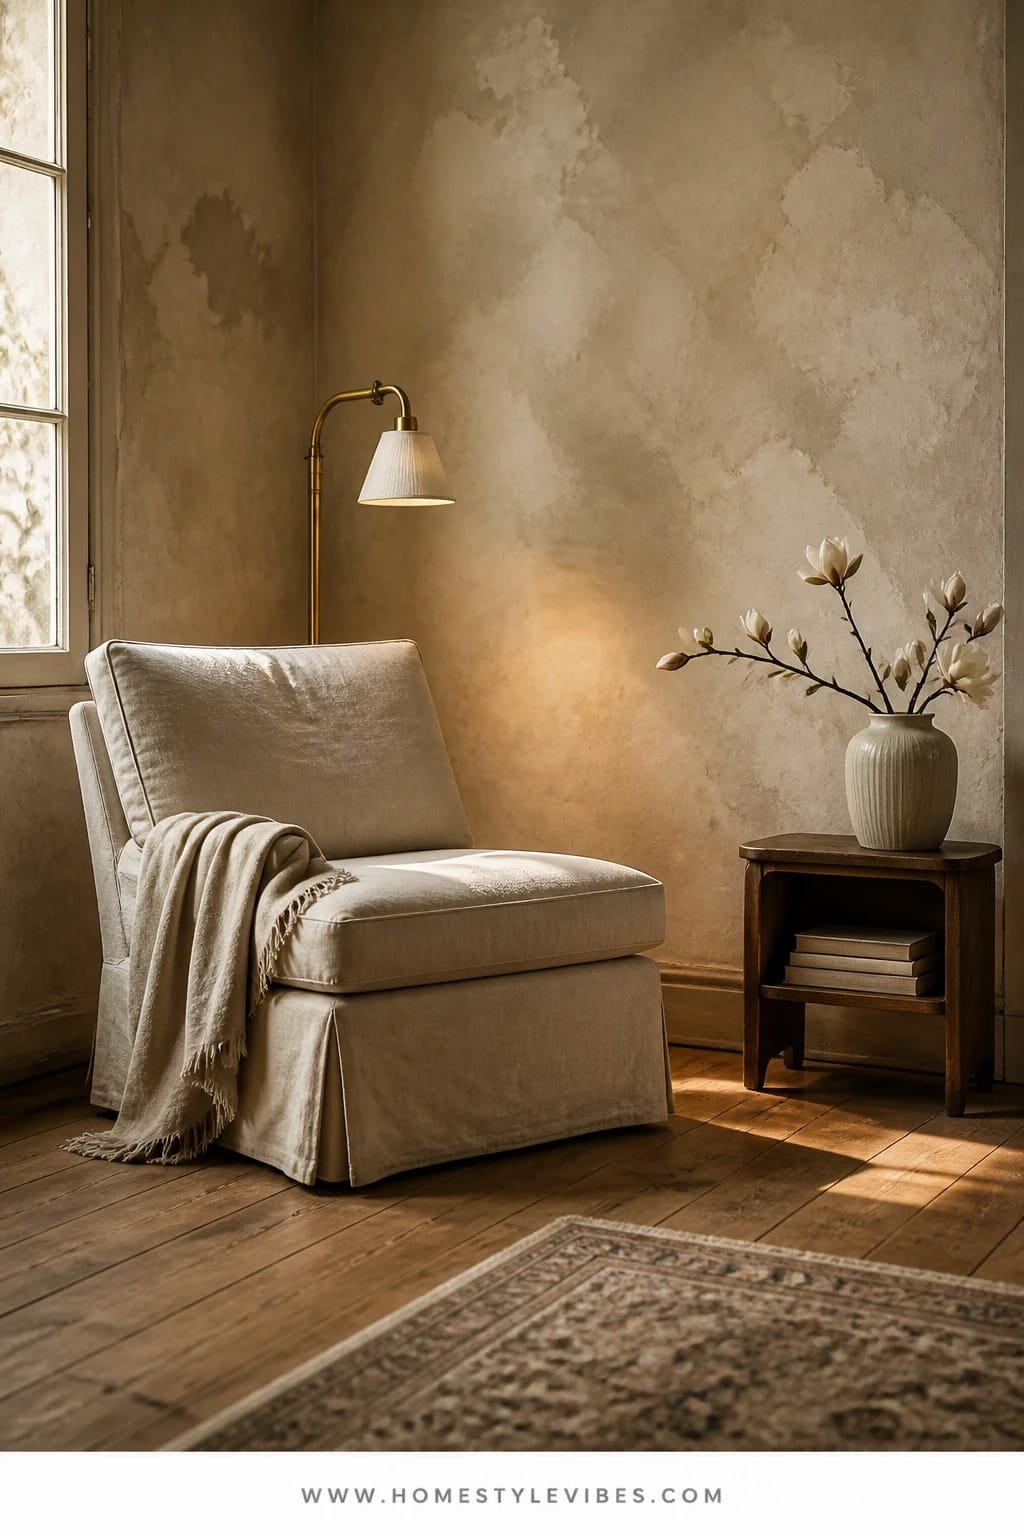
Sometimes the frustration is texture. You add pillows and throws, but the walls still look flat and “rental.” This nook solves it with a limewash plaster wall behind a skirted slipper chair. Limewash creates those soft clouds of color that read like watercolor in daylight, and the chair’s skirt introduces a historical wink that instantly tilts vintage. A focused pool-of-light floor lamp keeps the corner crisp without glare.
Why it works in real houses: limewash is forgiving to apply and looks best with slight imperfection—hello, DIY. Slipper chairs are small-space heroes; no arms, tight footprint, surprisingly comfortable. The skirt hides cords and visual clutter (charger, anyone?), which makes the scene look tidy in photos.
Variations? Keep it budget-friendly with pre-mixed mineral paint that mimics limewash, or go darker with a mossy green if your room gets abundant sunshine. Renter-friendly? Use a removable limewash-patterned wallpaper and a slipcovered slipper chair so you can change tones with seasons.
Budget Breakdown:
- Limewash paint + brush: $90–$220
- Slipper chair (skirted): $180–$600
- Adjustable floor lamp (narrow shade): $80–$220
- Vintage-style side pedestal: $60–$160
- Nubby throw + velvet lumbar: $50–$140
- Low-pile rug (2×4 or runner): $40–$120
Total Estimated Cost: $500 – $1,460
Best For: Small apartments, hallway nooks, anyone who craves softness and quiet color variation.
How To Recreate This Look:
- Choose a limewash color two steps warmer than your existing trim.
- Apply in X-shaped strokes; leave subtle highs and lows for character.
- Position the slipper chair 6–8 inches from the wall to show shadow depth.
- Set a narrow-shade floor lamp so the light lands on your lap and page.
- Style with one velvet lumbar and a nubby throw—restraint keeps it refined.
Why This Feels Designer: Controlled texture. Limewash gives organic movement, the skirt brings softness, and the tight color palette keeps it sophisticated instead of shabby.
Watch Out: Don’t choose a lamp with a translucent white shade if you can see the bulb filament. That weird bulb shadow hits the wall and cheapens the look. Go for an opaque or lined shade.
Pro Styling Tip: Angle the floor lamp so the shade just kisses the edge of the frame in photos; it creates a strong vertical that balances the scene.
Quick Tip: If your limewash looks too patchy when dry, mist the wall lightly with water and feather in more paint. Keep strokes short and random—perfection is the enemy here.
6. Reclaimed Oak Shelves, Warm Edison Glow, And A Vintage Library Ladder Stool
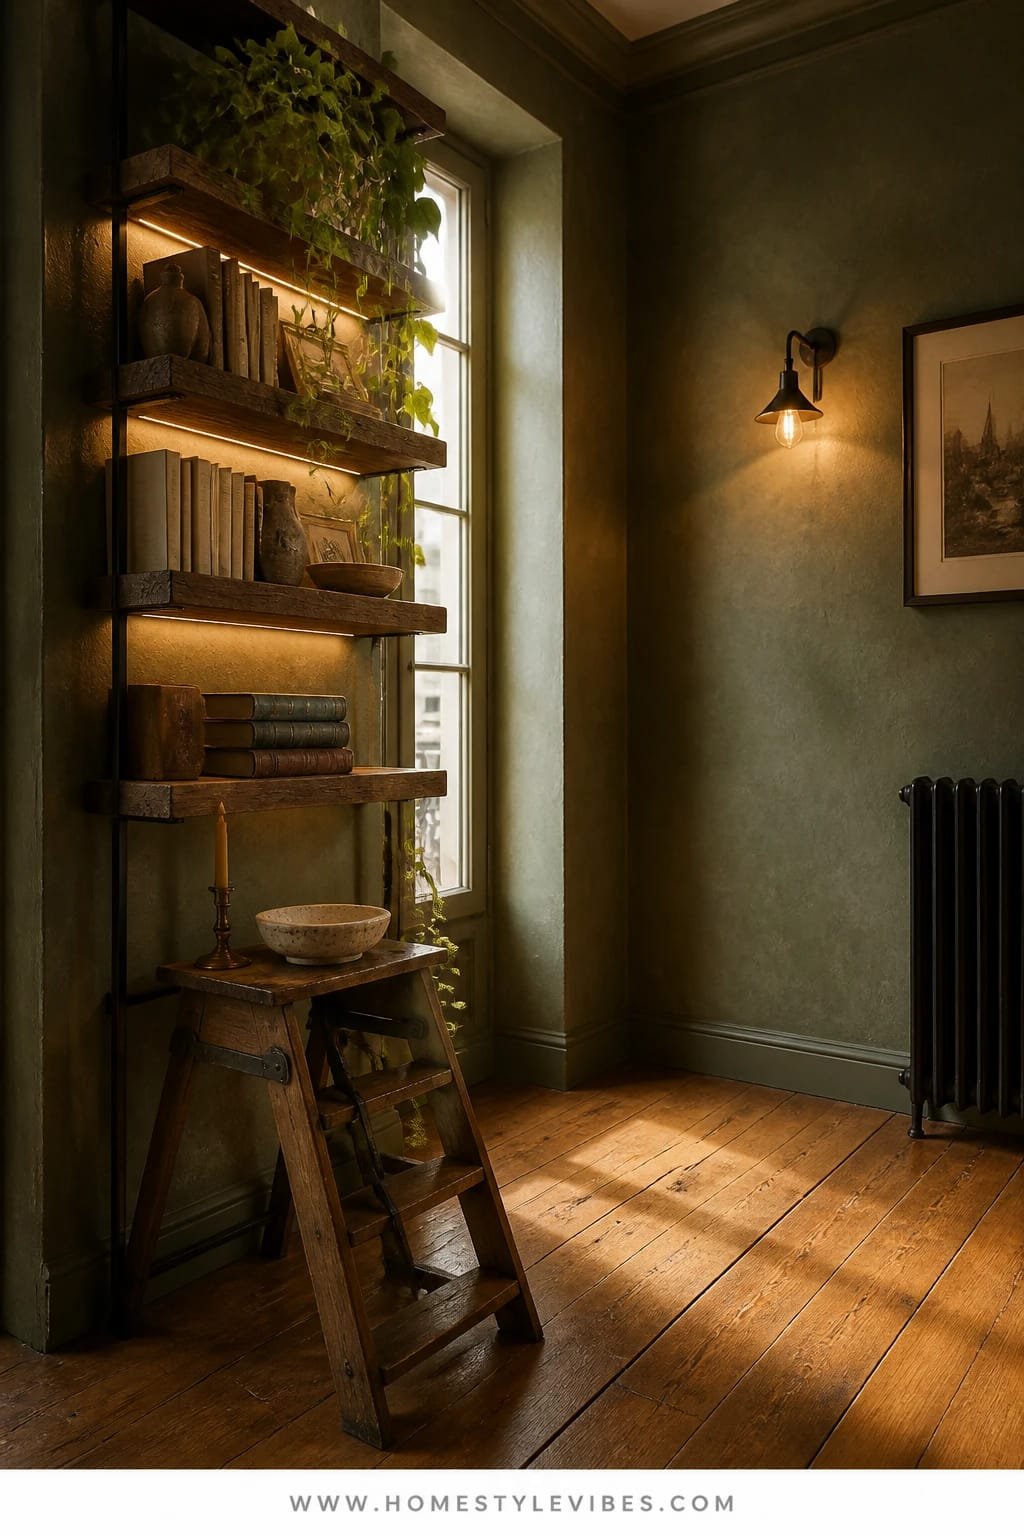
You want a vintage-inspired reading nook that doubles as a tiny book sanctuary, but floor space is tight. Shelves swallow rooms when done wrong. This setup solves the puzzle: slim reclaimed oak shelves mounted tight, a warm Edison-style glow to soften the wood, and a vintage ladder stool that doubles as seating or a side table. It reads like a Parisian apartment library—compact but full of soul.
In day-to-day life, this works because shelves handle storage vertically while the stool keeps things flexible. Lighting tucked under the lowest shelf with a plug-in strip creates a subtle halo that sets off book spines and throws a warm wash over your reading perch. Materials matter: reclaimed oak, blackened steel brackets, and linen-bound books. Cameras love the repetition of shelf lines and the warm highlight under the lowest ledge.
Budget variation: pine shelves with a reactive stain to fake age; use matte black brackets. Small-space tweak: three shelves instead of five and a collapsible ladder stool. Renter fix: use leaning ladder shelves against the wall and a clip-on light behind the vertical support for that halo effect.
Budget Breakdown:
- Reclaimed oak planks (3–5 shelves): $150–$450
- Metal brackets: $40–$140
- Edison-bulb table lamp or LED strip: $30–$120
- Vintage ladder stool: $60–$180
- Linen cushion for stool: $25–$60
- Wall anchors and hardware: $20–$40
Total Estimated Cost: $325 – $990
Best For: Tiny alcoves, renters using leaning shelves, collectors who like to display and actually read their books.
Key Design Elements:
- Main materials: reclaimed oak, blackened steel, linen
- Color palette: honey oak, soot black, ecru, ochre accent
- Lighting strategy: under-shelf glow plus one Edison bulb on the stool
- Furniture silhouettes: slim shelves, compact ladder stool, low-profile cushion
- Texture layers: linen-bound books, clay pot, rough wood grain
- Accent details: brass bookends, framed bookplate, dried olive branches
Why This Reads High-End: Repetition and restraint. Identical shelf thicknesses, consistent bracket spacing, and a single warm light source. The discipline makes it feel custom.
How To Recreate This Look:
- Measure shelf height to fit your tallest books plus 1–2 inches of air.
- Mount shelves with level precision; keep bracket spacing symmetrical.
- Add a warm LED strip under the lowest shelf or place an Edison lamp on the stool.
- Stack books in thirds: vertical, horizontal, negative space for breathing room.
- Top with a clay pot and olive branches to soften the lines.
Don’t Do This: Stuff every inch with books. Leave 20–30 percent open space so the nook feels curated, not crammed.
Pro Styling Tip: Turn a few books spine-in for tonal variation in photos—creamy pages add softness against dark brackets.
A friend of mine spent weeks agonizing over the perfect “book wall” paint color before realizing the issue wasn’t the paint—it was clutter. We edited, added an LED strip under the shelf, and used a ladder stool for stacking the current reads. Five minutes later, the wall stopped arguing with itself.
Here’s the mindset shift: your cozy reading nook isn’t an Instagram set. It’s where your shoulders drop. Start with one strong material and one intentional light source. Texture will do the rest.
Quick Checklist
- Choose one dominant vintage material (walnut, leather, cane, limewash, oak)
- Commit to a single primary light source at 2700K
- Angle the chair and pull it off the wall for depth
- Use one statement piece (tufted chair, wingback, rocker, ladder stool)
- Add one small side surface for tea and a book
- Layer one rug that contrasts with the chair material
- Limit metals to one finish for cohesion
- Style two book stacks (one vertical, one horizontal)
- Include one natural element (dried stems, olive branch, clay pot)
- Leave 20–30 percent negative space so the corner can breathe
Frequently Asked Questions
How do I build a vintage-inspired reading nook on a tight budget?
Pick one hero element—chair or wall treatment—and let everything else be simple. Use peel-and-stick wood, thrift a solid chair to reupholster, and rely on a great plug-in lamp. Texture and warm light make the biggest visual difference for the least money.
My corner is tiny. Which design from above works best for small spaces?
Go with the limewash + slipper chair setup or the reclaimed shelves with a ladder stool. Both use narrow footprints and keep visual weight light while still hitting that vintage note.
I rent and can’t drill into walls. Any renter-friendly alternatives?
Use leaning ladder shelves, plug-in sconces or picture lights, removable wallpaper or limewash-pattern decals, and lean art or mirrors instead of hanging. A skirted chair also hides cords so the corner looks finished without wall work.
How do I maintain leather or wood in a sunny reading nook?
Condition leather seasonally and rotate the chair a few inches every couple of months to avoid uneven fading. For wood, add UV film to windows or use sheers during peak hours. A 2700K bulb helps limit glare on pages and surfaces.
What’s the most common mistake when creating a cozy reading nook?
Flat lighting and too many small accessories. Keep one dominant light source and edit accents. The secret isn’t more stuff—it’s better materials and shadow play.
Conclusion
If one of these cozy reading nook ideas made you pause and picture yourself settling in—start there. Choose your hero material, pick a single light source, pull the chair off the wall, and add a tactile throw. You can build a vintage-inspired corner in a weekend, and it will feel like it’s always been part of your home.
The truth is, luxury in a nook comes from texture + lighting + restraint. Walnut against linen. Leather next to kilim. Candlelight licked across an antiqued mirror. Keep the palette tight and the details thoughtful, and the corner will stop trying so hard—and simply glow.
You’ve got this. Pick an idea, gather your pieces, and claim your corner. When the light hits just right and the room goes quiet, you’ll wonder why you waited so long to make space for the stories you love.