6 Cute DIY Garden Ideas Anyone Can Make This Weekend
You want a leafy little sanctuary that looks like a summer postcard. You hate the mess, the cost, and the “Where do I even start?” spiral. Picture this: dappled sunlight hitting warm wood, soft textures you can actually touch, herbs perfuming the air, and corners that finally look finished in photos. These 6 cute DIY garden ideas tackle the exact blocks—budget, time, and layout—so you can build a weekend-ready escape with style that reads high-end, not high-effort.
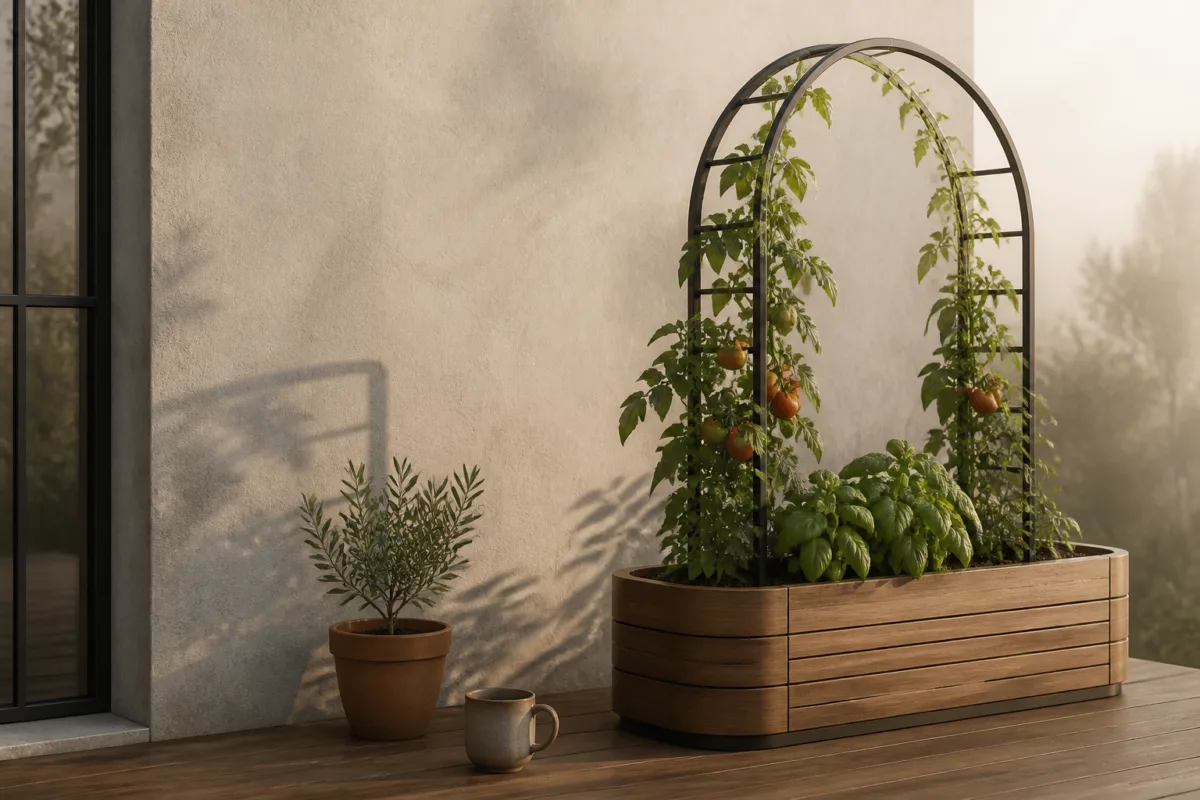
We’ll keep each project achievable: most under $150 and doable in a day or two. Expect specific color calls, texture pairings, and clever lighting that make your garden camera-ready. If you love settings that feel easy, real, and pin-worthy, you’re in the right spot. This vibe suits renters, small-space folk, and anyone who wants charm without a contractor.
1. Cedar Strip Raised Bed With Soft Dawn Light And Arched Trellis
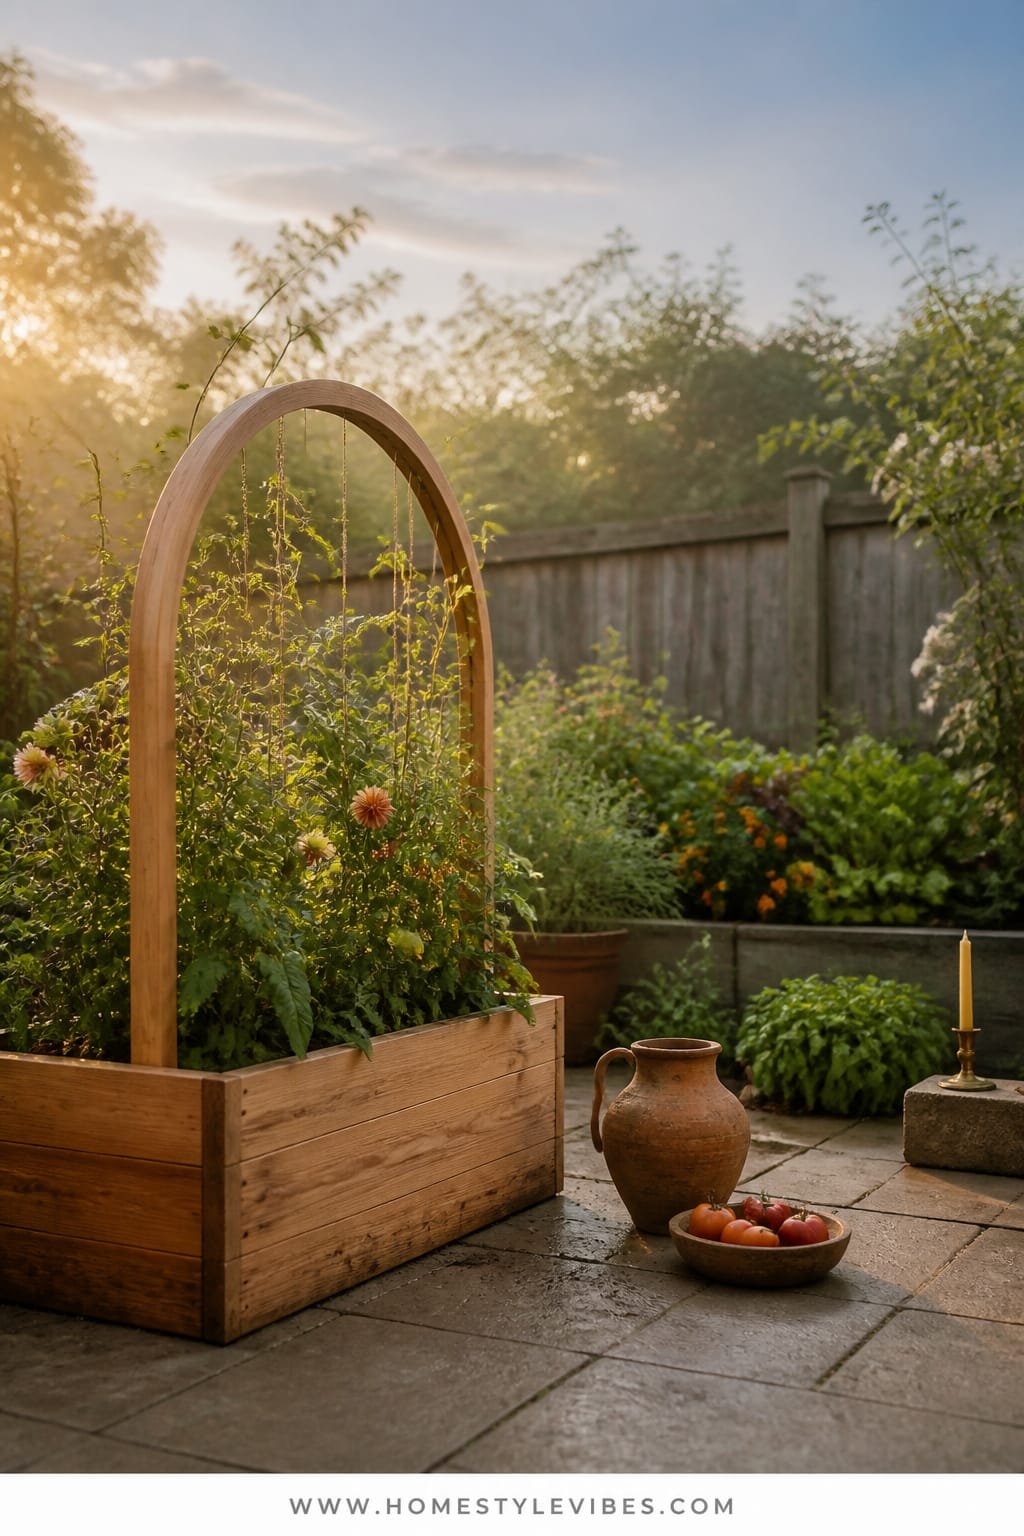
We’ve all been there: you want to grow tomatoes and dahlias, but your yard looks like a pile of pots had an argument. A cedar strip raised bed brings order, and the arched trellis adds that elegant curve that makes everything feel intentional. The mood reads slow-morning garden café—think misty air, dew on leaves, and a cup of something warm while basil brushes your wrist.
This works in real homes because cedar resists rot, the footprint is flexible, and the arched trellis creates instant vertical drama without feeling heavy. The soft dawn light through the arch throws pretty shadows on the cedar slats. Materials stay honest: warm cedar boards, matte black screws, a premade arch or PVC bending into a simple hoop, and jute twine for training vines. Photos pop thanks to the curve against the linear boards, plus the warm wood against cool greens.
Try it two ways: go budget with cedar fence pickets and a DIY PVC arch; upgrade to thick cedar posts, a powder-coated steel arch, and brass corner brackets for that boutique feel. Small space? Make a half-length bed and mount a single hoop trellis on the back side against a fence. Renter-friendly swap: build a freestanding bed liner with landscape fabric; skip digging.
Budget Breakdown:
- Cedar boards or pickets: $60–$140
- Corner brackets/screws (black or brass): $15–$40
- Arched trellis (PVC or metal): $20–$120
- Landscape fabric + soil: $35–$90
- Jute twine + plant clips: $6–$12
Total Estimated Cost: $136 – $402
Best For: Sunny strips along fences, townhouse patios, first-time growers who want tidy structure and vertical interest. Works spring through late fall.
Key Design Elements:
- Main materials: Cedar, matte black hardware, natural jute
- Color palette: Honey wood, leafy greens, soft charcoal accents
- Lighting strategy: Morning sun for gentle leaf glow; LED stake lights for low evening sparkle
- Furniture silhouettes: Curved arch, clean-lined rectangular bed
- Texture layers: Ribbed cedar grain, twine, soft soil, leafy gloss
- Accent details: Brass labels for plants, terracotta pots tucked at corners
How To Recreate This Look:
- Start with a rectangular bed footprint marked by stakes and string; aim for 3–4 feet wide so you can reach center plants.
- Add cedar boards to form the frame; secure with corner brackets and corrosion-resistant screws.
- Layer landscape fabric inside; fill with a high-quality soil/compost mix.
- Install an arched trellis at one long side; secure feet to the bed or sink into the ground.
- Style with jute twine for training vines, plant markers in brass, and two terracotta pots at the front corners for depth.
Why This Looks Expensive: The curve-meets-rectangle contrast reads custom, and consistent metal finishes (matte black or brass) keep it cohesive. Cedar’s warm tone patinas beautifully, so it looks curated even when it weathers.
Watch Out: Don’t oversize the bed. Anything wider than 4 feet becomes unmanageable and messy. And avoid mismatched hardware finishes—pick a lane and stick to it.
Pro Styling Tip: Shoot at golden hour with the sun behind the trellis; let vine shadows stripe the cedar for editorial depth.
2. Terracotta Stacked Fountain With Amber Evening Glow And Round Basin

It’s that one corner that always feels off—too empty, too quiet, too… waiting for something. A stacked terracotta fountain brings a gentle soundscape and the glow of water in low light. The mood leans Mediterranean courtyard: dusty terracotta, flickering candles, and the soft burble that makes conversations linger.
The reason this works in normal backyards is simple: terracotta is affordable, easy to find, and forgiving. A solar or plug-in pump runs quietly, and you can assemble it in an afternoon. Light plays a major role here; water reflects warm bulbs, making the space feel cozy after sunset. Textures layer beautifully: porous clay, glossy water, and smooth river stones. Photographs love the circular silhouette because it creates a focal target your eye lands on instantly.
Variations help you flex: on a budget, use thrifted terracotta and a basic pump; upscale with oversized bowls and a concealed reservoir. For small patios, choose a single-tier bowl atop a plant stand with a tiny recirculating pump. Renter-friendly? Place it on a rubber mat and run an outdoor extension neatly along the baseboard.
Key Design Elements:
- Main materials: Terracotta bowls, submersible pump, river stones
- Color palette: Clay orange, taupe stones, warm amber light
- Lighting strategy: String lights overhead plus two lanterns beside the basin
- Furniture silhouettes: Round basin base with smaller round tier
- Texture layers: Matte clay, glossy water, smooth stones, woven lanterns
- Accent details: Olive or rosemary in simple clay pots flanking the fountain
Budget Breakdown:
- Terracotta bowls (2–3 sizes): $40–$120
- Submersible or solar pump: $20–$85
- River stones: $10–$25
- Lanterns + warm LED candles: $25–$60
- Rubber mat/tray (optional): $10–$20
Total Estimated Cost: $105 – $310
Best For: Patio corners, balcony nooks with at least a 24-inch footprint, evening lounging zones.
How To Recreate This Look:
- Start with the largest terracotta bowl as the base; seal the drainage hole with a rubber stopper if needed.
- Add the pump inside with the cord discreetly routed; stack a smaller bowl above using flat stones to stabilize.
- Layer river stones around the pump to hide equipment; fill with water and test the flow.
- Install two lanterns or solar stakes around the fountain for amber glow.
- Style with two matching clay pots of herbs to frame the scene.
Why This Feels Designer: Repeating the round shape across bowls, basin, and stones creates harmony. Keeping the color family tight—clay, taupe, and warm amber—feels editorial, not random.
One Thing To Avoid: Don’t mix cool blue LEDs with warm amber lanterns. Pick one temperature; clashing light makes the setup feel cheap.
Pro Styling Tip: Place a black garden mat underneath to add contrast; it frames the terracotta in photos and keeps drips contained.
Keep scrolling—what’s coming next is a little wild, a little cottagecore, and it smells incredible.
Remember, this isn’t about recreating a showroom. It’s about building a garden that actually reflects how you relax. If one idea lights you up, start there and keep the rest for next month.
3. Limewashed Pallet Herb Wall With Dappled Afternoon Light And Copper Rail
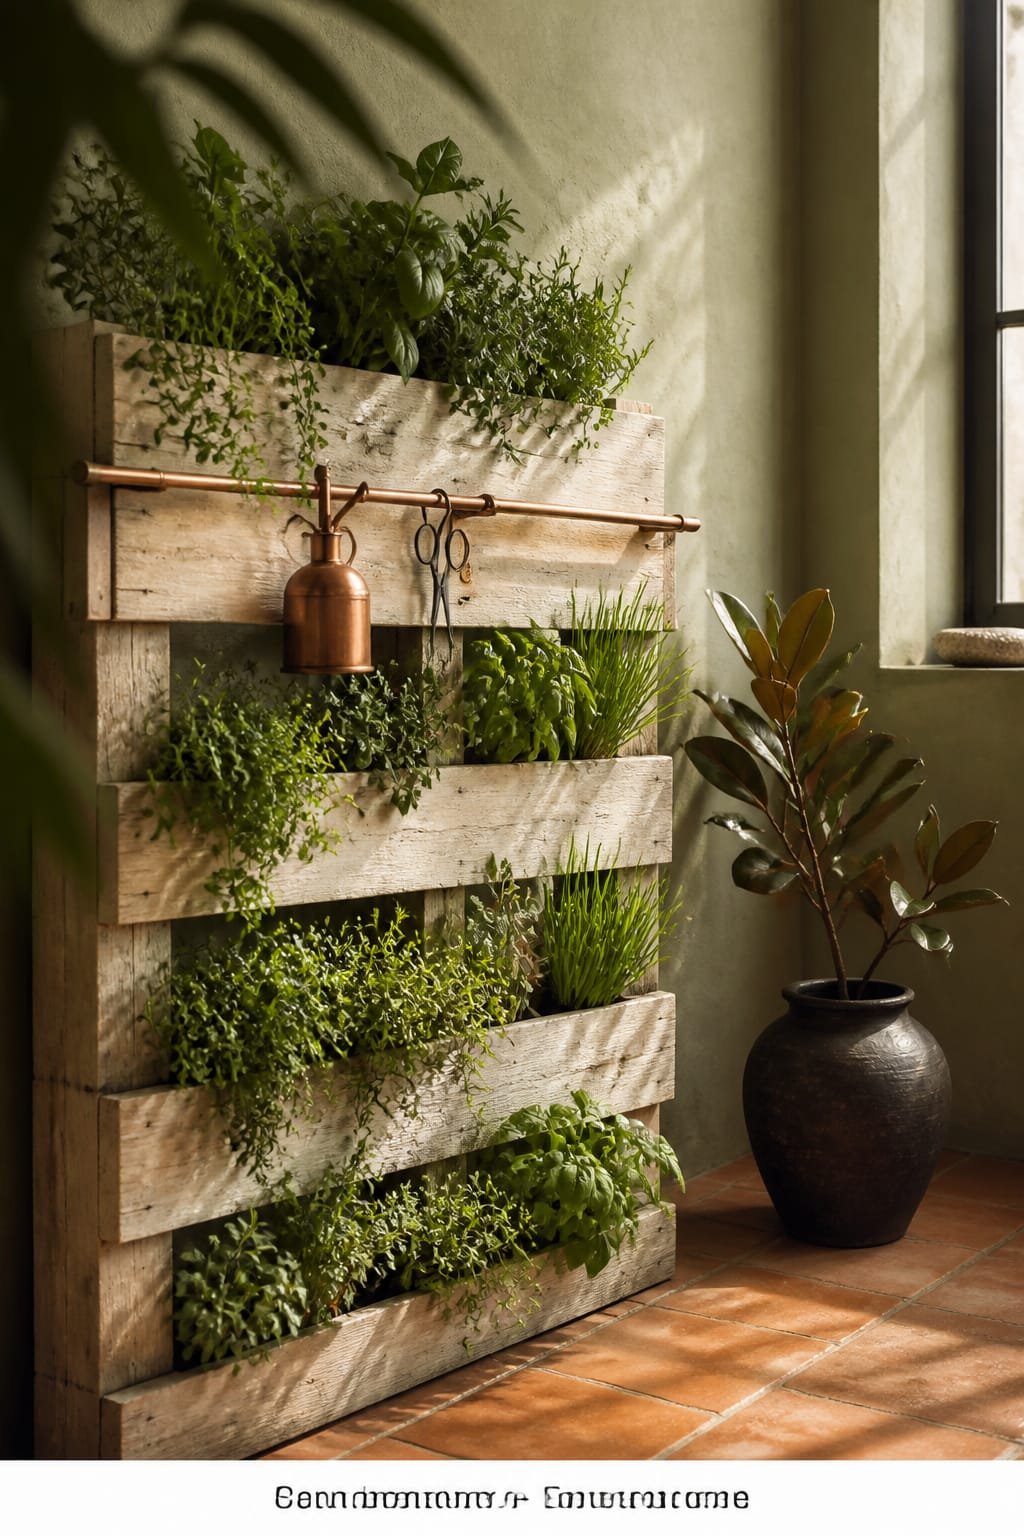
You’ve tried the cute mismatched herb pots… but they still look scattered and small. A vertical herb wall turns chaos into a living tapestry. The mood channels cozy French pantry meets backyard bistro: limewashed texture, leafy edges, and little copper highlights that catch the sun.
This setup behaves well in small spaces and rentals because pallets are lightweight, wall-mount or freestanding, and plant weight stays near the ground. Limewash adds instant patina, even if the wood started plain. Dappled afternoon light creates rich leaf shadows that photograph like a magazine—layered and soft. Materials sing: limewash, herb greens, brushed copper, and some matte-black screws for quiet structure.
Variations keep it flexible: on a tight budget, use a salvage pallet and leftover masonry paint watered down for a faux limewash; for a deeper look, go true limewash and seal with a breathable exterior sealant. Renter-friendly? Lean the pallet against the wall with rubber bumpers and anchor with discreet wire to a deck rail; no drilling into brick. Darker version: charcoal-wash the pallet and use brass S-hooks for drama.
Budget Breakdown:
- Wood pallet or slat panel: $0–$35
- Limewash or thinned masonry paint: $18–$45
- Copper rail + S-hooks or pipe set: $25–$60
- Planter tins or terracotta cups: $24–$60
- Herbs (6–10 plants): $18–$40
Total Estimated Cost: $85 – $240
Best For: Balconies and compact patios, cooks who snip herbs daily, renters who want a feature without a remodel.
Key Design Elements:
- Main materials: Limewash, pallet wood, copper rail
- Color palette: Soft putty white, verdant greens, polished copper
- Lighting strategy: Position where late afternoon light kisses foliage
- Furniture silhouettes: Vertical grid, slim rail, rounded planter cups
- Texture layers: Chalky limewash, rough wood grain, glossy herb leaves
- Accent details: Copper labels, woven basket for garden scissors
How To Recreate This Look:
- Start by sanding rough spots on the pallet; wipe away dust.
- Add a limewash layer—thin, streaky strokes look charming; let wood show through.
- Install a copper rail near the top; use S-hooks to hang planters evenly.
- Layer herbs in descending heights; keep thyme and oregano higher, basil at mid-level, mint in a contained pot low.
- Style with copper labels, a tiny watering can on the base, and a basket hook for shears.
Why This Reads High-End: The copper line acts like jewelry on a casual outfit. Paired with limewash patina, it suggests collected-over-time rather than rushed DIY.
The Most Common Mistake: Overcrowding. Leave negative space so the wall breathes. If every slat holds a pot, you’ll lose the rhythm that makes it photogenic.
Pro Styling Tip: For photos, mist leaves lightly; tiny droplets catch light and make greens look lush and dimensional.
4. Crushed Gravel Dining Pad With Cool Twilight String Lights And Concrete Bench
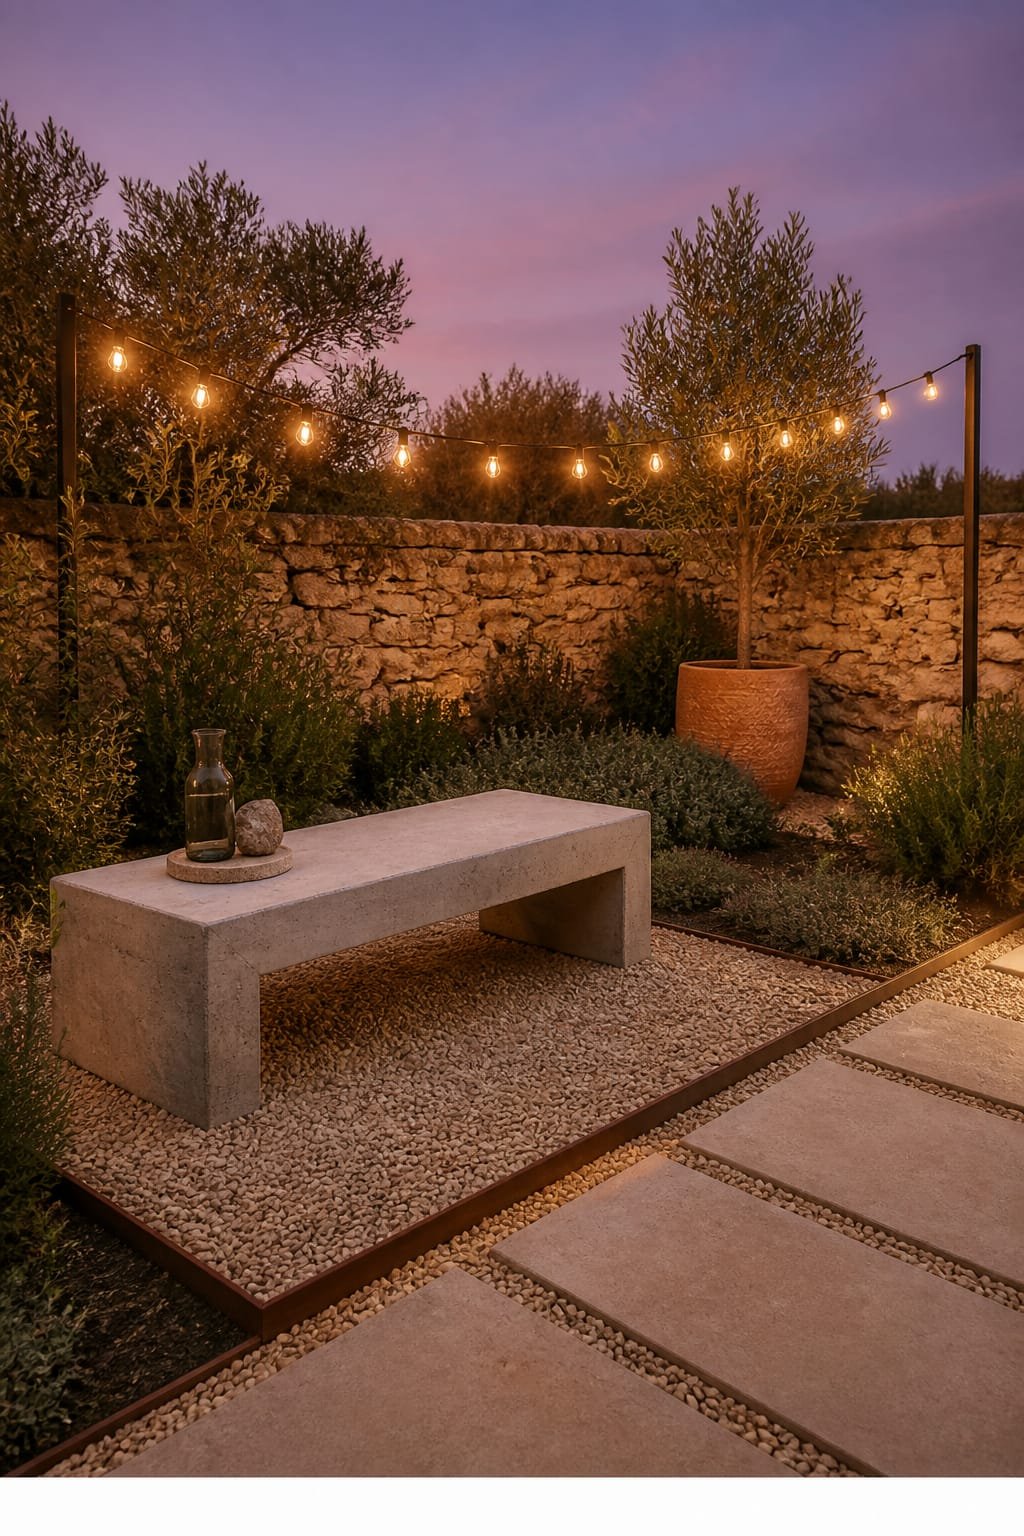
Let’s be honest: the dining set on the uneven lawn never feels right. Chairs wobble. Drinks spill. A crushed gravel pad solves it fast and looks chic, especially under cool twilight string lights. The vibe is modern Mediterranean: crunchy underfoot, olive-toned foliage nearby, and a monolithic concrete bench that anchors everything.
Why it works: gravel is budget-friendly, drains well, and installs in a day. A simple timber border or steel edging keeps it neat. Concrete—real or faux—adds visual weight that reads contemporary. Photographically, the pale gravel bounces evening light up onto faces, and string lights create a halo effect. Textures contrast: gritty gravel, smooth bench, soft linens.
Variations help every yard: small space version is a 6×8-foot pad with a café set; upgrade with a cast-in-place bench and integrated planter. Renter option: temporary paver mats laid over landscape fabric, then a thin gravel layer—easy to lift later. Cooler palette? Choose bluish gravel and stainless accents; warmer palette? Pick buff gravel and aged brass lights.
Budget Breakdown:
- Crushed gravel (½–1 yard): $45–$110
- Edging (timber or steel): $40–$120
- Landscape fabric + stakes: $25–$45
- String lights + poles or wall hooks: $30–$95
- Concrete bench (precast or DIY top over block base): $80–$220
Total Estimated Cost: $220 – $590
Best For: Entertaining zones, side yards needing purpose, renters who need a temporary but polished dining area.
Key Design Elements:
- Main materials: Crushed gravel, concrete, metal edging
- Color palette: Soft gray, olive green, linen white
- Lighting strategy: Overhead string lights at a 10–12-foot span with warm-cool balance around 2700–3000K
- Furniture silhouettes: Solid bench, slim bistro chairs, round or rectangular table
- Texture layers: Gritty gravel, smooth concrete, nubby linen runner
- Accent details: Olive tree in a clay pot, a black lantern cluster on the bench end
How To Recreate This Look:
- Start by marking the pad with spray paint; dig down 2–3 inches to level.
- Add landscape fabric; secure with stakes to prevent weeds.
- Install edging, then pour and rake in gravel until level and compacted.
- Install string light poles or hooks; drape lights in soft swags.
- Style with a concrete bench on one side, café chairs opposite, a linen runner, and one large potted olive as the scene-setter.
Why This Looks Intentional: The bench acts as a visual anchor, so it doesn’t read as “random table in the yard.” Edge detailing and consistent light temperature make it feel finished.
Don’t Do This: Don’t skip compaction. Loose gravel under a table is chaos. Compact with a tamper or rental plate compactor for a stable, photo-ready surface.
Pro Styling Tip: For photos after dusk, dim other lights so the string glow becomes the star and the gravel softly reflects faces.
Breather moment: If your brain’s buzzing, pick one idea that makes you smile and pin it. You don’t need all six to make magic. One polished zone beats five half-finished corners, always.
5. Reclaimed Brick Path With Golden Hour Side Light And Wrought-Iron Gate Accent
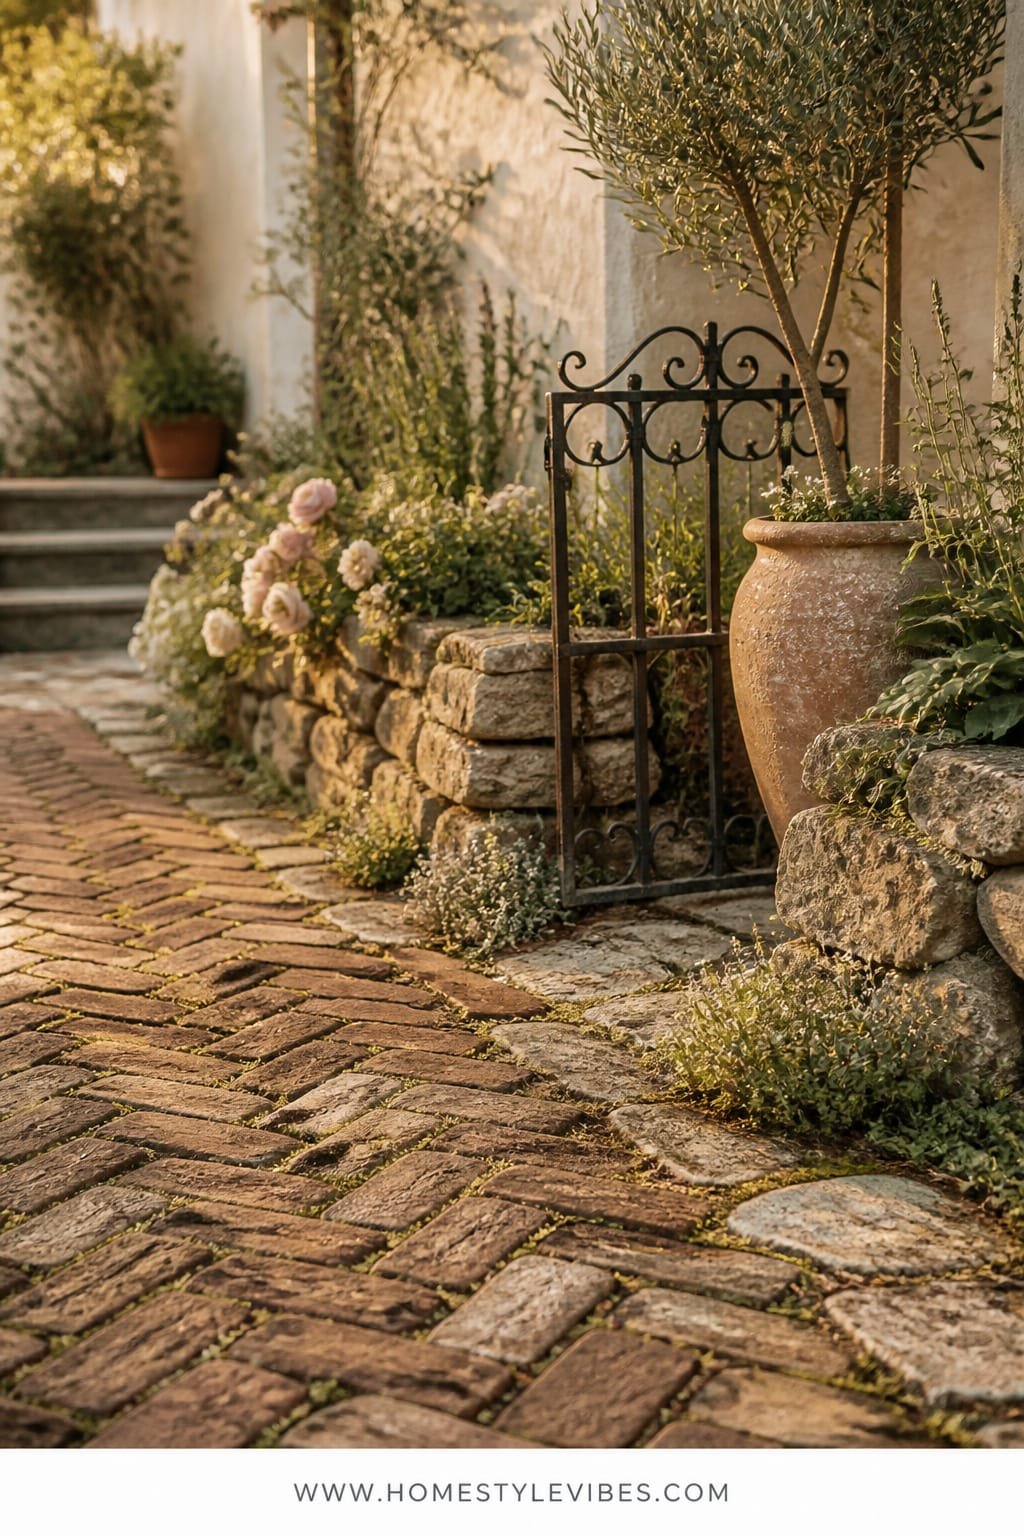
You love the idea of a charming cottage path. You hate the patchy grass and footprints after rain. A reclaimed brick path fixes the mud and adds instant soul. Pair it with a small wrought-iron gate panel (even as décor, not functional) and watch the whole garden feel like it has a story.
This approach is practical and forgiving. Reclaimed brick stands up to weather, looks good even when imperfect, and loves side lighting in the late afternoon—those micro-shadows between bricks create depth that cameras adore. Materials bring romance: aged red clay, soft moss, a black iron accent, and maybe a touch of thyme creeping between bricks for scent.
Budget vs. luxe? Budget: Craigslist or salvage yard bricks and pea gravel bedding. Luxe: herringbone layout with steel edging and a custom mini iron gate panel anchored to a post. Small yard? Build a 6–10-foot “moment path” leading to a pot or bench. Renter-friendly: Create a brick runner on sand with no mortar; easy to lift later.
Key Design Elements:
- Main materials: Reclaimed brick, sand or fines, wrought iron accent
- Color palette: Weathered red, charcoal, soft green
- Lighting strategy: Side light in late afternoon; a low garden uplight on the iron panel
- Furniture silhouettes: Curved or straight path with a petite gate panel for charm
- Texture layers: Rough brick faces, powdery sand, delicate moss
- Accent details: Thyme or Irish moss in joints, a simple black mailbox-style planter nearby
Budget Breakdown:
- Reclaimed brick (60–120 units): $80–$240
- Sand or stone fines: $25–$60
- Steel edging or timber: $30–$110
- Wrought-iron panel (decorative): $45–$150
- Groundcover plugs (thyme/moss): $12–$40
Total Estimated Cost: $192 – $600
Best For: Entry paths, side yard cut-throughs, cottage-style homes, anyone craving old-world charm with low effort.
How To Recreate This Look:
- Start by laying out a garden hose to test the curve or line; adjust until it feels natural.
- Add a 2–3-inch sand bed; level and lightly moisten.
- Layer bricks in your chosen pattern; tap level with a rubber mallet.
- Install edging to lock everything in; brush sand into joints.
- Style with a small wrought-iron panel at a turn or end point; plant thyme between bricks for scent and softness.
Why This Looks Expensive: Pattern + patina. Herringbone or basketweave layouts elevate reclaimed materials, and that iron accent reads custom, even if it’s from a flea market.
Watch Out: Don’t lay bricks on uneven soil. Take time to level the sand bed; unevenness shows up instantly in photos and underfoot.
Pro Styling Tip: Snap photos during golden hour from a low angle at the path’s start; the long raking light exaggerates texture and makes the joint greenery glow.
6. Slatted Cedar Lounge Nook With Warm Lantern Light And Hanging Egg Chair
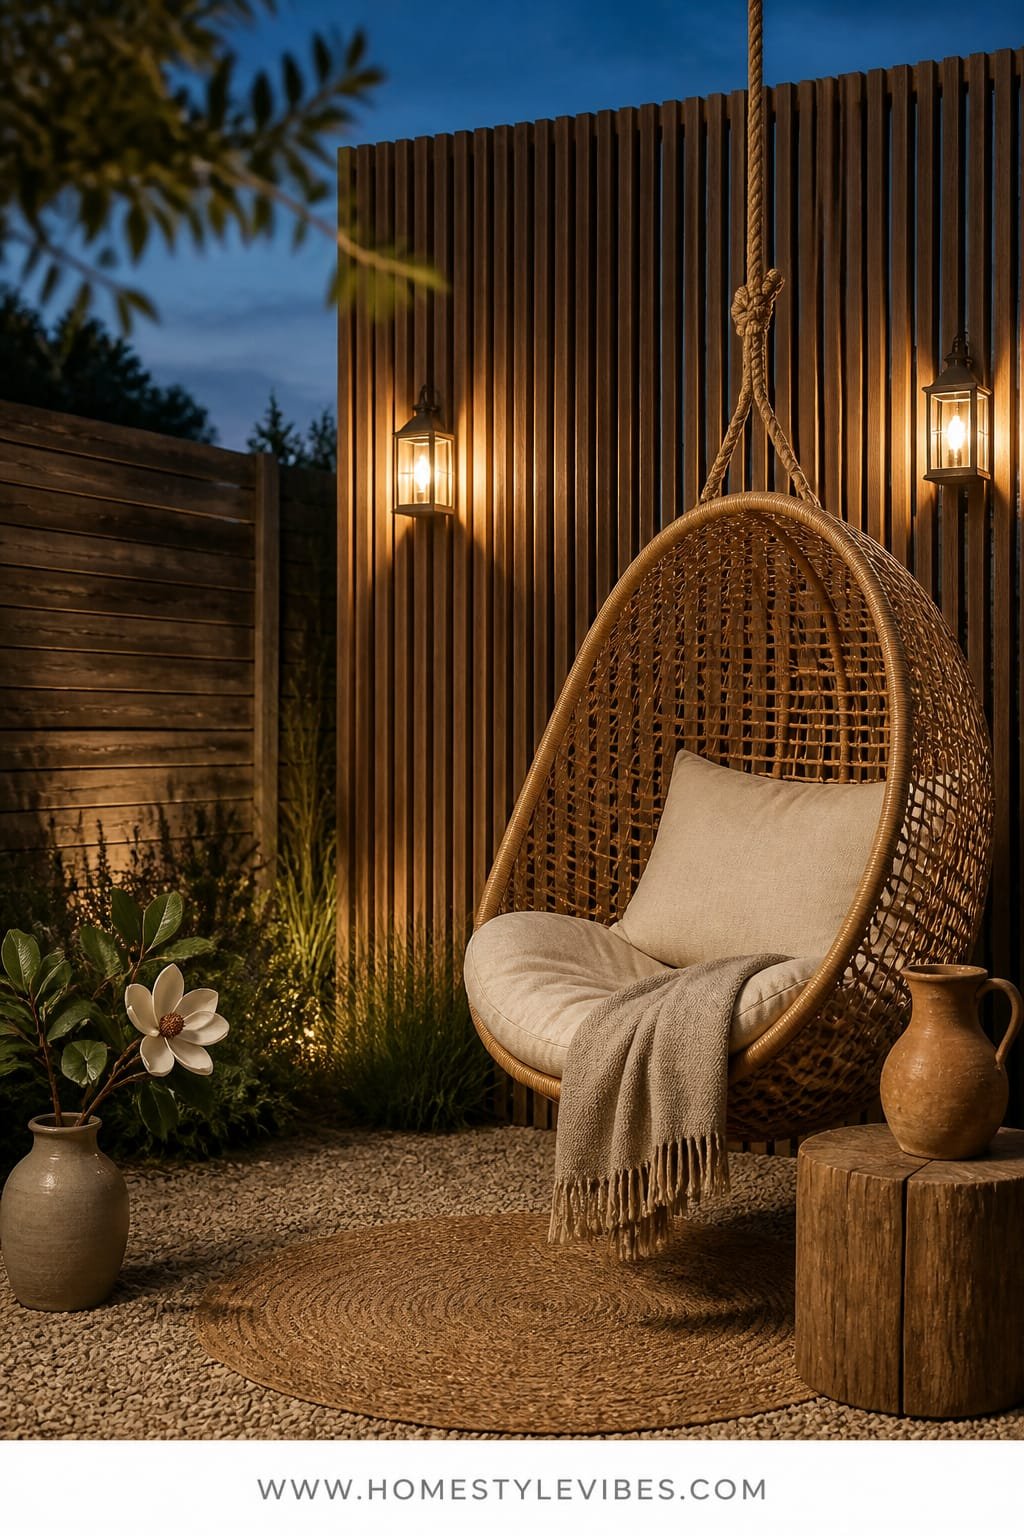
I’ll admit it: I avoided seating nooks because I worried they’d look like an afterthought. Then I built a slatted cedar wall and hung a single egg chair, and… I basically lived there all summer. It’s the cozy-casual mood you’ll never tire of: cedar slats, woven textures, and lantern light casting soft ovals at night.
This is renter- and small-space friendly because the slat wall can be freestanding or mounted to fence posts. The hanging chair becomes a sculptural focal point that eats less footprint than a sofa. Lighting matters a lot here; a trio of lanterns at different heights creates depth and soft warmth. Materials bring balance: warm cedar, black or natural rattan chair, neutral cushions, and a low ceramic side table for your drink.
Variations are easy. Budget: pine slats with outdoor stain, a stand-mounted egg chair, and battery lanterns. Luxe: tight-gap cedar, powder-coated chain, and smart outdoor lanterns you can dim from your phone. Darker mood? Charcoal-stained slats with a cream cushion for contrast. Small balcony? Half-width slat panel behind a single chair with one lantern and a plant stand.
Budget Breakdown:
- Cedar or pine slats + 2×4 frame: $85–$220
- Hanging egg chair + hardware or stand: $120–$380
- Lantern trio (LED): $35–$110
- Outdoor cushion + throw: $25–$80
- Side table (ceramic or concrete): $35–$90
Total Estimated Cost: $300 – $880
Best For: Reading nooks, small patios, shaded corners that need a visual anchor and evening ambiance.
Key Design Elements:
- Main materials: Cedar slats, woven rattan, ceramic side table
- Color palette: Honey wood, black or natural rattan, creamy textiles
- Lighting strategy: Three lanterns staggered at knee, seat, and eye level for layered glow
- Furniture silhouettes: Curved egg chair, vertical slat wall, drum side table
- Texture layers: Linear wood grain, woven chair, soft cushion, nubby throw
- Accent details: A potted fern for softness, brass hooks on the slat wall for a sun hat
How To Recreate This Look:
- Start by building a simple 2×4 frame; attach cedar slats with consistent spacing.
- Add a top rail with a sturdy eye bolt if you’re hanging the chair; otherwise, position a chair stand in front.
- Layer lanterns: floor lantern to one side, mid-height lantern on a hook, and a smaller one on the side table.
- Install a weatherproof rug to define the zone and catch shadows nicely.
- Style with a plush cushion, a throw for texture, and a single large plant to soften corners.
Why This Feels Designer: Vertical slats create a backdrop that frames the chair like art. Repeating circles—the chair curve and drum table—adds quiet harmony that feels curated.
One Thing To Avoid: Don’t cram too many pillows. One lumbar and one square is plenty; extra cushions make it fussy and steal the chair’s sculptural vibe.
Pro Styling Tip: Angle the chair 10–15 degrees off square. In photos, a slight angle reads relaxed and shows the sling curve better than a straight-on shot.
Perspective check: perfect isn’t the goal. Done and lovely beats perfect and unfinished. If you only build the slat wall this weekend and add the chair next paycheck, that still counts and still looks great.
Quick Checklist
- Cedar boards for raised bed
- Arched trellis or PVC hoop
- Terracotta bowls in graduated sizes
- Submersible or solar pump
- Limewash or thinned masonry paint
- Copper rail and S-hooks
- Crushed gravel and edging
- String lights rated for outdoors
- Reclaimed bricks and sand
- Wrought-iron accent panel
- Cedar slats and 2×4 frame
- Hanging egg chair or stand
- Lanterns with warm LEDs
- Landscape fabric and stakes
- River stones for fountain concealment
- Herb plants and copper labels
- Olive or rosemary in clay pots
- Linen runner and outdoor cushions
- Side table (ceramic or concrete)
- Rubber mat for fountain base
Frequently Asked Questions
How much should I budget to try just one of these 6 cute DIY garden ideas?
Plan on $120–$300 for a single project. The herb wall and fountain usually land on the lower end; the slatted lounge nook can climb higher depending on the chair. Start with one idea and add pieces slowly.
I rent—can I do any of this without drilling or damaging surfaces?
Yes. The herb wall can lean against a railing with bumpers, the gravel pad can sit on fabric and lift easily later, and the egg chair works with a freestanding stand. Use removable hooks for string lights and place the fountain on a rubber mat.
My patio is tiny. Which idea works best for small spaces?
The limewashed pallet herb wall and the terracotta single-basin fountain are perfect for tight balconies. The key is vertical storage of plants and one contained focal point. Keep the palette tight so it feels calm, not cluttered.
What’s the easiest idea for total beginners worried about tools?
The terracotta stacked fountain needs the fewest tools—mostly a pump, bowls, and stones. The herb wall comes next; you’ll need a drill for the copper rail, but it’s straightforward.
How do I keep these looking good with minimal maintenance?
Pick durable materials and set reminders. Wipe copper monthly, top up fountain water weekly, sweep gravel pads after wind, and trim herbs every 1–2 weeks. Consistent light maintenance beats seasonal overhauls.
Conclusion
Here’s the truth: a beautiful garden isn’t about more stuff; it’s about clear focal points, honest materials, and light that flatters. Choose one of these 6 cute DIY garden ideas and commit to it this weekend. A single polished corner—like a cedar-raised bed with that soft arch or a stacked terracotta fountain—can shift the entire mood of your home.
Texture, lighting, restraint. That trio builds quiet luxury outside. Let cedar age, keep metals consistent, and aim for a warm glow at dusk. You’ll be amazed how finished everything feels when you stop at “enough.”
Take a breath, grab your list, and start. You’re absolutely capable—and your garden is about to prove it. And FYI, when you hear that first evening burble from the fountain or cut basil from your wall, you’ll know it was worth every screw and sprinkle of gravel. Seriously.
About the Author

Krisztina P.Rendes, Founder of Home Style Vibes
Founder of Home Style Vibes
Krisztina Puskásné Rendes created Home Style Vibes as a cozy-modern lifestyle space where homemaking meets inspiration. Her goal is to help women create beautiful, organized, and peaceful homes they truly love — without overwhelm. You’ll find here heart-driven content on home decor, cleaning tips, easy family recipes, organization and decluttering, DIY home projects, plants, and seasonal ideas — all designed to bring more calm, comfort, and style into everyday life.