4 Mailbox Flower Bed Ideas That Instantly Boost Your Home’S Curb Appeal Now
You want a front yard that stops cars mid-scroll on Zillow and makes your mail carrier smile. You hate that scraggly patch of dirt around the mailbox that collects weeds and guilt. You want sunlit movement, lush texture, and that “someone who loves their home lives here” energy—but watering schedules, plant overwhelm, and a mailbox that leans like it’s seen some things keep getting in the way. These four mailbox flower bed ideas fix that exact frustration with photogenic layers, super-manageable care, and a clear plan you can finish in a weekend—on a budget under $500 per design if you shop smart.
Imagine velvety foliage brushing your ankles, low glints of brass catching evening sun, and blooms that look fresh even when you forgot to water for two days. We’ll build curb appeal that feels intentional from the street and even better up close, with real-world tips for light, plant spacing, and materials your HOA will actually approve. Each idea comes with a budget breakdown, styling blueprint, and small-space variations, so you can pick one and be done. These mailbox flower beds are wildly photogenic, Pinterest-friendly, and perfect for anyone who wants a mini front-yard “wow” that doesn’t hijack your entire Saturday.
1. Soft Cottage Curve With Lavender Breeze
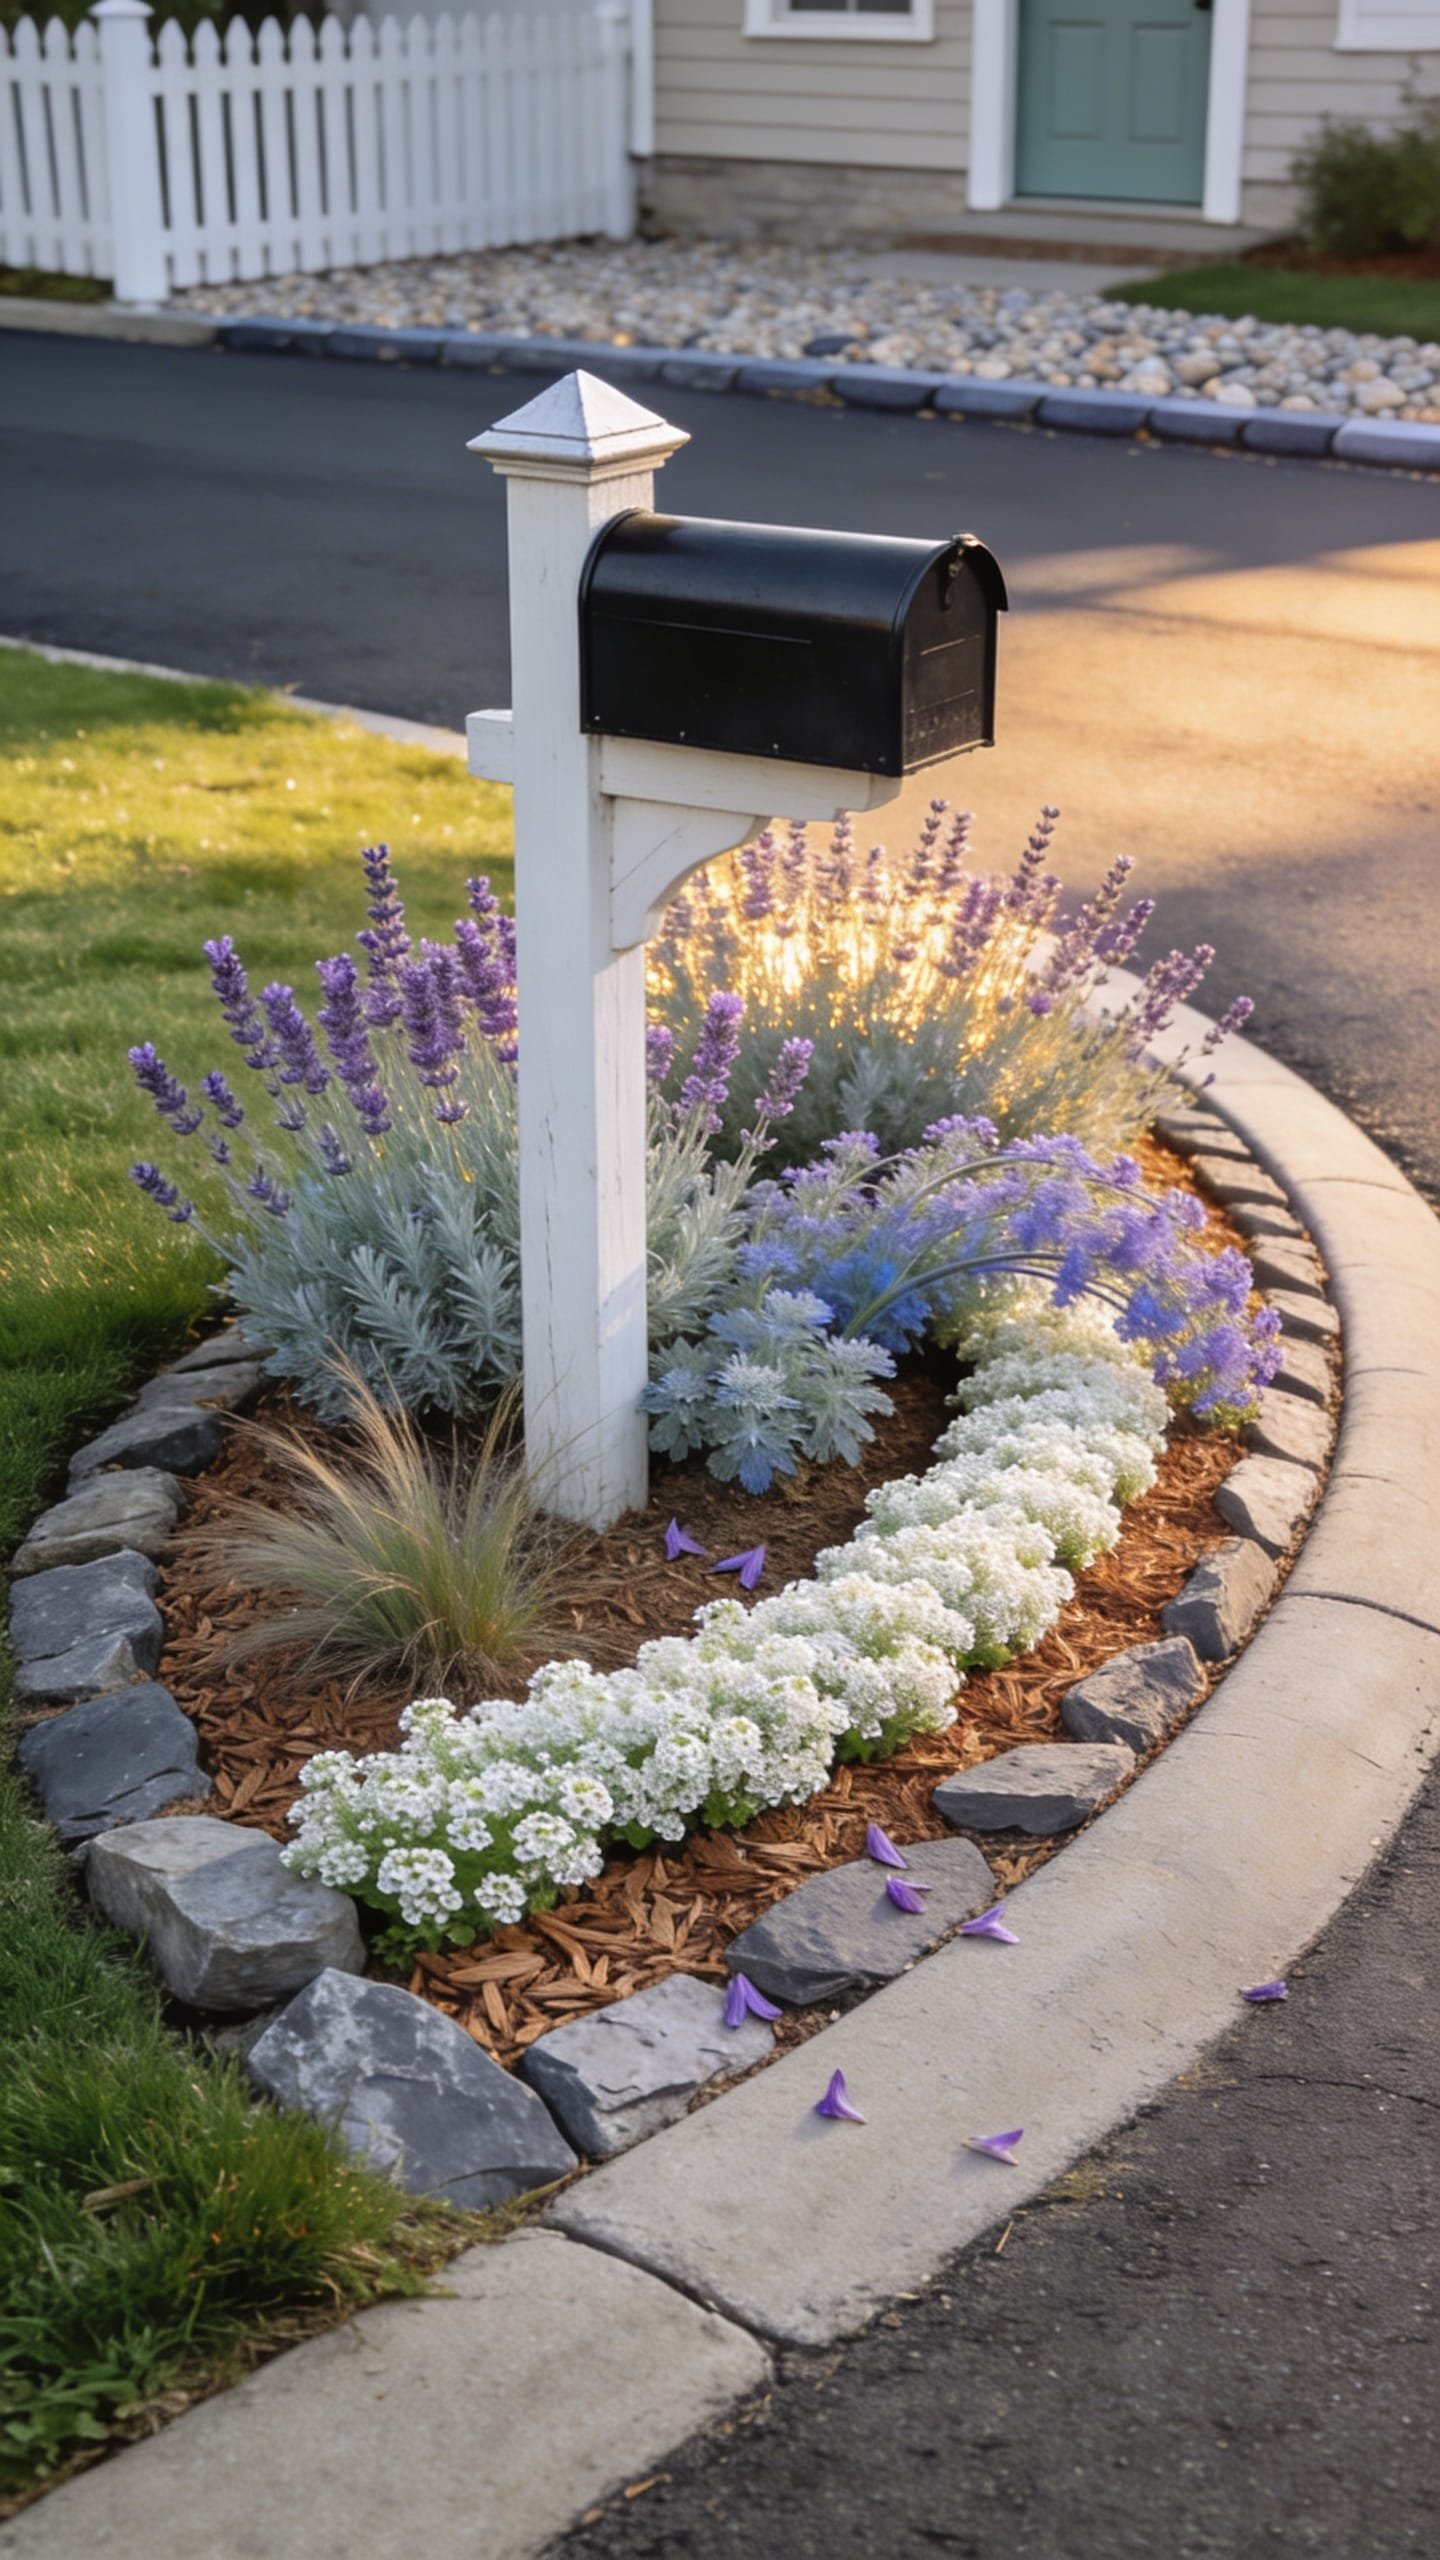
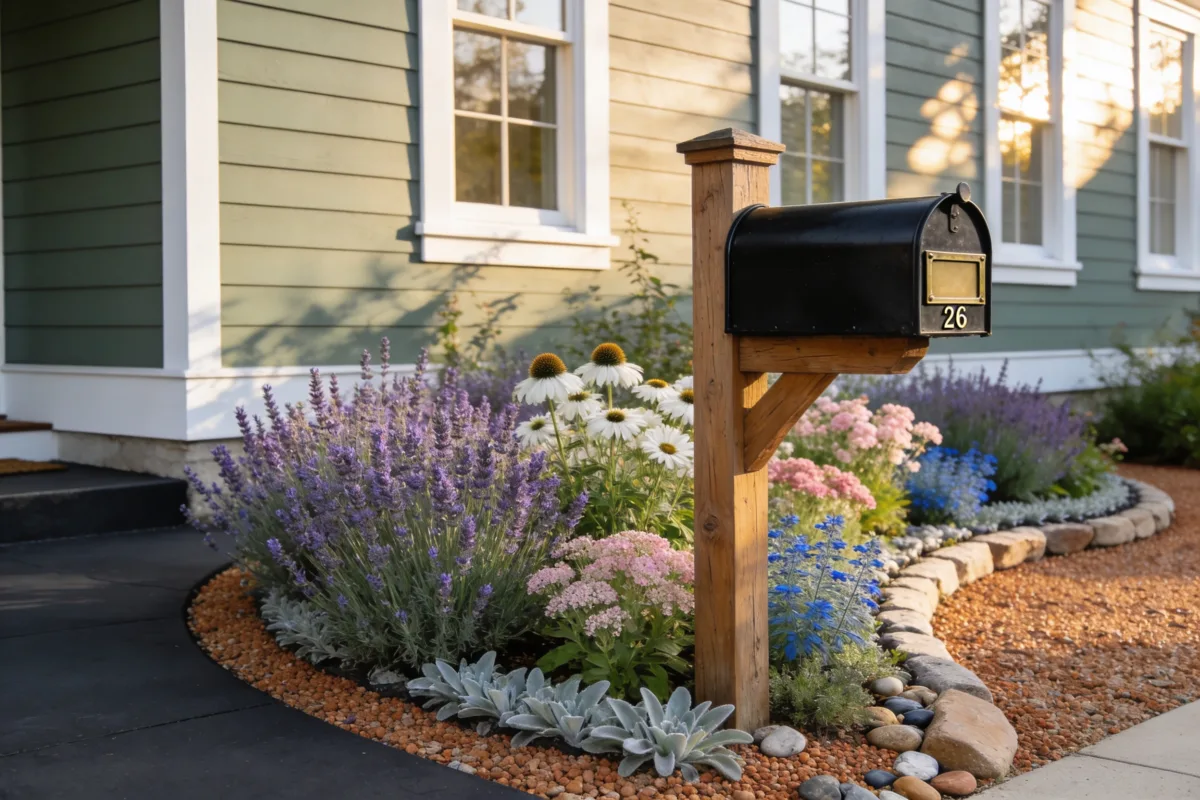
We’ve all been there: you pop a random geranium next to the mailbox, add a bag of “assorted perennials,” and pray for charm. Instead, it reads patchy and flat. This Soft Cottage Curve setup leans into gentle movement, layered heights, and fragrance that meets you at the curb. Think billowy catmint, frothy alyssum, and a drift of English lavender that catches golden hour like a whisper. The mood is whimsical but tidy—storybook cottage meets well-kept lane.
Why it works in real yards: curves are forgiving. A half-moon or loose S-curve around your mailbox visually widens the space, even if you’ve only got three feet to play with. The plant palette thrives in full sun and likes being a little neglected, which is ideal for a curb-side zone you might not baby every day. Morning light makes the silver-green foliage glow, while late afternoon creates soft shadows that photograph beautifully against a simple mailbox post.
Materials dominate on texture, not hardware: crushed pea gravel or pale river rock mulch, powder-coated edging, and a discreet black or galvanized steel mailbox with a simple flag. The contrast of soft blooms against crisp edging gives that editorial “finished” look. For photos, the layered heights (tall lavender in back, catmint mid-height, creeping thyme at front) create depth, and the lilac/blue/white palette reads cool and high-end on camera—no neon clashing.
Budget Breakdown:
- English lavender (3–4 plants): $30–$48
- Catmint (Nepeta) 2–3 one-gallon pots: $24–$45
- Creeping thyme or woolly thyme groundcover (6-pack): $18–$28
- Sweet alyssum annuals (flat): $18–$28
- Metal or composite edging (8–12 feet): $35–$90
- Crushed pea gravel or pale river rock mulch (4–6 bags): $32–$90
- Compost/soil amendment: $15–$25
- Watering spike or drip line add-on: $12–$40
Total Estimated Cost: $184 – $394
Best For: Small to medium front yards in full sun. Great for homeowners who love a romantic, low-maintenance look and want fragrant curb appeal spring through fall.
Key Design Elements:
- Main materials: metal edging, pea gravel, composted soil
- Color palette: cool lavender, dusty blue, soft white, silvery green
- Lighting strategy: highlight morning sun; consider a tiny solar spill light at the back for evening glow
- Furniture silhouettes: none—keep the mailbox simple and matte so flowers do the work
- Texture layers: feathery catmint, structured lavender, cushiony thyme, frothy alyssum
- Accent details: a subtle brass mailbox number plate; matte black mailbox for contrast
How To Recreate This Look:
- Start with shape: mark a soft half-moon or S-curve around the mailbox using string or a garden hose. Keep it at least 30 inches deep for proper layering.
- Add edging: install metal or composite edging to hold your curve. This single step makes the bed look “finished.”
- Layer soil: remove grass, loosen the soil, and mix in compost. Good soil is your secret weapon.
- Plant in drifts: 3–4 lavender at the back, 2–3 catmint in the middle, thyme and alyssum at the front to spill over the edge.
- Mulch with pale gravel: a thin, even layer. It brightens the palette and suppresses weeds.
- Install a discreet water spike or a single drip line loop if you live in a hot climate.
- Style with a slim brass number plate or a simple black metal number—no cutesy flags here.
Why This Looks Expensive: Repetition and restraint. Using drifts of just three to four plant types feels intentional, and the cool palette with pale gravel reads like a curated English garden moment, not a big-box mashup.
Watch Out: Don’t overpack lavender. It needs airflow. Space plants at least 18 inches apart or you’ll end up with mildew and sadness by mid-summer.
Pro Styling Tip: Photograph at 8 a.m. when dew catches on catmint and thyme; shoot slightly off-center to exaggerate the curve and get layered depth in frame.
Keep scrolling—if you’re more into modern lines and sculpted greens than soft cottage vibes, the next one was built for you.
2. Modern Gravel Ribbon With Sculptural Greens
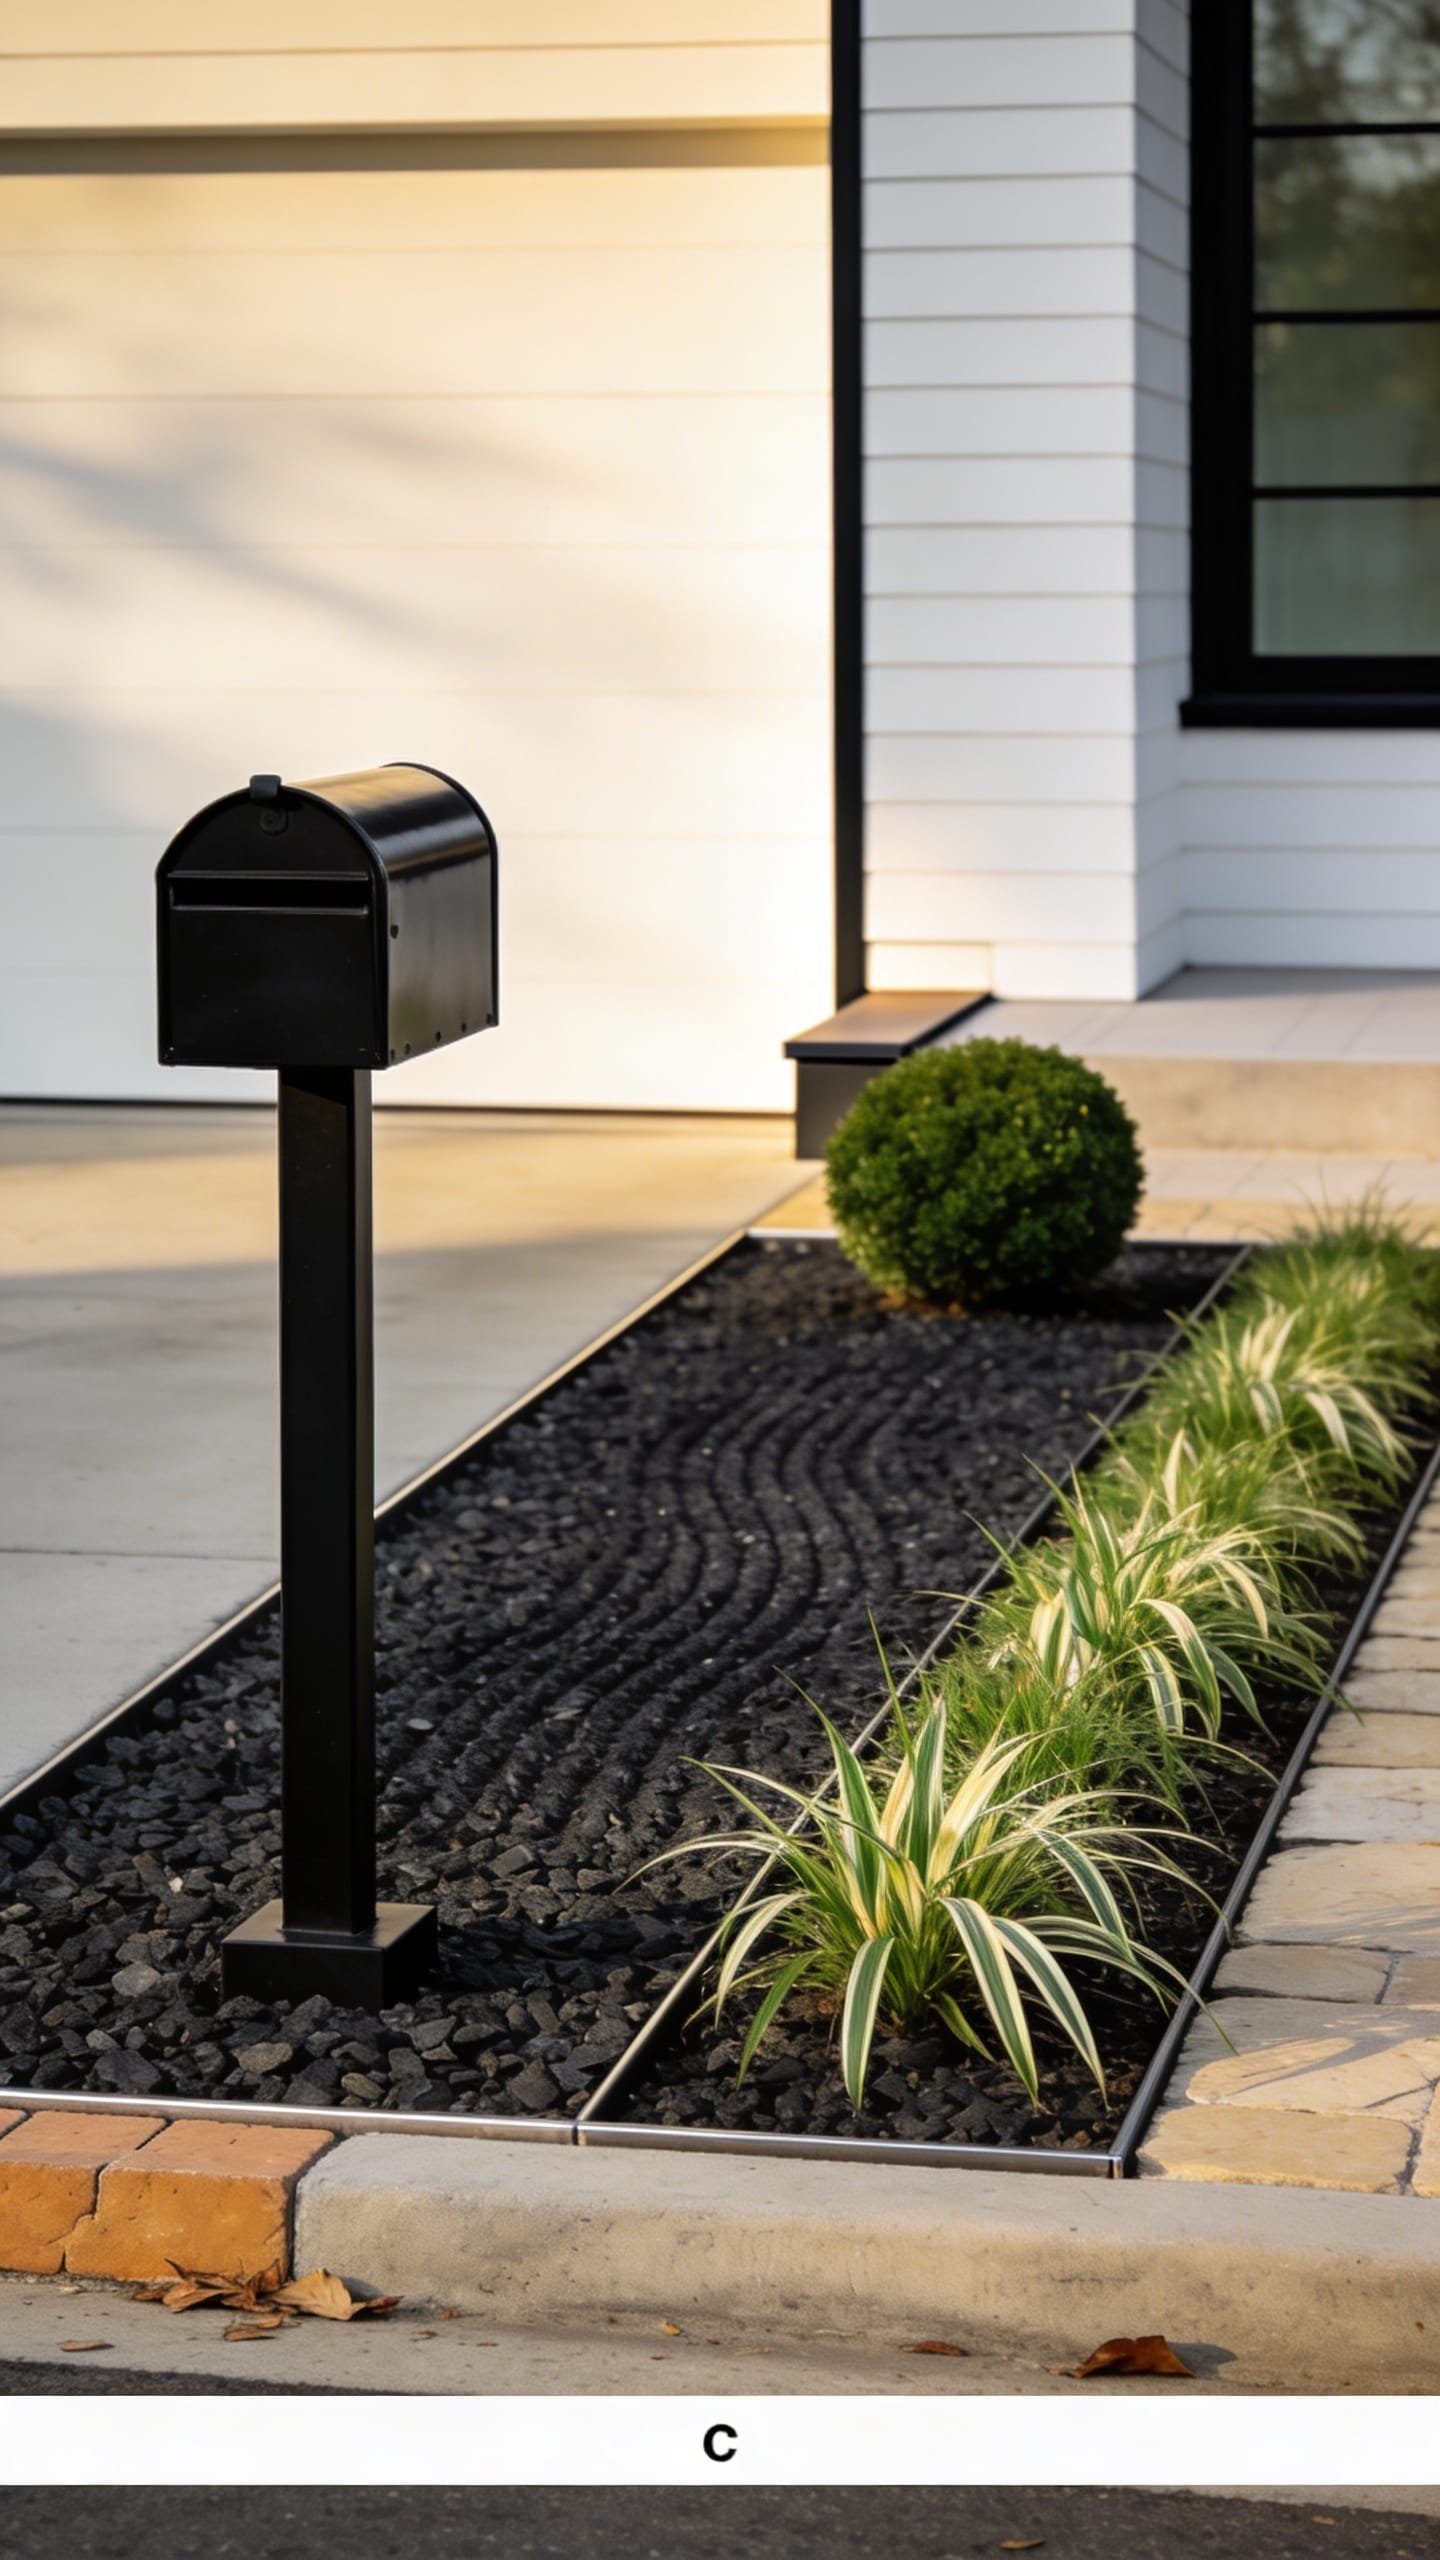
It’s that one corner that always feels off: the mailbox area that turns into a mud pit after rain and a crunchy brown zone by August. You’ve tried brightly colored annuals, but they compete with your clean-lined exterior. This Modern Gravel Ribbon leans into structure, low water use, and bold silhouettes that read strong from the street. We’re talking a black mailbox post, charcoal gravel, a clipped boxwood ball, and a narrow ribbon of variegated carex that sways like modern sculpture.
The mood is refined minimalism with movement. Why it works: the linear layout directs the eye along your walkway, which tricks the brain into reading the frontage as wider and more polished. It thrives in sun or part shade and welcomes a set-it-and-forget-it watering schedule once established. Lighting is easy: one low, warm white spotlight angled up the post creates crisp night shadows that make the greens pop without looking like a runway.
Materials lead here. Smooth black powder-coated metal, dark river rock or black basalt gravel, and one or two sculptural shrubs command attention. Because the palette sticks to green, black, and silver, everything photographs sleek—even on cloudy days. That contrast between sharp edging and tufted grass texture brings editorial drama in a tiny footprint.
Key Design Elements:
- Main materials: black basalt or charcoal gravel, steel edging, matte black mailbox/post
- Color palette: deep charcoal, inky black, evergreen, soft silver
- Lighting strategy: single low spotlight aimed at the post; optional solar stake lights for pathway rhythm
- Furniture silhouettes: n/a, but keep the mailbox boxy and unfussy
- Texture layers: clipped boxwood (dense), carex or blue fescue (fine), gravel (matte and uniform)
- Accent details: slim house numbers in brushed stainless; one basalt boulder for weight
Budget Breakdown:
- Matte black mailbox/post combo: $85–$220
- Steel or aluminum edging (8–10 feet): $40–$110
- Charcoal/black gravel (6–8 bags): $48–$120
- Boxwood ball or upright yew (1–2): $25–$70
- Carex ‘Evergold’ or blue fescue (5–7): $30–$70
- Basalt accent stone or small boulder: $35–$90
- Low-voltage spotlight + transformer (or solar spot): $30–$120
- Weed barrier fabric (optional): $12–$25
Total Estimated Cost: $305 – $825
Best For: Contemporary or mid-century homes, narrow parkways, drought-prone areas, and anyone who wants crisp curb presence with minimal fuss.
How To Recreate This Look:
- Start by sketching a straight or slight-arc bed, about 24–30 inches wide, anchored by the mailbox post.
- Install steel edging to define the ribbon. Keep the lines clean and parallel to the curb or walkway.
- Remove grass, level the soil, and compact a base layer of decomposed granite or sand if you have heavy soil.
- Plant the anchor shrub (boxwood/yew) nearest the post, then stagger the carex or fescue in a tight rhythm along the ribbon.
- Lay weed barrier fabric if desired; top with 1.5–2 inches of dark gravel for a uniform matte field.
- Add one modest boulder slightly off-center for asymmetrical balance.
- Install a single spotlight behind the post, angled up for sculptural shadows at night.
Why This Feels Designer: Strong negative space. The uninterrupted gravel field around sculptural plants creates breathing room that screams confidence and custom design.
One Thing To Avoid: Mixing gravel colors or sizes. Keep it consistent or it loses the gallery-like effect and starts to look like a driveway sample aisle.
Pro Styling Tip: Wipe the mailbox with a microfiber cloth before photos—fingerprints on matte black are camera magnets, and clean surfaces sharpen the contrast.
Prefer a flower-forward plan that still looks tidy from a distance? The next idea doubles down on color but keeps it organized, so your mailbox flower bed doesn’t veer into chaotic cottage jungle.
Remember, this isn’t about recreating a showroom. It’s about building a tiny outdoor scene that actually fits your home and habits. If one idea resonates more than the others, that’s your starting point. You don’t need all four.
3. Color-Block Bloom Ring With Pollinator Parade
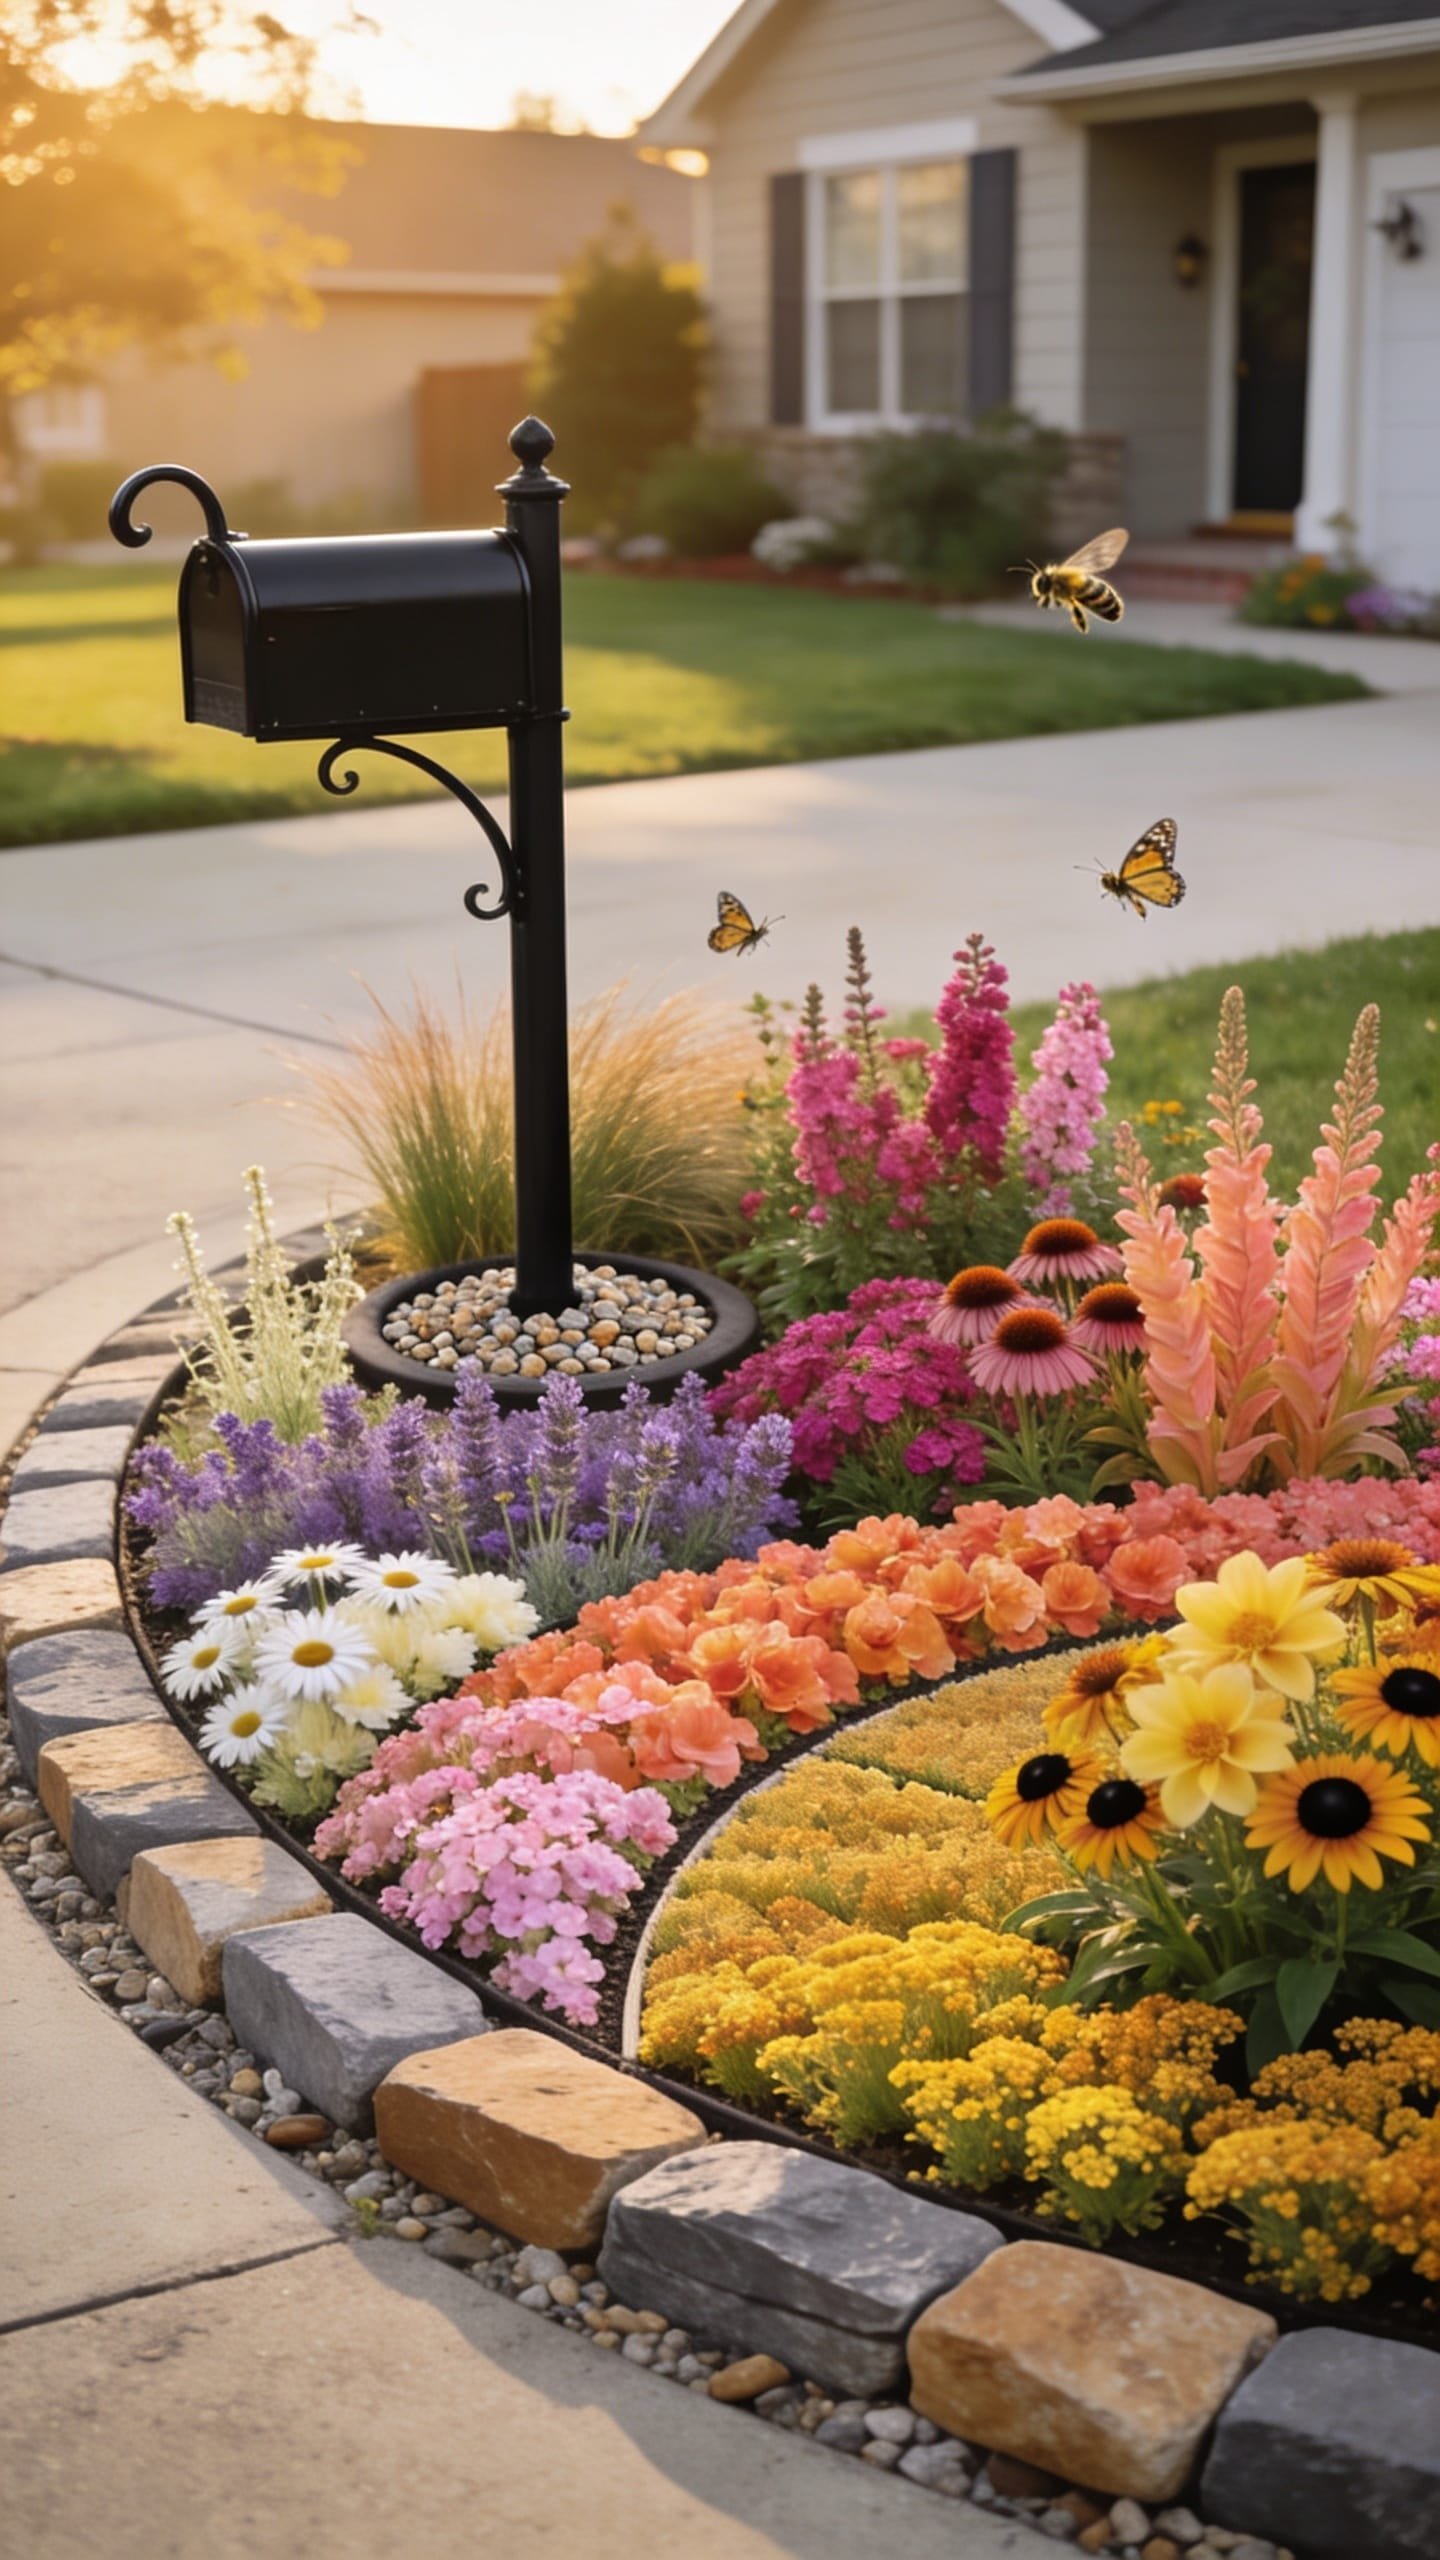
You love flowers. You hate when everything blooms at once, then the bed looks tired for months. This Color-Block Bloom Ring organizes the chaos: a tight circular or oval bed around your mailbox with intentional color zones that peak at different times. The vibe is cheerful and neighbor-friendly, with nectar-rich flowers that invite butterflies and friends to linger. It’s vibrant but not messy because each color family gets its own “slice.”
Here’s why it works: thoughtful succession planting gives you a rolling show from early spring through frost. A ring shape reads beautifully from every angle, which matters when cars pass by at 30 mph. Light matters here, too—petal translucency catches sun differently throughout the day, so color-blocking ensures contrast even when a section is in partial shade. On camera, distinct color wedges create depth and rhythm without visual noise.
I tried a version of this last spring after a year of brownish nothingness by our curb. Honestly, I didn’t expect much. But the first monarch that hovered over the purple salvia made me tear up—real talk. My spouse, who never notices plants, started asking which section would “pop” next.
Budget Breakdown:
- Edging pavers or stone (to form the ring): $70–$180
- Compost/soil upgrade: $25–$45
- Perennials: Salvia ‘Caradonna’ (2–3), Coreopsis (2–3), Echinacea (2–3), Black-eyed Susan (2–3): $60–$120
- Annual fillers: Zinnias, Verbena, Marigolds (flats): $24–$60
- Mulch (shredded bark or cocoa hulls): $20–$50
- Discreet stake/hoops for taller blooms: $12–$25
- Simple solar puck lights (2–3): $24–$60
Total Estimated Cost: $235 – $540
Best For: Full-sun spots in traditional neighborhoods, families who want pollinators and color, and anyone who loves seasonal change without constant replanting.
Key Design Elements:
- Main materials: natural stone or concrete paver edging, rich soil, shredded mulch
- Color palette: organized blocks—purple/blue, hot pink/magenta, sunny yellow/orange, creamy white
- Lighting strategy: low solar pucks to graze petals at night without spotlighting the mailbox itself
- Furniture silhouettes: curvy ring that softens the post; avoid bulky decorative figures
- Texture layers: upright spires (salvia), daisy faces (echinacea), airy fillers (verbena), tidy mounds (coreopsis)
- Accent details: slim bee/monarch-friendly plant markers; small flat river stones to step in for mail access
How To Recreate This Look:
- Start by shaping a 4–5 foot diameter ring or oval around the mailbox, leaving a 6–8 inch clearance from the post.
- Install paver or stone edging flush with the lawn for easy mowing and a polished border.
- Upgrade the soil with compost and shape a slight mound for better drainage and height.
- Divide the ring into 4 wedges. Plant a dominant perennial in each wedge, then underplant with a color-coordinated annual.
- Mulch with 1–1.5 inches of shredded bark to unify and control weeds.
- Add discreet plant supports for taller varieties so the bed doesn’t flop in late summer.
- Place 2–3 solar pucks at the outer edge of the ring for gentle evening glow.
Why This Reads High-End: Cohesive color blocks. Designers love repetition and restraint—even in bright palettes. Keeping each wedge in one family makes the bed feel curated, not chaotic.
The Most Common Mistake: Planting too many one-offs. Limit yourself to 4–5 species in the ring and repeat them. If you want more variety, swap varieties seasonally, not weekly.
Pro Styling Tip: For photos, water lightly 20 minutes before shooting so petals look fresh and mulch darkens for richer contrast.
Not into flowers at all? Or maybe your mailbox bakes in full afternoon sun where blooms go to crisp toast? The next one leans into desert-chic with a softness that still feels lush.
If your brain’s buzzing, pause. Pick the look that matches your house first, not just your plant crush. The right mailbox flower bed supports your architecture—cottage with softness, modern with structure, classic with symmetry. That’s how curb appeal reads “finished.”
4. Coastal Calm Drift With Blue-Grays and Seashell White
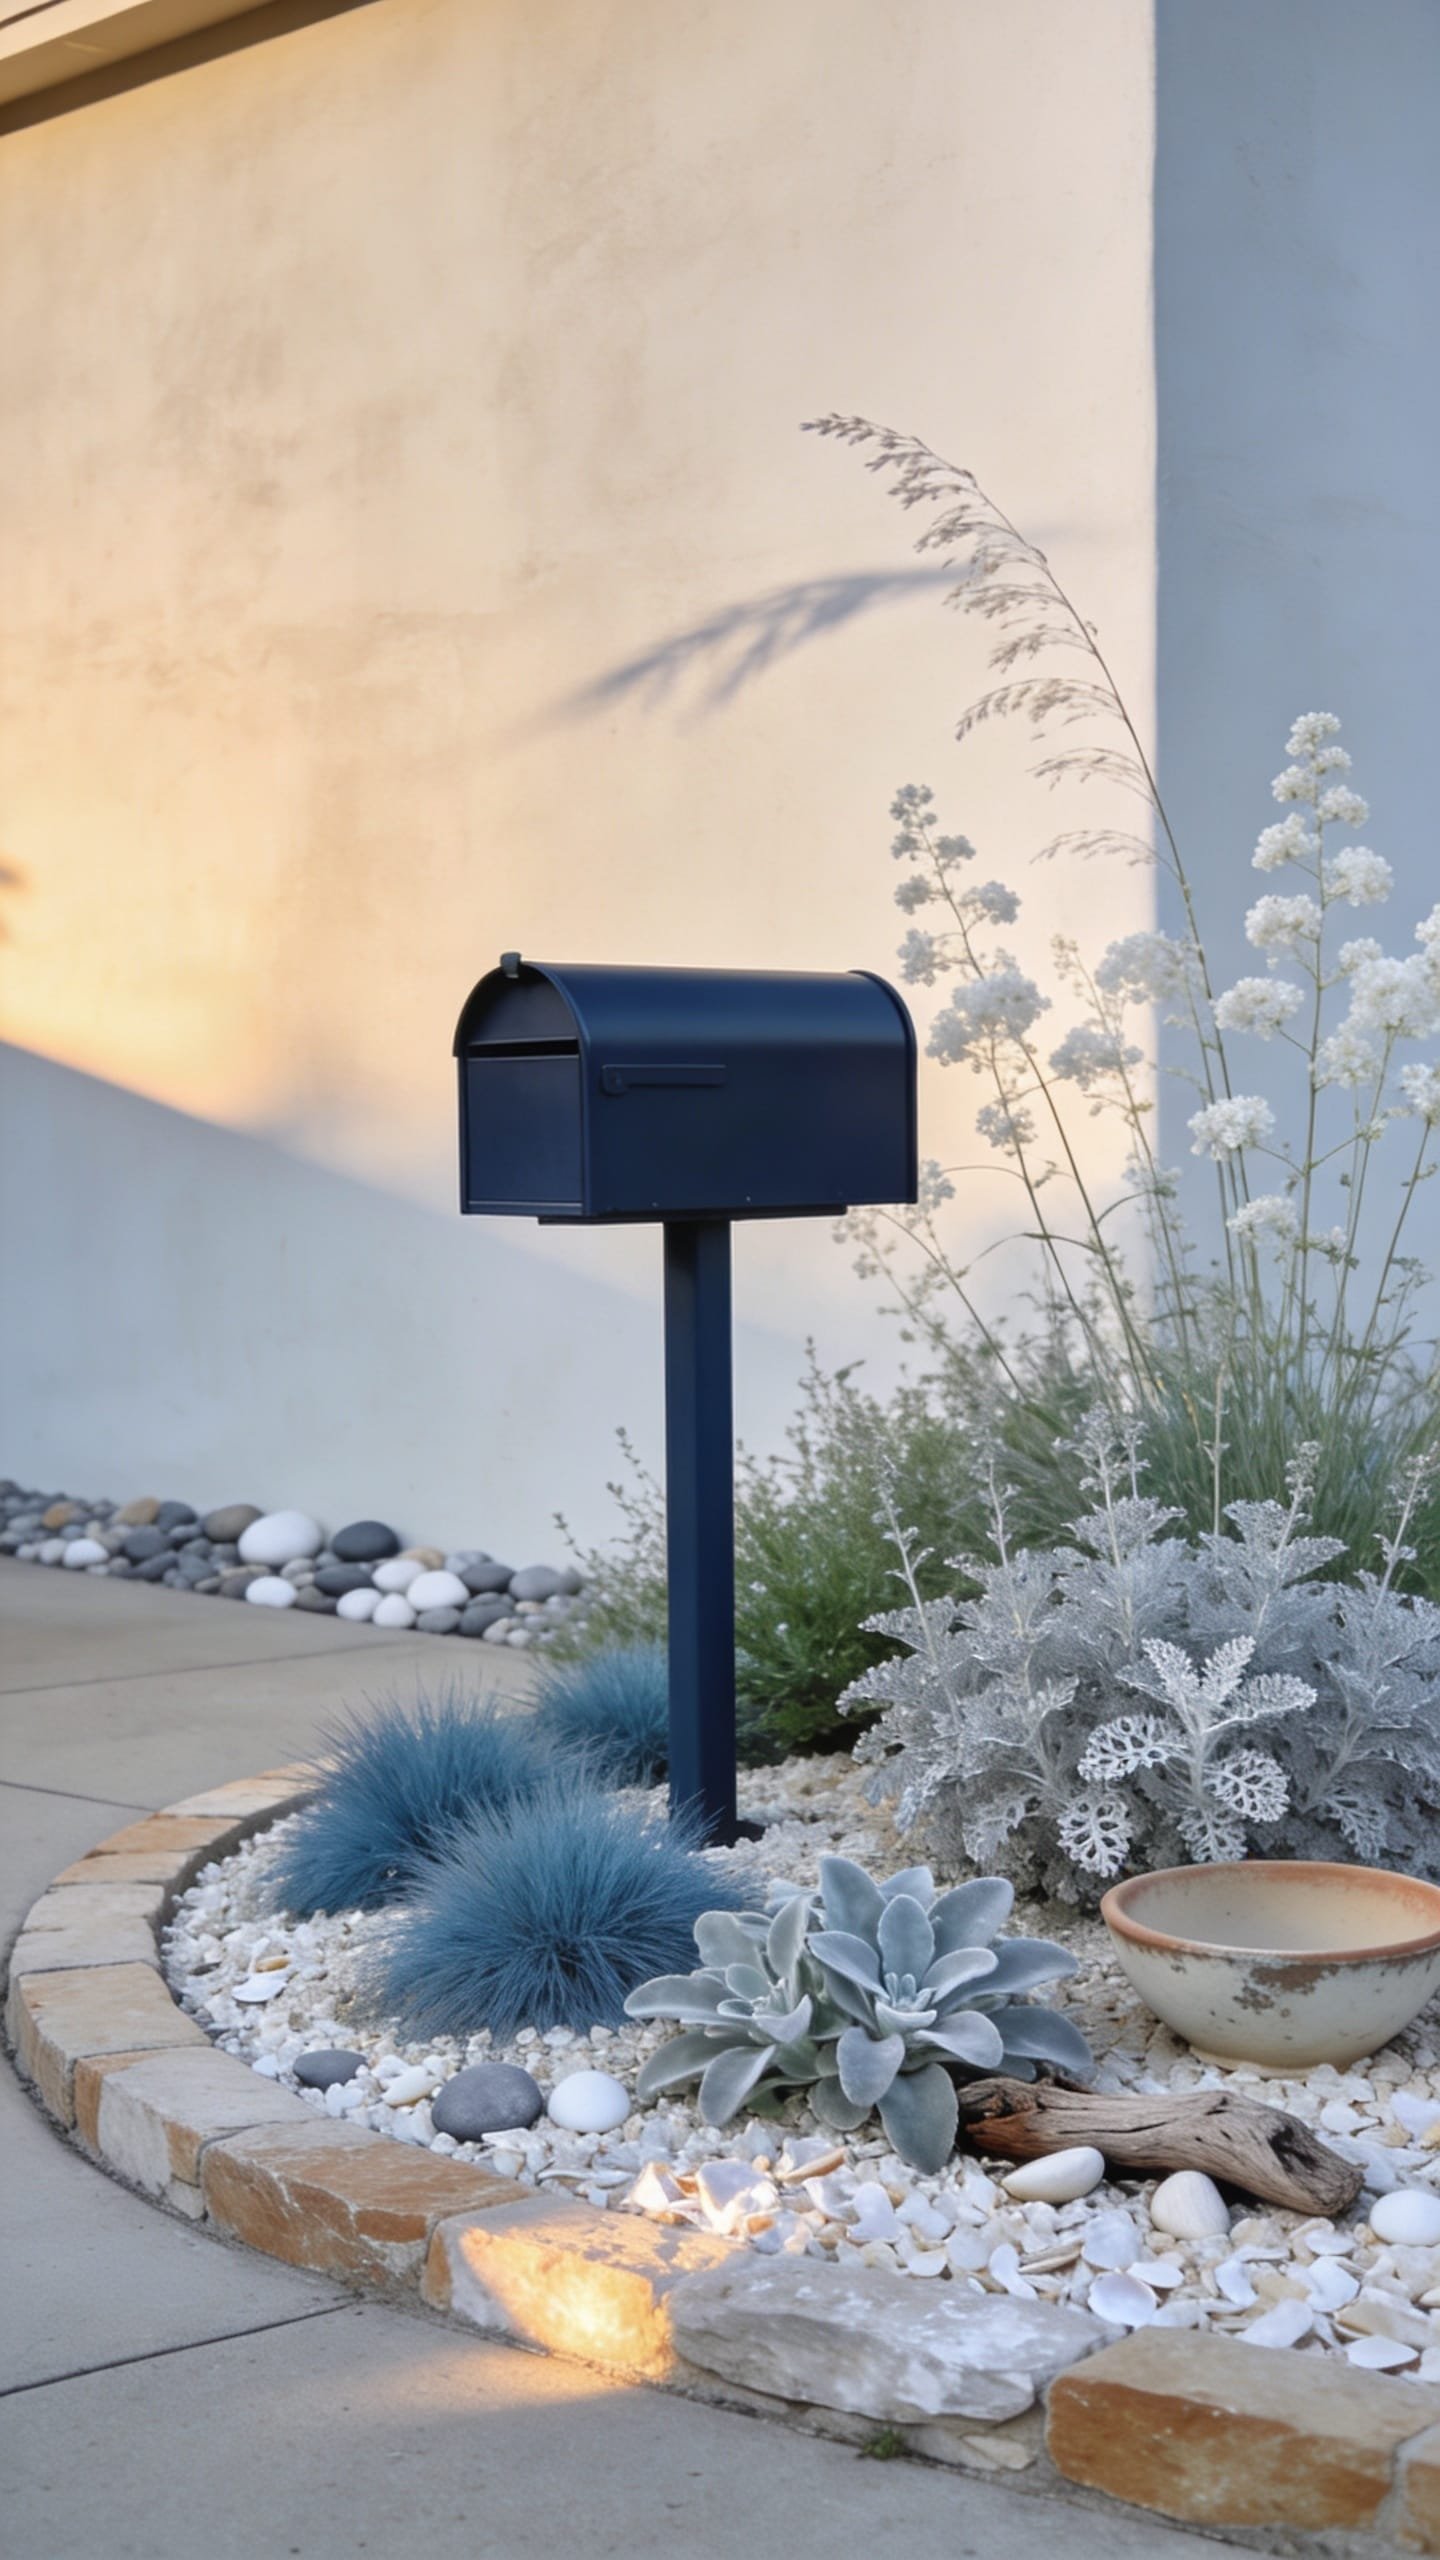
We’ve all stood at the curb thinking, “This feels… tired.” You’ve tried petunias and plastic edging and it still screams starter kit. The Coastal Calm Drift trades busy color for tone-on-tone serenity: blue fescue, lamb’s ear, dusty miller, and white blooming gaura whispering in the breeze. Picture sand-and-sea colors under a matte navy mailbox, with crushed oyster shell or pale limestone chip mulch that glows at dusk.
The mood is relaxed coastal garden meets modern Mediterranean—airy, informal, and unbelievably photogenic at sunset. Why it works in real life: drought-tolerant, heat-friendly plants love reflective light near the curb, and the pale mulch bounces gentle brightness back up onto foliage. Even small beds benefit from this approach; the light palette visually expands space and looks crisp from down the block.
Lighting ties it together. A single low, warm white path light grazing the front edge of lamb’s ear gives those fuzzy leaves a luminous halo at night. Materials push tactile contrasts: soft velvety leaves, tufted grasses, smooth shells, matte metal. It reads like a boutique coastal café entrance, but it’s your mailbox.
Key Design Elements:
- Main materials: crushed oyster shell or limestone gravel, cedar or composite edging, composted soil
- Color palette: blue-gray, soft silver, chalky white, muted navy
- Lighting strategy: one grazing path light up front; optional tiny solar stake hidden behind gaura for a starry glow
- Furniture silhouettes: slim, rounded mailbox post in navy or matte black for a maritime nod
- Texture layers: tufted grasses, velvety lamb’s ear, lacy gaura, silvery dusty miller
- Accent details: thin rope-style number plaque or small brushed nickel numbers; one beach stone cluster
Budget Breakdown:
- Matte navy mailbox/post or paint kit for existing: $20–$160
- Edging (cedar/composite): $28–$85
- Crushed shell or pale limestone chips (4–6 bags): $40–$120
- Blue fescue (3–5): $18–$50
- Lamb’s ear (2–4): $16–$45
- Dusty miller (3–4): $12–$32
- White gaura or white veronica (2–3): $20–$45
- Warm white path light or solar stake: $18–$70
- Soil amendment/compost: $15–$25
Total Estimated Cost: $187 – $632
Best For: Sunny to lightly shaded curbs, homeowners who want subtlety, and anyone facing salt spray or urban heat. Great in spring through fall, with winter interest from silver foliage.
How To Recreate This Look:
- Start by softening the shape: a lozenge or elongated oval bed around the post looks organic and beachy.
- Edge neatly with cedar or composite; keep the profile low so the pale mulch can visually “flow.”
- Prep soil well and slightly crown the center to avoid puddling after storms.
- Plant tufts of blue fescue in a loose rhythm, lamb’s ear near the front corners, dusty miller as a silver anchor, and airy gaura near the back for height.
- Top-dress with crushed shells or limestone chips for that coastal crunch and reflectivity.
- Install one warm white path light low and forward to graze texture at night.
- Finish with a small trio of rounded beach stones tucked into one side—keep it understated.
Why This Looks Intentional: Limited palette, maximum texture. Keeping the colors close lets subtle leaf shapes and finishes do the talking—like tone-on-tone fashion that looks expensive without trying.
Don’t Do This: Avoid bright red or neon pink flowers in this mix. They break the coastal whisper and make the bed feel disjointed from the mailbox’s calm vibe.
Pro Styling Tip: Shoot at blue hour—the silvers and blues sing, and even your mailbox paint looks richer.
Real talk: I once installed a “coastal” bed with a bold coral geranium someone gifted me. It looked like a perfect stranger crashing a quiet dinner party. I dug it out the next day. Consistency is kindness—to your eyes.
One more quick mindset reset: perfection isn’t the point. This is a living vignette by your curb—people walk by, dogs sniff, seasons shift. Expect it to evolve. That’s the magic.
Quick Checklist
- Decide on a clear shape: curve, ribbon, ring, or lozenge
- Install clean edging before you plant
- Pick 3–5 plants and repeat in drifts
- Match palette to your home’s style and mailbox finish
- Amend soil with compost for healthier growth
- Mulch consistently—gravel, shell, or shredded bark
- Add one discreet light for night texture
- Include an anchor element: shrub, boulder, or color block
- Leave a stepping spot for mail access
- Photograph from the street to catch spacing issues
Frequently Asked Questions
What’s the lowest-maintenance mailbox flower bed if I forget to water?
The Modern Gravel Ribbon with sculptural greens wins. Use boxwood or yew plus carex or blue fescue with dark gravel. Once established, it only needs occasional deep watering and seasonal cleanup.
My strip around the mailbox is tiny. Can I still do a color-block look?
Yes—shrink the Color-Block Bloom Ring into two wedges instead of four and use dwarf varieties. Even a 30-inch oval can look purposeful with a single salvia drift and a matching annual filler.
I rent and can’t dig up the curb. Any renter-friendly option?
Create a freestanding half-barrel or tall planter cluster at the mailbox’s base (with landlord approval for placement). Mimic any of the palettes above using pots and top with matching gravel or shell for cohesion.
How do I keep my mailbox bed looking good in winter?
Lean into structure: evergreen shrubs, grasses that hold seed heads, and pale gravel or shells. Add a small weatherproof lantern or a brass number plate for winter interest when blooms sleep.
What’s the most common design mistake with mailbox beds?
Overstuffing. Too many plant types shrink the look and create maintenance chaos. Pick a shape, choose a palette, and repeat. Restraint reads polished from the street.
The Wrap-Up
Curb appeal lives in the small details that greet you first: the curve of edging, the repeat of color, the way a single light brushes over texture at dusk. Pick one of these mailbox flower bed ideas, commit to the shape, and repeat just a handful of plants. That’s the secret sauce that makes the front of your home feel finished.
Remember, luxury isn’t about price tags—it’s texture, lighting, and restraint. You can do this in a weekend with a shovel, compost, and a plan. Start with the idea that made your shoulders drop and your eyes light up. Then plant it. Water it. Take a photo from the street and smile because, seriously, you did that.
You’re more than capable. And your mailbox is about to prove it every single day.

About the Author

Krisztina P.Rendes, Founder of Home Style Vibes
Founder of Home Style Vibes
Krisztina Puskásné Rendes created Home Style Vibes as a cozy-modern lifestyle space where homemaking meets inspiration. Her goal is to help women create beautiful, organized, and peaceful homes they truly love — without overwhelm. You’ll find here heart-driven content on home decor, cleaning tips, easy family recipes, organization and decluttering, DIY home projects, plants, and seasonal ideas — all designed to bring more calm, comfort, and style into everyday life.