Poop Shelf Chicken Coop Guide: How to Build One + Smart Design Ideas (Easy Cleanup & Healthier Hens)
You want a calm, clean coop that smells fresh and feels easy. You hate scraping dried droppings off rough wood at 6 a.m. with a headlamp and cold fingers. This guide shows you exactly how to build a poop shelf chicken coop setup that cuts daily cleanup to under five minutes—while keeping your hens healthier and your coop Instagram-ready. We’ll walk step-by-step, share budget-savvy materials, and give you design tricks that make it look intentional and work hard.
What’s Inside
What Is a Poop Shelf and Why Your Hens (and Nose) Will Love It
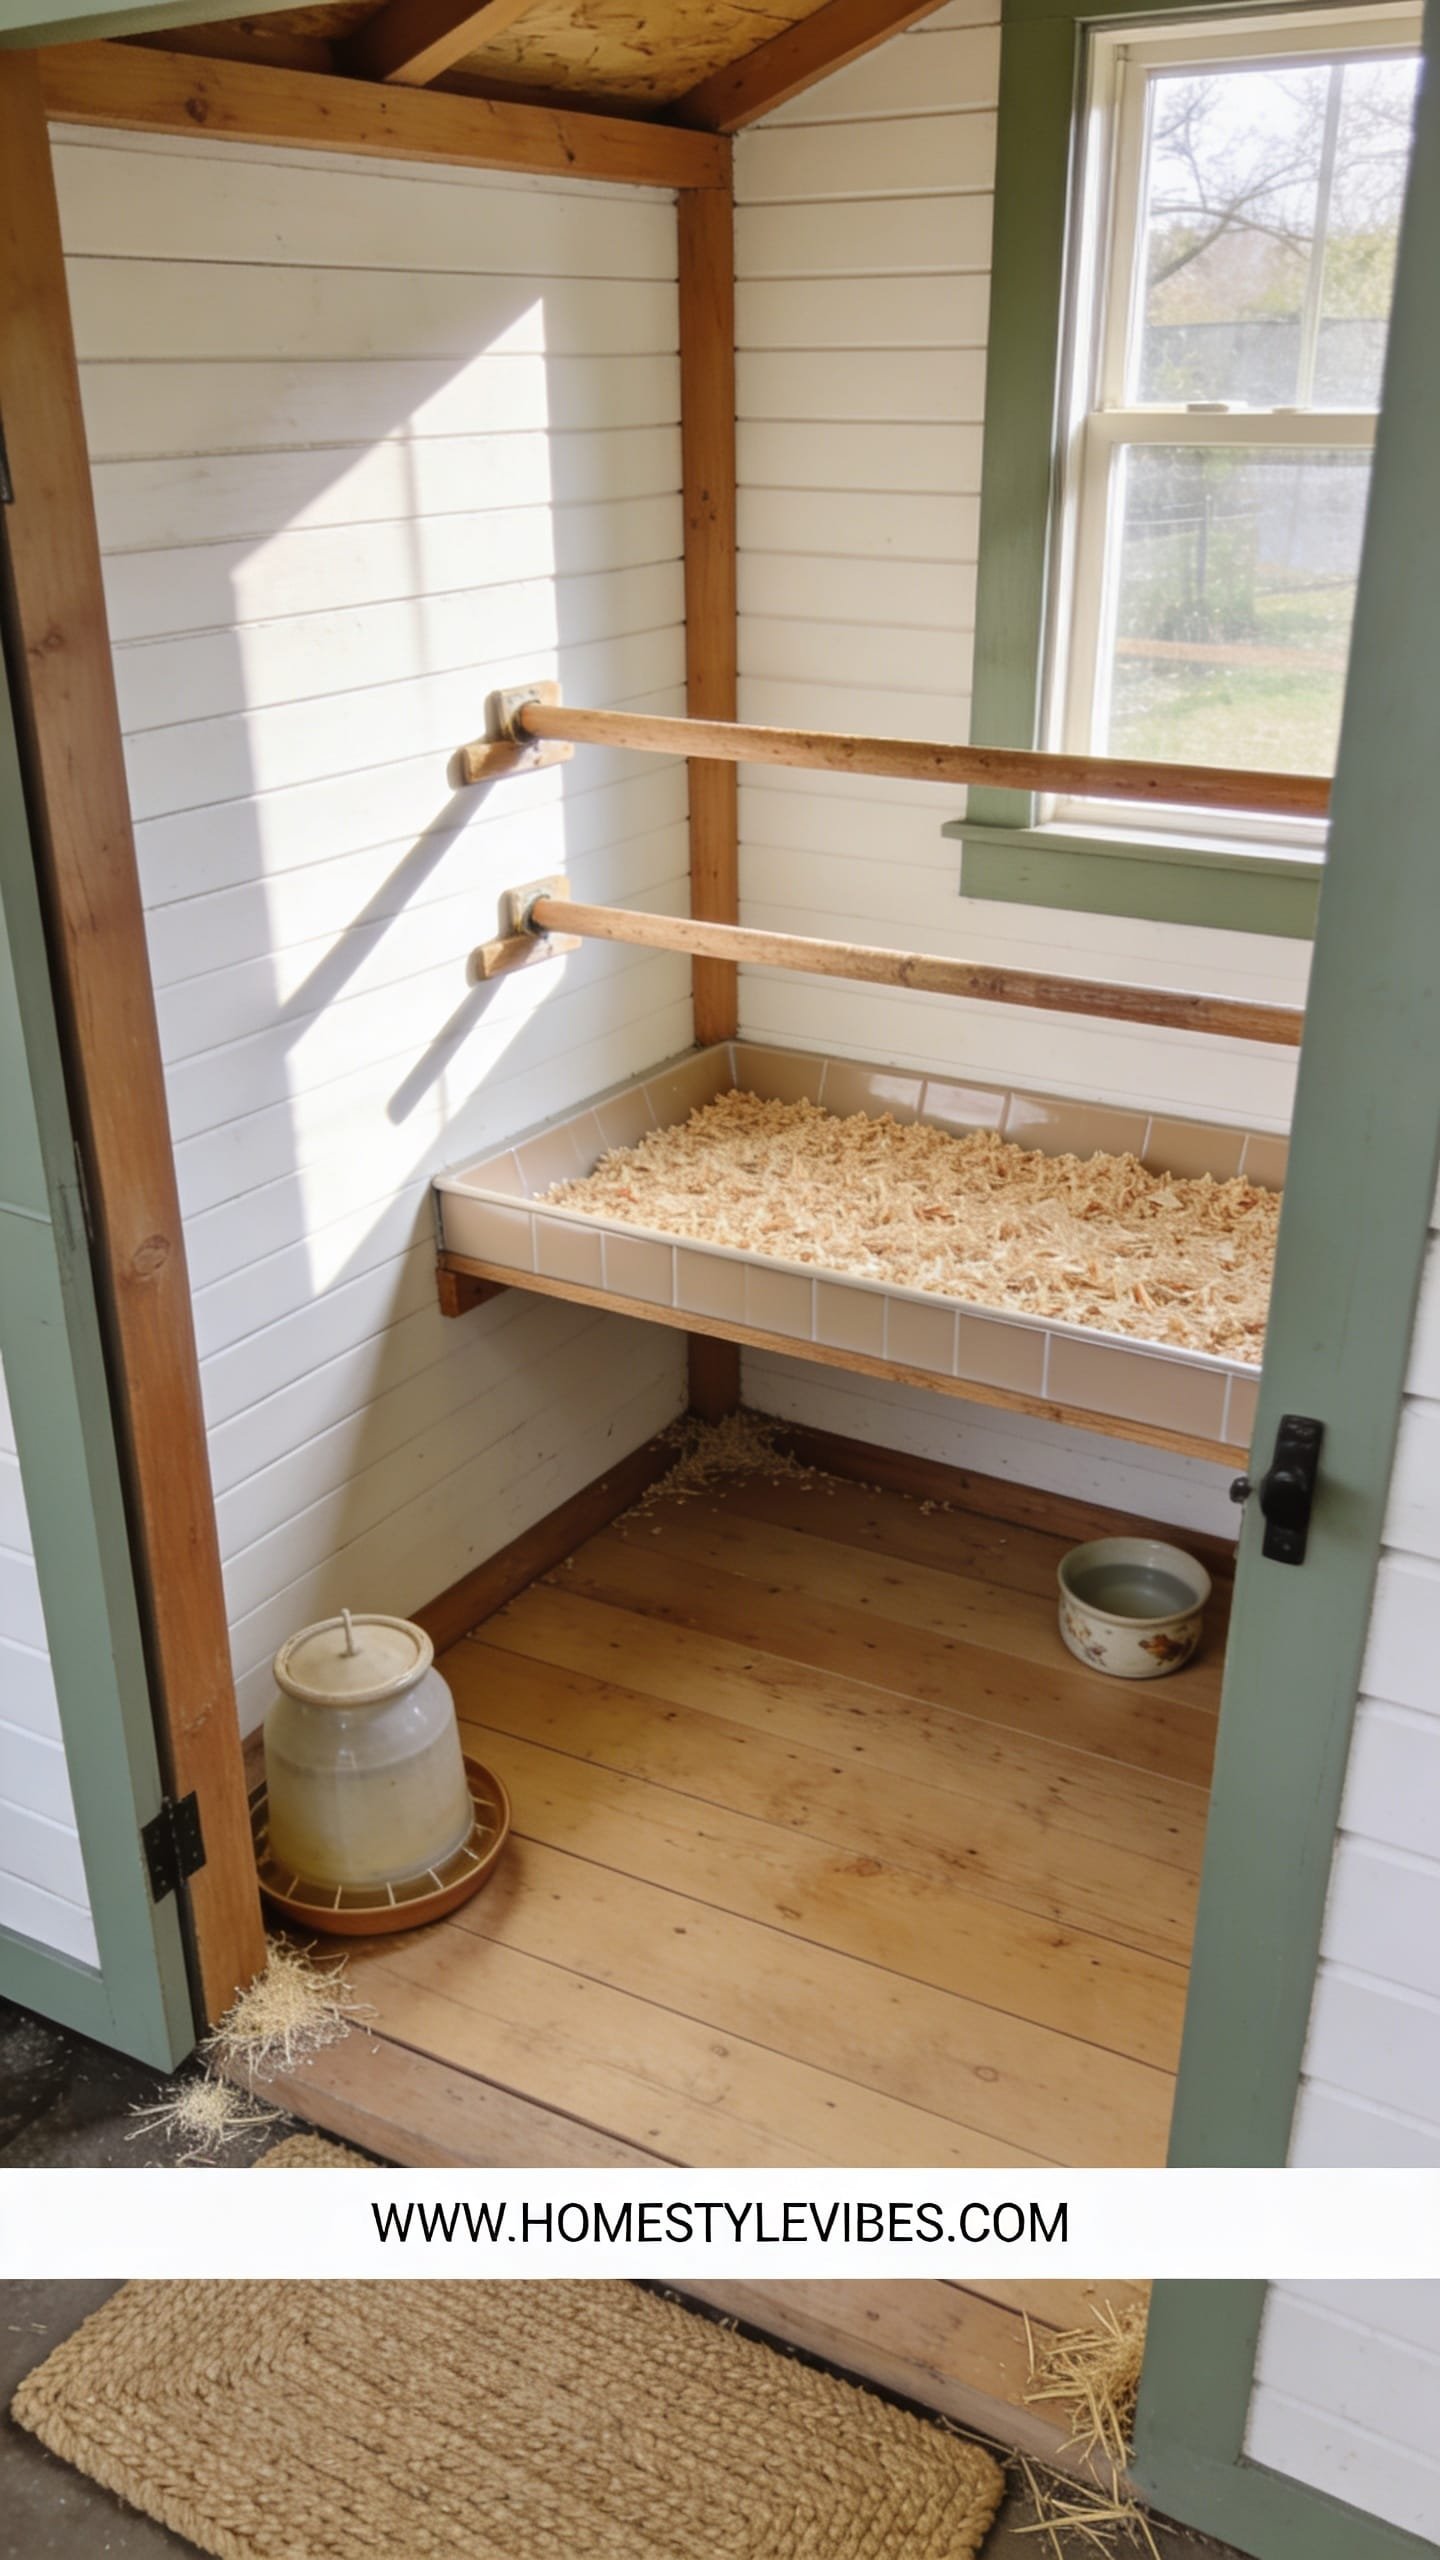
Think of this as the “catcher’s mitt” under your roost that snags droppings before they hit the floor.
We’ve all been there: the coop looks decent on day one, then turns into a crumbly mess of shavings, droppings, and mystery moisture. A poop shelf is a flat surface directly under the roosts that catches droppings overnight, so you can scoop or slide them into a bin each morning. The impact is immediate: less ammonia smell, fewer flies, and drier bedding that stretches your budget and your time.
Here’s why it works. Chickens do most of their business while they sleep, so consolidating that mess on a single surface changes everything. Instead of raking the whole coop, you swipe one surface—smooth, easy, done. Your floor stays clean, your eggs stay pristine, and the air feels lighter and less musty. The texture detail matters: a slightly slick, non-porous surface lets droppings release with a single scoop, while a matte rubber coating gives you traction in winter and damp weather.
On a budget? You don’t need fancy built-ins. A simple framed shelf topped with vinyl remnant or a repurposed cafeteria tray row will do the job and look tidy. Renters or folks with portable coops can use removable trays that slide out like drawers. Both options feel equally satisfying when that first scoop glides like butter.
- Budget-friendly alternative: Upcycle old baking sheets from a thrift store as modular trays under shorter roosts.
- Renter-friendly swap: A freestanding shelf unit on bricks or pavers—no screws into the coop walls.
Plan the Perfect Dimensions: Heights, Clearances, and Swoon-Worthy Flow
Dial in the sizing now so you’re not re-cutting plywood at dusk while the girls pace.
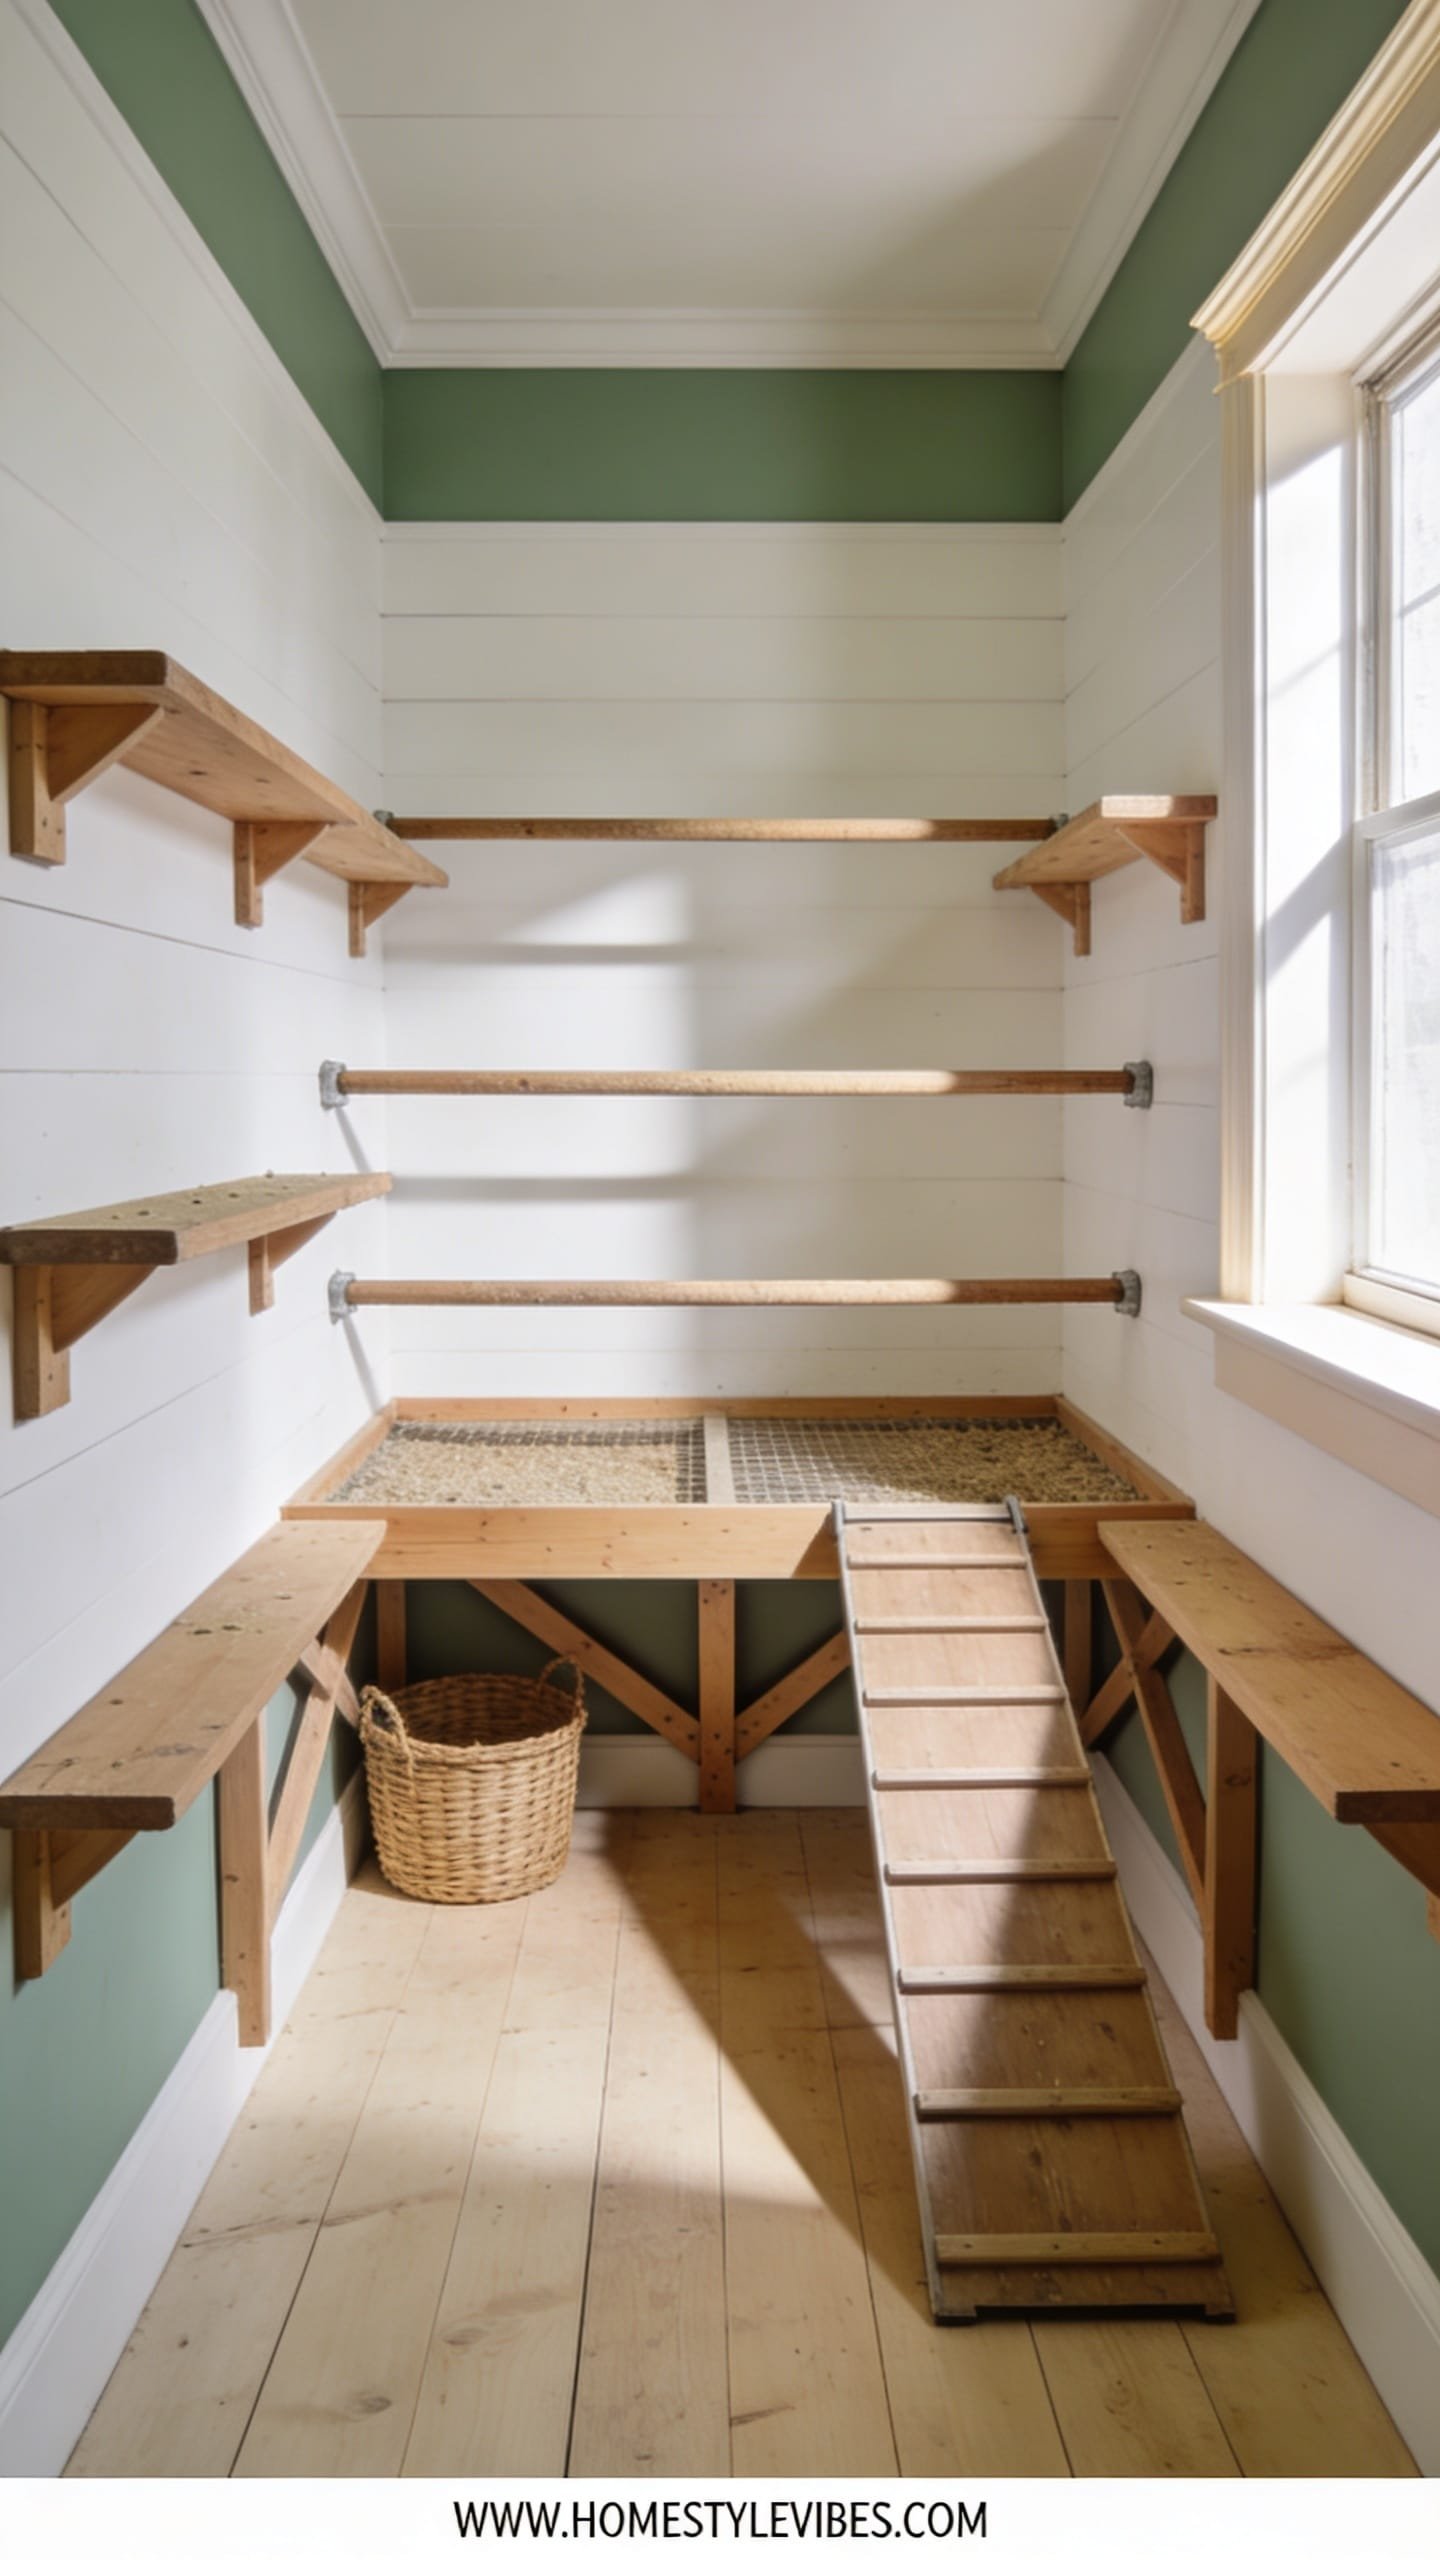
This is the part most people get wrong: they set roosts too high with too little space below, then the shelf becomes a head-bump hazard during cleaning. For most backyard coops, roosts at 18–24 inches high keep birds comfy and safe. Set the poop shelf roughly 8–12 inches below the roost bars to catch everything cleanly without birds scraping tails. You’ll want full-span coverage under every roost—droppings naturally fan out a few inches beyond the perch due to wiggles and shuffles.
Flow matters visually and practically. Keep nesting boxes lower than the roosts and not directly above the shelf, so hens don’t sleep in boxes or track mess into egg areas. For coops with charming little windows, position the roost opposite a window and set the shelf under it to get that golden morning light—cleaning feels less like a chore and more like a quick ritual in a warm beam of sunshine.
Got a tiny footprint? Build a narrow, wall-to-wall shelf that hinges up when you need access. You’ll appreciate the compactness on rainy days when mud and boots make tight spaces feel even tighter.
- Budget-friendly alternative: If lumber prices are wild, use a 1/2-inch plywood offcut framed with 1x2s for stiffness instead of pricier 3/4-inch sheets.
- Renter-friendly swap: A removable, lightweight shelf resting on cleats screwed into a temporary 2×2 frame that’s freestanding.
This isn’t about achieving a magazine-perfect coop—it’s about smart bones that make care easier. If measurements aren’t exact, don’t stall. Tweak as you go and let your birds show you what feels right.
Best Materials for a Poop Shelf: Linoleum, Trays, and Zero-Warp Plywood
Textures matter: slick enough to scrape, tough enough to hose, not precious about scratches.
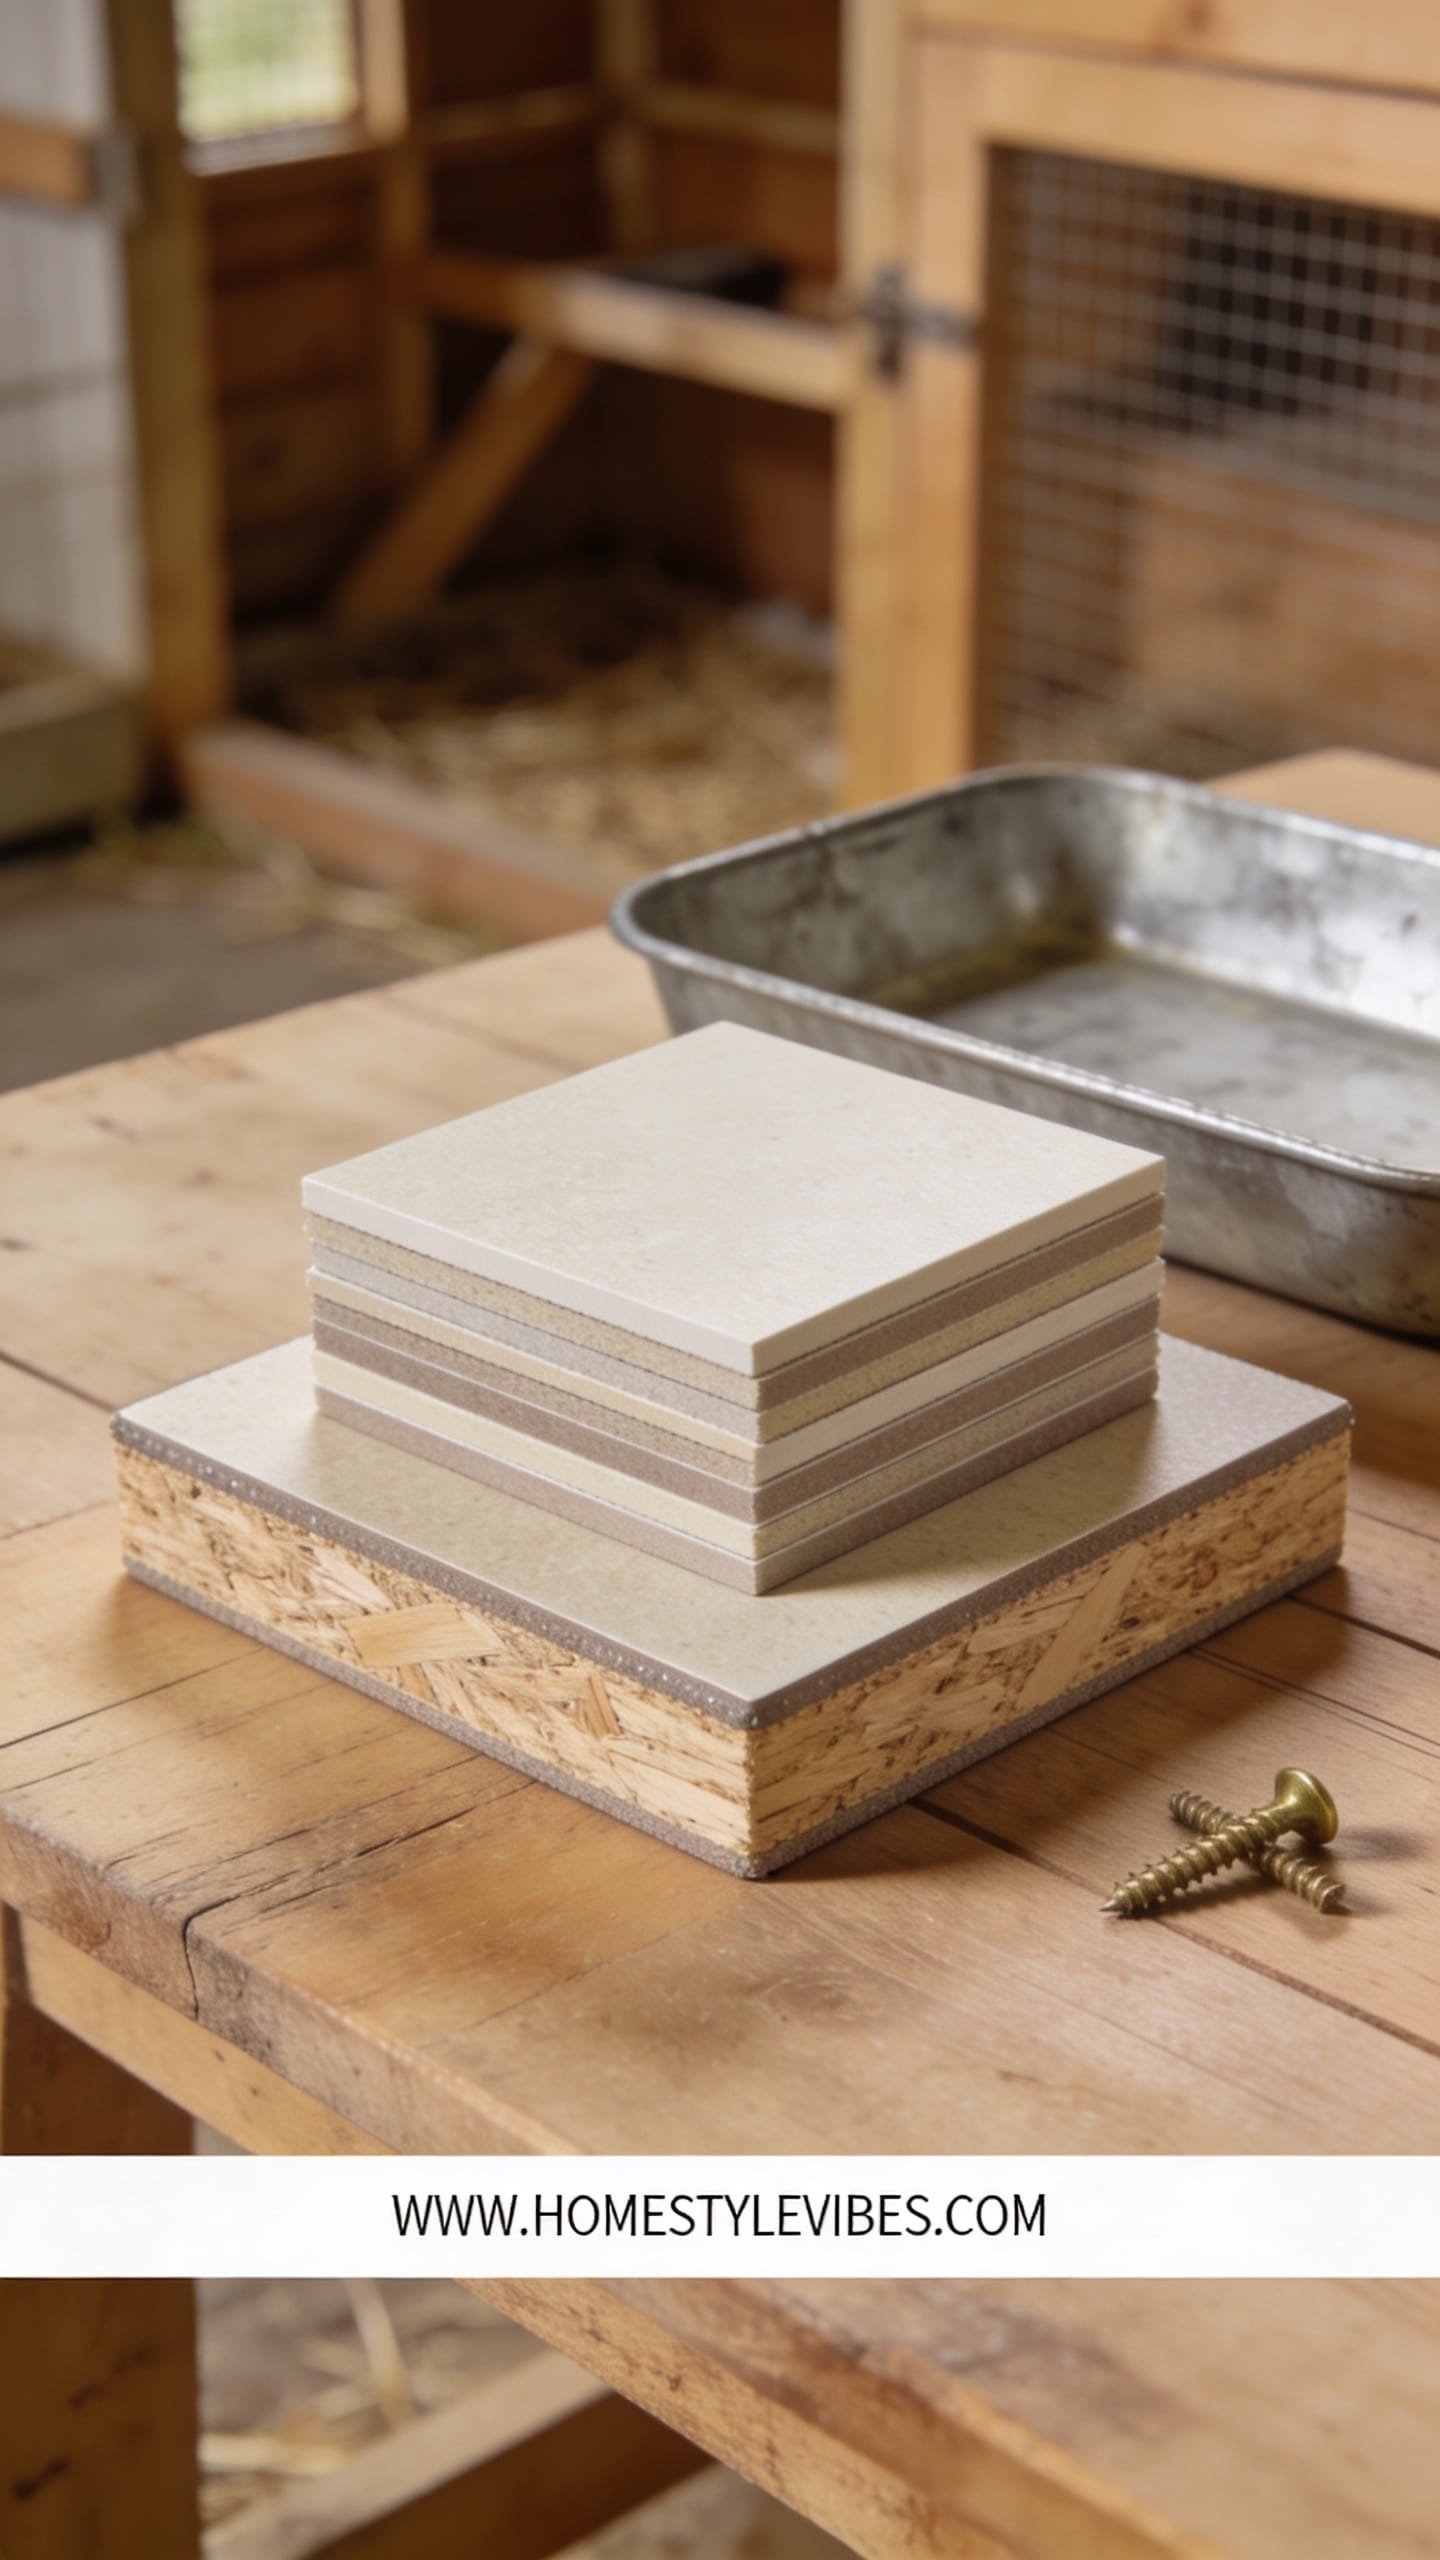
You’ve tried painting plywood, but it still feels sticky, and droppings glue themselves on like cement. The secret isn’t fancy paint—it’s a non-porous, flexible top layer that shrugs off moisture and ammonia. My top pick is sheet vinyl or linoleum from Home Depot or Lowe’s, cut to size and glued to plywood. It’s durable, easy to sanitize, and gives that smooth, satiny glide under a scoop. For the base, 1/2 or 3/4-inch plywood works; seal the edges with exterior polyurethane or paint to block swell.
Prefer modular? Cafeteria-style poly trays or oil-drain pans from an auto aisle slide in and out like drawers. They’re not just functional—they photograph clean, with crisp edges and soft matte surfaces that look pro. If you want nearly zero maintenance, consider HDPE cutting-board panels; they resist warping and clean with a single wipe, but they’re pricier. IMO, vinyl-over-plywood wins for most backyard coops on value and performance.
- Budget-friendly alternative: Peel-and-stick vinyl tiles over plywood; seal seams with silicone for an easy, cheap surface.
- Renter-friendly swap: Standalone bus tubs from Amazon or a restaurant supply store; just lift and dump into compost.
If you skip a step, nothing collapses—you’ll still have a shelf. Just remember: sealing edges and choosing a non-porous top are what turn “DIY” into daily ease.
How to Build a Poop Shelf Chicken Coop: Step-by-Step With Options
This is your build roadmap—from layout to the first gloriously easy morning cleanout.
It sounds obvious, but here’s where it usually falls apart: folks start cutting before mapping how the roosts, shelf, and access points interact. Start by standing in the coop and miming the morning scooping motion. Can you reach the back corner? Can you swing a bin or dustpan without bumping into a post? Once you feel the flow, the rest is simple carpentry.
Step 1: Measure and Mark
Mark roost height (18–24 inches). Mark shelf height 8–12 inches below. Use painter’s tape on walls to visualize depth and clearance. The tape trick shifts the vibe from “guessing” to “I’ve got this.”
Step 2: Build or Install Supports
Best overall: 1×2 or 2×2 cleats along the side walls with a center support if spanning wider than 36 inches. For portable coops, build a shallow ladder frame (think picture frame with two cross braces) and rest it on short legs or bricks for airflow beneath.
Step 3: Cut Your Shelf
Cut plywood to size. Dry-fit. If the back corners are irregular, trace with a piece of cardboard and transfer the curve for a snug, shadow-free fit that feels custom. Round front corners with a jigsaw for a softer, safer edge—your thighs will thank you.
Step 4: Add the Surface
Glue down sheet vinyl or linoleum with flooring adhesive. Roll out bubbles with a paint roller. Seal edges with a neat bead of silicone—clean lines look luxe and stop seepage. Alternatively, fasten HDPE or drop in modular trays now.
Step 5: Install a Low Lip (Optional)
Attach a 1-inch hardwood or PVC trim around the front and sides to hold in media. Leave the back open or add a tiny gap where the shelf meets the wall for ventilation and easy sweeping.
Step 6: Position Roosts
Set roost bars 8–12 inches above the shelf, centered front-to-back. Use 2x3s with the wide side up for comfy feet. Lightly sand edges for that smooth, worn-in feel hens love.
Step 7: Test With Media
Spread a thin layer of PDZ granules or fine sand. It muffles odor and turns scraping into a soft shush. You’ll hear the difference—gentle, not gritty.
- Budget-friendly alternative: Dry pine shavings in a very thin layer; not as scoopable but still workable.
- Renter-friendly swap: Skip lips and use trays filled with PDZ; slide out, dump, rinse, slide in.
If your first cut isn’t perfect, breathe. Coop carpentry is forgiving. Shims, trim, and silicone hide sins beautifully, and your hens don’t judge—they just want a safe, comfy perch.
Smart Design Ideas: Pull-Out Trays, Compost-Savvy Media, and Odor Control
Now that the basics work, let’s make it delightful: faster to clean, better for air quality, prettier to look at.
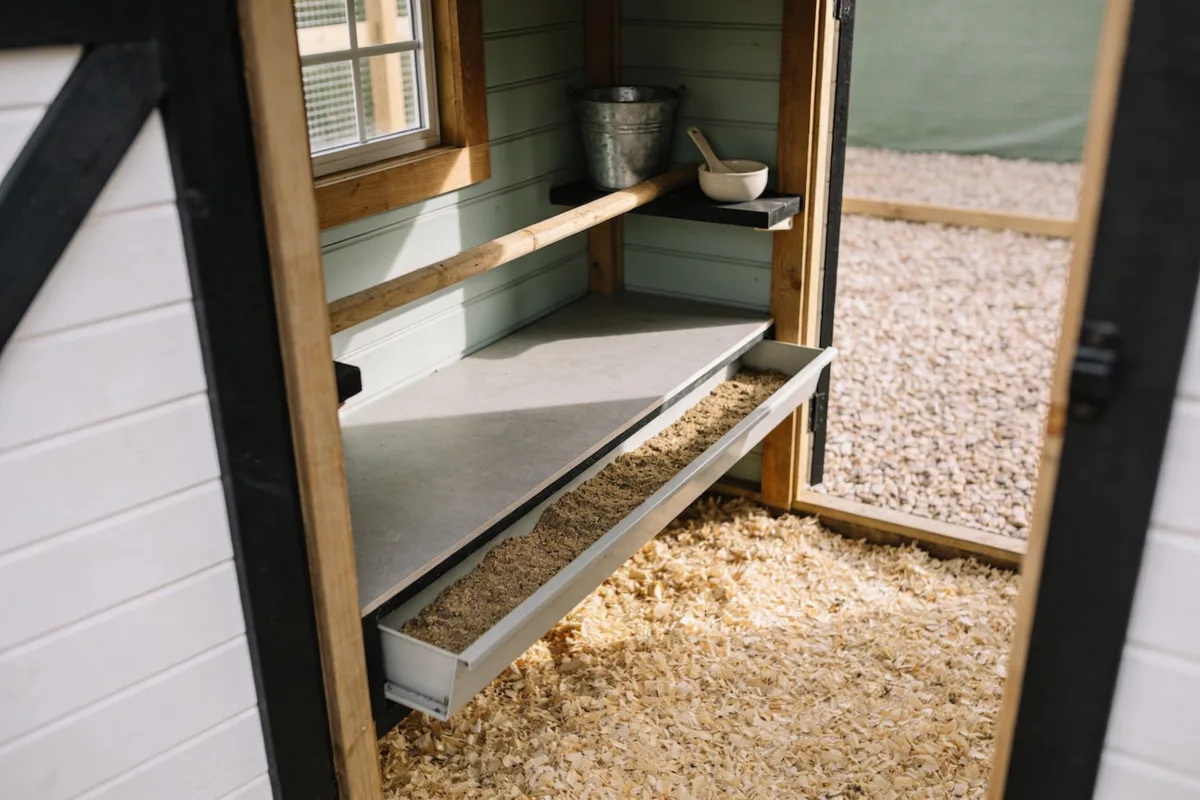
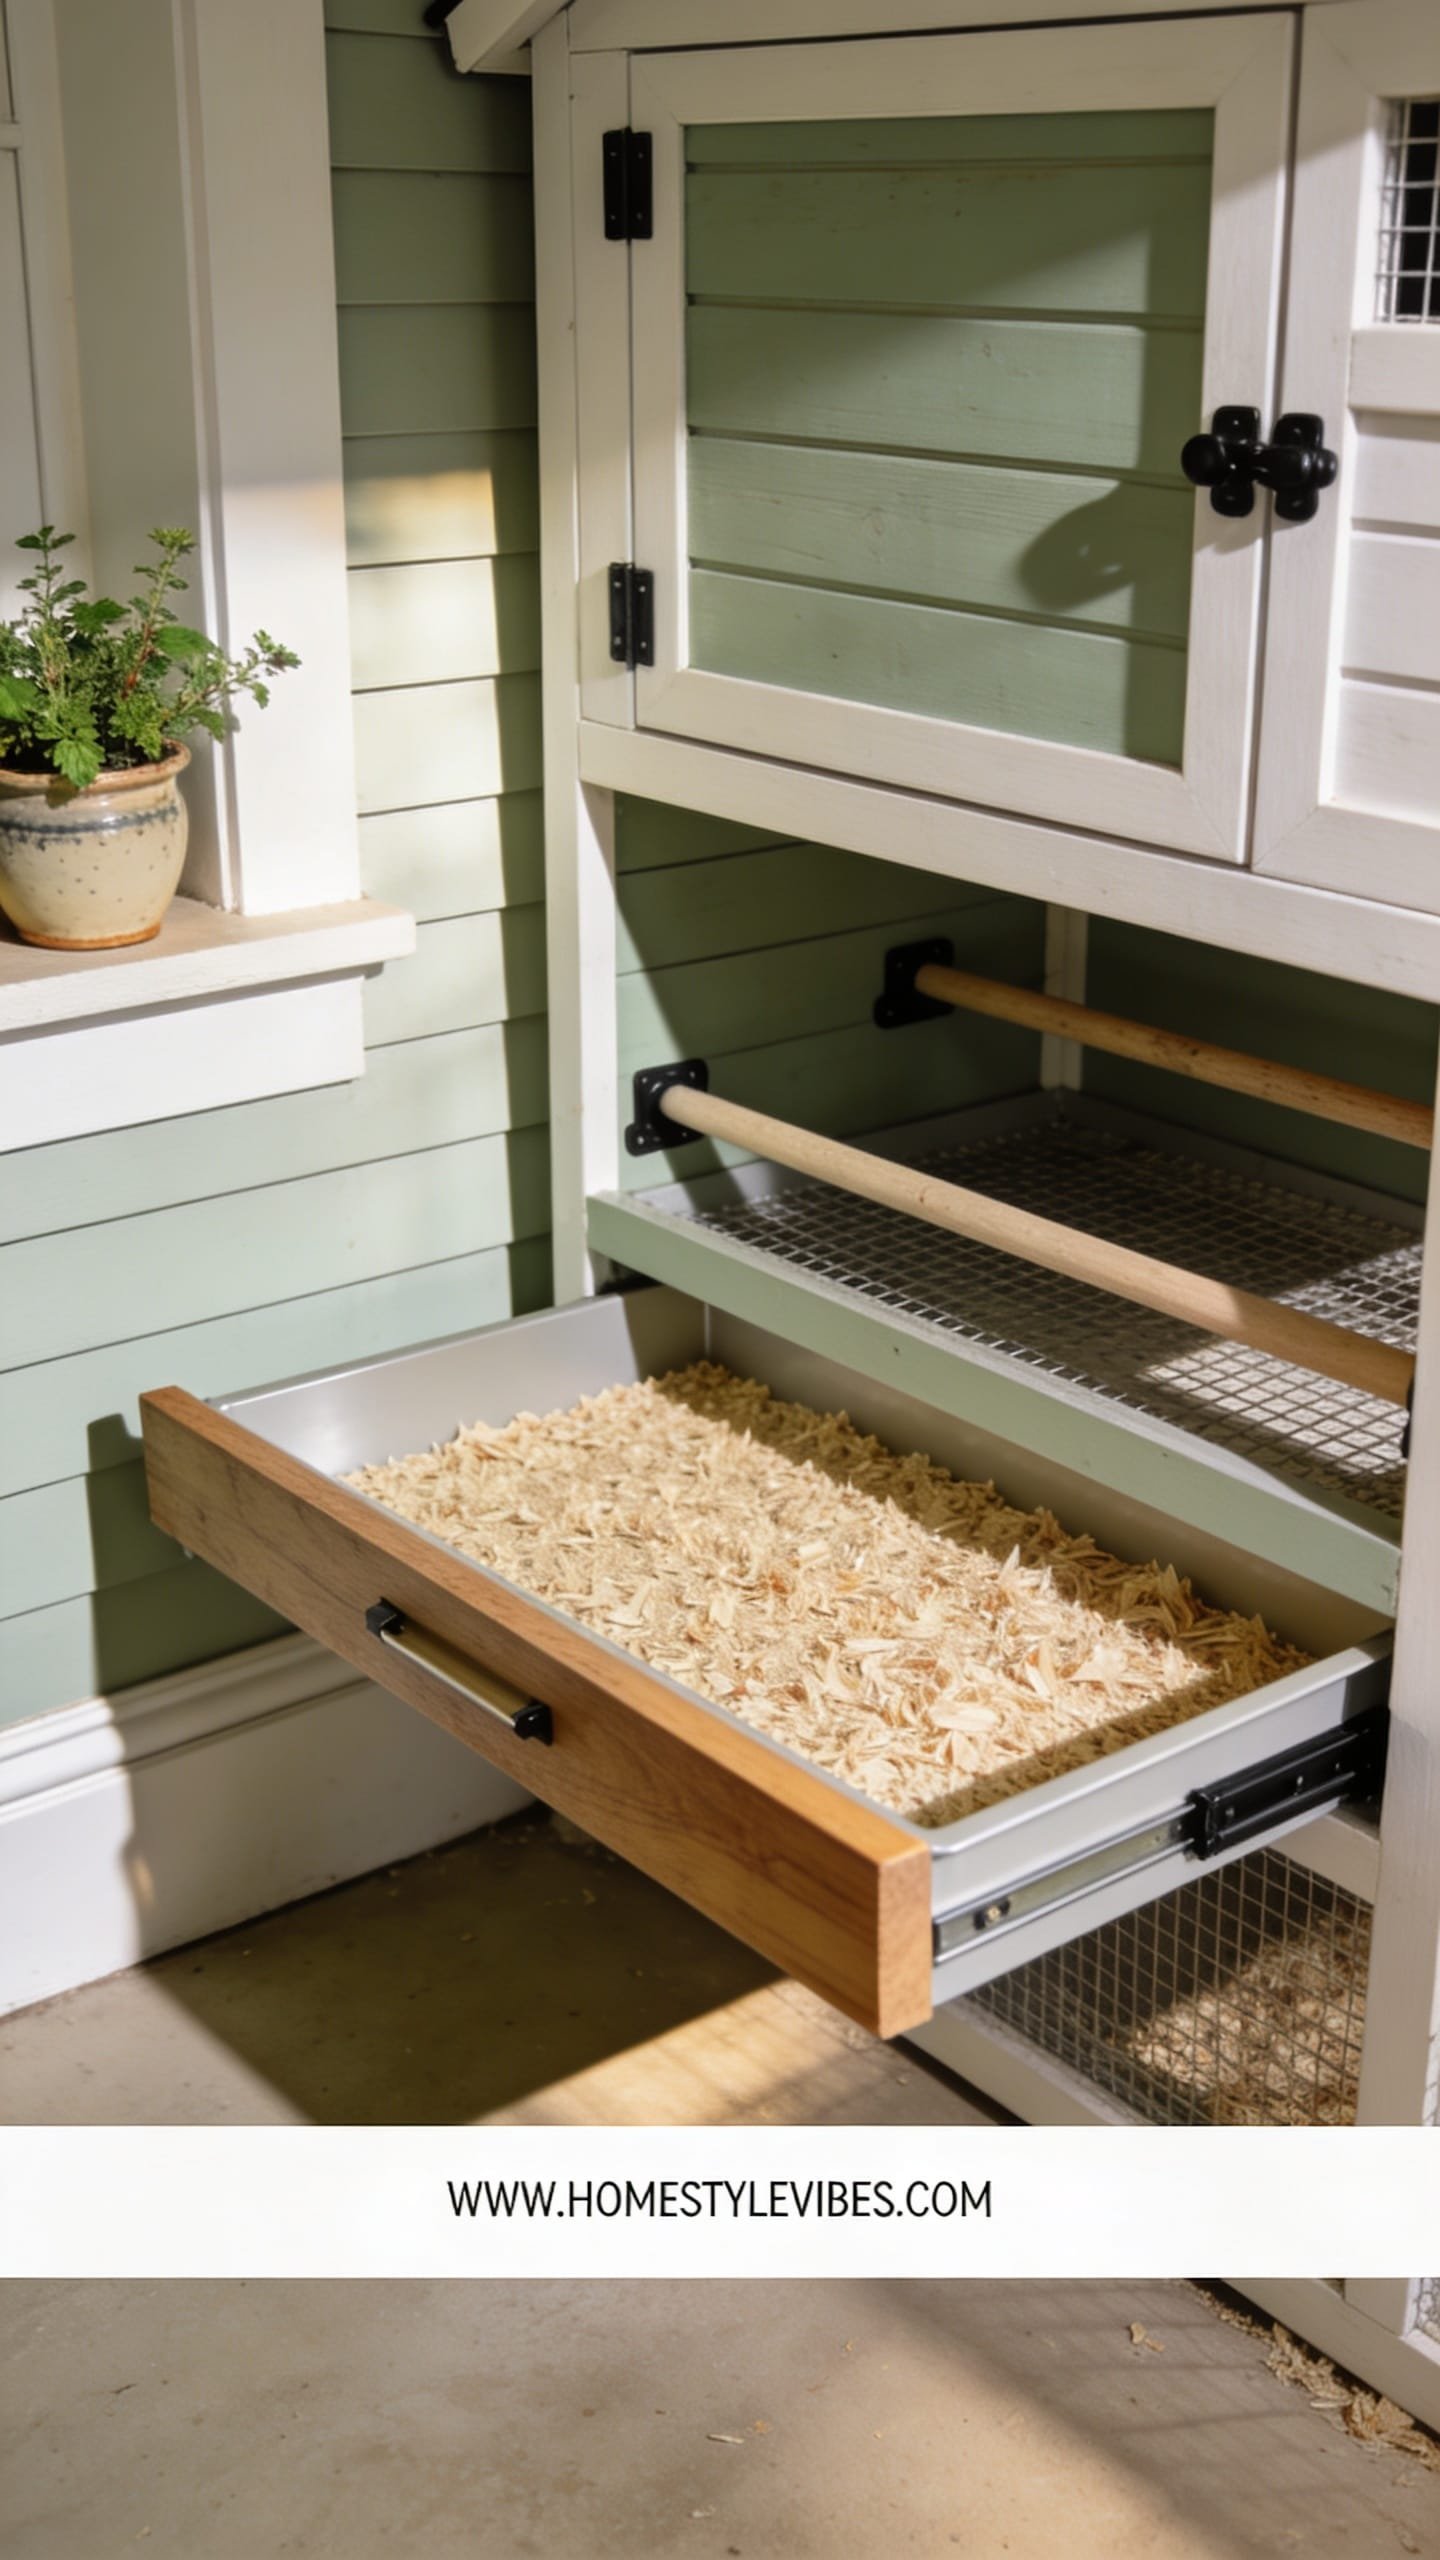
You’ve nailed the shelf, but it still feels like “work.” The transformation happens when your shelf integrates with your daily rhythm. A pull-out tray is the single biggest quality-of-life upgrade. Build it like a shallow drawer with side runners or aluminum angles. In the morning, slide it out, scrape into a 5-gallon bucket lined with a compostable bag, and slide back. That smooth glide? Chef’s kiss.
For media, PDZ granules win for ammonia control—they’re fine, absorbent, and lightly chalky, so a steel scraper glides with a soft scratch, not a squeal. Fine construction sand is the budget pick; it drains well and feels beachy underfoot, but can be heavier to move. Odor control is about balance: consistent airflow, low humidity, and a quick morning scrape. Add a few sprigs of dried lavender or cedar shavings in a sachet hung nearby for a fresh, woody scent that’s subtle, not perfumey.
- Best overall: PDZ on a vinyl-topped shelf for fastest clean and best odor control.
- Budget pick: Fine sand over peel-and-stick vinyl.
- Skip this one: Thick layers of pine shavings on the shelf; they mat, trap moisture, and feel messy fast.
- Budget-friendly alternative: Oil-drain pans from Walmart or Amazon as ready-made pull-out trays.
- Renter-friendly swap: Two bus tubs set side by side; pull one at a time for staggered cleaning.
Perfection isn’t the goal. Comfortable function is. Think of your coop like a tiny kitchen—if the tools are where your hand naturally reaches, you’ll use them daily without thinking.
Maintenance Rituals: 5-Minute Mornings and Deep-Clean Days
This is how you make it last—and smell like “fresh sawdust” instead of “barn in July.”
We’ve all imagined effortless chicken care; then life gets busy, and things slip. The truth is, a poop shelf makes maintenance almost automatic. Each morning, open the coop, slide the tray or step up to the shelf, and scrape into a lidded bucket. If you use PDZ, sprinkle a tablespoon or two back over any damp spots. Once a week, wipe the surface with a diluted white vinegar solution for a clean, tangy reset and a soft matte sheen.
Seasonally, do a deep clean. Remove the shelf or trays, hose them down on the lawn, and let them sun-dry—the warmth lifts odors and leaves a faint, sun-baked sweetness. Inspect seals and touch up silicone beads where needed. Replace any warped trims or loose screws. If ammonia ever lingers, that’s your nudge to add ventilation or reduce flock density at night.
- Budget-friendly alternative: A DIY scraper cut from a plastic jug for a non-scratch clean when you’re in a pinch.
- Renter-friendly swap: Disposable compostable liners inside bins for quick toss-and-go during busy weeks.
Quick Checklist
- Measure roost height (18–24 inches) and shelf clearance (8–12 inches below)
- Use 1/2–3/4 inch plywood sealed on all edges
- Add a non-porous top layer: sheet vinyl or linoleum
- Seal seams and edges with silicone
- Install a 1-inch lip to contain media
- Position roosts centered over the shelf front-to-back
- Choose PDZ or fine sand as media
- Consider pull-out trays with side runners
- Mount hooks for scraper and brush
- Keep a lidded 5-gallon bucket for daily waste
- Ventilate to control humidity and ammonia
- Schedule seasonal deep cleans and seal touch-ups
Frequently Asked Questions
Is a poop shelf really better than deep litter on the floor?
Yes—for daily ease and air quality. A shelf captures the bulk of droppings where hens sleep, so you remove the highest-ammonia waste fast. You can still use deep litter on the floor for insulation and composting, but the shelf prevents wet, stinky buildup.
What’s the cheapest way to build one that still works well?
Use 1/2-inch plywood, seal the edges, and top it with peel-and-stick vinyl tiles from Walmart or Home Depot. Add a tiny lip with scrap trim and sprinkle PDZ. Total cost can land under $60 depending on coop size.
My coop is tiny—can I still add a shelf?
Absolutely. Go wall-to-wall at 12–18 inches deep, hinge the front edge so it flips up, or use two modular trays that pull forward. Aim for reachability more than depth; if you can easily scrape the back edge, it’s big enough.
Will a poop shelf attract flies or smell in summer?
Not if you maintain it. Daily scraping plus PDZ keeps ammonia neutral and surfaces dry. Add airflow—crack a vent high and a window low to move air upward—and clean with diluted vinegar weekly. Flies hate a dry surface with no residue.
What’s the most common mistake beginners make?
Leaving raw wood exposed. Unsealed plywood drinks moisture and traps odor. Always use a non-porous top and seal the edges with silicone or exterior poly for that easy-glide clean.
Bring It Home: Your Clean, Calm, Healthier Coop
Here’s why this actually works: chickens are routine creatures. So when you design around their nightly habits, the mess becomes predictable and easy. A poop shelf isn’t glamorous, but it feels like magic the first time you clear it in under five minutes and breathe in air that smells like wood and sunshine, not ammonia.
Start small today. Measure your roosts, sketch the shelf, and pick a top layer you can grab this weekend from Home Depot or Lowe’s. Even a simple plywood-and-vinyl surface will transform your mornings. The rest—the runners, the trays, the pretty trim—can come later.
Your coop doesn’t have to be perfect to be beautiful. It needs to work for you and keep your flock healthy. Build the poop shelf, claim back your time, and enjoy that soft rustle of feathers at dawn without the dread of a messy cleanout. You’ve got this—and your hens will thank you with quiet, happy clucks.

About the Author

Krisztina P.Rendes, Founder of Home Style Vibes
Founder of Home Style Vibes
Krisztina Puskásné Rendes created Home Style Vibes as a cozy-modern lifestyle space where homemaking meets inspiration. Her goal is to help women create beautiful, organized, and peaceful homes they truly love — without overwhelm. You’ll find here heart-driven content on home decor, cleaning tips, easy family recipes, organization and decluttering, DIY home projects, plants, and seasonal ideas — all designed to bring more calm, comfort, and style into everyday life.