
7 Pumpkin Decorating Contest Ideas That Will Win First Place (No Carving Needed)
You want that first-place pumpkin moment—the bright, photo-ready kind that looks like it belongs at the center of a golden fall party spread. You hate the mess: the slimy seeds, the squishy strings, the cramping hands, and the way a carved pumpkin wilts two days later next to the heat vent. This no-carve guide delivers warm candle-glow, rich plaid, harvest abundance, and all the cozy-bright autumn magic—without a single serrated knife. Seven ideas, one weekend, under $100 each if you plan smart. Each concept is made to solve real-life pain points: small surfaces, kid chaos, pet tails, tight budgets, and the desire to actually enjoy your space.
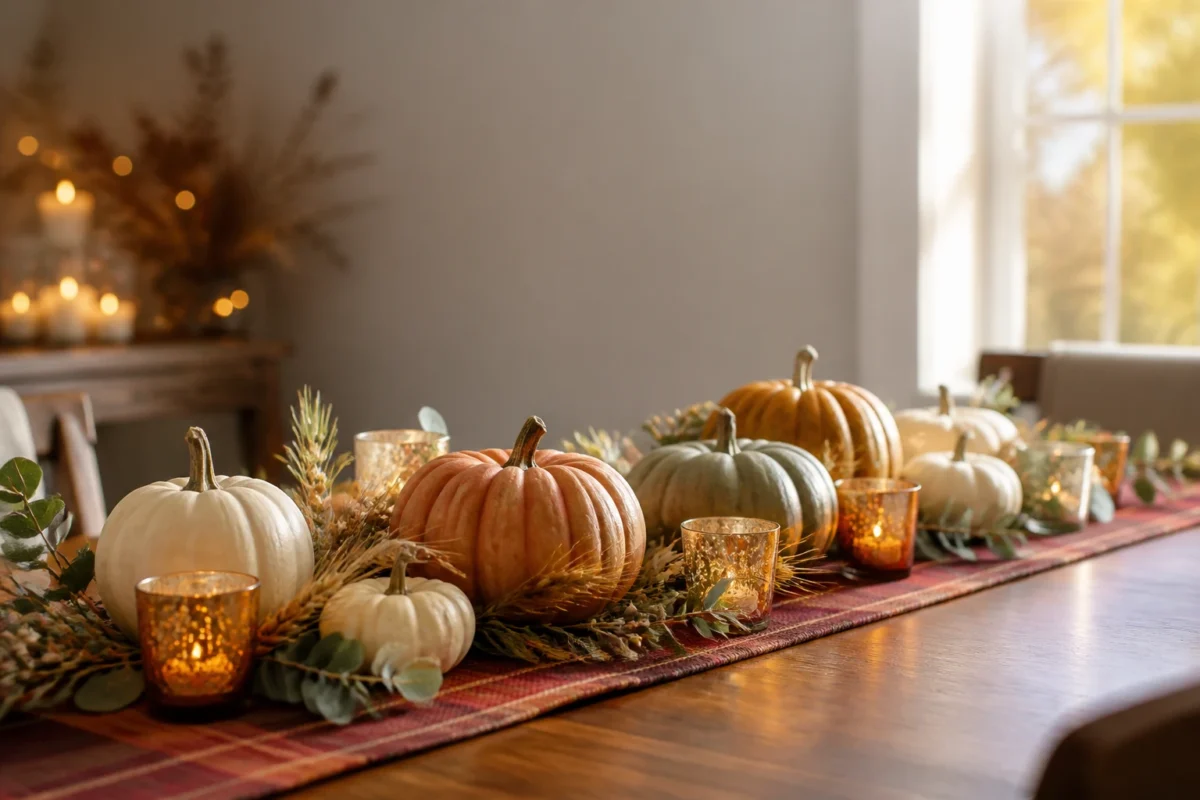
We’ll create layers of saturated rust and burgundy, tuck in branches and wheat, and set up flickering candlelight that makes your pumpkins feel cinematic. These ideas are wildly photogenic, insanely pin-able, and simple to stash when Thanksgiving rolls in. If you love a classic, cheerful, harvest-season house tour vibe—this is your moment.
1) Plaid-Backed Pumpkin Lineup With Amber Candle Glow On The Dining Table
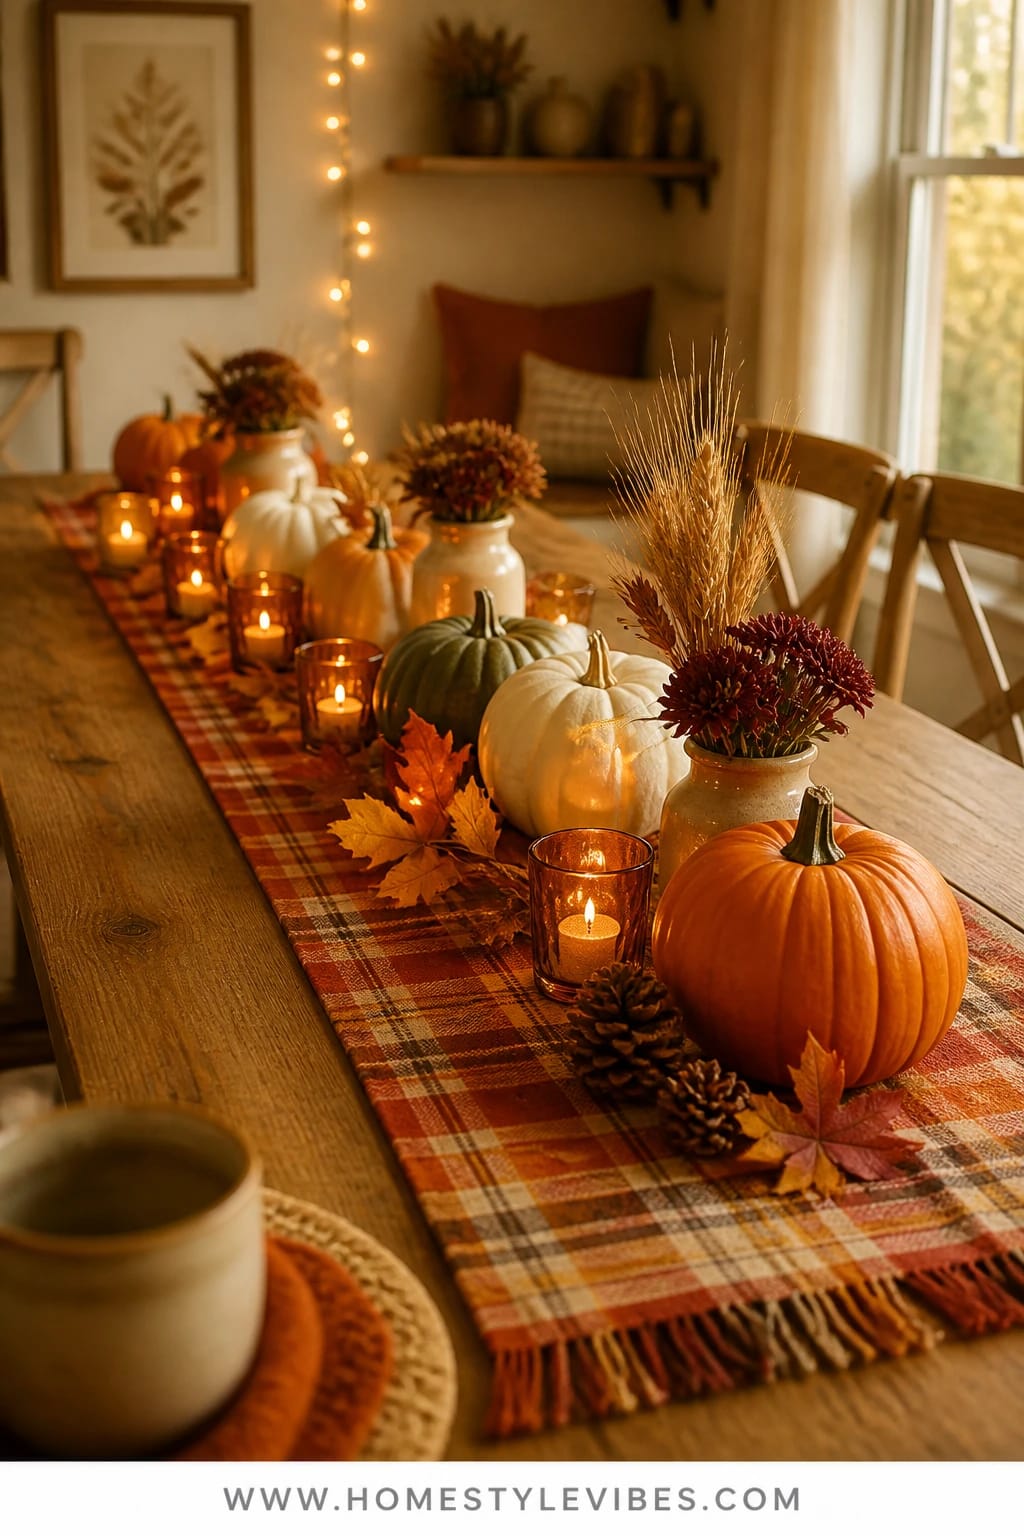
We’ve all been there: you set a pumpkin or two on the dining table and it looks… lonely. Not styled, just parked. This idea turns that flat feeling into cozy-bright theater. We lean into saturated fall plaid as a backdrop runner, place a neat lineup of mid-sized pumpkins down the center, and layer amber votive glow to create warm sparkle. The atmosphere is golden and generous—the kind that turns an ordinary Tuesday pasta dinner into a fall ritual.
Here’s why it works in real life: no carving means no mess, no rush, and no smell. The plaid anchors everything in seconds, and a simple linear layout keeps the look camera-ready and crowd-safe. Candlelight, positioned at alternating heights, creates pops of glow along the pumpkins’ curves and makes the color read deeper. It photographs beautifully because the color story is tight—rusts, burgundies, amber—and the rhythm of pumpkin-votive-pumpkin gives the eye a satisfying pattern to follow.
Variations: For a budget-friendly version, use a folded plaid scarf as a runner and thrift clear glass votives. For a small table, cut the lineup in half and cluster three pumpkins with two votives in a triangle—same vibe, less space. Keep this setup September-friendly by leaning into more greens and soft oranges; swap in deeper burgundies and brass napkin rings by late October through Thanksgiving.
Budget Breakdown:
- Plaid runner or scarf: $12–$35
- Assorted mid-size faux or real pumpkins (5–7): $20–$60
- Amber glass votives (6–10): $12–$30
- Unscented tealights or LED: $6–$12
- Optional brass napkin rings: $8–$18
Total Estimated Cost: $58 – $155
Best For: A standard 6–8 seat dining table in a family home; ideal for mid-season dinners and weekend gatherings when you want instant warmth without rearranging the whole room.
Key Design Elements:
- Main seasonal props: mid-sized pumpkins in classic orange, a few white for contrast
- Color palette: rust, burgundy, pumpkin orange, warm brass, amber glass
- Lighting strategy: low, warm candle glow spaced evenly through the center
- Textile layers: plaid runner or scarf, linen napkins if dining
- Natural elements: clipped branches or seeded eucalyptus tucked under pumpkins
- Accent details: brass napkin rings, ceramic salt cellar, vintage wood breadboard at one end
How To Recreate This Look:
- Start with a plaid runner (or scarf) down the center of the table.
- Add a linear lineup of pumpkins, mixing sizes but keeping profiles low for sightlines.
- Layer amber votives between pumpkins; alternate sides for a zig-zag glow.
- Place clipped greenery under edges of the runner for peeks of texture.
- Style with simple linen napkins and a small breadboard at one end to “bookend” the scene.
Why This Looks Expensive: Tight repetition reads intentional. The plaid provides a premium-looking foundation and the brass/amber details introduce gleam, which always photographs like money.
Watch Out: Don’t overcrowd; keep negative space between pumpkins so candlelight can carve out highlights and shadows. Overstuffing flattens the effect.
Pro Styling Tip: Hide one votive slightly behind a pumpkin so the light grazes the curve—this glow spot looks incredible in photos.
2) Wheat-Collared White Pumpkin Trio Under Warm Lamps On The Living Room Coffee Table
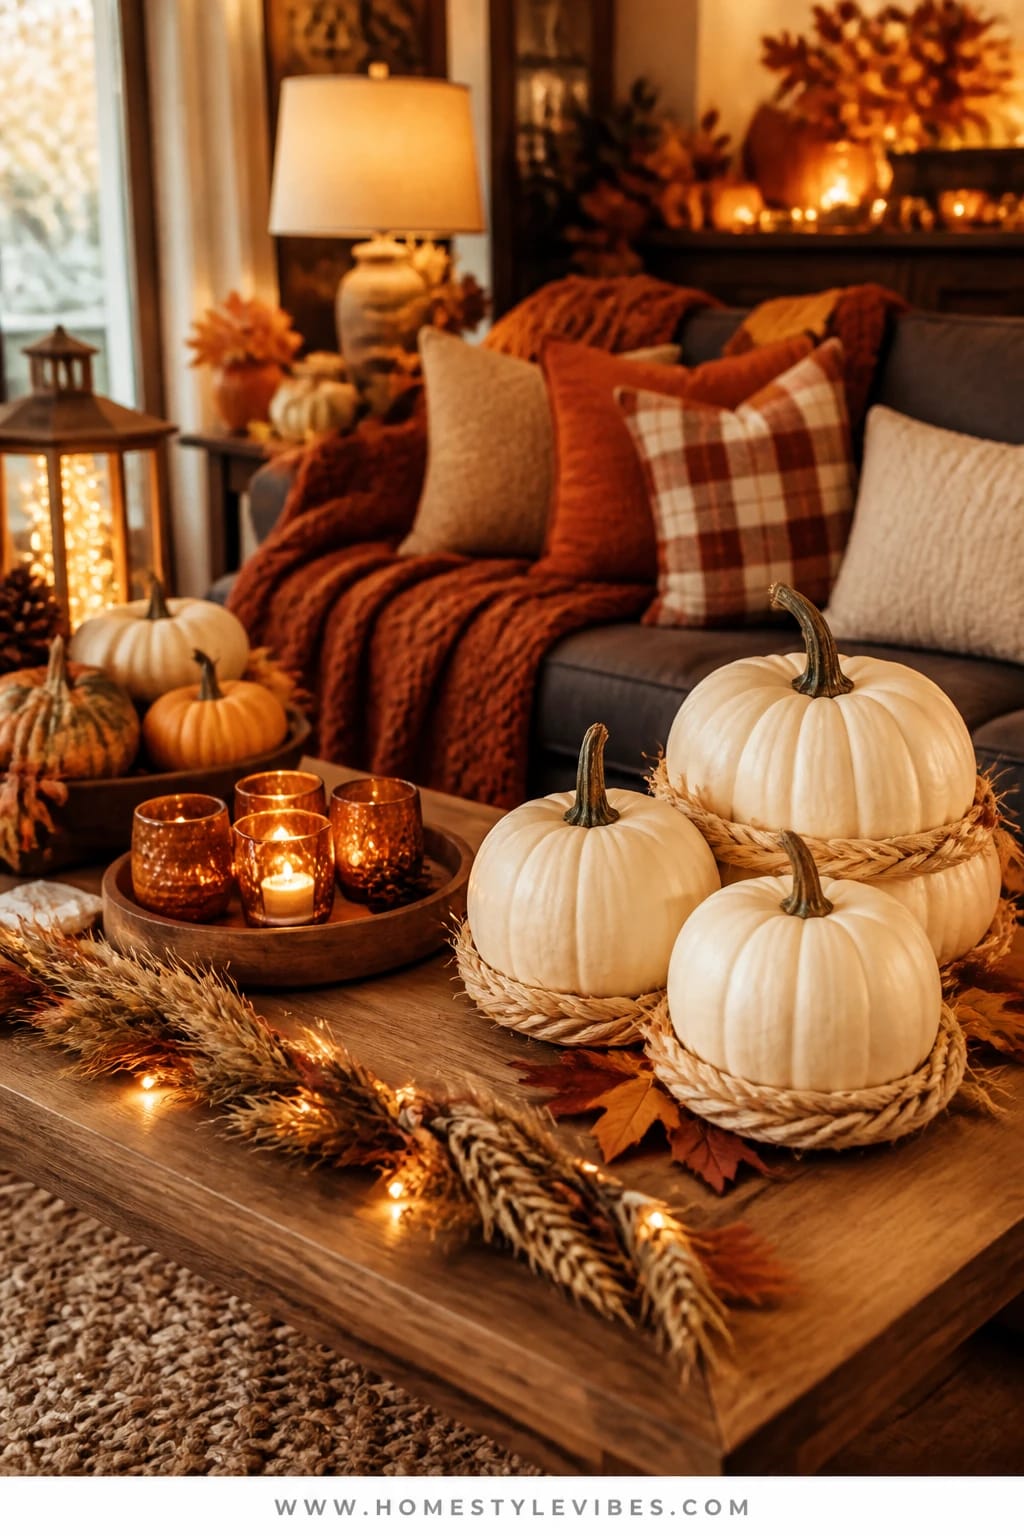
It’s that one coffee table that never looks styled, just busy. Remotes, half-read magazines, a lonely coaster. You’ve tried a big pumpkin centerpiece, but it looked like a bowling ball. Instead, create a white-pumpkin trio wearing “collars” of braided wheat and soft twine. We’re going for calm, glowing, harvest serenity under lamp light—quiet but striking.
This works because white pumpkins act like little lanterns under warm table lamps. The wheat adds feathery movement without bulk, and the trio reads balanced from every angle—which matters in an open living room. It’s family-friendly, pet-tail safe, and easy to lift when you need the surface. Photographs come out clean and inviting thanks to a restrained palette and a harmonious low profile.
Variations: On a tiny table, do a single large white pumpkin with a chunky wheat collar and one low votive. For color lovers, add a single rust velvet ribbon to one collar as a nod to cozy bright autumn without shouting. Early season? Keep just the white pumpkins and twine. Closer to Thanksgiving? Add a mini brass bell or two for sparkle.
Key Design Elements:
- Main seasonal props: 3 white pumpkins, wheat bundles, twine
- Color palette: white, soft wheat, oat, a hint of warm brass
- Lighting strategy: table lamp warmth aimed slightly above the pumpkins to graze their tops
- Textile layers: a neutral tray or shallow basket, maybe a linen runner folded in half
- Natural elements: wheat, dried grass stems
- Accent details: a single brass bell, a ceramic match striker if using candles nearby
Budget Breakdown:
- White pumpkins (real or faux, set of 3): $15–$45
- Wheat bundle (2–3 small): $10–$24
- Twine/ribbon: $3–$8
- Low-profile tray: $15–$35
Total Estimated Cost: $43 – $112
Best For: Living rooms with a central table and warm lamp lighting; great if you want a refined, low-maintenance focal point that doesn’t block TV sightlines.
How To Recreate This Look:
- Start with a neutral tray or folded runner to define your styling zone.
- Add three white pumpkins in a triangular arrangement.
- Layer wheat around each stem, securing with twine to create soft collars.
- Place the trio under a warm table lamp for a clean, luminous effect.
- Style with one small metallic accent to catch the light.
Why This Feels Designer: The controlled palette and repetition of form create visual harmony. The wheat collars introduce artisan texture that suggests hand-finished detail.
One Thing To Avoid: Avoid mixing too many ribbon colors; one accent hue at most. Multiple ribbons start to look crafty in a way that fights the calm vibe.
Pro Styling Tip: Slide the trio off-center on the tray and leave one side “quiet” for negative space—it photographs more editorial.
Still with me? The next idea adds height and color in the most satisfying way.
3) Rust Velvet Ribbon Pumpkin Stacks Beside Warm Books On The Fireplace Mantel
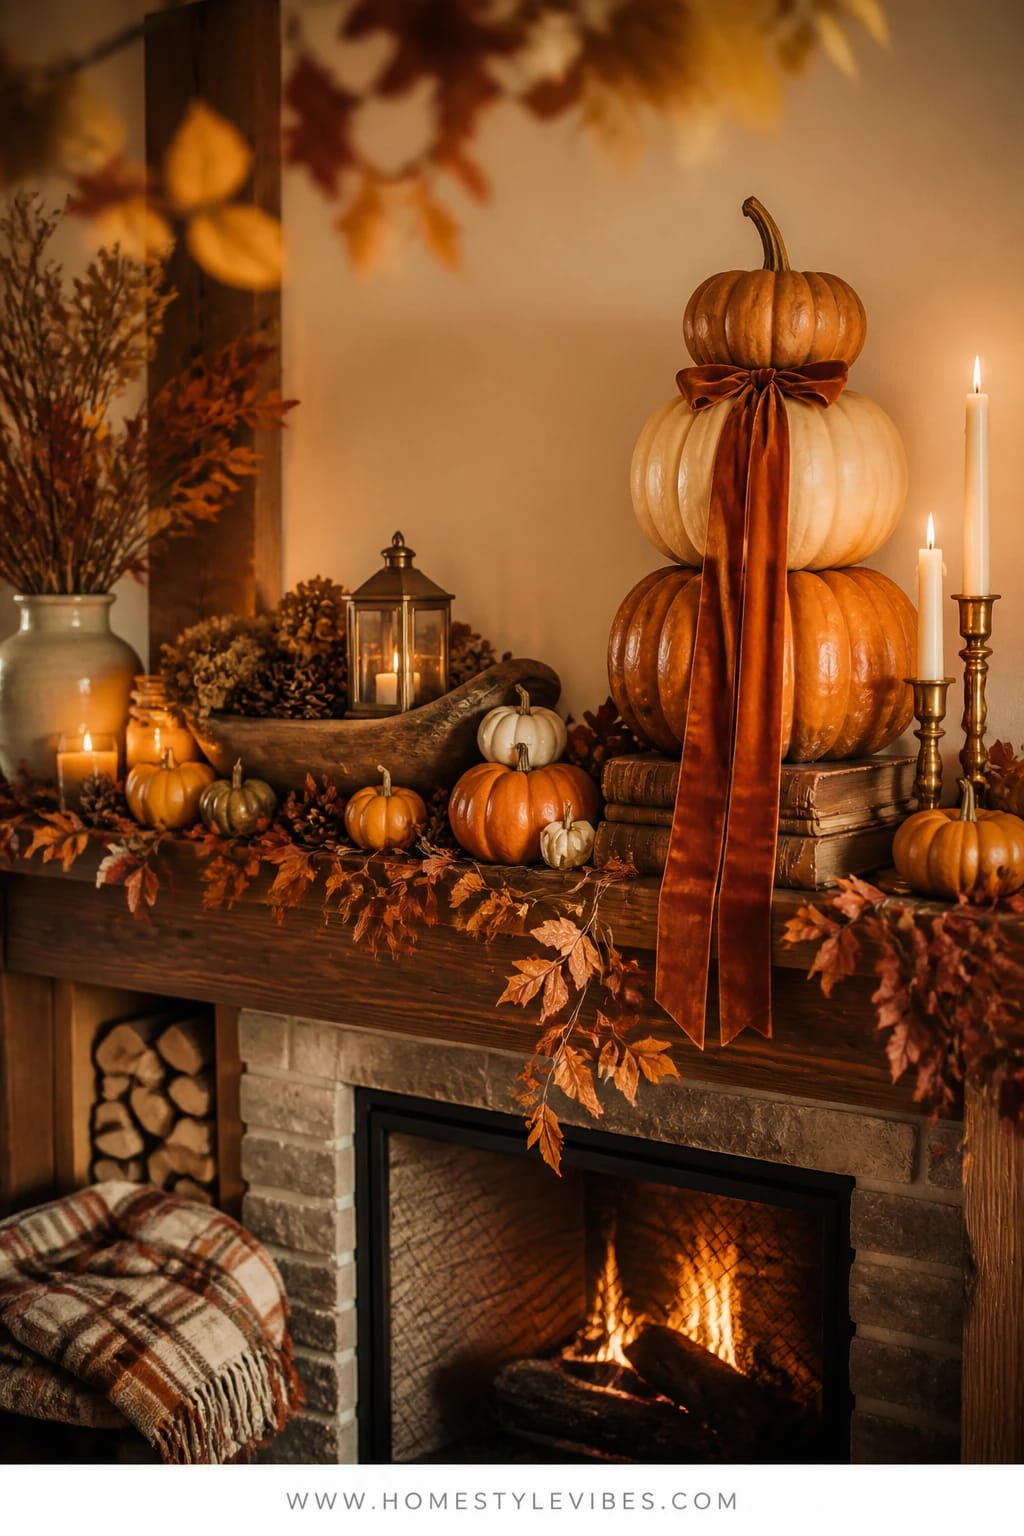
You’ve tried a single pumpkin on the mantel and it disappears. Or you stacked them once, and they toppled like a weird orange Jenga. This version solves it with stability and drama: two or three stacked pumpkins, belted with rust velvet ribbon, anchored by a small stack of warm-toned books and a pair of brass candlesticks. The mood is cozy-bright library: words, warmth, and a little romance from that velvet sheen.
Why it works at home: it creates verticality where you need it most without blocking the TV or art. Velvet ribbon reads plush and deliberate. Books tie in the room’s real life—no need to hide them; they’re part of the story. The brass catches candlelight and throws it across the pumpkin curves for magazine-worthy depth. Also, stacking on the mantel keeps surfaces out of reach for little hands, which, as someone who once watched a toddler peel ribbon like a banana, I deeply appreciate.
Variations: For a budget setup, thrift the books and use grosgrain ribbon instead of velvet. Small mantel? Do one stack plus one single-pumpkin moment on the other side. For a more neutral angle, swap rust ribbon for taupe and keep the book covers in tan and cream. September-friendly? Add a few sprigs of eucalyptus. Late season? Tuck in a spray of deep red faux berries.
Budget Breakdown:
- Pumpkins (2–3 per stack): $12–$36
- Velvet ribbon (2–3 yards): $6–$14
- Thrifted books in warm tones: $6–$18
- Brass candlesticks (pair): $15–$40
- LED taper candles: $12–$24
Total Estimated Cost: $51 – $132
Best For: Living rooms with a traditional mantel; perfect if you want visual height that looks finished but not fussy, all season long.
Key Design Elements:
- Main seasonal props: stacked pumpkins with velvet ribbon
- Color palette: rust, tan, pumpkin orange, brass, warm ivory
- Lighting strategy: two LED tapers on dim setting to glow without heat
- Textile layers: velvet ribbon, optional plaid throw draped nearby
- Natural elements: eucalyptus or berry sprigs
- Accent details: vintage-style bookmarks peeking out of books, a small framed fall print
How To Recreate This Look:
- Start with books laid horizontally to create your “base” mass on one side of the mantel.
- Add a stable stack of pumpkins; pick flattish-bottom pumpkins for the middle layer.
- Layer rust velvet ribbon around the stack like a belt; tie or pin discreetly at the back.
- Place brass candlesticks to the opposite side, then add LED tapers.
- Style with a small framed print or sprig to bridge the two clusters visually.
Why This Reads High-End: Balanced asymmetry plus luxe ribbon creates polish. The warm book spines and brass give depth, so the pumpkin color looks richer by contrast.
The Most Common Mistake: Picking round-on-round pumpkins for stacking. Choose one flatter pumpkin for the middle to keep gravity on your side.
Pro Styling Tip: Angle the stack slightly toward the room; a 10-degree turn shows more surface area and looks better in photos.
Before we move on, a tiny mindset reset: you don’t need all seven concepts. If one idea clicks, ride that. This isn’t about recreating a showroom—it’s about building the fall house you actually live in and love.
4) Gilded Leaf Pumpkin Cluster Under Golden Pendant Light On The Kitchen Island
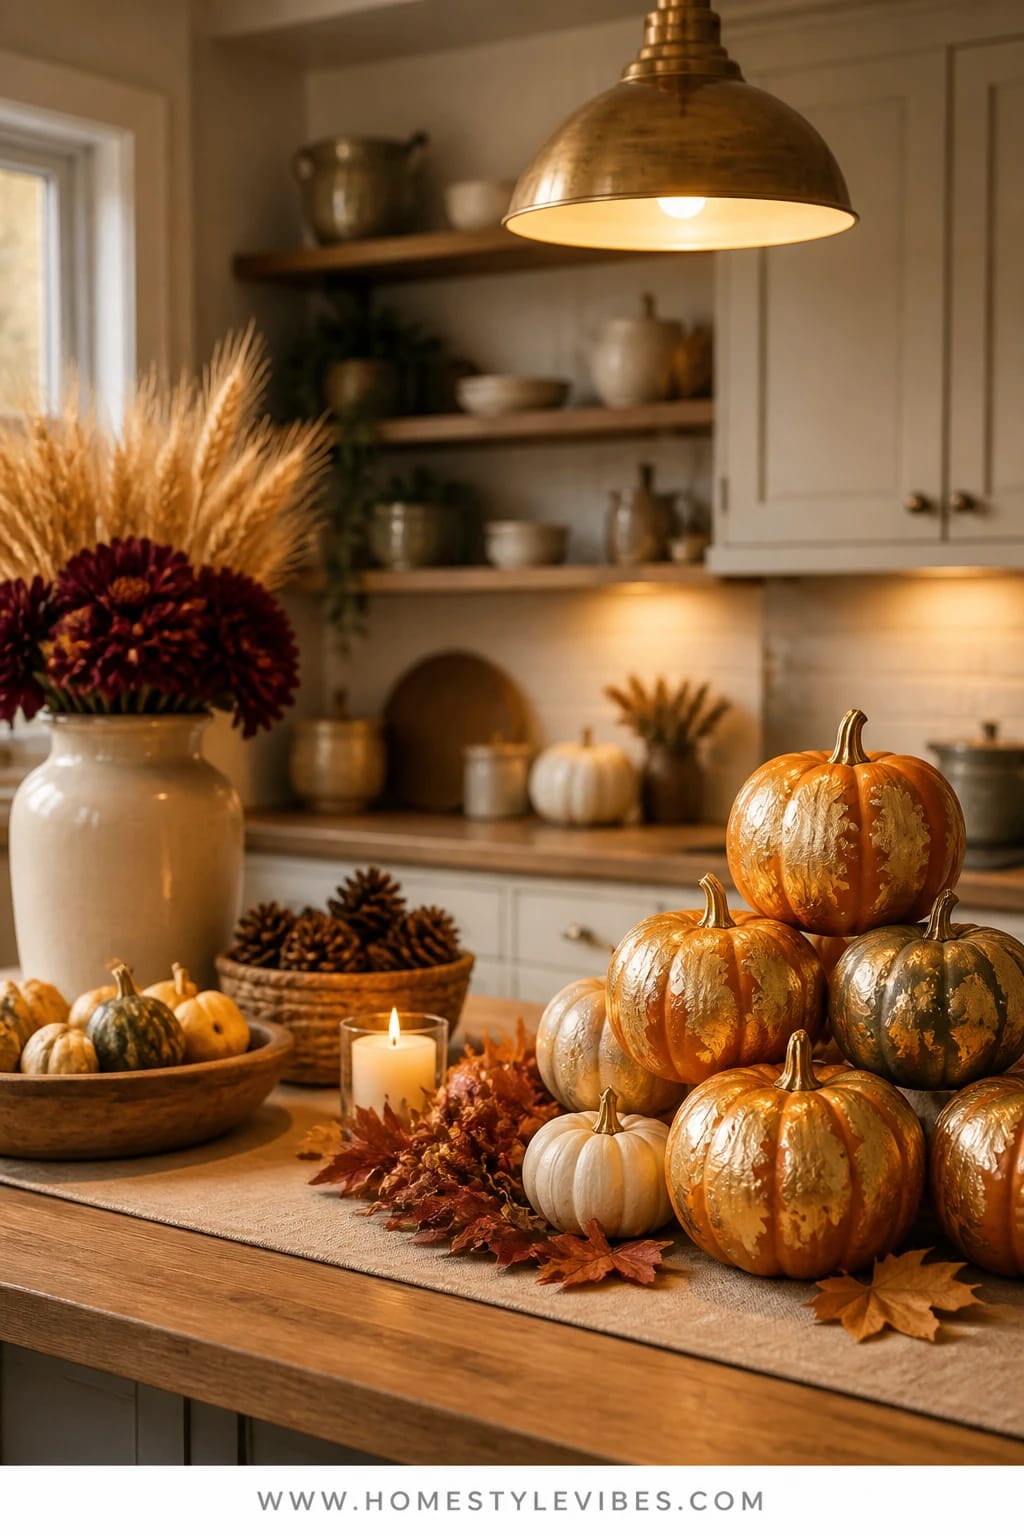
Kitchen islands can feel like drop zones—keys, lunchboxes, and a single pumpkin that looks like it wandered in from the porch. You want something festive that still leaves space to chop onions. Enter a tight cluster of small-to-medium pumpkins brushed with gilded leaf accents, set under your pendant’s warm light. It’s a jewel-box moment that still respects the surface’s daily job.
This works because the metallic taps into the pendant’s glow, creating a twinkle that makes even store-bought soup night feel special. The cluster format keeps it contained; you can literally pick up the tray and move it for big cooking projects. It’s pet- and kid-friendly, scrub-friendly, and it looks fantastic from across the room. Photos pop thanks to the metallic highlights and the pendant’s warm beam shaping the vignette.
Variations: For a smaller island, use a single pumpkin with a wide gilt stripe and two mini pumpkins tucked on a small board. On a tight budget, use metallic paint pen instead of leaf—faster, cheaper, still gleams. Early season? Mix more greens and creams. Late season? Add a few pinecones to hint at the coming holidays.
Budget Breakdown:
- Small-to-medium pumpkins (3–5): $9–$30
- Gold or brass leaf kit: $8–$15
- Soft brush and sealant: $6–$12
- Wood tray or marble board: $15–$45
Total Estimated Cost: $38 – $102
Best For: Busy family kitchens where you want pretty but portable; ideal for under-pendant glow and quick cleanup.
Key Design Elements:
- Main seasonal props: pumpkins with partial gilded leaf
- Color palette: pumpkin orange, cream, warm gold, wood
- Lighting strategy: targeted pendant light on dimmer to warm the metal
- Textile layers: none required; simplicity keeps it kitchen-friendly
- Natural elements: a sprig of rosemary or thyme for scent and texture
- Accent details: marble or wood tray to contain the cluster
How To Recreate This Look:
- Start with a clean tray or board centered under your pendant.
- Add 3–5 pumpkins, alternating sizes for a casual “mound.”
- Layer gold leaf onto select areas: stems, ridges, or a partial crescent.
- Place a rosemary sprig at the edge for fresh scent and color.
- Style by nudging pumpkins close enough to feel intentional but not crowded.
Why This Looks Intentional: The pendant’s spotlight plus a disciplined metallic accent says “designed,” not “dropped there.” It’s the intersection of practical and pretty.
Don’t Do This: Avoid leafing entire pumpkins. Overmetallicizing kills the cozy and feels chilly. Partial leafing delivers just the right spark.
Pro Styling Tip: If photographing at night, dim the pendant slightly and kill overhead cans—the warmer beam makes the gold glow like candlelight.
5) Harvest Garland And Pumpkin Pile With Warm String Lights On The Staircase Ledge
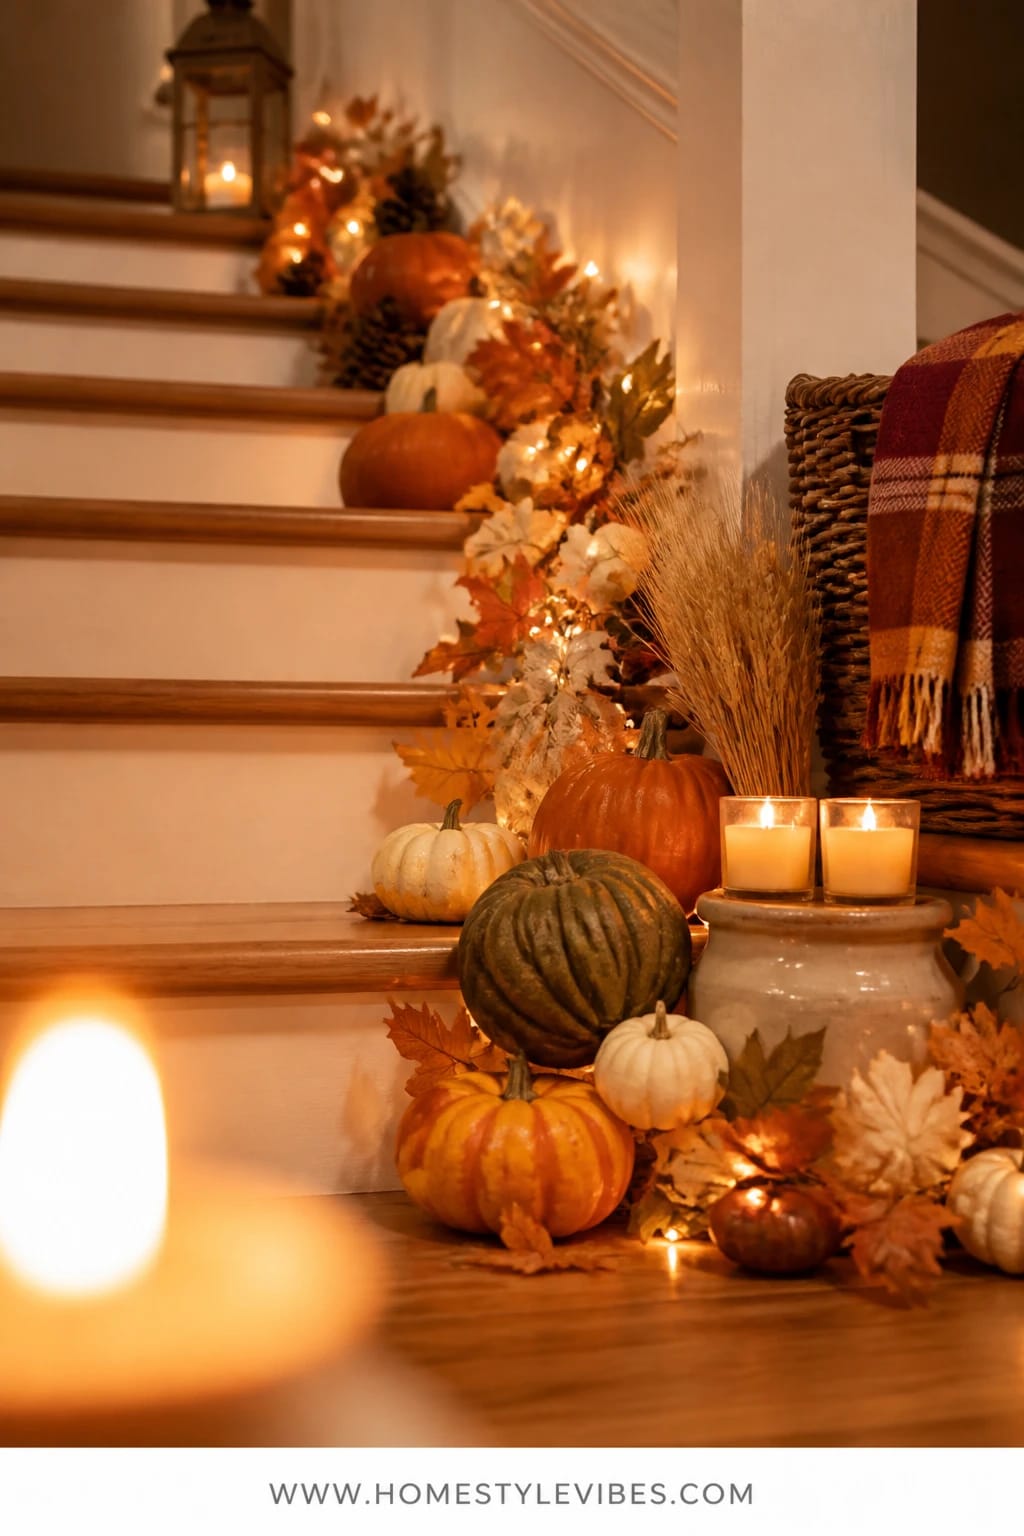
Stair ledges and landings are tricky—long, narrow, and echo-y. You’ve tried a single pumpkin and it just looks random. Solve it with a soft vine garland, a few well-placed pumpkins, and a delicate thread of warm micro string lights. The look whispers harvest without shouting, and it turns a pass-through into a moment of delight.
Why it works: the linear space begs for a linear element. The garland becomes your road, pumpkins become scenic stops, and the lights add a moonlit sparkle at night. It’s super photogenic because of the glow snaking through depth, and it’s practical—tucked against the wall so it stays out of foot traffic and dog tails. Storage later? Wrap garland in tissue, stack pumpkins, untangle lights once (we all have that one strand that mysteriously dies right before Thanksgiving; keep a spare).
Variations: For a smaller ledge, do mini pumpkins only with a stubby garland cutting. On a budget, twist two faux leafy garlands together for fullness. Early October? Keep it leafy. Mid-to-late November? Add wheat tufts and one or two pinecones so it bridges into the holiday season without whiplash.
Budget Breakdown:
- Faux harvest garland: $18–$45
- Assorted pumpkins (4–6): $12–$36
- Warm micro string lights: $8–$16
- Command hooks or clear clips: $6–$12
Total Estimated Cost: $44 – $109
Best For: Homes with a visible staircase or landing ledge; the most impact happens at dusk and after dinner when the lights glow.
Key Design Elements:
- Main seasonal props: faux harvest garland, pumpkins
- Color palette: deep greens, russet, orange, golden light
- Lighting strategy: micro lights woven through the garland, battery pack hidden
- Textile layers: none required; crisp backdrop helps the lights read
- Natural elements: optional wheat tufts at intervals
- Accent details: clear clips to guide the garland line neatly
How To Recreate This Look:
- Start by attaching clear clips along the ledge edge to guide the garland path.
- Add the garland, draping in gentle dips; secure as needed.
- Layer micro lights through foliage; keep the cord invisible.
- Place pumpkins at intervals, heavier at corners for balance.
- Style by tucking wheat tufts in the dips for softness.
Why This Looks Expensive: Controlled, continuous lighting tricks the eye into seeing a “built-in” moment. The rhythm of lights and pumpkins feels composed, like a styled storefront.
Watch Out: Don’t leave cords visible or batteries dangling. Hide power elements behind pumpkins or in a small basket—messy tech kills the magic.
Pro Styling Tip: Stagger pumpkin heights by resting one or two on slim books wrapped in kraft paper—subtle lifts add dimension in photos.
Feeling inspired? Let’s lean into the entryway next—because first impressions set the whole house tone.
6) Amber Glass, Cinnamon Sticks, And Speckled Pumpkins On The Entryway Console
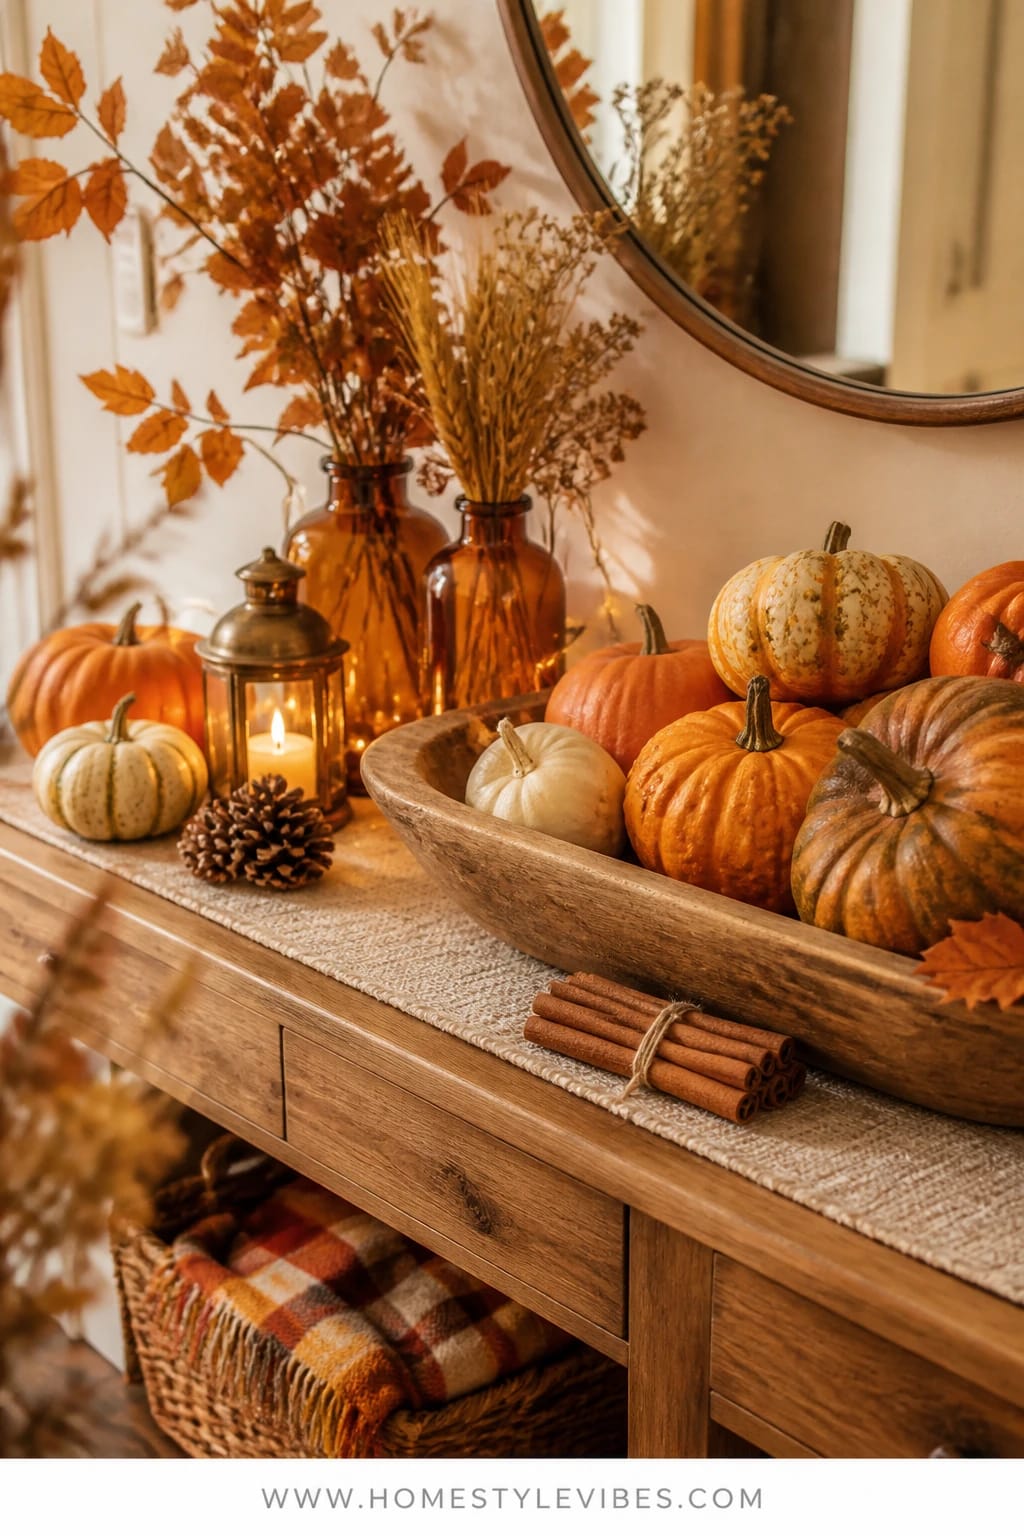
Entry tables can look like post office counters—keys, mail, random sunglasses. You’ve tried a pumpkin here, but it never reads as “styled.” Build a tiny harvest story: speckled pumpkins in a shallow bowl, amber glass bottles with clipped branches, and a bundle of cinnamon sticks tied with twine. The entry instantly smells like fall (subtle, not candle-store strong) and looks pulled together.
It works because a tray or bowl corrals chaos, amber glass adds warmth, and the cinnamon bundles introduce small-scale texture that says, “Someone thought about this.” The whole scene is shallow enough for tight hallways. It’s easy to move for wipe-downs, and it transitions from September through Thanksgiving by simply swapping the branch type—green early, coppery leaves mid-season, bare stems with tiny berries late.
I tried this on my own console last October and honestly couldn’t believe the difference. Guests who usually dump their keys paused to say “Oh, it smells so good in here,” and then—magic—placed their stuff neatly in the tray.
Budget Breakdown:
- Speckled pumpkins (real or faux, 3–5): $9–$25
- Amber glass bottles (set of 2–3): $12–$28
- Cinnamon sticks and twine: $4–$10
- Shallow bowl or tray: $15–$35
- Clipped branches (yard or grocery): $0–$8
Total Estimated Cost: $40 – $106
Best For: Narrow entryways that need fast style and a soft scent cue; great for homes with daily in-and-out traffic.
Key Design Elements:
- Main seasonal props: speckled pumpkins, amber glass, cinnamon bundles
- Color palette: amber, cream, orange flecks, soft brown
- Lighting strategy: nearby lamp or sconce with warm bulb (2700K) for cozy glow
- Textile layers: small woven mat or folded linen under the bowl
- Natural elements: seasonal branches swapped as the months change
- Accent details: a little brass dish for keys to keep the look tidy
How To Recreate This Look:
- Start with a shallow bowl or tray to claim the center of the console.
- Add 3–5 speckled pumpkins inside the bowl, with one slightly taller than the rest.
- Layer in one or two amber bottles with simple branches.
- Place a twine-tied cinnamon bundle on the tray’s edge for scent.
- Style by adding a brass key dish to keep life organized and pretty.
Why This Feels Designer: Repeating amber in glass and lighting creates a cohesive color echo. The cinnamon bundle reads like a styled prop, not clutter.
One Thing To Avoid: Avoid overcrowding the bowl; let the speckles show. Visual breathing room is what makes it look considered.
Pro Styling Tip: Turn one pumpkin so the prettiest speckle faces the door—first-sight detail sells the whole vignette in photos and in life.
Perspective check: perfection isn’t the goal. If your entry catches backpacks and breakfast wrappers on busy mornings, same. Style the tray anyway—on the average day, it still does the mood-setting job.
7) Painted Checkerboard Pumpkin Centerpiece With Warm Brass Bowls On The Breakfast Nook Table
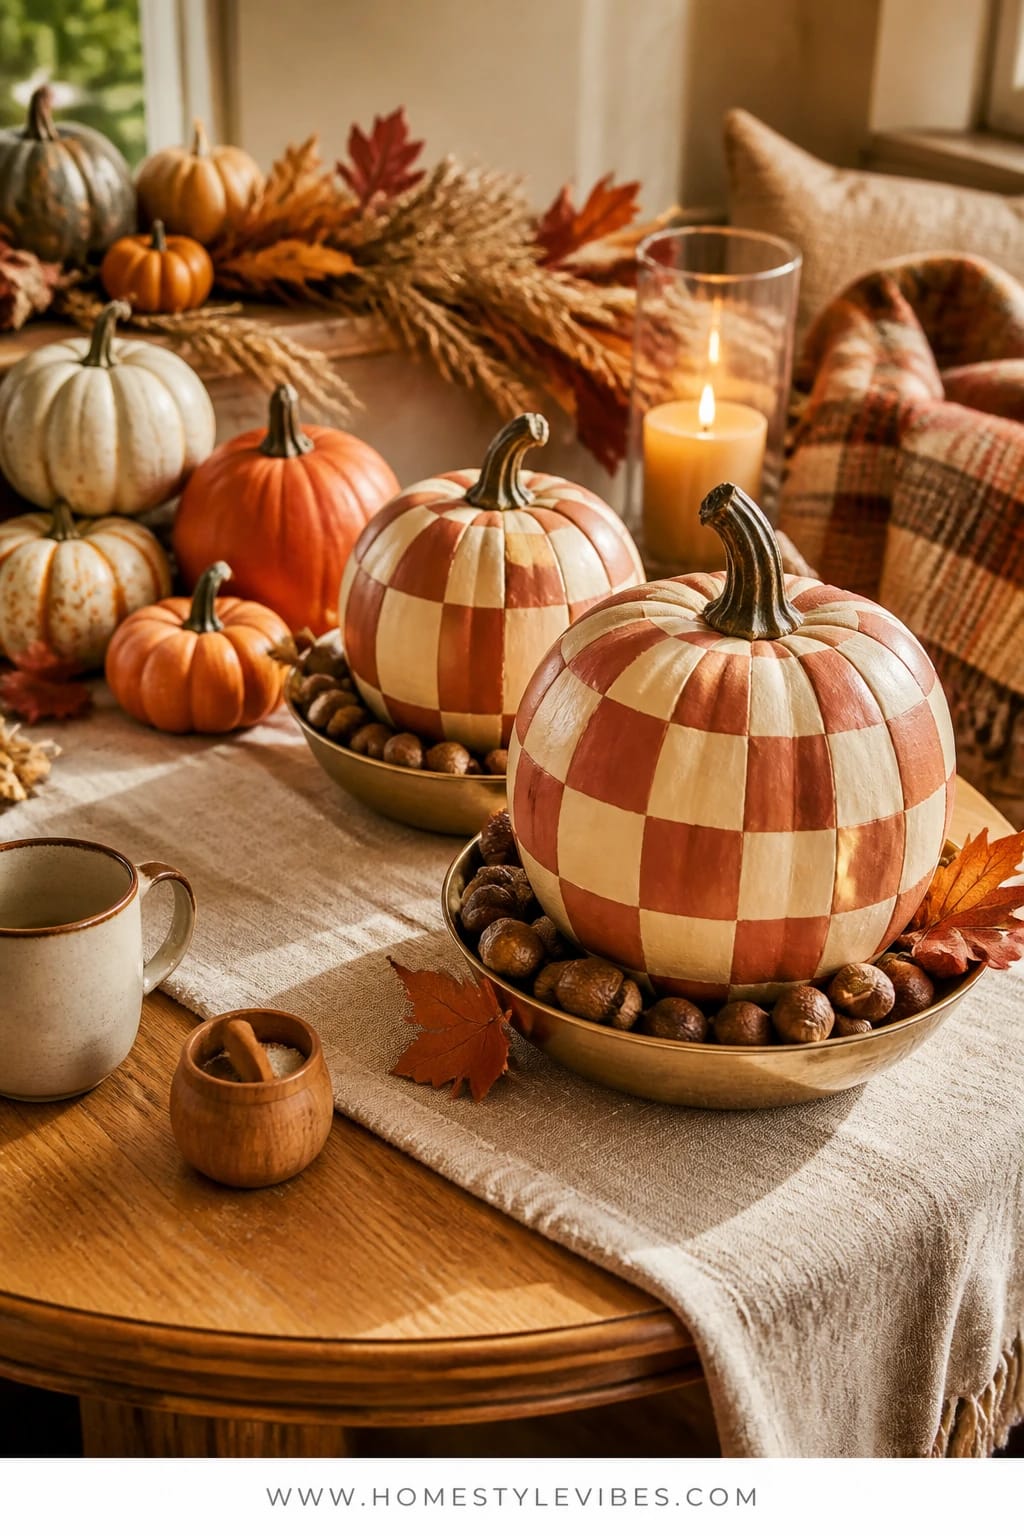
Some mornings need a little pep that doesn’t involve more coffee. The breakfast nook often sits in bright light and deserves a playful moment. Paint a couple of mid-sized pumpkins with a soft checkerboard pattern—warm cream and pale rust—then tuck them into low brass bowls with a halo of acorns or dried beans. It’s cheerful, cozy, and very “we do fall here” without going full craft hour.
Why it works: the checker pattern adds graphic charisma that feels modern farmhouse-meets-harvest. Brass bowls ground the pumpkins and catch morning sun with a mellow shine. Dried beans or acorns stabilize the pumpkins and add subtle texture. The whole piece is low and centered, perfect for small tables and family breakfasts. It photographs brilliantly because checkers love sunlight; even a little glare gives them dimensionality.
Variations: On a tiny round table, do a single pumpkin in a single brass bowl. On a budget, paint just the stem and one checker column for a minimal nod. Prefer classic vibes? Swap the checker for a loose stripe. Early fall? Keep the palette cream and sage. Late fall? Layer in a few burgundy napkins under the bowls for seasonal depth.
Budget Breakdown:
- Mid-sized pumpkins (1–2): $6–$16
- Acrylic craft paint (cream, pale rust): $4–$10
- Low brass bowls (1–2): $14–$40
- Dried beans/acorns (filler): $3–$8
- Painter’s tape (optional): $3–$6
Total Estimated Cost: $30 – $80
Best For: Sunny breakfast nooks or kitchen tables that need a joyful, low centerpiece you won’t bump into while setting plates.
Key Design Elements:
- Main seasonal props: checker-painted pumpkins in brass bowls
- Color palette: cream, pale rust, warm brass, natural brown
- Lighting strategy: morning light; adjust blinds to prevent harsh glare lines
- Textile layers: cotton or linen napkins in rust or oatmeal beneath bowls
- Natural elements: acorns or dried beans as tactile filler
- Accent details: small wooden salt pinch bowl to echo natural tones
How To Recreate This Look:
- Start with clean pumpkins; wipe with a dry cloth.
- Add light tape guidelines if you want straight checks, then paint alternating squares.
- Layer dried beans or acorns into the brass bowl.
- Place the pumpkin on top; wiggle to nestle and stabilize.
- Style with napkins peeking under the bowls for a soft color echo.
Why This Looks Expensive: The brass plus hand-painted detail reads artisanal. Limited colors and low profile keep it chic, not kitschy.
Don’t Do This: Don’t overpattern the table with busy placemats plus checks; let the centerpiece be the star and keep surrounding textiles simple.
Pro Styling Tip: For photos, rotate the pumpkin so a painted square catches the sun; the slight sheen makes the checks pop.
One more tiny mindset note: if something feels tricky—like spacing checks or stacking pumpkins—that’s normal. I still eyeball and adjust. The secret isn’t perfection. It’s warmth, repetition, and light.
Quick Checklist
- Plaid runner or scarf for instant dining table foundation
- Amber glass votives and LED tapers for warm glow
- White pumpkins and wheat for calm coffee table trios
- Velvet ribbon for polished mantel stacks
- Gold leaf or metallic paint pen for subtle shimmer
- Faux harvest garland and micro lights for staircase ledges
- Amber glass bottles and cinnamon bundles for entry consoles
- Brass bowls and dried beans as stable centerpiece bases
- Soft, saturated fall palette: rust, burgundy, amber, cream
- Hidden clips, felt dots, and tidy cords to keep the magic intact
Frequently Asked Questions
How do I keep costs down while still making a first-place-worthy pumpkin display?
Pick one anchor material (like a plaid runner or brass bowl) and reuse it across multiple seasons. Thrift the supporting cast—books, bottles, trays. Buy fewer but larger pumpkins for presence, then fill with inexpensive accents like dried beans, twine, and clipped branches from your yard.
Should I use real or faux pumpkins for these no-carve ideas?
Real pumpkins win on texture and color IMO, especially for close-up displays. Use faux for high-heat spots (mantels over working fireplaces) or long timelines. A mix is best: real where you see them up close, faux where you need longevity or height.
My space is small. Which idea works best without crowding?
Try the wheat-collared white pumpkin trio on a coffee table or the checker-painted single pumpkin in a brass bowl for the breakfast nook. Both are low-profile, compact, and still deliver that cozy-bright autumn glow.
How do I store everything after the season without a mess?
Dedicate one tote to textiles and ribbons, one to vessels and glass, and one to faux greenery/lights. Wrap velvet ribbon on cardboard to prevent creases. For faux pumpkins, stuff the hollows with soft cloth to prevent dents, and label each tote by room (mantel, entry, kitchen) so next year is plug-and-play.
Are candles safe around kids and pets with these setups?
Use LED tapers and flameless votives in high-traffic zones like the mantel, staircase, and entry. Save real candles for supervised dining. Keep cords and battery packs hidden and secured, and avoid scented candles near food—go for cinnamon bundles or rosemary sprigs for gentle fragrance.
When should I start decorating for fall with pumpkins?
Start light in early September—white pumpkins, greens, and simple textures. Build to warmer oranges, rust ribbons, and garlands by mid-October. Add deeper tones and a few berries or pinecones for late November to sail smoothly into Thanksgiving.
What if I rent and can’t add hooks or nails?
Stick to Command hooks and clear clips for garlands and lights, and favor tray-based styling on tables, consoles, and islands. Everything here is no-carve and mostly no-drill, so your deposit stays safe.
Wrap-Up: Your First-Place Pumpkin Moment Awaits
Pick one idea that made your shoulders drop in relief. Start there tonight. Lay the runner, tie the ribbon, tuck the wheat. Light the amber votives and watch the room soften. This is the cozy bright autumn vibe you wanted—warm light, saturated color, and easy layers you can actually live with.
The truth is, winning a pumpkin decorating contest—even a casual, at-home one—isn’t about carving skills. It’s about rhythm, glow, and a color story that feels generous. Line up your pumpkins with intention, let the candlelight pool in the curves, and add one tactile detail that makes you smile every time you pass by.
You’ve got this. Choose your moment, gather your pieces, and create the kind of fall scene that makes everyone say, “Wait… did you do this?” Yes. You did. And it’s gorgeous.

About the Author

Krisztina P.Rendes, Founder of Home Style Vibes
Founder of Home Style Vibes
Krisztina Puskásné Rendes created Home Style Vibes as a cozy-modern lifestyle space where homemaking meets inspiration. Her goal is to help women create beautiful, organized, and peaceful homes they truly love — without overwhelm. You’ll find here heart-driven content on home decor, cleaning tips, easy family recipes, organization and decluttering, DIY home projects, plants, and seasonal ideas — all designed to bring more calm, comfort, and style into everyday life.





