
6 Cute Painted Pumpkin Ideas For A No-Carve Halloween
You want a house that feels playfully spooky and stylish the minute October hits. You hate the mess, the fruit flies, and the slow collapse of carved pumpkins on the coffee table by week two. You’re craving a Halloween look that’s candlelit and a little witchy—think soft black candles, inky accents, subtle cobwebs, and pumpkins that look like they wandered out of a chic haunted library—but you also want it to be easy, affordable, and cute. These 6 painted pumpkin ideas keep everything indoors, totally no-carve, and achievable in one cozy afternoon, with a realistic budget and mess-free setup.
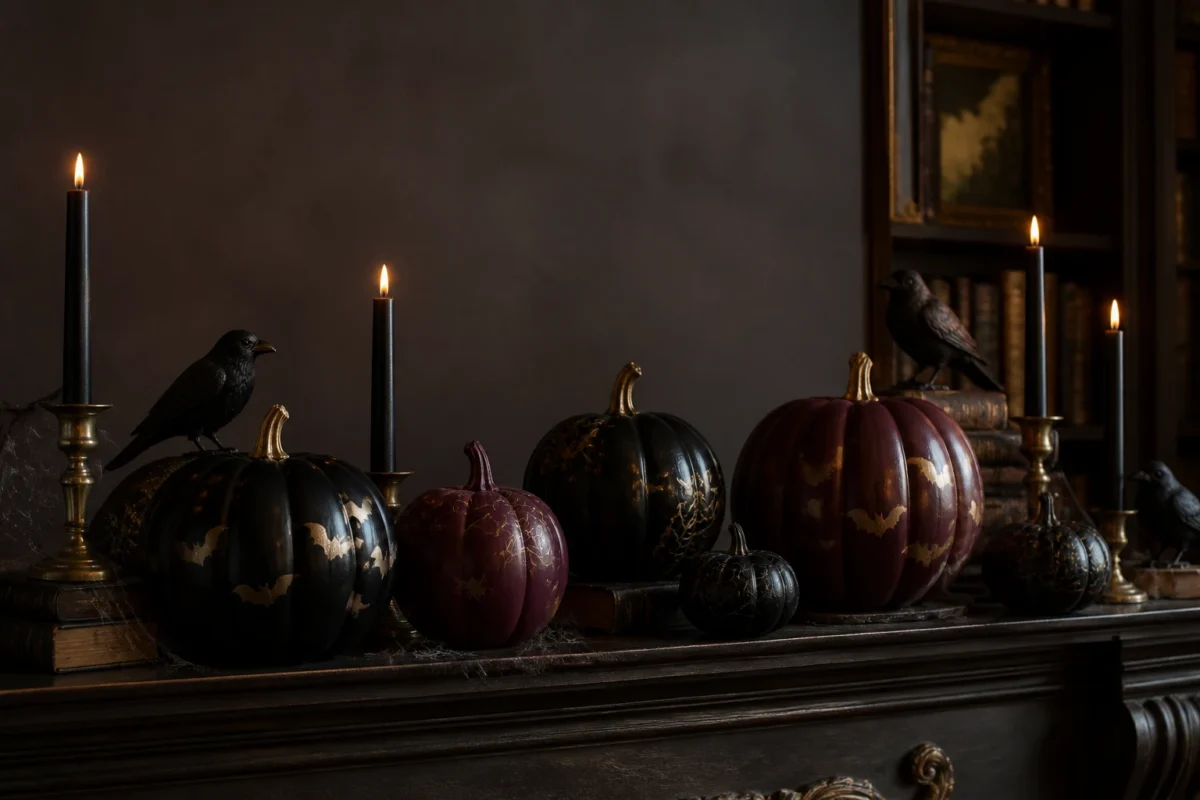
Each project leans into that moody-spooky Halloween vibe: black taper candles in antique brass, deep wine and aubergine touches, tiny crows, a hint of cobwebbing, and glam finishes that photograph like a dream. We’ll solve the “it still looks random” problem and the “I’m not crafty” nerves with step-by-step plans that actually work in real homes—on consoles, coffee tables, mantels, shelves, and kitchen islands. Expect Pinterest-worthy results without the pressure. If you love stylishly haunted moments with personality, you’re in the right place.
1) Velvet-Gloss Bats in Ink Black on the Mantel
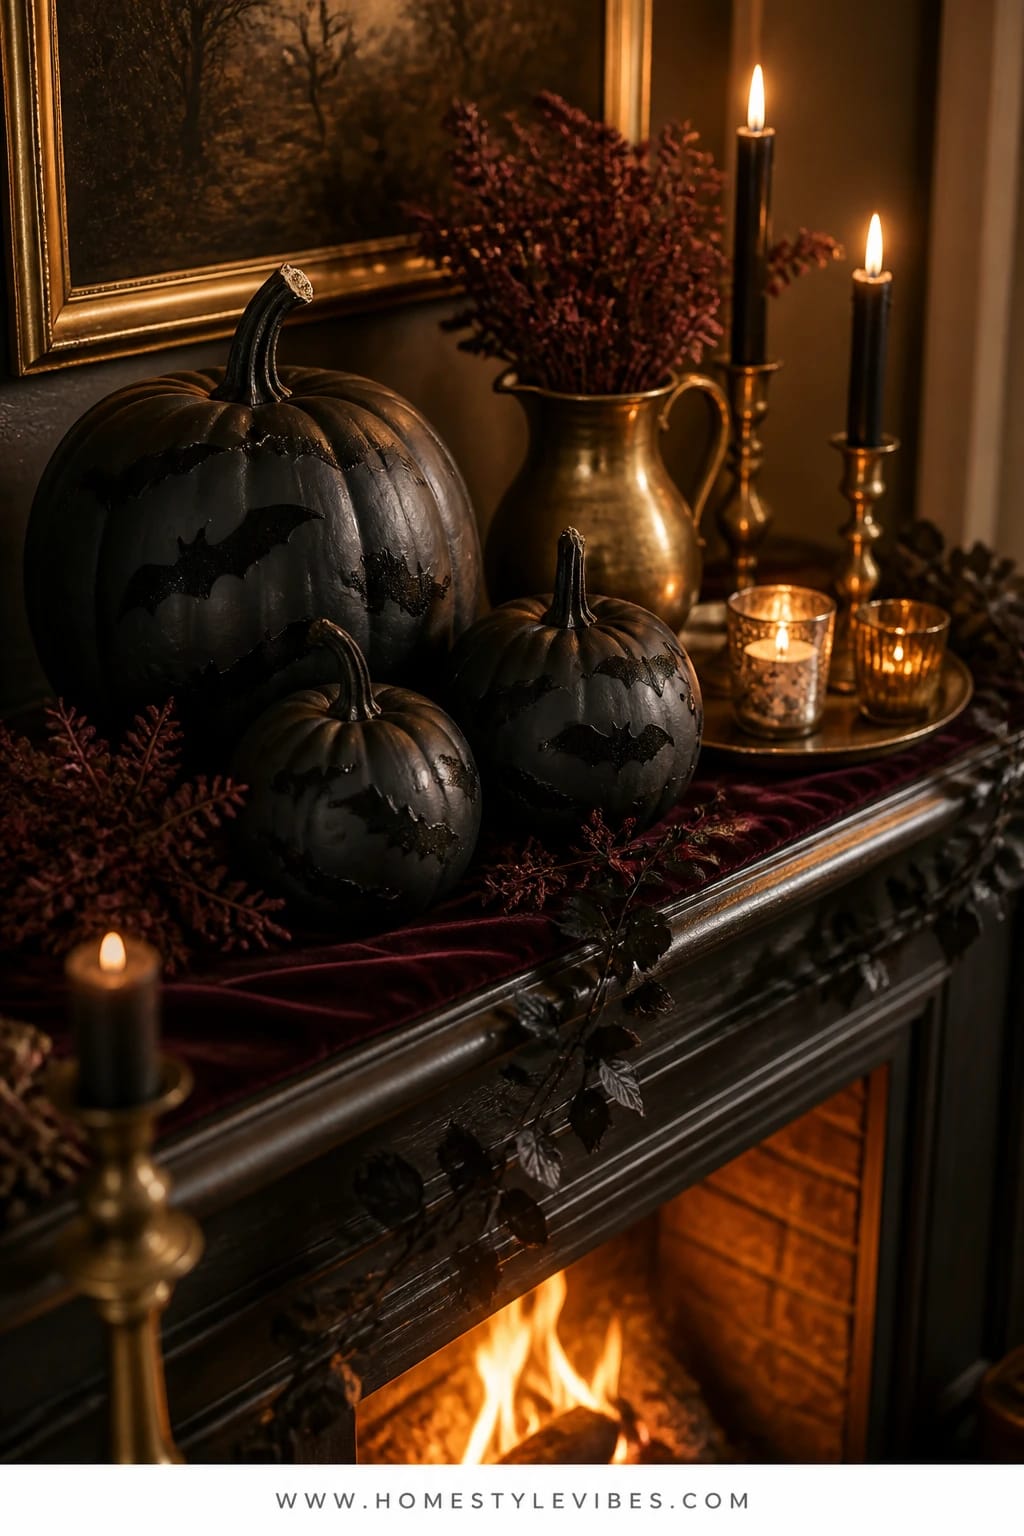
We’ve all been there: the mantel looks like a lost-and-found bin for mini pumpkins and candle stubs. You’ve tried lining up orange pumpkins, but it still reads “kid’s craft hour,” not “haunted-chic.” This painted pumpkin idea centers everything with a single, graphic look—inky black pumpkins with glossy velvet bat silhouettes—so your mantel feels intentional and candlelit, not chaotic.
The mood here is playful-spooky with a grown-up edge. Black matte paint paired with a velvet-gloss bat cutout creates that intimate Halloween drama, especially when you add black taper candles in antique brass holders. Real homes benefit because the pieces are sturdy, pet-friendly, and stash neatly in a bin after the season. Clustered candlelight throws shadows that make the bats feel like they’re about to flutter off. Props stay solidly in the Halloween vocabulary: black candles, crows, a hint of cobweb, and a few dried burgundy stems for depth without clutter.
It photographs beautifully because you’re working in a tight color story—matte black, deep wine, and warm brass—so every angle looks clean and moody. Two variations to try: a budget version using craft-store faux pumpkins and a single can of black spray paint; or a high-drama version with oversized faux pumpkins and stippled gloss-on-matte bat shapes for texture. It shifts easily from late September to Halloween week—swap the deep wine stems for bare black branches as the month creeps on.
Budget Breakdown:
- Faux pumpkins (assorted sizes): $3–$18 each
- Matte black spray paint or acrylic: $6–$10
- Velvet ribbon or velvet paper for bat shapes: $4–$9
- Antique brass candleholders (vintage or repro): $10–$25 each
- Black taper candles: $6–$12 per set
- Mini crows or ravens (decor accents): $5–$12 each
Total Estimated Cost: $45 – $135
Best For: A living room mantel that needs a clean, moody focal point. Works in traditional or modern homes and plays nice with existing art above the mantel.
Key Design Elements:
- Main seasonal props: painted black pumpkins, velvet bat silhouettes, black tapers
- Color palette: matte black, gloss black, antique brass, hints of deep burgundy
- Lighting strategy: clustered candlelight across the mantel for shadow play
- Textile layers: velvet ribbon or velvet-paper cutouts
- Natural elements: sparse dried burgundy roses or branches
- Accent details: antique brass holders, small crows, subtle cobwebbing at the corners
How To Recreate This Look:
- Start with a clean mantel; remove everything but a mirror or art if it’s fixed.
- Add a base line of 3–5 faux pumpkins in varying sizes; paint them matte black.
- Layer on bat silhouettes cut from velvet paper; adhere with tiny glue dots.
- Place antique brass holders with black tapers in asymmetrical pairs to create rhythm.
- Style with a single cluster of dried burgundy roses and one or two mini crows perched at the ends.
Why This Looks Expensive: The matte-on-gloss contrast reads like custom art, and the antique brass gives a collected, not store-bought, finish. The limited palette mirrors high-end styling rules: fewer colors, more texture.
Watch Out: Don’t crowd the mantel edge. Leave breathing space at the front lip so the shapes feel intentional, not precarious. And keep candles away from any ribbon or faux foliage.
Pro Styling Tip: For moody photos, light only the tapers and one lamp across the room—let the shadows make your bats feel alive.
2) Cobwebbed Cream Spook-Pop on the Coffee Table
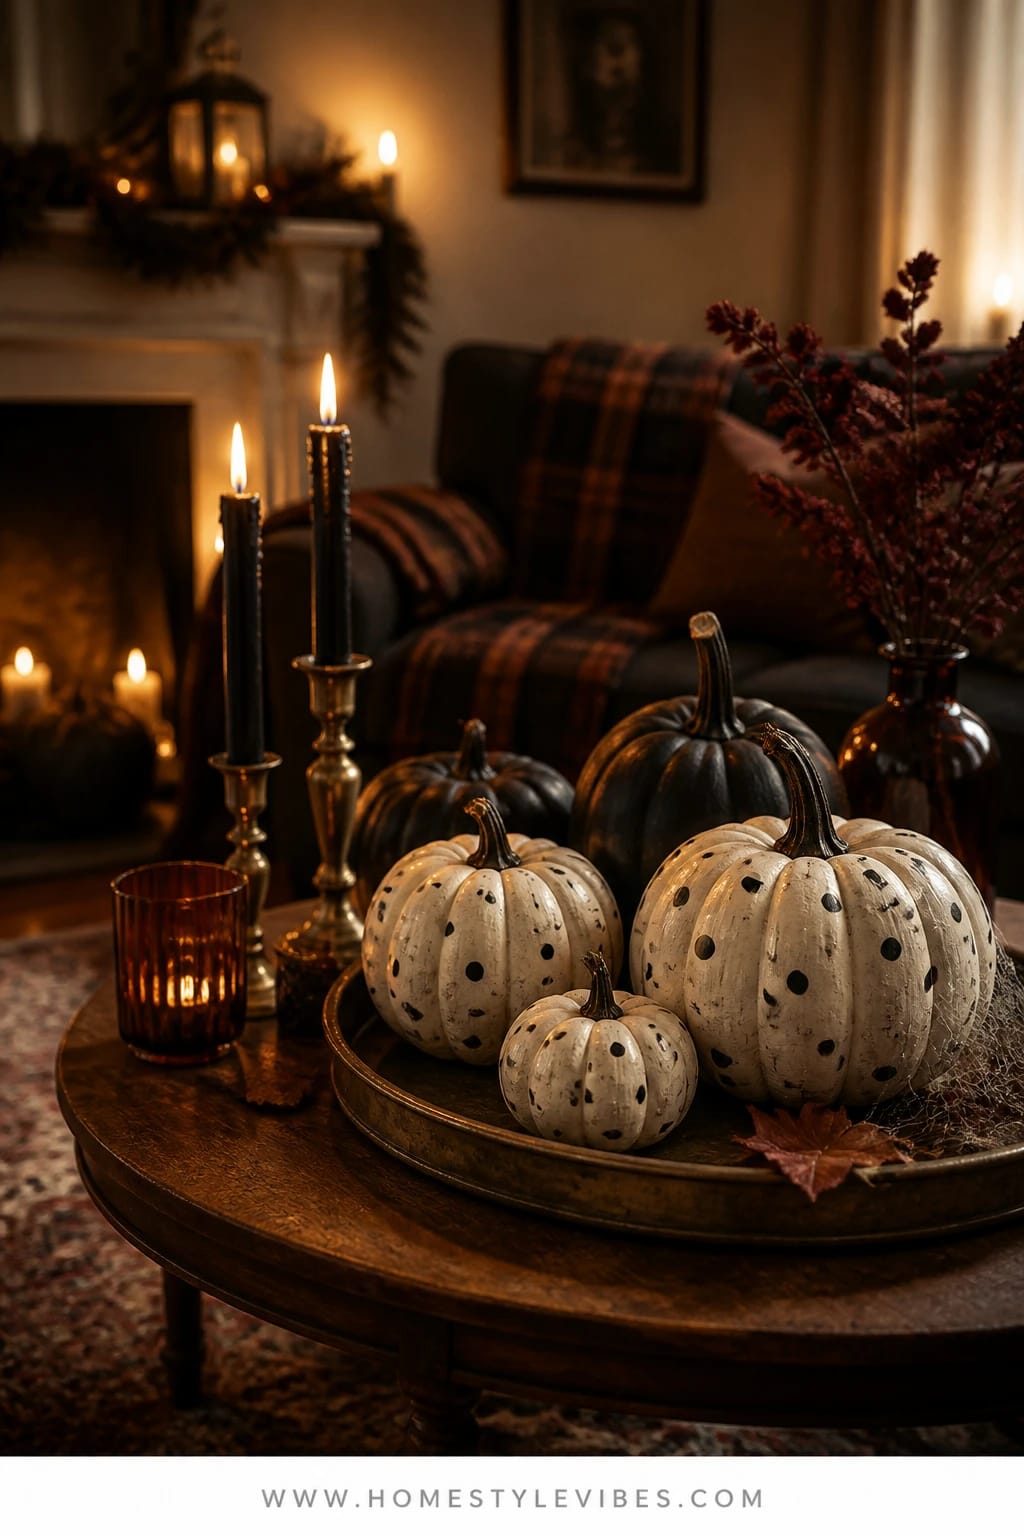
It’s that one living room spot that always feels off: the coffee table. You’ve got remotes, coasters, and not much room for decor. Painted pumpkins to the rescue, but with a twist—soft cream pumpkins glazed with a faint grey wash, topped with playful black “spook-pop” polka dots and a whisper of cobweb at the tray edge. No carving, no mess, all personality.
This creates a friendly haunted vibe—winks of Halloween without turning the room into a party store. It works because everything stays contained on a tray, so you can lift and move it for movie night. Candlelight bounces off the cream surfaces, and the black dots add graphic punch that reads across the room. Think petite black votives, a small stack of vintage card decks, and one raven figurine to anchor the scene.
Photos love this look because high contrast (cream and black) pops even in warm lamplight. Variation ideas: use white faux pumpkins with charcoal watercolor dots for a softer effect, or swap dots for tiny crescent moons if you want it witchy-cute. Transition it into November by removing the cobweb and raven, leaving the neutral pumpkins and a wool throw nearby.
Budget Breakdown:
- Faux mini and small pumpkins (cream/white): $2–$10 each
- Charcoal/black acrylic paint or paint pen: $3–$7
- Clear glaze or satin topcoat: $5–$10
- Round tray (black, brass, or wood): $15–$40
- Small raven figure: $6–$12
- Black votives or tea lights: $6–$10
- Subtle faux cobweb: $2–$5
Total Estimated Cost: $39 – $94
Best For: Busy family rooms where decor has to share space with snacks and remotes. Also great for pet households—everything stays secured in a single tray.
Key Design Elements:
- Main seasonal props: cream-painted pumpkins with black dots, raven figurine
- Color palette: cream, charcoal, black, a touch of brass
- Lighting strategy: a single table lamp plus black votives to keep it cozy, not cave-like
- Textile layers: a folded black knit throw on the sofa to echo the dots
- Natural elements: one dried seed pod or twig for height
- Accent details: low tray, subtle cobweb teasing the tray rim
How To Recreate This Look:
- Start with a tray that fits your table and leaves room for mugs.
- Add two small cream pumpkins and one mini; give them a light grey wash if too bright.
- Layer painted dots using a pencil eraser or round dauber for even circles.
- Place a small raven and two black votives; keep heights below sightline for TV viewing.
- Style with a tiny pinch of cobweb at the tray’s edge and one twig tucked under a pumpkin.
Why This Feels Designer: The restraint—the tray boundary, the limited palette, and repetition of dots—makes it look edited and calm even with spooky details.
One Thing To Avoid: Over-dusting with cobweb. A whisper looks eerie; a clump looks dusty. Less is more here.
Pro Styling Tip: Shoot from sofa height so the dots read like a pattern, not random specks, and let the lamp throw a warm halo onto the tray.
Remember, this isn’t a craft competition. It’s about a room that looks pulled-together when you walk in with your sweater and a bowl of candy corn. If one of these painted pumpkin ideas makes you smile, start there and ignore the rest for now.
3) Oxblood Brushstroke Pumpkins with Black Candles on the Dining Table
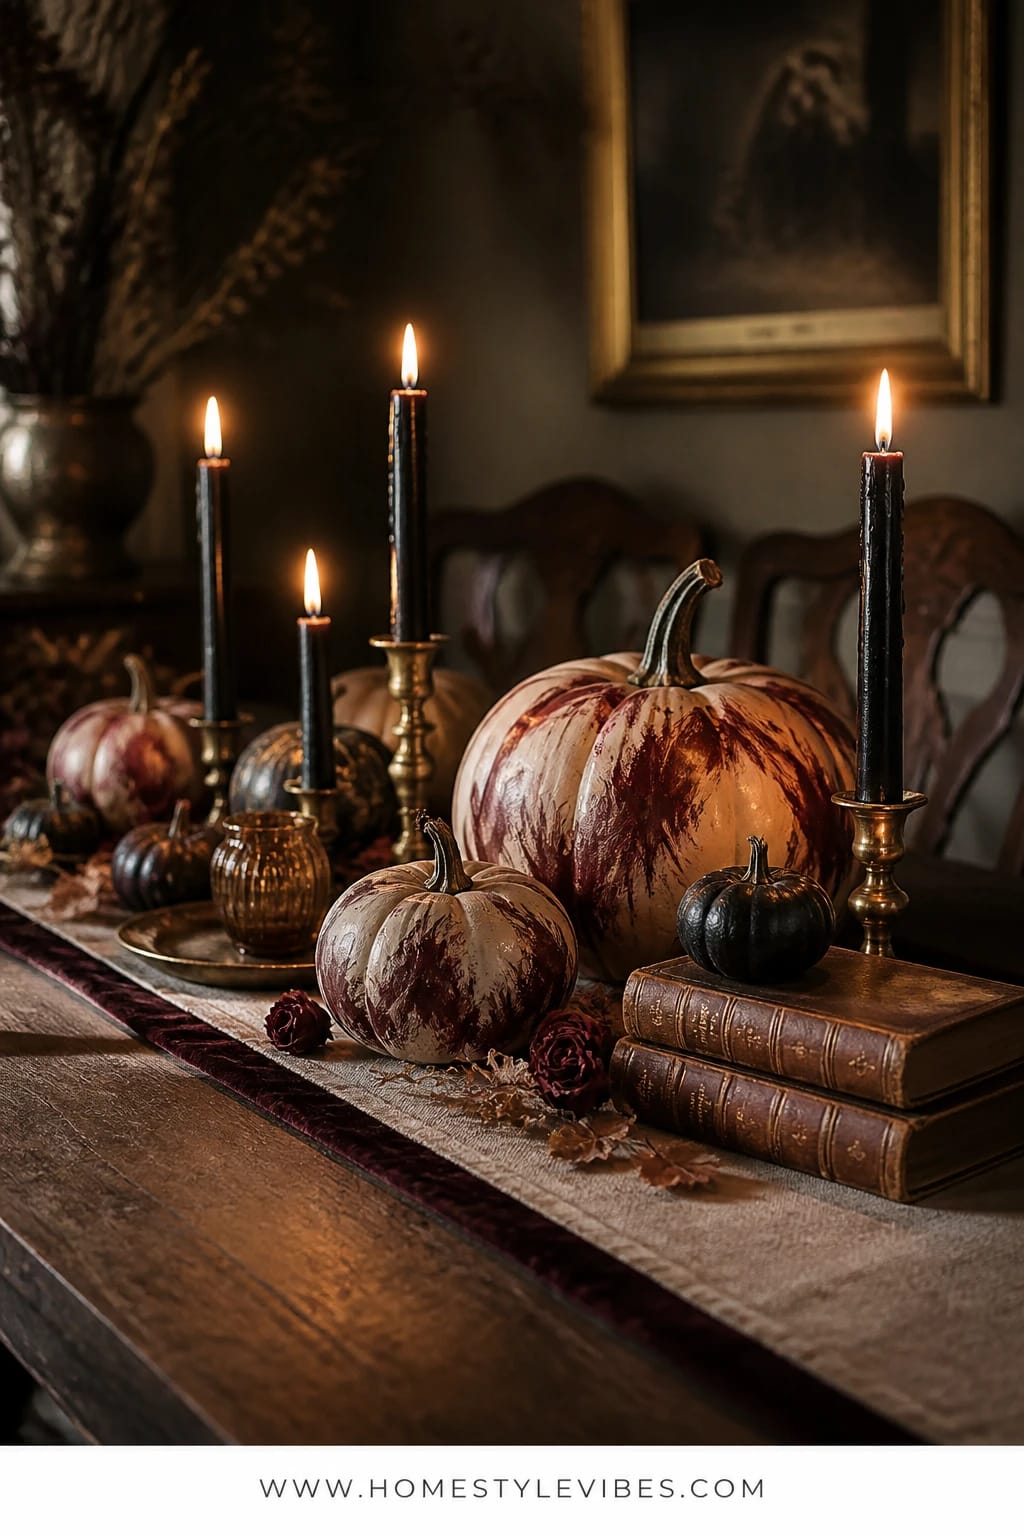
You want the dining table to look candlelit and a little dramatic, but it’s also the place where homework, takeout, and mail land. You’ve tried a big centerpiece and it just felt in the way. Enter the slim-profile runner with low painted pumpkins: oxblood brushstrokes over soft taupe or putty bases, flanked by black taper candles. It’s sultry, seasonal, and unbelievably practical.
The mood leans dark and romantic—vampy color without going full theatrical. Real homes love this because everything stays low, so sightlines across the table are clear. The clustered candlelight makes the brushstrokes glow, almost like wet velvet. A few antique brass candlesticks keep it timeless Halloween instead of hokey, while a single strand of tiny black beads or deep burgundy seed pods sneaks in that witchy nod.
As for photos? Those painterly strokes read as texture. You’ll get layered depth when the candles reflect along the brush marks. Variation one: use deep aubergine strokes for cooler rooms. Variation two: scale it down for a bistro table—just one medium pumpkin with dramatic strokes, plus a pair of short black tapers.
Budget Breakdown:
- Medium faux pumpkins (2–3): $6–$15 each
- Acrylic paint in oxblood, taupe/putty, and a soft glaze: $9–$15 total
- Simple black table runner: $12–$25
- Assorted black taper candles and antique brass holders: $20–$50
- Accent beads or dried pods: $5–$12
Total Estimated Cost: $52 – $117
Best For: Dining tables that need mood without bulk. Perfect for weeknight dinners and easily dressy enough for a Halloween gathering.
Key Design Elements:
- Main seasonal props: brushstroke-painted pumpkins, black tapers
- Color palette: oxblood, taupe, black, antique brass
- Lighting strategy: a tight line of candles to create a glowing runway down the runner
- Textile layers: a matte black runner to anchor the color
- Natural elements: dried burgundy pods, eucalyptus dyed near-black
- Accent details: scattered black beads, vintage flatware if you’re hosting
How To Recreate This Look:
- Start with a runner that fits your table length with 6–8 inches overhang.
- Add 2–3 pumpkins base-coated in taupe/putty; let dry.
- Layer oxblood brushstrokes in loose arcs; finish with a satin glaze to catch the light.
- Place black tapers in brass holders staggered between pumpkins.
- Style with a delicate strand of black beads or dried pods weaving through the base.
Why This Reads High-End: Painterly marks look bespoke. Paired with brass and black, it feels curated, like you hunted for these pieces rather than bought them in one trip.
The Most Common Mistake: Overcrowding the runner with too many pumpkins. Leave negative space so candlelight can bloom around each piece.
Pro Styling Tip: For photos, extinguish a candle right before snapping a shot—the wisp of smoke adds that haunted-dinner-party moment.
4) Gilded Spiderweb Monograms under Moody Bookshelf Light
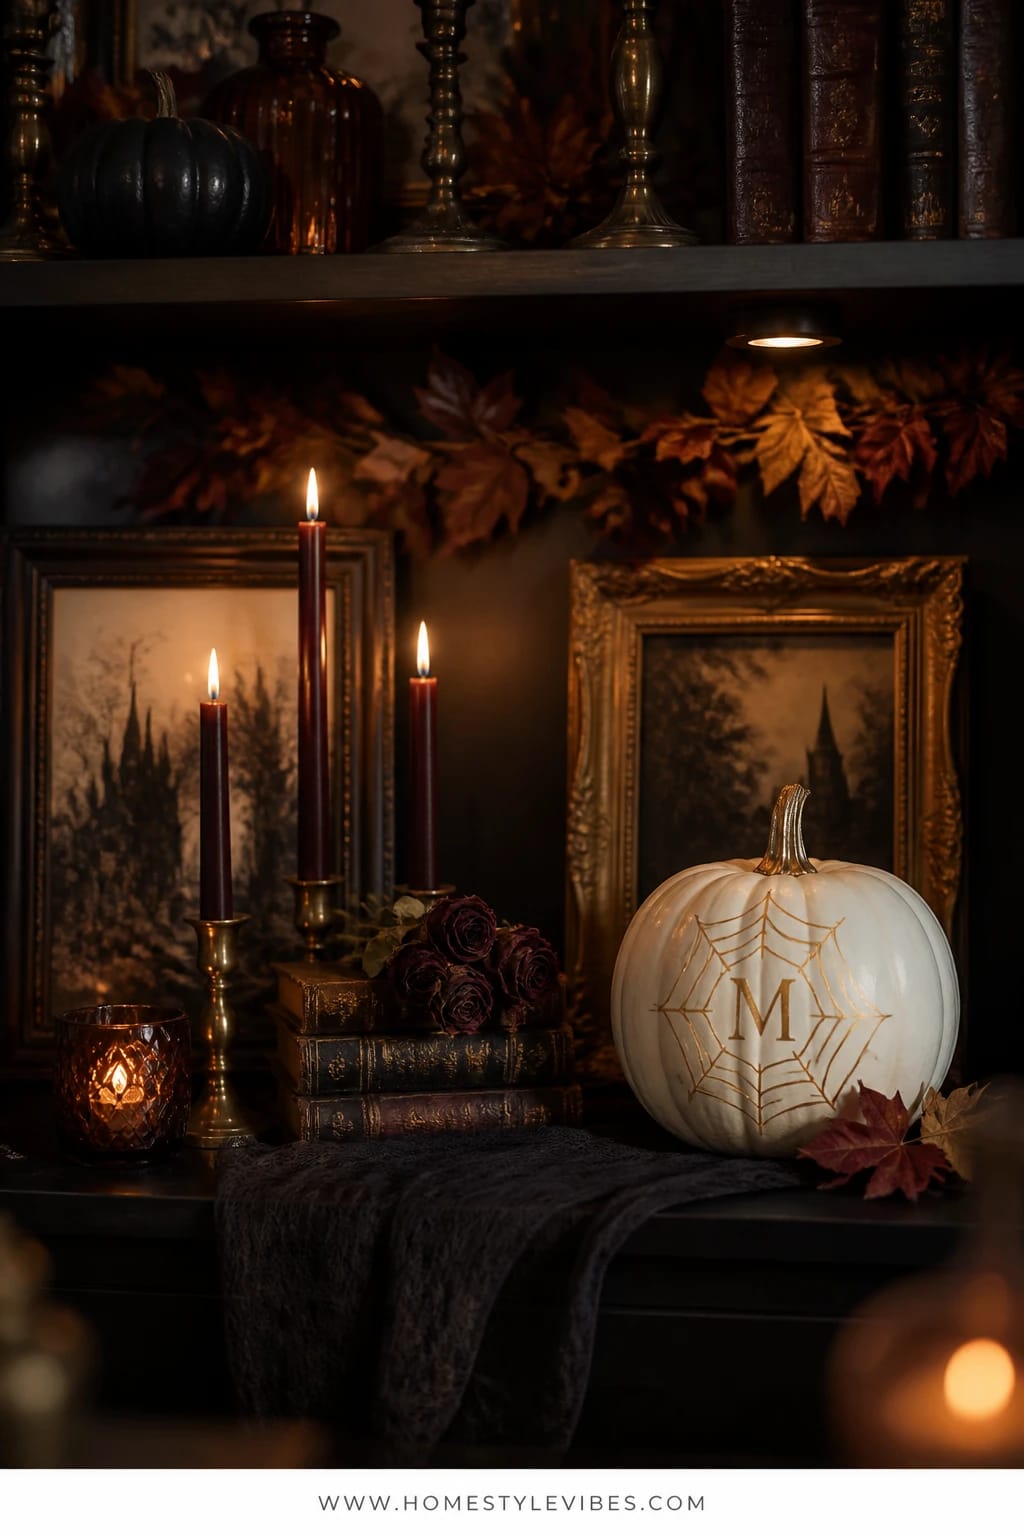
Open shelves can turn into a graveyard of random knickknacks by mid-October. You’ve tried adding tiny pumpkins in front of your books, but they looked like clutter. Instead, paint a set of petite pumpkins in bone or putty, then hand-draw a delicate gold spiderweb that spirals into a single letter monogram—one for each shelf or family member. Slide them beside dark-framed art and leather-bound books, then switch on your bookshelf puck lights for that shadowy, haunted-library glow.
The vibe is scholarly-spooky, a nod to dark academia without going full Victorian. Why it works: the pumpkins become tiny sculptures that break up rows of spines while staying slim and readable. Lighting from a puck or strip LED creates a halo that makes the gold lines wink, like the web just caught candlelight. Props stay on-theme: brass, black, aged paper, a raven paperweight, and a miniature skull or two (tasteful, not gory).
It photographs beautifully because the gold webbing gives you fine-line detail against the matte pumpkin base. Variation ideas: swap the gold for antique copper paint pen if your hardware skews warmer, or do tone-on-tone black gloss webs on matte black pumpkins for the stealth version. Transition to November by flipping the monogram side forward and hiding the web, or simply turn the pumpkin around for a plain putty face.
Budget Breakdown:
- Mini faux pumpkins (4–8): $2–$6 each
- Putty/bone acrylic paint: $3–$6
- Gold or copper paint pen: $4–$8
- LED puck lights or strip lighting: $15–$30
- Small props (mini skulls, raven paperweight): $6–$18
Total Estimated Cost: $36 – $98
Best For: Living room or office bookshelves that need a whisper of Halloween without disrupting daily function. Great for families who love initials and personal touches.
Key Design Elements:
- Main seasonal props: monogrammed spiderweb pumpkins
- Color palette: putty, bone, gold, black
- Lighting strategy: directed shelf lighting for metallic highlights
- Textile layers: a single piece of black velvet draped behind the most visible shelf
- Natural elements: a dried fern frond or pressing tucked behind a frame
- Accent details: antique brass bookends, gilt frames, matte-black frames
How To Recreate This Look:
- Start by clearing each shelf’s front edge; gather like items into small groups.
- Add base-coated pumpkins in bone or putty; let dry fully.
- Layer a delicate gold spiderweb that winds into a letter; keep lines thin.
- Place the pumpkins next to stacked books, offset with one dark-framed piece of art.
- Style with a single raven paperweight or skull to reinforce the theme without clutter.
Why This Looks Intentional: Repetition (same pumpkin scale, same web style) creates unity across shelves. The monograms add meaning, which always reads thoughtful, not random.
Don’t Do This: Avoid mixing bright orange anywhere on these shelves. One saturated hue will hijack the moody palette and break the spell.
Pro Styling Tip: Angle a puck light toward the pumpkin’s shoulder, not straight-on, so the gold lines catch and fall off into shadow.
Quick mindset reset: You don’t need to decorate every surface. One strong moment in each room—a mantel, a coffee table, a shelf—beats ten scattered bits that never quite add up.
5) Moonlit Moth Pumpkins with Aubergine Shadows on the Entry Console
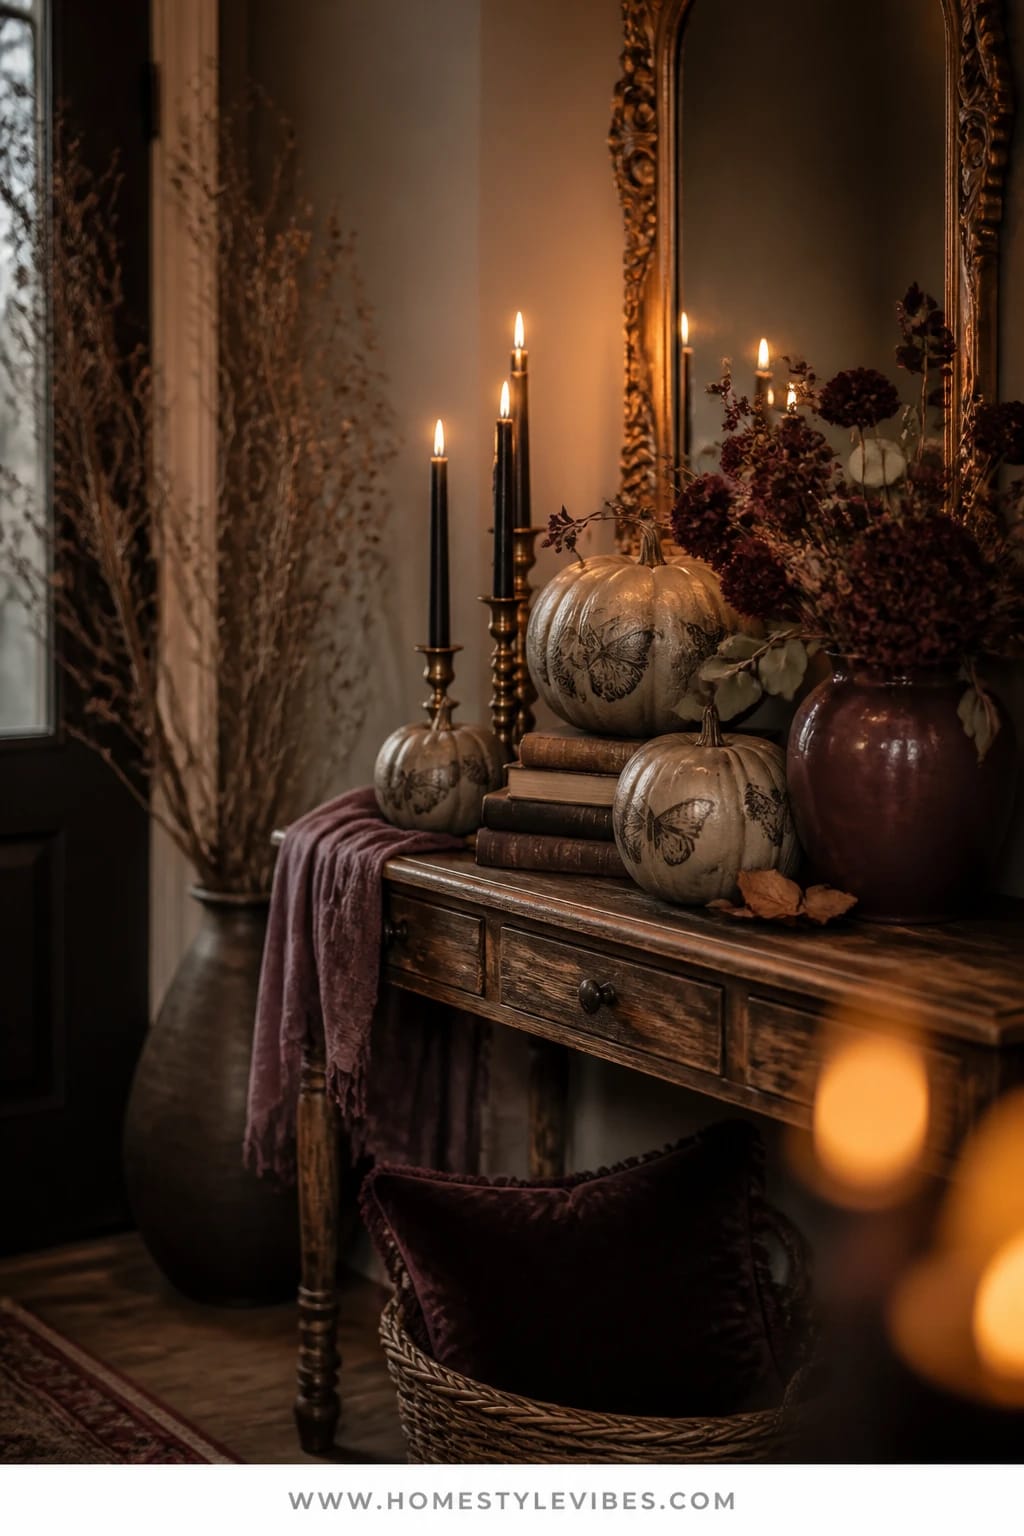
Entrances can feel like a forgotten hallway. Keys, mail, and a half-used lint roller are not exactly spooky. Here’s the fix: a lineup of painted pumpkins featuring delicate moth silhouettes in charcoal, brushed over a soft greige base with aubergine shadowing. Add a cluster of black candles and one ornate mirror above to catch the glow—suddenly your entry hums with haunted poetry.
The mood is subtle and slightly mysterious, an invitation to step deeper into the house. It works because the console is already a “pass-through” surface; a long, low composition won’t interfere with daily life. Lighting is everything here—let a single sconce or small table lamp play tag with the candle flames, casting fluttering shadows like moths at dusk. Materials keep that Halloween-but-sophisticated line: black iron bowl for keys, antique brass match striker, and a drape of smoky chiffon ribbon.
In photos, the moth wings add fine, feathery detail, and the aubergine shadows read as dimensional, not painted-on. Variation one: swap moths for tiny crescent moons if you prefer celestial magic. Variation two: for small consoles, do one medium pumpkin with a ring of moths and two short black pillars instead of tapers.
Budget Breakdown:
- Medium and small faux pumpkins (3–5): $5–$15 each
- Greige and aubergine acrylics plus charcoal paint pen: $10–$16
- Black pillar or taper candles with holders: $12–$30
- Antique-look mirror (if you need one): $35–$120
- Black iron catchall bowl: $12–$25
- Smoky chiffon or gauze ribbon: $4–$9
Total Estimated Cost: $73 – $215
Best For: Entryways that need atmosphere without blocking daily function. Especially good in homes with moody wall paint or darker wood floors.
Key Design Elements:
- Main seasonal props: moth-painted pumpkins, black candles
- Color palette: greige, charcoal, aubergine shadows, black, antique brass
- Lighting strategy: small lamp plus candles bouncing into a hanging mirror
- Textile layers: a gauzy ribbon or a narrow strip of black cheesecloth
- Natural elements: a twig of darkened eucalyptus or dried seed heads
- Accent details: iron catchall, brass match striker, ornate frame
How To Recreate This Look:
- Start by clearing the console; add a low runner if the surface scratches easily.
- Add pumpkins base-coated greige; sketch moths in charcoal, then soften edges with a dry brush.
- Layer aubergine along wing undersides for depth; keep it subtle.
- Place a trio of black candles, staggering heights just slightly.
- Style with a mirror above, a catchall bowl for keys, and a whisper of gauze ribbon trailing off one edge.
Why This Feels Designer: The shadowing technique adds dimension so the pumpkins read like art objects. The mirrored glow multiplies candlelight without adding clutter.
Watch Out: Don’t let gauze or ribbon touch open flame. Keep a six-inch safety zone, and always snuff candles if you’re leaving the house.
Pro Styling Tip: For photos, crack the front door open an inch at twilight so cool blue light kisses the aubergine shadows—instant moody contrast.
6) Chalkboard-Black Potion Labels on the Kitchen Island
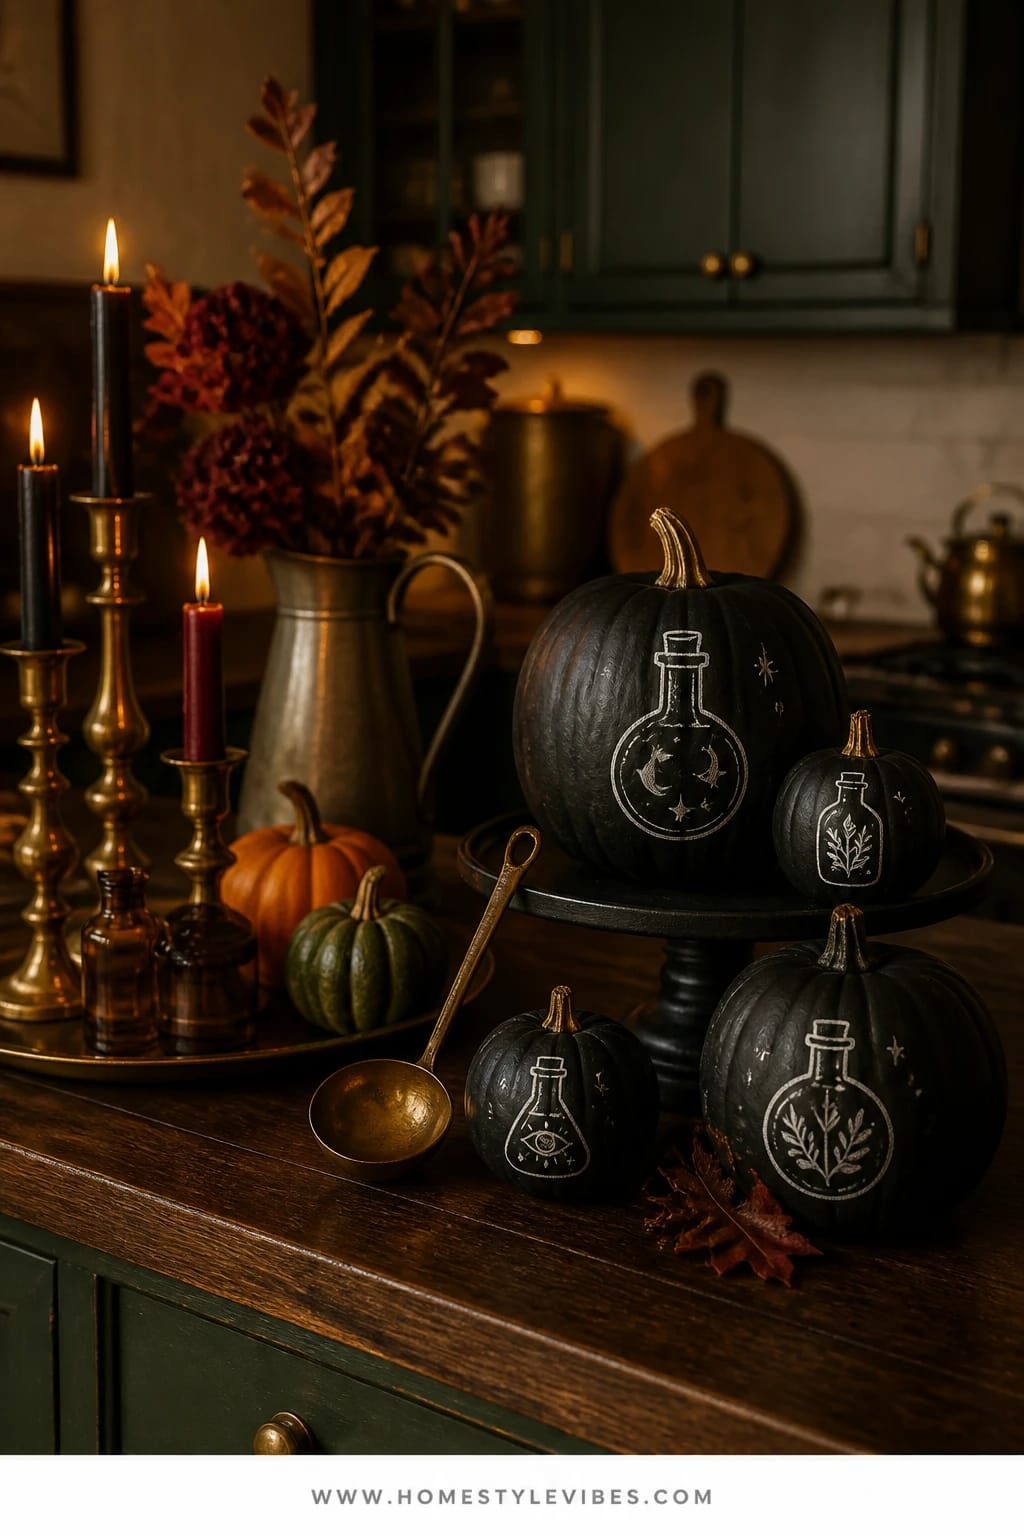
Real talk: the kitchen is hard. Counters are for cooking, not craft displays. But a compact vignette on the island can be both functional and adorable—painted pumpkins in chalkboard-black with hand-drawn potion labels (“Witch’s Brew,” “Moon Dust,” “Nightshade”), perched beside a black cake stand and one brass ladle for a tongue-in-cheek apothecary moment. No carving. No seeds in the sink. Just vibes.
The mood leans cheeky-haunted, perfect for anyone who sneaks cinnamon into the coffee and plays the Hocus Pocus soundtrack while meal-prepping. It works because the pumpkins sit on a single stand or tray, leaving chopping space open. Under warm can lights, the chalk designs look soft and tactile, like dusty spellbooks. The props are kitchen-friendly: a black pedestal, an old brass ladle or spoon, black tea tins, and a crow perched like it’s guarding the cauldron.
Photographs love the chalk texture—matte black soaks up light while the chalk lines catch it. Variation ideas: swap chalk for a white paint pen if you have curious cats; it’s smudge-proof. Or go mini with three tiny pumpkins labeled “Sugar,” “Spice,” and “Nightfall” for a subtle nod that still reads Halloween. Slide into November by erasing the labels and writing “Cider” and “Cranberry” instead.
Budget Breakdown:
- Small/mini faux pumpkins (3–5): $3–$10 each
- Chalkboard paint or ultra-matte black: $8–$14
- Chalk or white paint pen: $2–$6
- Black cake stand or low pedestal: $15–$35
- Brass ladle/spoon (thrift or heirloom): $4–$15
- Small crow or bat accent: $5–$12
Total Estimated Cost: $37 – $92
Best For: Busy kitchens where decor has to earn its footprint. Great for islands or wide counters that need a little seasonal spark.
Key Design Elements:
- Main seasonal props: chalkboard-black labeled pumpkins
- Color palette: matte black, white chalk, brass accents
- Lighting strategy: warm can lights overhead; add a single black candle in a hurricane if you want extra glow
- Textile layers: black linen napkin under the stand to soften the silhouette
- Natural elements: a sprig of dried bay or rosemary for “apothecary” authenticity
- Accent details: black tins, brass ladle, small crow
How To Recreate This Look:
- Start with a pedestal or tray placed off-center on the island.
- Add pumpkins painted chalkboard-black; let cure as directed.
- Layer handwritten labels in loopy script; add tiny borders or stars.
- Place a brass ladle leaning against the stand and one crow nearby.
- Style with a folded black napkin underneath and one herb sprig.
Why This Looks Expensive: Matte black plus hand lettering feels custom. The kitchen props ground it in reality, so it reads like a styled story, not a random cluster.
One Thing To Avoid: Don’t sprawl across the whole island. Keep everything on the stand or tray so you can slide it aside when it’s taco night.
Pro Styling Tip: Photograph from a slight overhead angle so the label typography is legible and the brass catches a warm kiss of light.
True story: I tried a version of this on my own island last October, wrote “Midnight Cocoa” on one pumpkin, and my family started requesting nightly hot chocolate. Did it become a habit? Yes. Was I mad about it? Absolutely not.
Quick Checklist
- Faux pumpkins in varied sizes
- Matte black paint and chalkboard paint
- Oxblood, aubergine, and greige acrylics
- Gold and charcoal paint pens
- Antique brass candleholders
- Black taper and pillar candles
- Raven or crow figurines
- Subtle faux cobweb
- Black runner and black linen napkin
- Velvet or gauze ribbon
- Dried burgundy roses and dark eucalyptus
- LED puck lights for shelves
- Tray or pedestal for coffee table and island
- Mirror for entry console glow
- Small props: beads, mini skulls, vintage cards
Frequently Asked Questions
How much should I budget to try one of these no-carve painted pumpkin ideas?
Plan on $40–$120 depending on what you already own. The tray-based looks (coffee table, kitchen island) usually land under $75, while mantel or dining table setups with candlesticks and multiple pumpkins can hit $100. Shop your house first for brass, trays, and mirrors to cut costs fast.
Are real or faux pumpkins better for these painted styles?
Faux pumpkins win for longevity and easy storage; paint grips well and you’ll reuse them next year. Real works if you love the heft, but keep them away from heat vents to avoid that sad, half-deflated slump by week three. If you paint real, stick to thin acrylic layers so they can still breathe.
I have a small living room. Which idea won’t crowd my space?
Go for the Cobwebbed Cream Spook-Pop on a single tray or the Gilded Spiderweb Monograms for your bookshelf. Both use small pieces and a tight color story, so they read polished without stealing square footage.
How do I store painted pumpkins after the season?
Let them dry completely, then wrap in tissue or old t-shirts and stack in a plastic bin with a sachet or silica pack to fight mustiness. Label by vignette (“Mantel Bats,” “Island Potions”) so you can pull one look next year without digging.
Are black candles safe around ribbon, cobwebs, and dried florals?
Use common sense: keep a six-inch clearance, never leave flames unattended, and snuff before bed. If you have pets or kids who tail-swipe, swap to LED tapers—there are convincing options in matte black now.
When should I start decorating with painted pumpkins for Halloween?
Late September is perfect. Build the neutral or moody base first, then layer in the spookier accents (crows, cobwebs) the week before Halloween. After the 31st, remove overt Halloween pieces and you’ll glide into November with just the moody pumpkins and brass.
What if I rent and can’t mount lights or hang heavy mirrors?
Stick to tray-based vignettes and battery LED puck lights with removable adhesive. For the “mirror glow” look on a console, lean a lightweight framed mirror instead of hanging it.
Final Thoughts
Pick one no-carve painted pumpkin idea that fits your life today—a tray on the coffee table, a line of bats on the mantel, a tiny monogram on a bookshelf—and start. You don’t need an entire house of decor to feel that Halloween magic. One moody moment, done with intention, can make the whole room feel finished when the candles crackle and the shadows dance.
Lean into the Halloween language: inky blacks, oxblood and aubergine notes, antique brass, candlelit shadows, tiny crows, a whisper of cobweb. Keep the palette narrow, the textures rich, and the shapes simple. That’s the secret—not more stuff, but better rhythm and deliciously dark light.
Honestly, this is supposed to be fun. Put on your favorite spooky playlist, grab a brush, and paint a pumpkin or three. Your home will look cute, moody, and totally you—no carving knife required, and no regrets when November rolls in. You’ve got this.

About the Author

Krisztina P.Rendes, Founder of Home Style Vibes
Founder of Home Style Vibes
Krisztina Puskásné Rendes created Home Style Vibes as a cozy-modern lifestyle space where homemaking meets inspiration. Her goal is to help women create beautiful, organized, and peaceful homes they truly love — without overwhelm. You’ll find here heart-driven content on home decor, cleaning tips, easy family recipes, organization and decluttering, DIY home projects, plants, and seasonal ideas — all designed to bring more calm, comfort, and style into everyday life.





