7 Luxury Rooftop Terrace Design Ideas That Look Like A Five-Star Hotel
You want a rooftop terrace that feels like a five-star hotel—soft lighting, plush seating, that city-skyline calm. You hate the reality: clunky furniture, harsh sun, and wind that turns your dinner napkins into kites. You imagine linen-draped lounges, stone underfoot, and lantern light flickering off brushed metal; but the logistics keep getting in the way. These 7 luxury rooftop terrace design ideas fix the pain points—wind, glare, clutter—while giving you a space that actually photographs like a resort. Pick one idea and aim for a weekend install and a $1,500–$10,000 budget band, depending on size and finishes. The vibe? Sophisticated, camera-ready, and deeply livable for quiet coffee mornings and spritz-at-sunset nights.
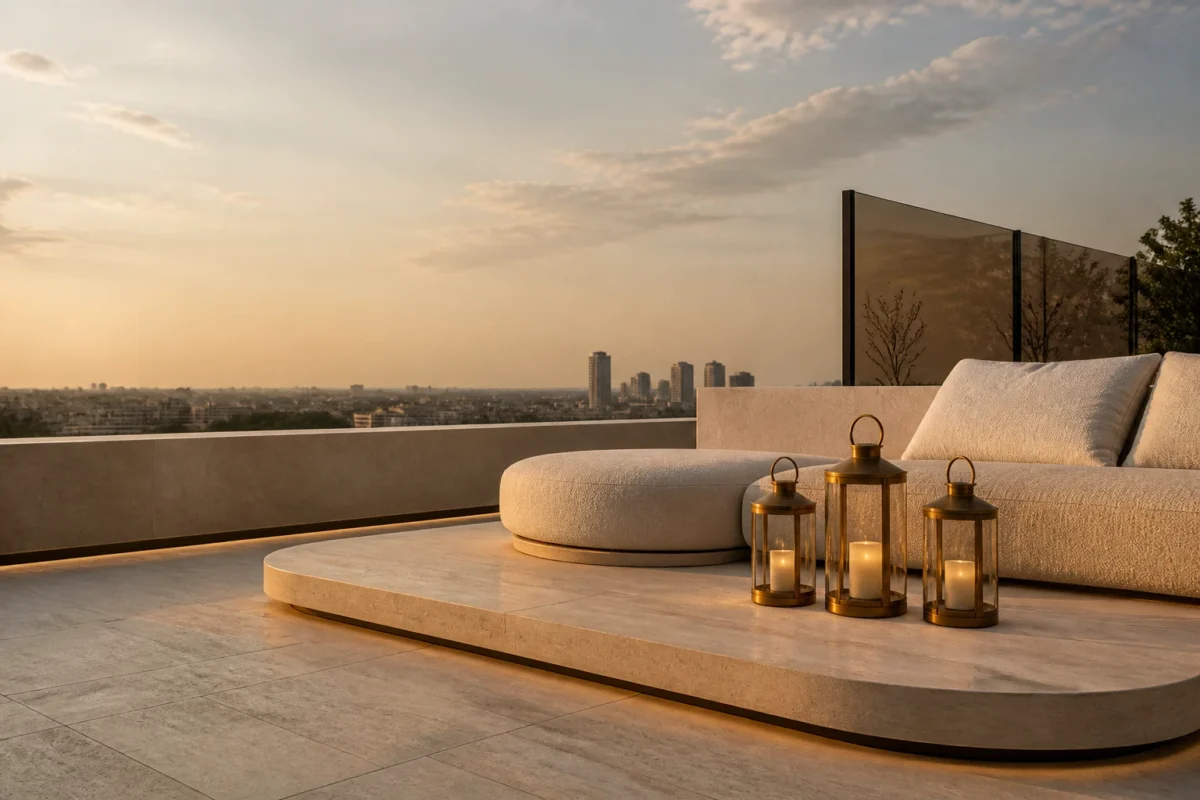
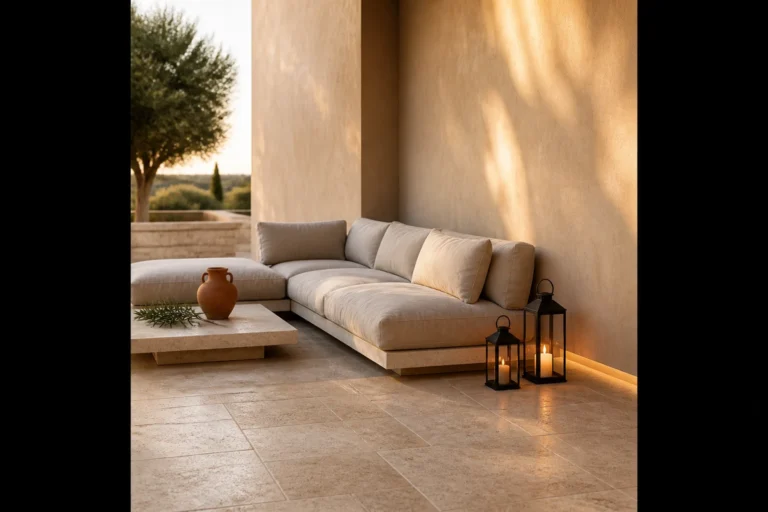
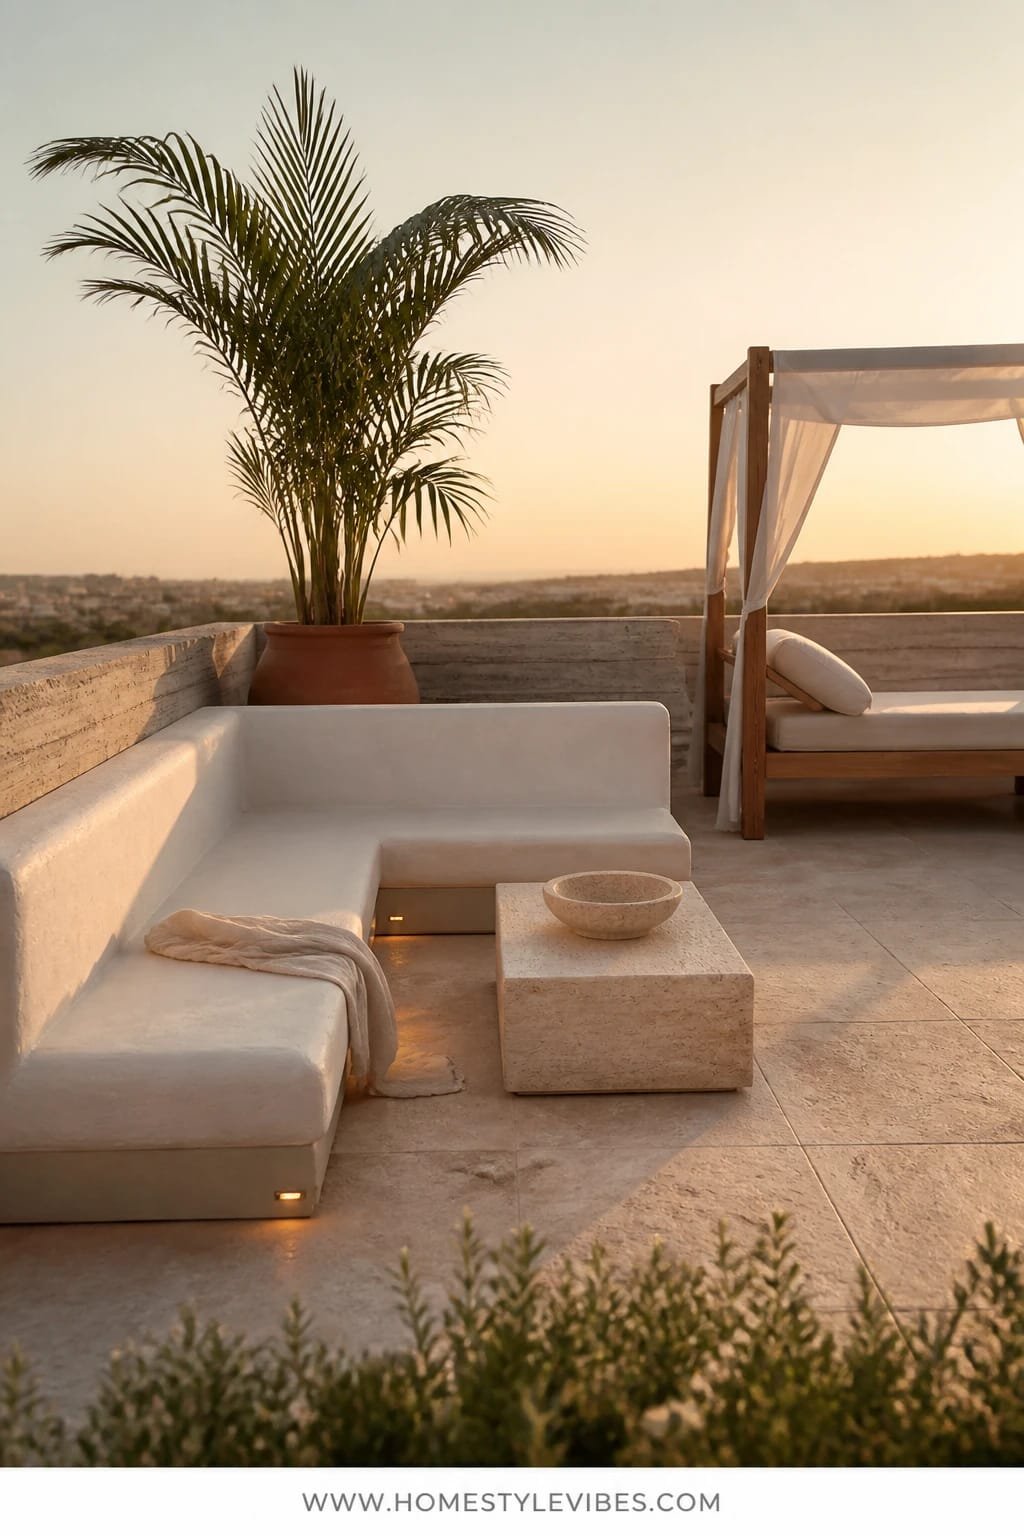
1. Travertine Platform Lounge With Golden Hour Lantern Glow and a Curved Modular Sofa

We’ve all been there: you drag furniture onto the roof and it somehow looks like a patio clearance aisle, not a hotel suite. The issue is the floor and silhouette, not your taste. This concept anchors everything with a low travertine-look platform (porcelain pavers or actual travertine if you’re fancy), wraps it with a curved modular outdoor sofa, and sprinkles in lanterns that turn the whole zone into a golden-hour dream. It reads like a boutique hotel lobby under the sky—soft, sculptural, and impossibly calm.
It works for real homes because curved seating breaks wind lines and makes small footprints feel intentional, not cramped. Travertine or travertine-look porcelain offers a neutral, sandy tone that flatters skin tones and plants, while golden lanterns add depth in the evening. The lighting strategy is simple: warm 2200–2700K LEDs inside mixed-height lanterns, clustered near corners and pathways for layered shadows that photograph beautifully. You get texture-on-texture: stone, slub linen cushions, and matte black hardware for quiet contrast.
Variations: For a budget-friendly version, use porcelain pavers on pedestals instead of stone. For small spaces, opt for a two-module curved loveseat plus a ceramic drum side table. Renters can skip the platform and define the “zone” with a large outdoor rug in warm sand.
Budget Breakdown:
- Porcelain travertine-look pavers: $8–$18/sq ft
- Curved modular outdoor sofa: $1,200–$3,500
- Outdoor lanterns (4–6 pieces) with LED candles: $120–$500
- Outdoor rug (9×12, sand): $250–$700
- Accent tables (ceramic or stone): $150–$600 each
Total Estimated Cost: $2,000 – $7,500
Best For: Medium rooftops with partial sun. Great for city apartments seeking a soft, hotel-lobby vibe and relaxed conversation zones.
Key Design Elements:
- Main materials: Travertine or travertine-look porcelain, linen-look performance fabric
- Color palette: Sand, cream, warm white, matte black accents
- Lighting strategy: Warm lantern clusters at varying heights
- Furniture silhouettes: Curved, low-profile modulars with deep seats
- Texture layers: Stone, slub textiles, matte ceramics, woven trays
- Accent details: Olive tree in a tall planter, black metal side tables, striped lumbar pillows
How To Recreate This Look:
- Start with a neutral base: lay porcelain pavers (or a sand-toned outdoor rug if renting).
- Add a curved modular sofa and keep the coffee table small to emphasize the curve.
- Layer mixed-height lanterns at corners; use warm LED candles, not cool-white bulbs.
- Install a dimmer on any overhead string lighting for control at dusk.
- Style with a woven tray, linen-texture pillows, and a tall olive or ficus for vertical anchor.
Why This Looks Expensive: The continuous, tonal palette and curved silhouettes feel custom. Travertine tones plus golden light mimic resort architecture, tricking the eye into “bespoke” territory.
Watch Out: Don’t use cool white bulbs. They wash out stone, flatten the scene, and make photos look clinical.
Pro Styling Tip: Place one lantern slightly off-center in the foreground to capture a soft bokeh glow in photos and add depth to wide shots.
Keep scrolling—next up is a design that solves the “nowhere-to-eat-comfortably” problem.
2. Teak Slat Decking With Moonlit Under-Rail LEDs and a Sculptural Pedestal Dining Table
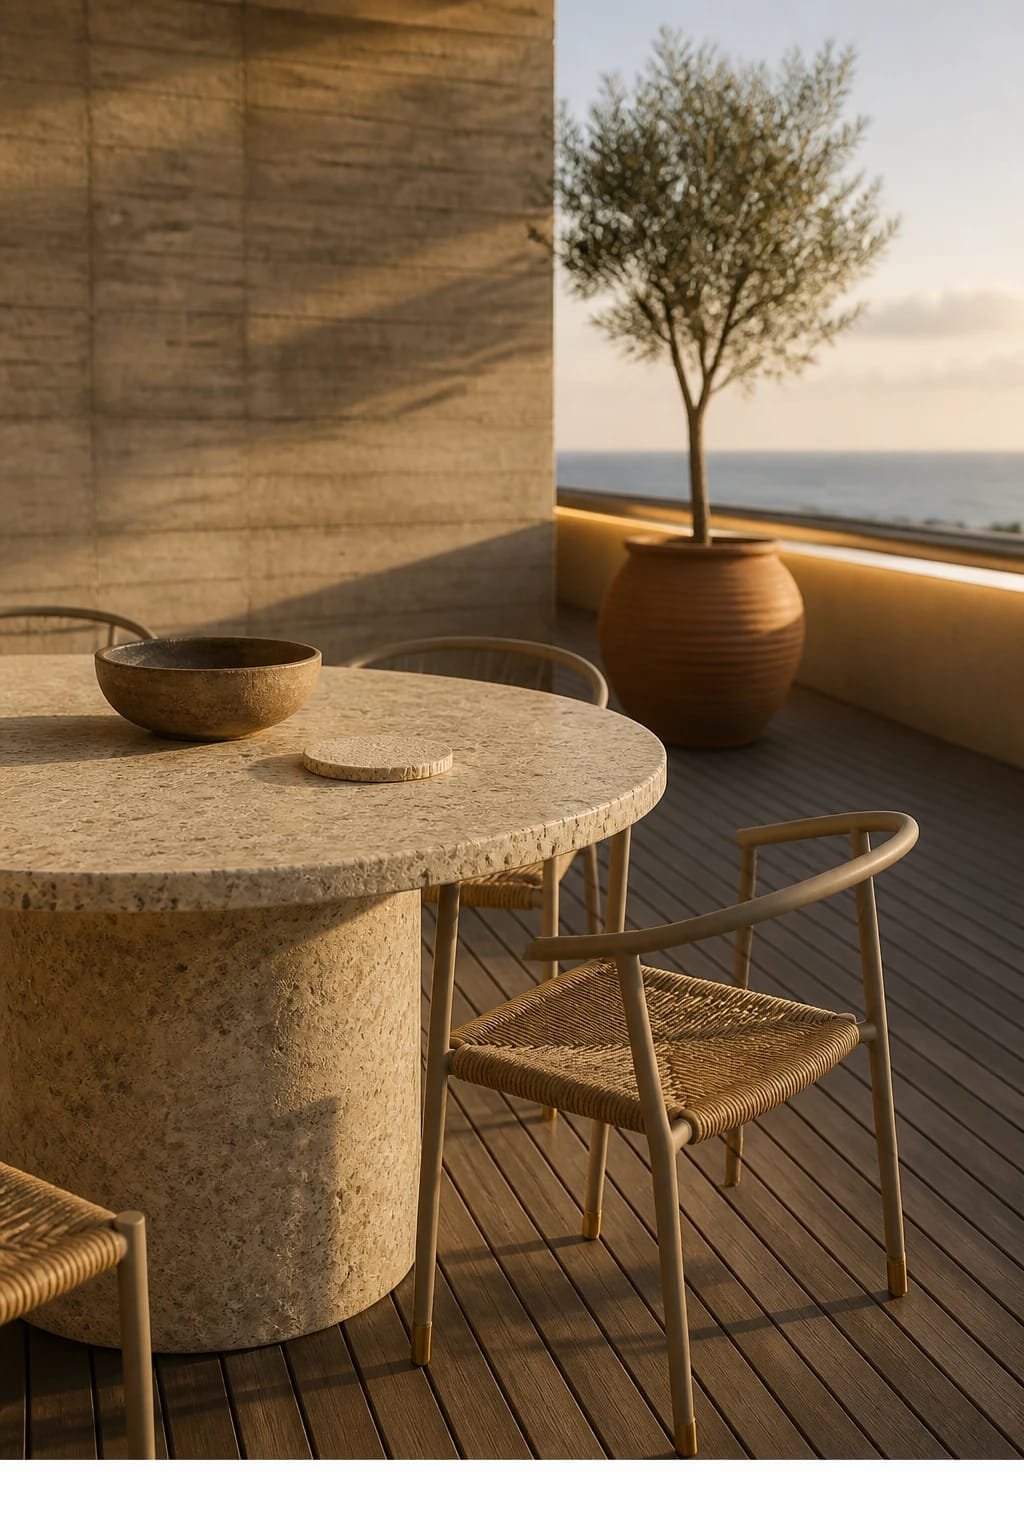
It’s that one corner that always feels off: you bring out a dining set, and everything looks too boxy, too crowded, or just… meh. The secret here is rhythm. Teak slat decking sets a grounded, yacht-deck feel, while under-rail LEDs give your rooftop terrace the moonlit perimeter glow you see in five-star resorts. A sculptural pedestal dining table (stone or terrazzo) becomes the anchor that keeps chairs from feeling like a tangle of legs.
The mood leans modern Mediterranean—clean, warm, and built for late dinners. Under-rail lighting makes it safer to navigate and eliminates the “headlights on a plate” effect you get with overhead glare. Teak’s natural oils handle weather like a champ, and the pedestal table gives everyone legroom, which matters more than you think for long meals. Photography-friendly? Absolutely: linear slats add direction, while the pedestal’s curves catch light and create soft highlights at golden hour.
Variations: For a lower budget, use acacia decking tiles. For a small balcony, pick a 32–36-inch round pedestal and two sling chairs. Want a darker version? Charcoal-stained decking with brass under-rail LED strips is moody and killer at night.
Budget Breakdown:
- Teak decking or tiles: $12–$30/sq ft
- Under-rail LED strips + transformer: $150–$500
- Pedestal dining table (stone/terrazzo): $800–$2,500
- Outdoor dining chairs (4–6): $400–$1,800 total
- Planter windbreak (3–4 tall planters): $300–$1,200
Total Estimated Cost: $2,000 – $6,500
Best For: Entertainers, sunset dinner fans, and terraces with some wind exposure.
Key Design Elements:
- Main materials: Teak, stone/terrazzo, powder-coated metal
- Color palette: Honey wood, limestone white, tobacco leather or slate gray
- Lighting strategy: Under-rail LED strips at 2700K for a soft perimeter glow
- Furniture silhouettes: Round pedestal base + slim, breathable dining chairs
- Texture layers: Slatted wood rhythm, smooth stone top, woven seat pads
- Accent details: Ceramic pitchers, linen napkins, olive branches in a vase
How To Recreate This Look:
- Install slatted decking or interlocking tiles in a single directional run toward your view.
- Mount under-rail LED strips along the terrace perimeter; aim downward for a wash, not a spotlight.
- Center a round pedestal dining table; keep the top matte for better photo reflections.
- Add 4–6 slim dining chairs; mix two captains’ chairs if space allows.
- Style with a linen runner, stoneware plates, and a low floral to keep sightlines open.
Why This Feels Designer: A round table plus linear decking reads like intentional design, not random furniture. The under-rail glow frames your scene like a stage set.
One Thing To Avoid: Don’t pick bulky chairs with thick legs. They clutter the visual field and fight your pedestal’s clean line.
Pro Styling Tip: For photos, angle chairs slightly away from the table to reveal silhouettes and catch more edge light.
Quick mindset reset: You don’t need every idea. If your terrace is small, steal just the lighting strategy or the planter trick and call it a win. This is about building a space that supports your life, not recreating a catalog spread.
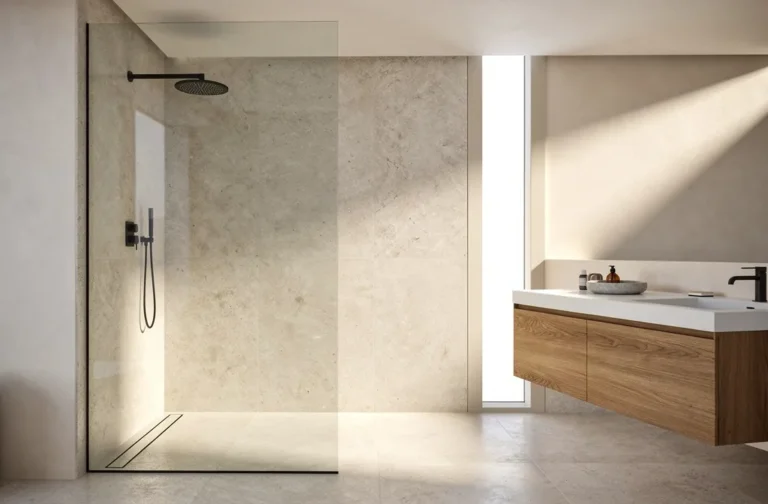
3. Tumbled Limestone Floor With Soft Diffused Cove Lights and a Low Fire Bowl Lounge
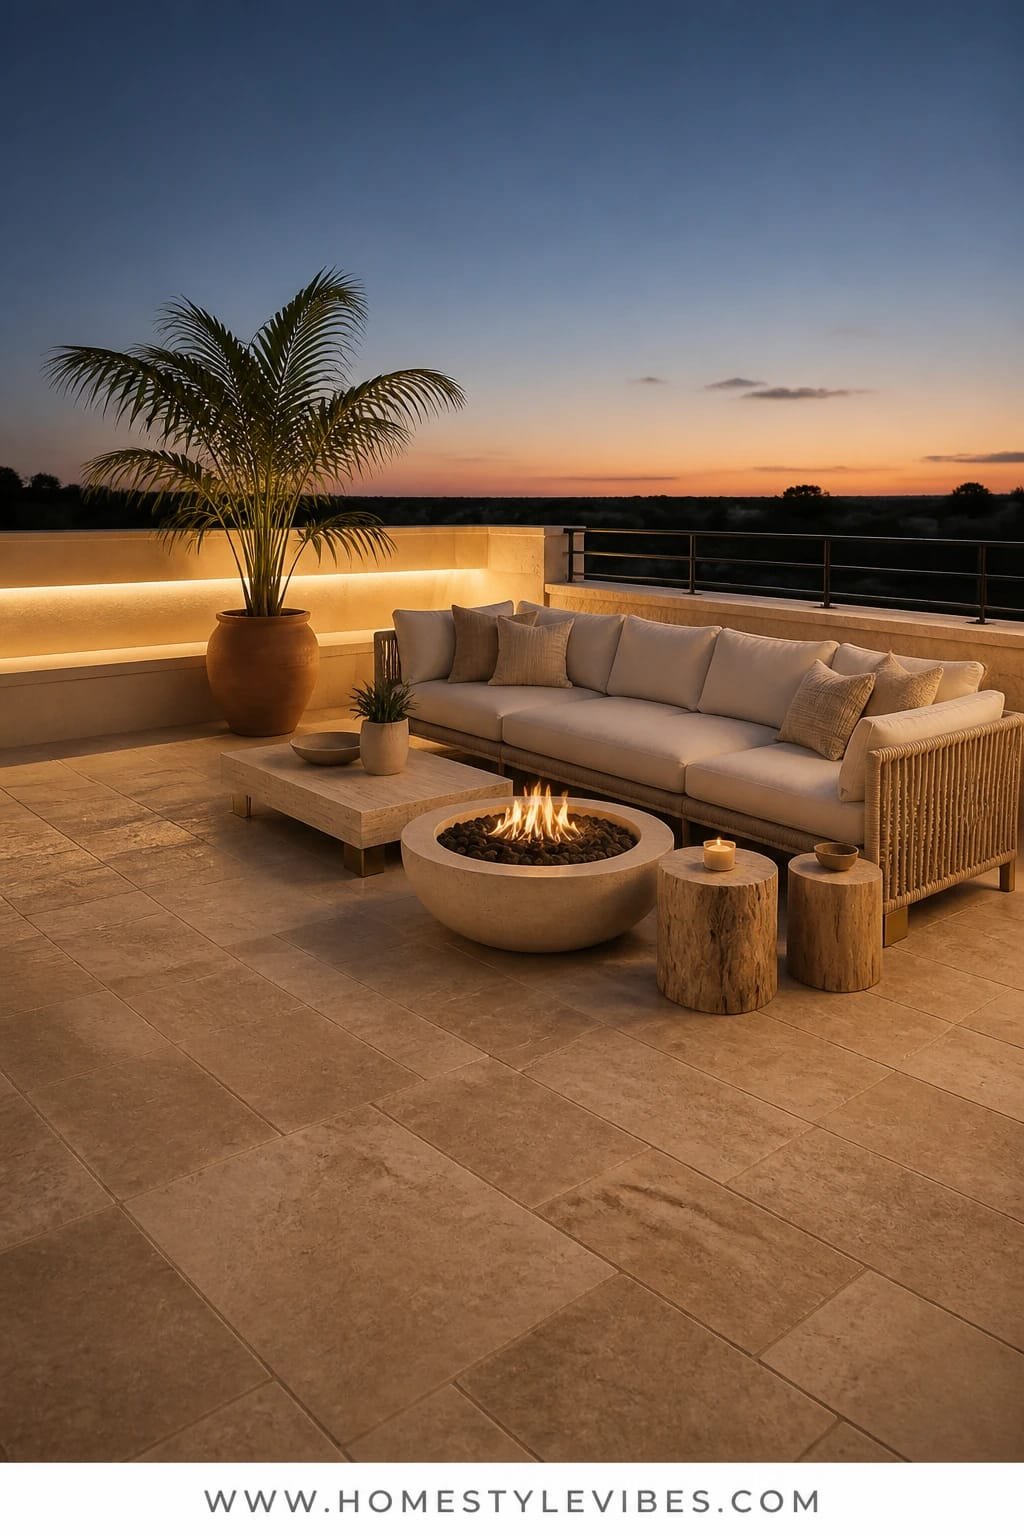
You’ve tried outdoor rugs, but it still looks pieced together. The culprit? Surfaces that don’t visually connect. Tumbled limestone creates a continuous, gracious field with natural variation that hides dust and looks luxurious even when not spotless. Add diffused cove lighting built into a short parapet or bench back, and drop in a low fire bowl for that resort-by-night magic. Instant hotel-spa mood on your rooftop terrace.
This setup makes sense for families and night owls alike: limestone stays cool underfoot, the cove glow reduces glare, and the low fire bowl keeps sightlines open so you still see the skyline. Photo-wise, the matte stone and soft light reduce hot spots and create creamy shadows—your camera loves it.
Variations: For renters, use limestone-look porcelain and battery-powered puck lights tucked under a bench lip. For a moody twist, choose noir lava rock in the fire bowl and smoked glass hurricanes.
Budget Breakdown:
- Tumbled limestone or porcelain lookalike: $10–$28/sq ft
- LED cove lighting + aluminum channel: $200–$700
- Gas or propane fire bowl: $500–$2,200
- Low lounge seating (platform style): $800–$2,500
- Wind screen (tempered glass panels): $600–$1,800
Total Estimated Cost: $3,000 – $8,500
Best For: Nighttime entertaining, wind-prone rooftops, and anyone who prioritizes atmosphere over maximal seating.
Key Design Elements:
- Main materials: Tumbled limestone, performance upholstery, lava rock
- Color palette: Bone, ivory, charcoal, muted taupe
- Lighting strategy: Low, diffused cove lighting at 2200–2700K
- Furniture silhouettes: Low, platform seating with oversized cushions
- Texture layers: Honed stone, slub weaves, rough lava rock, glass
- Accent details: Linen throws, ceramic match striker, low-profile planters
Why This Reads High-End: The combo of natural stone, concealed light sources, and an open flame signals “custom build,” even if you used plug-and-play components.
How To Recreate This Look:
- Lay limestone or porcelain tiles with a tight grout line for a monolithic field.
- Mount LED strips in a slim channel along bench backs or parapets to create a cove glow.
- Place a low fire bowl centered on the seating cluster; choose a matte finish to avoid glare.
- Anchor with low lounge seating and a few oversized cushions.
- Style with lava rock, linen throws, and a minimal tray for drinks.
The Most Common Mistake: Over-lighting. Keep ambient light low so the fire bowl remains the hero and skin tones look warm, not washed out.
Pro Styling Tip: Shoot at blue hour—the cool sky against warm stone and flame makes every photo look editorial.
4. White Plaster Benches With Sunset Uplighting and a Statement Canopy Daybed
You love the idea of a lounge zone that doubles as a daytime nap spot, but you hate chasing throw pillows every time a breeze picks up. Built-in plaster benches solve the problem and look like an Ibizan hideaway. Add discrete uplighting tucked at bench bases to glow at sunset, then bring in a statement canopy daybed for midday shade and instant hotel-level drama on your luxury rooftop terrace.
The mood skews resort-minimal: matte white, crisp shadows, and a canopied silhouette that screams vacation. Practical benefits? Built-ins won’t scoot around in wind, plaster stays cool, and the canopy reduces harsh glare during peak sun. Photographs sing because white plaster throws soft, cinematic shadows and the canopy lines frame your composition like a cabana.
Variations: Renter-friendly swap for benches: modular concrete-look blocks topped with custom cushions. For small spaces, choose a half-canopy lounger and a single L-shaped bench.
Budget Breakdown:
- Built-in plaster or stucco bench (contractor): $1,500–$4,500
- LED uplights (4–6 fixtures): $250–$900
- Canopy daybed: $900–$3,200
- Custom outdoor cushions in performance canvas: $300–$1,200
- Sheer outdoor curtains for canopy: $120–$400
Total Estimated Cost: $3,000 – $9,000
Best For: Sun-drenched rooftops, boho-modern homes, and weekend nappers.
Key Design Elements:
- Main materials: Plaster/stucco, performance canvas, powder-coated steel
- Color palette: Chandelier white, warm sand, black accents
- Lighting strategy: Floor-level uplights washing walls and casting long shadows
- Furniture silhouettes: Clean benches, squared arms, canopy frame
- Texture layers: Smooth plaster, canvas, braided jute, hammered metal
- Accent details: Oversized floor cushions, low hammered-metal table, potted cactus
How To Recreate This Look:
- Map bench dimensions; aim for 18–20 inches high and 24 inches deep for lounging.
- Install low-glare uplights at the bench base, spaced 3–5 feet apart.
- Assemble the canopy daybed; use sheer curtains to soften sun and frame views.
- Layer neutral cushions and 1–2 striped bolsters for rhythm.
- Style with a jute rug and a hammered-metal tray for texture contrast.
Why This Looks Intentional: Built-ins telegraph permanence. The canopy creates a focal point that corrals the eye and defines the scene like a cabana suite.
Don’t Do This: Avoid glossy white paint on benches. It glares in sun and looks cheap in photos. Go matte or mineral-based finishes.
Pro Styling Tip: Let the curtains puddle half an inch on the deck—just enough softness to read luxe without dragging dirt.
Did You Know? A 2700K bulb looks cozy at night, but if your building floods your terrace with cool-toned street light, dropping to 2200K helps counteract the blue cast so skin looks warm and inviting in photos.
5. Charcoal Concrete Pavers With Ember-Glow Strip Lights and a Sculptural Outdoor Kitchen Island
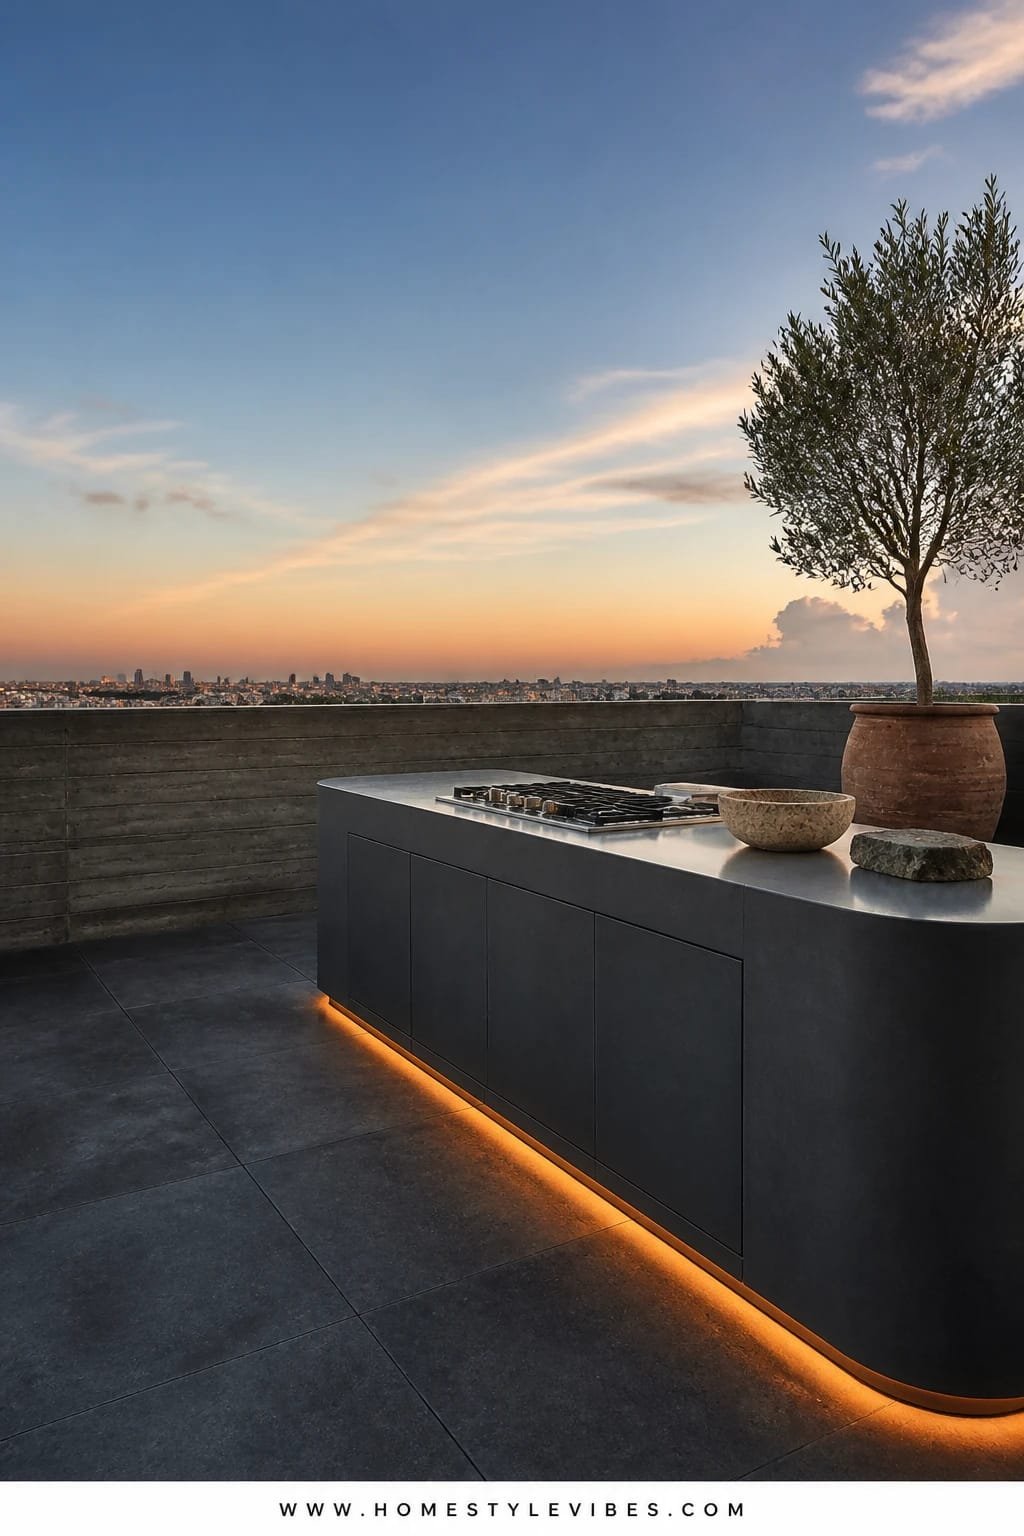
Ever notice how rooftop grills can hijack the vibe? Stainless boxes, messy tools, tangled propane lines. This design turns the outdoor kitchen into a sculptural moment. Charcoal concrete pavers make a dark, moody base that hides scuffs and soot. Install ember-glow strip lights under the island toe-kick, then build a streamlined island with integrated storage and a slim stainless cooktop. The statement piece is the island itself—long, monolithic, and seriously photogenic.
Mood is urban luxe—think rooftop restaurant chef’s table. It’s practical too: dark pavers are forgiving, under-counter lighting doubles as path lighting, and drawers keep tools invisible. Photography wins because shadow play on dark surfaces adds depth and pulls focus to the island’s clean lines.
Variations: If you can’t build, use modular kitchen units with a waterfall countertop. For tight layouts, do a 5–6 foot island with bar seating for two. Renter-friendly? A freestanding prep table plus a slim electric grill tucked behind a planter screen.
Budget Breakdown:
- Charcoal concrete pavers: $6–$14/sq ft
- Outdoor kitchen island build or modular units: $2,000–$8,000
- Ember-glow LED strips + aluminum channels: $180–$600
- Slim stainless cooktop/grill: $300–$1,800
- Bar stools (2–4): $200–$800 total
Total Estimated Cost: $3,000 – $10,000
Best For: Food lovers, frequent hosts, and rooftops with reliable ventilation.
Key Design Elements:
- Main materials: Charcoal concrete, stainless steel, ceramic or Dekton counters
- Color palette: Graphite, soft black, brushed steel, warm amber light
- Lighting strategy: Toe-kick strips and task lighting under an overhead shelf
- Furniture silhouettes: Waterfall island, backless bar stools, slim frames
- Texture layers: Smooth concrete, brushed metal, ribbed glass for wind screens
- Accent details: Magnetic tool strip inside cabinet, leather-wrapped tongs, herb planters
Why This Looks Expensive: Monolithic shapes and consistent dark tones read “custom millwork,” even in modular form. The ember glow mimics coals, instantly setting a restaurant mood.
How To Recreate This Look:
- Lay charcoal pavers in a tight running bond for minimal visual noise.
- Position the island parallel to the view; run electrical for strip lights and outlets.
- Install toe-kick LEDs with a 2200–2400K temperature for that ember feel.
- Choose bar stools with simple lines and weatherproof seats.
- Style with a single row of herb planters and a low-profile tray for bottles.
Watch Out: Don’t overdo stainless everywhere. One or two elements is refined; full stainless reads commercial kitchen, not boutique restaurant.
Pro Styling Tip: For photos, wipe the countertop with a barely damp cloth to get a subtle, even sheen that catches the evening light.
Micro-moment: Imagine searing scallops while the skyline hums below, herbs brushing your fingers as you plate. That’s the vibe we’re building toward—low effort, high ritual.
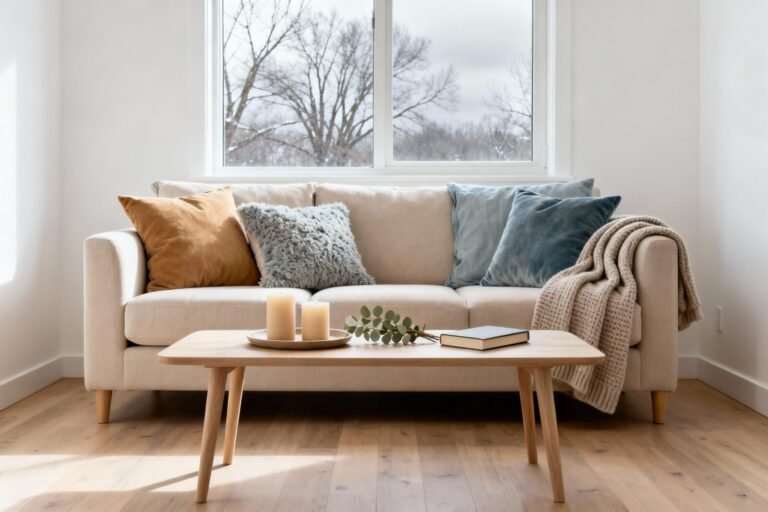
6. Fluted Cedar Cladding With Soft Amber Sconces and a Deep Sectional Chaise
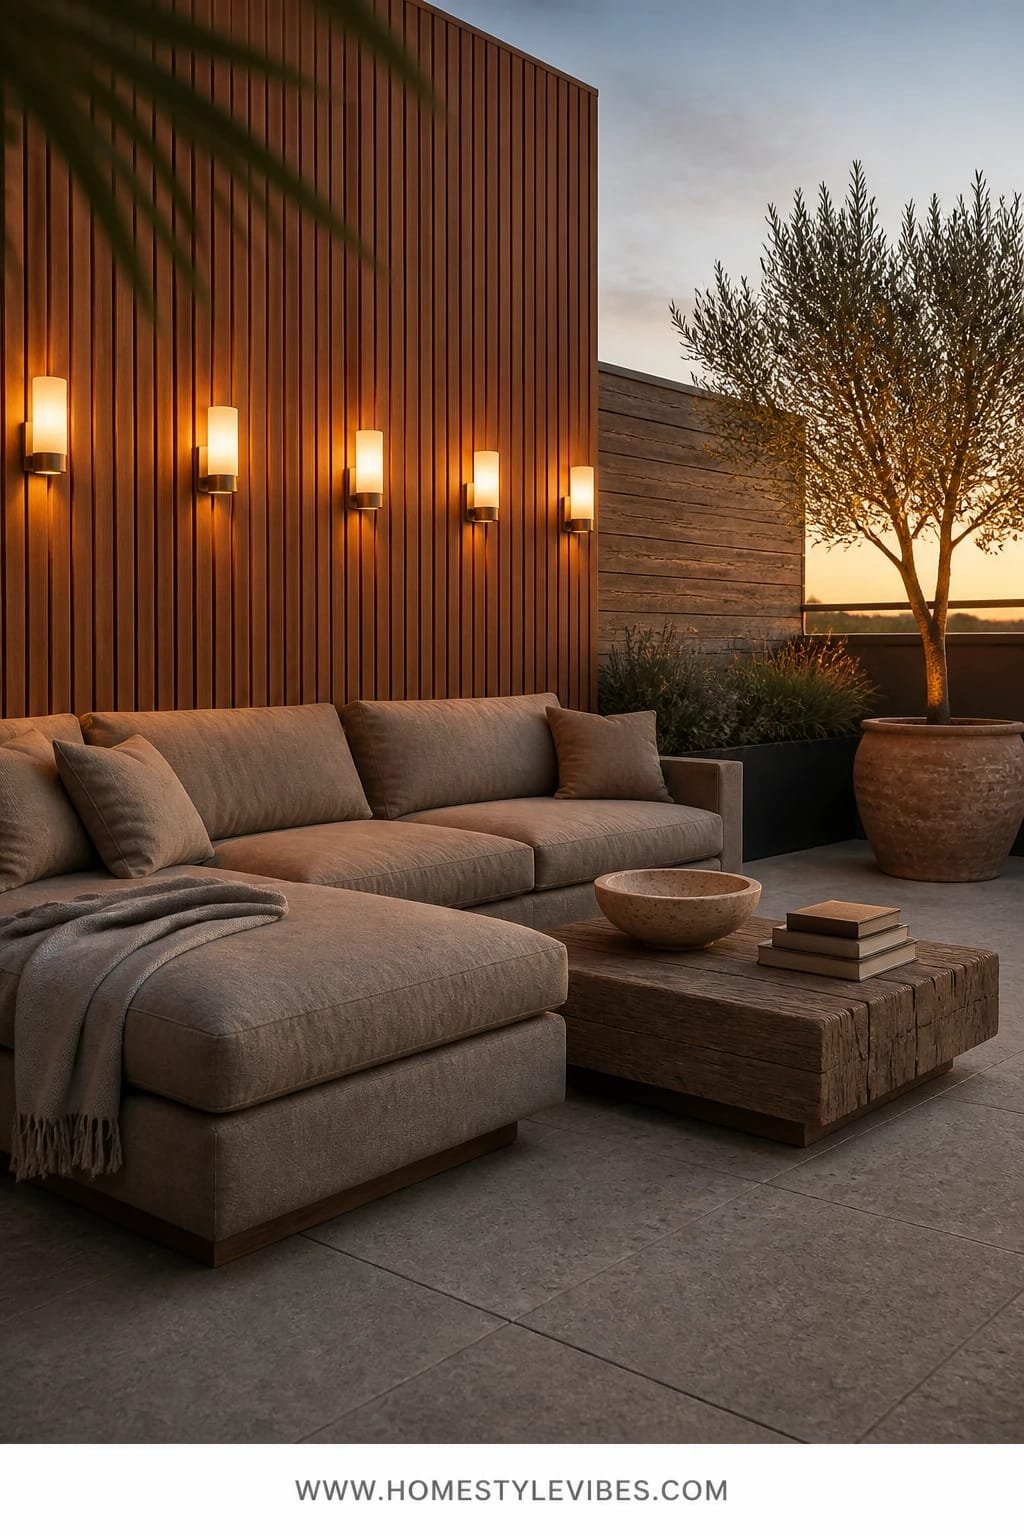
You want warmth and sound softness, but hard surfaces bounce every squeal and city honk. Fluted cedar cladding solves two problems: it softens acoustics and adds a luxe, architectural texture. Warm amber sconces mounted along the cladding turn the whole wall into a glowing backdrop, while a deep sectional chaise invites long lounging. The result? A cocoon-like, lodge-meets-rooftop escape that feels like a true hotel suite outdoors.
Why it works at home: cedar handles weather, ages beautifully to silver if you let it, and fluting reads tailored. The lighting sits at eye level for flattering portraits and zero glare. Photos get those dramatic ribbed shadows and warm highlights that make everything look intentional and expensive.
Variations: Budget swap for cedar: thermally modified pine or composite fluted panels. Small-space version: a two-seat chaise with a single fluted panel behind it. Darker take: stain the cedar walnut and swap fabrics to deep olive.
Budget Breakdown:
- Fluted cedar cladding: $12–$24/sq ft
- Outdoor sconces (3–5): $300–$1,000 total
- Deep sectional chaise: $900–$3,000
- Outdoor coffee table (stone or metal): $250–$900
- Planters with tall grasses (sound-softening): $150–$500
Total Estimated Cost: $2,000 – $6,500
Best For: Noise-sensitive rooftops, chill movie nights, and anyone who prioritizes comfort seating over dining.
Key Design Elements:
- Main materials: Cedar, performance boucle or canvas, powder-coated metal
- Color palette: Honey cedar, cream, tobacco, matte black
- Lighting strategy: Eye-level sconces with frosted shades at 2700K
- Furniture silhouettes: Deep chaise arms, low table, slim legs
- Texture layers: Ribbed wood, boucle upholstery, smooth stone
- Accent details: Wool-look outdoor throw, oversized candle, whispering grasses
How To Recreate This Look:
- Install fluted panels along one wall to create a textural backdrop.
- Mount sconces evenly, 6–7 feet apart, dimmer-controlled for evenings.
- Place a deep sectional chaise centered on the panel for symmetry.
- Add a sturdy coffee table and a rug in a tone one shade darker than your cushions.
- Style with tall grasses in planters to diffuse wind and add movement.
Why This Feels Designer: Textured walls plus eye-level lighting mirror boutique hotel lounge design principles—comfort first, then drama.
The Most Common Mistake: Using cool gray cushions against warm cedar. The clash reads unintentional. Choose creams, taupes, or olive.
Pro Styling Tip: Angle the chaise slightly toward the best view so the ribbed wall and skyline share the frame in photos.
Perspective check: If one material here jumps out—cedar, travertine, limestone—that’s your cue. Build your terrace around one dominant texture and let everything else support it. Less choice equals more calm.
7. Porcelain Terrazzo Tiles With Candlelit Niches and a Curved Banquette Dining Sofa
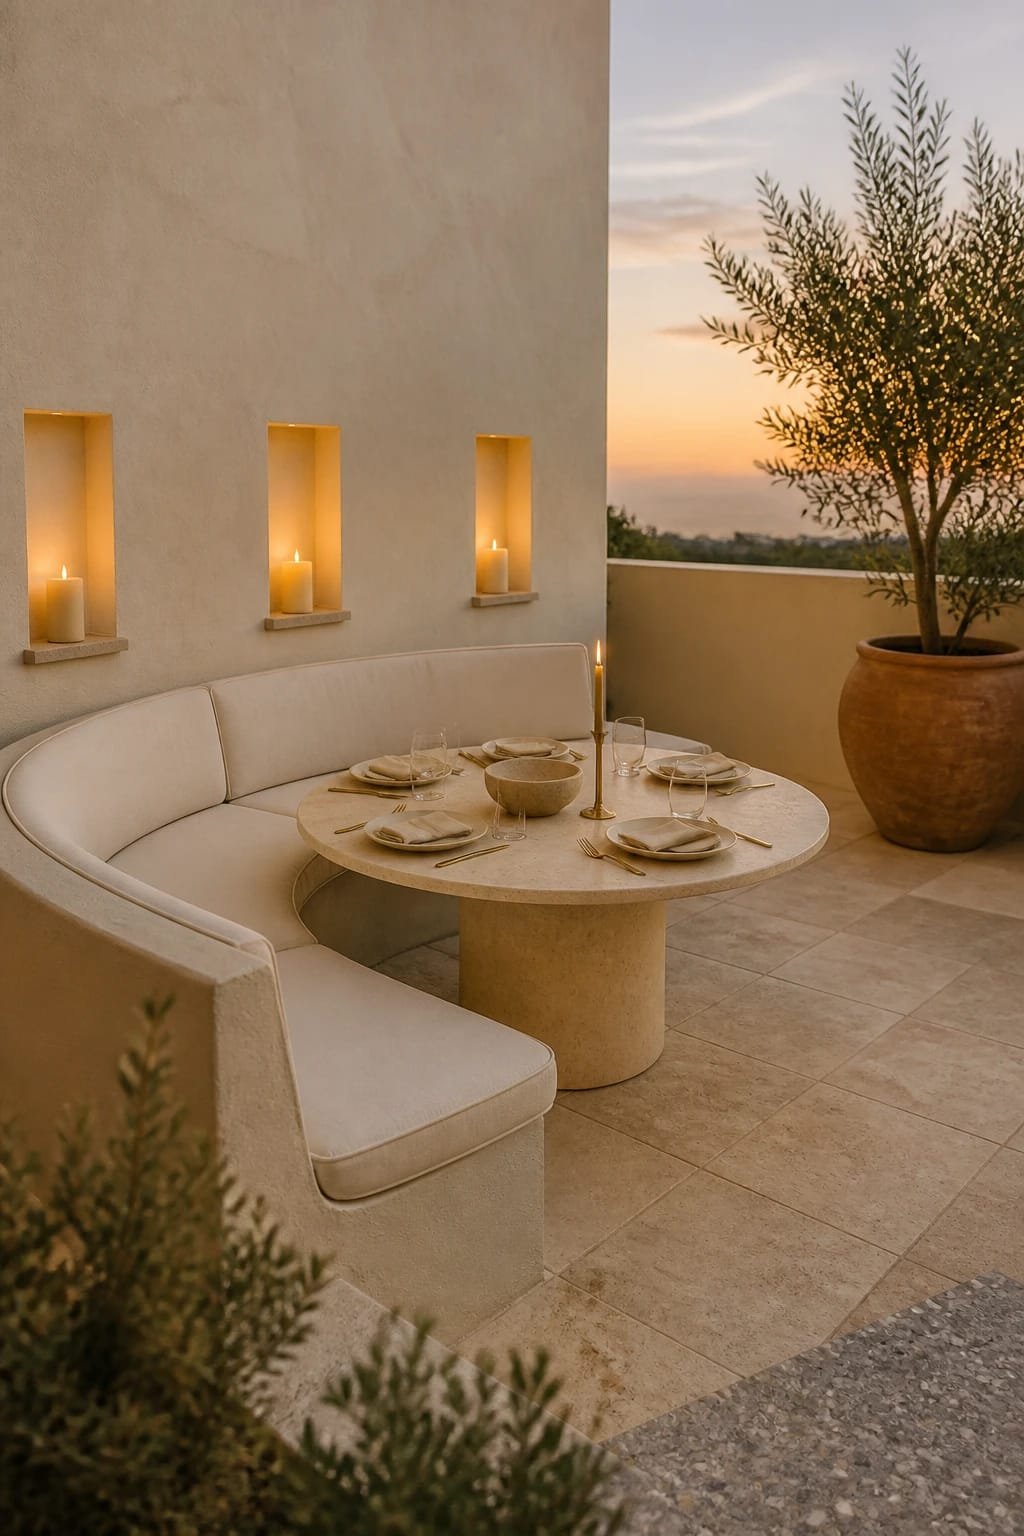
Lighting keeps tripping you up. Spotlights feel harsh, string lights look dorm-y, and candles blow out. Here’s the solve: porcelain terrazzo tiles for a chic, speckled base that hides crumbs and dust, shallow wall niches with wind-sheltered candles, and a curved banquette dining sofa that hugs a round table. Your rooftop terrace suddenly feels like a hidden courtyard in Milan—graphic, intimate, and thoroughly photogenic.
Terrazzo reads playful yet polished, and it’s easy to clean. Niches protect real candles (or hold rechargeable ones) so you get that flicker without frustration. A curved banquette fits more guests without chair legs everywhere, great for compact spaces. In photos, the terrazzo speckle adds micro-texture while the curve creates a strong focal line that looks designer.
Variations: If you can’t build niches, use hurricane lanterns tucked into a low shelving unit. Small-space version: a 36-inch round table and a half-moon banquette. Budget-friendly? Terrazzo-look rugs and a slim bench with curved back cushions.
Budget Breakdown:
- Porcelain terrazzo tiles: $8–$22/sq ft
- Shallow wall niches build-out: $600–$1,800
- Curved banquette (custom or modular): $1,200–$4,000
- Round dining table (stone or powder-coated metal): $500–$1,800
- Rechargeable candles/hurricanes: $120–$500
Total Estimated Cost: $2,500 – $8,000
Best For: Compact terraces, dinner parties, and anyone who wants a graphic yet soft look.
Key Design Elements:
- Main materials: Porcelain terrazzo, performance velvet or canvas, powder-coated metal
- Color palette: Soft white, warm gray flecks, blush or rust accents, black trim
- Lighting strategy: Candlelit niches plus a dimmable pendant over the table
- Furniture silhouettes: Curved banquette, round pedestal table
- Texture layers: Speckled tile, plush seating, matte ceramics
- Accent details: Rust-toned cushions, black rim plates, a single statement vase
How To Recreate This Look:
- Lay terrazzo-look tiles with minimal grout lines for a seamless field.
- Create or fake niches: recess shelves or use a slim wall shelf with hurricane covers.
- Place a round pedestal table and center the curved banquette around it.
- Install a small, dimmable outdoor-rated pendant over the table.
- Style with rechargeable candles, rust-toned textiles, and a single sculptural branch.
Why This Reads High-End: Curves plus micro-pattern equal visual richness. Candlelight in niches feels architectural, not improvised.
One Thing To Avoid: Too many small accessories. Let the terrazzo pattern and curve be the stars—clutter kills the vibe fast.
Pro Styling Tip: For photos, sweep crumbs but keep a faint dusting of terrazzo sparkle visible; it adds texture and realism.
Small confession: I once obsessed over outdoor pillow colors for weeks before realizing the real problem was my lighting temperature. Swapped to 2400K, and suddenly my “wrong” pillows looked perfect. The truth is, the right light forgives almost everything.
Quick Checklist
- Choose one dominant material: travertine, teak, limestone, concrete, cedar, plaster, or terrazzo
- Pick a single lighting temperature between 2200K–2700K for consistency
- Define zones with platforms, rugs, or built-ins
- Anchor with one statement piece: curved sofa, pedestal table, fire bowl, canopy daybed, or kitchen island
- Use low, layered light sources: lanterns, cove lights, toe-kick strips
- Favor matte finishes for photos (stone, canvas, powder coat)
- Hide clutter with closed storage and integrated benches
- Fight wind with heavier cushions, ties, and sheltered candles
- Add one tall planter or tree to break the horizon line
- Keep the palette tonal, then add one accent color
Frequently Asked Questions
How much should I realistically budget to make my rooftop feel hotel-worthy?
Plan for $2,000–$7,000 for a focused zone (seating or dining) using durable materials and good lighting. Full-terrace builds with custom elements can run $8,000–$20,000. Start with lighting and one statement piece to see a big visual shift fast.
My rooftop is tiny—can I still do a luxury look?
Yes. Choose one purpose (lounging or dining), go curved to save space, and define the zone with an outdoor rug. Use wall-mounted or under-rail lights to keep floors clear. A round table or a chaise with a side table works beautifully on compact footprints.
I rent—what can I do without drilling or building?
Use interlocking deck tiles, freestanding lanterns, rechargeable candles, and modular sofas. Create the canopy feeling with a freestanding pergola or an offset umbrella. Define niches with a narrow shelving unit and hurricanes for candlelight.
How do I maintain stone or wood outdoors without it looking tired?
Seal stone annually, sweep dust regularly, and spot-clean stains immediately. For teak, decide if you want it silvered or honey; oil if you prefer honey, leave it if you like patina. Store cushions or use covers to keep fabrics crisp.
What’s the most common design mistake on rooftop terraces?
Mismatched lighting temperatures and too many small pieces. Keep bulbs warm and consistent, and choose fewer, larger items over lots of tiny tables and chairs. It instantly feels calmer and more premium.
Conclusion
Pick one idea from these luxury rooftop terrace design plans and commit. Maybe it’s the curved sofa with lantern glow. Maybe it’s the pedestal table with under-rail LEDs. Start there, and watch how a single focused decision pulls everything else into place.
Luxury outdoors isn’t about stuffing the space; it’s texture, lighting, and restraint. A consistent palette, layered warm light, and one strong focal piece will make your terrace read like a five-star hotel, even if you’re sipping grocery-store prosecco in your sweats.
You’ve got this. Choose your anchor material, set your light to warm, and build the vibe one layer at a time. When the city hums and your terrace glows, you’ll feel it—the exact version of home you’ve been chasing, finally within reach.