
6 DIY Pumpkin Decorating Ideas That Don’t Require Any Carving
You want that cozy, camera-ready fall vibe — saturated rust, cinnamon warmth, pumpkins everywhere — but the mess, the knives, and the mushy, sagging jack-o’-lanterns by week two? Hard pass. You crave the amber glow and layered abundance of a harvest home, yet the thought of scooping pumpkin guts on a busy Tuesday kills the mood. These 6 DIY pumpkin decorating ideas deliver all the cozy bright autumn magic without any carving, sticky seeds, or stress — promise. With budget-friendly materials, a weekend of easy projects, and some strategic styling, you’ll get that golden, plaid-wrapped, candlelit look that photographs beautifully and actually works in a real family home.
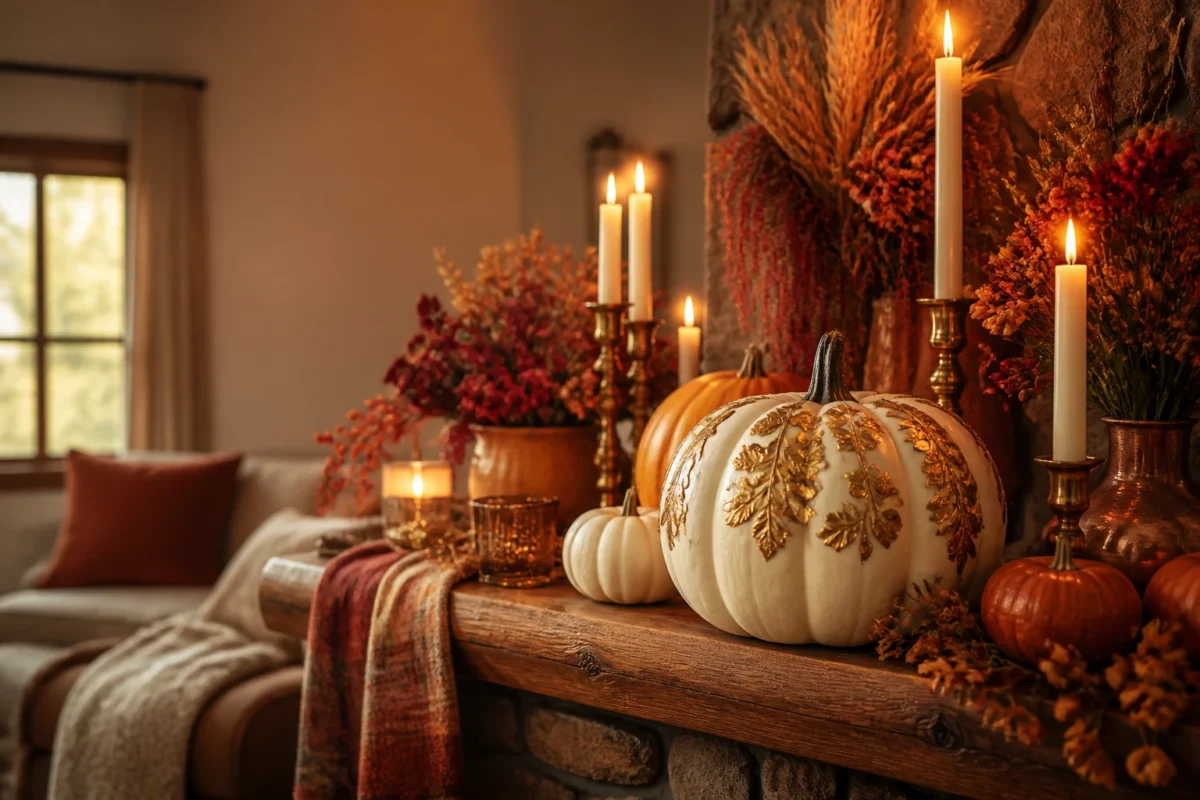
Each idea leans into the warm, saturated palette we love in fall: rust, marigold, cranberry, and deep pumpkin. Think wool throws, brass accents, wheat bundles, and flickering candlelight that makes your living room feel like a snuggly cabin, even if you still have LEGO in the corner. These are photogenic, achievable, and mood-lifting — perfect for early September through Thanksgiving. If you love a big reveal for a dinner night or a casual football hang, this is your playbook.
1) Gilded Leaf Pumpkins With Amber Candle Glow On The Living Room Mantel
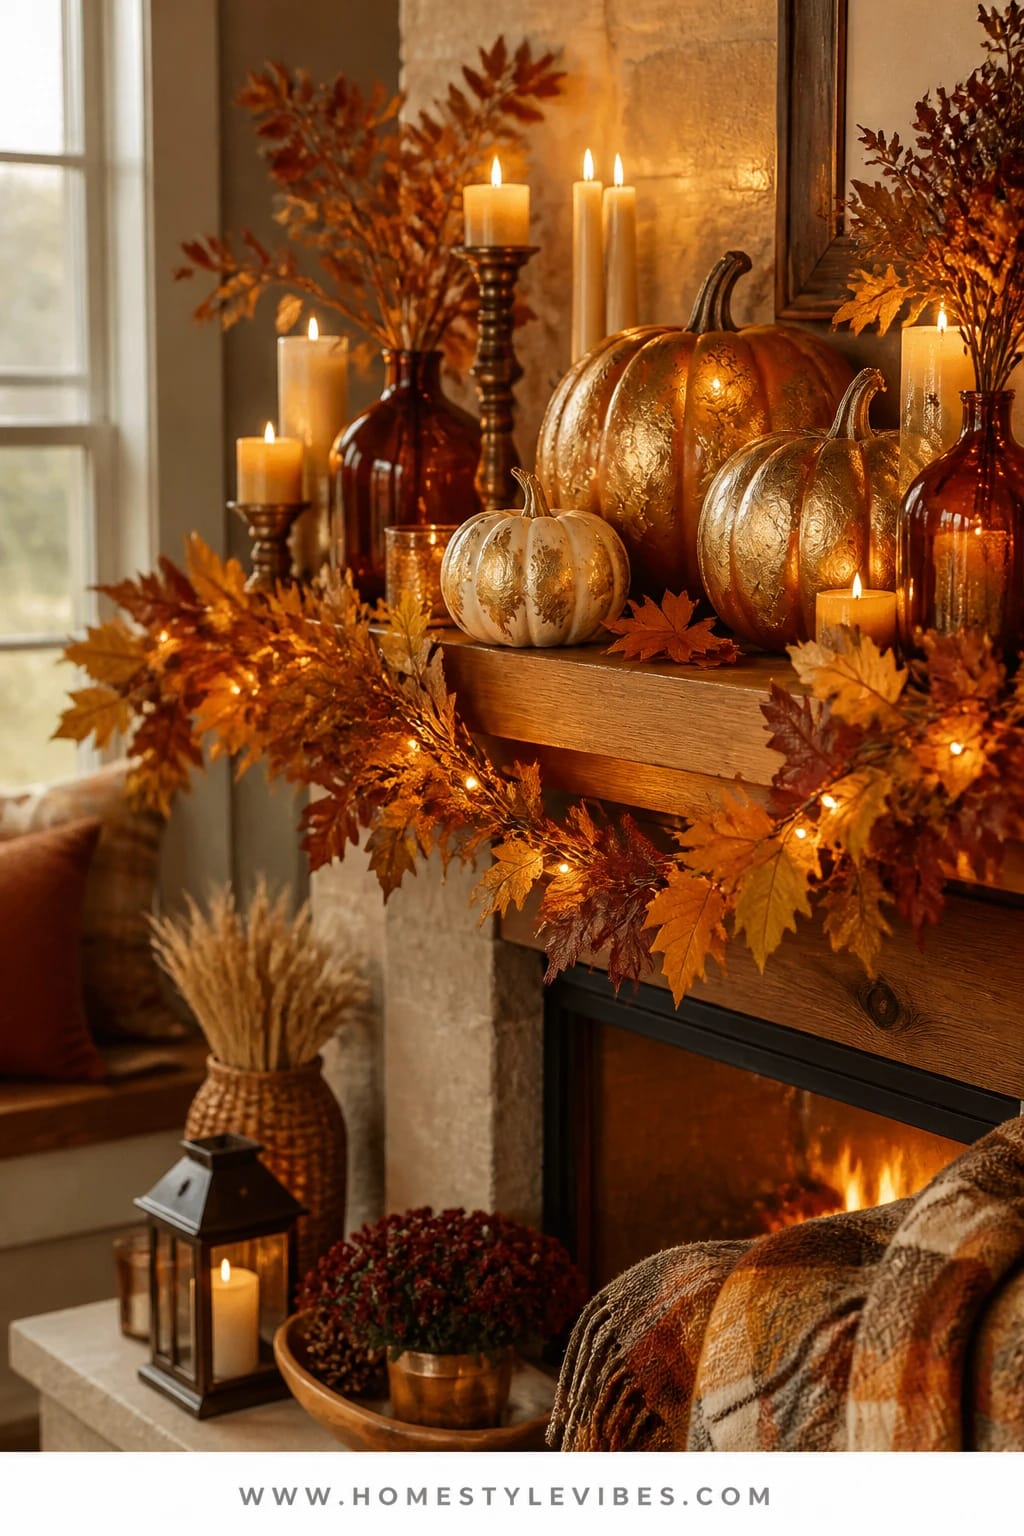
We’ve all been there: the mantel that tries so hard every fall and still looks sparse, like it’s missing the soul of the season. You’ve stacked a couple pumpkins, maybe tossed up a garland, and it still reads “random.” This no-carve pumpkin idea pulls the whole scene together with a simple, luxe trick: gilded leaves and warm candlelight that make every evening feel like a golden hour you can turn on.
The mood is classic cozy bright autumn — rich rusts, burnished gold, and soft flickers that skim across the pumpkins and your framed art. It works in real homes because it uses light to create depth: amber votives and pillar candles bouncing off metallic leaf details make even a small mantel feel abundant. Materials stay simple: real or faux pumpkins, metallic leaf sheets or metallic rub, Mod Podge, and a clutch of brass candlesticks or amber glass votives. It photographs beautifully because the reflective gold catches candlelight, and the layered heights of candlesticks, pumpkins, and a slim wheat garland create a magazine-worthy silhouette.
Try two variations. Budget-friendly: use metallic acrylic paint instead of leaf sheets and a couple of thrifted candlesticks. Neutral-leaning: choose creamy white pumpkins with soft antique gold leaf touches for a quieter look that still glows. This styling sails from September to Thanksgiving; swap in a few tiny cranberry accents after Halloween to tip it toward holiday hosting.
Budget Breakdown:
- Pumpkins (mix real/faux): $10 – $40
- Metallic leaf sheets or metallic wax: $6 – $20
- Mod Podge or adhesive: $5 – $10
- Amber glass votives or brass candlesticks: $12 – $50
- Wheat or faux leaf garland: $8 – $25
Total Estimated Cost: $41 – $145
Best For: Mantels in living rooms that feel a bit flat at night; households who want kid-friendly decor with no open flames near reach-level; the early-fall-to-Thanksgiving stretch where warm glow wins every evening.
Key Design Elements:
- Main seasonal props: pumpkins with gilded accents, wheat garland, amber votives
- Color palette: rust, pumpkin, cranberry, burnished gold, warm ivory
- Lighting strategy: low, layered candlelight plus dimmed lamps
- Textile layers: a throw casually draped on a nearby armchair in rust plaid
- Natural elements: dried wheat, a few eucalyptus sprigs for scent
- Accent details: brass candlesticks, antique-style frames, amber glass
How To Recreate This Look:
- Start with a clean mantel and place your largest pumpkin slightly off-center as an anchor.
- Add a mid-size pumpkin on the other side, then a small one in front to create a triangular composition.
- Apply metallic leaf or paint to pumpkin ridges or leaf-shaped cutouts for subtle shimmer.
- Line up candlesticks at varying heights behind the pumpkins and tuck in amber votives between them.
- Weave a thin wheat garland along the base, leaving negative space so it doesn’t look crowded.
Why This Looks Expensive: The metallic leaf reads as custom and designer because it reflects light in an irregular, handcrafted way — not the flat shine of cheap spray paint. The brass-and-amber combo suggests collected-over-time, not one trip to a big-box store.
Watch Out: Don’t over-gild. If everything shines equally, nothing stands out. Keep 70% matte pumpkins, 30% gilded accents for balance.
Pro Styling Tip: For photos, light candles 30 minutes before and turn off overheads; the warm low glow plus gilding gives you that rich, moody contrast without editing.
2) Plaid-Wrapped Pumpkins In Warm Window Light On The Dining Table
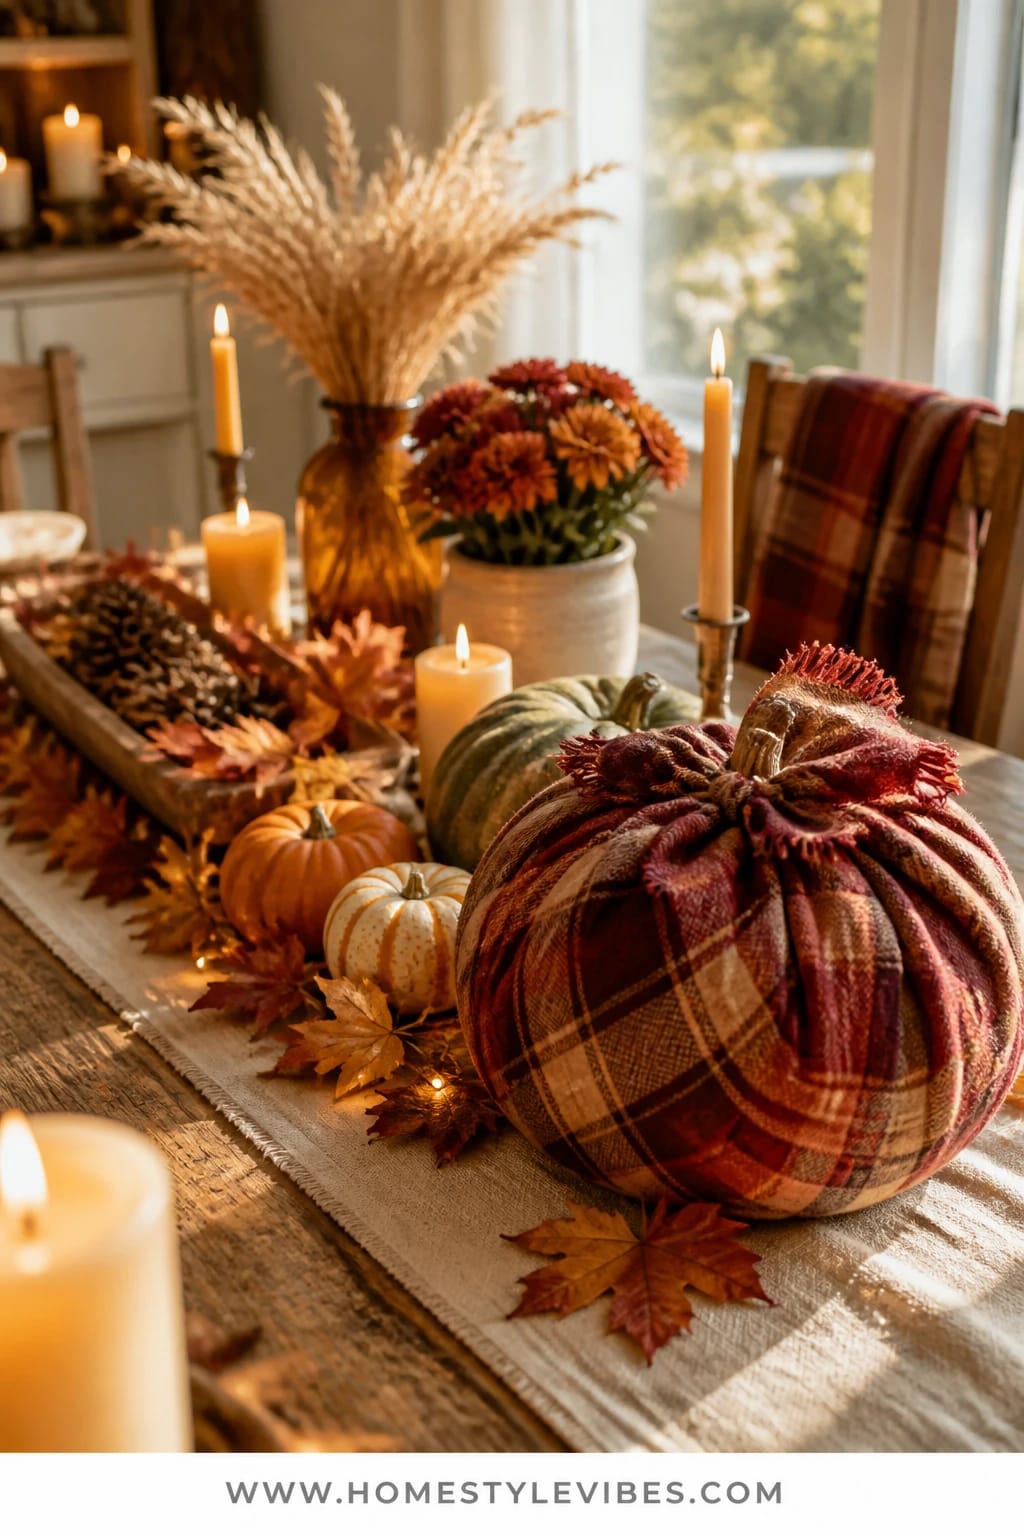
It’s that one dining table that never quite feels seasonal unless you commit to a full runner, ten plates, and a stress headache. You’ve tried scattering pumpkins, but they wander and feel like placeholders. The fix: wrap a few pumpkins in soft, rust-and-cranberry plaid — think scarf-style — and build a warm window-lit centerpiece that looks generous without fuss.
This creates a sit-down, pass-the-cider mood, perfect for weeknight dinners and weekend brunch. It works because texture does the heavy lifting; the fabric softens the hard curves of the pumpkins and brings instant pattern, while the window’s golden afternoon light turns the plaid fibers into a warm backdrop for food. It photographs like a dream thanks to the layered textiles, saturated color, and a few low votives tucked safely in glass hurricanes.
Two ways to tweak it: For small tables, use three mini pumpkins wrapped in fabric scraps and cluster them on a wood cutting board. For a calmer visual, pick a muted herringbone or oatmeal wool instead of high-contrast plaid. Keep it out through Thanksgiving by swapping in a cranberry linen napkin stack and a copper bowl of pears.
Why This Feels Designer: The tailored fabric wrap echoes upholstered dining chairs or drapery nearby, pulling your room’s textiles into the centerpiece. It reads custom — like you had pumpkins made to match your home.
Budget Breakdown:
- Real pumpkins (3-5): $10 – $25
- Plaid scarf or fabric remnant: $8 – $30
- Glass hurricanes/votives: $12 – $40
- Wood board or low tray: $10 – $25
- Optional dried flowers: $6 – $15
Total Estimated Cost: $46 – $135
Best For: Dining tables that need one strong focal point all season; busy families who want easy centerpieces they can lift in one move for homework space.
Key Design Elements:
- Main seasonal props: fabric-wrapped pumpkins, small hurricanes, dried florals
- Color palette: rust, cranberry, pumpkin, warm wood tones
- Lighting strategy: daytime window glow plus a few evening votives
- Textile layers: plaid scarf, soft napkins, maybe a linen runner
- Natural elements: dried hydrangea heads, seed pods, wheat stems
- Accent details: a copper bowl, ceramic salt cellars, matte black cutlery
How To Recreate This Look:
- Cut fabric into large squares; place pumpkin in center and gather corners at the stem, twisting gently.
- Secure fabric under the stem with floral wire or a twine bow.
- Set wrapped pumpkins on a wood board or tray to contain the vignette.
- Add two or three small hurricanes with tea lights or LED candles for safety.
- Tuck in dried stems low to the board for a natural, runner-like effect without the bulk.
One Thing To Avoid: Don’t choose slippery satin or thin cotton; they slide and show bumps. Wool blends or flannel grip better and hide stems cleanly.
Pro Styling Tip: Angle the board slightly off-center and shoot from chair height — you’ll capture that plaid texture and glowing glass for a Pinterest-worthy moment.
Keep scrolling — the next idea is the texture-forward fix for that empty coffee table that never cooperates.
3) Cinnamon-Studded Pumpkins With Golden String Lights On The Coffee Table
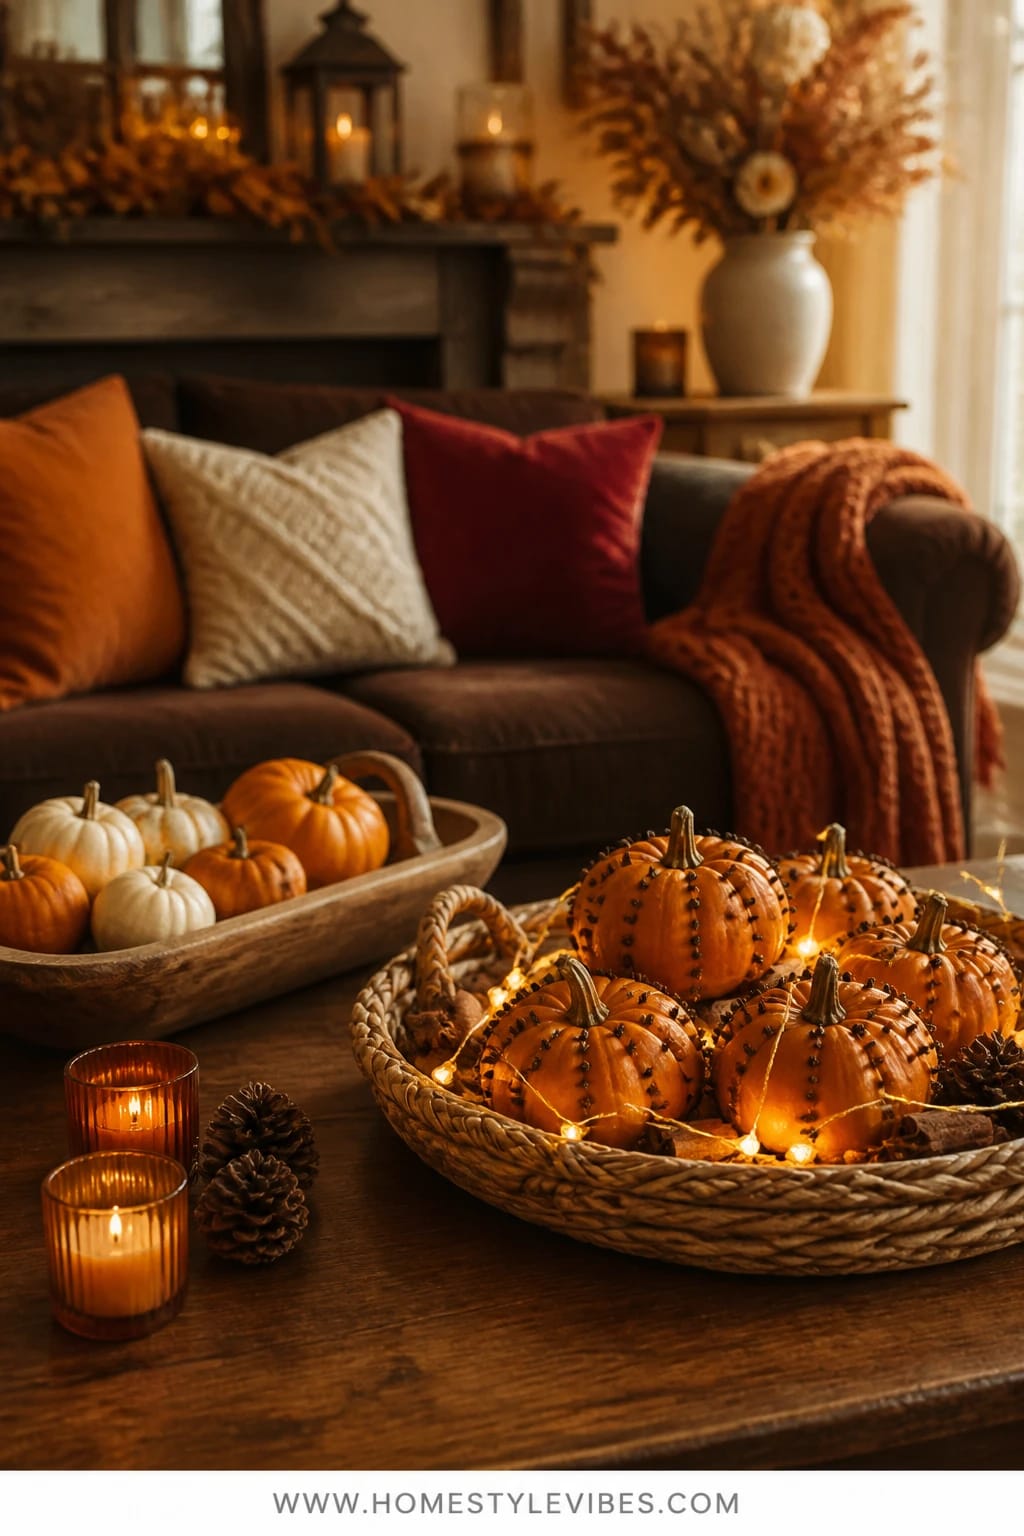
Your coffee table sets the tone for the whole living room. But it’s often a remote graveyard with a coaster and a dream. You’ve tried a tray and a candle, yet it still reads empty. Here’s the move: stud small pumpkins with whole cloves or cinnamon sticks, then nestle them among a low tangle of warm white string lights inside a shallow basket tray. Zero carving, major payoff.
The mood? Cozy, aromatic, and a little nostalgic. The cloves and cinnamon give off a whisper of spice when the heat kicks on or the afternoon sun warms the room. This works in homes with kids or pets because you can keep everything contained in a low tray and choose LED lights. It photographs beautifully due to the sparkly points of light under warm tones and the tactile contrast of smooth pumpkin and pebbly spice.
Try variations for any vibe. Super budget: use a couple of clementines studded with cloves among two mini pumpkins. More refined: stick to white pumpkins, use cinnamon sticks in tidy rows, and pair with a brass bowl of acorns for tonal restraint. This setup does all the seasonal heavy lifting from early fall to Thanksgiving — swap the string lights for a few votives as November deepens for an even warmer look.
Budget Breakdown:
- Mini pumpkins (4–6): $6 – $18
- Whole cloves/cinnamon sticks: $4 – $12
- Warm white LED string lights: $8 – $20
- Shallow tray or basket: $12 – $35
- Optional acorns or pinecones: $3 – $10
Total Estimated Cost: $33 – $95
Best For: Coffee tables and ottomans that need a simple, movable vignette; households that love scent but want something subtler than a strong candle.
Key Design Elements:
- Main seasonal props: studded pumpkins, LED string lights, natural filler
- Color palette: pumpkin, caramel, chestnut brown, warm white
- Lighting strategy: twinkly low lights for evening, indirect lamp glow nearby
- Textile layers: a nubby throw on the sofa arm, a wool rug underfoot
- Natural elements: pinecones, acorns, a sprig of rosemary if you like a herbal note
- Accent details: a brass or rattan tray, ceramic match striker (even if you’re using LEDs, it looks cute)
Why This Reads High-End: The repetition of a single treatment (studding) across multiple pumpkins looks curated and intentional. Plus, the controlled sparkle of tiny lights echoes boutique hotel bars — cozy but elevated and very photogenic.
How To Recreate This Look:
- Gather 4–6 mini pumpkins and wipe them dry.
- Press whole cloves into the skin in dotted lines or starbursts; for cinnamon sticks, secure with a tiny dot of non-toxic glue horizontally.
- Place a warm white light strand in a shallow tray; hide the battery pack under a napkin or mini book.
- Nestle the pumpkins among the lights, leaving some bulbs peeking for glow.
- Fill gaps with acorns or pinecones, keeping everything below mug-height so the tray feels usable.
The Most Common Mistake: Overfilling the tray. Leave visible surface space so it reads like a styled moment, not a storage bin.
Pro Styling Tip: For photos, pull the tray to the table’s front third and shoot at a slight angle; the foreground bulbs create dreamy bokeh glimmers.
Pause, breathe. If one idea is clicking, that’s your starting line. You don’t need all six — choose the scene that matches your daily life and go all-in on it. The secret is clarity, not quantity.
4) Pressed-Leaf Decoupage Pumpkins With Honeyed Glow On A Bookshelf Ledge
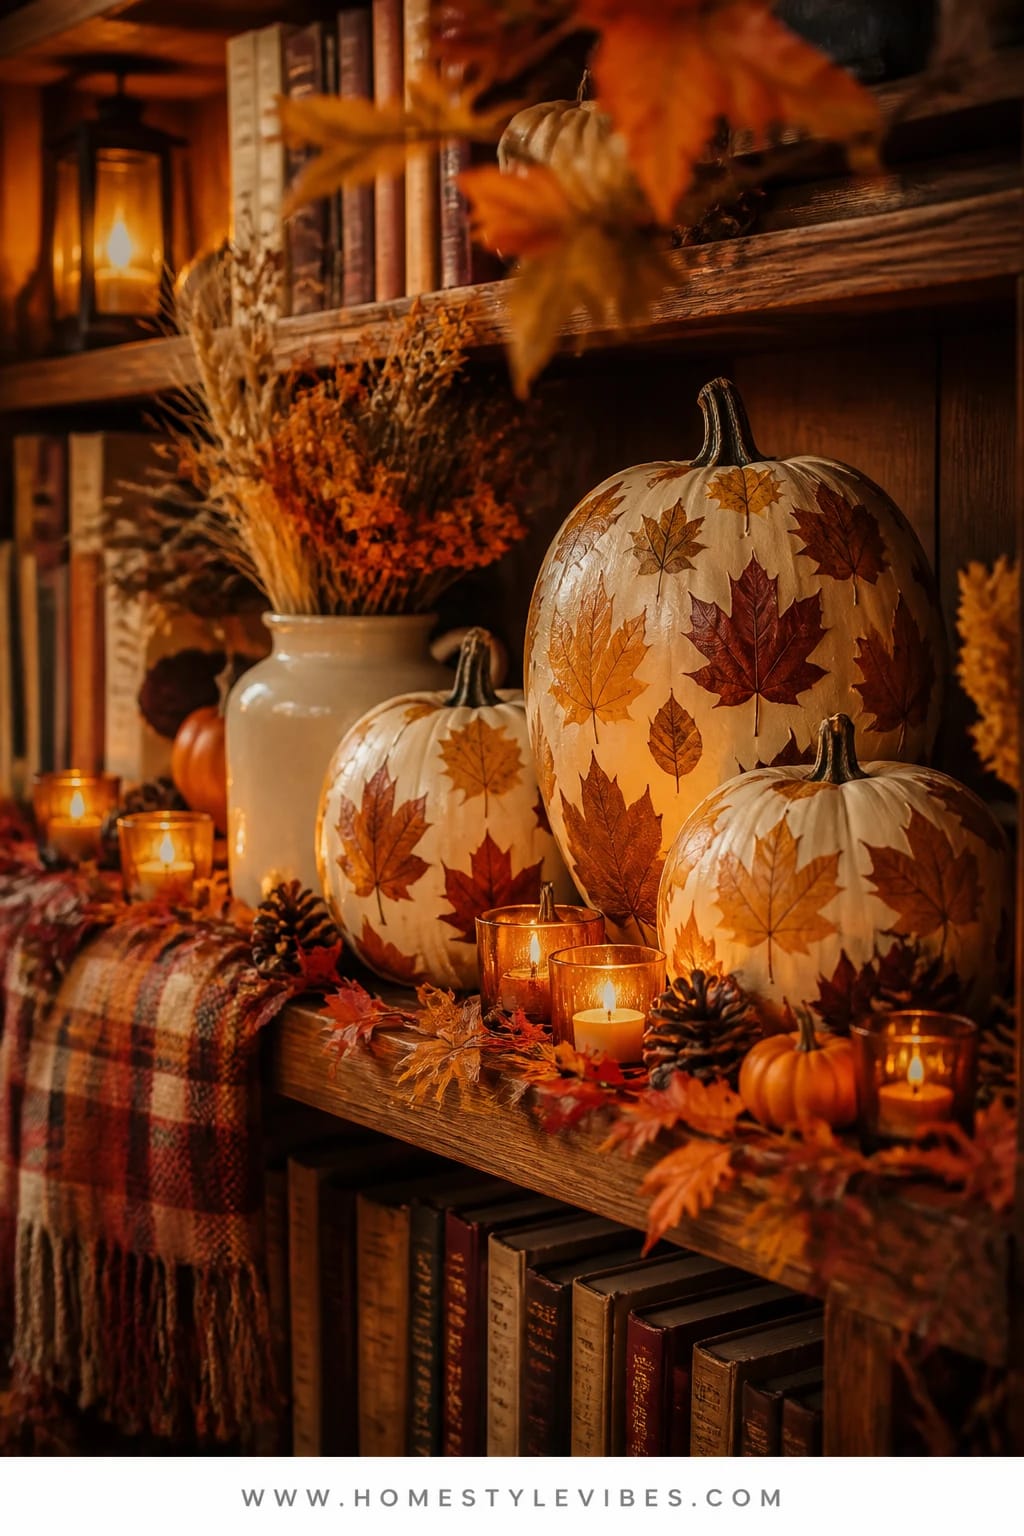
Bookshelves can swallow seasonal decor and make it disappear. You’ve tucked a pumpkin in and poof — visual black hole. The fix is contrast and detail: pressed-leaf decoupage on pale pumpkins, then a thin line of honeyed candle glow along the shelf to spotlight your work. No carving, just paper-thin layers that look like you painted them in a sunlit studio.
This mood leans into warm library coziness with a botanical twist. It works because the flatness of pressed leaves sits beautifully against a pumpkin’s curve, giving your eye something intricate to land on. For lighting, run a slim LED candle strip or place two tea lights in amber cups at either end; the gentle light grazes the shelf and throws whispery shadows under the leaves. It photographs like fine art: high contrast, tiny details, and tidy vignettes between book stacks.
Variations: Use faux white pumpkins for longevity and pack them away afterward, or go for real pale heirlooms if you love the authentic mottling. For a quieter look, use pressed ferns and brown-toned leaves; for color pop, choose maples in copper and wine. This carries through the entire season — swap a few books to face out with warm-toned covers for extra cohesion.
Budget Breakdown:
- Faux or real pale pumpkins (2–4): $12 – $40
- Pressed leaves (DIY or purchase): Free – $12
- Mod Podge matte and a foam brush: $6 – $10
- LED tea lights or slim candle strip: $10 – $25
- Amber cups or holders: $6 – $15
Total Estimated Cost: $34 – $102
Best For: Living rooms or dens with built-ins that need subtle seasonal punctuation; readers who love a crafted, natural look that still reads clean.
Key Design Elements:
- Main seasonal props: pressed-leaf pumpkins, amber tea lights, curated books
- Color palette: cream, honey, copper, deep brown
- Lighting strategy: pinpoint shelf lighting and low tea light glow
- Textile layers: a small woven basket and a leather bookmark peeking from a novel
- Natural elements: dried seed heads in a bud vase, a tiny gourd cluster
- Accent details: antique brass bookends, a ceramic dish for matches
Why This Looks Intentional: Repeating a single technique (pressed leaves) across multiple shelves creates a visual breadcrumb trail. Your eye reads it as a story, not a random scatter of pumpkins.
How To Recreate This Look:
- Press leaves for 3–5 days between parchment inside heavy books, or buy pre-pressed sets.
- Brush a thin coat of Mod Podge on a pumpkin section, lay the leaf, then smooth from center outward.
- Seal with another thin coat; let dry fully to avoid tackiness.
- Place pumpkins on alternating shelves near book stacks, not centered — asymmetry looks collected.
- Add two amber tea lights per shelf level or one slim LED strip along the back.
Don’t Do This: Avoid glossy sealants; they reflect too much and fight with the shelf lighting. Matte keeps it sophisticated.
Pro Styling Tip: Stack two or three warm-toned books horizontally and perch a mini decoupage pumpkin on top for an instant hero moment in photos.
5) Velvet-Mousse Painted Pumpkins With Brass Bowls On The Entryway Console
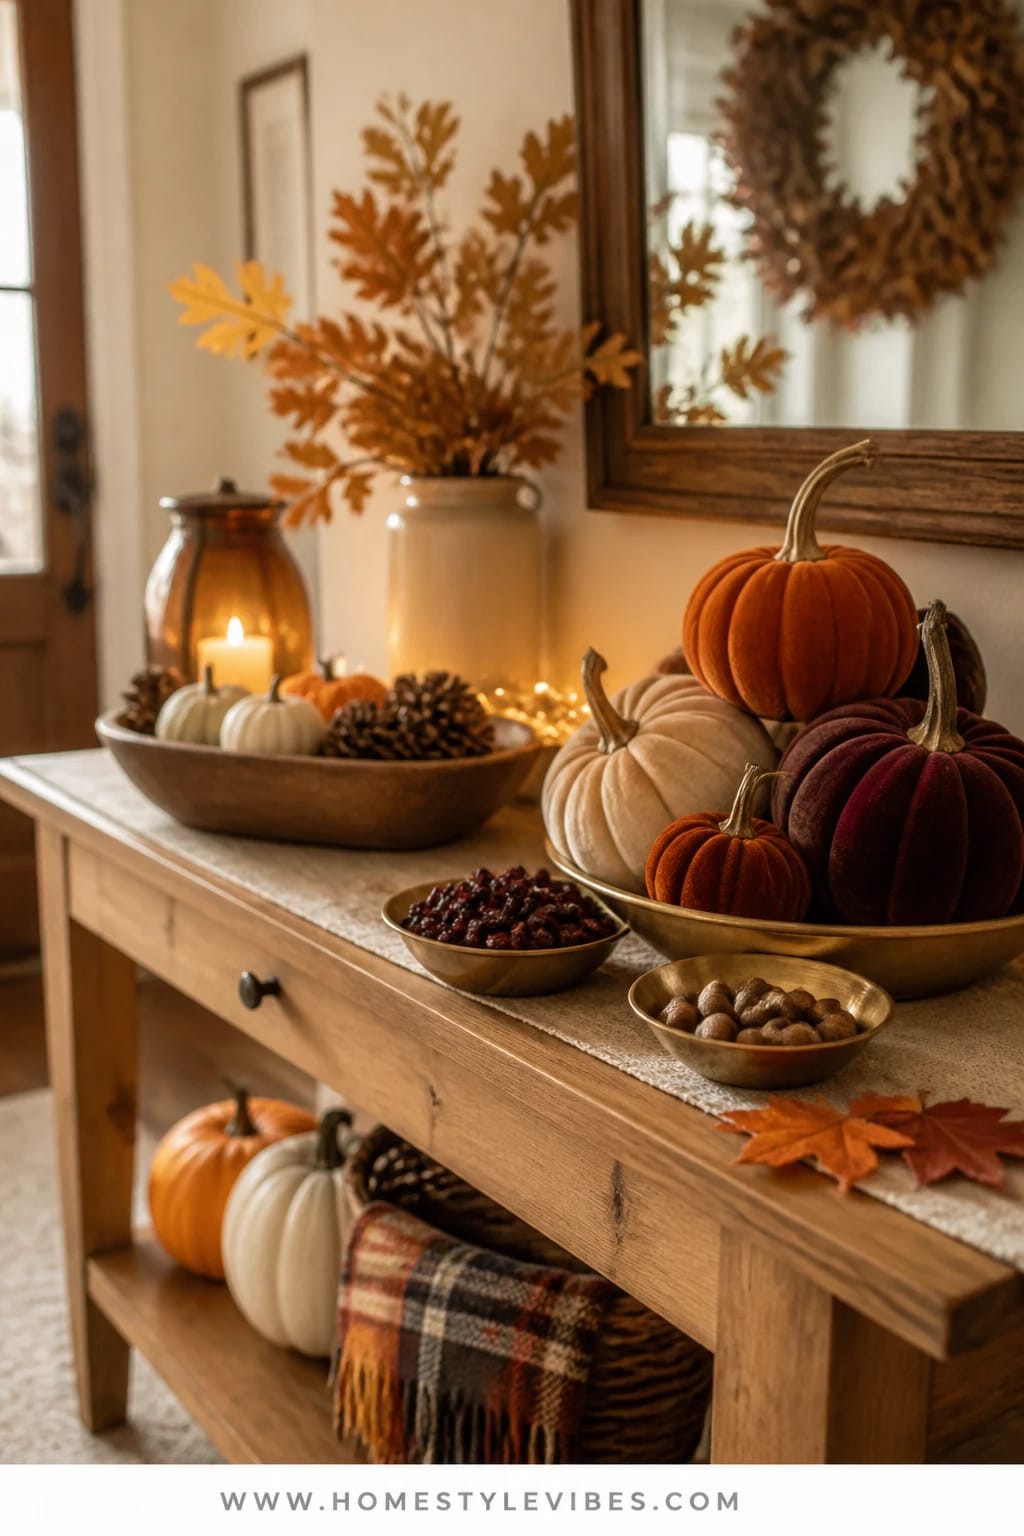
First impressions matter, and the entryway console often screams “keys and chaos.” You’ve put a pumpkin there before, but it felt plopped and temporary. Enter velvet-mousse painted pumpkins — a soft-touch, matte finish that looks like couture velvet from across the hall. Pair them with shallow brass bowls and a few berry sprigs and your entry instantly reads warm, gracious, and pulled together.
The mood: welcoming, golden, quietly rich. It works in real homes because matte paint hides scuffs, fingerprints, and the occasional bump from a backpack. A narrow console can take two medium pumpkins painted in tonal shades (think persimmon and deep rust) plus a brass catchall for mail. Lighting-wise, add a small shaded lamp; the bulb’s warm glow kisses the matte surface and brings out those velvety shadows. In photos, the texture steals the show — the paint absorbs light softly and looks expensive even if you used craft paint.
Variations: Small-space or minimalist? Do one pumpkin in a chalky terracotta tone with a single brass bowl of keys. Want a bolder moment? Add a cranberry-colored velvet ribbon around a pumpkin stem and tuck a sprig of seeded eucalyptus under the bow. This stays chic from early October to late November; swap in a few cinnamon-scented pinecones near Thanksgiving for a subtle holiday nudge.
Budget Breakdown:
- Real or craft pumpkins (1–3): $5 – $30
- Matte or chalk-finish paints in rust/terracotta: $8 – $20
- Soft brush or sponge: $3 – $8
- Brass bowl or catchall: $12 – $35
- Small table lamp with warm bulb: $20 – $60
Total Estimated Cost: $48 – $153
Best For: Busy entryways that need a polished moment; homes that want tactile warmth without clutter; households that appreciate a soft, non-fragile finish.
Key Design Elements:
- Main seasonal props: matte “velvet” pumpkins, brass bowls, seeded eucalyptus
- Color palette: terracotta, rust, cranberry, warm brass
- Lighting strategy: one shaded lamp with a 2700K bulb for honeyed glow
- Textile layers: a woven runner under the console for grounding
- Natural elements: eucalyptus, hypericum berries, or faux berry picks
- Accent details: a lidded wicker box for gloves, a framed fall print
Why This Looks Expensive: Matte texture suggests custom ceramics or velvet upholstery — your eye reads softness and quality. The brass-and-matte pairing hints at restrained luxury, like a boutique hotel lobby in October.
How To Recreate This Look:
- Clean pumpkin surfaces and rough up slick faux ones lightly with fine-grit sandpaper.
- Apply a base coat of chalk-finish paint; let dry.
- Mix a slightly darker shade and dab lightly with a sponge to mimic velvet depth.
- Place pumpkins in a staggered trio or a single hero piece near the lamp.
- Add a brass bowl for keys and a small sprig of eucalyptus to soften edges.
One Thing To Avoid: Don’t overblend the second color; the blotchy, soft pattern is what creates the velvet illusion. Uniform coverage flattens the effect.
Pro Styling Tip: For photos, turn the lamp so the light grazes the pumpkin at a 45-degree angle — you’ll capture plush shadows and that rich, tactile look.
Small confession: I tried this on my own entry console last October with leftover terracotta paint, and a neighbor asked where I bought my “velvet gourds.” Honestly couldn’t believe it worked that well.
6) Herb-Topped Pumpkin Centerpiece With Amber Bottles On The Kitchen Island
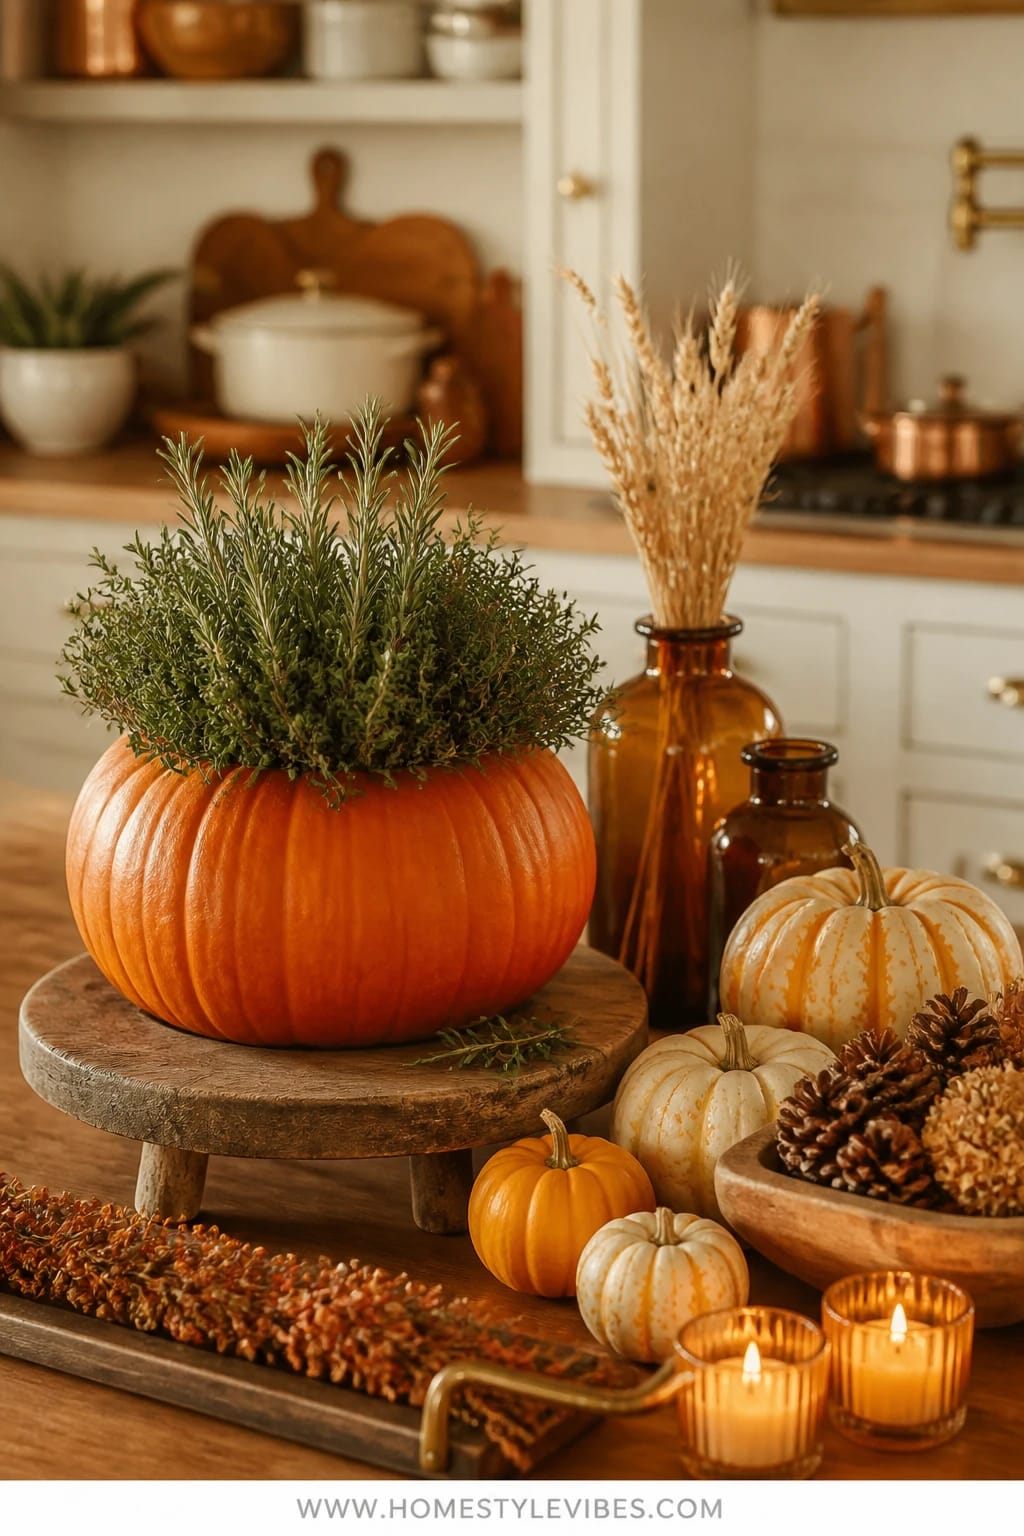
Kitchens are tricky. You need clear counters, but you still want seasonal soul. You’ve set a big pumpkin on the island before and it looked like it wandered in from the porch. The solution is scale and layering: create an herb-topped pumpkin centerpiece on a low board, then flank it with a few amber bottles for glow and color continuity. It feels like harvest brought inside — without any carving tools in sight.
The mood here is harvest kitchen — aromatic, useful, and warm. It works beautifully because the herbs are not just pretty; they’re practical. You can snip rosemary for roasted potatoes while it perfumes the room. Amber bottles (vintage or new) hold a few stems and catch that afternoon kitchen sun. At night, slip an LED taper into one bottle for a playful glow without taking up prep space. This photographs wonderfully from above — saturated greens, glossy amber, rustic pumpkin, and a wood board frame the scene like a cookbook spread.
Variations: For compact islands, use a sugar pumpkin with a petite rosemary ball on top and one bottle. If your kitchen leans modern, choose a white pumpkin, an all-thyme topper, and minimal amber bottles. Keep this through Thanksgiving and add a tiny bowl of cranberries on the board for color and a wink to the holiday.
Budget Breakdown:
- Medium pumpkin: $6 – $12
- Potted rosemary/thyme (2–3): $10 – $18
- Floral pins or toothpicks: $2 – $5
- Amber glass bottles or bud vases (2–4): $12 – $28
- Low wood board or lazy Susan: $12 – $30
Total Estimated Cost: $42 – $93
Best For: Busy kitchens that crave a single, portable centerpiece; home cooks who love fresh herbs within reach; open-concept spaces where the island is the visual anchor.
Key Design Elements:
- Main seasonal props: herb-topped pumpkin, amber bottles, wood board
- Color palette: pumpkin orange, deep green, amber, warm wood
- Lighting strategy: daylight bounce from windows, optional LED taper for evening
- Textile layers: a striped tea towel under the board for a soft edge
- Natural elements: fresh herbs, a few bay leaves or sage sprigs
- Accent details: a small salt cellar, a ceramic butter dish for charm
Why This Feels Designer: Form meets function. Anything that looks styled and makes dinner better reads smart and custom. The repetition of amber glass adds polish and ties to other warm metals in the kitchen.
How To Recreate This Look:
- Place a medium pumpkin on a low board centered on the island.
- Trim rosemary or thyme and shape into small clusters.
- Attach clusters around the stem with floral pins or toothpicks angled down; overlap for fullness.
- Position two to four amber bottles around the pumpkin with a few herb stems or a single wheat sprig each.
- Slide a striped tea towel under one side of the board for a casual, lived-in look.
Watch Out: Don’t use wet herbs; moisture can encourage soft spots on the pumpkin. Keep stems dry and let airflow do its job.
Pro Styling Tip: Photograph from a stool to get a top-down shot that shows the herb “halo” and the warm geometry of the board and bottles.
Here’s a tiny real-life moment: A friend of mine bought three different fall garlands last year for her kitchen and still hated the view. The issue wasn’t the garland — it was that nothing had purpose. We built her this herb-topped pumpkin on a lazy Susan. Now she spins it for easy snips while her kids do homework. Problem solved. Cinnamon rolls improved. Spirits lifted.
Remember: this isn’t about impressing the internet. It’s about building small rituals that make your home feel like an embrace when the air turns crisp. If a single vignette near the sofa makes your evening cocoa taste better, you’ve nailed it.
Quick Checklist
- Real or faux pumpkins in varied sizes
- Metallic leaf sheets or metallic wax
- Mod Podge matte and foam brush
- Amber glass votives and/or brass candlesticks
- Plaid scarf or wool fabric remnant
- Glass hurricanes and tea lights (LED optional)
- Warm white LED string lights
- Whole cloves and cinnamon sticks
- Shallow tray or rattan basket
- Pressed leaves or ferns
- Chalk-finish paints in rust and terracotta
- Soft brush or sponge applicator
- Brass catchall bowl
- Small shaded lamp with warm bulb
- Amber glass bottles or bud vases
- Potted rosemary or thyme
- Low wood board or lazy Susan
- Wheat stems, acorns, pinecones (optional)
- Striped tea towel or linen runner
- Eucalyptus or berry sprigs for finishing touches
Frequently Asked Questions
How can I keep my real pumpkins from rotting indoors if I’m not carving them?
Wipe them with a 1:10 bleach-water solution, dry thoroughly, and keep them away from heat vents and direct sunlight. Elevate them on a wood board or coaster to prevent moisture build-up underneath, and avoid crowding them with damp florals or fresh greens.
Are faux pumpkins worth it for these no-carve projects?
Yes if you want reusability. Faux pumpkins work beautifully for gilding, decoupage, and painting — especially the chalky velvet look. Use real pumpkins where scent and natural texture matter (like the clove and herb ideas) and mix faux in for longevity and budget balance.
What if I have a small space — which idea takes up the least room?
Go for the plaid-wrapped minis on a small tray or the pressed-leaf pumpkin on a bookshelf. Both compress into a single footprint and move easily for meals or work sessions. Scale down the number of items rather than skipping the technique.
How do I store finished faux pumpkins after the season?
Wrap each in tissue paper or bubble wrap, place them in a lidded bin, and store in a cool, dry closet. Keep anything gilded or decoupaged on the top layer to prevent rubbing. Label the bin by project so set-up next year takes ten minutes, not two hours.
Are candles safe with kids and pets? Any alternatives?
Use LED tea lights, tapers, and string lights for all low-height vignettes. If you love real flame, keep it high (mantel or tall hurricanes on the dining table) and never leave it unattended. The warm glow is the goal; LEDs bring that mood without the stress.
When should I start these no-carve pumpkin decorations?
Begin as early as the first cool week of September for the gilded and plaid ideas. Save herb-topped pumpkins and studded citrus for October so the freshness lasts. Everything here carries easily through Thanksgiving with minor swaps.
My rental has strict rules about adhesives and paint — any renter-friendly swaps?
Stick to fabric wraps, tied ribbons, and tray-based vignettes. For the gilded look, use removable metallic leaf stickers or metallic washi confetti on faux pumpkins. No surfaces touched, all the glow achieved.
Final Thoughts
Pick one idea that makes your shoulders drop in relief and start there tonight. Light a single amber votive, wrap a mini pumpkin in a scarf you already own, and see how the room softens. When you build from warmth, texture, and a few points of glow, you get the cozy bright autumn feeling without a single knife or mess.
The truth is, the magic isn’t in carving — it’s in layering. Rich color. Gentle light. Honest materials that look even better when the sun dips early and the kettle sings. Let these no-carve pumpkin ideas tuck into your daily life from September to Thanksgiving, shifting with your meals, your gatherings, and those quiet Sunday afternoons that smell like cinnamon.
You’ve got this. Start small, trust your eye, and enjoy the cozy, abundant, camera-ready home you’ve been craving — all without carving a thing.

About the Author

Krisztina P.Rendes, Founder of Home Style Vibes
Founder of Home Style Vibes
Krisztina Puskásné Rendes created Home Style Vibes as a cozy-modern lifestyle space where homemaking meets inspiration. Her goal is to help women create beautiful, organized, and peaceful homes they truly love — without overwhelm. You’ll find here heart-driven content on home decor, cleaning tips, easy family recipes, organization and decluttering, DIY home projects, plants, and seasonal ideas — all designed to bring more calm, comfort, and style into everyday life.





