4 DIY Fall Wreath Ideas For Your Front Door (Easy And Gorgeous)
You want that “fall starts here” feeling the second you walk up to the house—the golden light, the crunchy-leaf vibe, the kind of welcome that makes neighbors slow down on their evening walk. You hate that your front door often looks a little…forgettable. The truth is, a DIY fall wreath with thoughtful layers can flip your curb appeal in under an hour and under $45, no floral degree required. Picture rich rust and burnt orange, tiny clusters of berries, textured ribbon tails that flutter when the October air moves, and a warm, inviting glow from the porch light kissing everything just right.
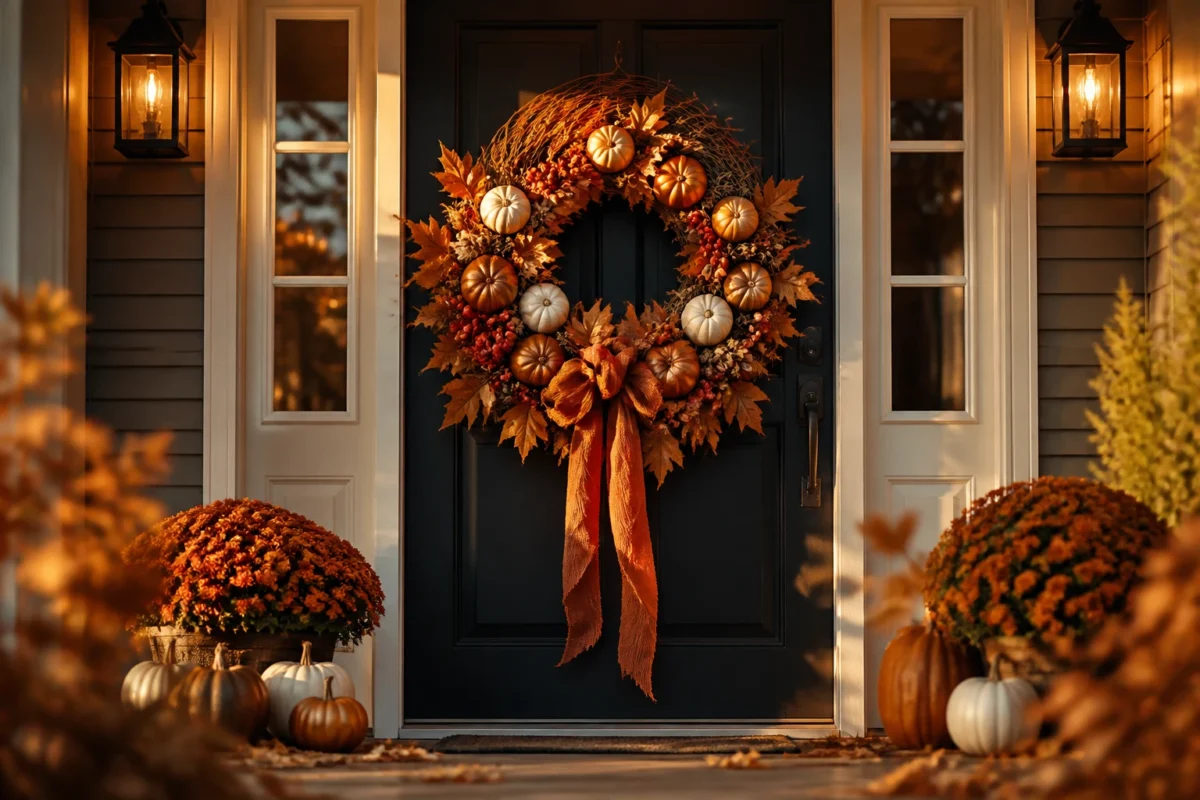
These 4 DIY fall wreath ideas for your front door fix the “blah door” problem with color, texture, and easy-to-source materials you’ll reuse season after season. They’re photogenic (hello, Pinterest board), budget-friendly, and styled to look abundant—not crafty. Each one is simple, gorgeous, and purposeful: we’ll talk color palettes, natural elements, lighting tricks, and the exact steps to “make it look finished.” If you love an abundant, cozy fall aesthetic, you’re in the right place. Let’s make the approach to your home feel like a warm hug.
1. Pumpkin Cluster Wreath With Burnt Orange Ribbons on the Front Door
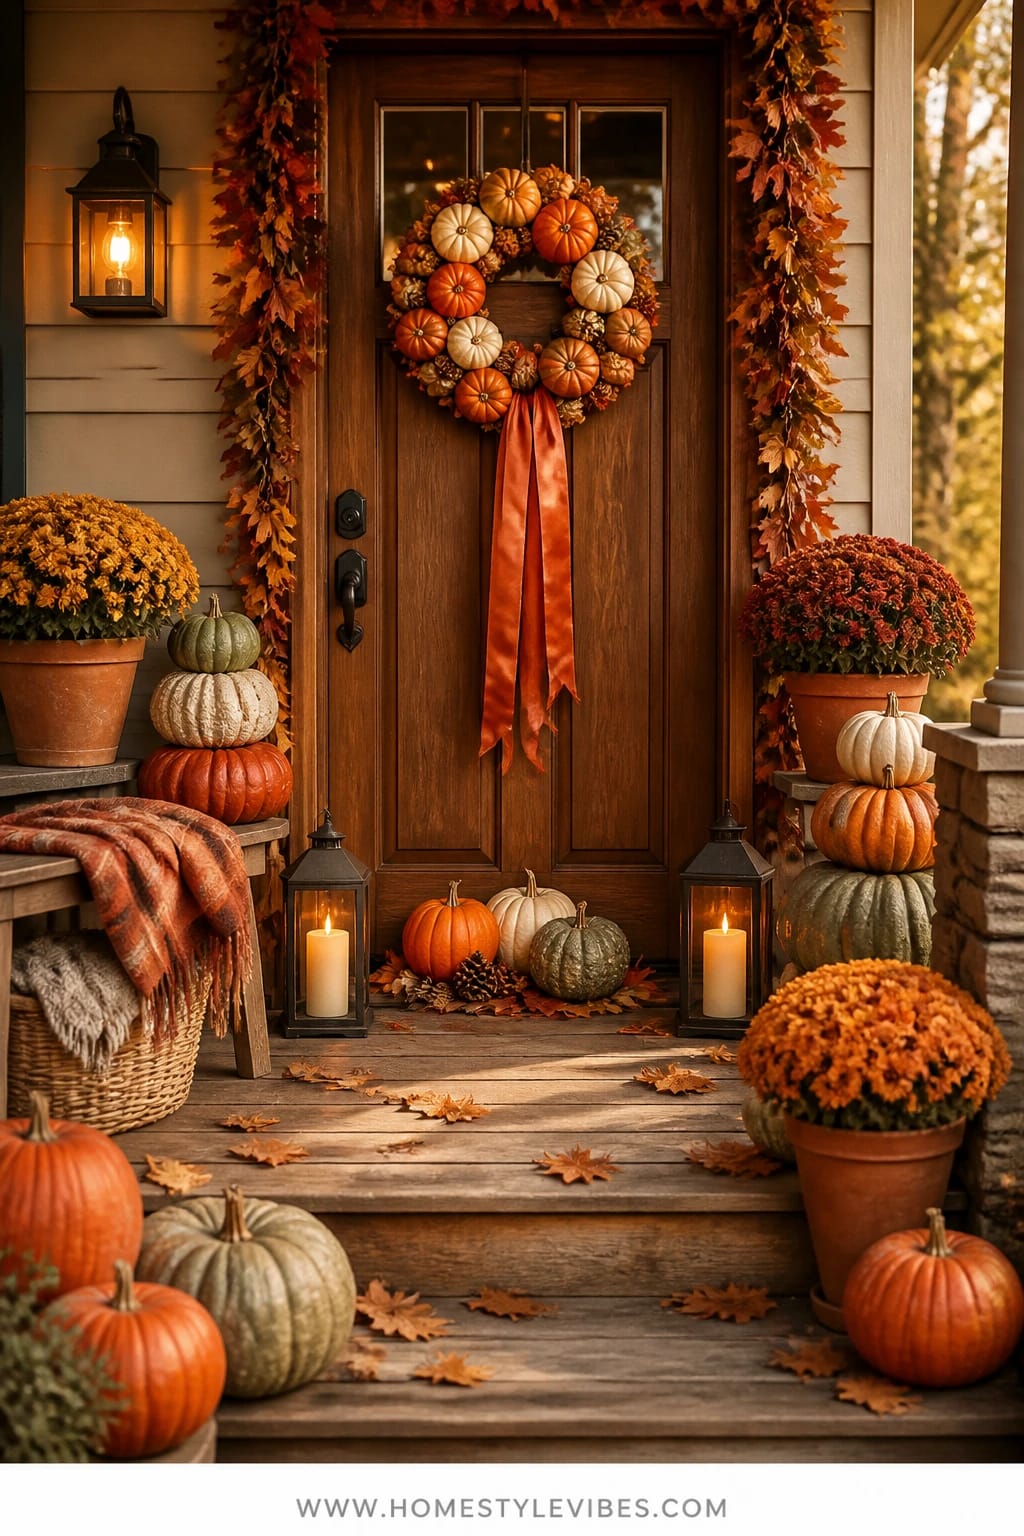
We’ve all been there: you hang a single store-bought wreath, step back, and it just looks…flat. It’s that one vertical plane that never quite fills the visual space of the door. This pumpkin cluster wreath solves that by adding dimensionality—think mini faux pumpkins with varied sizes, a few velvet textures mixed with matte finishes, and trailing ribbons in burnt orange that add movement. The mood is cheerful harvest-meets-chic boutique. It reads warm and abundant, not cluttered.
Here’s why it works on real front doors. First, pumpkins are shorthand for fall—but when you cluster them right, you create a focal point that’s bold enough to stand out from the street. It’s family-friendly (no shedding like leaf-heavy wreaths), and the materials store easily in a bin; no one wants to vacuum a porch because the wreath decided to molt. Lighting matters, too: the soft wash of your porch light will warm up the oranges and rusts, and the low-profile shine on velvet pumpkins catches light in a way that photographs beautifully at golden hour. Up close, the little stems and mixed finishes feel luxe; from the sidewalk, the pop of color sings.
Variations:
- Budget-friendly: Swap velvet minis for lightweight foam pumpkins and wrap them in strips of thrifted flannel for a cozy texture that costs pennies.
- Neutral version: Use cream and pale sage pumpkins with a single caramel ribbon tail for calm curb appeal through Thanksgiving.
Budget Breakdown:
- 18–24″ grapevine or wire wreath base: $6–$12
- Mini faux pumpkins (10–14 pieces, mixed finishes): $12–$22
- Burnt orange wired ribbon (2.5″ wide, 3–5 yards): $5–$10
- Floral wire + hot glue sticks: $3–$6
- Faux berry picks or seed pods (optional): $4–$8
Total Estimated Cost: $30 – $58
Best For: A standard or double front door that needs a bold focal point through September and October. Great for busy households that want a durable, non-shedding wreath with big color payoff.
Key Design Elements:
- Main seasonal props: Mini pumpkins (velvet, matte, and glossy), subtle berry clusters
- Color palette: Burnt orange, rust, copper, warm cream accents
- Lighting strategy: Warm porch light or lantern sconce angled down to graze the wreath’s textures
- Textile layers: Wired ribbon tails in burnt orange or copper satin
- Natural elements: Grapevine base, twig stems, seed pods
- Accent details: A small brass bell or copper leaf charm at the base knot of the ribbon
How To Recreate This Look:
- Start with a sturdy grapevine base; fluff and shape it so the circle looks full, not squashed.
- Add a cluster point: Choose the lower right edge as your “pumpkin hub” and wire on 3–4 larger minis first.
- Layer medium and small pumpkins around that hub, staggering heights and angles so the stems point in different directions.
- Place 3–5 short berry picks or seed pods to fill tiny gaps and add texture.
- Style with ribbon tails: Tie a full bow at the cluster point and let two 18–24″ tails drop past the wreath’s bottom edge.
Why This Looks Expensive: Clustering creates depth and a “florist’s hand” feel, while mixed pumpkin finishes mimic boutique-quality decor. The bow’s long tails add movement and scale, which always reads high-impact from the street.
Watch Out: Don’t scatter pumpkins evenly around the circle. A dotted ring reads cheap and flat. Commit to one strong cluster and let negative space frame it.
Pro Styling Tip: For photos, nudge the wreath slightly off-center on the door and shoot at a 45-degree angle so the pumpkin stems and ribbon tails catch warm light and create depth.
2. Amber Lantern Leaf Wreath on the Front Door
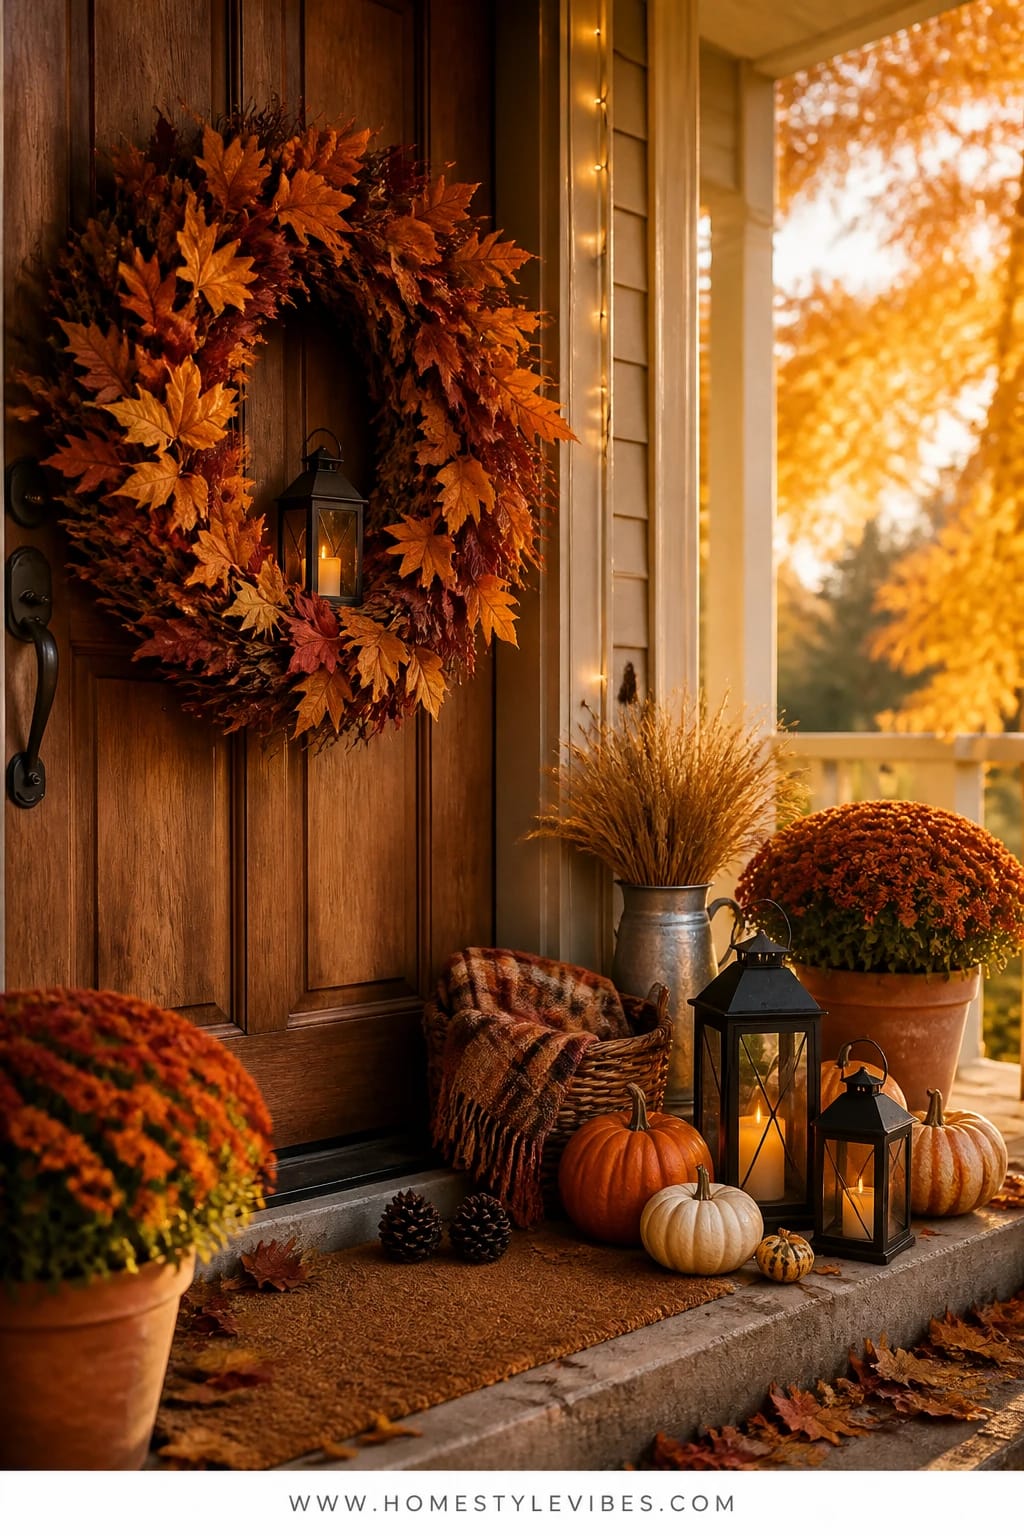
It’s that frustrating moment: you’ve tried leaf wreaths in every shade of orange, but they always look like a flat ring of paper. This idea flips the script by building a leaf wreath that feels like a walk through the woods, then tucking a tiny battery-operated “lantern” moment right at the base. Amber glow peeks through the leaves at night, so your front door doesn’t vanish when the sun drops at 5:12 p.m. Mood-wise, think golden-hour forest—quiet, warm, just a little magical.
Real-home friendly? Absolutely. It’s light, easy to hang, and super photogenic. The layered leaves (maple, oak, and a touch of eucalyptus) give range in shape and tone, which means your porch wall color won’t fight it. Here’s why it photographs beautifully: the warm light inside creates a luminous core that makes the wreath look three-dimensional. Those lit edges around leaf veins make the whole thing feel alive, even if you’re shooting on a cloudy day.
Variations:
- Small-space/condo door: Scale down to a 14–16″ base and keep the lantern tiny (think tea-light scale) so proportions stay balanced.
- Muted palette: Swap the bright oranges for bronze, cognac, and dusty olive leaves with a single amber glass accent.
Key Design Elements:
- Main seasonal props: Mixed faux leaves, tiny amber glass votive or mini lantern
- Color palette: Amber, cognac, saffron, deep olive, a kiss of burgundy
- Lighting strategy: Battery tea light or micro-LED in amber glass for safe, glowing center
- Textile layers: Thin suede cord or jute twine as an accent tie
- Natural elements: Grape tendrils or birch twigs peeking out for wildness
- Accent details: A single acorn or pinecone cluster at the bottom curve
Budget Breakdown:
- Wreath base (16–20″): $6–$12
- Faux mixed leaf picks (6–10 stems): $10–$20
- Mini amber votive holder or tiny lantern: $4–$12
- Battery tea lights or micro-LED: $3–$7
- Twine/suede cord + floral wire: $2–$5
Total Estimated Cost: $25 – $56
Best For: Anyone who wants a soft evening glow on the porch without dealing with real flames. Gorgeous from early September through Thanksgiving.
How To Recreate This Look:
- Start with a grapevine or twig base; if it’s too sparse, wrap once with brown floral garland for more coverage.
- Add leaves in layers, alternating leaf shapes and tones. Let some leaves extend past the base for a natural silhouette.
- Place the amber votive or mini lantern at the lower inner rim; secure a battery tea light inside.
- Style with a twine bow or suede knot just below the lantern to make the glow feel intentional, not accidental.
- Tuck 2–3 twiggy bits to break the perfect circle and add a little wild charm.
Why This Feels Designer: The internal light source gives the wreath a “lit-from-within” quality you usually only see in boutique installs. Mixed leaf shapes and subtle tonal shifts add depth and realism.
One Thing To Avoid: Don’t overfill the center. You need negative space so the amber light can glow. If the center is jam-packed, it’ll read as a dark lump.
Pro Styling Tip: Swap standard white LEDs for warm amber bulbs; the color temperature is what makes photos look cozy instead of sterile.
Remember, this isn’t about recreating a showroom. It’s about building a front door that actually feels like yours. If one idea resonates more than the others, that’s your starting point—you don’t need all four to make a statement.
3. Dried Floral and Pinecone Wreath With Rust Velvet Ribbon on the Front Door
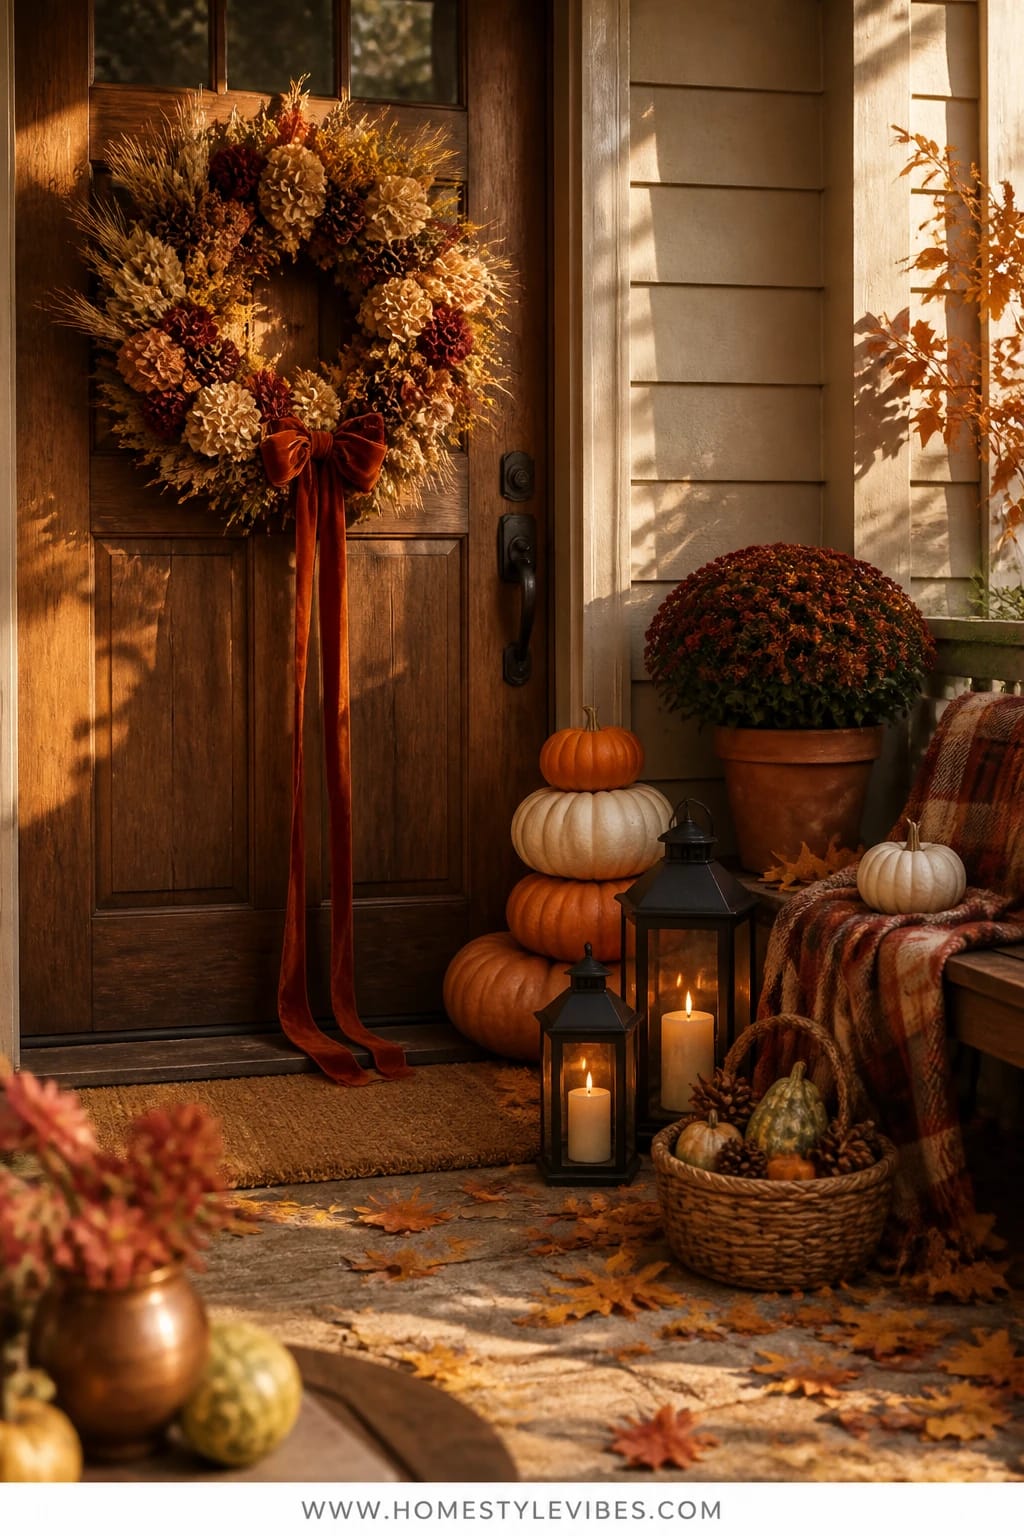
It’s that tricky in-between vibe: you want fall, but you don’t want to scream Halloween or go full “pumpkin patch.” This dried floral and pinecone wreath leans into texture—think wheat, bunny tails, dried hydrangea heads, and clustered pinecones—pulled together with a rust velvet ribbon that puddles softly at the base. The mood is earthy and elegant, like a countryside inn where the tea is always hot and the air smells faintly of cinnamon.
In real life, this works because dried botanicals age gracefully outdoors. They don’t look odd when they fade a touch; the patina is part of the charm. It’s easy to store, too: a wreath box or even a large trash bag with paper around the florals keeps it preserved for next year. Under a warm porch light, the textures glow—dried grasses catch the light and create that fuzzy halo that looks dreamy in photos. Bonus: no glitter, no shedding leaves lodged in your doormat for weeks.
Confession time: I tried this on my own front door last October, and I could not believe how put-together it made the entry feel. We had friends over for chili night, and three separate people asked where I ordered it. When I said, “I made it!” I got that raised-eyebrow impressed look we all low-key live for.
Variations:
- Budget-friendly: Mix in supermarket bouquet fillers like baby’s breath and statice; dry them upside down for a week and use in place of pricier florals.
- Thanksgiving transition: Add a small cluster of faux figs or mini pomegranates in November for a harvest feel without changing the base.
Budget Breakdown:
- Wreath base (wire or grapevine, 18–20″): $6–$12
- Dried florals (wheat, bunny tails, statice, hydrangea heads): $12–$28
- Pinecones (8–12 mixed sizes): $5–$10
- Rust velvet ribbon (2–3 yards): $7–$14
- Floral wire + hot glue: $3–$6
Total Estimated Cost: $33 – $70
Best For: Traditional or cottage-style homes, or anyone who wants a restrained, textural look that feels sophisticated from September to late November.
Key Design Elements:
- Main seasonal props: Dried wheat, bunny tails, hydrangea heads, pinecones
- Color palette: Rust, caramel, toffee, warm cream, soft brown
- Lighting strategy: Porch sconce with soft white or warm white bulbs to rake across textures
- Textile layers: Rust velvet ribbon bow with long tails
- Natural elements: Heavily featured; everything reads organic and tactile
- Accent details: A tiny brass acorn pin at the ribbon knot for a wink of metallic
How To Recreate This Look:
- Start with the base and map a loose crescent shape across one side—this creates flow without fully covering the circle.
- Add structure with wheat: lay stems in one direction, slightly overlapping for a windswept look.
- Layer bunny tails and statice to soften the edges; glue hydrangea heads in two or three “weight points.”
- Place pinecones near the densest floral clusters for balance and visual weight.
- Style with a rust velvet bow at the base of the crescent; let the tails hang 12–18″ for drama.
Why This Reads High-End: The asymmetrical crescent and tonal neutrals feel editorial. Velvet ribbon is the secret: it absorbs light, which gives the wreath that rich, plush look you see in boutique installs.
The Most Common Mistake: Overstuffing the entire circle. Leave some grapevine exposed so the crescent shape shows. Negative space is your friend—it keeps the design airy and sophisticated.
Pro Styling Tip: Dust the pinecones lightly with a soft brush before you shoot; clean, matte cones photograph beautifully and keep the textures crisp.
If your brain starts whispering, “Maybe I need a whole porch makeover,” pause. Pick the wreath that fits your door color and your style, and start there. One strong, well-layered wreath beats a scatter of random decor every single time.
4. Plaid Ribbon and Lantern Wreath With Golden Glow on the Front Door
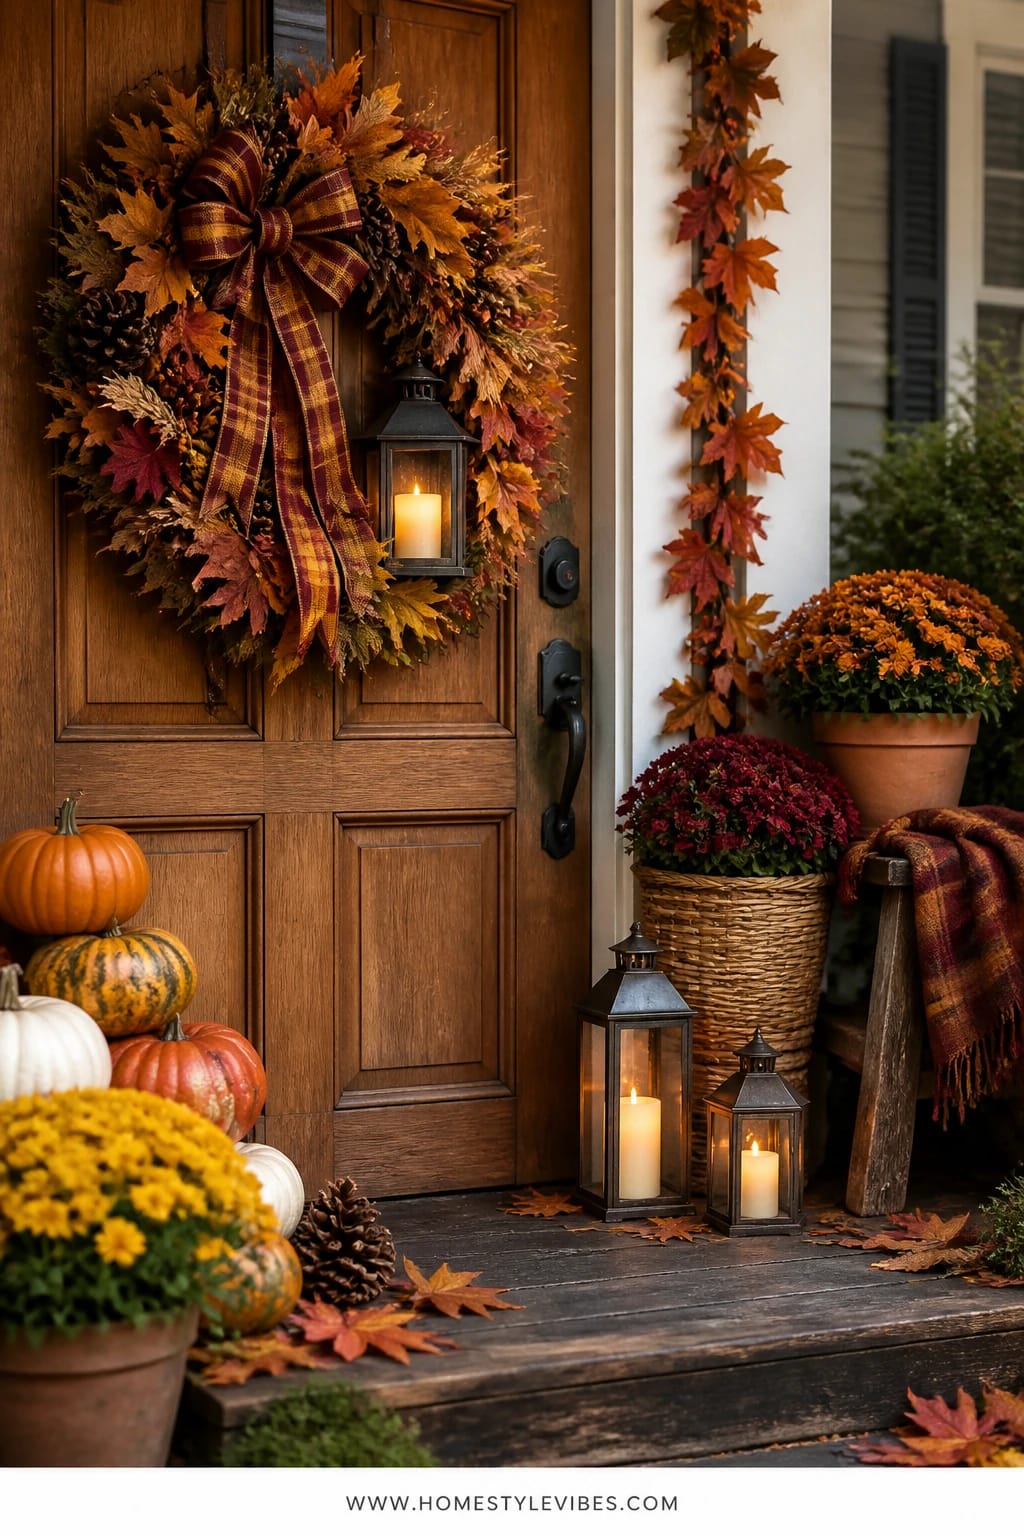
Ever hang a wreath, flip on the porch light, and realize it looks invisible at night? This plaid-and-lantern beauty solves that with two strategies: bold ribbon that reads from the street and a small, safe golden glow that flickers against the door after sunset. The vibe is nostalgic fall—like school scarves and thermoses of cider—yet it still feels crisp and current.
Here’s why it works: plaid adds structure and pattern, which is crucial against a big, flat plane like a door. By looping and layering ribbon throughout the wreath, you create rhythm and scale. Then a compact lantern tucks into the lower third and throws a golden glow across the foliage—so the wreath looks alive at night. Storage is simple (remove the lantern), and because ribbon doesn’t shed, it holds up well even in breezy weather.
True story: a friend of mine bought three different garland-wreath combos last year and still couldn’t figure out why her door looked dull. The real problem? No contrast and no light source. We added a burgundy-and-gold plaid ribbon, a tiny lantern with warm LEDs, and suddenly her navy door looked like a holiday card—but for October.
Variations:
- Moody palette: Swap burgundy/gold plaid for deep forest green and black watch plaid, keep the lantern glow warm.
- Make-ahead: Pre-loop your ribbons and wire them onto a storage hanger so you can pop them on the wreath in 60 seconds next year.
Budget Breakdown:
- Wreath base (greenery or mixed fall foliage, 18″): $10–$18
- Plaid wired ribbon (2–3 patterns, 6–8 yards total): $10–$18
- Small weather-friendly lantern + warm micro-LEDs: $12–$24
- Faux seed pods or mini mums (optional): $4–$8
- Floral wire + adhesive hooks/hanger: $4–$7
Total Estimated Cost: $40 – $75
Best For: Front doors with darker paint colors that need contrast and a night-friendly focal point. Perfect for late October through Thanksgiving.
Key Design Elements:
- Main seasonal props: Plaid ribbons, compact lantern, subtle floral picks
- Color palette: Burgundy, golden yellow, charcoal, a touch of cream
- Lighting strategy: Warm LEDs inside the lantern plus the porch sconce for layered glow
- Textile layers: Multiple ribbon patterns for depth (wide plaid, narrow coordinating stripe)
- Natural elements: A hint of eucalyptus or cedar sprigs if your base is plain
- Accent details: A tiny brass key or monogram charm tied into the bow
How To Recreate This Look:
- Start with a full foliage base; if yours is sparse, add a simple greenery garland layer first.
- Add ribbon loops: create 4–6 loose loops and tuck them evenly around the wreath so the pattern peeks through the greens.
- Layer a second ribbon pattern in smaller loops to create contrast and visual rhythm.
- Place the lantern at the lower third; secure it tightly to the base and run warm micro-LEDs inside.
- Style with a bold ribbon bow on the opposite side of the lantern for balanced asymmetry.
Why This Looks Intentional: The repeated ribbon pattern establishes a clear design language across the wreath. Paired with the lantern’s golden glow, your door gets both contrast and nighttime presence—two details that signal a thought-out design.
Don’t Do This: Don’t let tails dangle into the lantern opening. It’s safe lighting, but an errant ribbon tail reads messy and blocks that pretty glow.
Pro Styling Tip: Angle the lantern slightly forward and to the side; the directional light creates shadow play that photographs beautifully and adds dimension from the curb.
Quick Checklist
- Wreath base sized to your door (16–24″)
- Mixed textures: matte, velvet, natural
- Warm palette anchor: burnt orange, rust, amber, or burgundy
- One strong focal point (cluster, lantern, or bow)
- Layered elements: leaves, pumpkins, or dried botanicals
- Wired ribbon with long, intentional tails
- Battery-operated warm LEDs or tea lights
- Floral wire, hot glue, and snips
- Secure door hanger or command hook rated for outdoor use
- Final “step back” check for balance and negative space
Frequently Asked Questions
How do I keep costs down on a DIY fall wreath for my front door?
Reuse a basic grapevine base each year and swap only the accents. Buy stems and ribbon on sale, then cut picks into smaller pieces—one pick can become 3–4 accents. Focus on one standout element (like velvet pumpkins or a lantern) and keep the rest simple.
Are real or faux pumpkins and florals better for outdoor wreaths?
For wreaths, faux wins outdoors. Real mini pumpkins are heavy and can rot faster near a sunny or rainy door. Use high-quality faux and mix finishes for realism. If you crave “real,” add a fresh cluster on nearby porch steps instead of the door.
My front door is small. Will these wreaths overwhelm it?
Scale down to a 14–16″ base and keep the focal cluster proportionate. Use fewer, larger elements rather than lots of tiny ones. Choose ribbon tails that stop just past the bottom of the wreath to avoid visual clutter.
How do I store my fall wreath so it doesn’t get crushed?
Hang it on a command hook inside a closet or place it in a wreath box with tissue cushioning around delicate areas. Keep it out of direct sunlight and high humidity. Detach lanterns or heavy accents and store them separately.
Is it safe to use candles or lights on a front-door wreath?
Use battery-operated tea lights or micro-LEDs only—no open flames on the door, ever. Choose warm white or amber bulbs (around 2700K) and make sure wires are secure and weather-protected.
When should I hang a fall wreath?
Early September is perfect for neutrals and dried botanicals. Add pumpkins and deeper colors by late September. Keep it up through Thanksgiving by swapping a bow color or adding a small harvest accent in November.
Bring It All Home
Pick one of these DIY fall wreath ideas for your front door and start with the focal point—pumpkin cluster, glowing lantern, or a lush ribbon moment. That one decision sets the tone and keeps you from wandering the craft aisle in a daze. Then layer supporting textures, keep your palette tight, and let warm light do the heavy lifting. Cozy isn’t complicated; it’s color, texture, and glow working together.
The secret isn’t buying more stuff; it’s editing for impact and adding one or two elements that feel generous—long ribbon tails, a rich cluster, a bit of warm light. Step back, squint, and make one bold tweak if needed. You’ll know it’s right when the door looks finished and you catch yourself smiling every time you come home with a grocery bag of apples. You’ve got this—seriously. Your front door is about to give everyone that first-hit-of-cider feeling, day and night.
About the Author

Krisztina P.Rendes, Founder of Home Style Vibes
Founder of Home Style Vibes
Krisztina Puskásné Rendes created Home Style Vibes as a cozy-modern lifestyle space where homemaking meets inspiration. Her goal is to help women create beautiful, organized, and peaceful homes they truly love — without overwhelm. You’ll find here heart-driven content on home decor, cleaning tips, easy family recipes, organization and decluttering, DIY home projects, plants, and seasonal ideas — all designed to bring more calm, comfort, and style into everyday life.