
5 Leaf Collage And Nature Craft Ideas For Creative Autumn Afternoons
You want slow, creative autumn afternoons with warm light, saturated rust and burgundy, the soft crinkle of leaves, and that satisfying “we made this” glow. You hate the mess, the vague Pinterest instructions, and the crafts that look like first-grade homework. This cozy bright autumn guide gives you five leaf collage and nature craft ideas that actually work in real homes, all designed for indoor afternoons at the dining table, coffee table, kitchen island, and mantel, so your house looks like a storybook by dinner. Each project takes under two hours, max $60 in supplies, and leaves you with finished pieces that photograph beautifully in golden afternoon light and candle glow—think layered textures, harvest abundance, and zero stress.
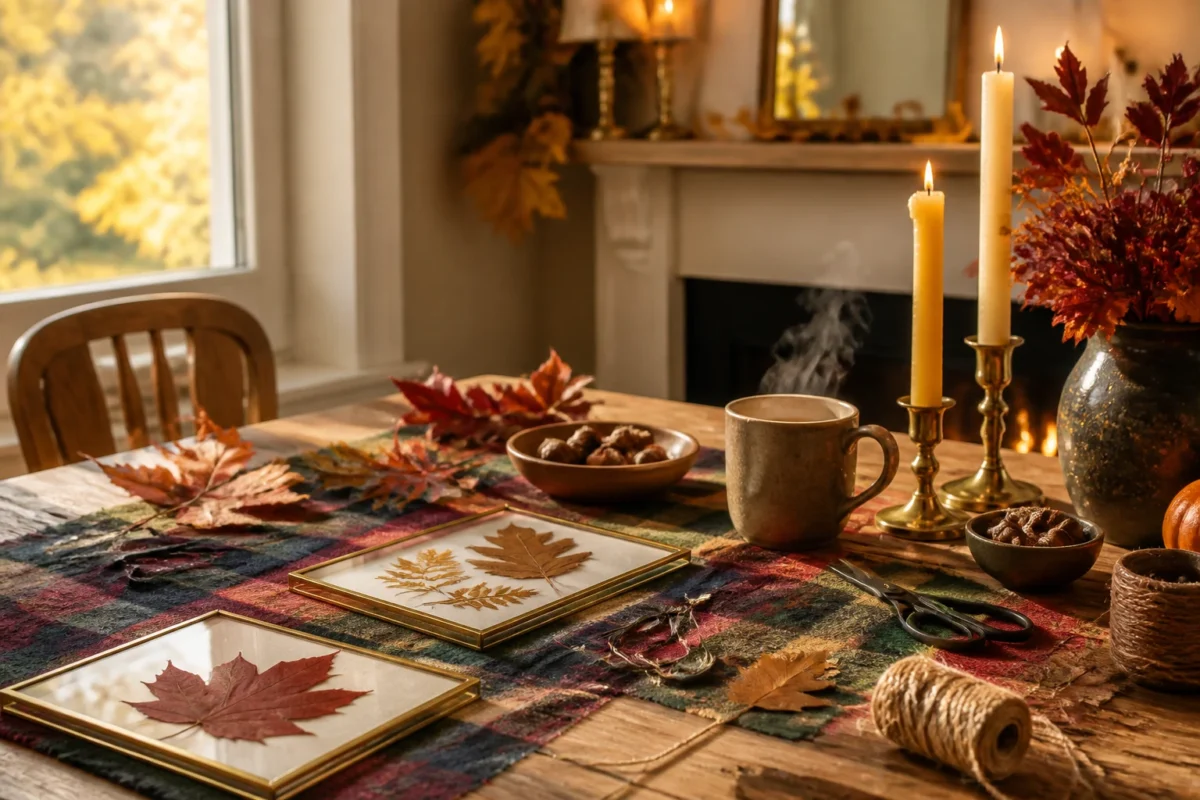
We’ll work with real leaves, bits of foraged texture, cinnamon warmth, plaid textiles, and soft amber hues to make projects that feel artful, not crafty. If you love the cozy bright autumn palette—rust, burgundy, pumpkin, wheat, deep green—you’ll feel right at home. These are perfect for early September through Thanksgiving, ideal for families, crafters, or anyone craving a quieter afternoon with a big visual payoff.
1) Pressed Leaf Gallery With Amber Glow On A Dining Table
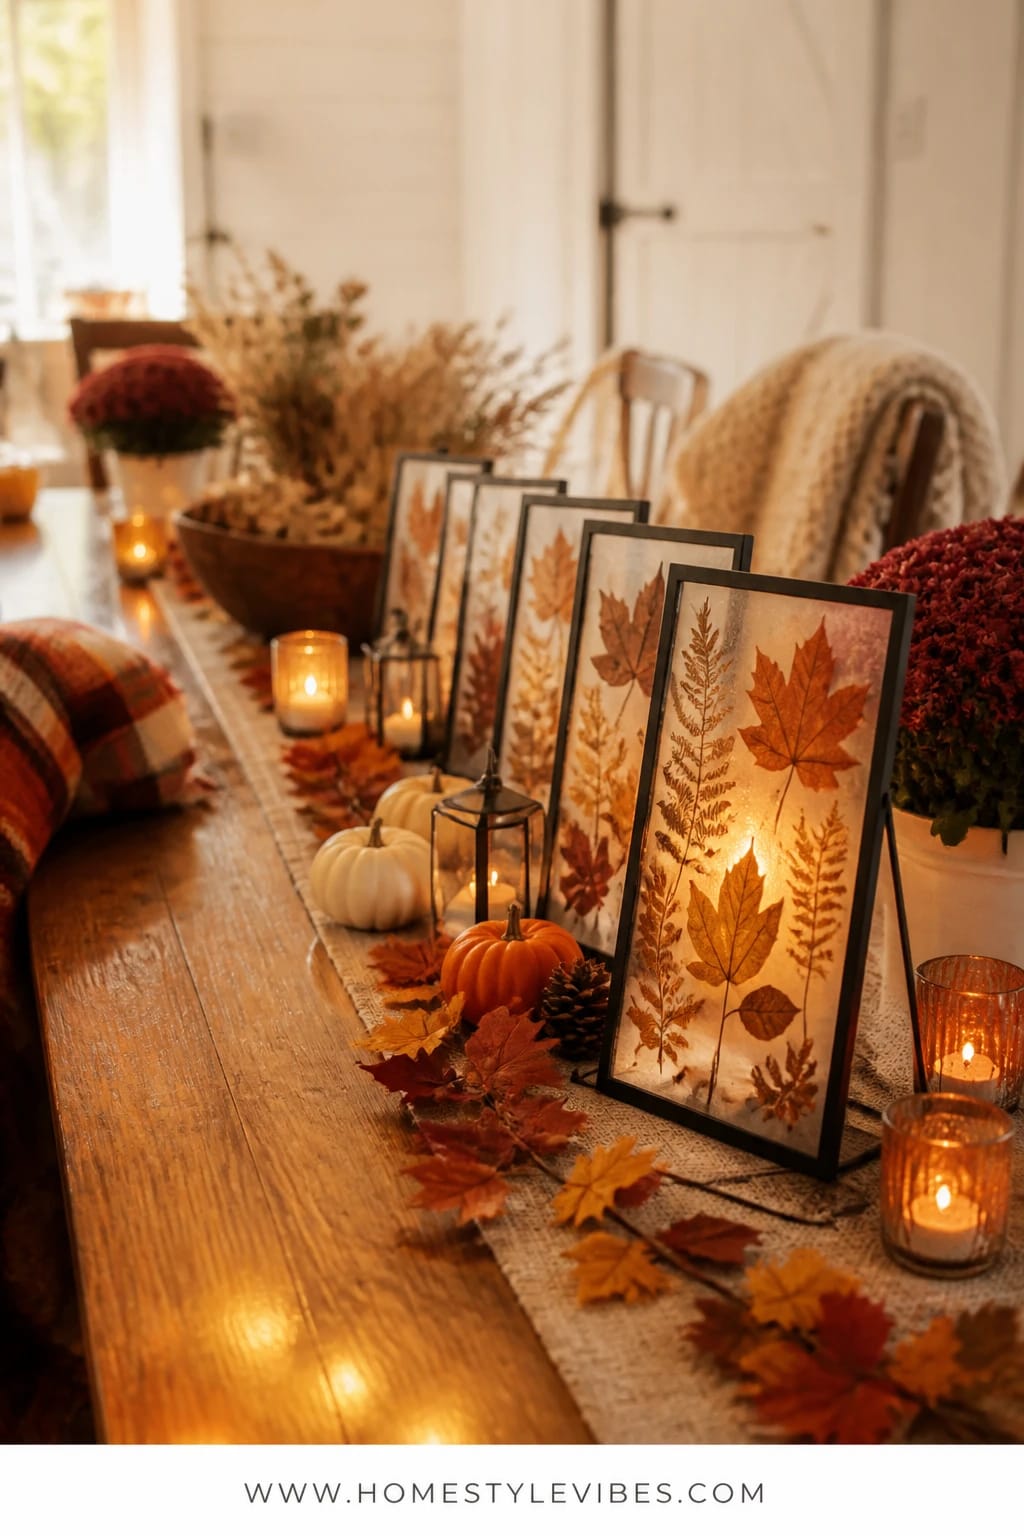
We’ve all been there: the dining room feels cold and unfinished, even with a pretty runner. You’ve tried swapping centerpieces, but it still looks sparse. This project creates an intimate, harvest-table mood where golden light bounces off glass, the leaves look like stained glass, and dinner feels special even if you’re serving soup and grilled cheese. Why it works: the pressed-leaf collage frames line the center of your dining table like a mini gallery, while a few amber glass votives pull warm light across the surface. It’s cozy bright autumn energy on a budget, and the finished pieces pack flat for next year.
In real homes, the long footprint of a table begs for a repeated element, and these frames deliver that rhythm. Afternoons look sunlit and inviting; evenings feel candlelit and calm. Your materials: thin black or wood gallery frames, clear acrylic sheets or glass, pressed leaves, small brass clips, and amber votives. The color saturation photographs beautifully: think burgundy oak leaves, golden aspen, mossy green fern fronds—layered with subtle light flares for that warm, pin-worthy glow. Store flat in a large envelope after the season.
Variations? Go small-space: one hero frame at the center on a wooden riser. Go neutral: wheat-toned leaves and bleached fern against an oatmeal linen runner with white votives. Make-ahead: press leaves between book pages for a week, or speed it up with a warm iron between parchment paper (low heat, quick passes).
Budget Breakdown:
- Set of 4 thin gallery frames: $28–$60
- Amber glass votive holders (6): $12–$24
- Pressed leaves (foraged or purchased): $0–$12
- Linen runner in rust or wheat: $18–$40
- Tealights (24 pack): $6–$10
Total Estimated Cost: $64 – $146
Best For: Medium to large dining tables that need warmth and a focal line. Great for early fall dinners through Thanksgiving, especially if you host often and want low-profile centerpieces that don’t block conversation.
Key Design Elements:
- Main seasonal props: pressed leaves, amber votives, thin frames
- Color palette: burgundy, rust, golden yellow, deep green
- Lighting strategy: low clustered candlelight plus afternoon window glow
- Textile layers: linen runner in wheat or rust, optional plaid napkins
- Natural elements: oak, maple, fern, ginkgo leaves
- Accent details: brass clips, slim black or natural oak frames
How To Recreate This Look:
- Start with a clean runner centered on the table—wheat if your leaves are bold, rust if you need warmth.
- Add your largest frame at the center, then stagger two to three smaller frames on either side.
- Layer leaves under glass/acrylic, spacing them so shapes overlap slightly but don’t crowd.
- Place amber votives in trios between frames for that soft, rhythmic glow.
- Style with a small bowl of seasonal fruit (pomegranates, pears) at one end for extra texture.
Why This Looks Expensive: Repetition plus restraint reads like curated art. The slim frames create a gallery effect, while the warm glass reflections feel boutique-restaurant chic. You’re not tossing everything on the table—you’re editing.
Watch Out: Don’t overfill frames. A dense collage looks muddy under glass. Leave negative space so each leaf’s veins and shape show clearly. Also, keep flames at least two inches from frames to avoid heat spots.
Pro Styling Tip: When photographing, turn off overheads and rely on window light + votives—this increases warmth and softens glare for rich color saturation.
2) Fern, Seed Pods, And Rust Ribbon Collage On A Living Room Coffee Table
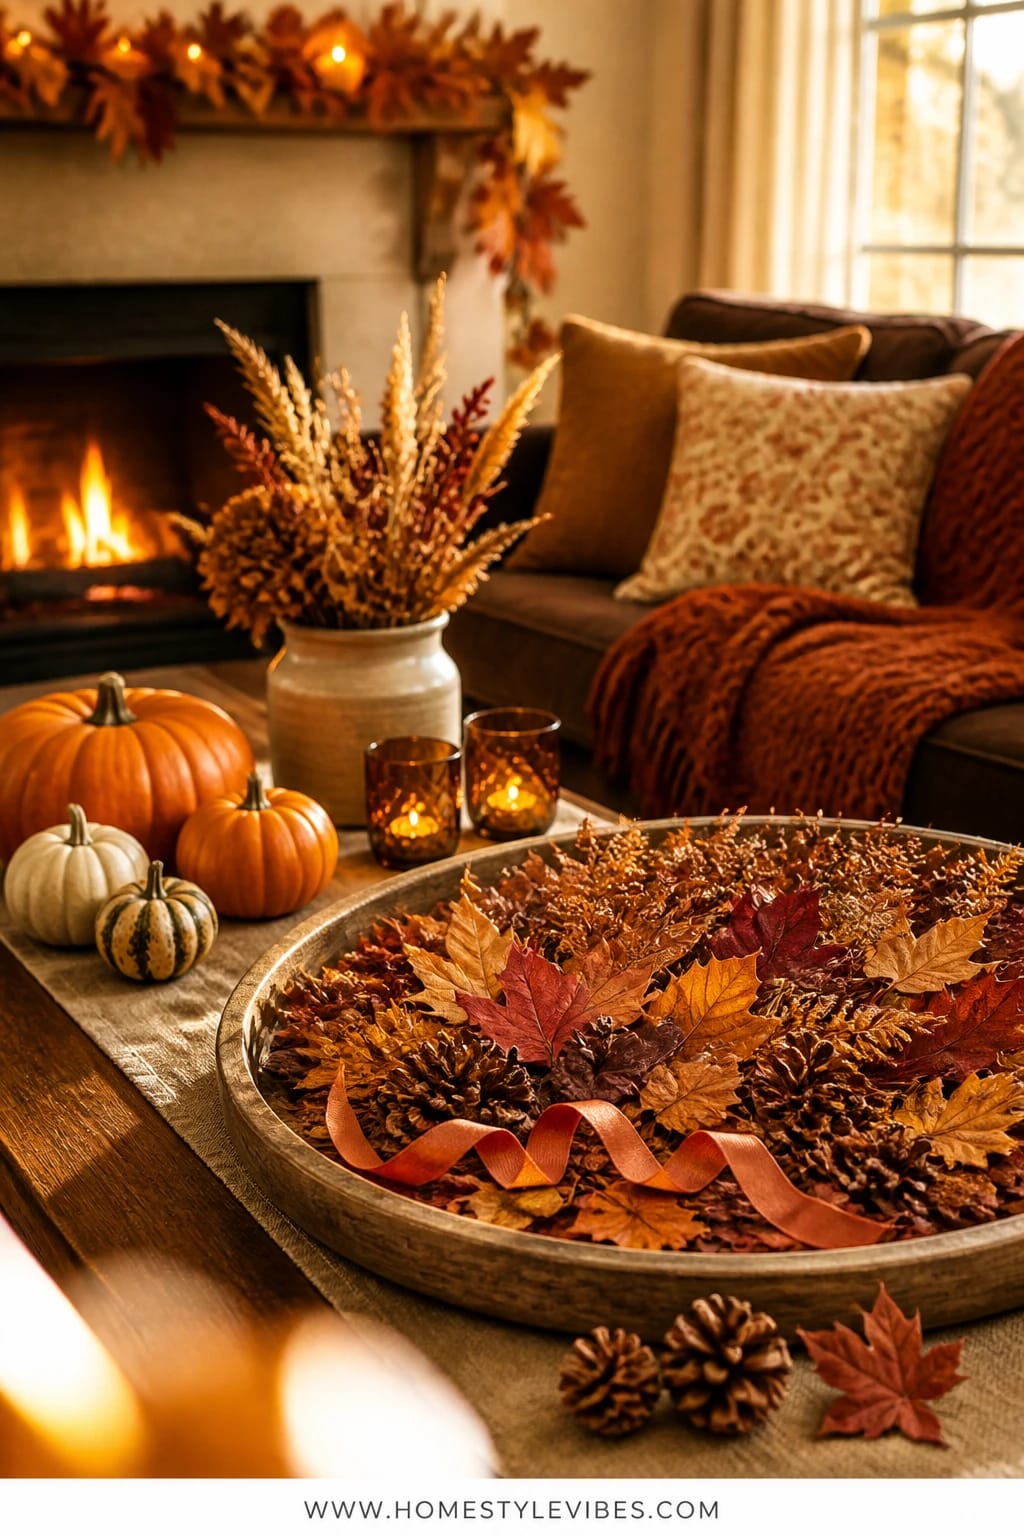
It’s that one corner that always feels off: your coffee table looks busy or, worse, barren. You’ve tried trays and stacks of books, but nothing feels seasonal and alive. A nature-craft collage on the coffee table solves it. The mood: casual, abundant, and textural—the kind of cozy bright autumn styling that invites you to sip cider and sink into the sofa. Why it works: a wide shallow tray corrals everything, while layered leaves, fern, seed pods, and a rust ribbon snake through the arrangement to tie it together. Evening lamp light catches the textures; daytime light highlights the shapes. It’s gorgeous and very forgiving.
This setup thrives in real homes because it tolerates kid hands, remote controls, and a cat who insists the tray belongs to her. The materials are unfussy: a low tray (wood or rattan), a piece of handmade paper as a base, a casual collage of leaves, acorns, seed pods, and a single rust velvet ribbon to unify the mess. Add a chunky tumbler candle in a cinnamon or clove scent. The look photographs beautifully with depth—foreground ribbon, middle-ground leaves, background candle glow—so your feed looks like a magazine without trying too hard.
Variations: Budget edit—swap the velvet ribbon for torn linen in rust or wheat. Minimalist version—use only fern and ginkgo with a thin silk ribbon. Kid-friendly—use flameless candles and a lidded jar for acorns (kids love shaking it like a fall snow globe, trust me).
Budget Breakdown:
- Low wood or rattan tray: $18–$48
- Handmade paper or parchment: $6–$16
- Assorted foraged botanicals: $0–$10
- Velvet ribbon (rust): $6–$12
- Chunky candle (cinnamon/clove): $8–$24
Total Estimated Cost: $38 – $110
Best For: Busy living rooms that need one strong seasonal moment without constant fussing. Perfect from early October through Thanksgiving, especially in family rooms with casual seating.
Key Design Elements:
- Main seasonal props: fern fronds, seed pods, acorns, velvet ribbon
- Color palette: rust, warm brown, moss, soft wheat
- Lighting strategy: table lamp glow amping up texture; optional single candle for warmth
- Textile layers: ribbon, handmade paper base, optional plaid throw on sofa
- Natural elements: dried fern, oak leaves, poppy pods, maple samaras (“helicopters”)
- Accent details: low tray, small brass bowl for matches
How To Recreate This Look:
- Start with a tray wide enough for breathing room (no smaller than 14 inches).
- Add a piece of handmade paper cut to fit inside the tray—this becomes your collage base.
- Layer your largest leaves first, fanning them like a quiet sunburst.
- Place seed pods and acorns in odd-numbered clusters; tuck stems under leaves to hide cut ends.
- Weave the ribbon through the arrangement in an S-curve, letting the tails drape casually over the tray edge.
Why This Feels Designer: The single ribbon color threading through everything creates cohesion—your eye reads the collage as one composed thought, not a pile of stuff. That’s the secret.
One Thing To Avoid: Don’t center the candle dead middle. Offset it to one side so the collage breathes and the flame doesn’t scorch delicate leaves.
Pro Styling Tip: For photos, pull the ribbon tail slightly forward into the frame. That little depth cue makes your coffee table vignette feel cinematic.
Remember, this isn’t about recreating a showroom. It’s about a room that holds your life: remotes, snack bowls, a half-finished crossword. If the idea makes you breathe easier, it’s right for you.
3) Ginkgo Silhouette Window Collage With Golden Light In The Kitchen
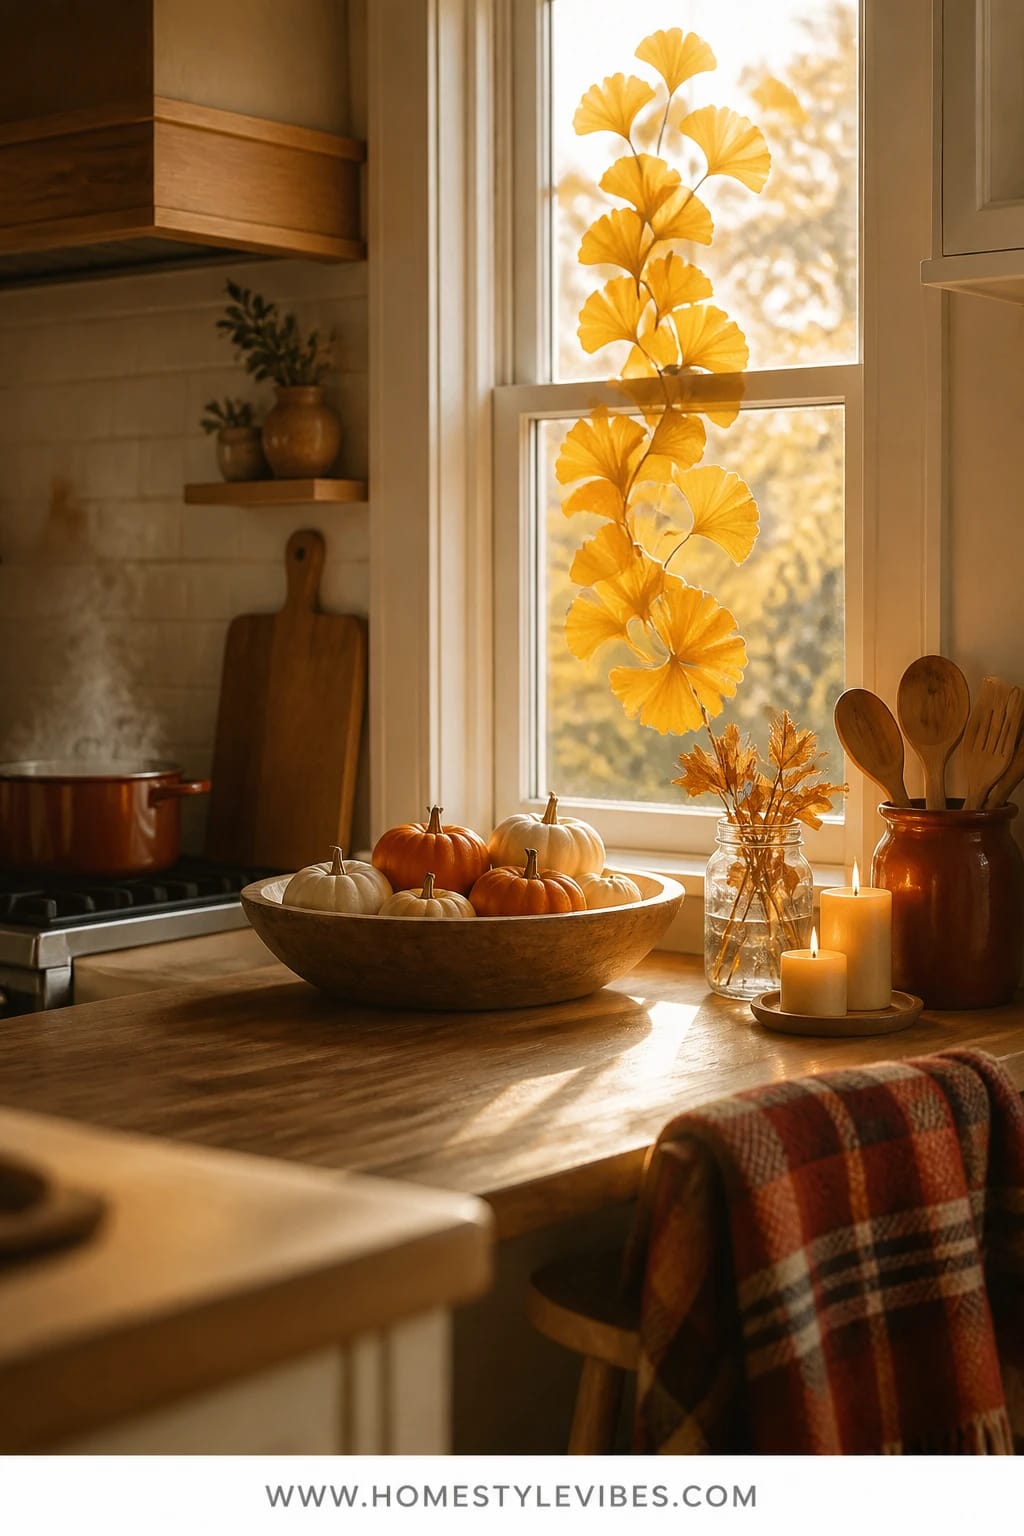
You want your kitchen to feel cheerful in the late afternoon, but counters clutter fast and decor steals workspace. A window collage gives you a seasonal hit without sacrificing an inch of prep area. Picture delicate ginkgo leaf silhouettes floating against the window, lit with honeyed backlight when the sun drops. The mood reads cozy bright autumn—uplifting, sunny, and a little magical, especially when steam curls from a simmering pot. Why it works: it’s vertical, so it stays out of your way; it uses removable dots, so cleanup takes two minutes; and it fills the view you see most while cooking.
In average homes, kitchen windows anchor the whole room’s mood. Transparent or translucent leaves look like stained glass when the light hits—greens go olive, rust turns tofire-amber, and veining shows up like watercolor lines. You need waxed paper, clear double-sided removable dots or tiny suction clips, and a handful of flat, pressed leaves (ginkgo, aspen, or maple). Add a tiny swag of wheat or a mini copper bell in the corner for a soft jingle when the breeze sneaks in. This one photographs like a dream at golden hour.
Variations: Small window—cluster leaves tightly in the center for a medallion effect. Bold version—alternate ginkgo with thin slices of dried orange for a hit of harvest color. Subtle version—keep it to one species in varying sizes. Make-ahead—press leaves the weekend before and store between parchment sheets with a heavy cookbook on top. My friend Mia tried this last year and texted me a photo at 4:37 p.m.—the whole window went honey-gold and she forgot she still had laundry in the dryer.
Budget Breakdown:
- Removable clear adhesive dots or suction clips: $5–$10
- Waxed or parchment paper (for pressing/protection): $3–$6
- Pressed leaves (foraged or purchased): $0–$12
- Small copper bell or wheat mini-swag: $4–$10
Total Estimated Cost: $12 – $38
Best For: Kitchens with a window above the sink or a breakfast nook window that catches afternoon light. Ideal for September through mid-November.
Key Design Elements:
- Main seasonal props: pressed ginkgo or aspen leaves
- Color palette: warm gold, olive green, soft rust, pale wheat
- Lighting strategy: backlit window magic—no extra lamps required
- Textile layers: optional small linen cafe curtain in wheat
- Natural elements: leaves plus a tiny wheat bundle or herb sprig
- Accent details: copper bell, clear clips, thin cotton twine
How To Recreate This Look:
- Start with clean glass. Any smudges will glow at sunset.
- Add a centered anchor leaf at eye level to set your grid.
- Layer outward with alternating sizes, keeping 1–2 inches between edges for breathing room.
- Place a small copper bell or wheat bundle at the top corner with a removable hook.
- Style with a small cutting board leaned against the backsplash in a matching wood tone to echo the warmth.
Why This Reads High-End: Symmetry with a touch of asymmetry—an ordered field of leaves with a single corner accent—mimics boutique window displays. It’s intentional without being stiff.
The Most Common Mistake: Using too many heavy, curled leaves. Choose flat, thin specimens so they adhere well and transmit light like stained glass.
Pro Styling Tip: Shoot it five minutes before sunset. Backlight saturates colors and creates a halo around every leaf for instant “save” clicks.
If one idea is calling your name, start there. You don’t need all five. Pick the spot you look at most—dining table, coffee table, kitchen window—and make that view sing first.
4) Maple Leaf Monogram With Plaid And Candle Glow On A Mantel
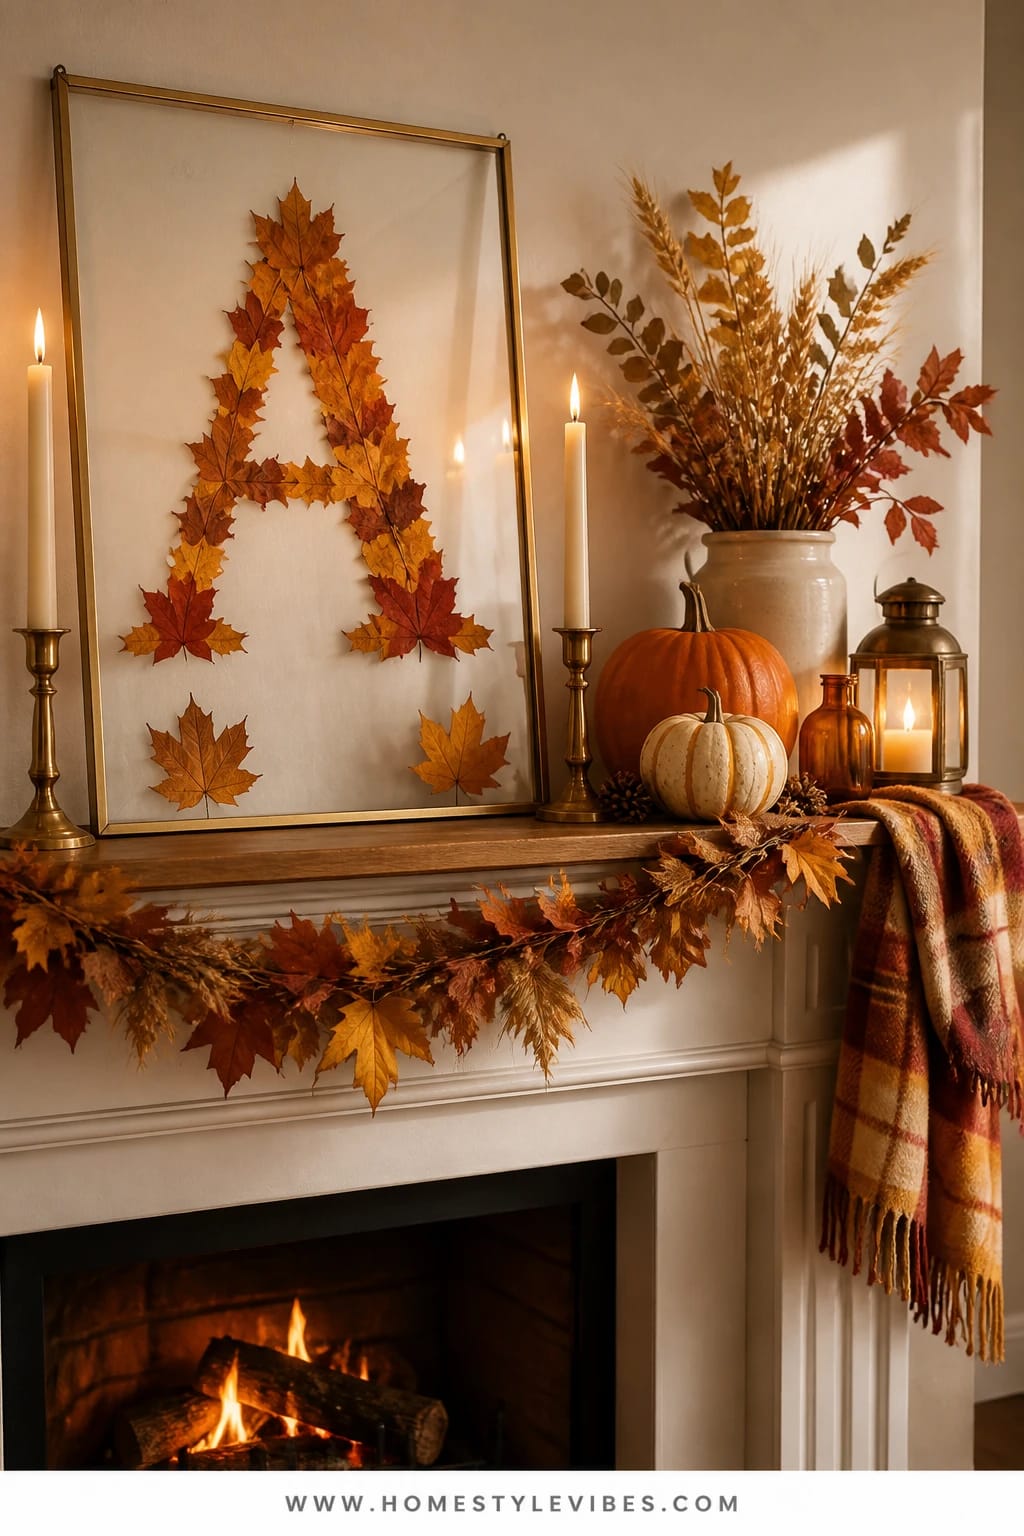
Your mantel tries so hard. You drape a garland, toss a few pumpkins up there, and it still feels scattered. Here’s the fix: anchor the whole story with a bold maple leaf monogram—a single initial shaped from leaves inside a floating frame—flanked by a pair of warm brass candlesticks and a whisper of plaid. The vibe is cozy bright autumn at its most classic: letter-perfect, candlelit, and personal. Why it works: the monogram creates a clear focal point so the rest of your layers don’t compete. One strong center, two supporting sides, and a grounding textile—done.
On real mantels, height and scale rule. A monogram in a 16×20 floating frame hits that sweet vertical note. Use double-stick tape dots to shape leaves into your initial on clear acrylic or glass; sandwich with a second acrylic/glass layer and secure inside the frame. Add two pumpkins—one white, one rust—at staggered heights. Tuck a folded plaid scarf or runner under everything for color and softness. Candlelight pulls warm amber across the glass and makes the letter glow. I tried this last October and honestly couldn’t believe the difference—it finally looked finished, not cluttered.
Variations: Small mantel—use a 12×16 frame and a single candlestick with a mirror on the opposite side. Dramatic version—use mixed-leaf colors for the letter with a darker plaid base. Minimal version—monogram, one candlestick, one pumpkin, and a plain oatmeal runner.
Budget Breakdown:
- Floating frame (16×20): $22–$48
- Pressed maple leaves: $0–$12
- Double-stick tape dots: $4–$8
- Brass candlesticks (pair): $18–$40
- Pillars or tapers (2–4): $8–$16
- Pumpkins (2 faux or real): $8–$24
- Plaid scarf or runner: $12–$28
Total Estimated Cost: $72 – $176
Best For: Standard living room mantels that need a strong center focal point. Works all season; swap plaid patterns as October shifts into November.
Key Design Elements:
- Main seasonal props: pressed maple leaves, pumpkins, plaid runner/scarf
- Color palette: rust, burgundy, cream, warm brass
- Lighting strategy: candle pairs to frame the focal point; dim overheads
- Textile layers: folded plaid base, optional knit throw nearby for softness
- Natural elements: leaves, pumpkins, dried wheat bundle (optional)
- Accent details: brass candlesticks, clear floating frame, small match striker
Why This Looks Intentional: A letterform focuses the eye, then everything else plays supporting roles. It’s the opposite of scattershot styling—your brain reads “center, left, right” and relaxes.
How To Recreate This Look:
- Start with your folded plaid runner centered on the mantel.
- Add the floating frame upright, leaning slightly against the wall for soft reflection.
- Layer the candlesticks on either side, heights slightly mismatched for movement.
- Place two pumpkins—one on a stack of flat books to vary height—off-center beneath one candle.
- Style with a small wheat bundle tucked near the base to echo leaf texture.
Don’t Do This: Avoid packing the mantel edge to edge. Negative space makes the monogram and candle glow matter. Also, keep real pumpkins away from heat vents (that half-deflated look by week three is… not the vibe).
Pro Styling Tip: Position one candle 4–6 inches in front of the frame’s lower corner for a soft light kiss across the glass—on camera it reads like a gentle gradient.
5) Harvest Herb And Leaf Collage Runner On A Kitchen Island With Warm Pendant Light
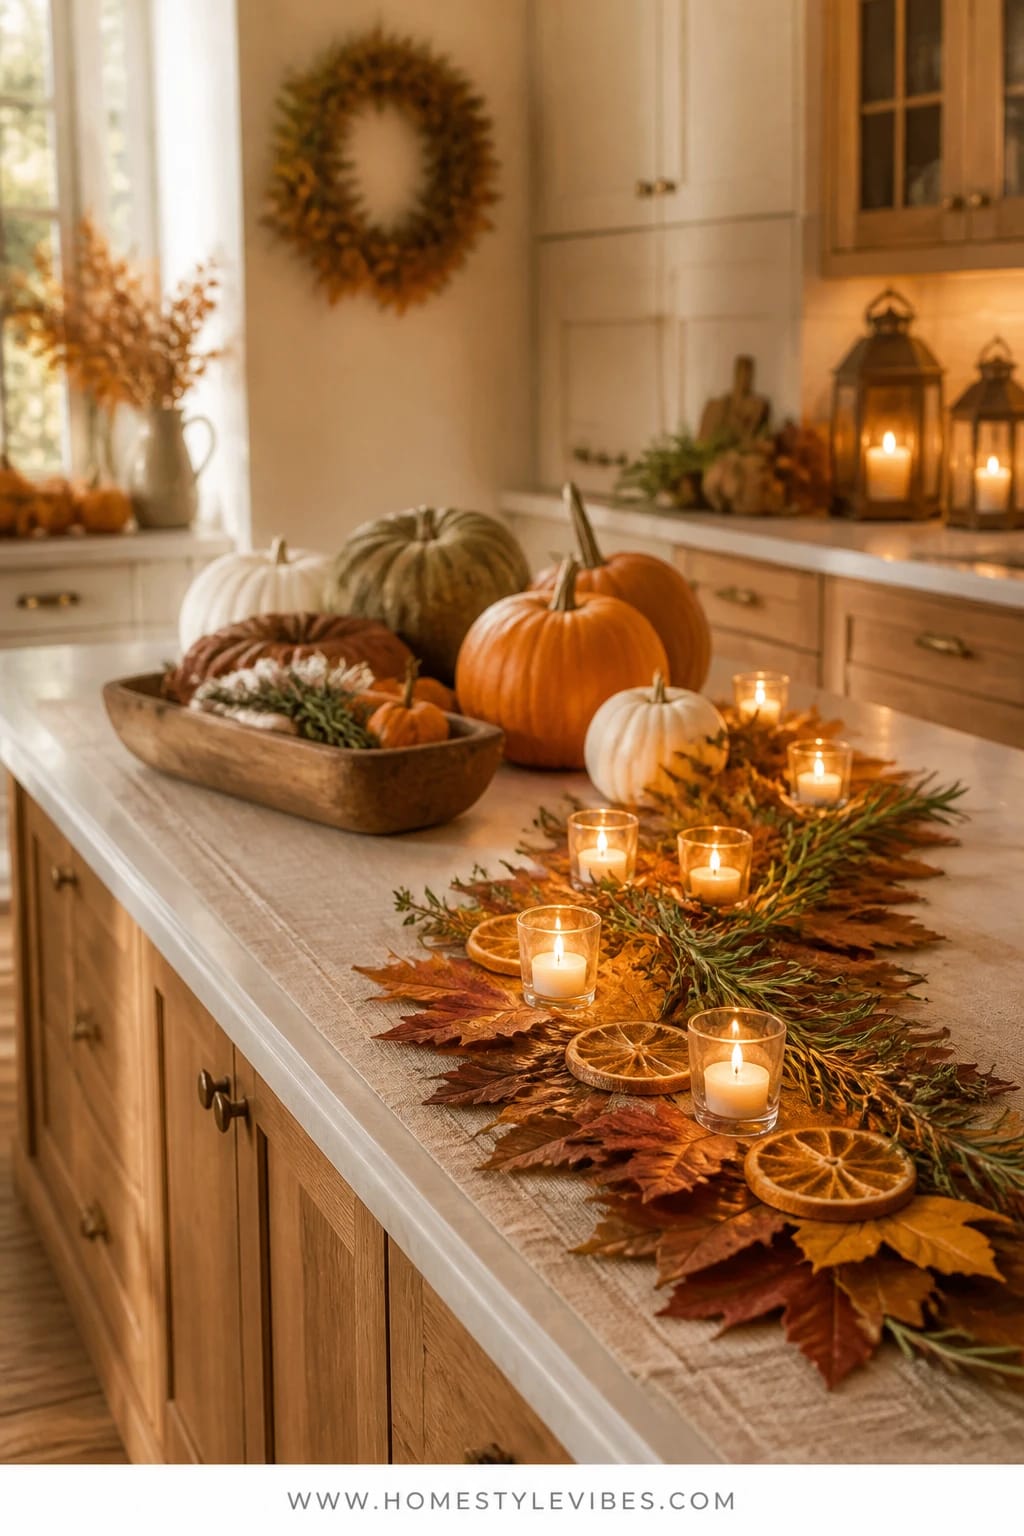
When guests gather, they orbit the kitchen island. Yours might feel functional but not festive—appliances, fruit bowl, done. This harvest herb and leaf collage runner turns that big, hardworking surface into the heart of your cozy bright autumn story. The mood is abundant and welcoming: a long, low trail of pressed leaves, rosemary and thyme sprigs, dried orange slices, and small votives that send amber ripples across the countertop. Why it works: it’s low-profile so you can still serve food; it smells amazing; and the repetition from end to end makes the entire kitchen feel intentional.
In the glow of pendant lights, everything warms up—rust leaves deepen, green herbs look jewel-toned, and the orange slices catch the light like tiny stained glass. Use butcher paper or kraft paper as your base (cheap and forgiving), layer a narrow band of linen on top, then arrange your collage down the center. Add three to five votives in glass holders for safety and shine. Photography-wise, this setup offers a runway of texture and light, perfect for those overhead shots we all love. Plus, cleanup? Roll the paper and compost the greens. Done.
Variations: Budget version—skip dried oranges and use apple slices dried in a low oven (200°F, sprinkle with cinnamon). Small island—use a square placemat as your base and create a compact collage. Neutral twist—stick to wheat, sage, and cream with white votives and pale leaves.
Budget Breakdown:
- Kraft or butcher paper roll: $6–$12
- Narrow linen runner: $16–$32
- Pressed leaves assortment: $0–$12
- Fresh herbs (rosemary, thyme): $4–$10
- Dried orange or apple slices: $4–$10
- Glass votives (5): $10–$20
- Tealights (pack): $6–$10
Total Estimated Cost: $46 – $96
Best For: Busy family kitchens where the island doubles as buffet and hangout zone. Ideal for weekend dinners, book clubs, or a pre-Thanksgiving prep day that still feels festive.
Key Design Elements:
- Main seasonal props: pressed leaves, fresh herbs, dried citrus
- Color palette: sage green, rust, amber, wheat
- Lighting strategy: warm pendant lights + low votives for glow without glare
- Textile layers: kraft paper base, narrow linen runner
- Natural elements: herbs, leaves, citrus
- Accent details: clear glass votives, wood cutting board risers for vary height at ends
How To Recreate This Look:
- Start with a strip of kraft paper cut to the island’s length and about 12 inches wide.
- Add a narrow linen runner centered on top to soften and elevate the look.
- Layer pressed leaves in a loose zigzag down the center, leaving gaps for herbs.
- Place herb sprigs in opposite directions for movement; tuck ends under leaves.
- Style with dried citrus tucked near each votive; space votives evenly for a soft, rhythmic glow.
Why This Looks Expensive: The runner-within-a-runner trick creates instant depth, while repeating small glass votives reads like restaurant ambiance. The herb scent adds a memory layer—guests will remember how it felt, not just how it looked.
Watch Out: Keep candles at least two inches from herbs and citrus. Herbs can crisp quickly under direct heat. If kids or pets are around, swap to flameless votives for peace of mind.
Pro Styling Tip: Turn pendants to warm color temperature if adjustable. Cooler bulbs flatten autumn colors; warm bulbs make rust and amber sing.
One more mindset check: your house doesn’t need to look like everyone else’s grid. The point is to enjoy the making as much as the final look. If a little asymmetry or a crooked ribbon makes you smile, you’re doing it right.
Quick Checklist
- Press leaves flat for 24–72 hours before crafting
- Choose one color story: rust/burgundy or sage/wheat
- Use repetition (frames, votives, ribbon) for cohesion
- Leverage warm light: window glow by day, candles by night
- Keep centerpieces low for conversation
- Mix textures: glass, linen, paper, botanicals
- Secure delicate pieces with removable dots
- Leave negative space so shapes read clearly
- Photograph at golden hour for saturated warmth
- Pack flat in labeled envelopes for next year
Frequently Asked Questions
How much should I budget for all five leaf collage and nature craft ideas?
Plan on $200–$450 total if you buy everything new. If you already have frames, candles, or runners, you can bring it down to $120–$250. Foraged leaves and DIY dried citrus reduce costs fast. Tackle one project at a time to spread spending across a few weekends.
Are real leaves better than faux for these crafts?
IMO, real leaves win every time for color depth and that papery texture. Press them flat and keep them out of direct heat. Use faux only where durability matters (kid-heavy mantels or sunny windows). You can also mix: real for the center, a few high-quality faux around edges.
What if I live in a small space and don’t have a mantel or big table?
Scale down. Try one 11×14 pressed leaf frame on a bookshelf, a mini coffee table collage on a tray, or a compact window medallion of leaves. The key remains the same: one focal, two supports, and warm light. Even a narrow console can host a small framed monogram with a single candle.
How do I store these projects after the season?
Disassemble anything perishable (herbs, citrus) and compost. Store pressed leaves in flat envelopes between parchment sheets inside the frames, or remove and file by color/species. Wrap frames in bubble or kraft paper and stack vertically in a closet.
Are candles safe around dried leaves with kids and pets?
Keep open flames at least two inches from botanicals and never leave them unattended. Use glass votive holders to contain flame height. For high-traffic areas or curious tails, swap to warm-white flameless votives—still cozy, zero stress.
When should I start these leaf collage projects?
Begin leaf-pressing in early September as colors turn, then craft on a Saturday afternoon once you’ve got a good mix. Mantel and table setups can go up by mid-October and carry you through Thanksgiving with small tweaks.
Closing Thoughts
Pick one idea from these leaf collage and nature craft projects and start this weekend. Maybe it’s the pressed leaf gallery down the dining table or the glowing kitchen window you’ll glance at a hundred times while you stir the pot. The secret isn’t doing everything—it’s choosing one spot and layering color, texture, and warm light until it feels like early evening in a cozy farmhouse.
Cozy bright autumn comes alive in the details: the papery rustle of a pressed leaf, the amber flicker on glass, the soft plaid under your fingertips. Build in layers, repeat shapes, and let negative space breathe. Your home doesn’t need perfection; it needs presence—a few handcrafted moments that make everyday meals and nightly TV feel like a little seasonal ritual.
You’ve got this. Gather a handful of leaves, strike a match, and let your creative afternoon glow carry you right into a beautiful fall evening. Seriously—five minutes after you light those candles, the whole room will feel like it’s giving you a warm hug.

About the Author

Krisztina P.Rendes, Founder of Home Style Vibes
Founder of Home Style Vibes
Krisztina Puskásné Rendes created Home Style Vibes as a cozy-modern lifestyle space where homemaking meets inspiration. Her goal is to help women create beautiful, organized, and peaceful homes they truly love — without overwhelm. You’ll find here heart-driven content on home decor, cleaning tips, easy family recipes, organization and decluttering, DIY home projects, plants, and seasonal ideas — all designed to bring more calm, comfort, and style into everyday life.





