
5 Halloween Leaf And Egg Carton Crafts For Spooky Season Fun
You want a home that feels enchantingly Halloween—chic jack-o’-lanterns, candlelit shadows, rustling garlands, and clever little creatures perched where no one expects them. You hate the clutter, the plastic overload, and the feeling that you need an art degree to make anything cute. Consider this your warm, witchy shortcut: five Halloween leaf and egg carton crafts that look designer, photograph beautifully, and come together with pocket change and a free afternoon. These are spooky, playful, and wildly achievable—think black candles, dried leaves, subtle cobwebs, and a little mischief sparkling from your bookshelves.
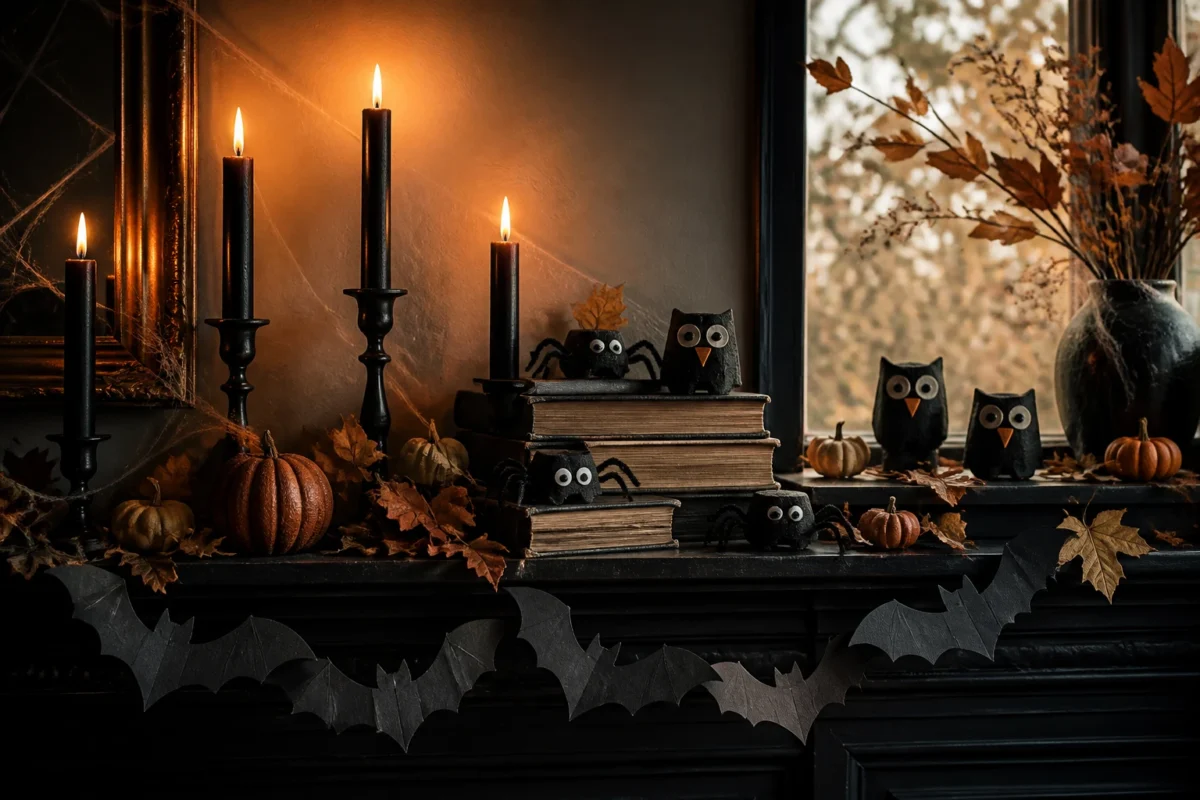
Each idea turns kitchen cast-offs and fall leaves into stylish decor that actually feels finished and not like a preschool project (no shade to the littles—these are family-friendly). We’re keeping it inside the house—mantels, dining tables, bookcases, window ledges, and entry tables—so everything lives where your Halloween moments actually happen. Expect dramatic shadows, warm candle glow, inky blacks, and those nostalgic oranges that make your October heart beat faster. Maximum effect for under $25 per craft and 30–90 minutes each. If you love the playful side of spooky season and want budget-friendly, Pinterest-worthy results, you’re in the right haunted house.
1) Leaf-Crowned Bat Parade in Black Candlelight on the Mantel
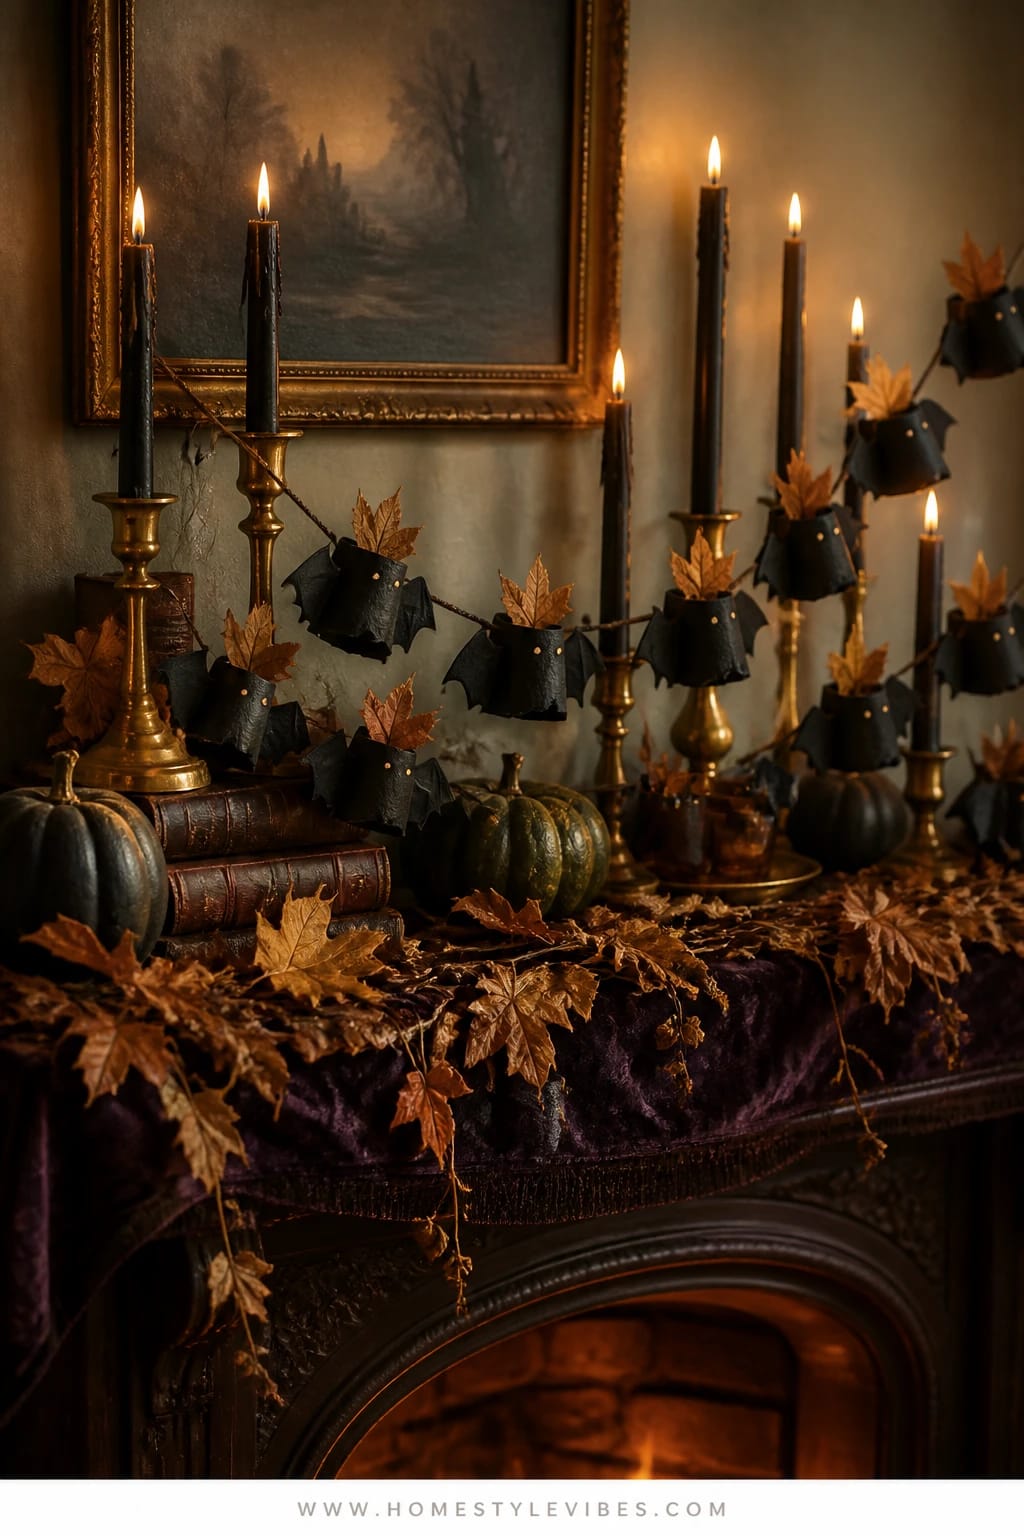
It’s that one corner that always feels off—the mantel looks like a jumble of pumpkins and picture frames that don’t talk to each other. You’ve tried sticking a random garland up there, but it still looks thin and a little sad by evening. This setup creates a moody, candlelit story: a parade of tiny egg carton bats, each wearing leaf “crowns,” swooping between black taper candles and a drape of dried foliage. It reads mischievous but stylish—like a vintage Halloween postcard come to life.
Here’s why it works in real homes: the scale is easy to manage (mantels are narrow), the bats are light and safe to move around, and the dried leaves mean zero maintenance. Candles—unscented black tapers—do the heavy visual lifting at night, throwing fluttering shadows that make the bats feel alive. In the morning, the matte black against warm wood and the caramel tones of dried leaves look editorial. If you have a TV over the mantel, this frames it without blocking sightlines. Photography-wise, the shape variation is your secret weapon: tall candles, low bats, and a rippling drape of leaves creates depth and movement that reads beautifully on camera.
Variations: Try a symmetrical version if your living room needs order—candles at the ends, garland centered, bats angled inward. Want a more kid-friendly vibe? Paint a few bats pumpkin orange, but keep most black so you don’t lose the chic factor. Make-ahead trick: paint the bats and seal leaves a week early, then style in 10 minutes on party day.
Budget Breakdown:
- Egg carton (recycled): $0
- Matte black craft paint: $3–$6
- Black taper candles: $6–$12
- Antique brass or thrifted candlesticks: $0–$15 (use what you have)
- Twine/floral wire for leaf garland: $2–$4
- Sealing spray or Mod Podge (optional): $4–$8
Total Estimated Cost: $11 – $30
Best For: Mantels in family rooms or living rooms where you want evening drama without heavy decor. Ideal for mid-October through Halloween, and easy to pivot into late fall by snipping off the bats and keeping the leafy garland.
Key Design Elements:
- Main seasonal props: Egg carton bats, dried leaf garland, black tapers
- Color palette: Matte black, antique brass, tobacco brown leaves, whisper of bone-white
- Lighting strategy: Clustered candlelight on the ends and center for deep shadows
- Textile layers: A narrow black runner or velvet ribbon across the mantel for grounding
- Natural elements: Dried oak or magnolia leaves, a few seed pods
- Accent details: Brass candlesticks, small vintage frames with spooky silhouettes
How To Recreate This Look:
- Start with a clean mantel and add a slim black runner or length of velvet ribbon.
- Cut egg carton cups into bat shapes: two cups side-by-side for the body, scallop the edges into wings, snip tiny ear points on the top.
- Paint bats matte black; let dry. Glue tiny dried leaf “crowns” above the ears.
- Create a loose leaf garland by wiring together dried leaves and seed pods with twine.
- Place 3–5 candlesticks across the mantel. Drape the leaf garland, then perch bats in little clusters as if mid-flight. Keep some near candle bases to catch shadow play.
Why This Looks Expensive: The matte paint, antique brass, and restrained palette read intentional and collected, not crafty. The asymmetry—slightly heavier on one side—feels styled by a pro.
Watch Out: Don’t overcrowd with props. Fourteen bats look fun in your head and chaotic in real life. Stop at five to seven for breathing room.
Pro Styling Tip: For photos, light the candles 15 minutes before shooting so the wicks blacken and the flames steady, then angle one bat just in front of a candle to catch that cinematic shadow.
Quick Tip: If your leaves feel brittle, brush a whisper of Mod Podge on the backs only. It preserves the color and keeps the front looking authentically matte.
2) Jack-O’-Lantern Leaf Luminarias in Warm Amber on the Dining Table
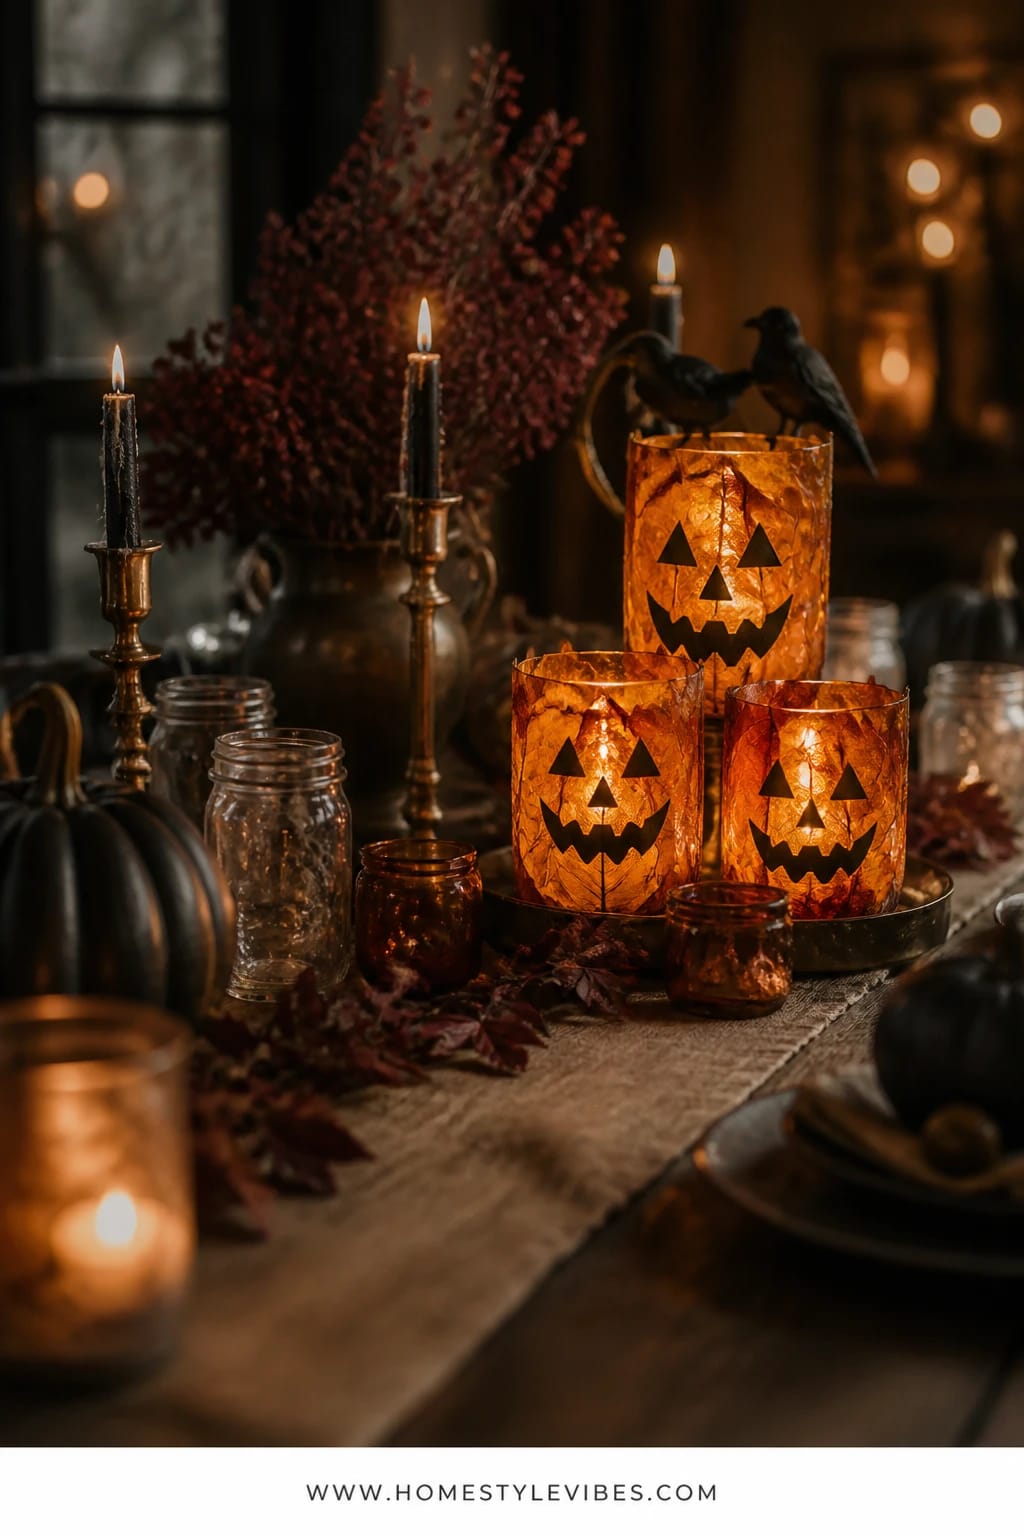
We’ve all been there: the dining table centerpiece either blocks faces or looks so flat it disappears once plates hit the table. You want glow and charm that still lets you pass the mashed potatoes. Enter leaf-wrapped jack-o’-lantern luminarias—dainty cylinders made from egg carton “faces” lined with pressed leaves, all lit from within by tea lights. They’re short, safe if you use LED candles, and wildly photogenic in that candlelit, Halloween way.
This idea works in real homes because it’s modular. Make two for everyday dinners and a cluster of seven for a party. The light filters through the leaves, which turn a moody amber-orange without shouting. At night, the tiny cut-out grins throw dappled, almost Victorian shadows across the table. During the day, the organic textures keep things interesting without taking over. And because the height stays low, you keep all the eye contact and none of the centerpiece regret.
Small-space version: line three on a narrow console or a kitchen island. Budget tweak: sub parchment paper for vellum inside the “lanterns.” Want drama? Add a black table runner and scatter a few faux crows or dried orange slices around the base for still-life vibes.
Budget Breakdown:
- Egg cartons (recycled): $0
- Pressed leaves (free): $0
- Clear-drying glue or Mod Podge: $4–$8
- Thin vellum or parchment paper: $3–$6
- Battery tea lights: $6–$12 per pack
- Black table runner (optional): $10–$20
Total Estimated Cost: $13 – $38
Key Design Elements:
- Main seasonal props: Leaf-wrapped luminarias, mini jack-o’-lantern faces from egg carton cut-outs
- Color palette: Warm amber, soft orange, inky black accents
- Lighting strategy: Low, scattered glow across the table for intimate drama
- Textile layers: Black or oxblood runner, simple linen napkins
- Natural elements: Pressed maple or aspen leaves, dried orange slices
- Accent details: Tiny black dish for matches (if using real tea lights), slender brass salt and pepper mills
How To Recreate This Look:
- Press leaves between heavy books for 24–48 hours to flatten.
- Cut egg carton cups into tiny triangles and crescent mouths for jack-o’-lantern faces; paint black.
- Cut vellum into strips and form cylinders (2–3 inch diameter) with clear tape.
- Brush glue on the outside of cylinders; layer pressed leaves so they overlap. Let dry.
- Glue the tiny face pieces onto the leaf surface. Place LED tea lights inside and arrange down the center of the table.
Why This Feels Designer: The translucency of leaves against warm light feels bespoke. Repeating one element (the cylinders) in odd numbers reads cohesive and intentional.
One Thing To Avoid: Don’t mix too many leaf species and sizes. Stick to one or two types for a pattern that reads clean, not chaotic.
Pro Styling Tip: Tuck one luminaria slightly behind a taller glass or bottle for layered depth in photos—foreground blur makes the glow richer.
Did You Know? A single deep red leaf among mostly amber tones anchors the color story and makes the photo pop—your eye catches the contrast instantly.
3) Haunted Herbarium Leaves with Matte Black Frames on the Bookshelf
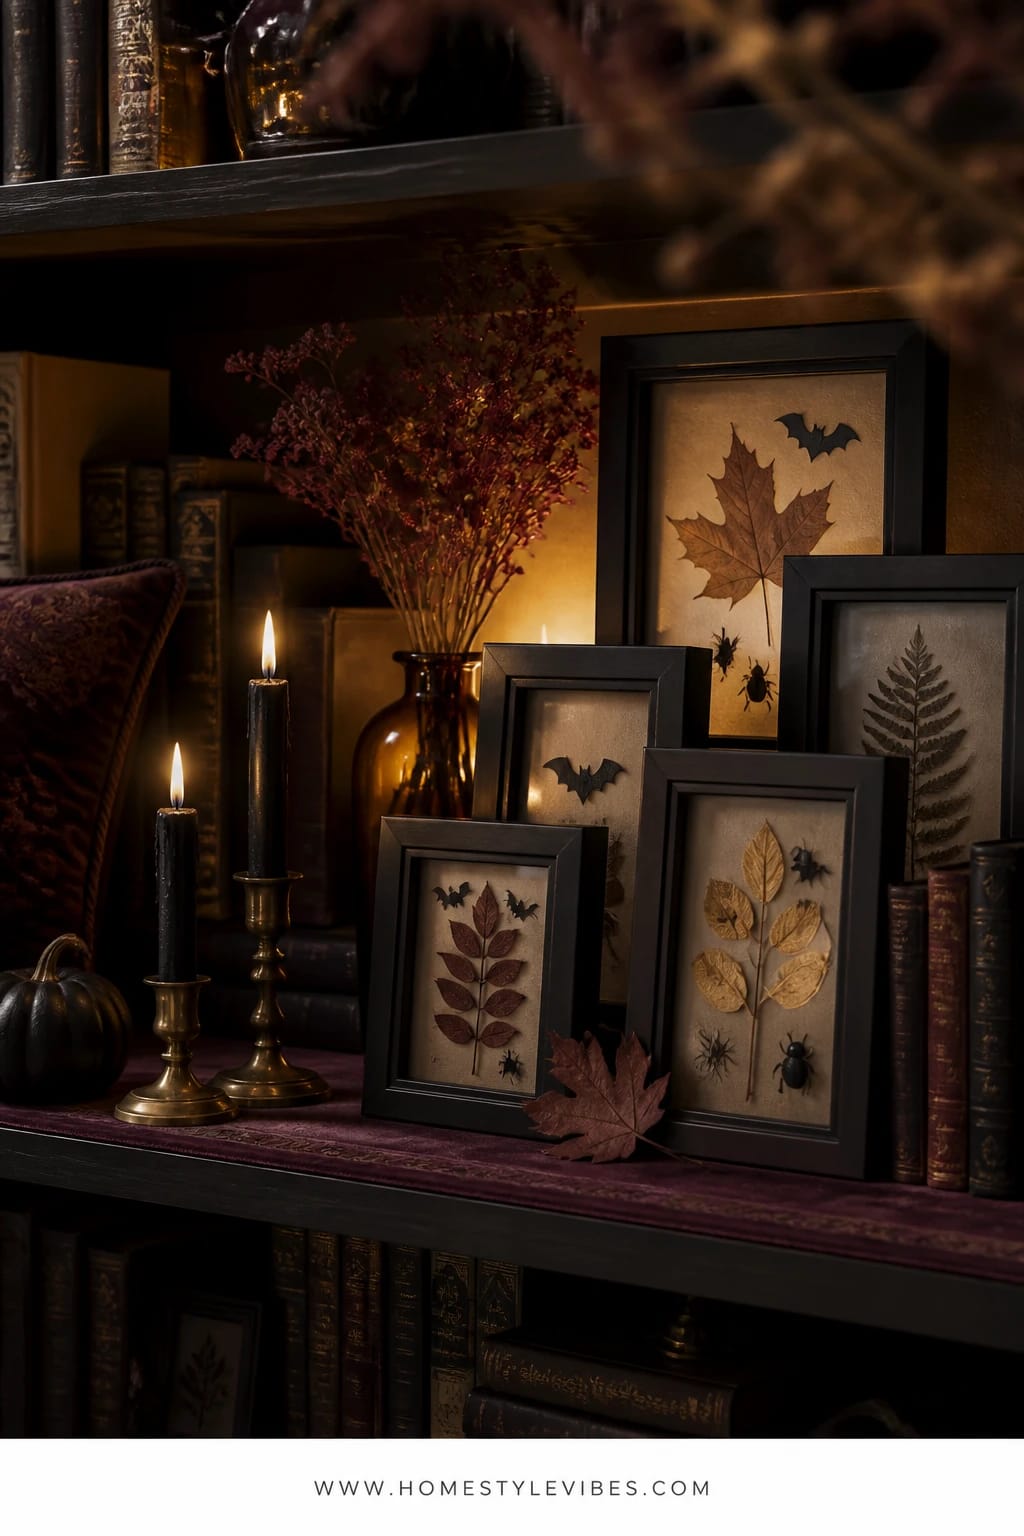
Your bookshelf wants to be spooky, but every skeleton figurine you try looks like it belongs at a costume store. You’ve tried rearranging books, adding a pumpkin or two, and somehow it still looks random. The fix: a row of “haunted herbarium” art—pressed leaves mounted with egg carton shadow bugs and tiny bat silhouettes, all framed in matte black. The mood is witchy study meets quiet Halloween mischief.
It works because the frames bring structure. Suddenly, your shelf has repeated verticals anchoring the eye. The egg carton bits—trimmed into scarab-like shapes or dainty bats—add dimension so the leaves don’t feel flat. Light this with a single picture light or even a well-placed clip lamp, and the shadows give your “specimens” a collected, old-world vibe. Photography bonus: the matte frames cut glare, the layered paper creates little shelves of depth, and the repeated black line rhythm looks editorial.
Variation for color lovers: swap one or two black mats with oxblood or deep aubergine cardstock. Small library corner? Place just one frame leaning on a shelf with a brass magnifying glass and a crow figurine—mini vignette, big impact. Make-ahead tip: press leaves now; assemble on a rainy Sunday with tea and a spooky playlist.
Budget Breakdown:
- Thrifted frames or IKEA Ribba: $4–$12 each
- Black spray paint (for frames): $6–$10
- Cardstock or black construction paper: $2–$5
- Egg carton scraps (recycled): $0
- Glue stick or double-sided tape: $2–$4
Total Estimated Cost: $14 – $43 (for a trio)
Best For: Bookshelves or built-ins that need structure and story. Great for living rooms where you want subtle Halloween that still feels grown-up.
Key Design Elements:
- Main seasonal props: Pressed leaves, egg carton scarab/bat silhouettes
- Color palette: Matte black, tawny leaf brown, oxblood accents
- Lighting strategy: Focused task light or picture light for clear shadow contours
- Textile layers: None required; add a suede bookmark or velvet ribbon for texture nearby
- Natural elements: Dried seed heads or fern fronds
- Accent details: Small brass magnifying glass, vintage-looking labels
Why This Reads High-End: Repetition and negative space. Each frame has breathing room, and the matte finish avoids the plastic glare that screams “craft.”
How To Recreate This Look:
- Spray-paint thrifted frames matte black; let dry thoroughly.
- Cut black cardstock to fit as a “mat.”
- Trim egg carton pieces into slim bat or beetle shapes; paint satin black for a slight sheen.
- Mount a pressed leaf to the cardstock. Add the egg carton silhouette slightly offset to create shadow depth.
- Label each piece with a tiny strip of paper: “Noctis Maple,” “Twilight Fern,” etc. Frame and lean on shelves.
The Most Common Mistake: Overfilling the page. If you crowd the leaf and silhouette together dead-center, it flattens. Give it off-center placement and let the empty space do its thing.
Pro Styling Tip: Angle one frame just a hair (not fully straight) and tuck a black taper candle in a brass holder nearby—your camera will thank you for the varied heights and textures.
Remember, this isn’t about recreating a showroom. It’s about building rooms that feel like your version of Halloween—smart, a little mysterious, and full of character. If one idea sings to you, start there. You don’t need all five.
4) Midnight Crow Leaf Mobile with Oxblood Accents over the Entry Table
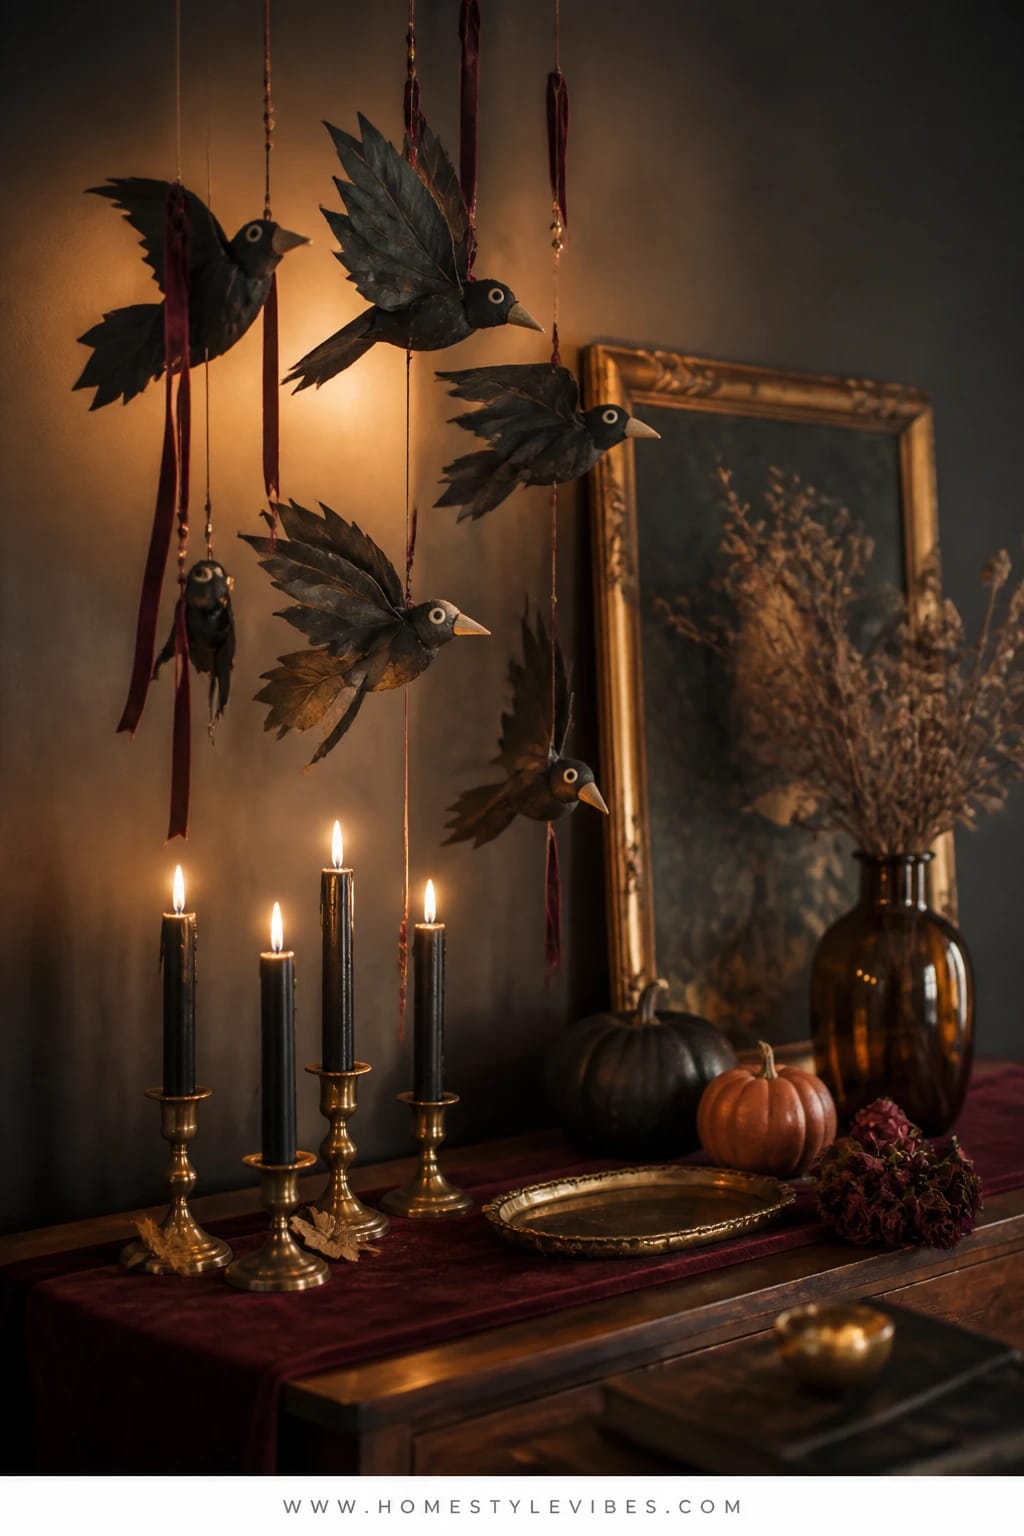
That entry table works hard by day and feels ignored by night. Keys, mail, and that one renegade Lego often live there, and nothing you add seems to stick. Suspend the magic above it. A midnight crow mobile—egg carton beaks and eyes on leaf “bodies,” strung at different heights over your entry table—creates instant Halloween theater the second you open the door. Pair it with oxblood ribbon tails and a short row of black taper candles on the table below. It’s a vertical story that saves surface space.
Why this works at home: mobiles pull the eye up, which is perfect for small foyers. Leaves are feather-light, so even a gentle draft gives them movement—like crows shifting on a wire. Use fishing line for the float effect or black thread for a graphic look. Light the table with just two candles and leave the overhead light off at night; the shadows make your “flock” look alive. It stores flat, too—silk the leaves with a spritz of sealer and stack between tissue for next year.
I did a version of this last October and honestly, I couldn’t believe the difference. Guests paused under it, actually looked up, and the whole space felt like a scene—moody, a pinch theatrical, but not cheesy. If you’re a maximalist, add a subtle cobweb across one corner. If you’re minimal-leaning, keep the palette strictly black and oxblood and edit hard.
Budget Breakdown:
- Leaves (gathered): $0
- Egg carton (recycled): $0
- Black paint + a dot of gold or white for eyes: $3–$6
- Fishing line or black thread: $2–$4
- Oxblood ribbon: $3–$8
- Simple branch dowel or thin rod to hang: $2–$6
- Adhesive ceiling hook: $3–$5
Total Estimated Cost: $13 – $29
Best For: Entry tables or console tables where floor space is tight. Perfect for late October when you want high impact fast.
Key Design Elements:
- Main seasonal props: Leaf “crows” with egg carton beaks/eyes
- Color palette: Inky black, oxblood accents, warm brass
- Lighting strategy: Low candlelight on the table, dim ambient light overhead
- Textile layers: Oxblood velvet ribbon tails, a thin black runner
- Natural elements: Leaves, a small branch or rod
- Accent details: A single brass tray for keys to keep it functional
How To Recreate This Look:
- Cut tiny triangles from egg carton for beaks; paint black or dark brass. Punch littlest circles for eyes; dot with white or gold.
- Glue beaks and eyes onto flat, dark-toned leaves to form “crow faces.”
- Tie lengths of fishing line or thread to each leaf at slightly varied heights.
- Anchor all strands to a thin rod or branch. Add short oxblood ribbon tails in between for richness.
- Hang from a removable ceiling hook above your entry table. Add two black tapers on brass holders beneath.
Why This Looks Intentional: Playing with vertical space and negative space feels like an art installation. The oxblood ribbon breaks up the black-on-black story just enough.
Don’t Do This: Avoid heavy clusters that bang together every time the door opens. Weight the bottom of each strand with a discreet knot or a tiny paperclip painted black.
Pro Styling Tip: For photos, shoot from the side so the mobile strands overlap—layered silhouettes look instantly cinematic.
Quick Tip: Keep a lint roller in the entry drawer. Black ribbon and candle wax love to collect dust; a two-second roll makes it photo-ready before guests arrive.
5) Witchy Pumpkin Patch Terrarium with Noir Leaves on the Window Ledge
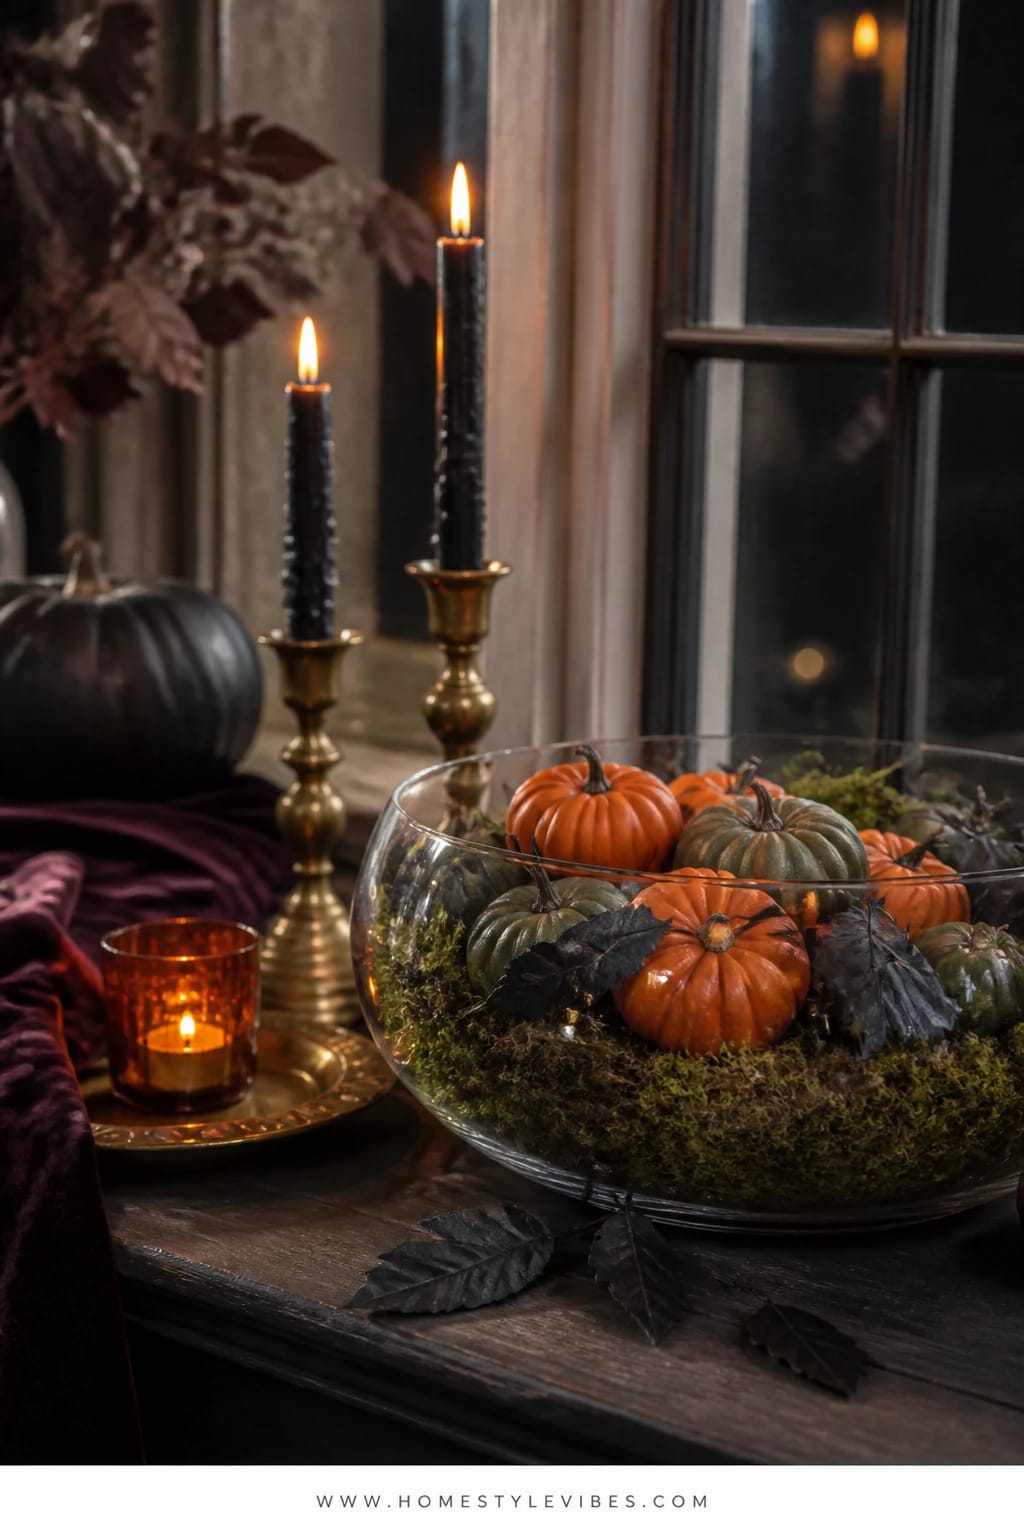
You want a moment on the window ledge that whispers Halloween by day and glows by night—but potted plants there just wither in the draft, and big decor blocks the light. The answer is a shallow terrarium scene: egg carton mini pumpkins nestled in moss with painted noir leaves acting like shadowy vines, all tucked into a low glass vessel. It’s moody, subtle, and steals any slice of afternoon sun for a quiet sparkle.
Real-home practicality wins here. Everything is lightweight and low-profile, so you still get your daylight. The pieces store in a shoebox after Halloween, and you can rebuild it next year in an hour. The lighting trick: two or three LED micro fairy lights coiled through the moss, then hidden under a leaf—sudden candlelight vibes without open flame near the curtains. Photographing this is pure fun; set your phone near the window jamb and let the backlight outline the pumpkin shapes for that cozy, haunted glow.
Have kids? Let them paint the pumpkins. Have a design itch? Keep the palette strict—black leaves, ember-orange pumpkins, a touch of antique brass in the form of a tiny bell or key. If you want to stretch this through November, swap the bats for cinnamon sticks and call it a “late-harvest” vignette.
Budget Breakdown:
- Egg cartons (recycled): $0
- Orange, black, and deep green craft paints: $6–$10
- Moss (bagged): $4–$8
- Shallow glass vessel or trifle bowl: $0–$15 (shop your cabinets)
- LED micro string lights: $6–$12
- Clear-drying glue: $3–$5
Total Estimated Cost: $13 – $40
Best For: Window ledges in kitchens or living rooms where you want subtle day-to-night charm without blocking light. Great for mid-season through Thanksgiving with minor tweaks.
Key Design Elements:
- Main seasonal props: Egg carton mini pumpkins, noir leaf “vines,” moss base
- Color palette: Ember orange, soot black, moss green, hint of brass
- Lighting strategy: Backlit sun by day, micro LEDs by night for twinkle
- Textile layers: None required; add a thin black ribbon bow on the vessel if desired
- Natural elements: Moss, dried leaves, a small twig arch
- Accent details: Tiny brass key or bell, a miniature crow figurine
How To Recreate This Look:
- Cut egg carton cups; glue two together base-to-base for plump pumpkins. Add a tiny stem with a snipped carton ridge.
- Paint pumpkins in layered oranges (dab in a little brown for depth). Dry-brush ridges for realism.
- Paint a handful of leaves matte black to act as shadowy vines.
- Fill a shallow glass vessel with a layer of moss. Weave micro LEDs through, leaving the battery pack easy to access.
- Nestle pumpkins, add painted leaves, and tuck in a small twig arch for structure.
Why This Looks Expensive: Low, contained styling inside glass reads curated. The color restraint—mostly green, orange, and black—feels intentional, not cluttered.
Watch Out: Don’t overload the vessel. You want little pockets of negative space so the light can bounce—too much moss and it becomes a dark lump.
Pro Styling Tip: Photograph late afternoon with just the LEDs on—the sunfade plus twinkle mimics candlelight without the risk.
Some honesty: cutting neat curves from egg cartons is trickier than it looks. My first “pumpkin” had a weird divot that made it look like a shriveled apricot. Sand the edges lightly once dry; it smooths everything out and saves your paint job.
Did You Know? If your window ledge gets chilly, real mini pumpkins nearby can age fast. Keep these faux ones front and center and stash real gourds a foot away from the glass to dodge that week-three deflated look.
Perspective shift: You’re not building a haunted house set. You’re shaping a few moments of delight your family bumps into every day—on the way to coffee, while grabbing keys, when the evening lights flicker on. Pick one spot and make it magical.
Quick Checklist
- Egg cartons pre-cut into cups, wings, beetles, and tiny triangles
- Matte black craft paint plus one accent color (oxblood or ember orange)
- Pressed leaves in one or two species for cohesion
- Clear-drying glue or Mod Podge and a basic brush
- Black taper candles and sturdy brass or thrifted holders
- Vellum or parchment for luminarias
- Fishing line or black thread for mobiles
- Oxblood ribbon or velvet trim for richness
- Moss and a shallow glass vessel for terrariums
- LED tea lights or micro string lights for safe glow
- Simple tools: scissors, craft knife, hole punch, tape
- Optional sealing spray to preserve leaves
Frequently Asked Questions
How do I keep pressed leaves from crumbling or losing their color by Halloween?
Press them for 48 hours between paper towels and heavy books, then mist the backs with a matte sealing spray or brush on a thin coat of Mod Podge. Store them flat until you’re ready to craft. Avoid direct sunlight to keep the warm browns and ambers rich.
What if I’m on a super-tight budget—can I still make these Halloween leaf and egg carton crafts look good?
Absolutely. Prioritize matte black paint, a single pack of LED tea lights, and the egg cartons you already have. For frames, spray old ones black. For runners, use a strip of black fabric or an old T-shirt cut cleanly. The cohesion of color and finish is what sells the look.
Are real candles safe around dried leaves and paper elements?
Use LED candles near anything dry, especially garlands or mobiles. If you want real flames on a mantel or table, keep candles at least 6 inches from leaves, use sturdy holders, and never leave them unattended. In entryways or with kids and pets, I strongly prefer LED.
My space is small. Will these crafts make it feel cluttered?
Pick one focal zone only: mantel, bookshelf, or window ledge. Keep your palette restricted to three colors (black, amber, brass), and repeat just one shape (bats, crows, or pumpkins). The repetition feels neat, not busy.
When should I start making these so they’re ready for spooky season?
Press leaves in late September, assemble frames and bats the first week of October, and style the final scenes the weekend before your Halloween plans. Most pieces take under 90 minutes and can be stored flat if you’re early.
What do I do with everything after Halloween so it doesn’t get crushed?
Layer crafts between sheets of tissue in a shallow box. Label zip bags: “Bats,” “Luminaria Faces,” “Terrarium Leaves.” Store candles separately. Next year, you’ll set up in minutes because everything’s sorted by zone.
Bring the Magic Home
Pick one corner and go all in—mantel, table, bookshelf, window ledge, or entry. Start with the Halloween leaf and egg carton craft that made your heart skip. A flock of tiny bats against black candlelight. A hush of amber leaf luminarias at dinner. A haunted herbarium on the shelf that makes your books look like they’ve been whispering all night.
The secret isn’t spending more—it’s committing to mood. Think shadow and glow, matte black and warm leaf-brown, a little mischief in the details. Layer light low, repeat a shape, and keep your palette tight. Suddenly, your home feels like the good kind of haunted: cozy, clever, and irresistibly photogenic.
You’ve got this. Grab the egg carton from the recycling, press a handful of leaves, and let spooky season settle in. When the lights dim and the first candle crackles, you’ll know you pulled it off—stylish, a bit witchy, and completely yours.

About the Author

Krisztina P.Rendes, Founder of Home Style Vibes
Founder of Home Style Vibes
Krisztina Puskásné Rendes created Home Style Vibes as a cozy-modern lifestyle space where homemaking meets inspiration. Her goal is to help women create beautiful, organized, and peaceful homes they truly love — without overwhelm. You’ll find here heart-driven content on home decor, cleaning tips, easy family recipes, organization and decluttering, DIY home projects, plants, and seasonal ideas — all designed to bring more calm, comfort, and style into everyday life.





