6 Thanksgiving Buffet And Dessert Table Ideas For Effortless Hosting
You crave a Thanksgiving buffet and dessert table that feels abundant, warm, and beautifully photographed. You hate the last-minute scramble where everything looks half-done, the pies feel crowded, and the line stalls at the stuffing. You want that cozy bright autumn energy—saturated rust and burgundy, amber candle glow, pumpkins and plaid, a harvest of textures—without spending your entire holiday budget or entire weekend styling. These six Thanksgiving buffet and dessert table ideas fix the biggest hosting frustrations with real-home solutions you can set up in an hour or less, with a budget cap you choose.
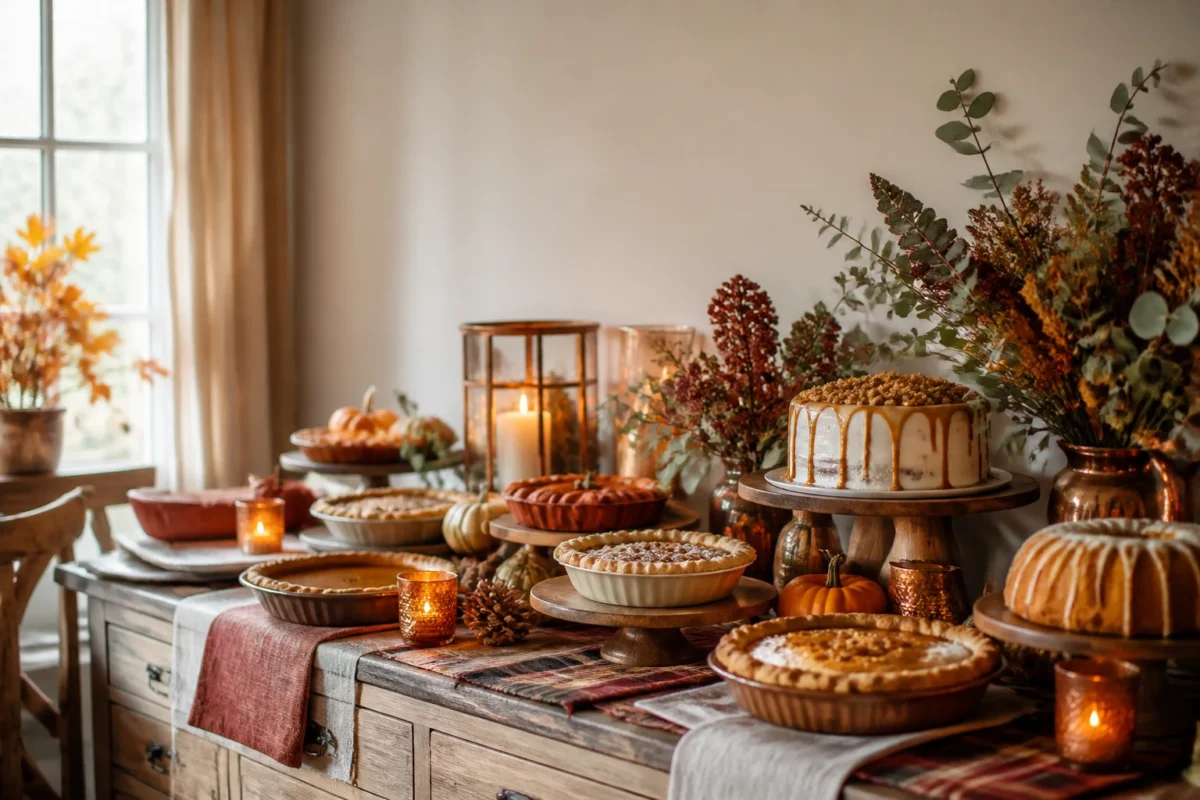
Think: glowing candles on the sideboard, layered linens, copper and wood serving pieces, and a confidently orchestrated flow that makes guests feel taken care of. Expect warmth, color, a little drama (the good kind), and buffet lines that move at an easy pace. Everything here looks gorgeous in photos—Pinterest-pretty—and works in the chaos of a family-and-friends holiday. If you love a hospitable, festive home and want your Thanksgiving spread to feel both generous and effortless, you’re in the right place.
1. Pumpkin-Peaked Sideboard With Amber Candle Glow in the Dining Room
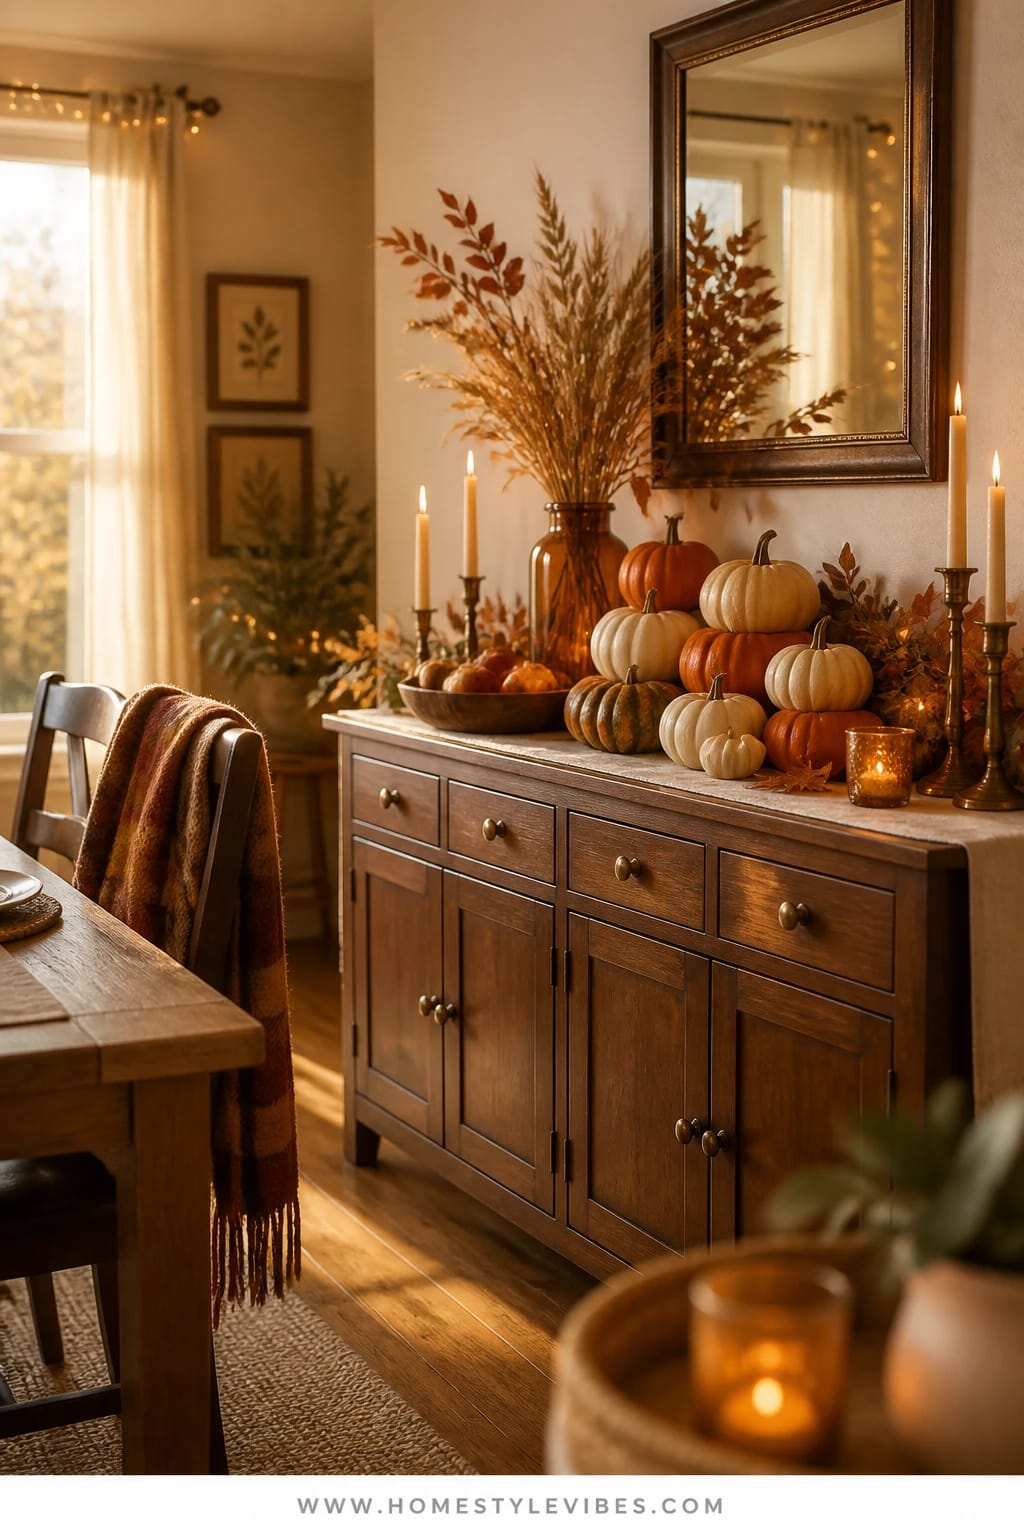
We’ve all been there: the dining room sideboard becomes a clutter catchall—mail, chargers, a random pitcher—then Thanksgiving hits and you’re out of space for the buffet. This idea turns your sideboard into a warm, glowing harvest stage where everything looks intentional and within reach. It leans into cozy bright autumn: the saturated glow of amber, burnished brass, cinnamon-toned wood, and a few well-placed pumpkins that read “harvest,” not “Halloween.”
Here’s why it works in real homes: sideboards sit at the perfect height for self-serve dishes and are close to the dining table for easy seconds. Candles clustered at varying heights add flattering light and a festive feeling—think the kind of luminous warmth that makes cranberry sauce look jewel-toned. You’ll use accessible materials: pillar candles in amber glass, a plaid runner with rust and gold threads, brass or wooden risers for height, footed bowls, and a few small sugar pie pumpkins for color and shape. Photographs love this look because of the layered depth—foreground pumpkins, mid-level platters, taller candlesticks—plus the glow bouncing off polished surfaces.
Variations:
– Budget-friendly: swap real brass for thrifted brass-look candlesticks or amber thrift-store goblets turned into tea light holders.
– Small-space: use a narrow console and scale down the platters; offer rolls in a vertical bread basket to save inches.
– Make-ahead version: stage empty platters and labels the night before so you’re literally placing hot dishes where they belong at serving time.
Budget Breakdown:
- Amber glass pillar holders: $20–$60 (set of 3–5)
- Assorted candles (unscented): $10–$30
- Plaid runner or layered tea towels: $15–$40
- Brass/wood risers or cake stands: $25–$100
- Mini pumpkins/gourds: $8–$20
- Serving bowls and platters: $0–$120 (use what you own; thrift if needed)
Total Estimated Cost: $78 – $370
Best For: Traditional dining rooms with a sideboard, buffet cabinet, or console. Ideal for mid-November through Thanksgiving when you want maximum glow and easy reach for sides.
Key Design Elements:
- Main seasonal props: sugar pie pumpkins, mini gourds, amber glass candleholders
- Color palette: rust, burgundy, marigold, warm wood, aged brass
- Lighting strategy: clustered pillars and tea lights to create bounce and cast warm light across serving dishes
- Textile layers: plaid runner, linen napkins, cotton tea towels under hot dishes
- Natural elements: eucalyptus sprigs, rosemary tucked by the bread basket
- Accent details: brass tongs, wooden serving spoons, labeled tent cards
How To Recreate This Look:
- Start with a plaid runner down the sideboard; let it drape slightly for softness.
- Add height: place a cake stand at one end and a stack of books under a platter at the other.
- Layer amber candles in odd numbers; mix pillars and tea lights.
- Place platters where they’ll live—stuffing and potatoes at the front, sauces near the center, bread near the end.
- Style with mini pumpkins tucked near corners and a few herb sprigs for fragrance.
Why This Looks Expensive: Repetition of materials—amber glass and brass—makes it feel curated, while modest height variation adds a “styled by a pro” vibe. The cohesive warm palette reads polished in photos.
Watch Out: Don’t over-fragrance with scented candles near food. Keep wicks trimmed so you get glow, not smoke, and avoid placing flames under upper cabinets.
Pro Styling Tip: Angle one candle just behind the cranberry sauce—when you photograph from the side, the ruby shines like stained glass.
2. Copper-Handled Dessert Bar With Golden Light on the Kitchen Island
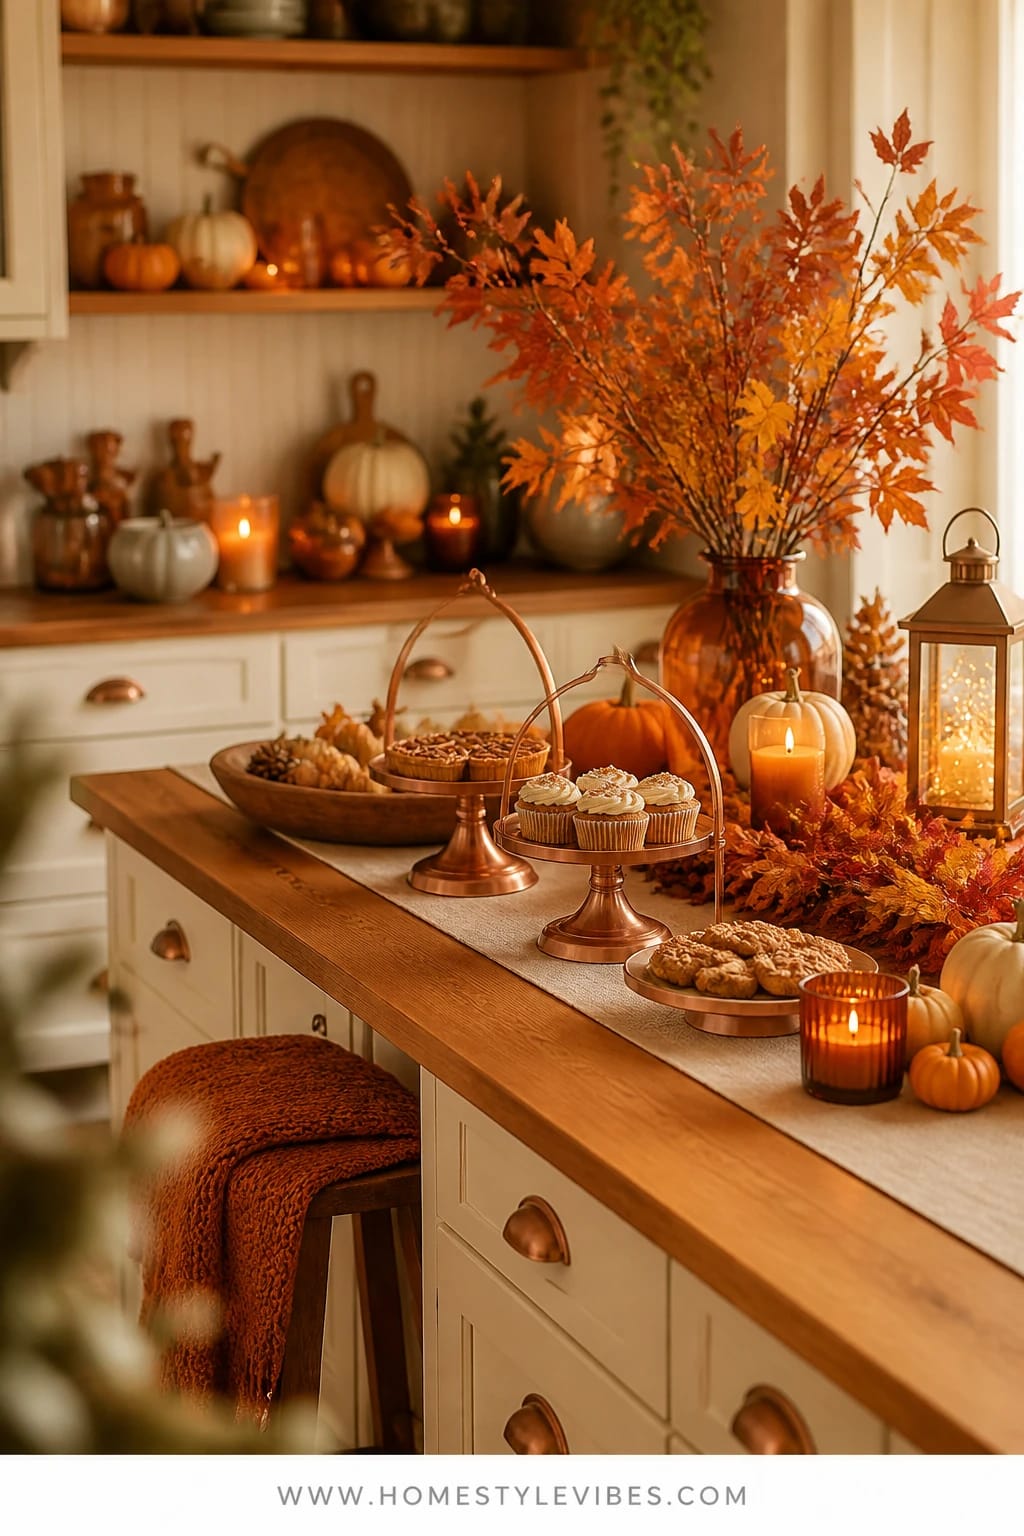
It’s that one spot that always gets mobbed: the dessert zone. You’ve tried stacking pies and it still looks chaotic, with crumbs everywhere and no room to cut. This setup transforms the kitchen island into a golden-lit dessert bar that feels like a patisserie moment—copper handles, caramel tones, a little sparkle, and clear cutting space so guests serve themselves without elbowing grandma.
The mood: cozy bright abundance with a hint of bakery charm. Why it works: most kitchens have the best evening light and easy clean-up surfaces. By corralling sweets on trays with copper handles and using footed stands for pie and cake, you create clear zones—cutting area, plating area, toppings area. Light the scene with a couple of warm-tone battery-operated lanterns or fairy lights in amber glass cloches for that gentle golden shimmer. Photographs thrive on shine: copper rims, glossy ganache, burnished pie crusts, all warmed by low, honeyed light.
Variations:
– Budget: thrift ceramic pie stands and spray paint a cheap tray “antique copper.”
– Small island: stack vertically—two-tier stand for cookies; keep pies at opposite ends to spread the crowd.
– Make-ahead: pre-slice one pie and leave the other whole for drama; cover slices with wax paper triangles for easy lifts.
Key Design Elements:
- Main seasonal props: copper-handled trays, footed pie stands, amber fairy lights in glass
- Color palette: caramel, toffee, cream, burgundy accents (cherries, cranberries)
- Lighting strategy: battery lanterns and warm LED strands to add glossy highlights
- Textiles: a runner of oatmeal linen or a wood board “runner” for crumb control
- Natural elements: cinnamon sticks in a jar, dried orange slices on twine
- Accents: small gold-tipped dessert forks, labeled pie markers
Budget Breakdown:
- Copper-handled trays: $25–$70 each
- Footed cake/pie stand: $20–$65
- LED fairy lights/lanterns: $12–$40
- Neutral runner or board: $0–$40
- Pie markers and small labels: $5–$15
Total Estimated Cost: $62 – $230
Best For: Open kitchens where guests naturally gather. Great for late afternoon to evening serving when the lights glow and dessert becomes an event.
How To Recreate This Look:
- Start by centering a neutral runner or wood board on the island to define the dessert zone.
- Add one tall footed stand toward the back, then a copper-handled tray to the front-left.
- Layer amber fairy lights inside a glass cloche or large hurricane and place to one side.
- Set pies and cakes at different heights; leave a clean cutting board space with a sharp knife.
- Style with small bowls of toppings (whipped cream, spiced nuts), and add labeled markers so guests know what’s nut-free or gluten-free.
Why This Feels Designer: The secret isn’t the number of desserts—it’s the staging. Elevation, metallic sheen, and a deliberate cutting zone make it look planned and polished.
One Thing To Avoid: Don’t over-crowd the island. If you have more than four desserts, create “waves”: bring out the next items after the first round clears. Visual breathing room looks editorial and keeps crumbs contained.
Pro Styling Tip: For photos, angle your camera to catch the copper tray edge and the fairy light reflection in a glass dome—it adds instant sparkle and depth.
Keep scrolling—Section 3 solves the “line jam” problem with a smart L-shaped flow that feels five-star hotel meets family kitchen.
3. Plaid-Layered L-Shape With Burgundy Accents on a Dining Table and Console
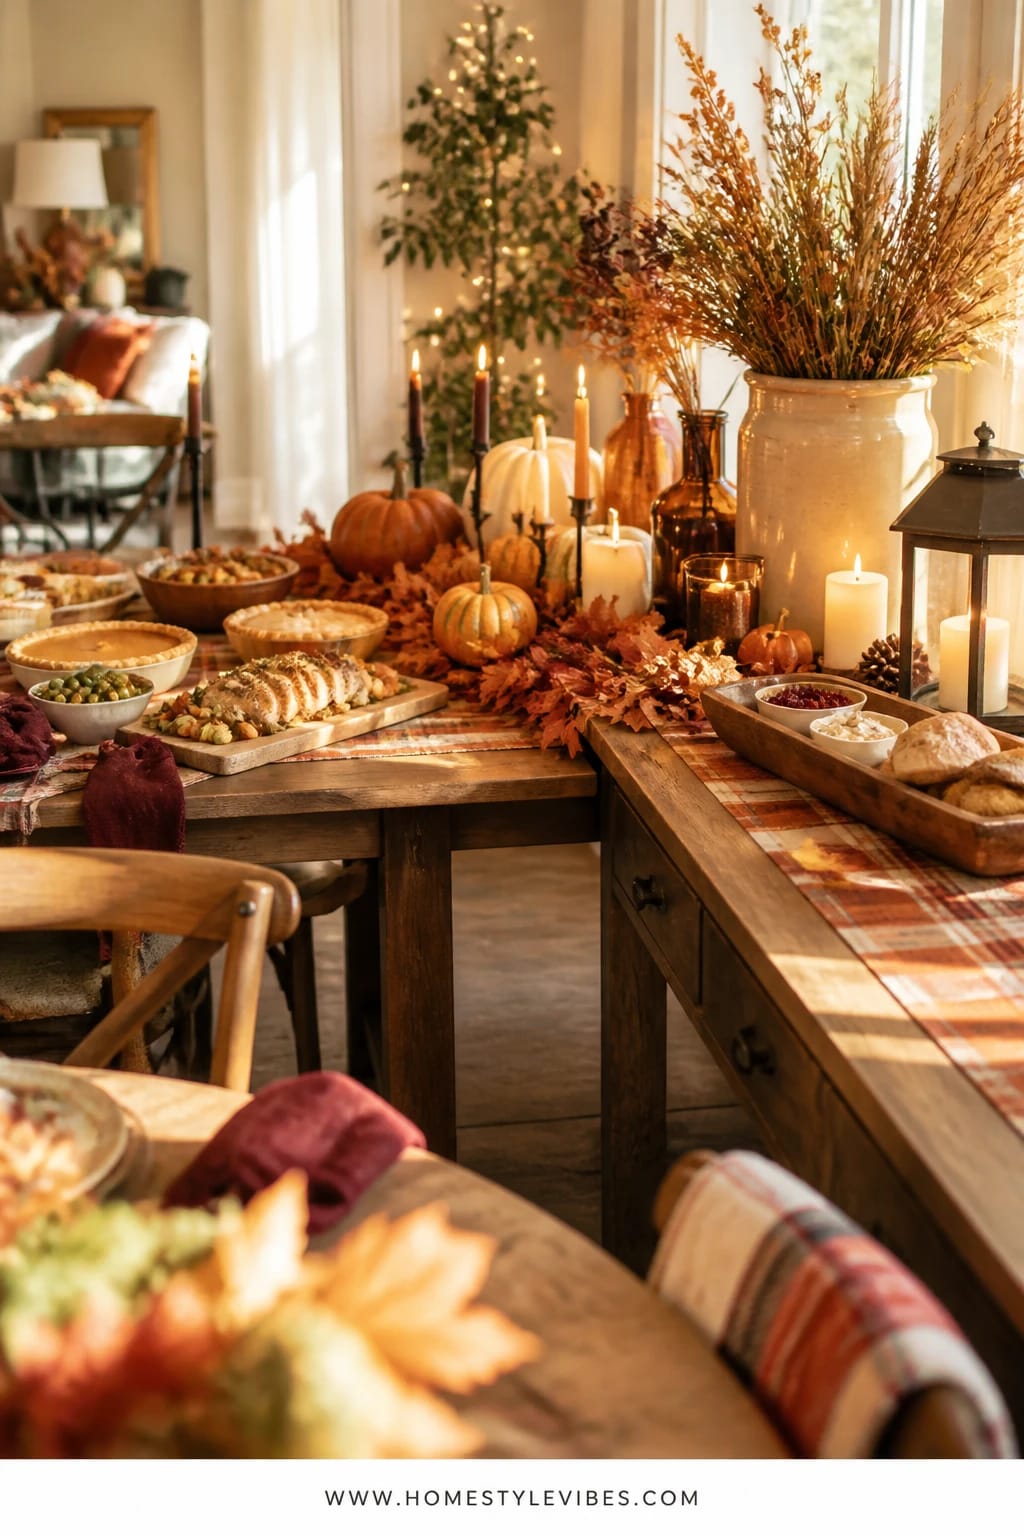
Big family, small serving surface? Lines that snake around the room and kids getting hangry? This L-shaped buffet layout uses your dining table plus a nearby console or bookcase to create a two-stop flow: mains and sides first, sauces and bread second. The look leans classic cozy bright: a plaid runner, burgundy napkins, warm wood boards, and simple candle glow guiding the path.
Here’s why it works: lines move faster when guests don’t need to double back for sauces. The L-shape gives you space to breathe and keeps the table from looking like a crowded cafeteria. Lighting the “corner” of the L with a cluster of tapers or a trio of glass votives quietly signals where to turn next. It photographs beautifully because you get a sweeping layered moment—plaid across the long table, a tuck of burgundy by the console, and the friendly punctuation of pumpkins at the bend.
Variations:
– Budget-friendly: use two long tea towels overlapped as a runner; borrow a neighbor’s folding table and cover with a throw blanket in complementary colors.
– Small rooms: create a soft L with the table and a bar cart instead of a full console.
– Make-ahead: bring out rolls and butter, gravy, and cranberry on the second leg 10 minutes after the mains hit—guests naturally flow over for round two.
Budget Breakdown:
- Plaid runner/tea towels: $10–$35
- Burgundy napkins: $12–$40 (set)
- Glass votives and unscented candles: $10–$25
- Assorted wood boards/platters: $0–$80 (use existing or thrift)
- Mini pumpkins/apples for the bend: $6–$15
Total Estimated Cost: $38 – $195
Best For: Family-style Thanksgiving with limited surface area. Great in dining rooms that connect to a living space or hallway for natural flow.
Key Design Elements:
- Main seasonal props: plaid runner, mini pumpkins, apples
- Color palette: burgundy, rust, wheat, warm wood
- Lighting strategy: a candle cluster at the “bend” to guide traffic
- Textile layers: linens under hot dishes, a throw blanket on the console if it’s not pretty
- Natural elements: a bowl of pomegranates, rosemary sprigs near butter dishes
- Accents: matte black serving tongs, labeled sauce spoons
How To Recreate This Look:
- Start with the dining table: lay a plaid runner and anchor with a big wooden board.
- Add the console or bar cart to the side to form an L; drape a neutral throw if the finish clashes.
- Layer main dishes on the table and condiments/bread on the console.
- Place a candle cluster at the corner and a bowl of apples or pumpkins beneath to draw the eye.
- Style with burgundy napkins tucked under serving bowls to preview the palette.
Why This Reads High-End: Intentional layout geometry. The L-shape feels like an event setup, not just “wherever it fits,” and the repeating burgundy notes tie both surfaces together like a visual ribbon.
The Most Common Mistake: Skipping labels. People hesitate and slow the line if they don’t know what a dish is. Simple tent cards keep the mood easy—and free up your voice for toasts instead of FAQs.
Pro Styling Tip: When shooting the spread, stand where the L opens and frame the corner candle cluster in the foreground to create depth and draw the viewer through the scene.
Remember, this isn’t about recreating a showroom. It’s about serving people you love in a way that actually works for your home. If one idea clicks, start there and ignore the rest until next year.
4. Harvest Garland Glow With Warm Brass on the Living Room Console
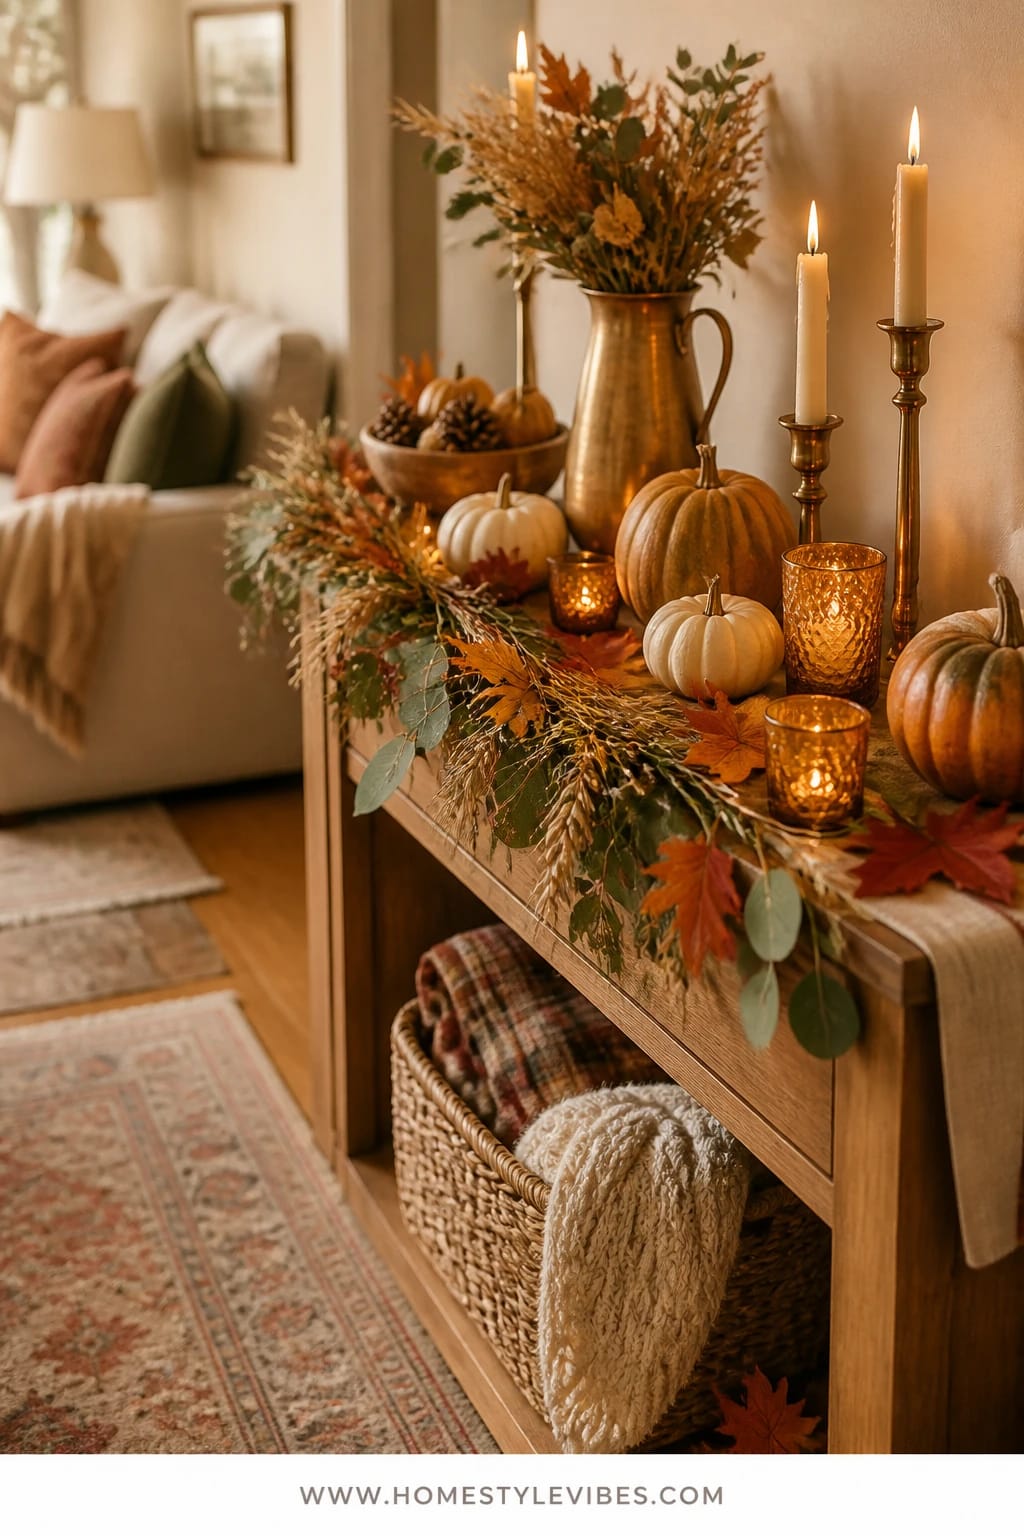
Some homes just don’t have a formal dining room, or it doubles as the kids’ art studio. Your living room console can step in as a stunning buffet for appetizers or a dedicated dessert landing strip. We’re talking a harvest garland—eucalyptus, faux maple, or dried wheat—layered with warm brass accents, votives, and a few real pumpkins for texture. The vibe: cozy bright autumn with that relaxed “help yourself” energy that keeps people mingling.
It works because it breaks free from the kitchen bottleneck. Guests can grab a slice of pumpkin loaf, drift to the sofa, and circle back for pecan bars. The garland is your secret styling backbone—it covers cords, frames platters, and adds that editorial fullness. Lighting is gentle: tea lights nestled in the garland and one or two taller candles flanking each end. Photography loves the garland’s soft edges and the golden pinpoints of light peeking through leaves.
Variations:
– Budget-friendly: mix a $12 faux eucalyptus strand with clippings from your backyard and one $5 string of micro-lights.
– Petite console: keep garland slim, use two cake stands instead of large platters, and serve bite-size bars over full pies.
– Make-ahead: stage empty stands in the morning, then set out desserts after dinner while the coffee brews.
Budget Breakdown:
- Faux harvest garland: $15–$60
- Micro-lights (warm white): $8–$18
- Tea light holders/votives: $10–$30
- Brass or brass-look accents (bowls, small trays): $15–$50
- Real pumpkins (small): $5–$15
Total Estimated Cost: $53 – $173
Best For: Open-concept living rooms with a long console or media cabinet. Perfect for a relaxed, grazing-style Thanksgiving where the main meal is seated but dessert lingers.
Key Design Elements:
- Main seasonal props: harvest garland, micro-lights, small pumpkins
- Color palette: warm green eucalyptus, rust, gold, creamy whites
- Lighting strategy: tea lights tucked into the garland for scattered glow
- Textile layers: linen runner under the garland for extra softness
- Natural elements: dried orange slices, cinnamon sticks
- Accents: brass bowls for truffles, wood boards for bread pudding squares
How To Recreate This Look:
- Start by placing a linen runner down the console; coil the garland loosely on top.
- Add micro-lights along the garland spine, keeping the battery pack hidden under a pumpkin.
- Layer two footed stands at opposite ends for symmetry and height.
- Place a row of small desserts down the center and larger platters at the edges.
- Style with tea lights nestled in safe, clear spots—no flame touching leaves.
Why This Looks Intentional: The garland acts like set design. It weaves everything together so even a random mix of plates looks like part of one story.
Don’t Do This: Avoid overly scented candles or garland sprays near edible items. Keep flames away from faux greenery—use LED tea lights inside the garland and real candles only on bare surfaces.
Pro Styling Tip: For photos, slightly angle the footed stand at one end and shoot from a low side angle so the garland swoops across the frame like a ribbon.
5. Warm Wood and Plaid on a Rolling Bar Cart by the Window
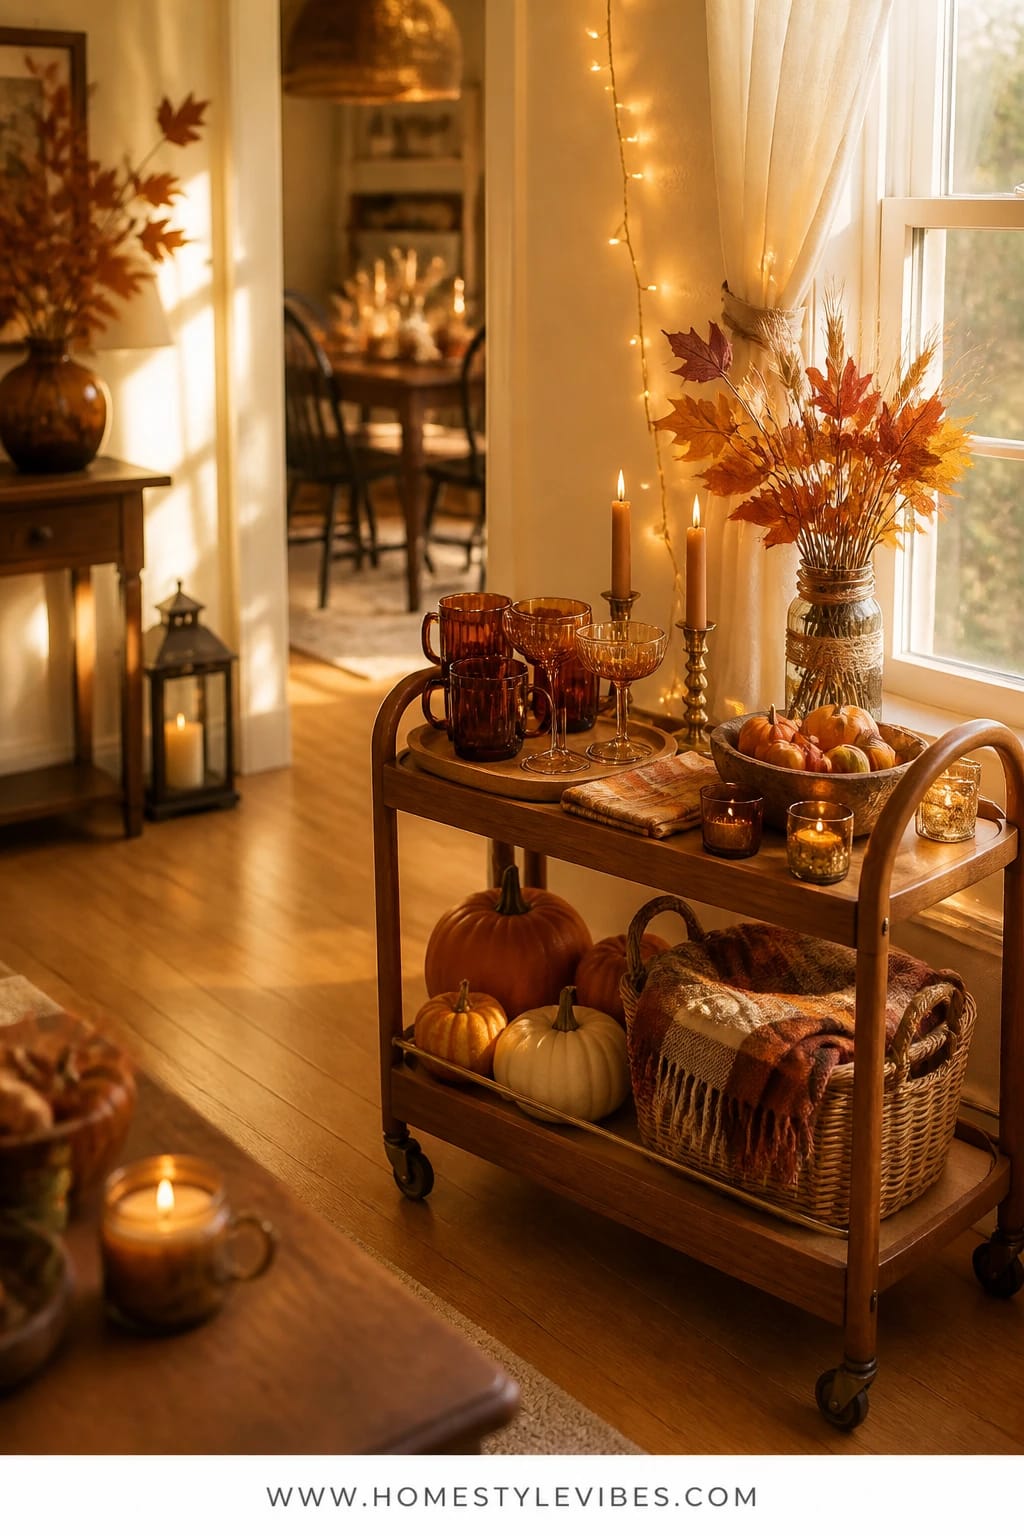
Ever notice how dessert plates and coffee mugs start to colonize the kitchen counter? A rolling bar cart becomes your mobile dessert-and-coffee station that glows near a window by day and feels inviting by night. The look is classic cozy bright: warm wood trays, plaid napkins, amber mugs or coupe glasses for cider, and a cluster of votives for sparkle. It’s practical and photogenic without hogging precious counter space.
Real-home win: you can park the cart where the natural light hits in the afternoon (hello, gorgeous pie crust), then roll it closer to the seating area after dinner. I tried this last October and honestly couldn’t believe the difference in flow—people naturally paused, grabbed dessert, and never clogged the sink area. Use a top-bunk/bottom-bunk mindset: pies and tarts up top for “show,” plates, forks, napkins, sauces, and coffee fixings on the lower shelf.
Variations:
– Budget: use a thrifted cart or even a sturdy side table on sliders; add a plaid scarf as a makeshift runner.
– Small space: dedicate the cart solely to drinks (mulled cider, decaf coffee) and leave desserts on the counter for a split station that reduces crowding.
– Make-ahead: prefill a thermos with hot cider and set small cinnamon sticks in a tumbler so guests can grab and stir.
Budget Breakdown:
- Bar cart: $70–$300 (or use a side table you own)
- Wood trays: $15–$45
- Plaids (napkins or scarf runner): $12–$35
- Amber glass mugs or coupes: $18–$60 (set)
- Votives/LED tea lights: $10–$25
Total Estimated Cost: $127 – $465
Best For: Homes where the kitchen is small and the living area is the hangout zone. Great for early-bird bakers who want to set up in the afternoon light and roll in later.
Key Design Elements:
- Main seasonal props: bar cart, warm wood trays, plaid textiles
- Color palette: rust, deep gold, cream, rich wood
- Lighting strategy: window light by day, votives at dusk
- Textiles: plaid napkins, knit coaster set, a small wool throw hung on the side
- Natural elements: dried apple slices, cloves for garnish
- Accents: a small framed “Sweet Things” sign, gold dessert forks in a tumbler
How To Recreate This Look:
- Start with your cart near a window and lay a plaid napkin or scarf on the top shelf.
- Add a wooden tray to corral pie or tarts; keep plates stacked to one side.
- Layer amber mugs or glasses on the lower shelf with napkins and cutlery.
- Place a small cluster of votives on the top back corner to warm the scene.
- Style with a jar of cinnamon sticks and a small dish of orange peel twists.
Why This Looks Expensive: Everything is contained and portable. The consistent material choices—wood, amber, plaid—read as a styled mini vignette, not a leftover landing zone.
Watch Out: Keep hot carafes on the lower shelf to avoid accidental bumps. If kids are around, park the cart and lock the wheels.
Pro Styling Tip: Tuck one whole pomegranate on the top shelf for a pop of saturated color that photographs beautifully against wood grain.
Pause and breathe. You don’t need to chase every idea. Pick the one that solves your biggest pain point—crowding, lighting, or layout—and let that be enough this year. Progress over perfection.
6. Maple-Syrup Tones With Candle Clusters on a Breakfast Nook Table
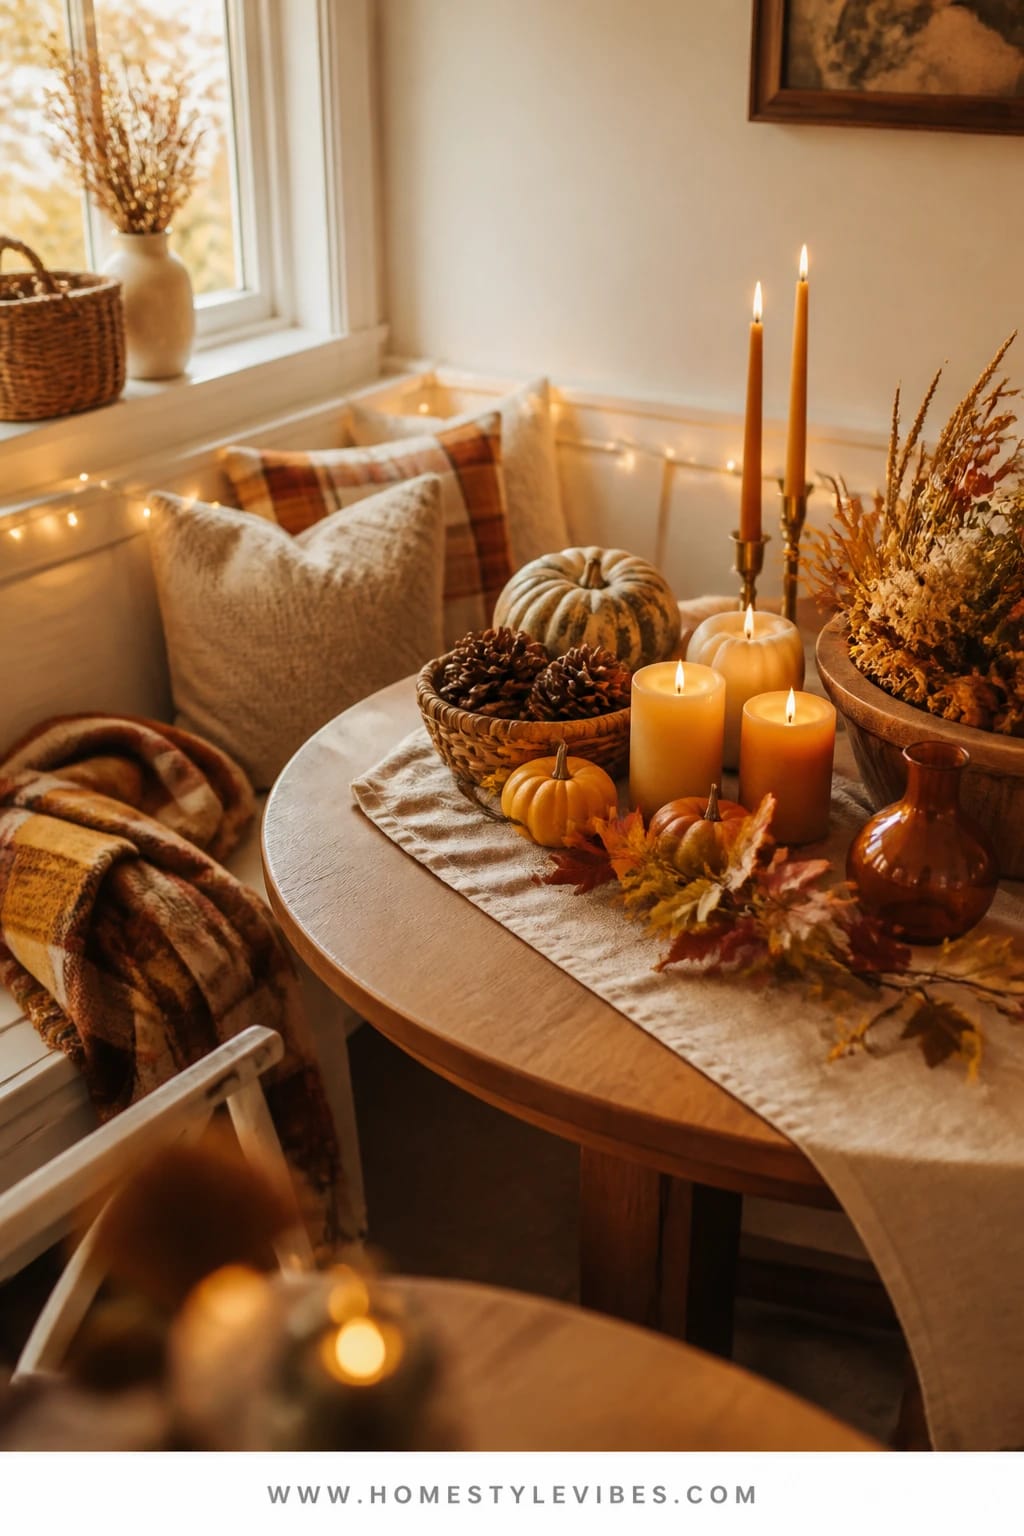
Maybe you’re cooking in a whirlwind and the dining room is maxed out. The breakfast nook—often overlooked—can hold a charming dessert buffet with a maple-syrup palette: tawny woods, butterscotch linens, caramel glass, and soft candle clusters. It’s intimate, sweet, and out of the traffic pattern so you can refill plates without weaving through cousins and casserole carriers.
This setup thrives on gentle, low lighting—think a trio of different-height pillar candles and one tapered pair at the back, plus the soft gleam of a brass bowl filled with clementines or pears. Use layered textiles for that cafe coziness: a neutral tablecloth plus a narrow runner, then place a couple of cake stands and a shallow wooden bowl for cookies or biscotti. Photos love this one because the warm tones unify everything, and the candle clusters add bokeh-like sparkle in the background.
Variations:
– Budget: use mismatched plates and unify them with linen napkins in a warm wheat color.
– Small table: serve one “hero” dessert—like a tall pumpkin cheesecake—and surround it with bite-size sides.
– Make-ahead: set the entire tablescape the day before, then add desserts 20 minutes before serving; the glow distracts from any cracks in a pie crust (been there).
Budget Breakdown:
- Neutral tablecloth and runner: $25–$60
- Candle cluster set (pillars + tapers): $15–$45
- Brass bowl or platter: $20–$80
- Cake stands (2): $30–$90
- Decor fruit (clementines/pears): $6–$12
Total Estimated Cost: $96 – $287
Best For: Homes with a cozy eat-in kitchen or bay-window nook. Great if you love a slow, cafe-style dessert moment with coffee refills and second slices.
Key Design Elements:
- Main seasonal props: pillar and taper candles, brass bowl, wooden cake stands
- Color palette: maple, butterscotch, cinnamon, soft cream
- Lighting strategy: candle clusters for intimate warmth, overhead dimmed
- Textiles: linen tablecloth, narrow runner, cotton napkins in wheat
- Natural elements: pears, clementines, or a few sprigs of thyme
- Accents: small spoon rests for serving utensils, ceramic ramekins for sauces
How To Recreate This Look:
- Start with a neutral tablecloth and add a narrow runner down the center.
- Add two cake stands of different heights, one slightly off-center.
- Layer candle clusters: three pillars grouped on one side, two tapers on the other.
- Place a brass bowl of fruit near the front for color and easy snacking.
- Style with small ramekins for caramel or whipped cream and a clean stack of dessert plates.
Why This Feels Designer: Tone-on-tone warmth. The maple-butter palette looks cohesive and elevated, even with simple store-bought desserts dressed on pretty stands.
One Thing To Avoid: Don’t mix too many patterns in a small nook. Let texture and warm solids do the heavy lifting so the table doesn’t feel busy.
Pro Styling Tip: Position one candle behind a translucent jam jar; when photographed, the light glows through like stained glass and makes even simple pound cake look luxe.
True story: a friend of mine bought three different garlands before realizing the “off” feeling wasn’t the greenery—it was the lighting. Once she swapped a cool overhead bulb for a warm, dimmable one and used two clusters of tea lights, her buffet suddenly felt like a fall magazine spread. The secret wasn’t more decor; it was better glow.
Quick Checklist
- Pick one surface: sideboard, island, console, bar cart, or breakfast nook table
- Choose a warm palette: rust, burgundy, gold, cream, warm wood
- Add height: footed stands, cake pedestals, stacked books
- Layer textiles: runner + napkins + a tucked tea towel under hot dishes
- Create zones: mains first, sauces later; or desserts up top, toppings below
- Cluster candles: pillars or LED for safe glow around food
- Repeat materials: brass, amber glass, wood for a curated look
- Label dishes: small tent cards for allergens and clarity
- Use garland or greenery: to connect pieces and hide cords
- Leave negative space: don’t overcrowd—stage in waves
- Corral crumbs: wood boards or a runner that’s easy to shake outside
- Photograph smart: backlight cranberry sauce, angle stands, capture the glow
Frequently Asked Questions
How do I keep costs down while still getting a rich, cozy buffet look?
Repeat low-cost materials for cohesion: amber tea lights, thrifted brass-look candlesticks, and wood cutting boards you already own. Thrift pie stands or stack plates on inverted bowls for height, and use produce—apples, pears, mini pumpkins—as affordable decor that you’ll actually eat later.
Real or faux pumpkins and florals—what’s better for a Thanksgiving buffet?
For serving surfaces, I prefer real pumpkins and herbs because they sit near food. Faux can look great in garlands or around a console, but keep anything scented or glittery away from dishes. If you go faux, tuck in fresh rosemary or eucalyptus for a hint of real texture and fragrance.
I have a tiny kitchen island. Where do desserts go?
Split the station. Keep the island for cutting space and one hero dessert, then roll in a bar cart or use a living room console for the rest. Two smaller clusters photograph better and reduce crowding more than one overloaded surface.
How do I store all this seasonal stuff after Thanksgiving?
Choose collapsible items: foldable runners, stackable stands, and universal pieces like wood boards and brass trays that you’ll use year-round. Store candles in zip bags by color and height, keep a labeled shoebox for “Fall Buffet,” and donate anything you didn’t touch this year.
Are candles safe around kids and pets on a buffet?
Use unscented pillars away from edges and keep wicks trimmed. In busy areas or near faux garland, switch to LED tea lights and battery lanterns. You still get the cozy glow without worry, especially on low carts or tables.
When should I start decorating the buffet and dessert table?
Stage the surfaces the day before: lay runners, place stands, and set empty platters with sticky-note labels. On the day, you’ll just add food, light candles, and cue the caramel sauce. It’s the difference between panic and “pass the pie, please.”
Final Notes
Pick one of these Thanksgiving buffet and dessert table ideas and start with what you already own. Borrow a stand, thrift a brass candlestick, toss a plaid scarf down as a runner, and cluster a few candles for that warm amber glow. You don’t need a mountain of decor—you need a clear plan, cozy lighting, and a few layered textures that say harvest abundance.
The truth is, effortless hosting isn’t about having ten desserts or the perfect pie crust. It’s about flow, warmth, and color: a saturated cranberry beside brass, a slice of pumpkin pie under candlelight, a plaid runner that quietly ties it all together. Let the cozy bright autumn language—glow, wood, plaid, pumpkins—do the heavy lifting while you focus on the people in the room. You’ve got this. Light the candles, cue the cinnamon, and make the sweetest kind of mess: crumbs and conversations that linger long after the plates are cleared.

About the Author

Krisztina P.Rendes, Founder of Home Style Vibes
Founder of Home Style Vibes
Krisztina Puskásné Rendes created Home Style Vibes as a cozy-modern lifestyle space where homemaking meets inspiration. Her goal is to help women create beautiful, organized, and peaceful homes they truly love — without overwhelm. You’ll find here heart-driven content on home decor, cleaning tips, easy family recipes, organization and decluttering, DIY home projects, plants, and seasonal ideas — all designed to bring more calm, comfort, and style into everyday life.