6 Fall Front Door Decor Ideas That Create The Most Welcoming Entrance
You want that golden-hour, candlelit fall welcome that makes neighbors linger and delivery drivers smile. You hate that your front door still looks like July with a wreath that’s seen better days and a lonely pumpkin melting into the porch boards. You picture glowing lanterns, layered plaid, mums bursting with color, and a doorframe hugged by leaf garland… but the how keeps stalling you. These 6 fall front door decor ideas fix the exact pain points—cluttered steps, awkward scale, sad lighting—so you get a cozy, abundant entrance that photographs beautifully and actually works for real life. Pick one concept and you can pull it together in a weekend for under $250, then keep layering through Thanksgiving.
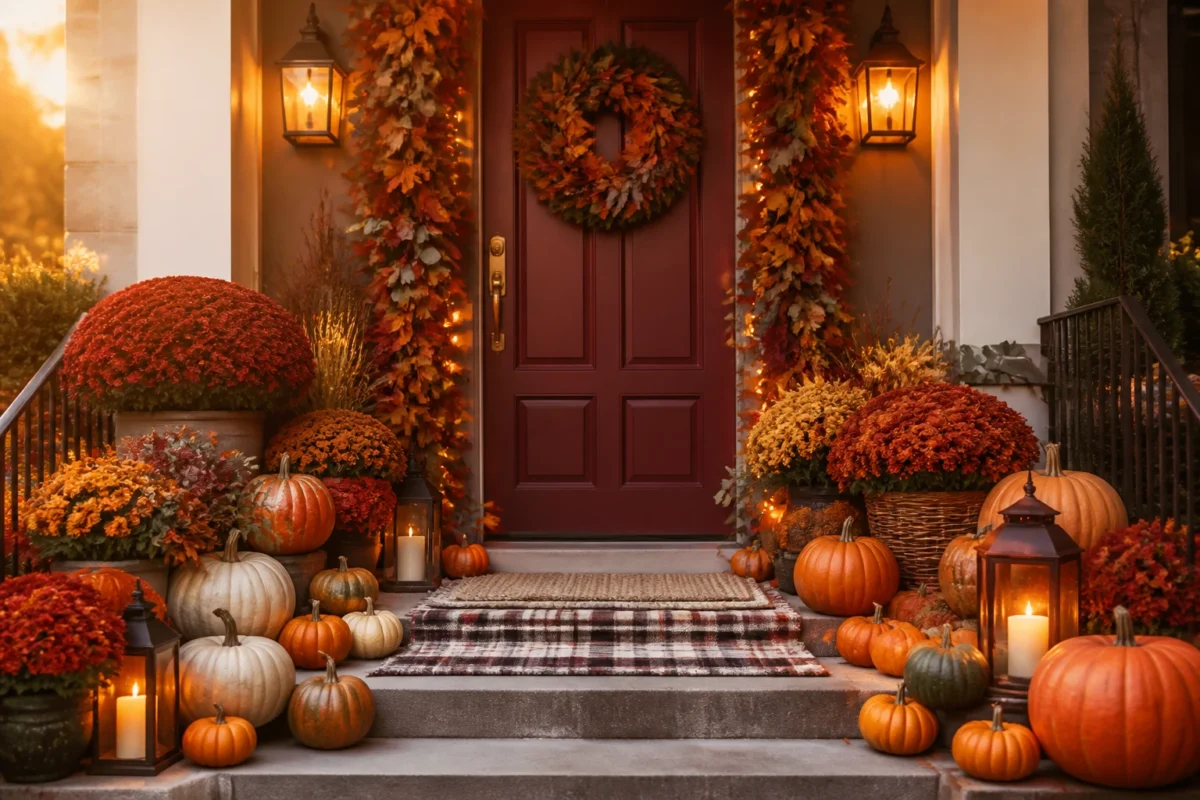
Expect warm rust and burgundy, chunky textures, real and faux pumpkins that play nicely, and lighting that makes everything feel like it’s bathed in cinnamon and amber. These are highly photogenic, Pinterest-friendly looks made for small porches and busy schedules. If your vibe is “cozy farmhouse meets city stoop,” “I like abundance without chaos,” or “I need color that doesn’t feel loud,” you’re in the right place.
1. Pumpkin-Lined Porch Steps With Amber Lanterns And Leaf Garland
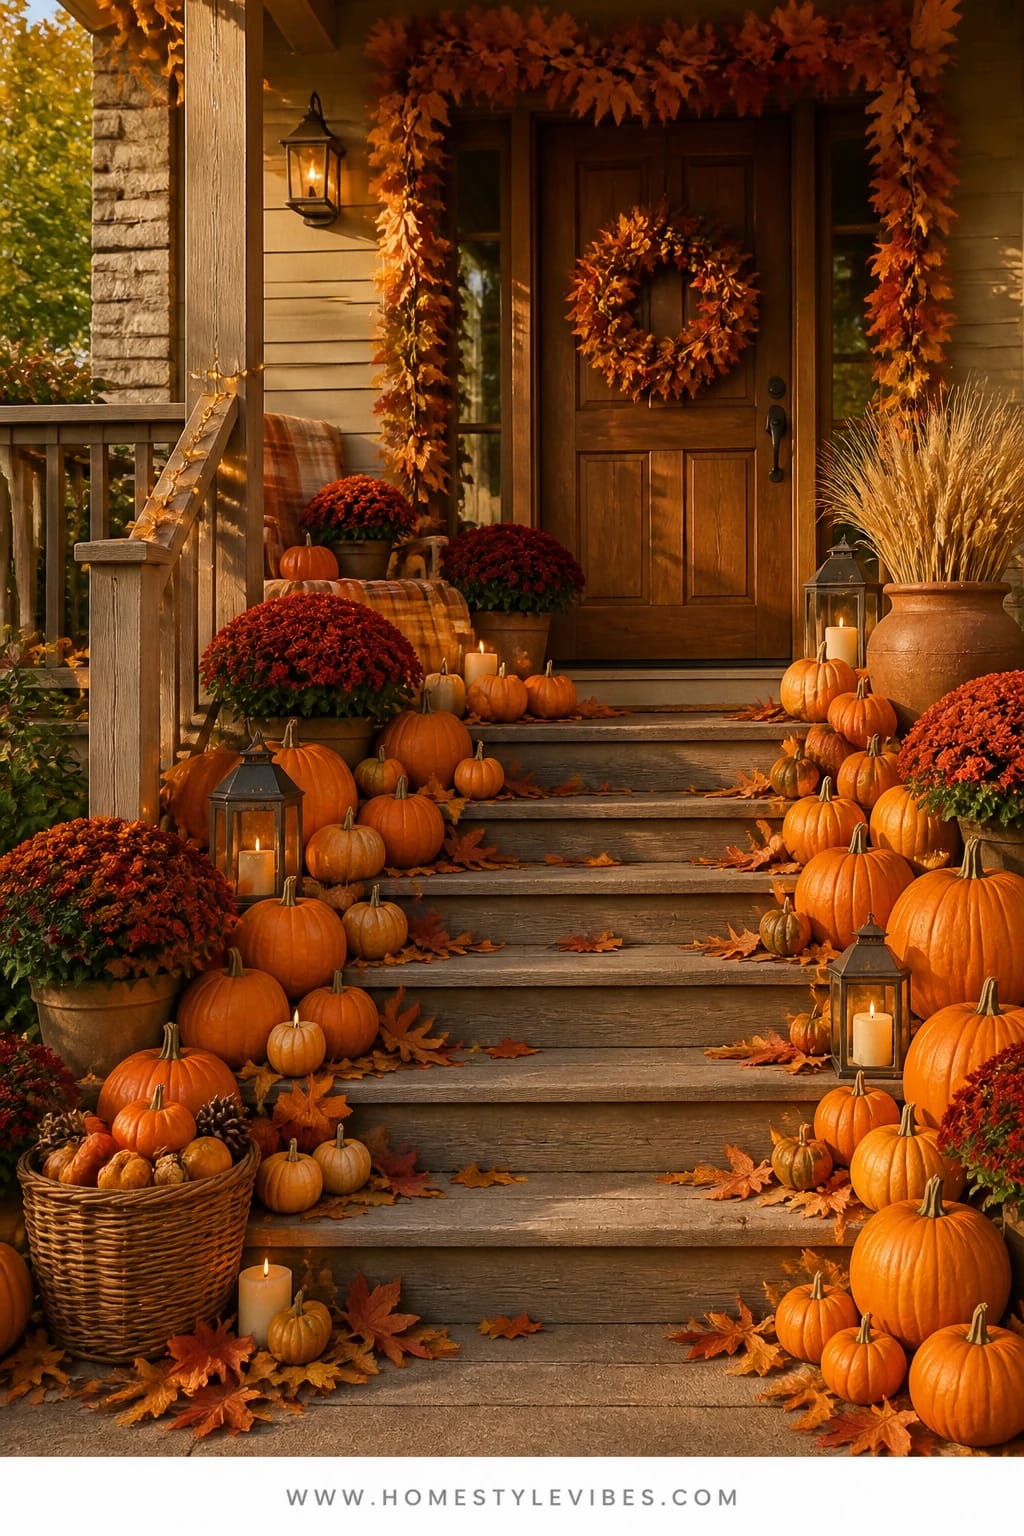
We’ve all been there: you set out a couple pumpkins and a lantern, step back, and it still looks… lonely. The scale falls flat, the steps don’t feel layered, and the doorway doesn’t read as a destination. This idea builds a generous, pumpkin-lined path to your door, then frames the entrance with a warm leaf garland and the candlelit glow of amber lanterns. The mood? Harvest-market charm meets cozy cabin welcome—inviting at a glance, even better up close.
Here’s why it works at real houses: stairs naturally create height layers. When you line the treads with varied pumpkin sizes (think tall heirlooms, stubby cinderellas, and a few baby whites), the composition has instant depth without complicated styling. Amber lanterns at the base and top step establish a triangle of warm light, which pulls the eye straight to the door. The leaf garland draped around the frame fills negative space so your wreath doesn’t have to work overtime. Bonus: it’s easy to sweep around and kid-friendly if you use battery candles.
Materials make the magic. Choose real pumpkins for saturated, matte color and that perfectly imperfect texture; mix in two or three faux options to carry you to mid-November without the “half-deflated by week three” slump. Amber glass lanterns deliver a rich, old-world glow. Copper or brass handles on lanterns add subtle shine. The garland should have movement—layers of russet, ochre, and mossy green leaves with tiny acorns or pinecones woven in. Photographs love this combo: layered steps create foreground and mid-ground, lantern flames add bokeh, and the garland frames the shot like a vignette.
Variations you’ll actually use:
- Budget-friendly: Use mostly faux pumpkins picked up on end-of-season clearance and wrap stair edges with a single high-quality garland split into two sections.
- Small-space stoop: Cluster 3 pumpkins of increasing size on one side, 1 lantern on the other, and a half-garland swagged over the top of the door.
- Neutral palette: Stick to white, sage, and pale peach pumpkins with a eucalyptus-forward garland and black metal lanterns.
- Renter-friendly: Command hooks on the trim for the garland, and stick-on felt pads under lanterns to protect paint or stone.
Budget Breakdown:
- Real pumpkins (6–10 mixed sizes): $30–$70
- Faux pumpkins (2–3 heirloom styles): $24–$60
- Amber glass lanterns (2–4): $40–$120
- Battery flameless candles (pack of 4): $18–$35
- Leaf garland (1–2 strands, quality faux): $25–$80
- Command hooks and outdoor-safe ties: $8–$15
Total Estimated Cost: $145 – $380
Best For: Homes with at least two steps and a visible doorframe; anyone who wants a showy but simple welcome that lasts from early October through Thanksgiving.
Key Design Elements:
- Main seasonal props: Mixed real and faux pumpkins, amber lanterns, leaf garland
- Color palette: Rust, ochre, moss, cream, touches of copper
- Lighting strategy: Triangular placement of lanterns to lead the eye
- Textile layers: Optional plaid stair runner or doormat stack
- Natural elements: Acorns, twigs, mini gourds tucked along edges
- Accent details: Copper-handled lanterns, aged pots as pumpkin risers
How To Recreate This Look:
- Start with a clean slate: sweep steps and wipe the door; stack two doormats (a coir base with a plaid rug underneath).
- Add structure: place one lantern on the bottom step and one near the door handle side.
- Layer pumpkins by size: largest on the bottom step corners, medium on middle steps, smalls near the door.
- Drape the leaf garland around the doorframe, anchoring at top corners and midpoint.
- Style with micro accents: tuck mini gourds and pinecones between pumpkins; set candles to a warm, flicker mode.
Why This Looks Intentional: The stepped scale. You’ve created a pathway with a clear rhythm: big-to-small, dark-to-light, low-to-high. The garland frames the story, and the lanterns punctuate it like bookends. It reads thoughtfully composed, not thrown together.
Watch Out: Don’t crowd the tread where people actually walk. Leave at least 10–12 inches of clear depth on each step so guests don’t brush pumpkins with their ankles and send them tumbling.
Pro Styling Tip: For photos, angle one lantern slightly toward the camera and dim the others—this gives you a hero glow and keeps the rest from blowing out.
2. Rust Plaid Entryway Console With Candlelit Warmth And Pinecones
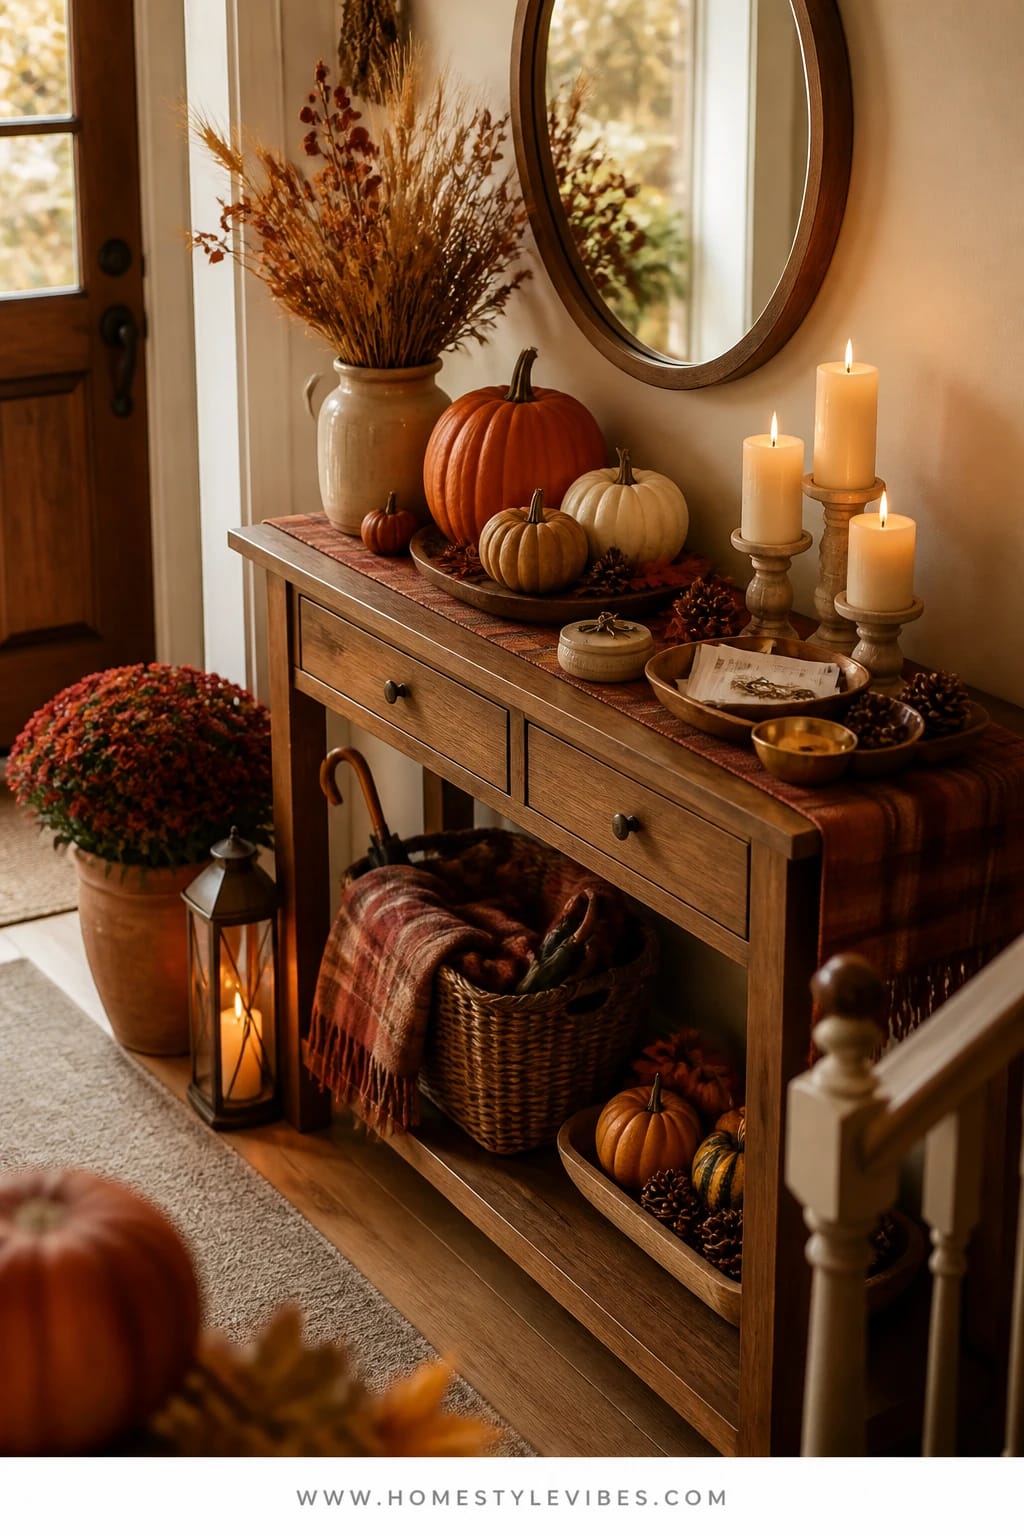
It’s that one corner that always feels off: the console table by the door that collects keys, mail, and the odd soccer shin guard. You’ve tried a wreath above it and a bowl, but it still feels like a catchall. This setup transforms your entryway console into a rust plaid moment with candlelit warmth and woodsy pinecones, so the first few steps inside feel intentional and seasonal without sacrificing function.
The mood leans “cabin in the city.” Think chunky woven basket for umbrellas, a rust plaid runner grounded by a dark-stained console, and a couple clusters of creamy pillar candles in hurricane vases that protect the flames from drafts. Pinecones add that papery rustle when you move them and photograph like little stars—great texture without any watering schedule. It’s family-friendly, renter-friendly, and easy to pack up in one bin in November.
Lighting here does the heavy lifting. Candlelight bouncing off a mirror above the console doubles the glow, and a small amber glass table lamp adds a steady, low-level warmth at dusk. When I tried this on my own entry last October, I swapped a bright white bulb for a 2200K “vintage” LED and couldn’t believe how much cozier the hallway felt. Warm light transforms rust plaid from loud to luxe.
To photograph beautifully, keep layers shallow but varied: lamp height, candle cluster at mid-level, low pinecone tray. Then punch in with your phone from waist height to capture that warm saturation and height variation. Two versions to love:
- Budget-friendly: Thrift a frame, print a toned fall landscape (sepia works), and lean it behind the lamp to fake a collected feel.
- Neutral take: Swap rust plaid for cream-and-charcoal buffalo check, keep the pinecones, and add eucalyptus sprigs for a cool tone.
- Small console: Use a narrow folded scarf as the runner and one hurricane with a chunky candle; tuck mail in a lidded basket.
- Long season: Start with pinecones and plaid in September, add a mini ceramic pumpkin in October, swap to brass bells in late November.
Budget Breakdown:
- Rust plaid runner or scarf: $18–$45
- Amber glass table lamp or vintage-style bulb: $20–$60
- Hurricane vases (2) + unscented pillar candles: $25–$55
- Pinecones (bag) or foraged: $0–$12
- Basket for mail/keys: $12–$35
- Mirror or thrifted frame: $0–$60
Total Estimated Cost: $75 – $257
Best For: Small entryways that need order and warmth; families who need surfaces that function day-to-day but look good with zero fuss.
Key Design Elements:
- Main seasonal props: Plaid runner, pinecone tray, pillar candles
- Color palette: Rust, warm cream, espresso wood, soft gold
- Lighting strategy: One warm lamp + candle cluster reflected in mirror
- Textile layers: Plaid runner or scarf, woven catchall basket
- Natural elements: Pinecones, a clip of dried wheat or seed pods
- Accent details: Amber glass, aged brass picture frame
How To Recreate This Look:
- Start with the runner or folded scarf to set color and texture.
- Add your lamp on one side and place a mirror or frame behind it.
- Layer two hurricanes with pillar candles at the opposite end.
- Place a shallow tray in the center, fill with pinecones, and tuck a few wheat stems in.
- Style with a lidded basket for keys and a small ceramic pumpkin in October.
Why This Feels Designer: It’s the mixed heights and the way warm light bounces through amber glass. Everything earns its spot, and nothing is too big. Symmetry-adjacent (lamp one side, candles the other) feels collected, not staged.
One Thing To Avoid: Over-scenting. If you’ve got a candle, skip the strong diffuser. Competing fragrances at the doorway can feel cloying and read “gift shop” instead of “home.”
Pro Styling Tip: Lower your lamp shade to eye level when standing in the entry—no bulb glare in photos, just a soft halo on the wall.
Remember, this isn’t about recreating a showroom. It’s about crafting a welcome that actually works with your habits. If one idea sings, start there and let the rest wait—cozy happens in layers, not all at once.
3. Golden Wreath And String Lights Around A Craftsman Door
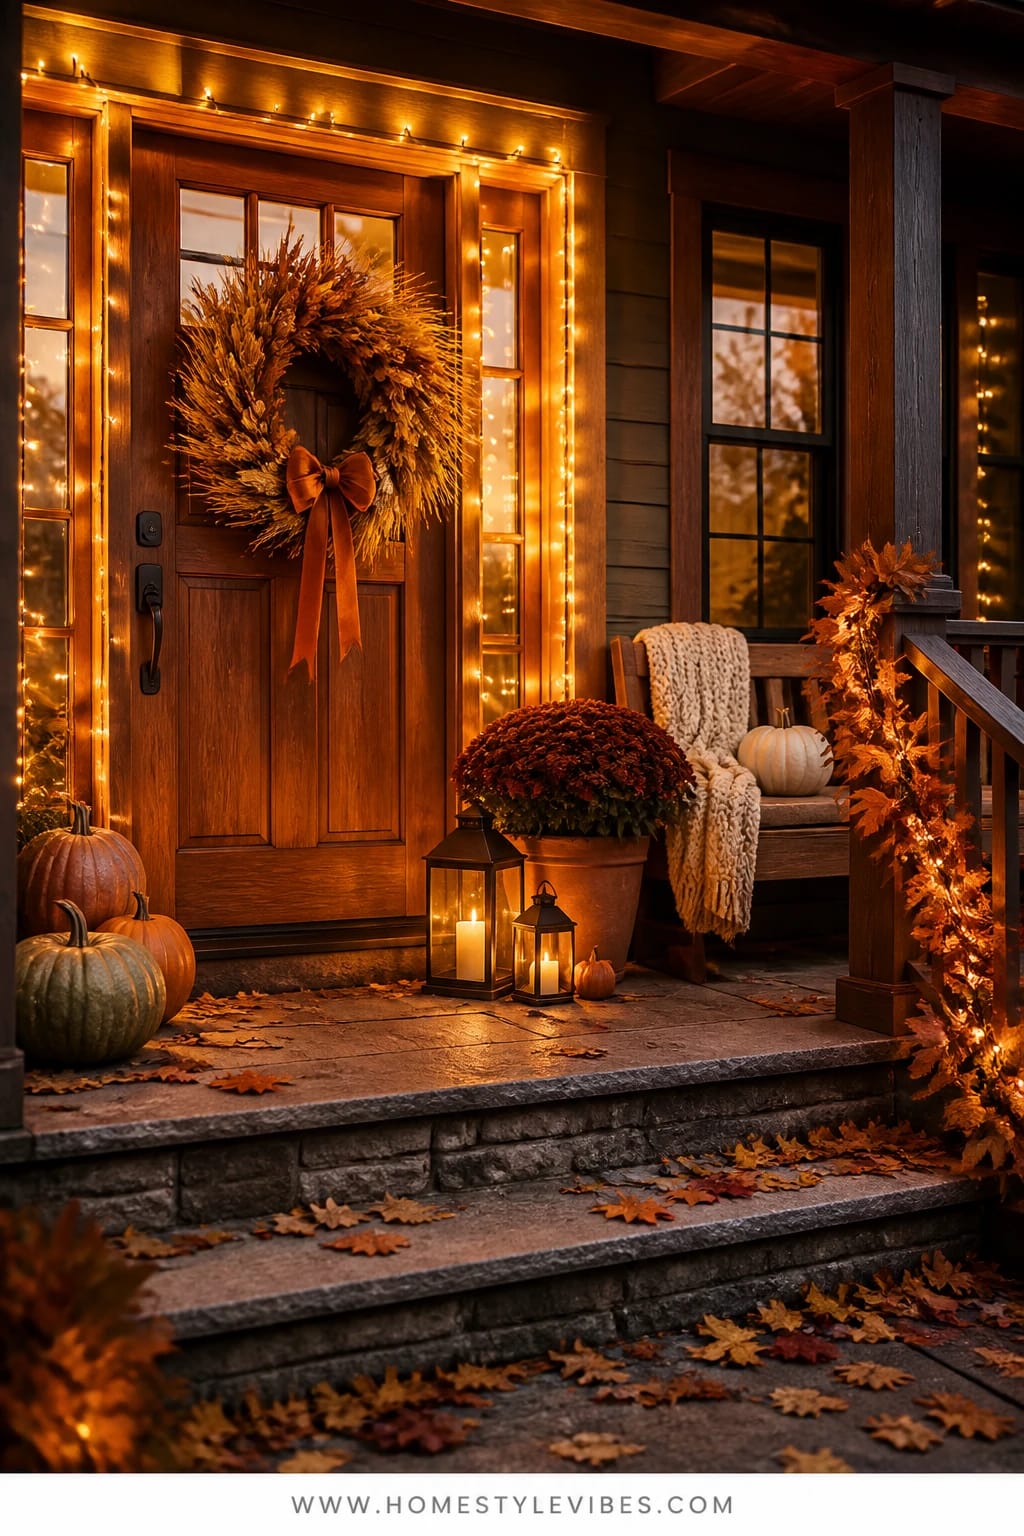
You want that cinematic glow at night, but you’ve been burned by a sad, cool-white string of lights that makes your door look like a gas station. This concept marries a lush, golden wreath with warm string lights tracing the Craftsman trim. The result feels like your doorway is lit by the last ten minutes of sunset every evening—without touching the porch sconce.
It works in real life because the lights serve as a dimmable frame you can put on a timer. Choose a wreath with depth—think dried wheat, mini preserved leaves, and a low-sheen ribbon—then let the string lights halo the trim or transom. Craftsman details really shine under warm light; the shadows deepen those lovely lines, and the glow pools right at the threshold. Family-friendly and renter-safe if you use clear removable hooks under the trim lip.
Materials that matter: incandescent-look LED string lights in 2200–2400K with brown or black wire that disappears at dusk, a wreath in golden tans with a few burnt orange notes, and one long velvet ribbon tail for movement. For photos, the wreath’s texture catches tiny highlights, and the lights give dreamy orbs. If your porch has a bench or planter, keep it simple: one terracotta pot with a golden mum to echo the wreath.
Variations:
- Budget option: A basic grapevine wreath + a bundle of dried wheat stems inserted around the circle, then a ribbon. Hang with a command hook.
- Modern neutral: Swap the ribbon for a leather strap, use micro fairy lights with a very warm tone, skip mums for olive branches in a pot.
- Small facade: Run the lights only along the top trim and a foot down each side—less is more on narrow doors.
- Late-season shift: In November, tie in a few burgundy leaves and a small bell cluster without redoing the whole wreath.
Budget Breakdown:
- Golden-toned wreath (store-bought or DIY): $28–$120
- Warm LED string lights (indoor/outdoor, 50–100 ft): $18–$45
- Clear removable hooks and light clips: $10–$18
- Velvet or grosgrain ribbon: $6–$16
- Terracotta pot + golden mum: $15–$35
Total Estimated Cost: $77 – $234
Best For: Porches with pretty trim that deserve attention; anyone craving nighttime curb appeal that doesn’t scream holiday too early.
Key Design Elements:
- Main seasonal props: Golden wreath, warm string lights, single mum in terracotta
- Color palette: Golden straw, burnt orange ribbon, earthy terracotta
- Lighting strategy: Perimeter framing with very warm LEDs on a timer
- Textile layers: Velvet ribbon tail for movement
- Natural elements: Dried wheat, preserved leaves
- Accent details: Leather strap or brass bell tuck-in for November
Why This Reads High-End: The restraint. You chose one hero (the wreath) and one supporting star (the glow). Everything else steps back. High-end styling often means fewer, better pieces and strong lighting control.
How To Recreate This Look:
- Start by hanging the wreath at eye level with a command hook or over-door hanger.
- Add the ribbon or leather strap; let one tail hang lower for asymmetry.
- Run string lights along the doorframe: anchor at the top center, then work outwards and down.
- Hide the plug in a pot or behind trim; use a timer for dusk-to-bedtime.
- Place one terracotta pot with a golden mum on the latch side for a visual counterweight.
The Most Common Mistake: Using cool white lights or bright bulbs in the porch sconce that fight the warmth. Keep everything in the golden family so the look stays cohesive.
Pro Styling Tip: Shoot close-ups at twilight, when the sky is blue and the lights are warm—you’ll get that cinematic contrast that makes the wreath sing.
If one detail keeps tripping you up—scale, color, lighting—solve just that piece before buying more. One thoughtful fix usually unlocks the whole look.
4. Burgundy Mum Planters And Pumpkins Framing A Farmhouse Bench
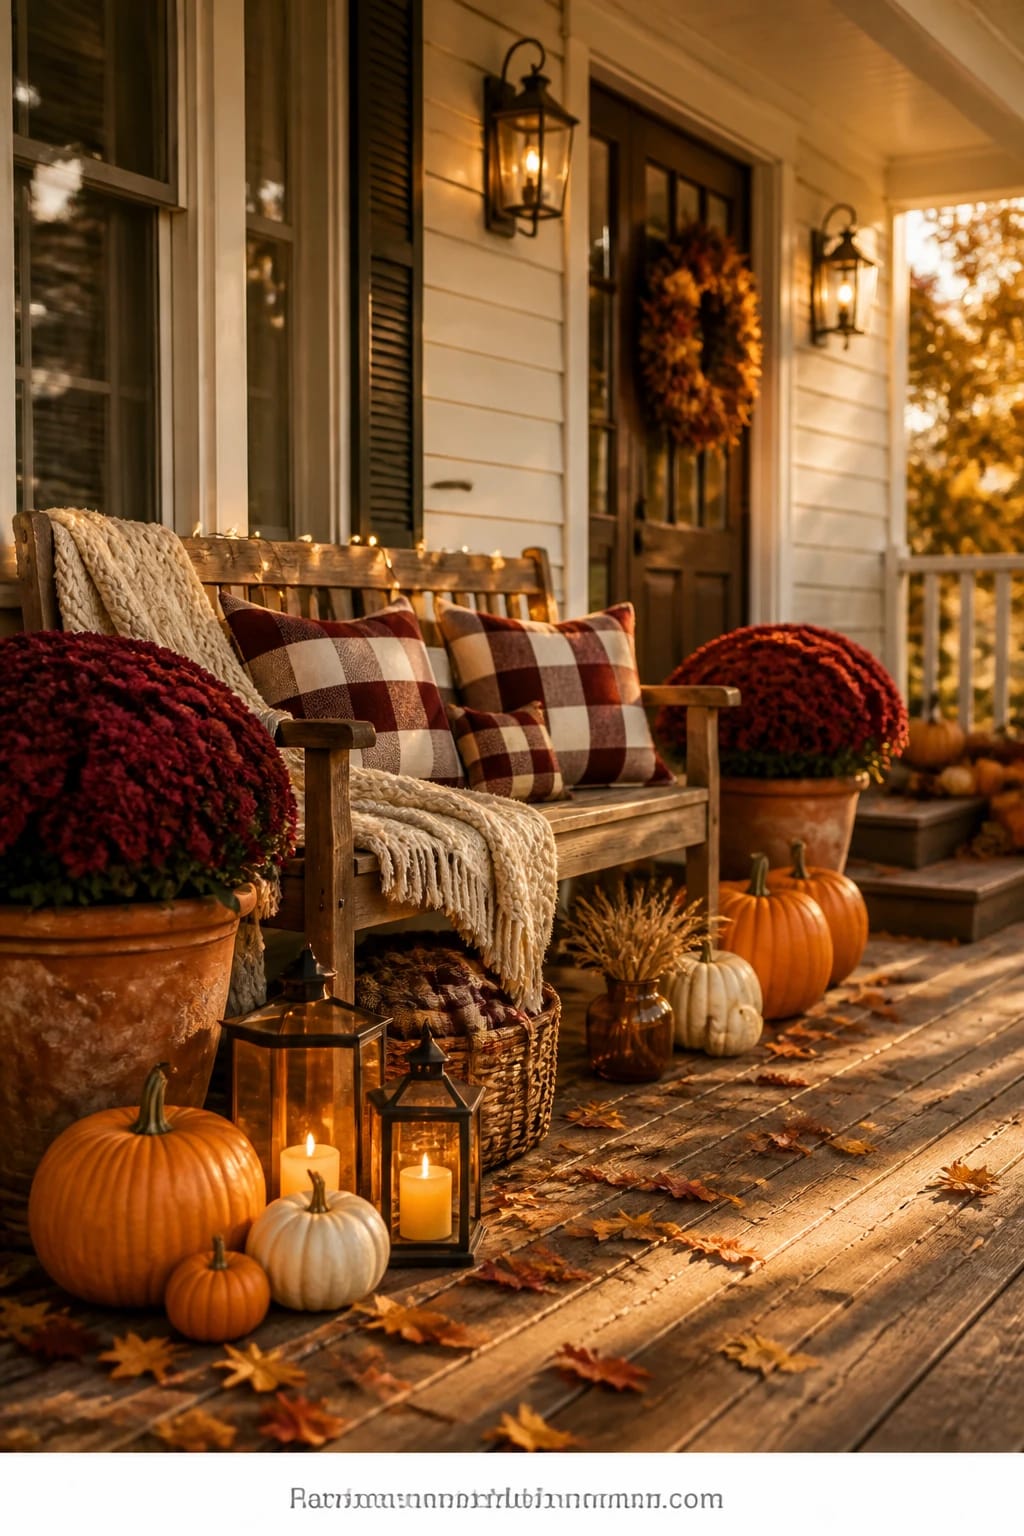
You’ve got a bench on the porch that you love in summer, but come fall it turns into a prop graveyard—random pillows, a stray blanket, and mums that never quite anchor the space. This design turns that bench into the heart of your fall front door decor with twin planters of burgundy mums and a curated pumpkin trio on each side. It reads like “come sit, sip cider, and watch the leaves,” even if you only perch long enough to tie a shoe.
The mood mixes porch-sittin’ ease with harvest richness. Burgundy adds depth you can’t get with brights; it makes weathered wood look intentional and plays beautifully with black hardware and oil-rubbed bronze. Why it works: the bench gives you a natural center, the planters add height, and the pumpkins fill the low plane. That triangle—tall, mid, low—keeps the eye moving. It’s durable, easy to water, and simple to refresh if one mum goes crispy before Halloween. And yes, we’ve all had that one pot give up in week two. It happens.
Materials worth noting: matte black or galvanized planters, deep burgundy mums with tight buds (they’ll bloom longer), classic orange and pale green pumpkins, and a chunky knit pillow or two in a neutral. If you want to photograph it magazine-pretty, steer pillows to the ends of the bench and keep the center open so the wood shows. The texture of knit next to the smooth pumpkin skin adds visual interest that reads beautifully on camera.
Variations to match your budget and space:
- Budget: Use painted plastic planters in matte black and one large mum split into two pots.
- Small stoop: Half-bench or even a sturdy wood stool; one planter and a single pumpkin trio on the latch side.
- Muted: Swap burgundy for dusty mauve or soft cream mums; keep pumpkins white and sage.
- Kid zone: Anchor pumpkins on rubber doorstops so little feet don’t roll them—learned this one the hard way.
Budget Breakdown:
- Farmhouse bench (if needed) or refresh with stain: $0–$180
- Planters (pair): $35–$120
- Burgundy mums (2 large): $24–$48
- Pumpkins (6 total, mix sizes): $25–$60
- Pillows with outdoor inserts: $18–$50
- Rubber stops or risers: $6–$12
Total Estimated Cost: $108 – $470
Best For: Porches with seating; classic or farmhouse exteriors; anyone who wants a high-impact, low-fuss front door moment from mid-September to Thanksgiving.
Key Design Elements:
- Main seasonal props: Burgundy mums, pumpkin trios, farmhouse bench
- Color palette: Burgundy, burnt orange, sage, charcoal
- Lighting strategy: Optional lanterns at bench ends or string lights under eaves
- Textile layers: Chunky knit pillows or a plaid throw
- Natural elements: Wood grain, live mums, real pumpkins
- Accent details: Matte black planters, metal house numbers in similar tone
Why This Looks Expensive: Repetition and restraint. Matching planters, mirrored pumpkin groupings, and a limited palette feel bespoke. The bench wood shows through instead of getting buried, which signals confidence.
How To Recreate This Look:
- Place the bench centered or slightly off-center depending on your door swing.
- Set a planter on each side, about 12–18 inches from the bench legs.
- Group three pumpkins near each planter: largest in back, medium to one side, small at the front.
- Add one or two pillows at the bench ends; keep the middle clear.
- Optional: A lantern near one planter or a folded throw draped over the bench back for texture.
Don’t Do This: Avoid piling pillows in the middle or covering the whole seat. It shifts from “sit here” to “photo prop only,” and guests won’t know where to land.
Pro Styling Tip: Angle the two front pumpkins slightly inward like they’re “looking” at the door—subtle, but it guides the viewer’s eye right where you want it.
Take a breath. You don’t need all the layers day one. Start with structure (bench, planters), then add the fun bits (pumpkins, textiles) over a couple of crisp Saturdays.
5. Dried Floral Wreath And Lantern Cluster On A Narrow Townhouse Ledge
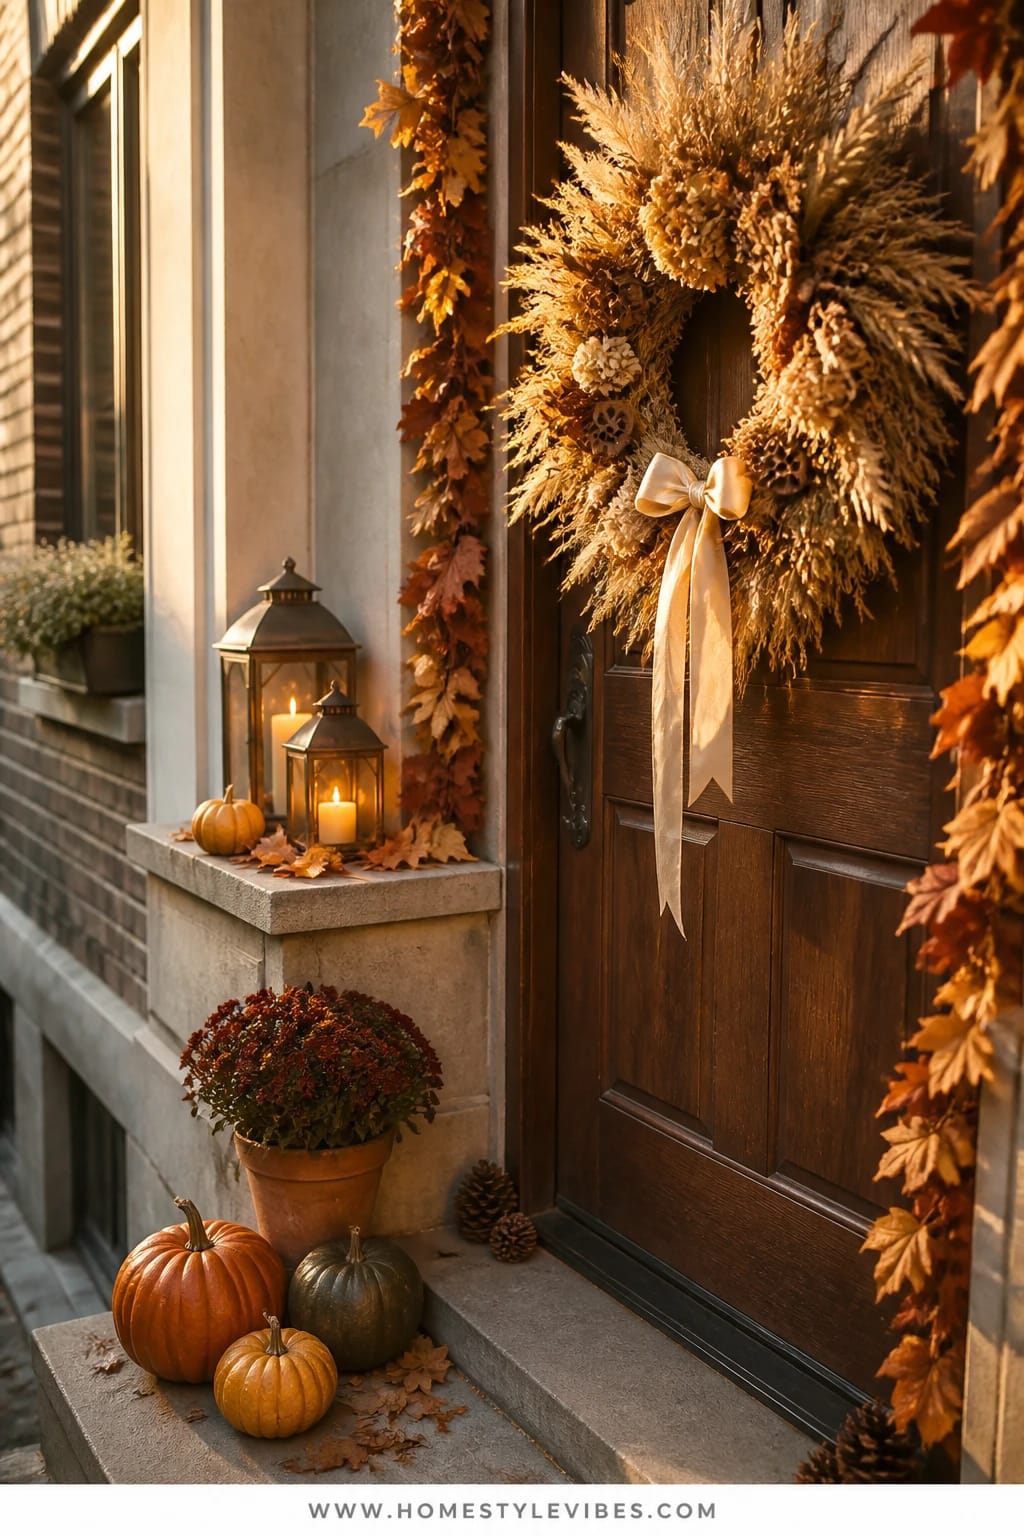
You live in a walk-up with a skinny stoop or a townhouse with a tiny landing, and every Pinterest idea seems built for palatial porches. I get it. This design embraces the narrow footprint: a dried floral wreath brings autumn’s texture to the vertical plane, while a lantern cluster sits on the one usable ledge, creating a compact, photogenic vignette that still feels generous.
The vibe is editorial and a little romantic—papery dried florals in rust, caramel, and straw tones, plus lanterns in different heights for that flickering, layered glow. Why it works: when floor space is limited, you move the story up to the door and concentrate the rest in one tight triangle. It’s pet-friendly and landlord-friendly if you opt for battery candles and removable hooks. And everything packs down to two pieces in storage, which your January self will appreciate.
Materials: a dried floral wreath with a mixed base (think strawflower, wheat, ruscus), lanterns in black or antique brass, and a single low dish with mini pinecones to bridge the height difference. To photograph well on a narrow ledge, stagger the lantern bases just slightly—not aligned—so you catch shadow lines. I helped a friend do this on her Brooklyn stoop last fall; she texted me later that night because three neighbors asked where she bought her wreath. Proof: scale done right gets noticed.
Variations:
- Budget: DIY a grapevine base and hot-glue a pack of dried florals from the craft store; choose two lanterns instead of three.
- Modern minimal: One oversized lantern, a sleek metal wreath hoop with a half-moon of florals, and a monochrome doormat.
- Long season: Add a burgundy ribbon in October; switch to a flax-colored linen ribbon and tiny brass bells by Thanksgiving.
- Renter fix: Over-door wreath hanger and adhesive gel pads under lanterns to keep them from migrating when the door opens.
Budget Breakdown:
- Dried floral wreath (DIY or purchase): $28–$110
- Lanterns (2–3 varying heights): $35–$120
- Battery candles (drip-look or moving flame): $18–$40
- Low dish or tray + pinecones: $10–$25
- Over-door hanger and gel pads: $8–$14
Total Estimated Cost: $99 – $309
Best For: Small stoops, row houses, apartments with a shared landing; anyone who needs handsome fall front door decor with minimal footprint.
Key Design Elements:
- Main seasonal props: Dried floral wreath, lantern cluster, pinecone dish
- Color palette: Rust, caramel, straw, black or brass metal
- Lighting strategy: Three points of candlelight at different heights
- Textile layers: Optional slim runner doormat to elongate the space
- Natural elements: Dried stems, pinecones, grapevine
- Accent details: Linen ribbon tails, slim metal tray
Why This Looks Expensive: Natural, non-shiny textures. Dried florals have a sophisticated matte quality, and mixing lantern heights reads considered. The color story stays in one family, which always looks pricier than a rainbow.
How To Recreate This Look:
- Hang the wreath at the top third of the door so it shows above visitors’ shoulders in photos.
- Place the tallest lantern at the back corner of the ledge, medium in front, small to the side.
- Add the low dish with pinecones to connect the grouping.
- Set all candles to the same warm flicker mode and put them on a dusk timer.
- Finish with a slim doormat to visually widen the step.
Watch Out: Don’t let lantern doors face the street if wind gusts are common—turn them 90 degrees for stability, and they’ll still read beautifully from the sidewalk.
Pro Styling Tip: For that editorial shot, crouch low and shoot upward slightly—your lantern heights will stack and the wreath will crown the frame.
Perfection isn’t required. If a lantern scuffs or a ribbon creases, that patina reads cozy. We’re building a feeling, not a museum exhibit.
6. Plaid Layered Doormat Stack With Pumpkins And Candlelit Window Ledge
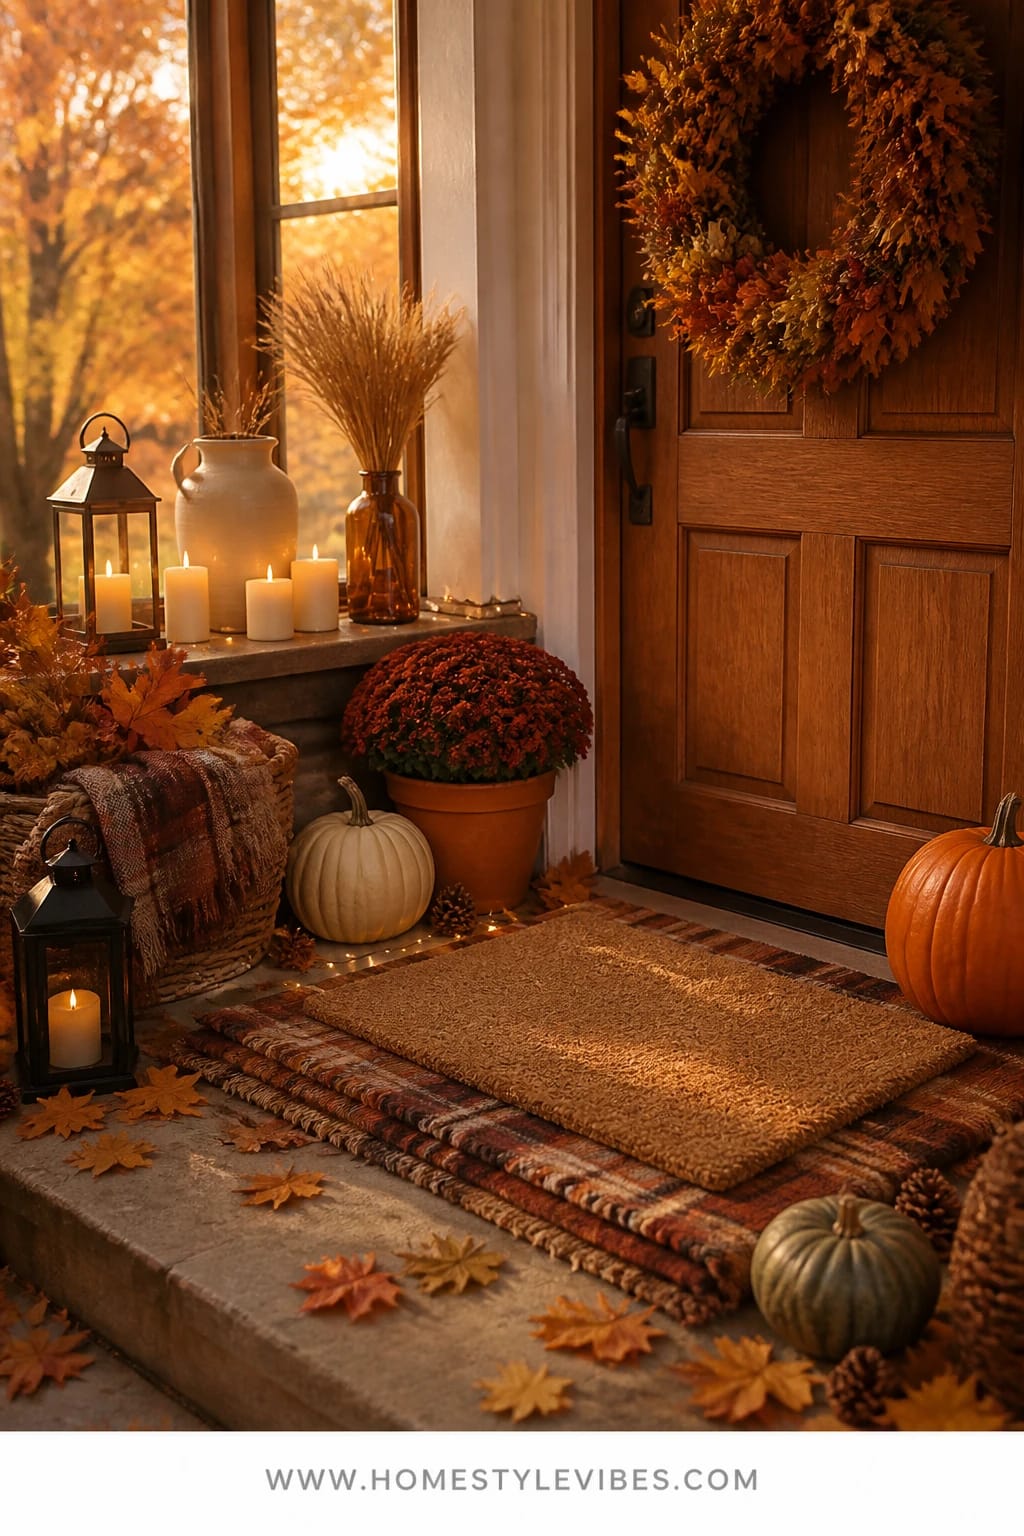
You’ve got a great door color, but your welcome zone feels flat—like the first step into fall never quite lands. A layered doormat stack in warm plaid, a pair of pumpkins flanking the threshold, and a candlelit window ledge nearby can change the whole vibe with three quick moves. It’s one of those small upgrades that, seriously, makes the entry finally feel finished.
This mood is all about texture and line. The plaid peeks out under a classic coir mat, the pumpkins give that rounded harvest shape, and the window ledge (or even a mail slot shelf) gets two to three glass votives for an intimate, candlelit sparkle. Why it works in real homes: mats are practical, pumpkins stay out of the walkway, and the candles sit above foot level, away from curious paws and swinging backpacks. Battery tea lights keep it hassle-free, or go real for the crackle when you’re home.
Materials: a 2×3 plaid outdoor rug in rust and cream, a standard 18×30 coir mat with a cheeky fall phrase or simple border, two medium heirloom pumpkins in contrasting tones (think muted sage and deep orange), and clear glass votives on the ledge. For the camera, the layered lines of the mat draw the eye inward and warm candlelight catches on glass, creating depth. One small moment, big atmosphere.
Variations for your reality:
- Budget: Use a plaid bath mat meant for heavy traffic (indoor-outdoor) under your existing coir—works in a pinch.
- High-contrast: Black-and-cream plaid under a bold “Welcome” mat, with white pumpkins for a crisp look that still reads warm with candlelight.
- No ledge? Install a narrow picture ledge just inside the sidelight window and let the glow spill outward.
- November pivot: Swap pumpkins for a low bowl of pinecones and add a burgundy ribbon knot on the mat corner.
Budget Breakdown:
- Plaid outdoor rug (2×3): $20–$45
- Coir doormat: $15–$45
- Heirloom pumpkins (2): $12–$28
- Glass votives (3–5) + tea lights: $10–$25
- Narrow ledge (if needed) + adhesive strips: $12–$30
Total Estimated Cost: $57 – $173
Best For: Any front door that needs a quick hit of layered warmth; ideal for renters and busy folks who want big impact in under an hour.
Key Design Elements:
- Main seasonal props: Plaid rug, coir mat, pumpkins, glass votives
- Color palette: Rust, cream, burnt orange, clear glass
- Lighting strategy: Clustered votive glow at window height
- Textile layers: Two-mat stack for depth and pattern
- Natural elements: Real pumpkins or a pinecone bowl in late season
- Accent details: Simple border graphics, subtle typographic mat
Why This Feels Designer: Scale relationships are on point. The plaid rug extends past the coir mat by a consistent border on all sides, and the pumpkins are proportionate to the doorway—not tiny, not giant. It reads clean and confident.
How To Recreate This Look:
- Lay the plaid rug first and center the coir mat so you have a 2–3 inch reveal on all sides.
- Place one pumpkin to the latch side and one to the hinge side, both about 6–8 inches off the mat to avoid tripping.
- Set 3–5 glass votives on the window ledge, staggering heights if you have different sizes.
- Choose warm tea lights or set battery candles to flicker mode.
- Give the mat pile a quick brush to lift fibers and make the text/graphic pop for photos.
The Most Common Mistake: Skipping the underlay rug size. Too small and it just looks like a crooked shadow under your doormat. Aim for at least 2 inches of reveal on each side.
Pro Styling Tip: For that scroll-stopping shot, stand above the mat and shoot straight down—patterns align, pumpkins frame, and the candle glow reads as little halos in the corner of the frame.
I’ll be honest: the little things can be fussy. Ribbon tails fray, one pumpkin inevitably develops a soft spot, and there’s always that one strand of string lights that dies two days before Thanksgiving. That’s normal. Real homes have quirks, and fall decor actually gets better with a little patina and personality.
Quick Checklist
- Warm 2200–2700K bulbs for porch and entry lights
- Leaf garland to frame the door
- Mix of real and faux pumpkins in varying sizes
- Amber or brass-accented lanterns
- Plaid rug layered under a coir doormat
- Dried floral or wheat-forward wreath
- Burgundy mums in matching planters
- Battery candles with timers
- Pinecones for low, textural fill
- Removable hooks and gel pads for renter-friendly installs
- Velvet or leather ribbon for wreath detail
- Woven basket or tray at the entry console
Frequently Asked Questions
How can I stick to a budget for fall front door decor without it looking sparse?
Choose one hero element and build around it. For example, go all-in on a beautiful wreath, then add one lantern and a trio of mixed pumpkins. Use repetition (two similar pumpkins or matching planters) and a tight color story so it feels full, not busy. Set a budget cap—say $150—and stick to items you’ll reuse next year.
Are real or faux pumpkins and florals better for these ideas?
IMO, real pumpkins always win for texture and color. They photograph beautifully and feel authentic. Mix in 2–3 quality faux pumpkins to carry you through warm spells. For florals, dried stems (wheat, strawflower) beat fresh for durability outdoors, while preserved leaves in garlands hold up better than totally faux if you want a natural look.
My porch is tiny. Which idea should I start with?
Go for the dried floral wreath and lantern cluster or the layered doormat stack. Both use vertical space and tiny footprints. Keep groupings tight and edit to three elements: one vertical (wreath), one glow (lanterns or votives), one grounding piece (mat or single pumpkin).
Where do I store all this after fall without creating clutter?
Pick collapsible pieces. Dried wreaths store in flat garment bags under the bed, faux pumpkins nest inside each other, and lanterns hold smaller decor like candles and ribbon. Label one bin “Front Door Fall” with a simple inventory list so next year’s setup takes minutes.
Is it safe to use real candles on the porch with pets and kids?
Use flameless candles for daily life, then light real pillars only when you’ll be nearby. Hurricane vases protect flames from little hands and wind. Keep all candlelight off the walking path and at least 12 inches from door swing zones to avoid accidental bumps.
When should I start decorating my front door for fall?
Start structure in early September: mats, planters, wreath bases. Add pumpkins and mums when nights dip below 60°F so they last. String lights and richer hues land nicely by early October, and you can roll through Thanksgiving by swapping in deeper ribbons and pinecones mid-November.
I’m a renter. How do I hang garlands and wreaths without damage?
Use over-door wreath hangers, clear removable hooks, and magnetic hooks if your door is metal. For garlands, anchor at top corners with adhesive hooks and use twine or floral wire to create gentle drapes. Gel pads under lanterns keep them in place and protect paint or stone.
Your Cozy Finish Line
Pick one idea that matches your front door’s bones and your daily rhythms, and start there. Maybe it’s the pumpkin-lined steps with amber lanterns that make you smile at dusk, or the rust plaid console that finally corrals the mail. Keep your eye on the three pillars that make fall decor feel rich: layered texture, warm light, and generous but edited groupings.
The truth is, you don’t need dozens of pieces—you need the right scale, a unified color story, and glow that flatters everything it touches. Add one layer per weekend, cue the cinnamon warmth, and let your front door do the welcoming for you. You’ve got this—and your stoop is about to be the cozy moment you look forward to every single day.
About the Author

Krisztina P.Rendes, Founder of Home Style Vibes
Founder of Home Style Vibes
Krisztina Puskásné Rendes created Home Style Vibes as a cozy-modern lifestyle space where homemaking meets inspiration. Her goal is to help women create beautiful, organized, and peaceful homes they truly love — without overwhelm. You’ll find here heart-driven content on home decor, cleaning tips, easy family recipes, organization and decluttering, DIY home projects, plants, and seasonal ideas — all designed to bring more calm, comfort, and style into everyday life.