7 DIY Halloween Decor Ideas That Beat Anything From The Store
You want that unmistakable Halloween magic: candlelit corners, inky shadows, crows perched like they know something you don’t, and jack-o’-lanterns grinning slyly from inside your home. You hate when store-bought decor feels cheesy, flimsy, or oddly generic once you set it down on your mantle or coffee table. This guide packs seven DIY Halloween decor ideas (done right inside your home) that create rich candlelit mood, stylish spooky moments, and scenes that actually look high-end in photos, all with a weekend’s worth of effort and a budget cap of $150 per idea at most. These are the pieces that make your rooms feel haunted-in-a-good-way, not haunted by glitter bats you regret buying.
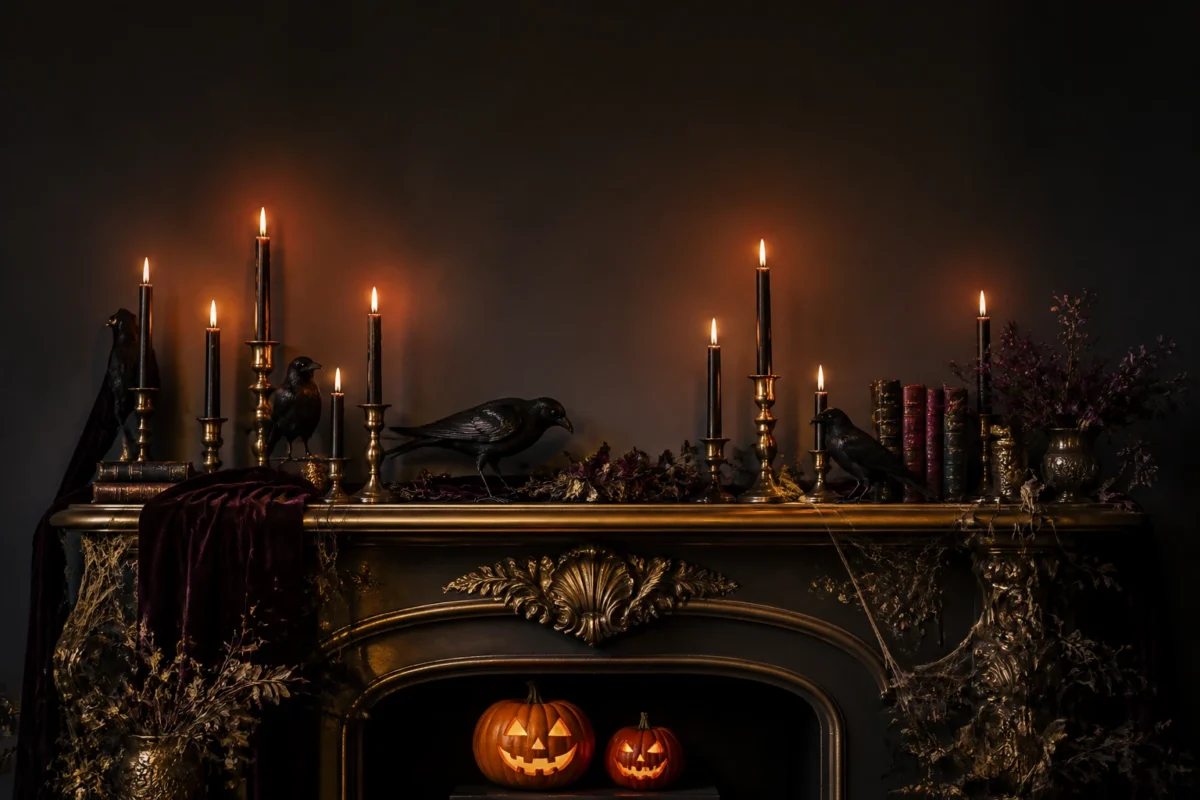
Expect black taper candles in antique brass, subtle cobwebs that feel like whispers not webs, deep aubergine and oxblood details, and strategic shadows that make everything more dramatic at night. These are Halloween decor ideas that beat anything from the store because they’re custom-sized to your spaces and layered with the kind of thoughtful styling you just don’t get from a plastic multi-pack. They’re Pinterest-loved, guest-approved, and kid-friendly when styled with flameless candles. If you live for candlelit drama and stylish spooky vibes from October 1 to Halloween night, you’re in exactly the right place.
1) Raven Mantel With Black Taper Candlelight On A Gilt-Framed Fireplace
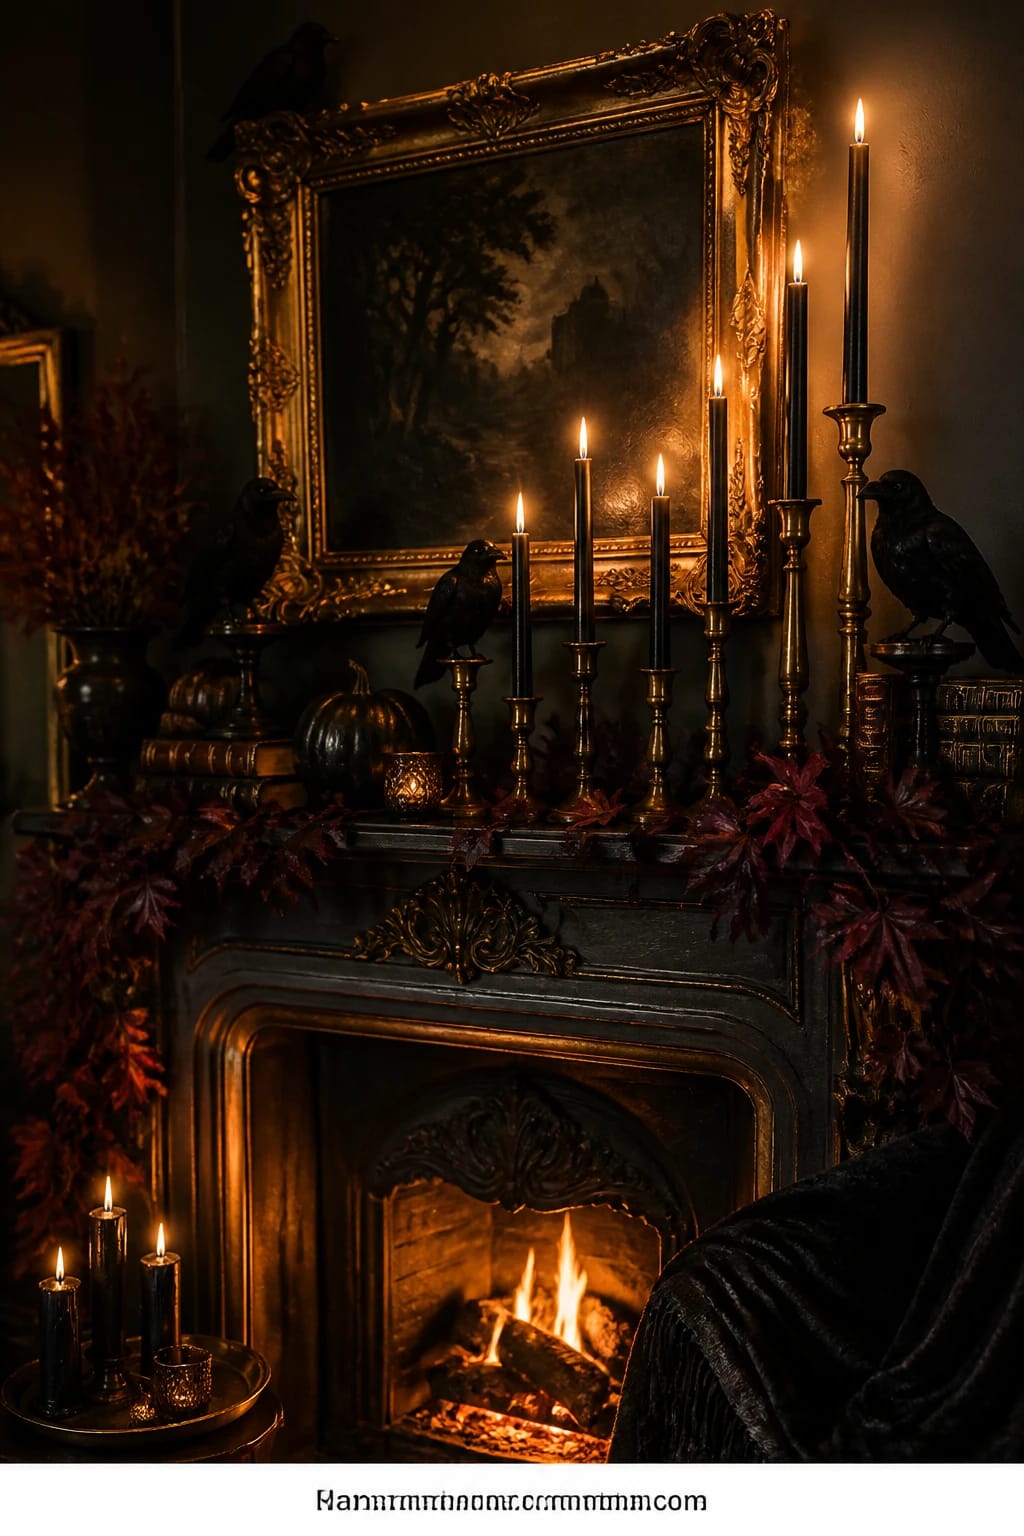
We’ve all been there: the mantel should be the Halloween star, but it ends up looking like a random lineup of knickknacks. You’ve tried the banner, the garland, even the store-bought bats—but it still reads flat. This raven-heavy mantel leans into intimate candlelit drama with black tapers in antique brass, a soft scattering of faux crows, and one moody gilt frame that anchors the whole scene. It works because it’s layered at multiple heights, it respects negative space, and at night, the clustered candlelight creates these elegant shadows that feel museum-level spooky.
Why it wins at home: you can scale it to a shallow mantel or a deep one, and every element stores easily in a single flat bin. The main props—black candles, antique-style holders, a handful of crows, maybe a strand of subtle faux webbing—hit that sweet spot between theatrical and tasteful. The light does the heavy lifting: when you cluster candlelight at varying heights and add one strong silhouette (a crow against a gilt frame), your mantel photographs beautifully from every angle with warm highlights and crisp, moody shadows.
Variations to try: If your mantel is narrow, run the candles in a tight zigzag and perch just one crow on the frame edge. For a budget version, thrift any picture frame and rub a little black and gold craft paint to fake age. Prefer a tone-down? Swap the crows for a single black feather arrangement and keep the candles in a tight trio.
Budget Breakdown:
- Antique brass candleholders (thrifted or reproduction): $6–$30 each
- Black taper candles (pack of 12): $12–$25
- Faux crows (set of 3–5): $10–$35
- Thrifted gilt-style frame: $10–$40
- Subtle faux cobwebs: $3–$6
Total Estimated Cost: $41 – $136
Best For: Traditional living rooms or dens with a central fireplace; great from early October through Halloween, and easy to soften into late fall by removing crows after the 31st.
Key Design Elements:
- Main seasonal props: black taper candles, faux crows, subtle faux cobwebs
- Color palette: coal black, antique brass, oxblood accents if desired
- Lighting strategy: cluster 5–9 candles at varying heights for layered glow
- Textile layers: none required on the mantel; consider a dark velvet pillow nearby for echo
- Natural elements: a few dried burgundy roses tucked beside the frame
- Accent details: gilt frame, small black urn or pedestal for elevation
How To Recreate This Look:
- Start with a large gilt-style frame centered on the mantel (no art needed, empty is beautiful).
- Add 5–9 brass candlesticks in a loose cluster, tallest near the frame’s edge.
- Layer in 2–3 faux crows: one perched on the frame corner, one on the mantel lip, one near a candle.
- Place a few dried roses or dark eucalyptus along the base to break up straight lines.
- Style with a whisper of faux cobwebs only in corners—not over the candles.
Why This Looks Expensive: Brass + black is forever chic, and the negative space in the empty frame feels like a gallery moment. Your eye reads intention, not clutter.
Watch Out: Don’t overdo cobwebs. One wisp in a corner = intrigue; a full blanket = dust bunny chaos on camera.
Pro Styling Tip: Stagger candle heights and light them 10 minutes before guests arrive so the wax forms cinematic drips for photos.
2) Aubergine Pumpkin Cluster With Smoky Glass On A Moody Dining Table
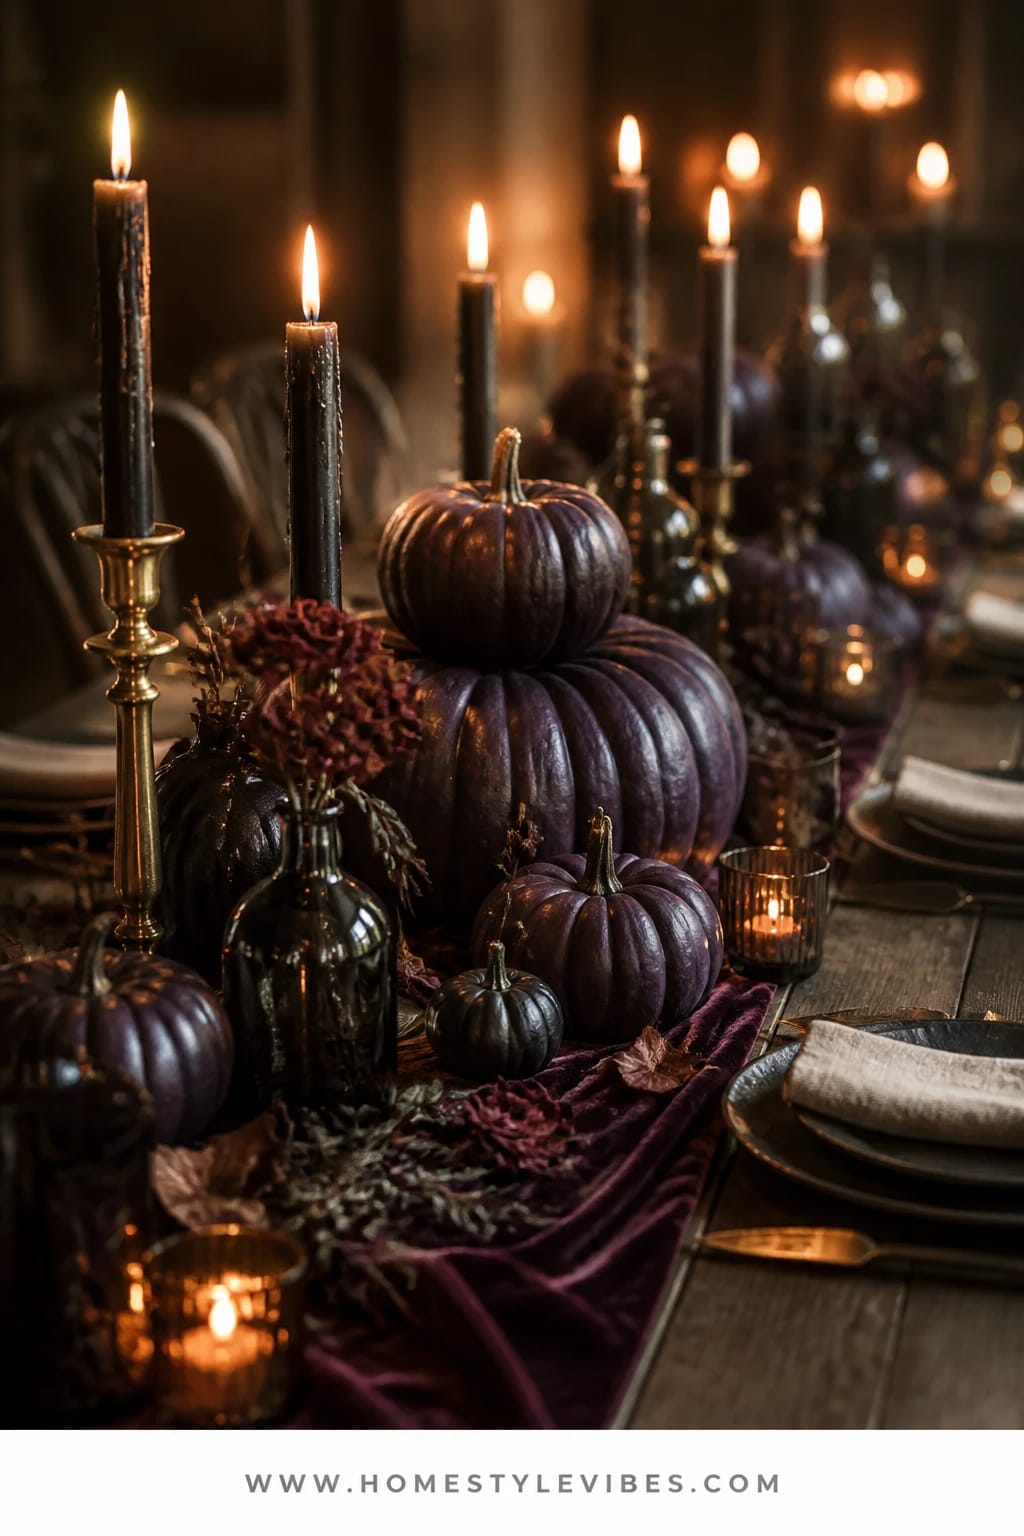
It’s that one table that always feels too “everyday” once October hits. You toss a runner down and it still reads like any Tuesday dinner, not Halloween dinner party. The fix? A moody centerpiece built from aubergine-painted pumpkins, smoky glass bottles, and black tapers that pull the eye down the length of the table like a candlelit runway. It creates this understated witchy atmosphere—dramatic, a little scholarly, but still warm enough for second helpings of cider-braised chicken.
Here’s why it works in a real dining room: low-profile pumpkins keep sightlines open for conversation, and the smoky glass catches candlelight with that subtle mirror-like shine. The result photographs beautifully: deep purples saturated against a dark runner, candle flames peppered down the center, and reflective glass catching little glints. You can set it once and keep it up from the first chill through Halloween night, then remove the crows and leave the deep tones through early November.
Variations: Short table? Create one tight cluster at the center with three pumpkins and two bottles. No time to paint? Wrap real orange pumpkins in matte black or eggplant-colored hosiery for a silky finish (seriously) and tie off underneath. For more drama, add a single trailing dark floral stem into one bottle—dried amaranth reads especially luxe.
Budget Breakdown:
- Real or faux pumpkins (3–7 mixed sizes): $12–$60
- Acrylic paint in aubergine/eggplant tones: $6–$12
- Smoky glass bottles or apothecary jars (thrifted): $3–$10 each
- Black taper candles + simple holders: $18–$40
- Dark table runner (linen or cotton): $15–$35
Total Estimated Cost: $54 – $157
Best For: Dining rooms that host 4–8; lovely for a mid-October dinner party or a casual pumpkin-carving night that still looks styled.
Key Design Elements:
- Main seasonal props: aubergine pumpkins, black tapers, smoky glass bottles
- Color palette: eggplant, black, oxblood, antique brass accents
- Lighting strategy: tapers in intervals, dimmed chandelier for shadowy edges
- Textile layers: dark runner with a soft, rumpled finish
- Natural elements: dried amaranth or dried burgundy roses
- Accent details: minimal brass or matte black candleholders
How To Recreate This Look:
- Start with a dark runner centered on the table.
- Add 3–7 pumpkins, largest at center, tapering down in size toward the ends.
- Layer 3–5 smoky bottles among pumpkins, keeping labels minimal or removed.
- Place black tapers every 12–16 inches for rhythmic light.
- Style with one or two dried stems in bottles and a sprinkle of tiny faux spiders if you like a wink.
Why This Feels Designer: A tight palette and repetition of shapes (pumpkins, bottles, tapers) creates visual harmony that reads curated, not cobbled together.
One Thing To Avoid: Skip orange napkins here. Keep linens in black, deep plum, or charcoal so the aubergine can play lead.
Pro Styling Tip: Photograph at dusk with only the candles and a dimmed chandelier—your camera will catch that velvety purple depth.
Keep scrolling—next up is the entryway that sets the entire tone the second you crack the door at twilight.
3) Witchy Apothecary In Candlelit Shadows On An Entryway Console
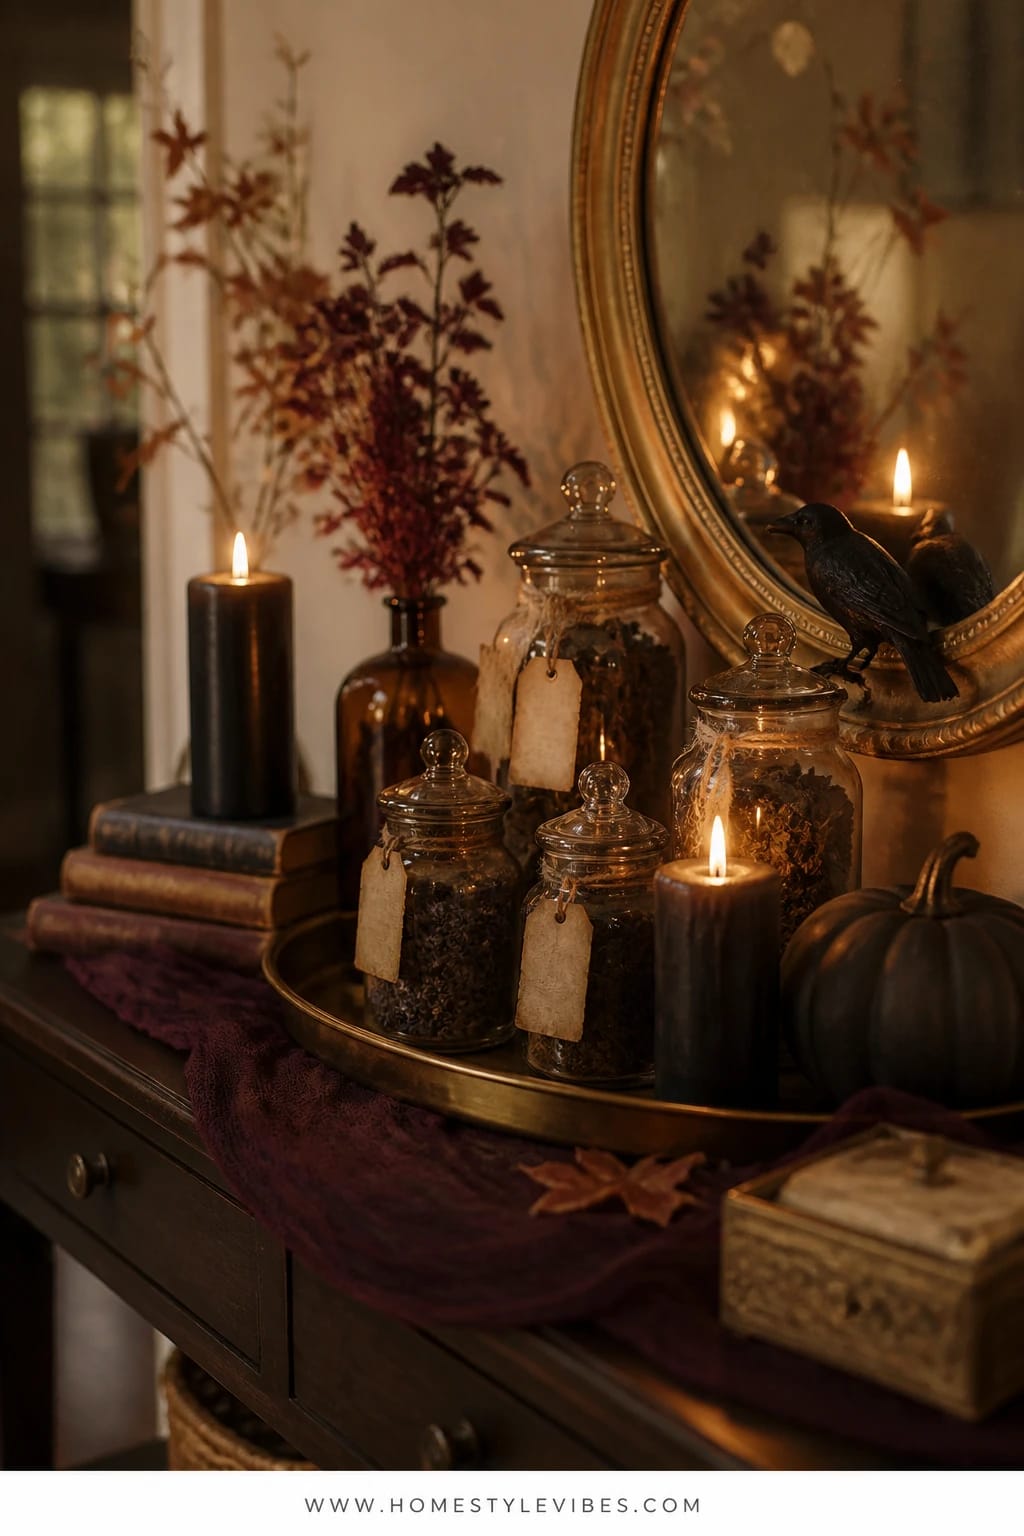
Your entryway sets the mood, but it’s notoriously tricky. A small console, a mirror, keys everywhere—suddenly it’s chaos dressed like Halloween. Build a mini witchy apothecary that’s purposeful: lidded jars, handwritten potion labels, a single crow under the mirror, and a stack of vintage-look books. It’s a hush of spooky, not a scream. The candlelit shadows from two black pillars are everything here—one in front of the mirror so the flame doubles, one tucked by the books for asymmetry.
I tried this on my own console last October and honestly couldn’t believe the difference. The secret wasn’t the jars—it was the labels and restraint. Two glass jars with interesting shapes, a matte black bowl of key “ingredients” (acorns, cloves, or black sand), and a small bell jar hiding one statement find, like a tiny skull or an antique key. That bell jar becomes the focal point and makes the rest feel plausibly “collected.”
Why it works: entryways need fast, clean stories, not scattered bits. Everything here stores neatly after Halloween, and the console stays functional with a tray for keys. At night, the mirror doubles candlelight, painting soft shadows that turn your regular old wall into a moody backdrop worthy of a Victorian ghost novel. Variation: small space? Make a single vignette on one tray you can lift off when you need the surface back. Budget version? Use jam jars with twine, coffee-stain your labels, and print a vintage font for quick authenticity.
Budget Breakdown:
- Glass jars/bottles (thrifted): $2–$8 each
- Potion label paper + twine: $4–$10
- Bell jar/cloche (small): $12–$30
- Black pillar candles + holders: $12–$24
- Vintage-look books (thrifted): $2–$6 each
- Faux crow: $5–$12
Total Estimated Cost: $37 – $102
Best For: Narrow entry consoles or credenzas; ideal for early October setup that greets trick-or-treaters’ parents with quiet drama.
Key Design Elements:
- Main seasonal props: apothecary jars, bell jar with a focal item, black pillars
- Color palette: black, smoky glass, parchment, oxblood ribbon
- Lighting strategy: candle near mirror for reflected glow
- Textile layers: one small black linen runner or leather tray
- Natural elements: cloves, dried bay, black sand, or tiny pinecones
- Accent details: hand-tied labels, matte black bowl, antique keys
How To Recreate This Look:
- Start with a tray or runner to define the vignette.
- Add two jars with labels—vary height and silhouette.
- Layer a small stack of books to one side for height.
- Place a bell jar with one striking object as your hero.
- Style with a crow perched by the mirror and two black pillars for glow.
Why This Reads High-End: Limited palette, handcrafted labels, and one cloche focal point suggest intention and curation rather than seasonal impulse buys.
The Most Common Mistake: Filling jars with random colored candy. Keep contents dark, neutral, or textural so the mood stays haunting, not cheerful.
Pro Styling Tip: Tilt one label slightly and scuff an edge—the tiny imperfection photographs as “real” and old-world.
Remember, this isn’t about recreating a showroom. It’s about crafting a home that feels like your stories live here—especially the spooky ones. If one idea resonates more than the others, start there and ignore the rest for now.
4) Shadowy Jack-O’-Lantern Library With Antique Brass On A Bookshelf
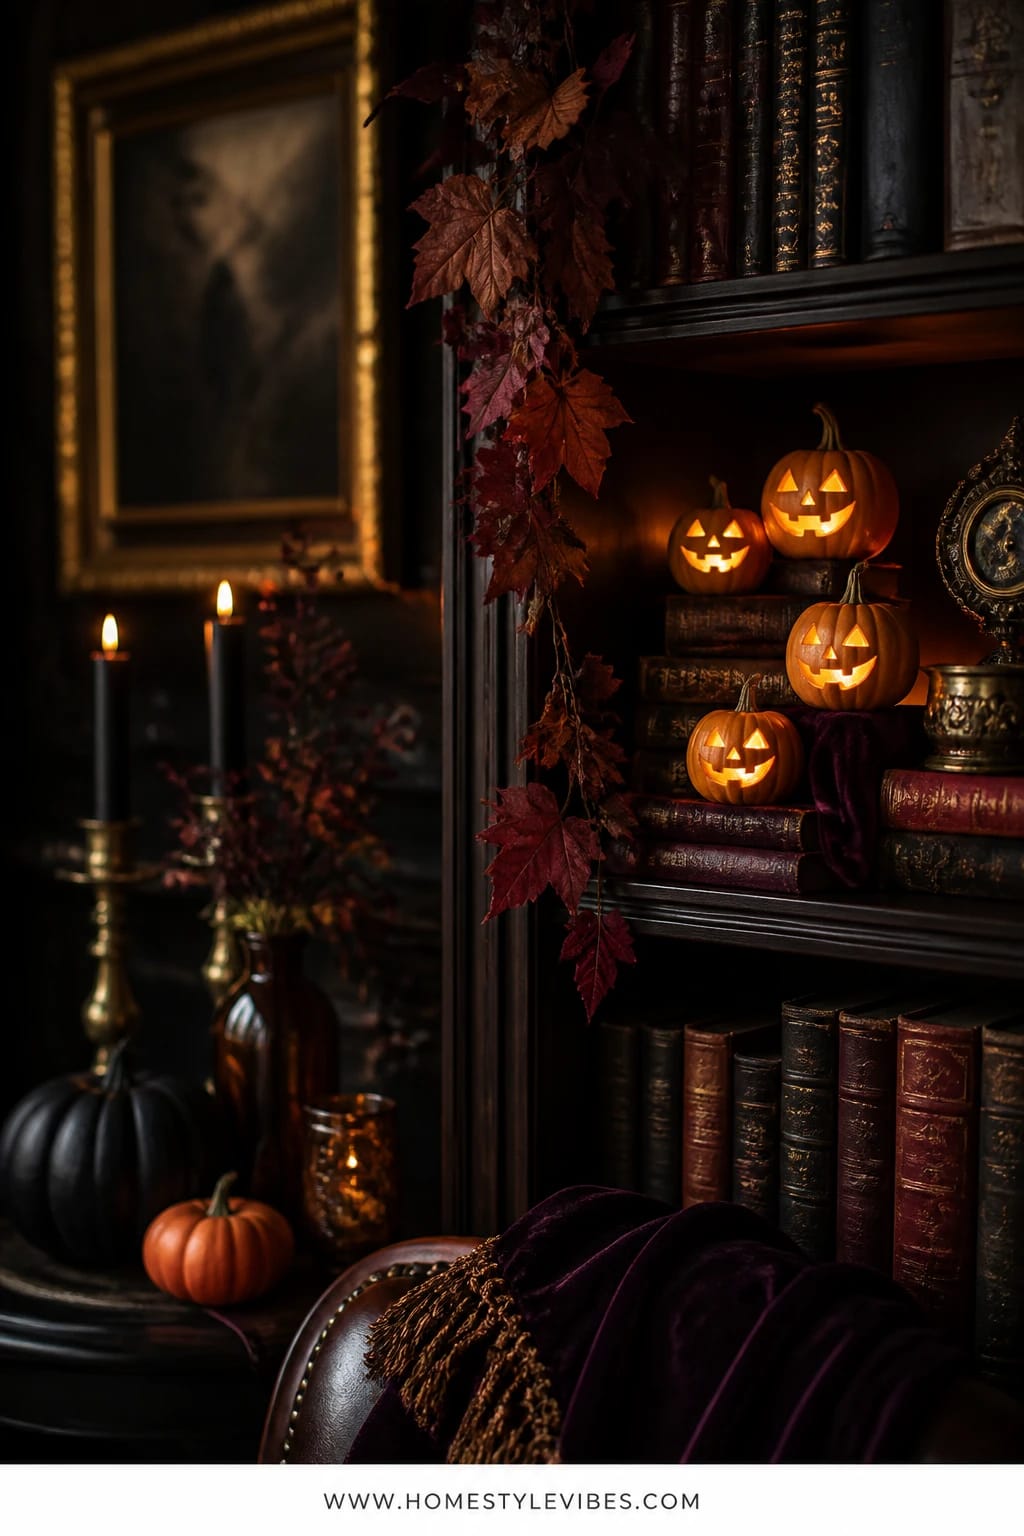
Bookshelves can feel cluttered, fast. You add one pumpkin and suddenly the shelf looks like a craft store exploded. The trick? Carve or paint two mini jack-o’-lantern faces on small pumpkins and nestle them among leather-bound or dark-jacket books, then repeat brass and black in small doses across the shelf. This creates little “scenes” instead of a messy spread. The light? Use micro battery-operated tea lights inside the minis for an eerie, warm grin that stays safe near paper.
Here’s why it plays well in real life: mini pumpkins tuck in without robbing shelf space; you can still find your dog-eared mystery novel. Repetition matters more than quantity: two jack-o’-lanterns total, four brass accents, and maybe one strand of ultra-fine fairy lights hidden behind the books to throw a soft halo. The photo moment snaps when the candle-lit faces glow while the rest of the shelf recedes into shadow—instant mood, zero chaos.
Variations: No carving? Paint matte-black pumpkins and add subtle gold-leaf crescent smiles instead of full faces. Kid-friendly? Draw faces with a gold paint pen and skip open flames entirely. For a grander look, add a tiny framed silhouette of a raven or witch profile on one shelf to echo the Halloween theme without shouting.
Budget Breakdown:
- Mini pumpkins (real or faux, 2–4): $4–$16
- Battery tea lights (pack): $6–$12
- Antique brass bookends or trinket dishes (thrifted): $5–$25
- Fairy lights (warm white): $8–$15
- Gold paint pen or leaf kit (optional): $6–$14
Total Estimated Cost: $29 – $82
Best For: Living room or study bookshelves where you want an evening glow that doesn’t take over the room.
Key Design Elements:
- Main seasonal props: mini jack-o’-lanterns, warm tea lights, brass book accents
- Color palette: black, brass, deep burgundy spines, charcoal
- Lighting strategy: hidden fairy lights plus jack-o’-lantern glow
- Textile layers: none needed; let the books’ worn cloth do the talking
- Natural elements: dried burgundy roses tucked on a shelf
- Accent details: small gilt frames, vintage magnifying glass
How To Recreate This Look:
- Start by clearing one or two shelves to 70% capacity to make visual space.
- Add a pair of mini pumpkins and carve or paint simple faces.
- Layer brass bookends and a small gilt frame to anchor the theme.
- Place battery tea lights inside pumpkins and a fairy light strand behind books.
- Style with one dried flower cluster to soften edges.
Why This Looks Intentional: Limiting faces to two creates focal points. Everything else becomes supporting texture, not competition.
Don’t Do This: Avoid bright-white fairy lights; they read wintry and clinical. Warm amber only for Halloween’s moody glow.
Pro Styling Tip: Shoot straight on, then slightly from the side so one pumpkin is in the foreground and the other falls softly out of focus for depth.
5) Velvet-Bound Spellbooks And Oxblood Candles On A Coffee Table Tray
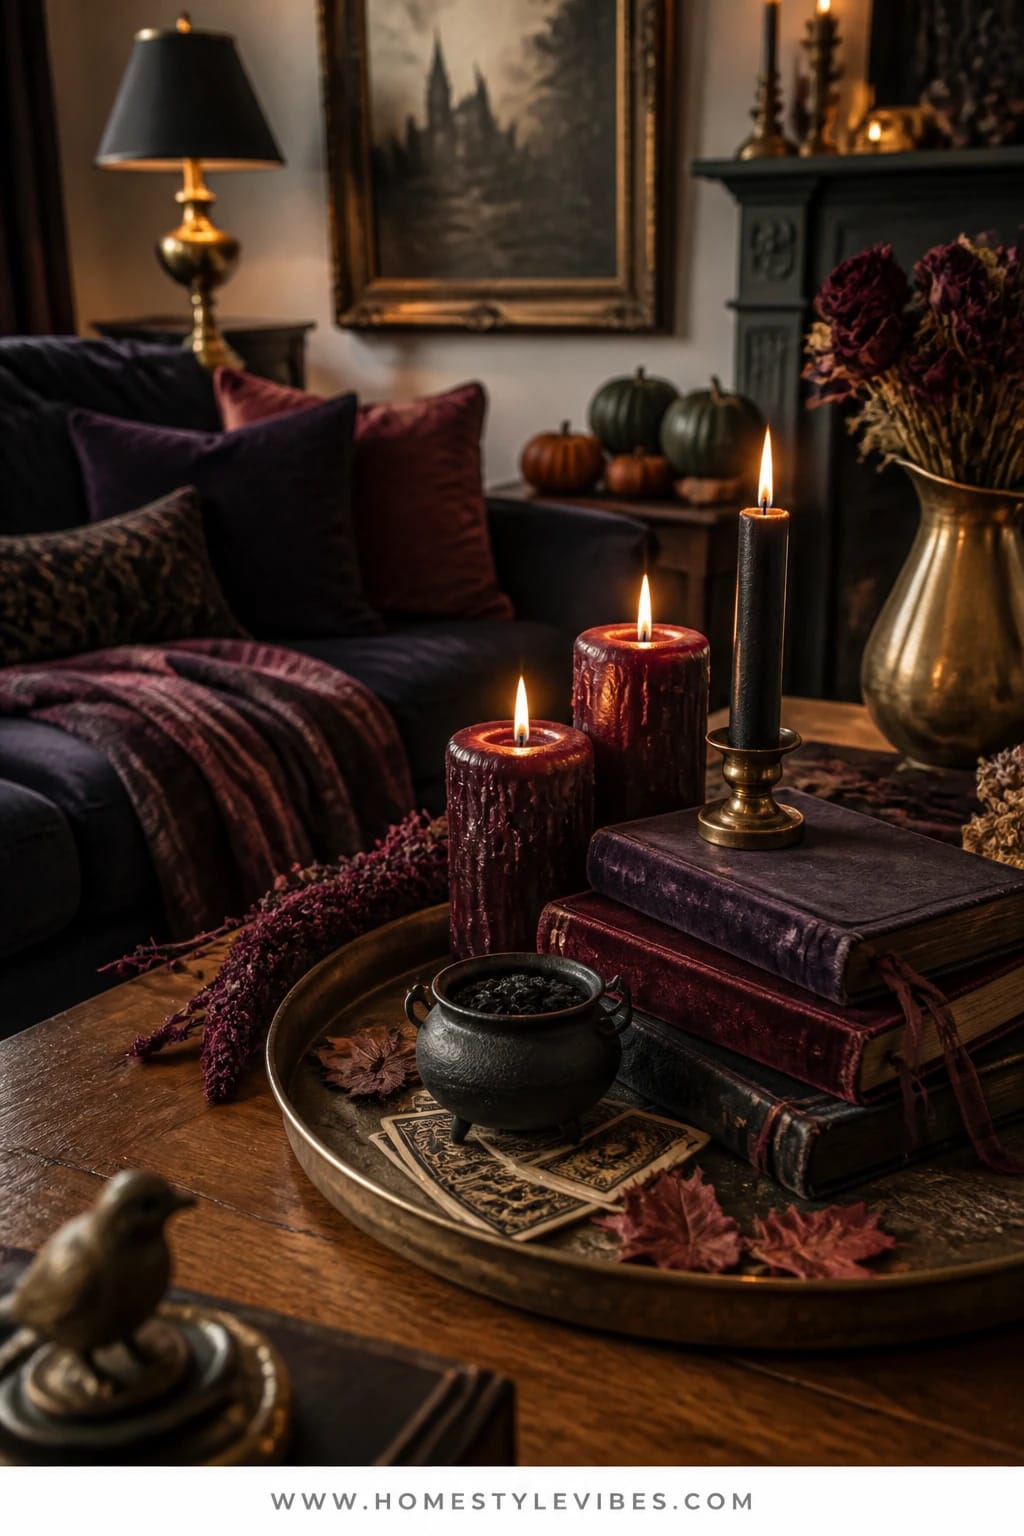
Coffee tables get busy: remotes, mugs, random mail. By October, you crave that sophisticated Halloween moment but still need somewhere for your tea. A large tray solves this. Create a mini scene with velvet-bound “spellbooks,” oxblood pillar candles, a small brass cauldron (or black sugar bowl), and a deck of vintage-style cards. The mood reads witchy-luxe—think moody study where secrets live between pages.
It’s practical: the tray lifts easily when you need the surface, and everything nests inside for storage once the month ends. Velvet-wrapped books catch low evening light with a soft sheen, while oxblood candles add a deep, wine-rich tone that anchors the palette. Photographing it is a joy—textures upon textures, and that pop of glinting brass amid velvety blacks makes your phone camera do a happy little autopilot portrait effect.
Variations: No velvet on hand? Wrap books in black craft paper and tie with an oxblood ribbon. Small table? Use a round tray with one book, one candle, and the smallest cauldron. Riff for late fall by removing the cauldron and cards, leaving the velvet books with a brass acorn to go “mysterious autumn” instead of Halloween.
Budget Breakdown:
- Oversized tray (thrift or budget retailer): $15–$40
- Old hardcover books (thrifted): $2–$5 each
- Velvet fabric or ribbon: $6–$18
- Oxblood pillar candles: $10–$24
- Small brass bowl/cauldron: $8–$25
- Vintage-style cards or tarot deck (optional): $10–$20
Total Estimated Cost: $51 – $127
Best For: Family rooms where the coffee table still needs to function; perfect from mid-October to Halloween week.
Key Design Elements:
- Main seasonal props: velvet-wrapped books, oxblood candles, brass bowl
- Color palette: black, oxblood, antique brass
- Lighting strategy: one or two candles only—intimate not bright
- Textile layers: velvet wrap or ribbon adds plush drama
- Natural elements: one dried plum leaf or sprig tucked under ribbon
- Accent details: tarot deck, match striker
Why This Looks Expensive: Velvet + brass always suggests heritage. When the colors stay tight and the materials feel tactile, your living room looks intentionally styled, not seasonal-chaotic.
How To Recreate This Look:
- Start with a tray that covers at least one-third of your coffee table.
- Add two or three hardcover books wrapped in velvet or black paper.
- Layer one oxblood candle to the left and a brass bowl to the right.
- Place a small deck of cards at a slight angle for visual break.
- Style with a single dried leaf and strike-anywhere matches for theater.
Watch Out: Don’t crowd the tray. Aim for 60% coverage so there’s room for a mug—that small bit of table space makes the whole scene feel lived-in, not staged.
Pro Styling Tip: If using real flame, position the candle so its reflection catches on the brass—instant glow-up in photos.
Pause and breathe. You don’t need every project, and you don’t need a perfect house to make Halloween inside feel magical. Pick one surface—a mantel, a tray, a console—and give it five honest minutes of focus. That’s where the charm lives.
6) Gilded Bone China And Black Candles On A Dramatic Bar Cart
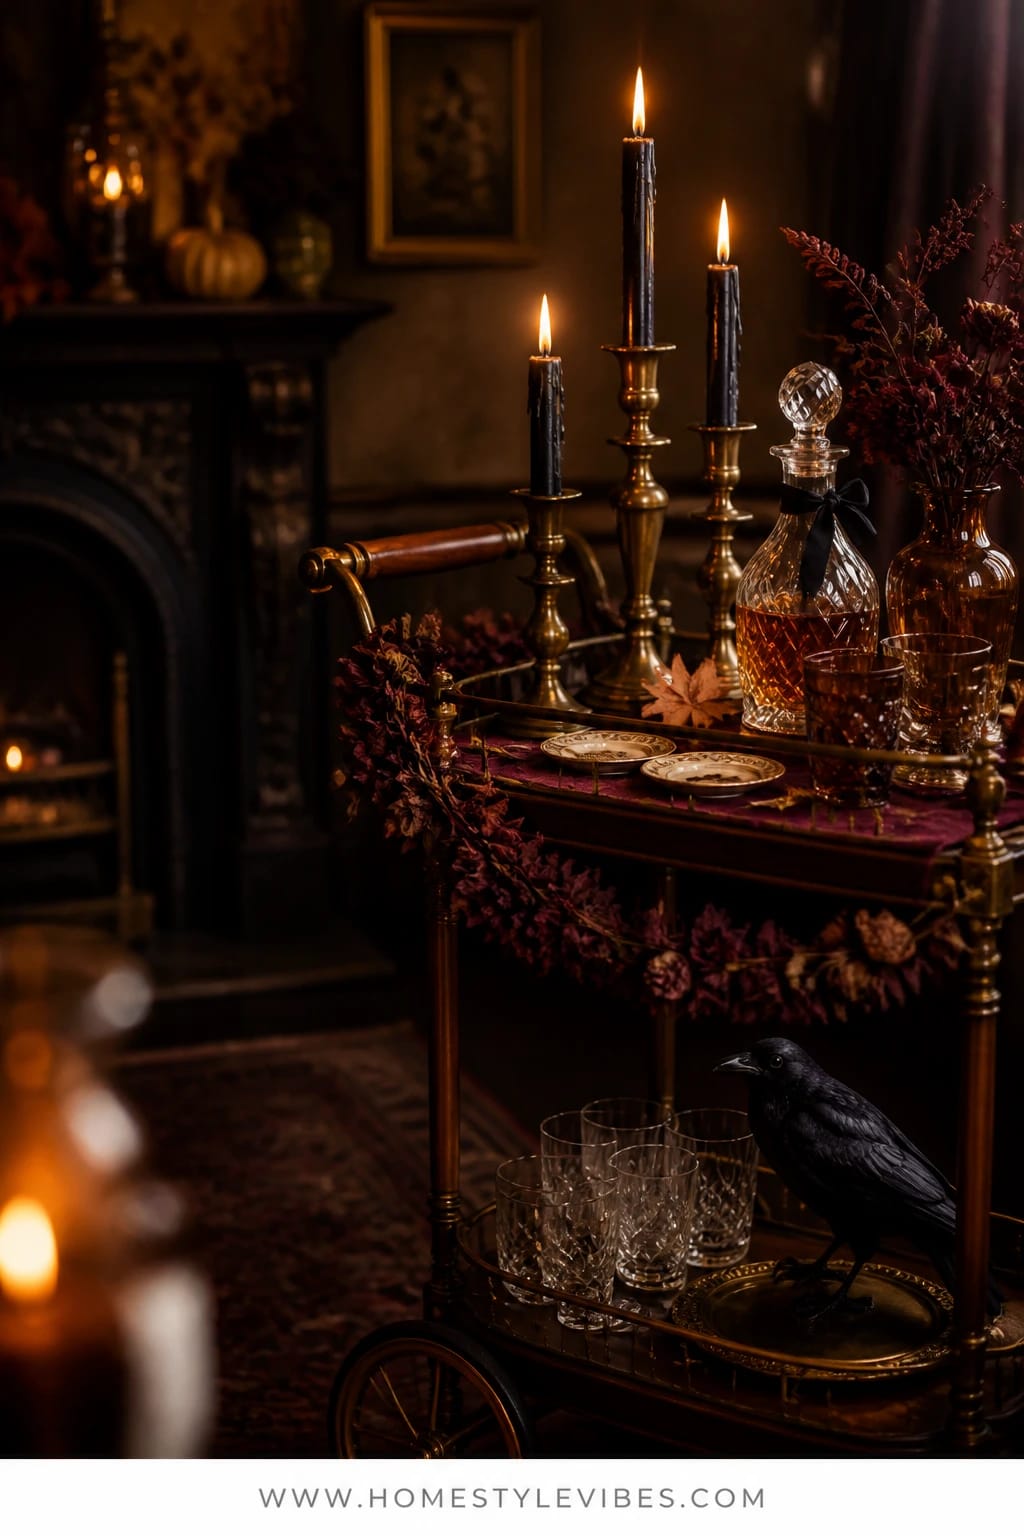
Bar carts are a magnet for cluttered bottles and half-used mixers. On Halloween, that mess feels extra loud against the moody vibe you want. Flip the script: go sparse and theatrical. One tier becomes a mini drink altar with black taper candles, vintage gilded bone china saucers as coasters, and a single decanter with black ribbon. The other tier corrals glassware and one raven. That’s it. It reads like a Victorian cocktail ritual in the best way.
In real homes, we need function: guests should know where to set a glass and what to pour. That’s why the gilded saucers matter. They organize drinks and add a sense of ceremony. Lighting is simple: two tapers and maybe a dim lamp nearby. Shadows around the wheels of the cart look deliciously haunted at night, and your photos won’t show chaotic labels because…you edited them out by putting most bottles in a cabinet and decanting one “house special.”
Variations: No bar cart? Use the top of a buffet or a small console shelf the same way. Budget route: thrift saucers for a dollar each and spray-paint candleholders matte black. For a subtle look, swap the raven for a small brass bat charm tied to the decanter neck.
Budget Breakdown:
- Black taper candles + holders: $15–$35
- Vintage gilded saucers (set of 4–6): $8–$24
- Simple glass decanter: $15–$40
- Black ribbon or velvet tie: $3–$8
- Faux raven (optional): $5–$12
Total Estimated Cost: $46 – $119
Best For: Open-plan living/dining where a moody drink station becomes the party magnet; excellent on Halloween night for self-serve cocktails.
Key Design Elements:
- Main seasonal props: black tapers, raven, gilded saucers
- Color palette: black, gold, clear glass, touches of oxblood ribbon
- Lighting strategy: two candles plus ambient lamplight
- Textile layers: none; let metal and china shine
- Natural elements: a single burgundy carnation in a mini bud vase
- Accent details: black ribbon on decanter, small brass scoop for ice
How To Recreate This Look:
- Start by clearing the cart completely and polishing surfaces.
- Add candleholders to the back corners of the top tier.
- Layer the decanter center-front with a ribbon tie.
- Place gilded saucers in a tidy row for coasters.
- Style the bottom tier with glassware, a mini ice bucket, and one raven.
Why This Feels Designer: Strong edit. When everything has a purpose and repeats a palette, your cart stops being a storage shelf and becomes a styled moment guests remember.
One Thing To Avoid: Skip bright cocktail napkins; they shout over the shadows. Choose black or deep burgundy cloth instead.
Pro Styling Tip: For photos, push the cart 12 inches from a wall so candles throw dramatic oval shadows behind them.
7) Midnight Moth Wall And Black Paper Bats Over A Candlelit Piano
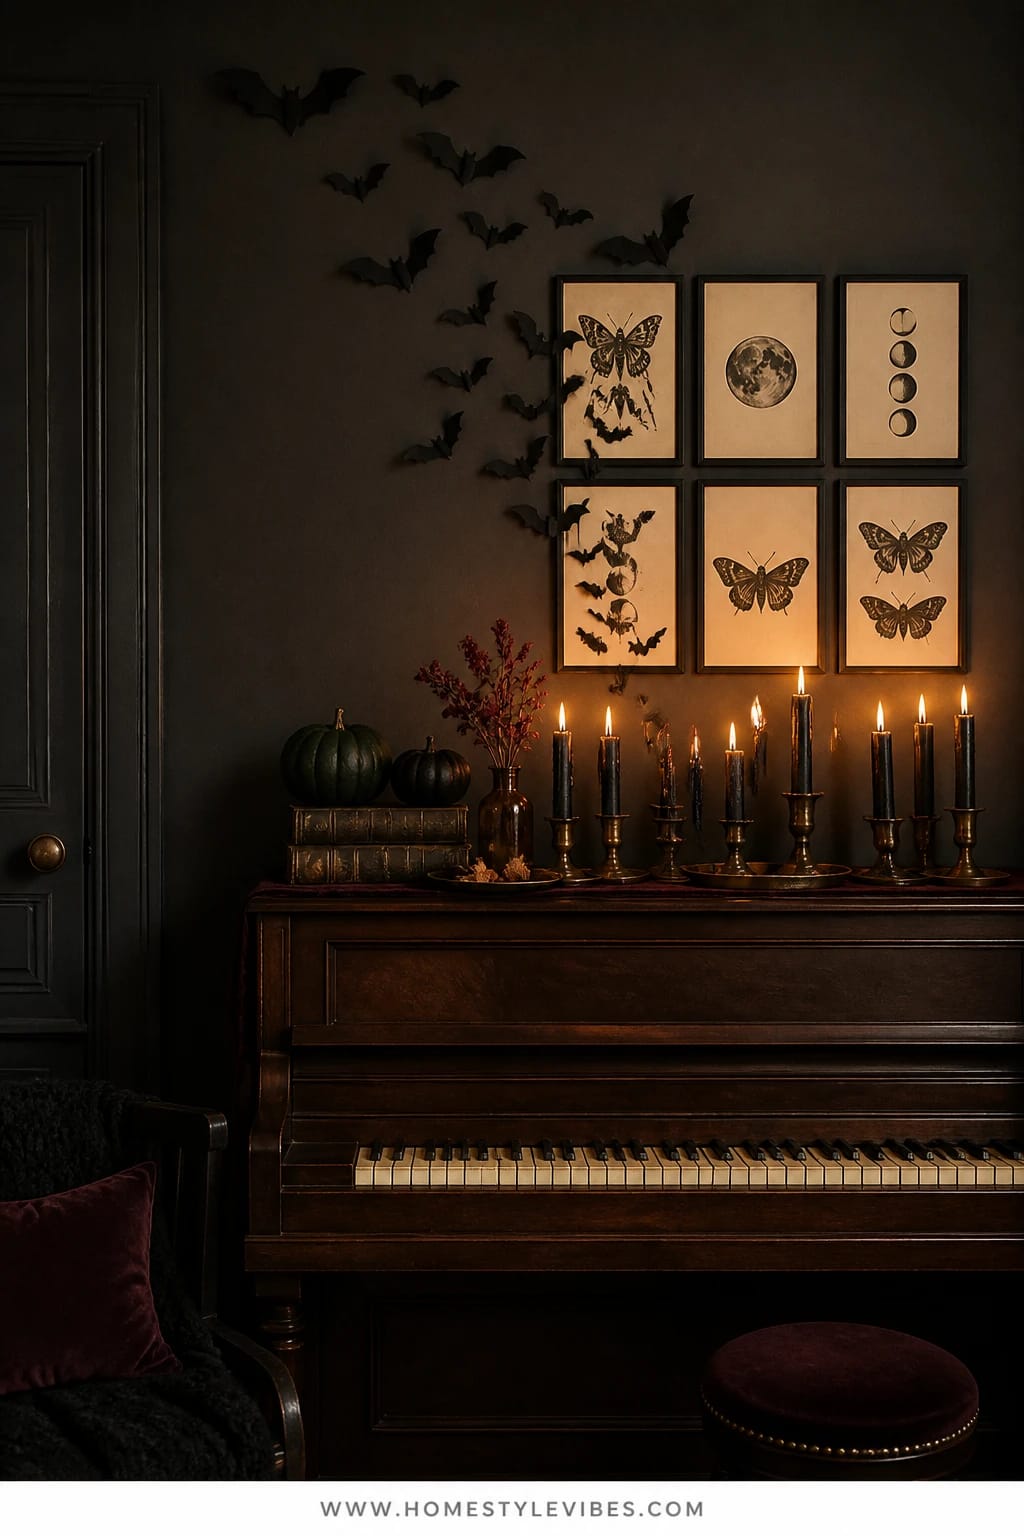
There’s always that big furniture piece—piano, sideboard, or long media console—that feels like a black hole. You plop down a pumpkin and it disappears. Time to go vertical. Create a midnight moth wall using printable silhouettes (moths, lunar phases, oddities) in simple black frames above the piano, then let a flock of matte black paper bats emerge from the frames and fly up toward the ceiling. Add a runner of low, black candles on the piano top. Now your eyes travel up and the whole area hums with story.
The mood is mysterious and a bit scholarly, like you’ve been cataloging midnight creatures between minor chords. It works in real homes because paper elements are light, renter-friendly, and easy to remove. Frames give visual weight without requiring expensive art, and the bats create movement. Lighting brings it home: a line of stubby candles throws broken little shadows on the wall that make the moths feel alive at night. Photographs? Unreal. You get a cascade effect of shapes and glow, very Pinterest-friendly, very “who did your styling?”
Variations: No piano? Do this above a low media console or a buffet. Small space version: three frames, five bats, two candles. Want to bring it into November? Remove bats and keep the moth frames with brass candlesticks for a moody autumn look that sidesteps Halloween.
Budget Breakdown:
- Printable moth art + cardstock: $6–$12
- Simple black frames (thrifted or budget): $5–$15 each
- Matte black paper bats: $6–$12
- Adhesive putty/command strips: $5–$10
- Short black pillar or votive candles: $10–$20
Total Estimated Cost: $32 – $104
Best For: Music rooms or living rooms with a long empty wall; best starting late October once evenings fall earlier.
Key Design Elements:
- Main seasonal props: moth silhouette art, black paper bats, short black candles
- Color palette: black on off-white wall, touches of antique brass if desired
- Lighting strategy: low candle line to throw jumpy shadows upward
- Textile layers: a slim black runner on the piano top
- Natural elements: dried seed pods in a small black vase
- Accent details: minimal—let the wall animation take focus
How To Recreate This Look:
- Start by printing moth silhouettes and framing them in a tidy grid or salon cluster.
- Add paper bats beginning in or near the frames and arcing upward.
- Layer a slim black runner on the piano or console.
- Place a line of short black candles along the back edge for safe clearance.
- Style with a tiny vase of dried pods to add a single organic note.
Why This Looks Expensive: The gallery wall structure tricks the eye into seeing “art,” while the bats add bespoke movement. It reads custom, not store shelf.
Watch Out: Keep bats matte. Shiny paper glares under candlelight and breaks the illusion.
Pro Styling Tip: For photos, shoot from a low angle so the bat arc looks like it’s truly taking flight across the ceiling line.
One more mindset nudge: Perfection isn’t the point. The slightly crooked label, the wax drip you didn’t plan, the paper bat that leans a touch—that’s the moody charm we’re after. I still remember the year a friend bought three different garlands before realizing her entry stayed flat because the light was wrong, not the garland. We moved one lamp and suddenly—witchy glamour.
Quick Checklist
- Black taper candles (real or flameless)
- Antique brass candleholders (thrifted if possible)
- Faux crows or ravens
- Smoky glass bottles and apothecary jars
- Aubergine or eggplant acrylic paint for pumpkins
- Dark table runner (charcoal, black, or deep plum)
- Bell jar/cloche for a single focal object
- Velvet fabric or ribbon to wrap books
- Oxblood pillar candles
- Tray for coffee table styling
- Matte black paper bats for wall animation
- Printable moth or vintage oddity silhouettes
- Warm-white fairy lights or battery tea lights
- Dried burgundy roses, amaranth, or seed pods
- Adhesive putty/command strips for renter-safe walls
Frequently Asked Questions
How do I keep costs down while still getting that rich, moody Halloween look?
Thrift first for brass, frames, and books. Spend on candles (real or high-quality flameless) because lighting carries the vibe at night. Stick to a tight palette—black, brass, aubergine—so even inexpensive items feel coordinated and upscale.
Real or faux pumpkins for indoors?
IMO, real minis win for texture and color, especially for jack-o’-lantern shelves. Keep them away from heat vents and sunny windows to avoid the sad slump. Faux is great for painted aubergine pumpkins on a dining table—paint adheres better and you can reuse them every year.
How do I decorate a small apartment living room without clutter?
Choose one anchor surface per room: a mantel, coffee table tray, or bookshelf niche. Build a tight vignette there and leave the rest simple. Go vertical with paper bats or framed silhouettes to add drama without swallowing floor space.
What about storage after Halloween—will all these DIYs take up too much space?
Most elements nest or go flat: frames stack, bats and labels slide into a folder, velvet wraps and runners fold, and crows tuck into candle boxes. Dedicate one lidded tote labeled “Halloween—Mantel/Entry” so next year’s setup takes 15 minutes, tops.
Are candles safe with pets and kids around?
Use flameless tapers and pillars anywhere tails or tiny hands roam. For real candles, keep them high (mantel, shelf), use sturdy holders, and never near faux cobwebs. Flame-free still gives you that warm flicker in photos—seriously, the new ones look great.
When should I start decorating indoors for Halloween?
Start with moody basics—brass, black candles, dark runners—in late September. Layer in crows, bats, and jack-o’-lantern faces the second week of October. On November 1, peel off bats and birds and keep the candle-and-brass core through Thanksgiving.
What if my rental doesn’t allow nails or paint?
Use adhesive putty or removable strips for frames and bats. Lean frames on mantels and shelves instead of hanging. Focus on trays, consoles, and tabletop vignettes—they bring the drama and leave walls untouched.
The Wrap-Up
Pick one idea from these DIY Halloween decor ideas and start tonight. Light a couple black tapers, unwrap a strand of warm fairy lights, and let the room go quiet and shadowy for a minute. That’s the moment Halloween slides in—subtle, stylish, a little secretive.
The truth is, you don’t need bins of themed stuff. You need depth, candlelight, and a few well-placed props that nod to the haunted without turning your home into a party store. Layer black, antique brass, and deep aubergine. Cluster candles, set a single crow, tuck in a dried rose. Let darkness do some of the design work for you.
You’ve got this. Start with one surface, trust the shadows, and enjoy the way your home looks after dusk. It’s going to feel like your favorite Victorian ghost story—only warmer, and with better snacks.
About the Author

Krisztina P.Rendes, Founder of Home Style Vibes
Founder of Home Style Vibes
Krisztina Puskásné Rendes created Home Style Vibes as a cozy-modern lifestyle space where homemaking meets inspiration. Her goal is to help women create beautiful, organized, and peaceful homes they truly love — without overwhelm. You’ll find here heart-driven content on home decor, cleaning tips, easy family recipes, organization and decluttering, DIY home projects, plants, and seasonal ideas — all designed to bring more calm, comfort, and style into everyday life.