6 Fall Kitchen Island And Counter Styling Ideas That Stay Practical
You want a fall kitchen that feels like a cozy bright autumn postcard—saturated rust peeking through gingham, pumpkins nestled by a warm candle glow, a bowl of crisp apples right where you set down your keys. You hate the reality: cluttered counters, sticky syrup rings from pancake day, and decorative bits that have to be shoved aside whenever you chop an onion. The truth is, you can have the warm amber light, the harvest palette, and the layered textures—without sacrificing prep space or sanity. These 6 kitchen island and counter styling ideas fix the specific frustrations that make fall decor feel fussy, all while staying totally workable for real cooking and family life.
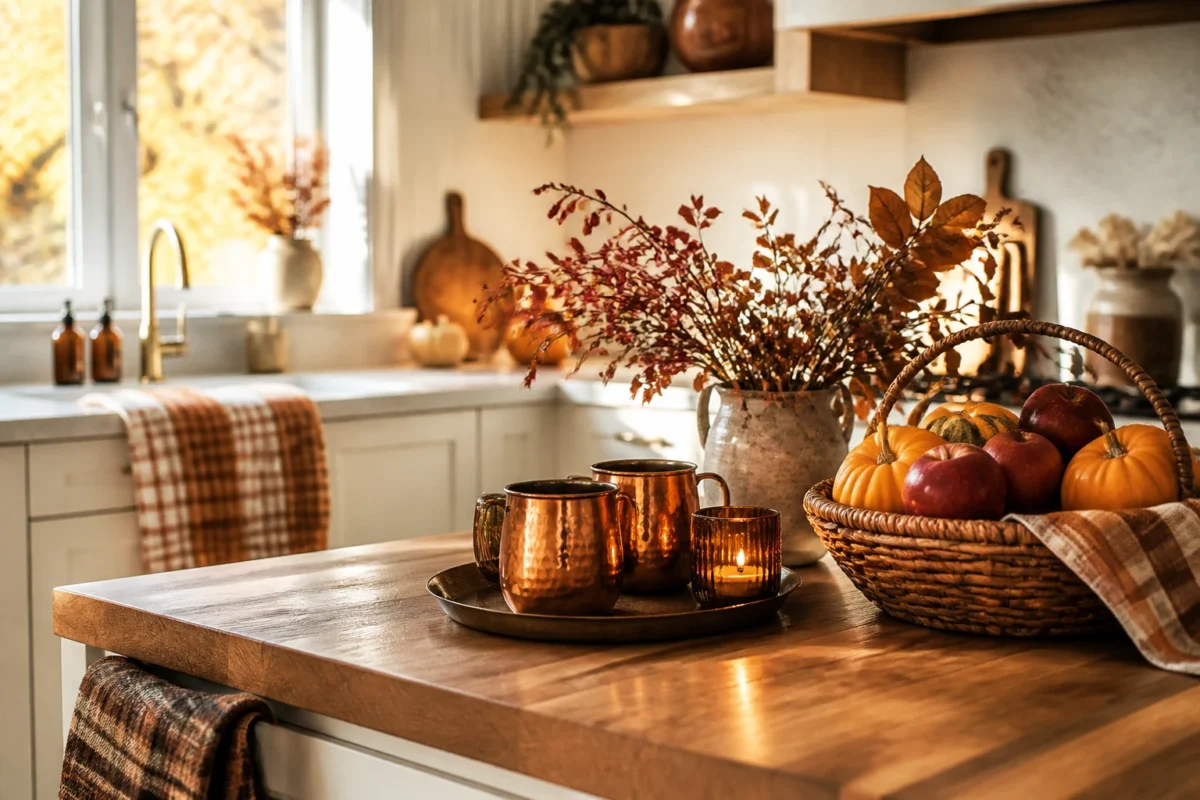
Expect golden afternoon light, woven textures, plaid hints, and the quiet abundance of fall produce—styled in ways that glide from weekday lunches to weekend hosting. Every idea can be pulled together in under two hours and under $200 (many under $60), and each one photographs beautifully. Think color saturation you can feel, warm glow that doesn’t block the cutting board, and quick-swap pieces that whisk away when it’s time to roll pie dough. If you love a cozy bright autumn look and actually make meals in your kitchen, this is your season’s playbook.
1) Copper Mugs, Amber Candle Glow, and a Wood-Top Kitchen Island
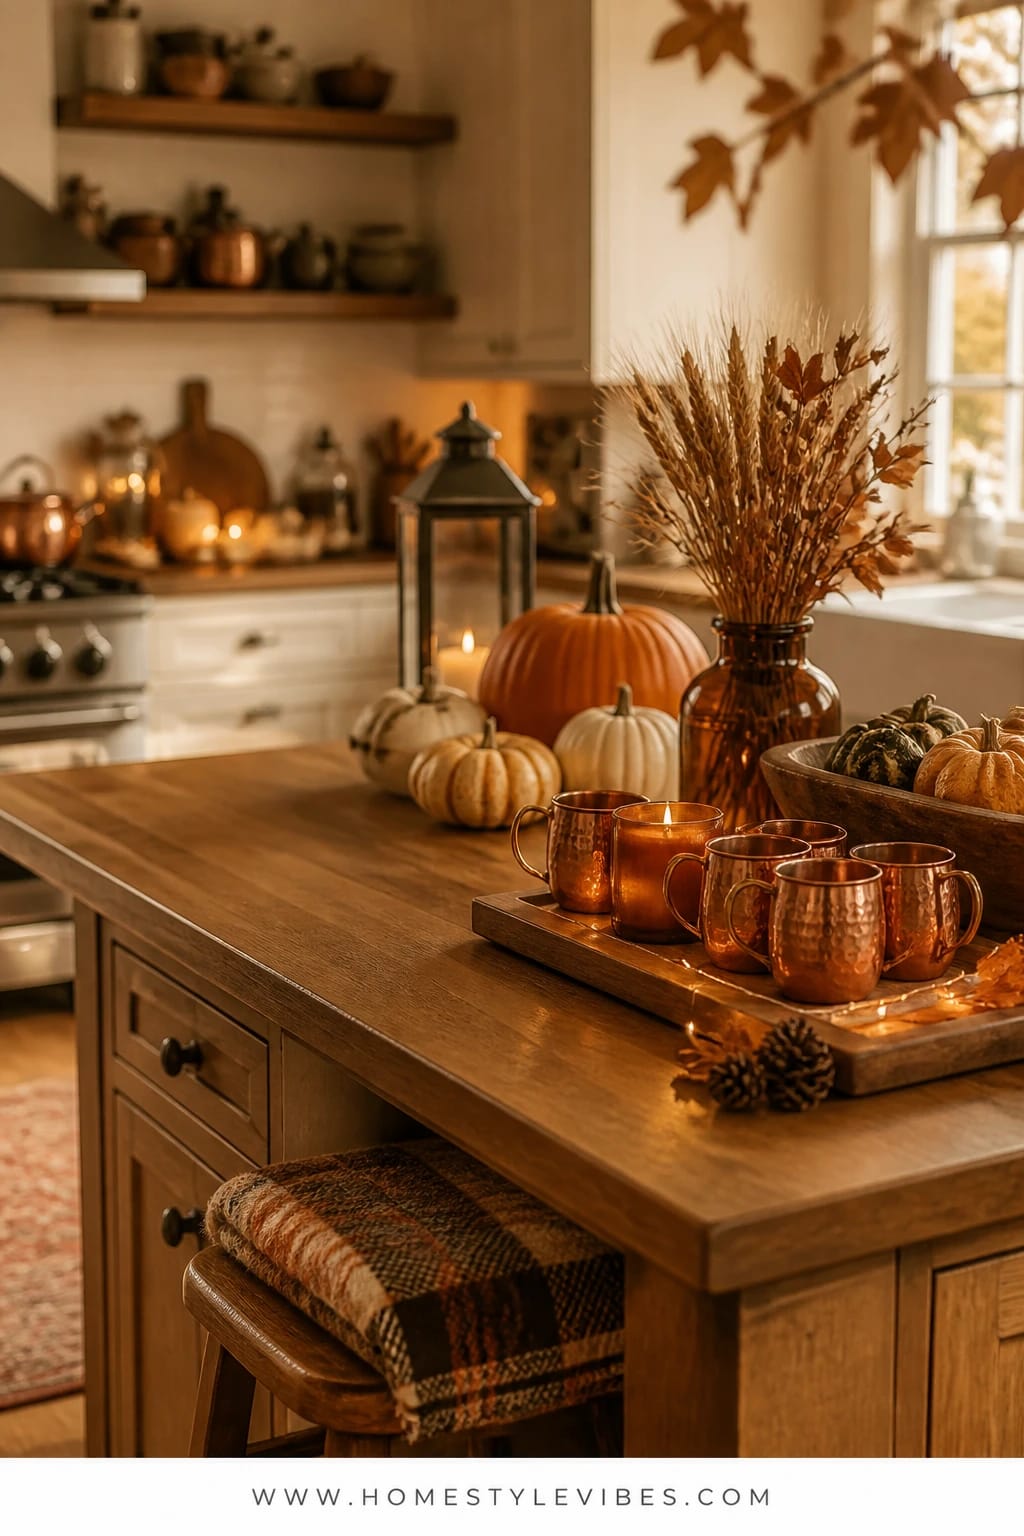
We’ve all been there: you put a pretty vignette on your island and then lose your only prep zone to fragile little knickknacks. It’s that one layout problem that keeps you from committing to fall decor in the busiest room of the house. This setup leans hard into cozy bright autumn—think warm copper, a single amber candle, a wood tray—while leaving a clear working lane so you can chop, stir, and serve without moving a dozen things.
The effect feels like late-afternoon sunshine on a hayride, but indoors. Copper mugs and a hammered copper bowl catch the golden window light and echo the candle’s low flame. On camera, those metallic reflections create layered depth without adding more items. It works in real homes because everything sits on one moveable tray. When it’s chicken pot pie night, lift, set aside, and your island is open again in five seconds.
Light matters here. One small amber-glass candle or a flameless flicker tucked slightly behind the copper keeps the glow soft and even. Add a few russet and sugar-pie pumpkins to repeat those burnished tones. It photographs beautifully because the palette is saturated but tight: burnished copper, warm wood, deep rust, cream. If your kitchen leans white and bright, this brings contrast; if it’s already warm, it amplifies it like a chorus.
Variations that make it yours: Do a small-space version with just two copper mugs, one mini pumpkin, and a 6-inch tray. Budget-friendly? Use thrifted brass cups instead of copper and a honey-colored jar candle. If you want a more neutral read, swap bright orange pumpkins for white and pale wheat tones, but keep the copper for warmth.
Budget Breakdown:
- Copper mugs (set of 4): $25–$60
- Hammered copper or brass bowl: $20–$50
- Wood tray (12–16 inches): $15–$45
- Amber-glass candle or flameless option: $8–$25
- Mini pumpkins (real): $5–$12
Total Estimated Cost: $73 – $192
Best For: Open kitchens with a central island that doubles as prep-and-serve, especially mid-season from late September to early November when copper looks extra rich against warm sunlight.
Key Design Elements:
- Main seasonal props: Copper mugs, mini pumpkins, small amber candle
- Color palette: Burnished copper, warm wood, deep rust, cream
- Lighting strategy: One low, warm flame near reflective metal
- Textile layers: One folded rust or plaid napkin under the mugs
- Natural elements: Real pumpkins or apples
- Accent details: Hammered textures, a round wood tray
How To Recreate This Look:
- Start with a wood tray centered slightly off to one side of your island (leave a clear prep lane).
- Add a hammered copper bowl and fill with apples or mini gourds.
- Layer two to four copper mugs next to the bowl—handle angles facing out for easy grab-and-go.
- Place a small amber-glass candle behind the mugs for a warm back-glow.
- Style with a rust plaid napkin peeking under the bowl for a soft textile note.
Why This Looks Expensive: Repetition of one luxe material—copper—reads intentional and cohesive. The hammered finish adds artisanal texture without visual clutter. Keeping everything corralled on a quality wood tray looks curated, not chaotic.
Watch Out: Don’t overfill the tray. If it’s crammed, you’ll hate moving it at dinnertime. Aim for 70% coverage, 30% breathing room.
Pro Styling Tip: For photos, tilt the candle slightly behind the copper bowl so you catch a warm glint on both metal and fruit—instant depth.
2) Pumpkin Bread Board, Golden Fruit, and a Quartz Counter Corner
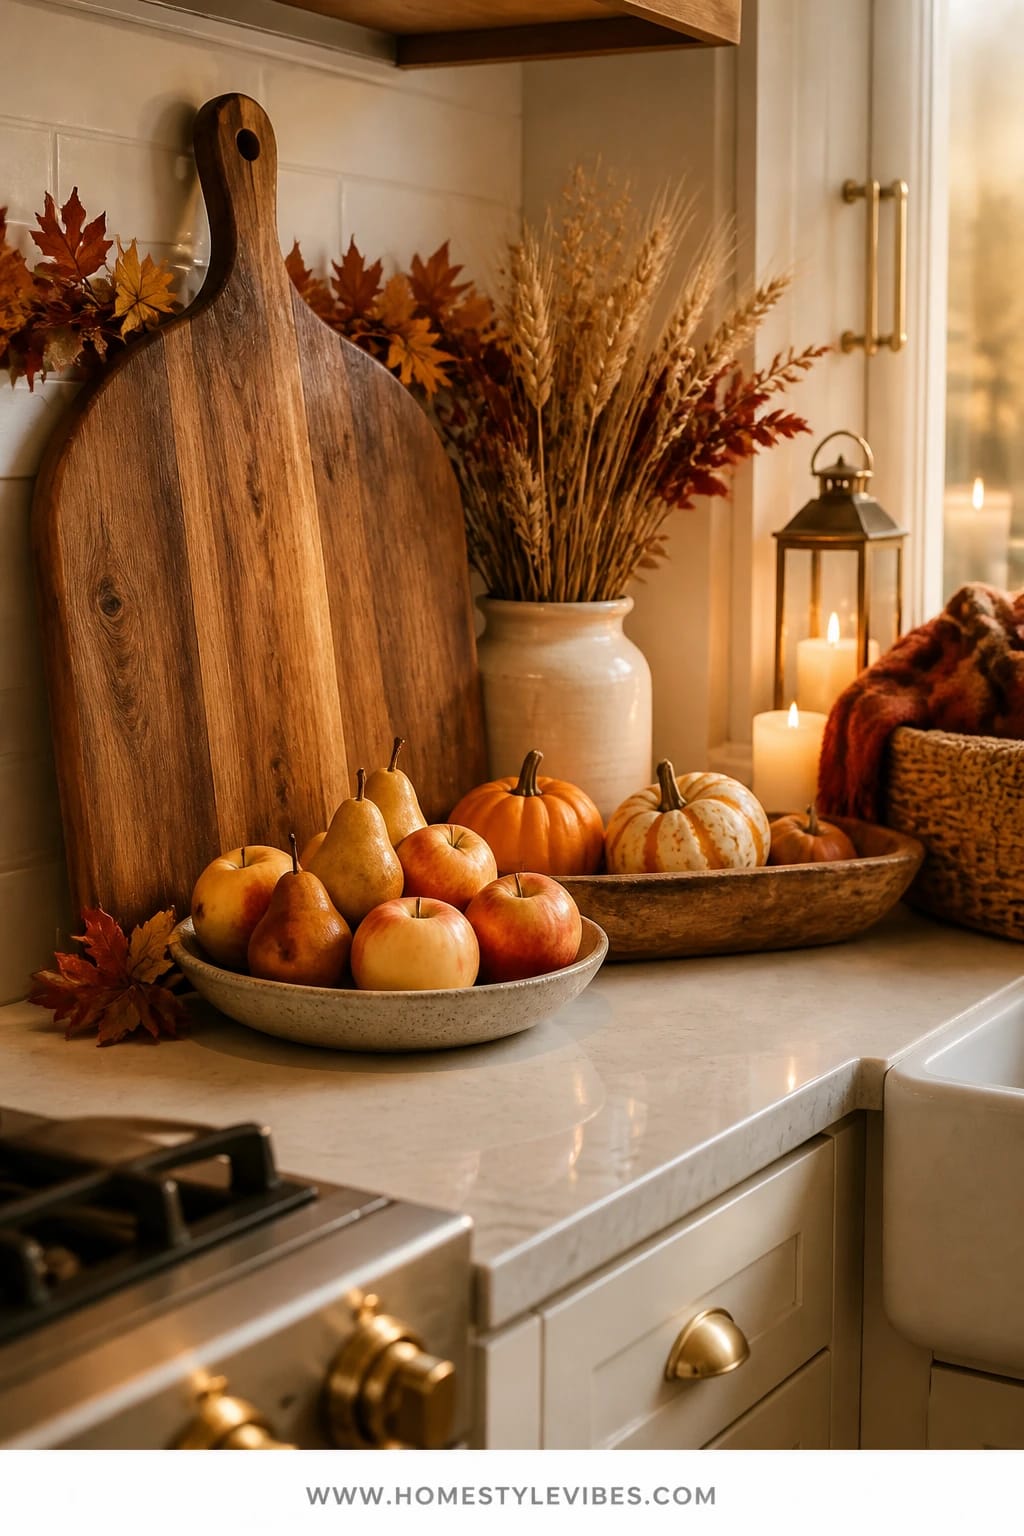
It’s that corner that always feels off: the spot between the sink and stove where mail piles up and the hand soap bottles multiply like gremlins. You’ve tried a vase of flowers there, but it still looks like an afterthought. Instead, anchor the corner with a handsome bread board and a shallow fruit bowl filled with golden pears or Honeycrisp apples—practical, edible, and inherently fall.
This creates a homey, cozy bright autumn mood without a single candle. The light is all about bounce: quartz counters and pale walls reflect afternoon light, making the fruit look jewel-toned and alive. Because everything lives on a board, you can slide it forward for easy wiping, then push it back to reclaim depth. It’s family-friendly and snack-forward—your people will actually eat the decor, which is the most satisfying kind of tidy.
Photographs love this setup. A sliced pear on the board with a linen towel draped casually? Magazine moment. Add one or two small white pumpkins to keep the palette calm if your kitchen already has a lot going on. This corner styling carries you from early fall through Thanksgiving—just replace early apples with Bosc pears later in the season for deeper color.
Small-space version: Use a mini bread board and a cereal bowl for fruit. Budget-friendly: Grab a secondhand wood board and sand it lightly with food-safe oil; a matte finish looks richer than shiny lacquer. If you’re a neutral lover, swap the bright red apples for yellow and soft green pears to dial back the saturation but keep the fall vibe.
Key Design Elements:
- Main seasonal props: Bread board, shallow fruit bowl, 1–2 mini pumpkins
- Color palette: Warm wood, ivory quartz, golden pears, soft rust towel
- Lighting strategy: Natural window light reflecting off pale counters
- Textile layers: A washed linen towel in oatmeal or soft rust
- Natural elements: Fresh fruit, small pumpkins
- Accent details: Matte ceramic bowl, simple salt cellar if space allows
Budget Breakdown:
- Large bread board: $20–$60
- Ceramic fruit bowl: $15–$40
- Fresh fruit (weekly refresh): $6–$15
- Linen towel: $10–$22
- Mini pumpkins (optional): $3–$8
Total Estimated Cost: $54 – $145
Best For: Corners of quartz or marble counters near a window; busy kitchens that need edible decor and quick cleanup.
How To Recreate This Look:
- Start with a clean, oiled bread board tucked into the corner for a 45-degree angle visual.
- Add a shallow ceramic bowl centered on the board and fill with golden pears or apples.
- Layer a linen towel, folded lengthwise, under the bowl so it peeks an inch or two.
- Place one or two mini pumpkins along the outside edge of the board.
- Style with a small salt cellar or butter dish if you have room—keep it simple.
Why This Feels Designer: Angling the board in the corner feels purposeful and makes a dead space functional. The matte finishes (linen and ceramic) play beautifully with glossy quartz, giving that balanced, finished look.
One Thing To Avoid: Don’t mix too many fruit colors. Keep it to one or two tones for a calm, seasonal read rather than a fruit salad explosion.
Pro Styling Tip: For photos, cut one pear and fan the slices on the board; that creamy interior brightens the scene and looks abundant.
Pause here, take a breath. You don’t need to style every surface. Pick the island and one counter corner. That’s enough to make the kitchen feel seasonal without interrupting your routines.
3) Plaid Runner, Brass Pedestal Bowl, and a Family-Friendly Kitchen Island
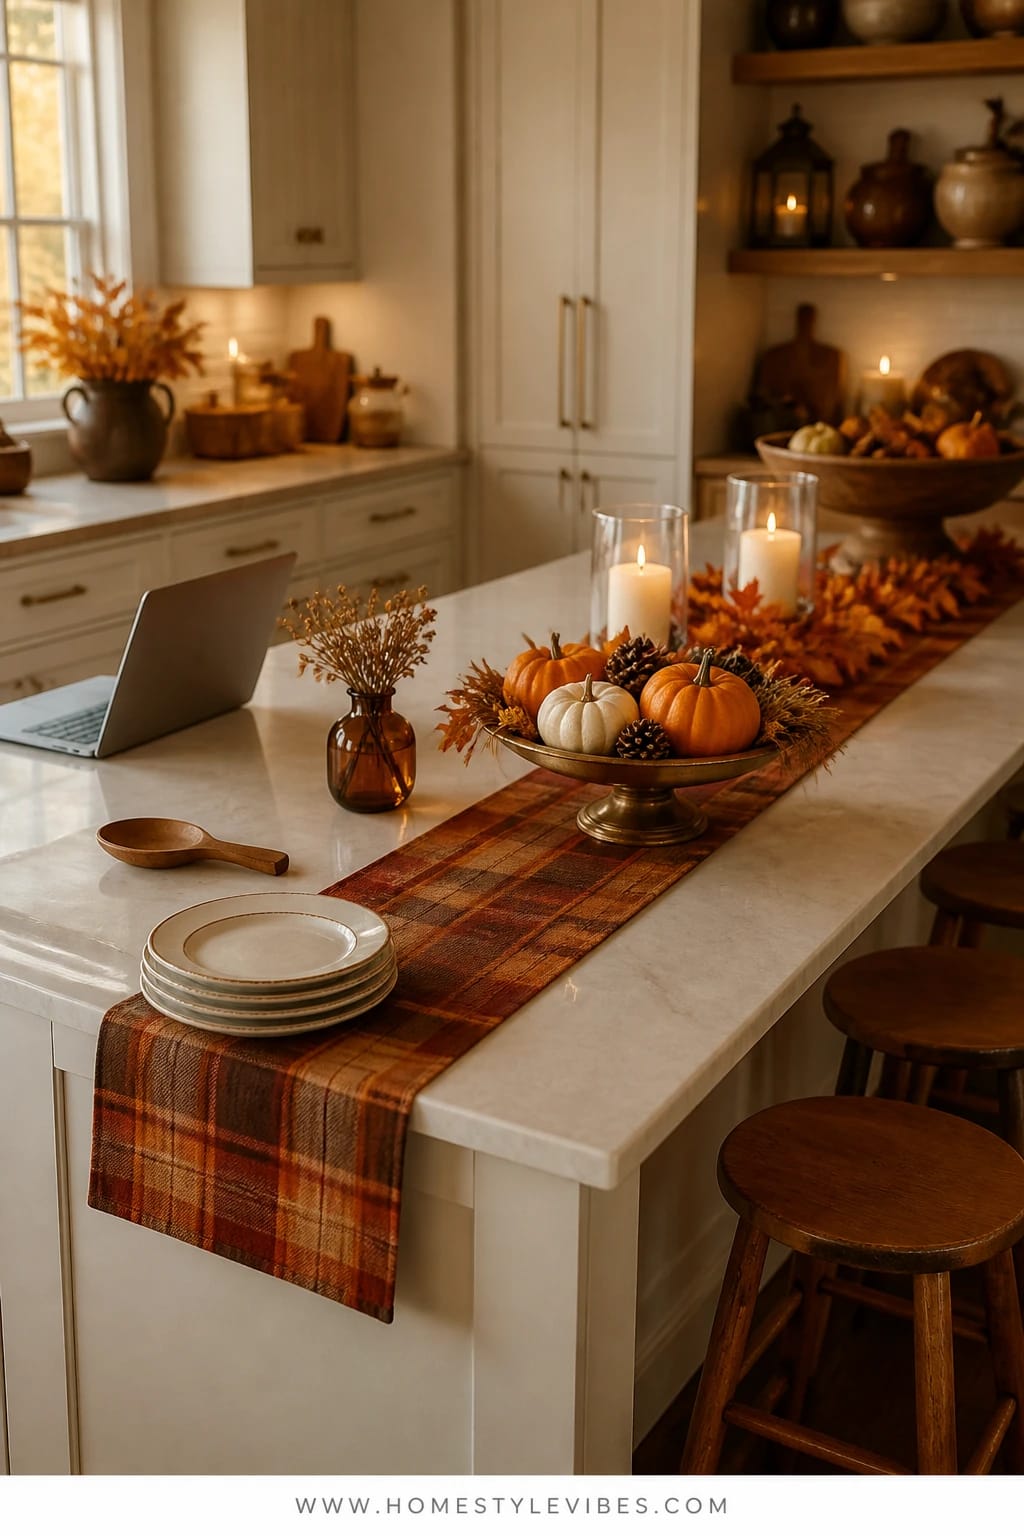
Hosting season sneaks up, and suddenly your island turns into a buffet, craft station, and homework desk. You’ve tried a center vase, but it gets shoved left and right and topples during pancake hour. A narrow plaid runner down the middle with a low brass pedestal bowl solves the chaos. Everything reads festive, but the height stays low and the edges stay open for dishes, laptops, and those very necessary cereal spills.
This vibe is cozy bright autumn at its most practical: a pop of plaid in rust and cream, a brushed brass bowl brimming with mini pumpkins or clementines, and maybe a couple of cinnamon sticks tucked in for fragrance. Candlelight isn’t mandatory here, but if you want it, use two squat amber votives at the ends. The runner acts like a traffic lane for your eyes and your people—items return to the runner, leaving the counter edges clear.
Photos love the linear structure. The runner’s stripes guide the eye, the bowl anchors the center, and the low height means you don’t block anyone’s face in candid shots. It packs up easily; in five seconds you can lift the runner with everything on it. Small homes benefit big time from that kind of flexibility.
Two variations: A smaller island? Cut the runner to size and hem with iron-on tape. For a calmer palette, choose a subtle cream-on-taupe check and fill the bowl with pale wheat-colored gourds. If you worry about kids and brass, go for a matte wood pedestal—still warm, still fall, just a little more knock-proof.
Budget Breakdown:
- Plaid table runner (8–12 feet): $15–$35
- Brass or wood pedestal bowl: $25–$70
- Mini pumpkins or clementines: $6–$15
- Amber votives (optional): $8–$18
Total Estimated Cost: $46 – $138
Best For: Multi-use kitchen islands in family homes; weeknight dinners and weekend brunch where you need form and function together through November.
Key Design Elements:
- Main seasonal props: Plaid runner, low pedestal bowl, optional votives
- Color palette: Rust, cream, brass, soft orange
- Lighting strategy: Even overhead light with optional warm votives at ends
- Textile layers: Soft cotton or linen runner for grip and texture
- Natural elements: Mini pumpkins, clementines, or pomegranates
- Accent details: Cinnamon sticks, dried orange slices for scent
How To Recreate This Look:
- Start with a runner centered on the island, leaving 5–8 inches of bare counter on both sides.
- Add a low pedestal bowl in the middle so sightlines stay open.
- Layer in seasonal fill—keep to one type for a cleaner read.
- Place two low votives near the runner’s ends if you want evening glow.
- Style with one fall napkin folded under the bowl for a quiet extra layer.
Why This Reads High-End: The elongated composition feels tailored. Matching the runner’s width to your island, rather than using a too-wide piece, makes it look custom.
The Most Common Mistake: Using a tall centerpiece. It looks dramatic but interferes with conversation and every real-life task. Low and wide wins here.
Pro Styling Tip: Angle your camera slightly from the runner’s end for that editorial runway shot; the lines naturally lead into the scene.
4) Spice Jar Caddy, Warm Under-Cabinet Light, and the Main Prep Counter
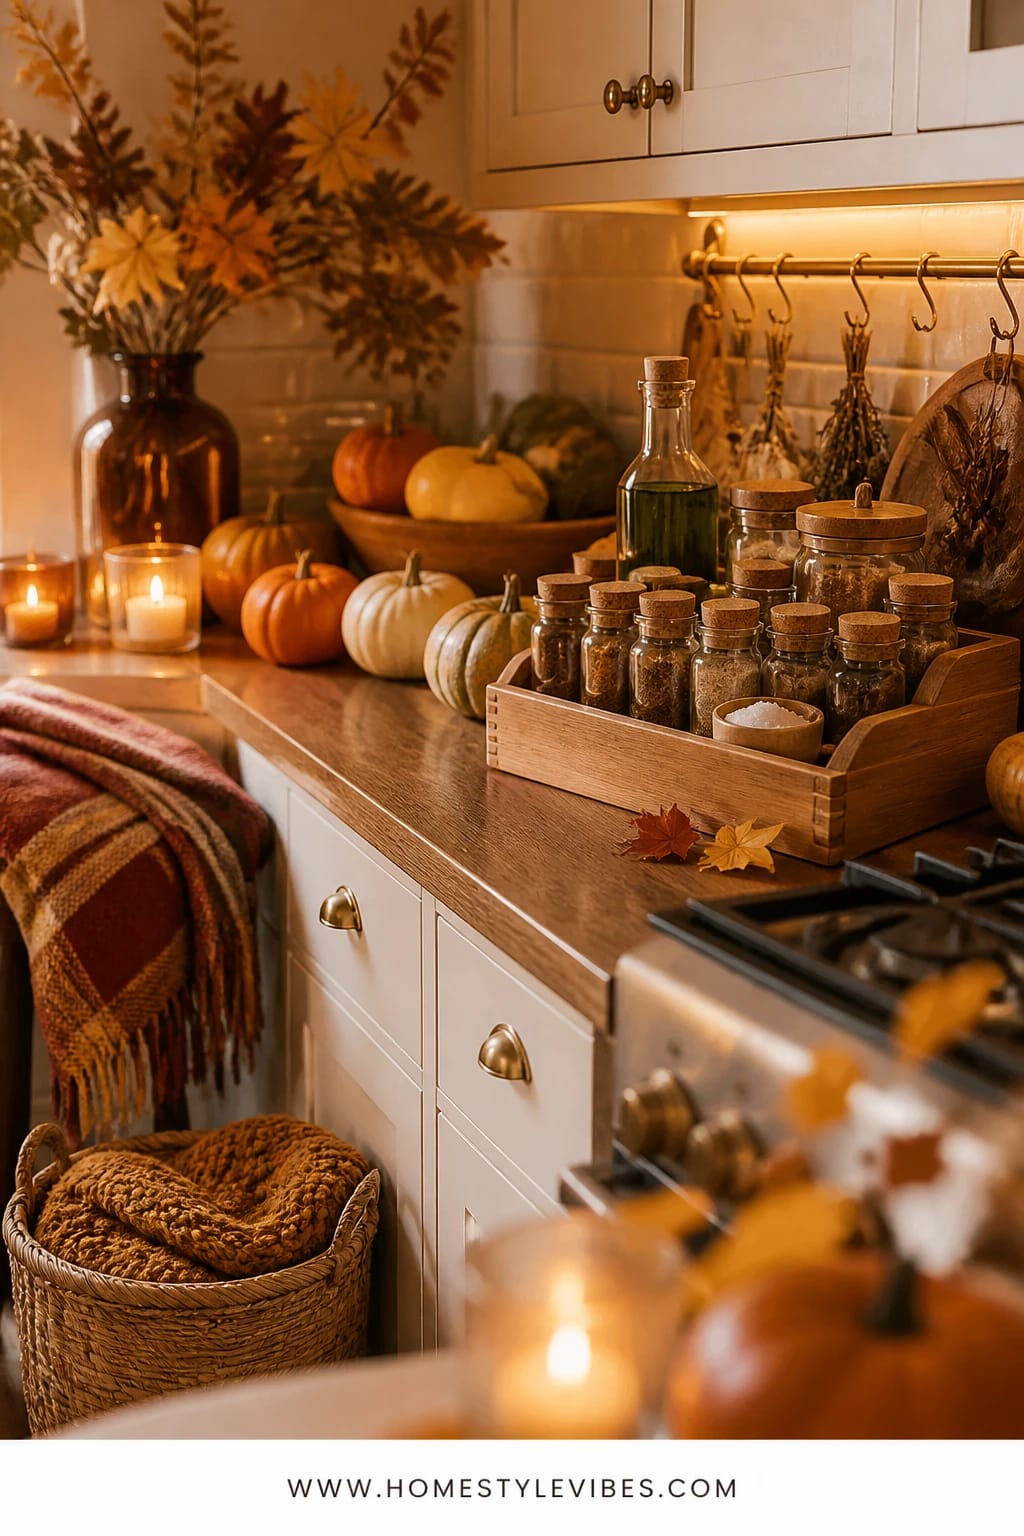
Your everyday clutter probably lives near the stove: oil, salt, pepper, the garlic you swear you’ll use before it sprouts. That spot can look messy fast. You’ve tried decanting into pretty jars, but it still feels scattered. The fix is a handled caddy that corrals the essentials, paired with warm under-cabinet lighting to make it glow like a tiny bodega of fall flavor.
We’re talking cozy bright energy via function-first styling. A shallow wooden or rattan caddy holds amber-glass spice jars, a small oil dispenser, and a salt cellar. Slide it forward to cook; slide it back when you wipe down the counter. Turn on warm LED under-cabinet lights (or add a strip if you don’t have them) and the whole scene looks intentional—practical items now look like part of the decor.
This photographs beautifully because of the glow-on-glass moment. Amber jars read like tiny lanterns, and the earthy palette—honey, rust labels, natural wood—stays within that warm harvest lane. It’s far easier to maintain than a purely decorative setup because you use it every day. Plus, nothing too tall—no shadowy blocks cutting the light.
Two ways to customize: Budget-friendly? Use your current spices, just remove one loud label and face the jars with the clean side forward; add uniform kraft labels later. Small kitchen? Choose a narrow, long caddy to slot between the stove and wall. If your kitchen runs cool and white, lean into slightly darker amber to warm things up.
Key Design Elements:
- Main seasonal props: Amber-glass spice jars, wood/rattan caddy, salt cellar
- Color palette: Honey amber, natural wood, soft black text
- Lighting strategy: Warm under-cabinet LED, 2700–3000K
- Textile layers: A tiny waffle-weave dish towel under the caddy for grip
- Natural elements: Garlic bulbs, a sprig of rosemary or thyme
- Accent details: Matte black scoop, small oil dispenser with brass spout
Budget Breakdown:
- Handled caddy: $12–$35
- Set of amber jars with labels: $18–$40
- Salt cellar: $10–$25
- Oil dispenser: $10–$22
- Under-cabinet LED strip (if needed): $15–$35
Total Estimated Cost: $65 – $157
Best For: Main prep counters and stove-adjacent zones in busy kitchens where function must look neat, particularly October weeknights.
How To Recreate This Look:
- Start with a clean counter and install warm LED strip lights if you don’t have them.
- Add a narrow caddy and a small dish towel beneath for grip and softness.
- Layer in 6–8 frequently used spices in amber jars—front labels facing outward.
- Place a salt cellar and oil dispenser at the outer edge for easy grab.
- Style with one fresh herb sprig tucked by the jars to nod to the season.
Why This Looks Intentional: Grouping utilitarian items by color and material (amber, wood, black) makes everyday tools feel curated. The warm light is the secret sauce—everything glows, nothing feels random.
Don’t Do This: Avoid filling the caddy with every spice you own. Keep it to the ones you actually use in fall cooking. Too many jars feel like store shelving.
Pro Styling Tip: For photos, turn off cool overheads and let the under-cabinet light do the work; your amber tones will saturate beautifully.
Remember, this isn’t about recreating a showroom. It’s about a kitchen that works hard and still says “fall” when you walk in with your grocery bags. If one idea clicks, start there and ignore the rest until next weekend.
5) Harvest Cutting Board Stack, Rust Tea Towels, and the Coffee Station Counter
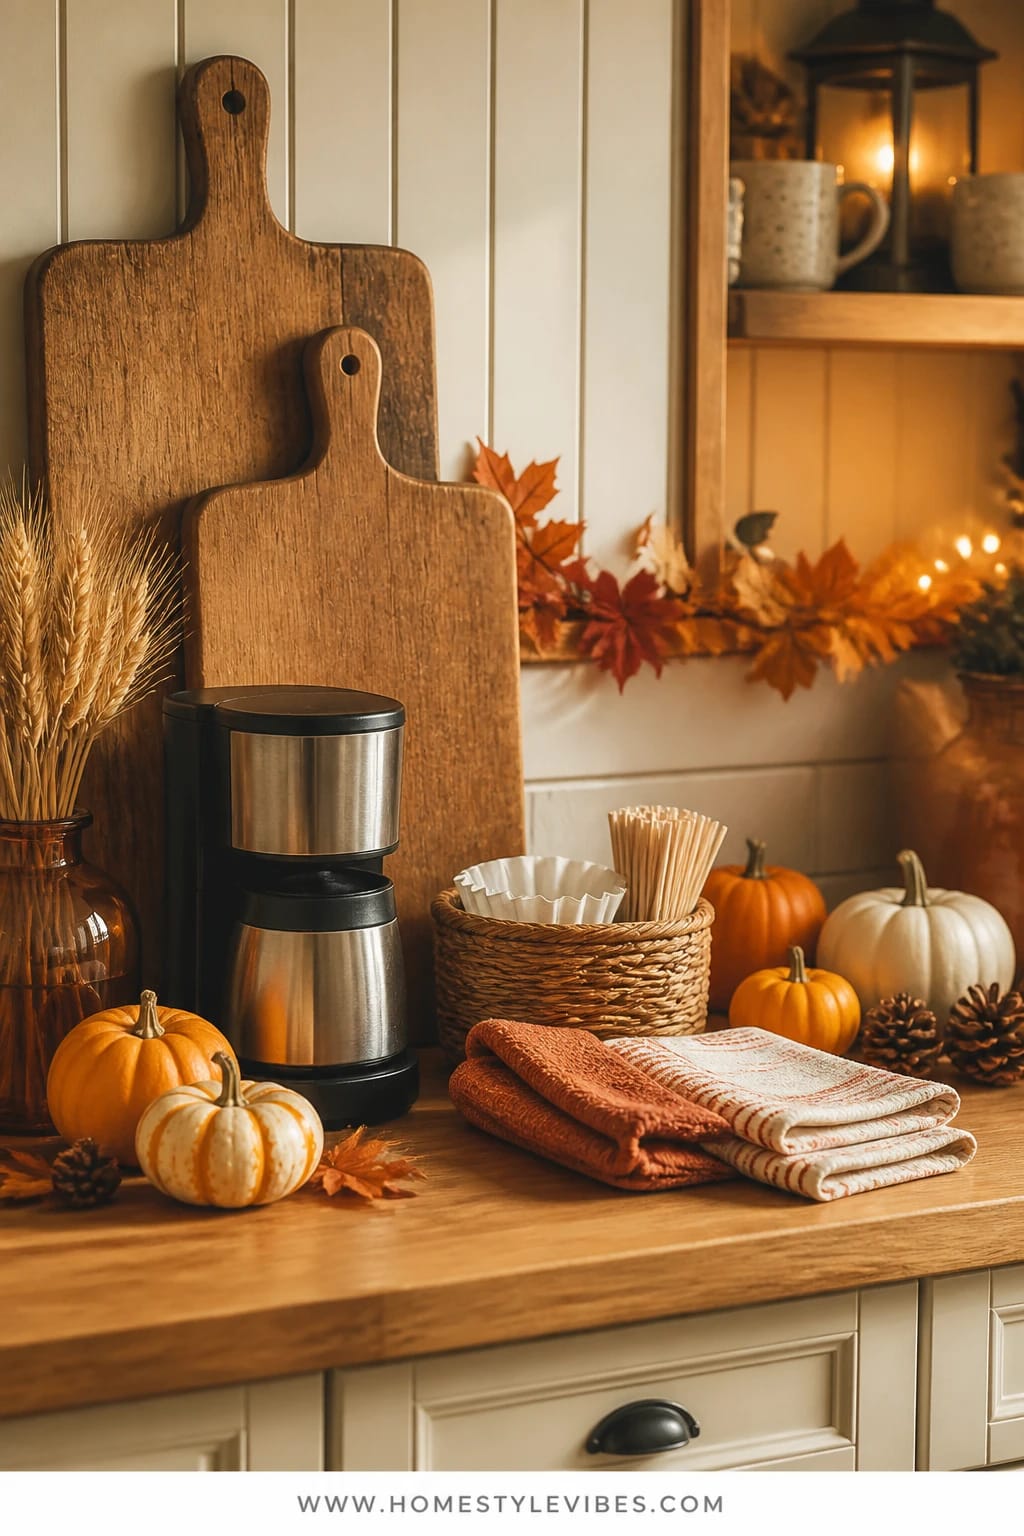
Mornings get hectic fast. The coffee machine monopolizes a corner, and everything else feels like clutter—filters, mugs, random spoon. You’ve tried a mug tree, but it becomes a tangly mess. The solution: a layered cutting board stack behind the coffee maker as a vertical backdrop, rust-and-cream tea towels folded neatly, and a low basket for filters and stirrers.
The mood is friendly farmhouse meets crisp October air. Two boards—one large, one medium—create height and texture without eating counter space. A short basket corrals the tiny bits that otherwise roll around. Add a single white mini pumpkin or a tiny bud vase with a clipped branch and you’ve got that cozy bright nod right where you need caffeine most.
This photographs like a magazine because of the vertical rhythm: boards, machine, basket, all in a tidy triangle. The rust textiles tie to the season while the rest stays neutral so it never feels overdone. Plus, it’s truly practical—you can refill filters, grab a towel, and pour milk without stepping around breakable decor.
Two variations: For a small counter, use one board only and lean it behind the machine. If you prefer a softer palette, swap rust towels for oatmeal and add a wheat bundle in a short jar. I did this last October and couldn’t believe how finished my kitchen felt at 6:30 a.m., even with bedhead and mismatched socks.
Budget Breakdown:
- Large cutting board: $20–$45
- Medium cutting board: $15–$30
- Low basket or lidded canister: $10–$25
- Rust/cream tea towels (set of 2): $12–$24
- Mini pumpkin or bud vase: $3–$12
Total Estimated Cost: $60 – $136
Best For: Coffee corner counters that need storage and a seasonal nod; everyday use from early September through Thanksgiving, especially in homes with a steady stream of guests.
Key Design Elements:
- Main seasonal props: Cutting board stack, rust tea towels, mini pumpkin
- Color palette: Warm wood, rust, cream, matte black accents
- Lighting strategy: Morning natural light plus a soft lamp or under-cabinet light
- Textile layers: Folded towels, maybe a tiny plaid coaster under the creamer
- Natural elements: A clipped branch or eucalyptus sprig
- Accent details: Short rattan basket, ceramic canister
How To Recreate This Look:
- Start by cleaning the corner and pushing the coffee machine an inch away from the wall.
- Add a large board behind it and a medium board layered in front, both leaned securely.
- Place a low basket or canister to the side for filters and spoons.
- Layer two folded rust tea towels—one under the basket, one within reach of drips.
- Style with a single mini pumpkin or a clipped branch in a tiny vase.
Why This Looks Expensive: Vertical layers make any counter feel designed. Using real wood boards and natural fiber baskets adds texture that looks rich, not fussy.
Watch Out: Don’t let the boards slide. Add small non-slip dots or a tiny bit of museum gel at the bottom corners to keep them steady behind the machine.
Pro Styling Tip: Shoot this corner in the morning with blinds half-open—diffused light on the boards shows grain and warmth without glare.
6) Apple Crate Tray, Warm Pendant Light, and a Galley Counter Pass-Through
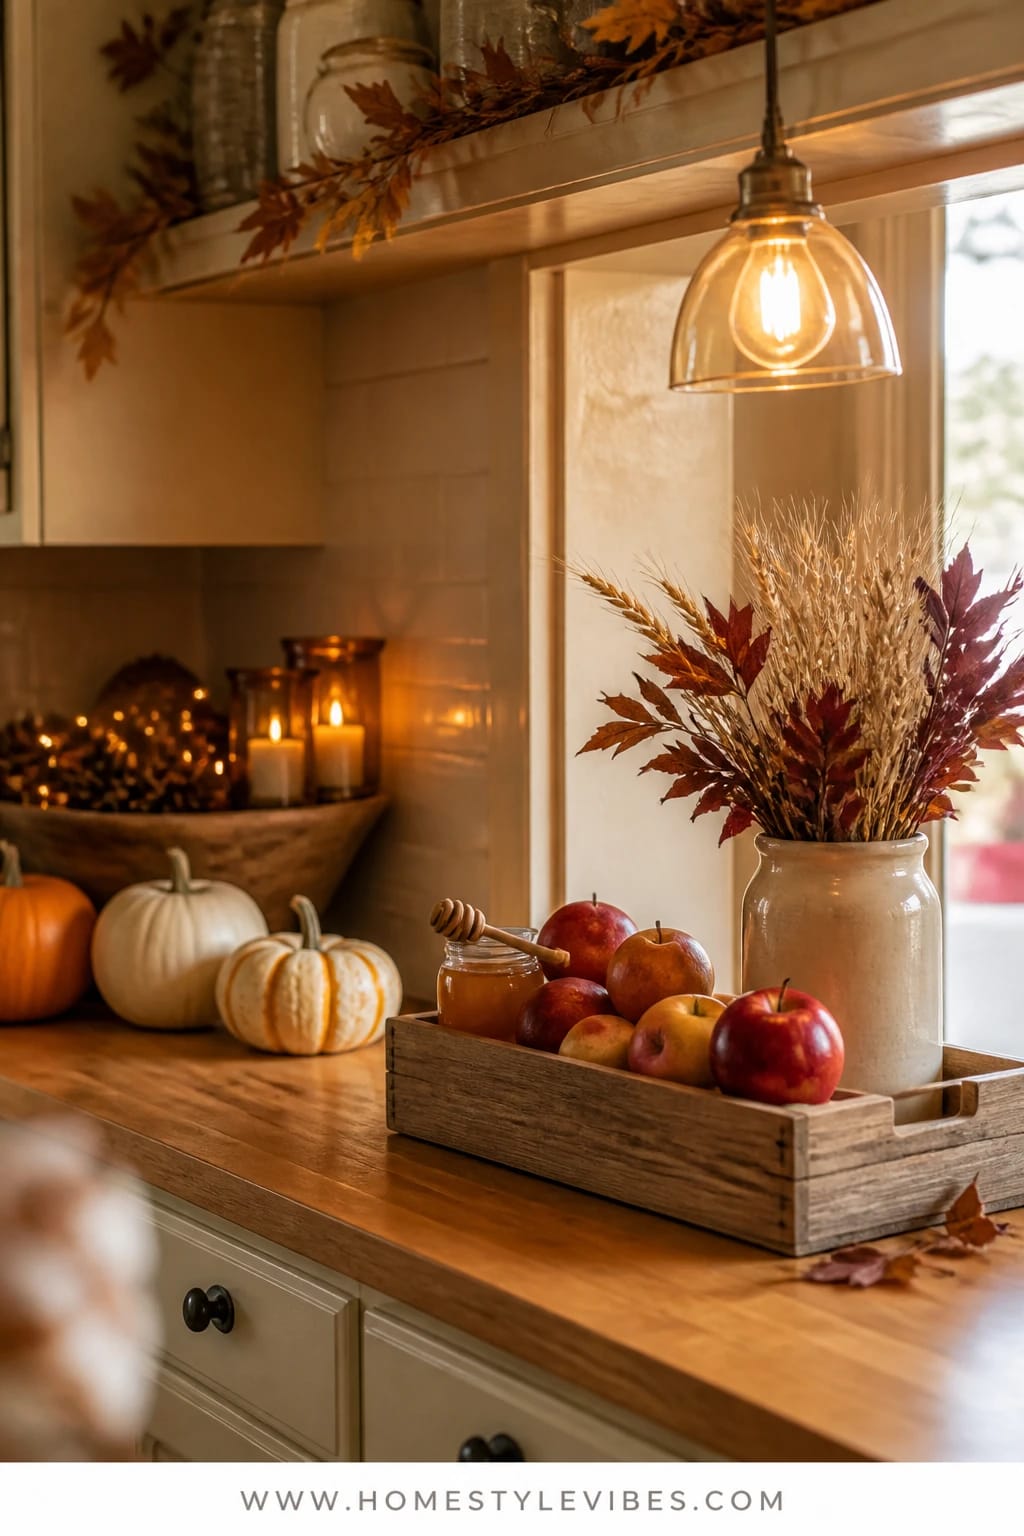
Galley kitchens are stingy with space. A pass-through counter becomes a drop zone for everything—keys, mail, soccer shin guards (true story). You’ve tried a basket, but it turns into a black hole. Enter the slim apple-crate tray: a shallow wood tray styled with in-season apples, a glass honey jar with a dipper, and a short vase of wheat or dried leaves. It looks like a still life but functions like a landing strip that you can clear in one hand.
We’re keeping the cozy bright autumn palette—deep red apples, amber honey, wheat tones—and pairing it with a warm pendant bulb overhead. That pendant does a lot of heavy lifting here. Light the tray at night and everything glows like a painting; during the day, the wood grain adds warmth to the narrow space.
In photos, you get contrast and simplicity. A slim tray says restraint, which feels luxurious in a small footprint. Real life loves it because you can lift the whole tray during dinner service and stash it on the fridge for an hour, then return it post-dishes. I used a thrifted spice crate once and lined it with an old plaid napkin—instant charm, and it kept apple stems from scratching the counter.
Two easy variations: Tight budget? Use a shoebox lid covered with kraft paper as a temporary tray (seriously) and upgrade later. For a muted palette, choose pale yellow apples and white wheat in a clear jar. If you’re worried about sticky honey near mail, switch the honey jar for a small cinnamon bundle tied with twine.
Budget Breakdown:
- Shallow apple crate or tray: $12–$35
- In-season apples: $5–$12
- Glass honey jar with dipper: $8–$18
- Short vase and dried wheat/leaves: $10–$22
- Warm LED pendant bulb (2700K): $6–$14
Total Estimated Cost: $41 – $101
Best For: Narrow pass-through counters or the end of a galley run; great from early October through Thanksgiving when apples are at their prettiest.
Key Design Elements:
- Main seasonal props: Apple-filled tray, honey jar, dried wheat
- Color palette: Deep apple red, amber honey, pale wheat, warm wood
- Lighting strategy: Single warm pendant focused directly over the tray
- Textile layers: A fold of plaid napkin lining the tray bottom
- Natural elements: Fresh apples, dried stems
- Accent details: Small twine bow, matte black or brass tray handles
How To Recreate This Look:
- Start by centering a slim tray on the pass-through, leaving space for plates.
- Add a plaid napkin liner for color and to cushion fruit.
- Layer in apples, stacking a few at the back for height.
- Place a honey jar on the front corner and a short vase of wheat at the opposite back corner.
- Style with a simple twine bow around the vase or a cinnamon bundle for scent.
Why This Feels Designer: A controlled, linear composition in a tight space reads thoughtful. The pendant spotlighting creates that “styled moment” eye-catch without crowding.
One Thing To Avoid: Don’t overload the tray. Leave negative space so you can actually grip it with one hand. Full but breathable wins.
Pro Styling Tip: For photos at night, dim other lights and let the pendant create a soft pool on the tray—your apples will look lacquered and lush.
Real talk: I once tried a full-on pumpkin patch on my island—stacked gourds, trailing garland, the works. It was gorgeous for exactly 36 hours until soup night required elbow room. Practical styling loves you back. It looks good and then steps aside when life walks in with a sheet pan.
Quick Checklist
- One moveable tray for your island
- Warm-toned candle or flameless option
- Copper or brass accent piece for glow
- Shallow fruit bowl with in-season produce
- Plaid or rust-toned runner cut to fit
- Low pedestal bowl to keep sightlines open
- Handled caddy for everyday spices
- Under-cabinet warm LED strip
- Cutting board stack for vertical texture
- Short rattan or wood basket for small items
- Shallow crate tray for narrow counters
- Warm pendant bulb (2700–3000K)
- Mini pumpkins in one color family
- Rust or oatmeal linen towels
- Dried wheat or a clipped branch for height
Frequently Asked Questions
How do I keep these fall kitchen island and counter styling ideas under budget?
Pick one hero material and repeat it. For example, choose copper or brass, not both. Thrift boards and bowls, use real fruit as decor, and corral everything on one tray you already own. Most looks land under $60 when you shop your house and add just one seasonal element.
Are real or faux pumpkins and florals better for counters where we cook?
IMO, real small pumpkins and fresh fruit win for counters. They’re food-safe adjacent and smell like fall. For tall moments, use dried stems (wheat, eucalyptus) instead of fresh flowers so you’re not dealing with drippy water near outlets.
My kitchen is tiny. Can I still style a kitchen island or counter without losing prep space?
Yes—choose a single narrow tray or board and keep items low. In a galley, place the tray at the pass-through or the least-used corner. The trick is a lift-and-go setup so you can clear it with one hand.
What about storage after the season? I don’t want a box of random fall stuff.
Focus on multi-season basics: wood boards, neutral trays, amber jars. Store only the strictly seasonal bits (mini pumpkins get composted, dried wheat can stay in a vase in a closet). Keep it to one bin labeled “Kitchen Fall”—future you will thank you.
Are candles safe on kitchen counters with kids and pets around?
Use low, stable vessels and keep flames away from towel edges and traffic lanes. If you’re nervous, flameless candles in amber glass still give that golden glow without worry. Under-cabinet lighting can mimic warmth too.
When should I start decorating the kitchen for fall?
Start light in early September—fruit bowls, a rust towel, a tray. Add pumpkins and wheat in October. Keep the warm glow and caddies through Thanksgiving, then swap fruit for citrus and evergreens in December.
Wrap-Up: Make Fall Work Hard in the Heart of Your Home
Here’s the heart of it: your kitchen can look like a cozy bright autumn mood board and still run like a weekday command center. The secret isn’t more stuff—it’s smarter groupings, warm light, and pieces that lift out of your way. Start with the idea that tugged at you—maybe the copper tray on the island or the bread board corner—and set a 20-minute timer. That’s enough to make the room feel finished.
Fall decor in the kitchen loves color and warmth: rust threads in a runner, amber glow bouncing off metal, apples stacked like little jewels. Keep heights low, palettes tight, and everything on a tray or board. These fall kitchen island and counter styling ideas aren’t precious; they’re practical, photogenic, and ready for soup night, snack time, and a last-minute pie. You’ve got this—seriously. Light the candle, pour the cider, and enjoy the season right where life actually happens.

About the Author

Krisztina P.Rendes, Founder of Home Style Vibes
Founder of Home Style Vibes
Krisztina Puskásné Rendes created Home Style Vibes as a cozy-modern lifestyle space where homemaking meets inspiration. Her goal is to help women create beautiful, organized, and peaceful homes they truly love — without overwhelm. You’ll find here heart-driven content on home decor, cleaning tips, easy family recipes, organization and decluttering, DIY home projects, plants, and seasonal ideas — all designed to bring more calm, comfort, and style into everyday life.