6 Fall Halloween Craft Ideas The Whole Family Will Love Making
You want an at-home Halloween that feels warm, playful, and beautifully “us.” You hate the plastic clutter, the rushed last-minute scramble, and crafts that look great on Pinterest but flop on your dining table. Picture this instead: a cozy, candlelit evening where black taper candles flicker, cheerful jack-o’-lantern faces beam from a bookshelf, and subtle cobwebs dance in the lamplight while everyone crafts together. These 6 Fall Halloween craft ideas fix the “it never comes together” feeling and give you a stylish, spooky-but-sweet home you can actually live in—on a $20–$150 project range, a weekend of time, and materials you’ll reuse next year.
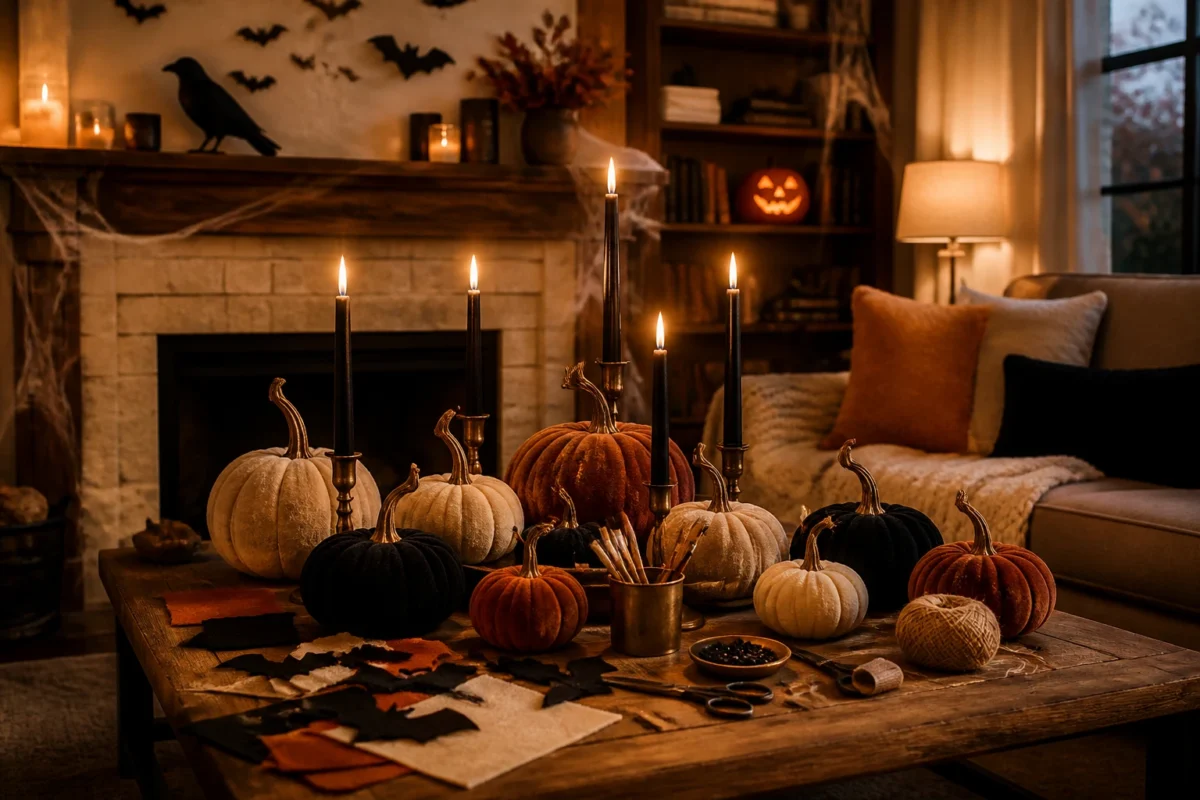
This is about mood as much as making: playful spooky styling, a few gothic touches, and family-friendly projects that photograph beautifully. Think creamy and black paint, felt bats, crows on a mantel, and pumpkin textures that feel intentional under warm lamplight. These ideas are highly photogenic and scroll-stopping—perfect for your fall home and your camera roll. Ideal for families who want a Halloween vibe from now through October 31st, with plenty that can transition right into November.
1) Velvet Pumpkin Patch With Black Candlelight On The Coffee Table
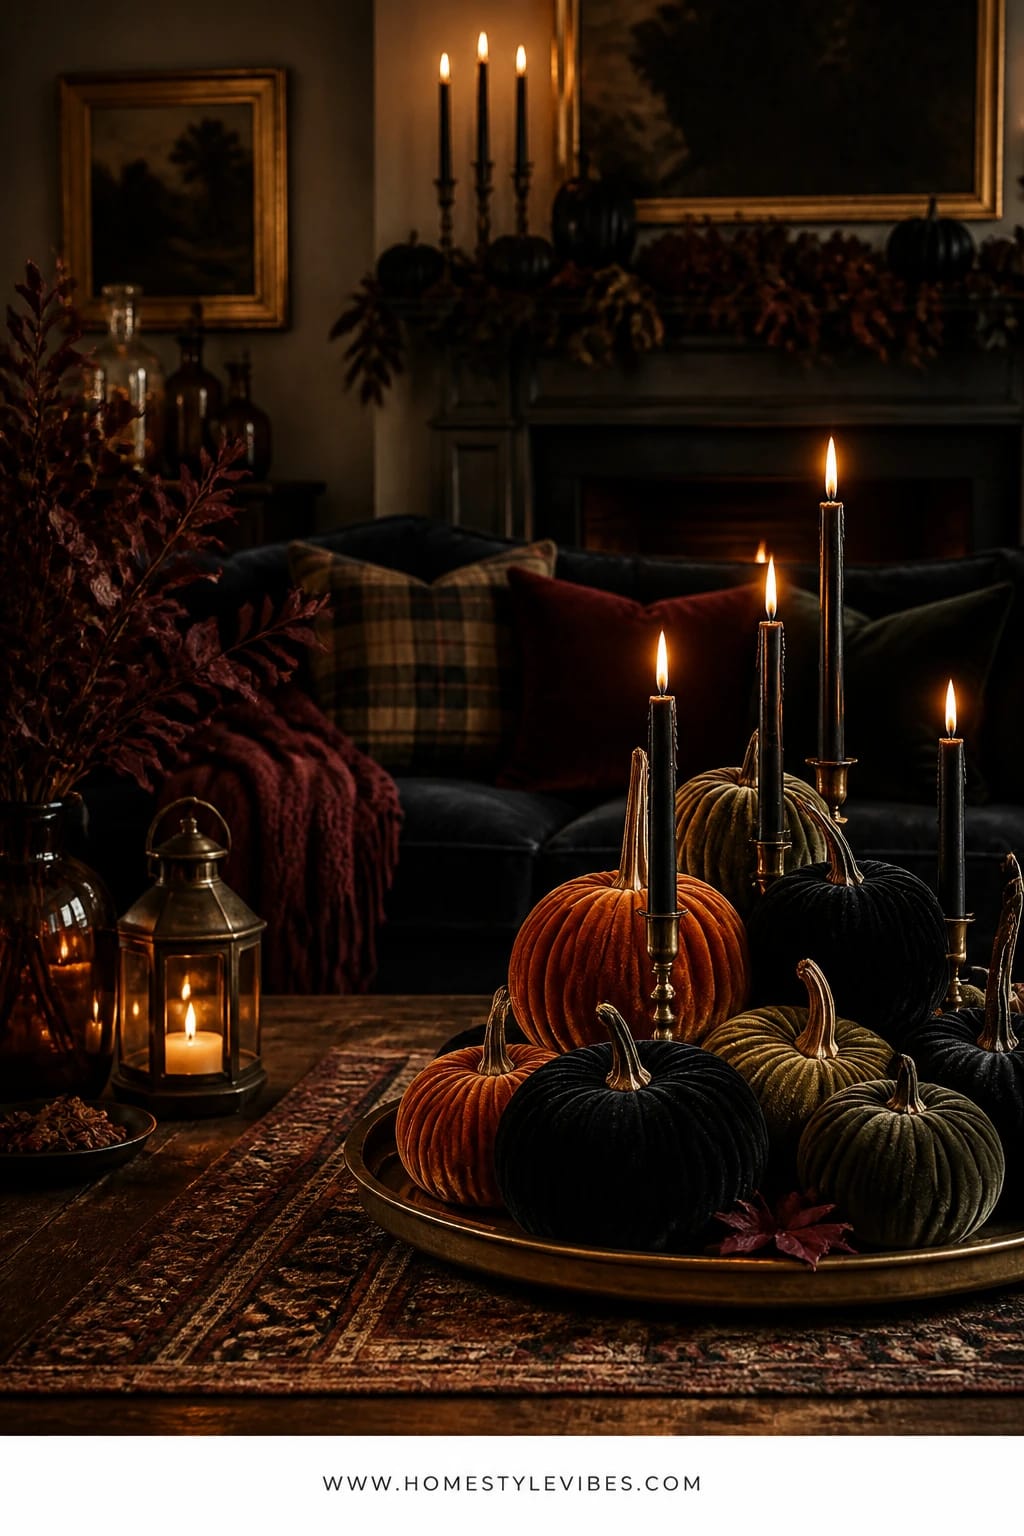
We’ve all been there: the coffee table turns into a dumping ground for remotes, mail, and half-finished coloring pages. You’ve tried a tray and a candle, but it still looks flat and random. This Halloween craft idea corrals the chaos with a velvet pumpkin centerpiece you can actually make together, layered on a low tray with black taper candles to bring that moody, playful glow right into the living room.
The mood is rich and cozy with a wink of spooky—velvet textures, soft candle shadows, and a few tiny crows perched nearby. It works in real homes because it’s tactile for kids, pet-proof with battery tapers if you need them, and easy to store in a single lidded box for next year. Lighting does the heavy lifting: black candles create sculptural shadows and luxe depth without needing a ton of decor around them. This photographs beautifully thanks to the contrast between matte velvet and the glossy candlelight, plus the height variation of pumpkins and tapers.
Two variations: 1) Budget-friendly: use scrap fabric or thrifted sweaters instead of velvet; stuff with rice or dried beans for a weighty, luxe feel. 2) Small-space: go mini—cluster four 3-inch pumpkins on a book stack and add just one black taper in a brass holder for a tidy footprint that still reads dramatic.
Budget Breakdown:
- Velvet or fabric fat quarters: $2–$5 each (4–8 pieces)
- Polyfill or dried beans/rice: $4–$10
- Wooden stems or twig clippings: free–$6
- Tray or low basket: $12–$40
- Black taper candles: $8–$18
- Candle holders (thrifted brass works): $8–$25
Total Estimated Cost: $34 – $104
Best For: Family rooms or living rooms with a centrally placed coffee table; great from late September through Halloween, and you can remove the bats or crows to carry the velvet pumpkins into November.
Key Design Elements:
- Main seasonal props: DIY velvet pumpkins, black tapers, small faux crows
- Color palette: black, deep rust, charcoal, creamy white
- Lighting strategy: two to three tapers at different heights for moody pools of light
- Textile layers: velvet, sweater knit scraps, twine ties
- Natural elements: twig stems, a few dried seed pods tucked on the tray
- Accent details: thrifted brass holders, low rattan or wood tray
How To Recreate This Look:
- Start with a neutral low tray or basket to ground the arrangement.
- Add DIY pumpkins: cut fabric circles, stitch a loose running stitch around the edge, cinch, stuff, and tie off.
- Layer twig stems into the tops; wrap with twine for a “pumpkin vine” feel.
- Place two or three black taper candles off-center to create asymmetry and depth.
- Style with one or two small crows and a few dried pods to finish the vibe.
Why This Looks Expensive: The velvet texture and black candlelight feel boutique—like something from a curated home shop—especially when you vary pumpkin sizes and stick to a tight color palette.
Watch Out: Don’t overcrowd the tray. Leave negative space so each candle and pumpkin silhouette can breathe; crowded pumpkins can look like a clearance bin, not a styled vignette.
Pro Styling Tip: For photos, turn off overhead lights and rely on tapers plus a nearby table lamp; the shadows make the velvet read richer and the pumpkins pop.
2) Cut-Paper Bats In Cream And Charcoal On The Mantel
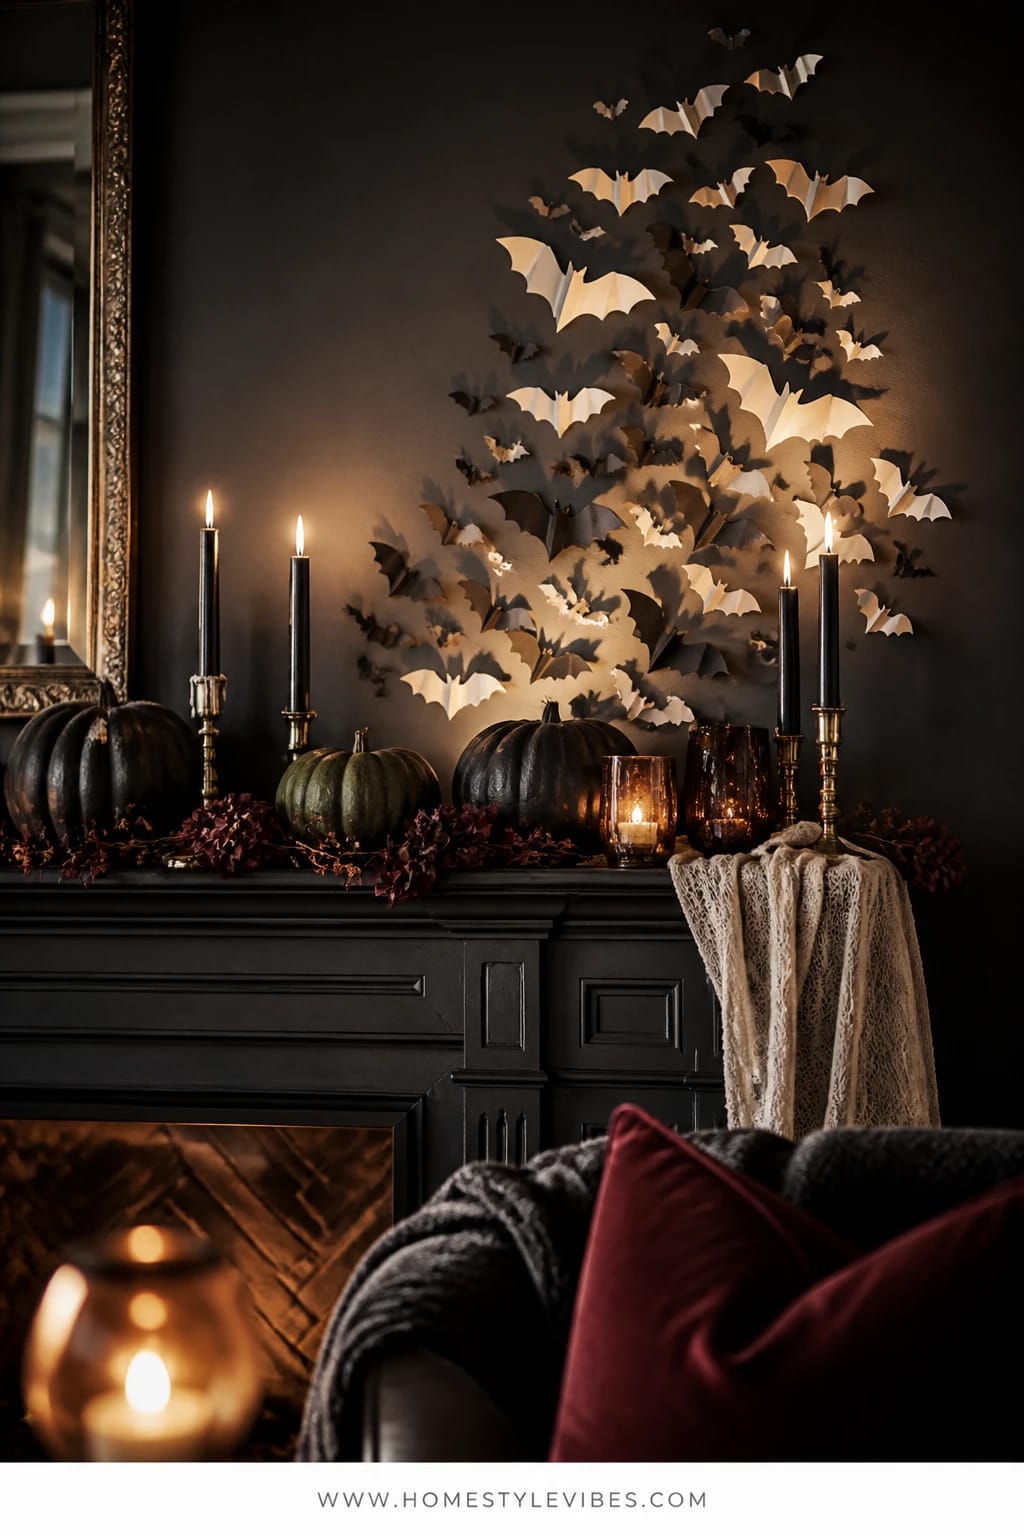
It’s that one corner that always feels off—your fireplace surround. You hang a garland, you toss a pumpkin up there, and yet it never reads “Halloween,” just “placed items.” Enter layered cut-paper bats in cream and charcoal, fluttering up the wall from the mantel like a chic, spooky swarm.
This creates playful drama without gore: neutral bats swoop up the wall in a gentle arc, and your eye follows the movement. It works in real homes because it’s lightweight, renter-friendly, costs almost nothing, and stores flat in a single file folder. The lighting effect? Perfect at dusk. The bats catch golden lamplight along the edges while nearby candlelight throws tiny bat shadows for an instant haunted-house-but-stylish moment. It photographs like a dream thanks to depth and directional flow—those little wings create natural movement in a still image.
Variations: 1) Minimalist: do a single swoop of bats from one mantel corner up to the ceiling. 2) Punchy: add a black tulle runner under a few white mini pumpkins on the mantel for contrast without clutter.
Budget Breakdown:
- Heavyweight paper or cardstock (cream, charcoal, black): $5–$12
- Painter’s tape, removable putty, or clear adhesive dots: $3–$6
- Optional black tulle: $4–$10
- Mini white pumpkins (faux or real): $6–$18
Total Estimated Cost: $18 – $46
Best For: Homes with a fireplace or even a blank living room wall where the mantel idea can translate to a console table beneath.
Key Design Elements:
- Main seasonal props: paper bats, mini pumpkins, optional tulle
- Color palette: cream, charcoal, soft black, white
- Lighting strategy: lamp glow plus one or two black candles on the mantel
- Textile layers: gossamer tulle runner
- Natural elements: a few dried eucalyptus stems in a low vase
- Accent details: matte black picture frames with moody art prints
How To Recreate This Look:
- Start by cutting bat shapes in three sizes; fold a soft crease down each wing.
- Add removable adhesive to the bat centers, leaving wings slightly lifted.
- Layer the bats in a swoop from mantel corner to wall, largest near the base, smallest up high.
- Place two black tapers (or battery tapers) on one side of the mantel.
- Style a few white mini pumpkins and a short vase of dried stems to balance the bat flow.
Why This Feels Designer: Movement plus restraint. The curved “flight path” leads the eye up and around the room, and the tight palette keeps it chic.
One Thing To Avoid: Don’t scatter bats randomly. A messy placement reads like stickers. Stick to arcs or clusters that suggest motion.
Pro Styling Tip: For photos, scrape a lamp a foot closer to the mantel—side light crisps the bat edges and adds depth.
Quick palate cleanser before we keep scrolling? Light a candle, take a sip of something cinnamon-y, and imagine which wall would love a swarm of bats.
3) Jack-O’-Lantern Garland In Warm Amber On The Dining Table Runner
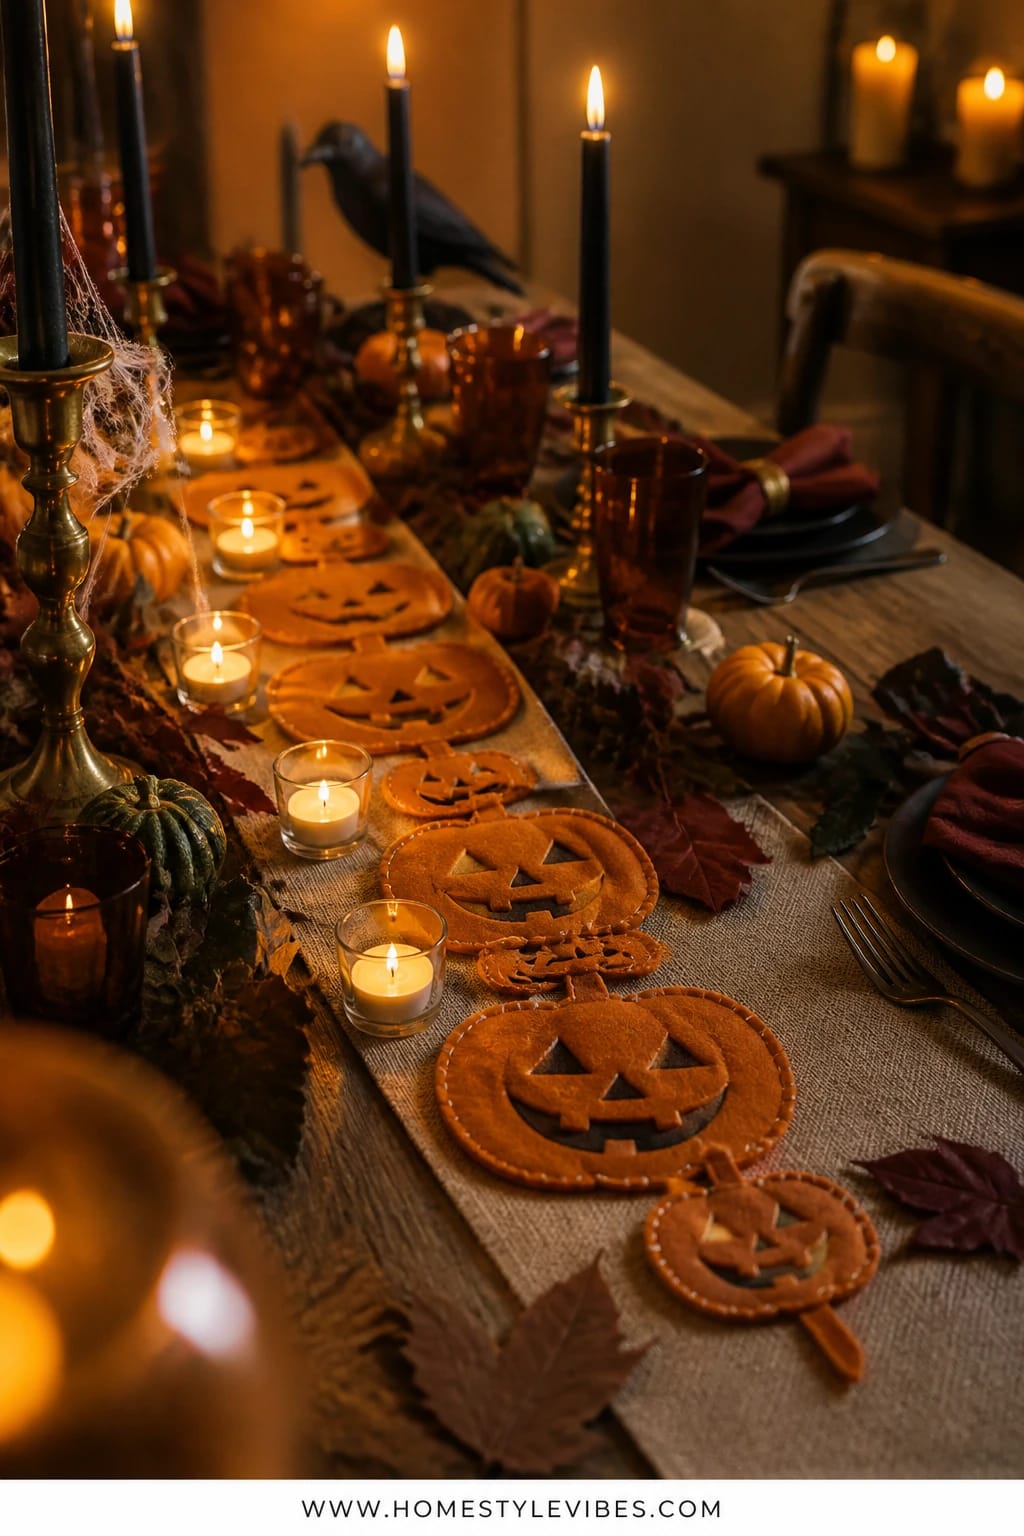
You want your dining table to feel festive for weeknight dinners and weekend pumpkin pancakes, but store-bought centerpieces can feel stiff or too tall for real conversation. A flat jack-o’-lantern garland laid down as a runner gives you height control and easy involvement for little hands—everyone can design a few goofy grins.
The mood is cheerful-spooky: warm amber felt pumpkins smiling up your table, with tea lights winking between them. It’s family-friendly because it’s soft, kid-proof, and quick to move when you need homework space. Lighting here sings; keep it low and warm with battery tea lights dotted along the garland, so the faces come alive in the glow. For photos, the garland reads richly saturated and layered—especially if you vary pumpkin sizes and intersperse leaves in deeper rust.
I tried this on my own table last October and honestly couldn’t believe the difference once I switched from a single bulky centerpiece to a garland runner. Suddenly, we had room for pizza night and a craft moment after, without clearing the whole table.
Budget Breakdown:
- Felt sheets (rust, pumpkin, mustard, black for features): $6–$18
- Twine or thin ribbon: $3–$7
- Battery tea lights: $8–$16
- Leaf cut-outs or faux leaf scatter: $5–$12
- Neutral table runner (optional): $10–$25
Total Estimated Cost: $32 – $78
Best For: Busy dining tables that need to transition from meals to crafts; great for families with kids who love choosing face shapes.
Key Design Elements:
- Main seasonal props: felt jack-o’-lantern garland, battery tea lights
- Color palette: amber, pumpkin orange, rust, black accents
- Lighting strategy: low tea light glow for friendly, not-scary faces
- Textile layers: felt runner over a linen or cotton base runner
- Natural elements: a few acorns or seed pods scattered lightly
- Accent details: simple ceramic salt cellar and wood napkin rings
How To Recreate This Look:
- Start by cutting simple pumpkin shapes in 3–4 sizes from felt.
- Add face cut-outs in black felt; glue or stitch them on.
- Layer pumpkins along twine or simply arrange them as a “runner” down the table center.
- Place battery tea lights between pumpkins to backlight the faces.
- Style with leaf cut-outs and keep tableware simple so the faces stand out.
Why This Reads High-End: Keeping the faces simple and graphic—think classic triangles and clean curves—feels modern and intentional, like a boutique party store find.
The Most Common Mistake: Too many competing colors. Skip neon orange or shiny glitter; stick to warm ambers and rust to avoid a kiddie-party look.
Pro Styling Tip: For the money shot, dim overheads and let candles and a single pendant do the work—the shadows give each pumpkin face a life of its own.
Remember, this isn’t about recreating a showroom. It’s about crafting a home that actually feels like yours—cackly laughter, crumbs, creative mess and all. If one idea resonates more than the others, that’s your starting point. You don’t need all six.
4) Witchy Herb Jars With Black Ribbon On The Kitchen Island
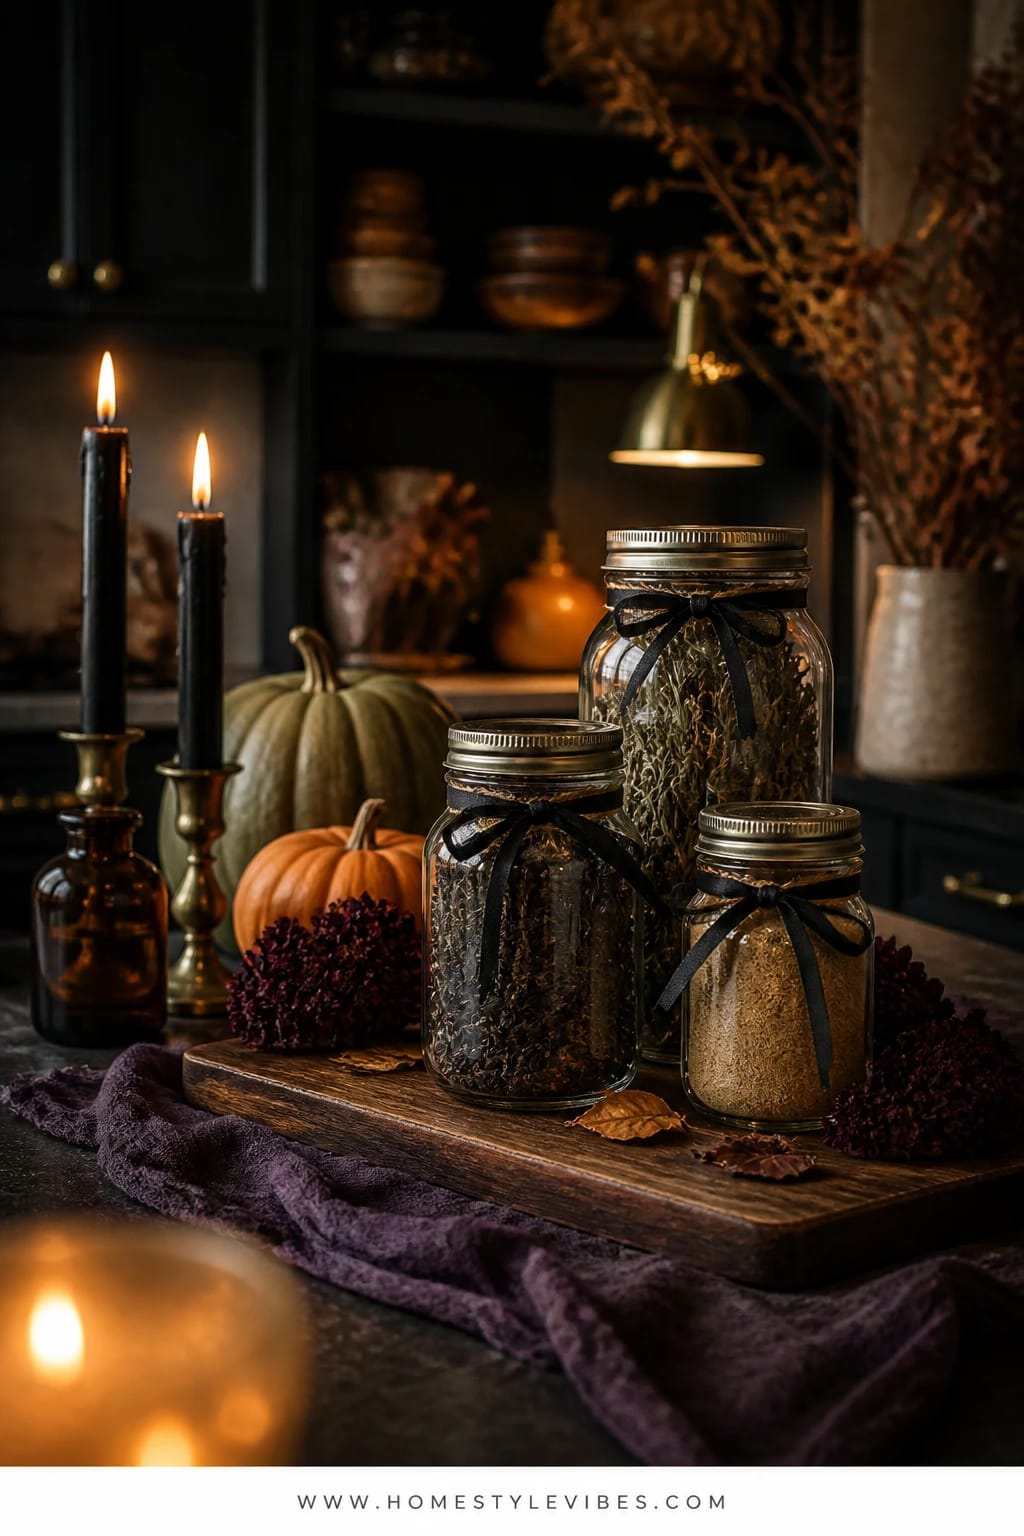
Halloween in the kitchen can skew plastic and kitschy fast. You’ve tried themed towels and a novelty mug, but it still reads cluttered. Instead, make witchy herb jars with simple vintage-style labels, black ribbon ties, and a dark wood cutting board as a base. Suddenly your island becomes a moody, playful apothecary—very kitchen-appropriate, totally family-craft-friendly.
The vibe is witchy-chic, not gory: glass jars of “Nightshade” (black tea), “Crow’s Claw” (rosemary sprigs), and “Moon Dust” (powdered sugar). Kids can help choose names and assemble labels, and you’ll actually use the contents. Lighting is key here—let under-cabinet lights hit the jars from above in the evening, so the textures in each jar glow. Photographs love the clear glass, the matte black ribbon, and the interplay of shadows inside each jar.
Two variations: 1) Minimalist version: three jars only, styled on a sleek black tray with one black taper nearby. 2) Color-pop version: add a single aubergine dish towel and a tiny faux crow perched on a jar lid for height and whimsy.
Budget Breakdown:
- Glass spice jars or mason jars: $10–$25
- Black ribbon or twine: $3–$8
- Label paper or printable labels: $4–$10
- Fillers (tea, rosemary, bay leaves, star anise, cocoa): $8–$20
- Wood board or black tray: $12–$30
- Optional small faux crow: $4–$8
Total Estimated Cost: $37 – $101
Best For: Busy kitchens that need functional decor; perfect for families who cook together and want themed ingredients within reach.
Key Design Elements:
- Main seasonal props: labeled herb jars, black ribbon, faux crow
- Color palette: clear glass, black, wood, aubergine accent
- Lighting strategy: under-cabinet wash or a pendant focused on the tray
- Textile layers: one dark dish towel or mini runner under the tray
- Natural elements: rosemary, bay, dried citrus slices
- Accent details: vintage-style fonts on labels, tiny brass spoon
How To Recreate This Look:
- Start by washing jars and removing any labels for a clean look.
- Add printable labels with playful witchy names; tie black ribbon around the neck.
- Layer jars on a wood board or black tray, largest at the back, smallest in front.
- Place a small faux crow on a lid or perch it beside the board for character.
- Style with a folded aubergine towel and a brass spoon for a finished look.
Why This Looks Intentional: Everything on the island joins one story—ingredients you use, styled as a witch’s pantry. It’s cohesive, useful, and not a single piece feels random.
Don’t Do This: Skipping the board or tray. Without a base, jars spread and feel like clutter instead of a styled vignette.
Pro Styling Tip: For photos, slide the board within the glow of the pendant’s brightest spot; glass will sparkle and labels will read crisp.
5) Shadow-Puppet Story Night With Black Silhouettes On The Bookshelf
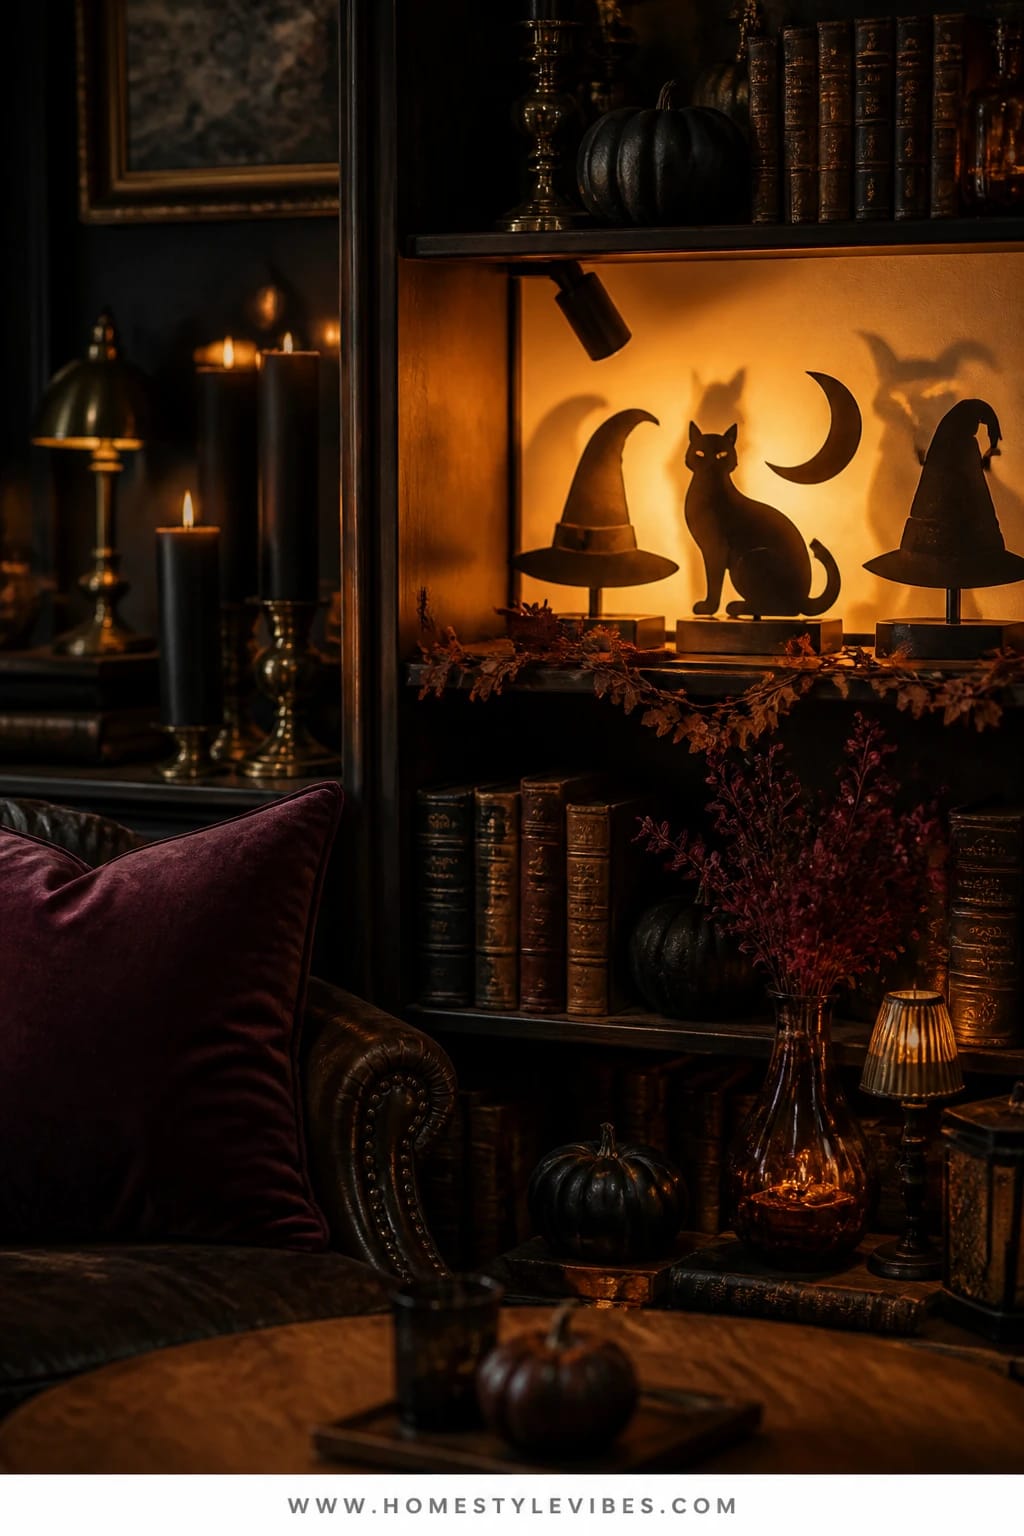
Bookshelves can become a maze of personality: family photos, kids’ trophies, that one plant you keep forgetting to water. You’ve tucked in a pumpkin before, but it disappears among the spines. This craft turns your shelves into a stage for a family story night—DIY black silhouette cutouts (witch hats, cats, crescent moons) set on tiny stands with a small clip light to cast crisp shadows behind them.
The mood is theatrical and intimate, perfect for a post-dinner read-aloud. It works because everything is flat-packable and light; you can shift it to one shelf when you need the space back. Lighting is the star—angle a clip light low so silhouettes project on the back of the shelf like mini theater sets. This looks fantastic on camera; the negative space around each shape, the glow behind them, and the soft book spines make irresistible photos.
A friend of mine bought three different garlands for her shelves before realizing the real problem was her lighting. Once we added a single warm clip light behind two silhouette cats, the shelf finally looked finished—like a scene, not just decor.
Budget Breakdown:
- Heavy black cardstock or thin foam board: $5–$12
- Skewers or small stands (binder clips work in a pinch): $2–$6
- Warm clip light or puck light: $10–$20
- Optional sheer black ribbon for a tiny “curtain” effect: $3–$7
Total Estimated Cost: $20 – $45
Best For: Living room or family room shelves where you do bedtime stories or weekend movie nights; ideal for smaller homes that need multi-use decor.
Key Design Elements:
- Main seasonal props: silhouette cutouts—witch hats, cats, moons, brooms
- Color palette: black silhouettes, warm wood, soft cream pages
- Lighting strategy: a single warm clip or puck light behind or below the shapes
- Textile layers: thin ribbon draped like a curtain
- Natural elements: a small dried leaf pressed behind glass in a frame
- Accent details: matte black bookends to echo the silhouettes
How To Recreate This Look:
- Start by sketching bold shapes on cardstock; cut cleanly with a craft knife.
- Add stands: glue to skewers and wedge into erasers, or clip into binder clips for low stands.
- Layer silhouettes at varying distances from the back panel to get depth.
- Place a warm clip light low and behind to project strong shadows.
- Style with a few spine-out black or charcoal books to frame the scene.
Why This Feels Designer: The strong shapes and considered light read like art installations, not kids’ crafts. The trick is the shadow—designers always think about light first.
Watch Out: Don’t clutter every shelf. Choose one or two shelves for the story scene and keep the rest calm, or you’ll lose the drama.
Pro Styling Tip: Photograph slightly off-center so you catch both the silhouette and its shadow—instant depth, zero filter needed.
If your brain is buzzing, pause. Pick one surface: coffee table, mantel, kitchen island, bookshelf, or dining table. Start there. You’ll be amazed how one finished moment makes the whole room feel ready for Halloween.
6) Haunted Portraits In Oxblood And Black On The Entryway Console
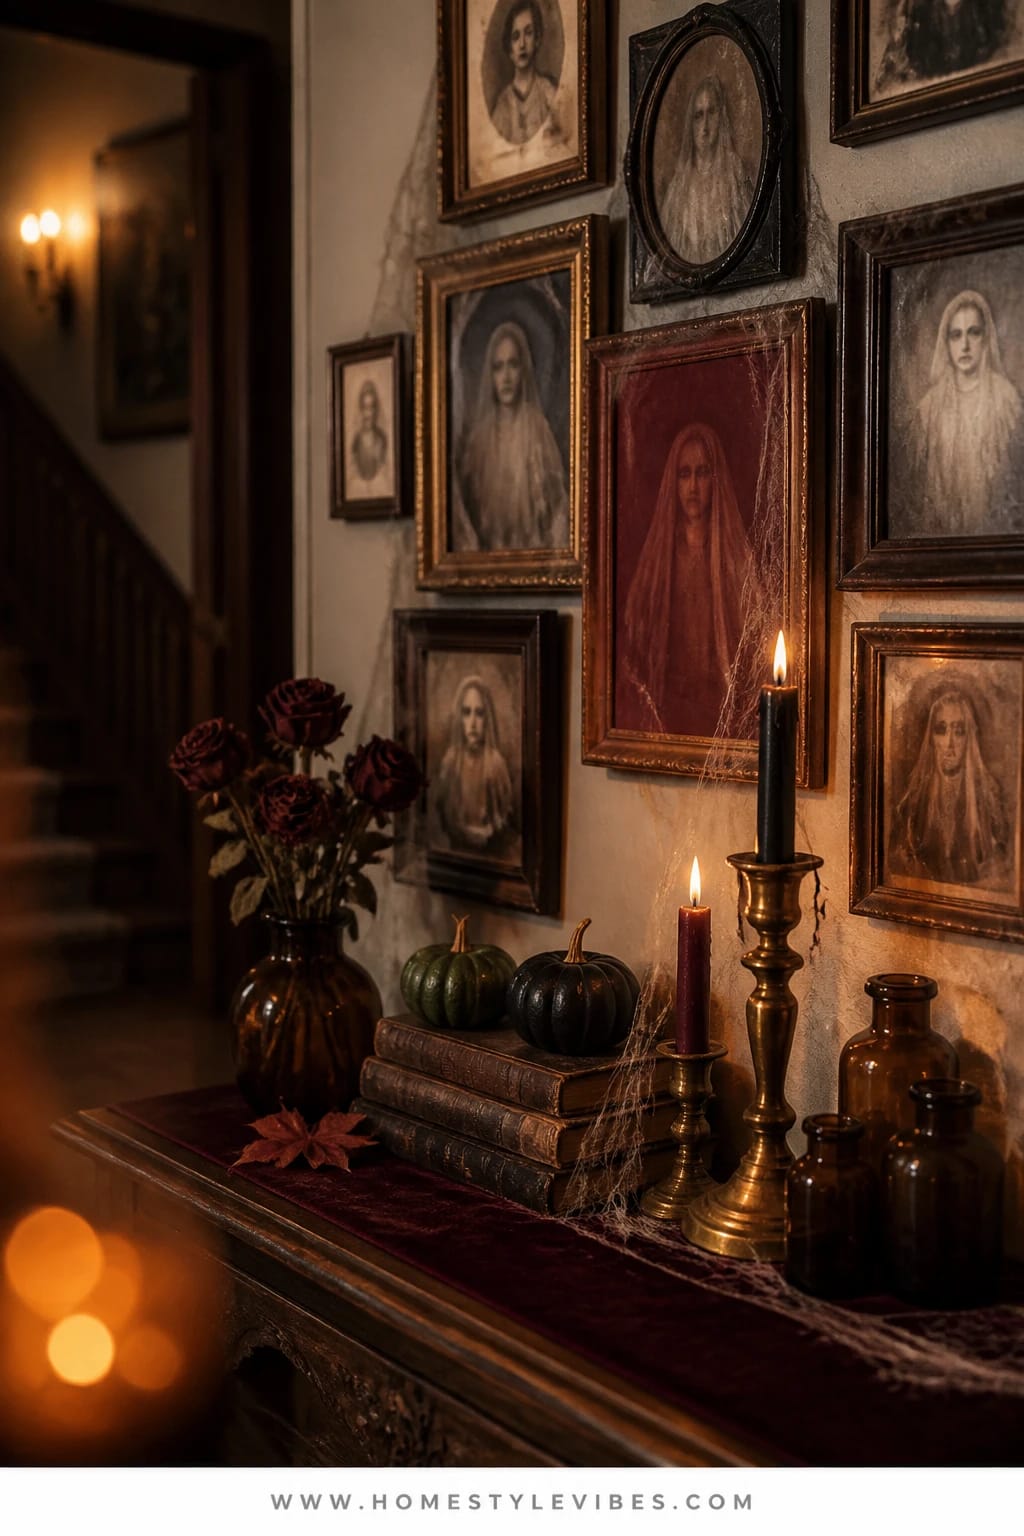
Your entryway sets the tone, but it often gets the least love: keys, backpacks, and that mystery coupon pile. You’ve tried seasonal bowls and it still looks like a drop zone. Haunted portraits solve it in one focused statement. Craft them with thrifted frames, moody prints (public domain vintage portraits work great), and add subtle “ghostly” overlays with tissue paper or vellum. Top the console with a single oxblood velvet runner and a brass candlestick with a black taper, and your doorway whispers “Welcome to our haunted house—but we have snacks.”
The mood is sophisticated spooky: oxblood velvet, black accents, and portraits that look almost real until you notice a faint extra set of eyes or a reversed reflection you drew with a white pencil. It works because you cluster the drama in one spot; you still have a bowl for keys and a tray for mail. Lighting here matters: a small table lamp with a warm bulb will throw soft light that picks up the velvet sheen and gilded frames, creating gorgeous shadows around the portrait edges. Photos love that interplay—dark frames, rich runner, a single taper flicker.
Variations: 1) Kid-collab: print family photos in black and white, let kids draw “ghost” outlines on vellum laid over each image, then slip both into a frame. 2) Minimalist: one large portrait, velvet runner, and one taper—big drama, tiny effort.
Budget Breakdown:
- Thrifted frames: $5–$15 each
- Printed vintage portraits (letter size): $0.20–$3 each
- Vellum or tissue paper overlays: $3–$7
- Oxblood velvet runner or fabric remnant: $10–$25
- Brass candlestick + black taper: $12–$28
- Small table lamp (if needed): $20–$45
Total Estimated Cost: $30 – $123
Best For: Entryway consoles or hallway buffets; great for households that want immediate mood as guests walk in without tripping over decor.
Key Design Elements:
- Main seasonal props: haunted portrait frames, black taper, velvet runner
- Color palette: oxblood, black, antique brass, cream
- Lighting strategy: one lamp plus a taper for layered glow
- Textile layers: velvet runner or remnant with a rich nap
- Natural elements: a small bundle of dried burgundy roses
- Accent details: oval vintage frame among rectangles for visual interest
How To Recreate This Look:
- Start with a velvet runner to claim the console surface.
- Add framed portraits: print, overlay with vellum, sketch faint “ghost” details, and reframe.
- Layer frames: one leaning against the wall, one standing, a small oval in front.
- Place a brass candlestick with a black taper to one side for balance.
- Style with a small dish for keys and a stack of mail on a slim tray to keep function intact.
Why This Looks Expensive: Vintage frames plus velvet automatically feel collected. The limited palette—oxblood, black, brass—reads curated and intentional.
One Thing To Avoid: Don’t mix too many frame finishes. Stick to brass, black, and one wood tone max or you’ll lose the haunted “family” story.
Pro Styling Tip: For photos, angle one frame slightly to catch lamp glare softly on the glass—just enough to hint at the overlay, not enough to reflect your hallway.
Small mindset reset: Your home doesn’t need to scream Halloween in every corner. A strong entryway moment plus one glow-filled vignette in the living room often beats a scattered mix everywhere. Curate the magic where your family spends time.
Quick Checklist
- Velvet or sweater-knit fabric for DIY pumpkins
- Black taper candles and sturdy holders
- Paper or cardstock for bat cutouts
- Removable adhesive dots or putty
- Felt sheets in warm amber and rust tones
- Battery tea lights for kid-safe glow
- Glass jars with printable witchy labels
- Black ribbon or twine for jar ties
- Clip or puck light for shelf silhouettes
- Thrifted frames for haunted portraits
- Vellum or tissue for ghostly overlays
- Oxblood velvet runner or remnant
- Small faux crows for mantle or coffee table
- Tray or board to anchor each vignette
- Warm 2700K bulbs for cozy, spooky color
Frequently Asked Questions
How much should I budget to do at least two of these Fall Halloween craft ideas?
Plan on $60–$180 depending on what you have at home. The bat mantel and shelf silhouettes are the most budget-friendly. Velvet pumpkins and haunted portraits cost more because of fabric and frames—but they also store well and can be reused every year.
Real or faux pumpkins and florals—what photographs better and lasts longer indoors?
IMO, real mini pumpkins win every time for texture and color, but keep them away from heat vents to avoid that sad half-deflated look by week three. For florals, dried stems like eucalyptus and seed pods are best—they hold shape and color for weeks and store flat.
My space is small. Which idea gives the biggest mood without taking over?
Do the bat mantel (or a bat “flight” over a console) and the haunted portrait moment. Both use vertical space, require minimal surface area, and deliver strong Halloween vibes in tight quarters.
How do I store these crafts after Halloween without creating clutter?
Use flat art portfolios or large envelopes for bats and silhouettes. Stack velvet pumpkins in a single shoebox with tissue between them. Label herb jars and keep them in the pantry—functional storage. Frames stack upright behind winter coats or under a bed.
Are candles safe with kids and pets? What’s a good alternative?
Black tapers look amazing, but swap to battery tapers and tea lights near curious hands or wagging tails. If you do light real candles, keep them in weighted holders, use a draft-free corner, and never leave them unattended—ever.
When should I start decorating for Halloween to get the most out of the effort?
Start with the neutral-friendly pieces (velvet pumpkins, portraits without overtly spooky overlays) in late September, then layer in bats, jack-o’-lantern faces, and crows the first week of October. You’ll enjoy the mood for a full month without peaking too early.
I’m worried about walls—will bat adhesives damage paint?
Use painter’s tape loops or removable adhesive dots on the bat centers only. Test in an inconspicuous spot first. Avoid placing them over fresh paint (less than 30 days) or on textured surfaces where adhesion can vary.
Final Thoughts
Pick one idea that made your heart skip: the velvet pumpkin tray, the swooping bats, the witchy jars, the jack-o’-lantern runner, the shadow-puppet shelf, or haunted portraits in the entry. Start small. One finished moment ignites the whole mood—suddenly the house feels like Halloween and the rest comes easier.
The truth is, Halloween charm is a trifecta of what we’ve done here: layered texture, warm candlelike light, and a touch of playful spooky. Keep your palette tight, your lighting warm, and your styling clustered with intention. You don’t need more stuff; you need a few strong stories told in the right corners.
So gather the felt, queue up a cozy playlist, and let everyone pick a role—cutter, labeler, tape wizard, glow tester. By bedtime, you’ll have a home that looks beautifully haunted and a family that feels proud of what you made together. Seriously—you’ve got this.
About the Author

Krisztina P.Rendes, Founder of Home Style Vibes
Founder of Home Style Vibes
Krisztina Puskásné Rendes created Home Style Vibes as a cozy-modern lifestyle space where homemaking meets inspiration. Her goal is to help women create beautiful, organized, and peaceful homes they truly love — without overwhelm. You’ll find here heart-driven content on home decor, cleaning tips, easy family recipes, organization and decluttering, DIY home projects, plants, and seasonal ideas — all designed to bring more calm, comfort, and style into everyday life.