
7 Easy Fall Crafts For Adults That Make Beautiful Home Decor
You want a home that glows—saturated rusts and burgundies, candlelight flicker, a hint of plaid, pumpkins that don’t feel cheesy. You’re craving that cozy bright autumn vibe, but here’s the snag: everything in stores looks the same, your mantel still feels unfinished, and crafting as an adult sounds either like kindergarten or chaos. These 7 easy fall crafts for adults will fix all of that with richly layered color, warm light, and harvest abundance—no perfection required and most done in under an hour for under $40. Expect photogenic corners, golden glow on chilly evenings, and decor that actually works in real living rooms, dining nooks, kitchens, and mantels through Thanksgiving. If you love cozy bright fall, this is your moment.
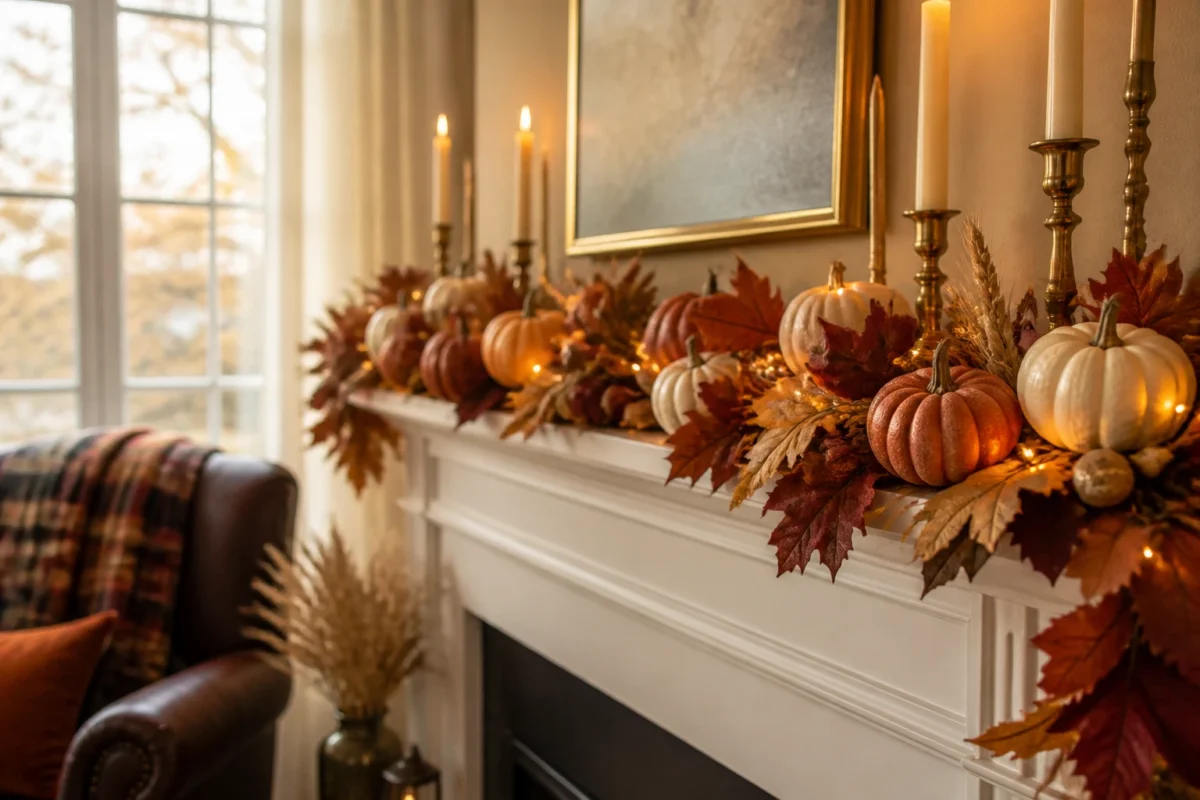
1) Harvest Pumpkin Garland With Golden Glow On The Mantel
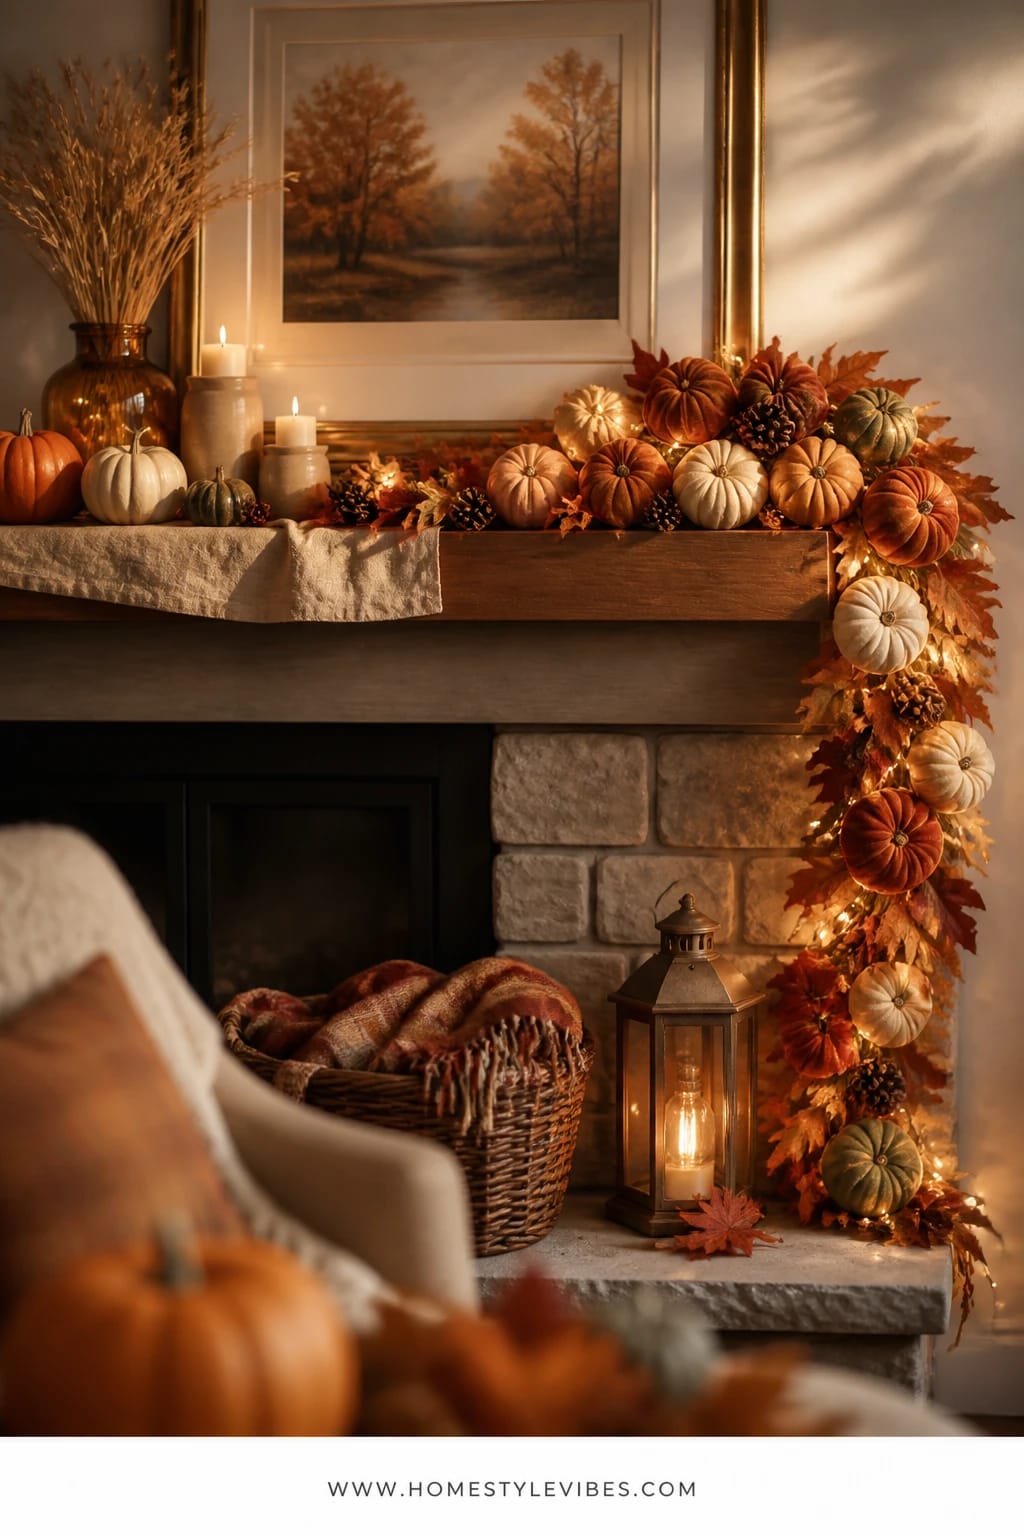
We’ve all been there: the mantel looks flat, even after you add that one ceramic pumpkin and a candle. It’s that one focal point that should sing “fall” but keeps whispering “bare minimum.” Enter a simple craft that blends soft pumpkin shapes, warm amber string lights, and a leaf garland that flows like a river of color across the mantel.
This creates that cozy cabin warmth—the kind where the golden light pools under your artwork and dances off brass frames at dusk. It works in real homes because it’s modular: you can shorten or lengthen, tuck the cord behind frames, and adjust around TVs or family photos. The materials—mini faux pumpkins, felt leaves, and micro-LEDs—layer beautifully and photograph like a dream: dimensional foreground, saturated oranges and burgundies, and that signature warm glow that makes even Tuesday nights feel like a celebration.
Try variations. For a small-space version, use a half-garland centered under a single art print. For a budget-friendly take, skip the pre-made garland and cut leaf shapes from felt sheets in rust, mustard, and berry, then hot-glue onto jute twine. If you prefer a lighter touch, stick to white pumpkins and soft wheat-toned leaves for a more restrained palette that still reads fall.
Budget Breakdown:
- Micro-LED string lights (warm white): $8–$15
- Mini faux pumpkins (8–12 pieces): $10–$25
- Felt sheets in rust, mustard, burgundy: $4–$8 total
- Jute twine or thin ribbon: $3–$6
- Hot glue sticks: $2–$4
Total Estimated Cost: $27 – $58
Best For: Standard to wide mantels, family rooms where the TV competes with decor, early September through Thanksgiving. Ideal if you want a warm anchor that’s easy to store and reuse.
Key Design Elements:
- Main seasonal props: mini faux pumpkins, felt leaves, leaf garland
- Color palette: rust, pumpkin orange, burgundy, accents of mustard
- Lighting strategy: warm micro-LEDs tucked under leaves for glow without glare
- Textile layers: felt and twine for softness and structure
- Natural elements: optional dried wheat or eucalyptus stems added at the ends
- Accent details: antique brass candlesticks nearby for extra warmth
How To Recreate This Look:
- Start with a clean mantel and decide your garland length (edge-to-edge or centered).
- Add micro-LEDs along the back ledge, securing the battery pack behind a frame.
- Layer the leaf garland or handmade felt leaves over the lights, letting some drape.
- Place mini pumpkins at varied intervals; cluster a few for visual weight.
- Style with a couple of brass candlesticks or a framed print to anchor the flow.
Why This Looks Expensive: The combination of soft texture and strategically hidden lighting mimics designer holiday installs. The staggered clusters and asymmetry feel intentional, not store-bought.
Watch Out: Don’t use cool-white LEDs; they make oranges look harsh. Warm white only. Also avoid over-stuffing—leave a few inches of negative space so the garland can breathe.
Pro Styling Tip: For photos, dim overheads and turn on just the micro-LEDs and one nearby lamp to let the warm tones saturate and the mantel glow.
2) Plaid-Trimmed Linen Pumpkins In Oatmeal Light On The Coffee Table
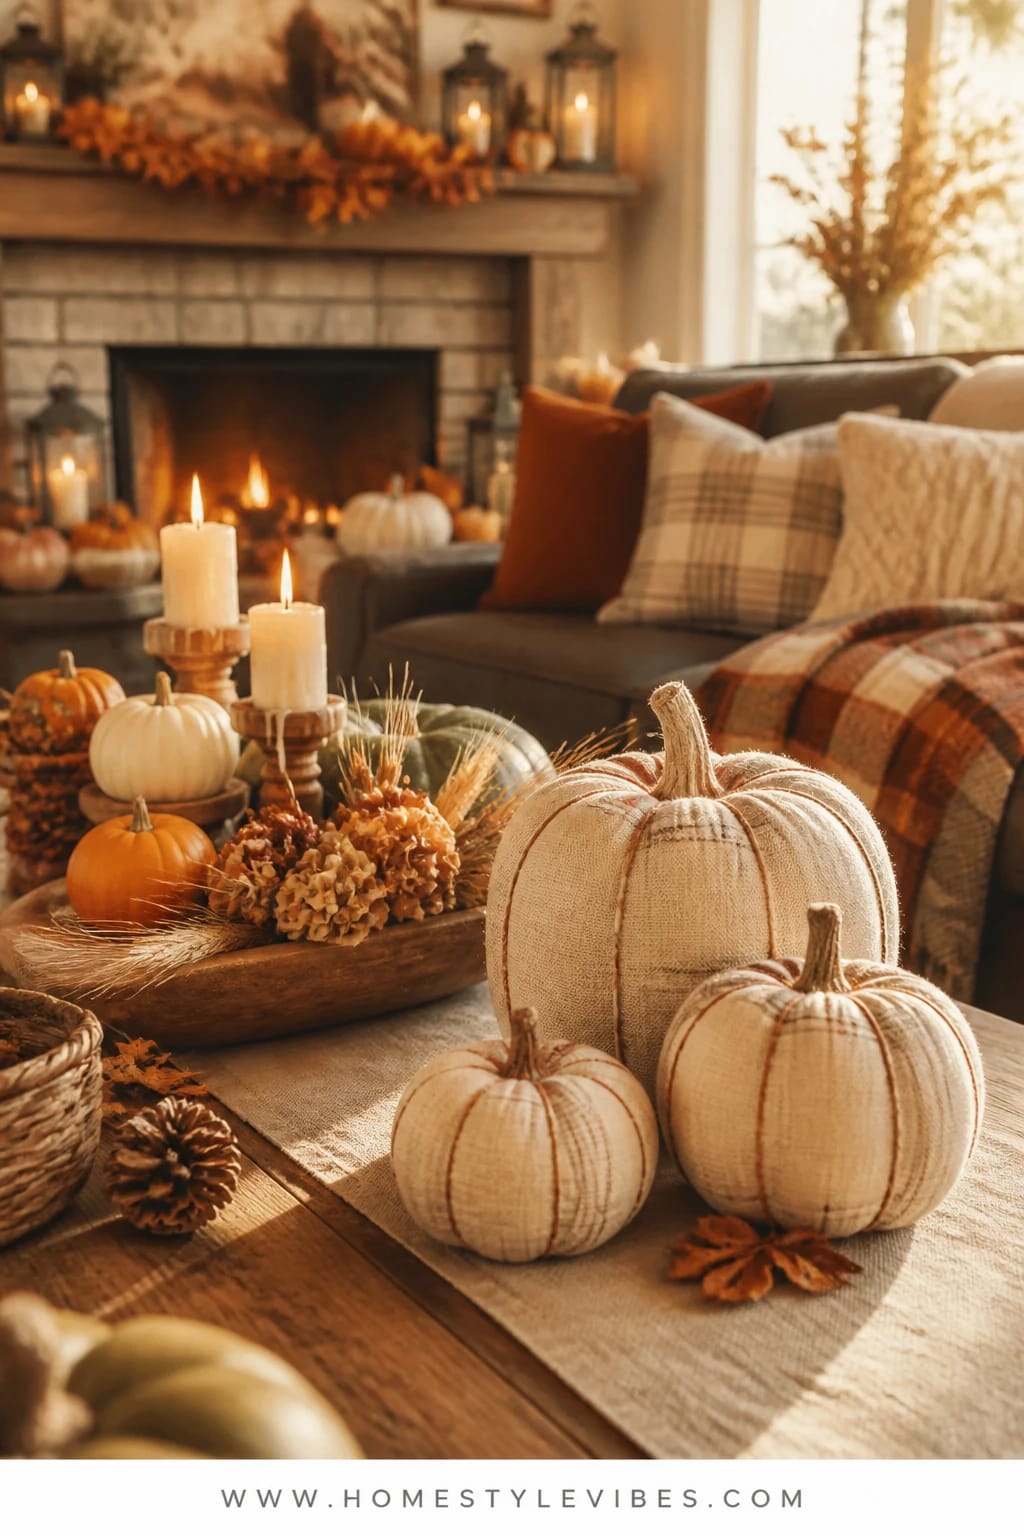
That coffee table that always looks cluttered? You’ve tried a tray, a candle, a book stack—and it still reads “random.” Soft linen pumpkins with a whisper of plaid trim add calm shape and harvest charm without overwhelming the room.
The mood here is cozy bright but tailored: think oatmeal linen, soft rust stitching, and quiet pattern. It works in high-traffic homes because these pumpkins are light, shatter-proof, and easy to scoop into a basket when you need to play a board game. Afternoon light halos the fabric, and the subtle plaid lines catch just enough glow to photograph beautifully.
Go full color with rich rust and burgundy linens, or keep it airy with cream and wheat. For a quick DIY, cover foam pumpkin forms with scrap linen and hot-glue a plaid ribbon at the base of the stem. Make-ahead version: sew covers with a simple running stitch so you can slip them off and wash or reuse next year.
Budget Breakdown:
- Foam pumpkin forms (various sizes): $10–$20 for 4–6
- Linen fabric remnants or old napkins: $0–$15
- Plaid ribbon or bias tape: $4–$8
- Twine and cinnamon sticks (for stems): $3–$6
- Hot glue or needle/thread: $3–$6
Total Estimated Cost: $20 – $55
Best For: Living rooms that need soft texture and low-profile decor; great from late September through November.
Key Design Elements:
- Main seasonal props: linen-wrapped pumpkins, plaid ribbon
- Color palette: cream, oatmeal, soft rust, berry accents
- Lighting strategy: indirect lamplight and afternoon sun to warm the textiles
- Textile layers: linen, cotton plaid trim, twine
- Natural elements: cinnamon stick stems add subtle scent
- Accent details: low wood tray to gather the grouping
How To Recreate This Look:
- Start with 3–5 foam pumpkins in varied sizes.
- Add linen by wrapping each pumpkin snugly, tucking fabric at the base.
- Layer plaid ribbon around the base of each stem for a tailored finish.
- Place the pumpkins in a shallow tray with a couple of favorite coffee-table books.
- Style with one small candle (unscented if near snacks) and a sprig of faux berries.
Why This Feels Designer: The mix of texture (linen + plaid) with a tight color story makes the vignette look curated, not crafty.
One Thing To Avoid: Don’t scatter them solo across the room. Grouping creates impact. Lone pumpkins look like leftovers.
Pro Styling Tip: Angle one pumpkin so the plaid trim faces the camera—those simple stripes add instant visual interest in photos.
Remember, this isn’t about recreating a showroom. It’s about building a fall rhythm that feels like yours—warm light, soft textures, and just enough color to make you smile when you set down your mug.
3) Cinnamon-Orange Simmer Pot With Amber Candlelight On The Kitchen Island
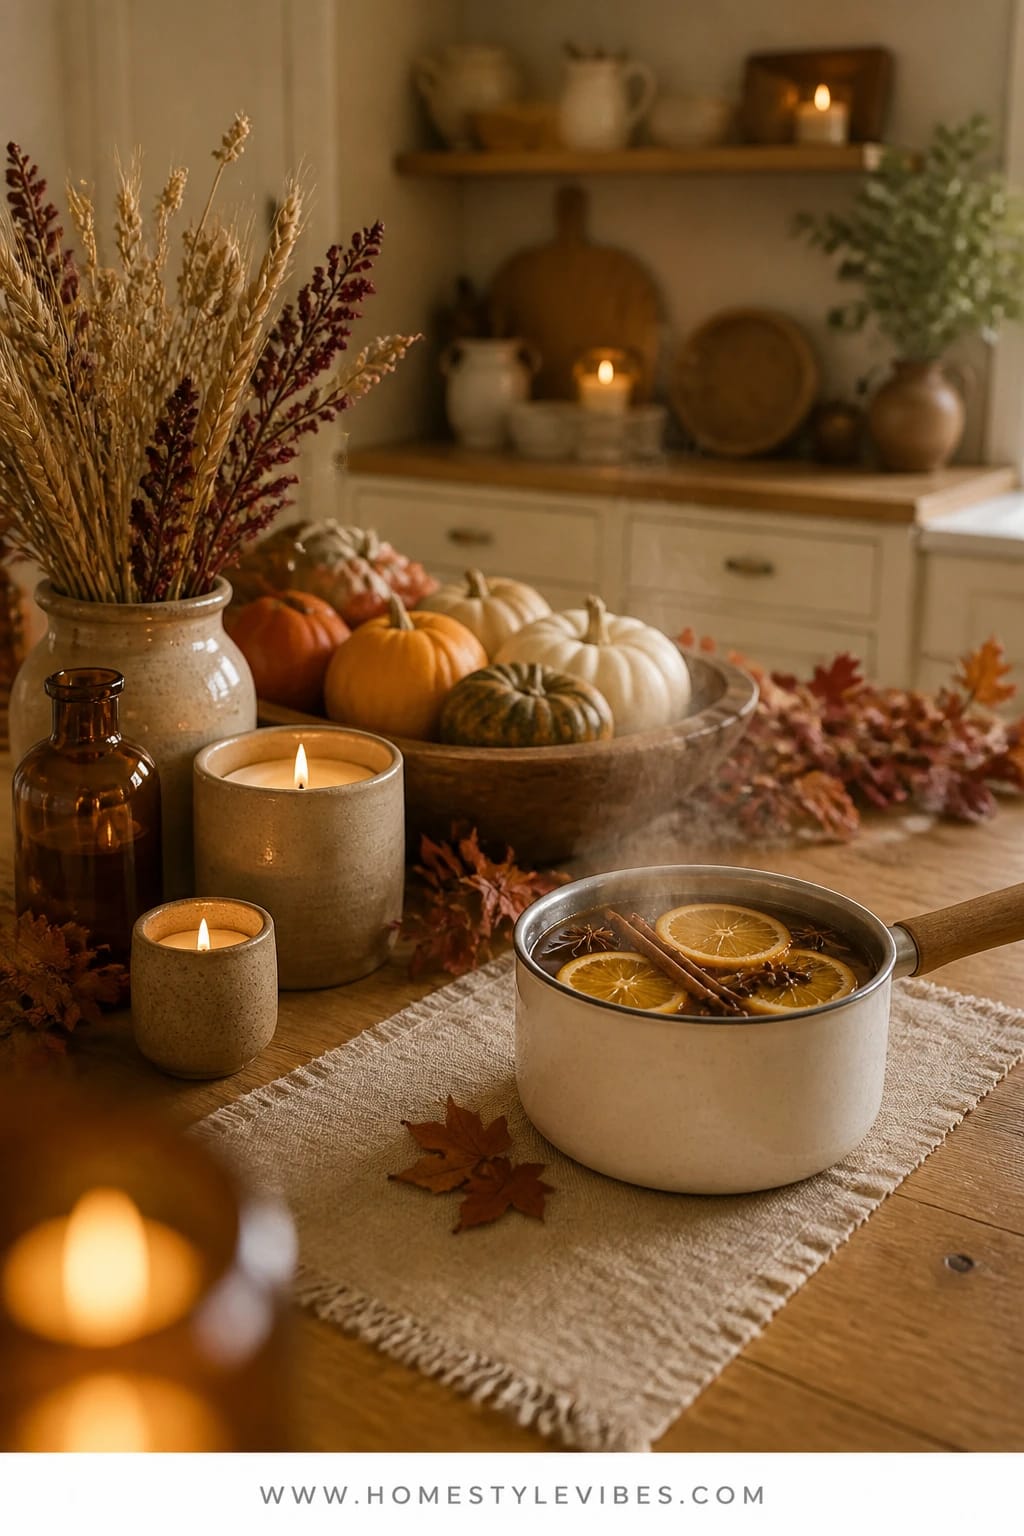
Cooking smells that compete with your candles? Burnt toast at 8 a.m. that lingers until dinner? A simmer pot craft is the low-key secret to a kitchen that smells like a crisp orchard walk and looks charming at the same time.
This idea brings harvest abundance to the kitchen without clutter. Thin slices of oranges, a few cinnamon sticks, cloves, and a couple of star anise pods go into a small pot with water, barely simmering. The scent fills the house with cozy bright notes, and the setup—wood board, small jar of spices, a votive or two—doubles as decor on your island. It photographs beautifully thanks to the color pop of oranges and the amber glow of tea lights beside the pot.
For a small-space or kid-friendly twist, do a no-heat version: add the same ingredients to a stovetop-safe bowl and pour kettle-hot water over before guests arrive. For a muted palette, swap oranges for sliced pears and add vanilla extract for a golden, bakey scent that’s less citrus-bright and more pie-adjacent.
Key Design Elements:
- Main seasonal props: oranges, cinnamon sticks, cloves, star anise
- Color palette: warm amber, orange, deep brown spices
- Lighting strategy: 2–3 amber votives for evening warmth
- Textile layers: small linen towel or runner under the board
- Natural elements: fresh citrus, whole spices
- Accent details: glass jar with a wooden scoop for the cloves
Budget Breakdown:
- Oranges (2–3): $2–$4
- Cinnamon sticks, cloves, star anise: $6–$12
- Tea light votives: $5–$12
- Small wood board/tray: $10–$20 (reusable)
Total Estimated Cost: $23 – $48
Best For: Busy kitchens that benefit from functional decor; ideal during weekend cooking and weeknight dinners through late fall.
How To Recreate This Look:
- Start with a small saucepan and fill halfway with water.
- Add orange slices, 2 cinnamon sticks, a pinch of cloves, and 1–2 star anise.
- Layer in the look: set a wood board on your island with the pot, votives, and a small jar of extra spices.
- Place a linen towel under the board for softness and to catch drips.
- Style with one tiny ornamental gourd or a sprig of eucalyptus for color harmony.
Why This Reads High-End: Sensory layering—scent, glow, texture—feels hotel-lobby intentional. The curated board setup keeps it tidy and editorial.
The Most Common Mistake: Boiling too hard. Keep it at the barest simmer so the scent lasts and you don’t scorch the pan. Refill with water as needed.
Pro Styling Tip: Photograph right as the citrus oils glisten on the surface with the tea lights lit; that’s the golden moment.
4) Leaf-Pressed Lanterns With Honeyed Light On The Dining Table
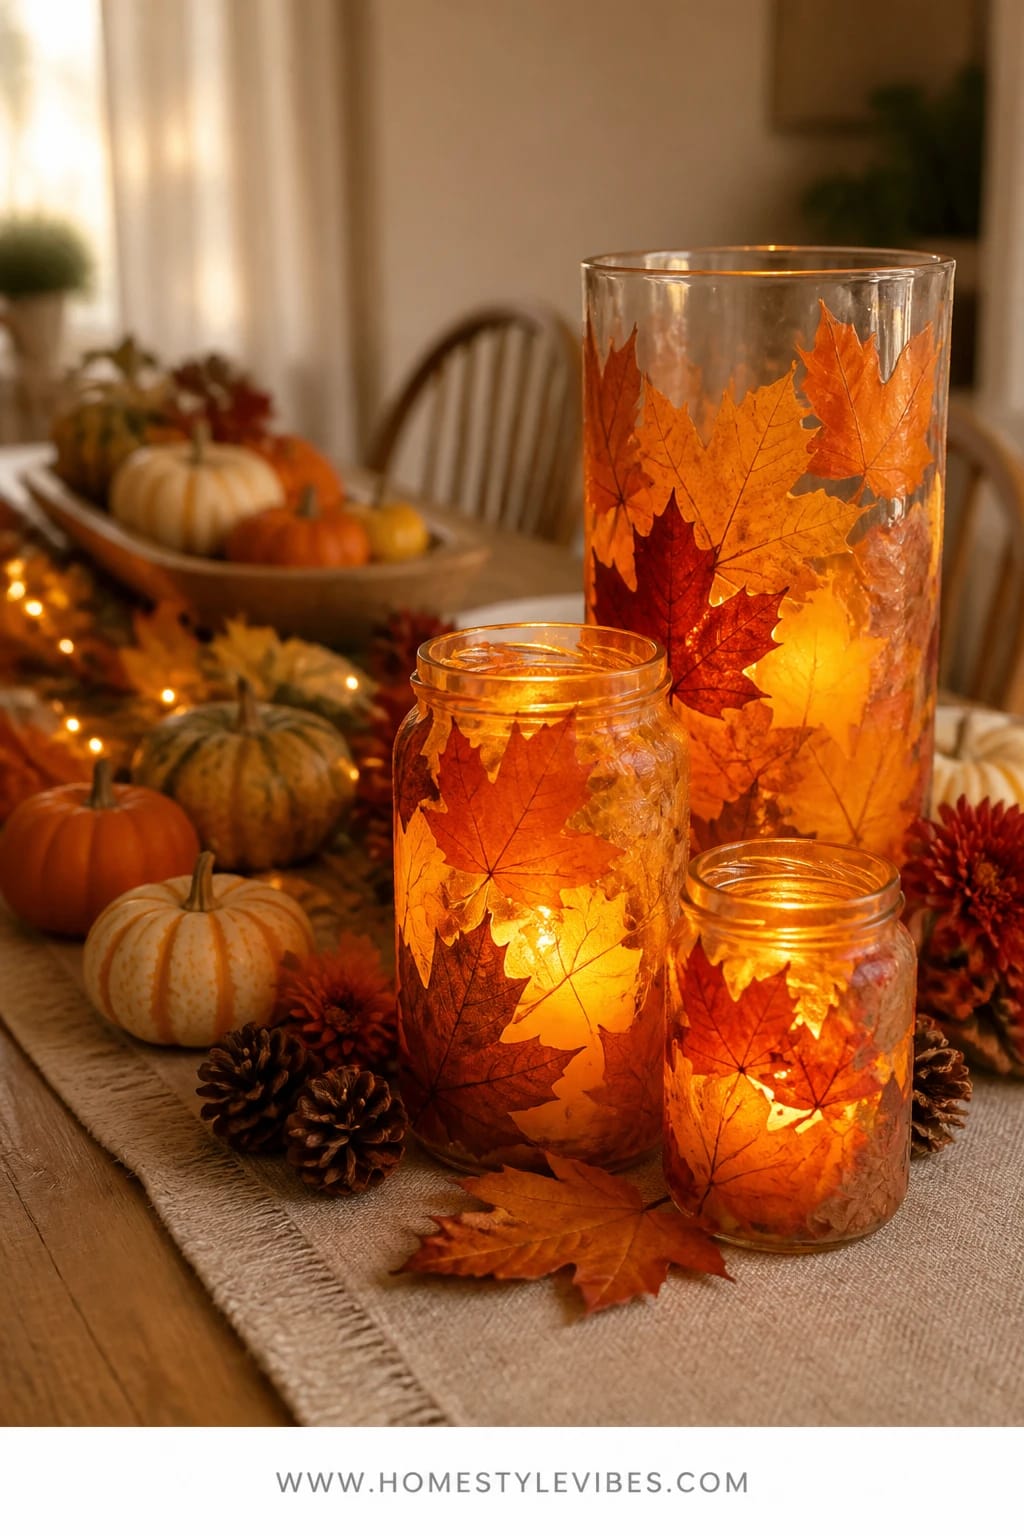
It’s that dining table that always feels too stark between meals. You add a runner, maybe a bowl, and it still looks echo-y. Leaf-pressed lanterns change that with a soft veil of color and candlelight that turns dinner into an event—even if you’re eating takeout over a weeknight debrief.
The craft is simple: press colorful leaves between parchment and heavy books for a few days (or use faux leaves), then Mod Podge them onto clear glass hurricane vases or big jars. When you drop in pillar candles or LED pillars, the leaves glow like stained glass—rust, amber, and cranberry coming alive. It works in real homes because it’s low height, easy to move, and safe with LED candles around kids or pets. The look photographs insanely well: warm light diffusing through the leaf veins and a runner or plaid napkins peeking in the background.
Choose two lanterns for a small table or a trio for a longer one. For a quieter palette, stick to pale wheat and faded gold leaves. For a dramatic pop, add a burgundy leaf or two and scatter a few acorns down the runner. I tried this on my own table last October and honestly couldn’t believe the difference once the sun set and the lanterns started to glow—our everyday pasta looked like a bistro meal.
Budget Breakdown:
- Glass hurricanes or large jars (2–3): $12–$36
- Faux or pressed leaves: $3–$10
- Mod Podge and foam brush: $6–$10
- LED or wax pillars (3): $12–$24
- Runner (optional): $10–$25
Total Estimated Cost: $33 – $95
Best For: Dining tables of any size; perfect for cozy dinners and hosting from mid-October through Thanksgiving.
Key Design Elements:
- Main seasonal props: pressed leaves, glass hurricanes, pillar candles
- Color palette: amber, rust, cranberry, wheat
- Lighting strategy: candles at staggered heights down the center
- Textile layers: simple cotton or linen runner
- Natural elements: acorns, small pinecones, or wheat sprigs
- Accent details: small brass salt and pepper mills for a gleam
How To Recreate This Look:
- Start with clean, dry glass hurricanes or jars.
- Add Mod Podge to the glass, press leaves gently, and seal with a top coat.
- Layer two to three lanterns down the runner, varying sizes.
- Place LED or wax candles inside; light just before dinner.
- Style with a scatter of acorns and one folded plaid napkin at each place.
Why This Looks Intentional: Repeating leaf tones across multiple lanterns creates cohesion, while the mix of glass sizes adds a curated rhythm.
Don’t Do This: Avoid dense coverage. Leave clear gaps so the candlelight can shine through; otherwise it reads muddy instead of glowing.
Pro Styling Tip: Shoot at blue hour with room lights dimmed; the leaf lanterns will radiate color against the cooler light outside.
If one idea resonates more than the others, that’s your starting point. You don’t need all seven. Do one corner really well, then add as your energy and budget allow.
5) Velvet Ribbon Wheat Sheaves With Warm Lamp Light On The Entry Console
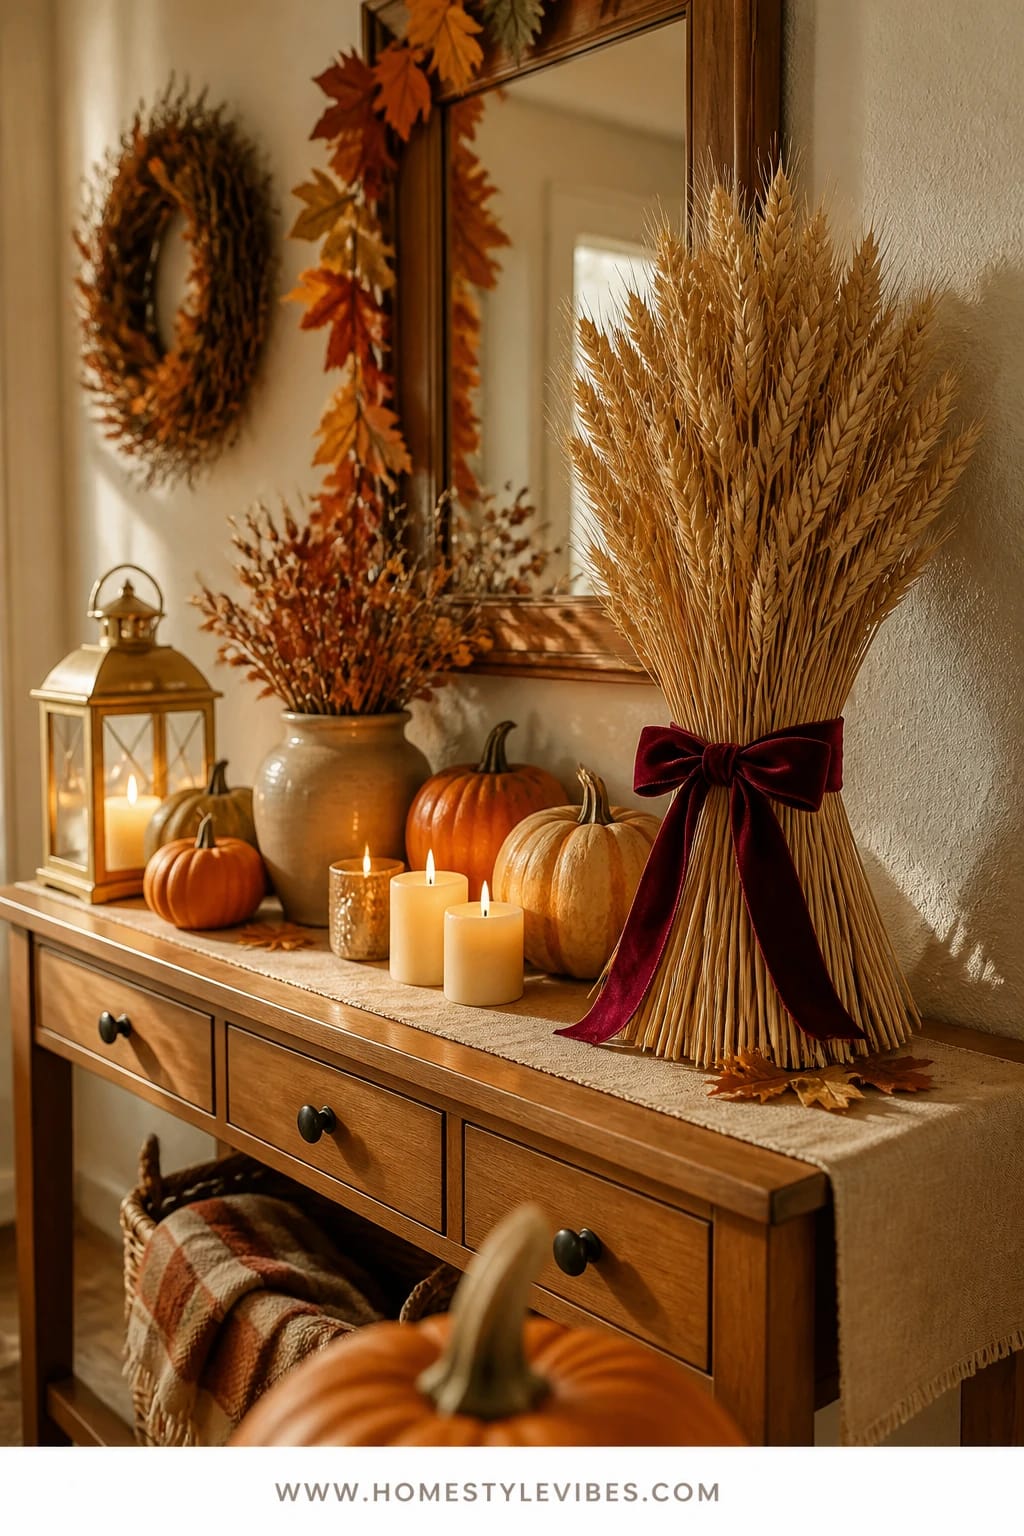
That empty entry console can feel like a missed opportunity. Keys everywhere, a random mask still lurking from 2020, and zero fall vibe. A wheat sheaf tied with velvet ribbon brings instant harvest welcome with a tailored edge.
Here the mood leans classic cozy bright: golden wheat catches lamp light, and a deep rust or burgundy velvet ribbon adds richness. This works for busy households because it’s vertical, compact, and not fragile. You can move it for cleaning in two seconds. The texture alone—papery wheat heads against plush velvet—makes it wildly photogenic, especially beside a glowing table lamp and a small dish for keys.
For a minimal approach, do a single sheaf in a ceramic crock. For a fuller scene, group two sheaves at different heights, add a framed fall photo, and tuck one mini pumpkin near the lamp base. Small-space twist: make a petite version with wheat stems in a skinny bud vase and a velvet bow around the vase neck.
Key Design Elements:
- Main seasonal props: dried wheat bundles, velvet ribbon
- Color palette: wheat gold, cream, rust or burgundy ribbon
- Lighting strategy: one warm table lamp to highlight the wheat texture
- Textile layers: velvet ribbon, linen runner on console
- Natural elements: dried wheat (long-lasting and reusable)
- Accent details: ceramic bowl or tray for mail and keys
Budget Breakdown:
- Dried wheat bundle(s): $8–$20 each
- Velvet ribbon (2–3 yards): $6–$12
- Crock or vase (optional): $12–$30
- Linen runner (optional): $10–$20
Total Estimated Cost: $24 – $82
Best For: Entryways that need a soft, upright focal point with minimal footprint; ideal for the whole season.
How To Recreate This Look:
- Start by trimming wheat stems so they stand evenly.
- Add a snug tie with twine to secure the sheaf’s waist.
- Layer a velvet ribbon bow over the twine and adjust tails to drape.
- Place on a console with a warm lamp on the opposite side for balance.
- Style with a small dish for keys and one understated pumpkin.
Why This Looks Expensive: Velvet always reads luxe, and pairing it with a single natural element feels purposeful instead of fussy.
Watch Out: Don’t choose a ribbon that’s too narrow; 1–1.5 inches wide creates presence. And keep the bow tails long for graceful lines.
Pro Styling Tip: Angle the bow slightly to the side for a more editorial look; straight-on bows can feel a little stiff in photos.
6) Apple-Picking Memory Collage With Warm Brass Frames On The Living Room Bookshelf
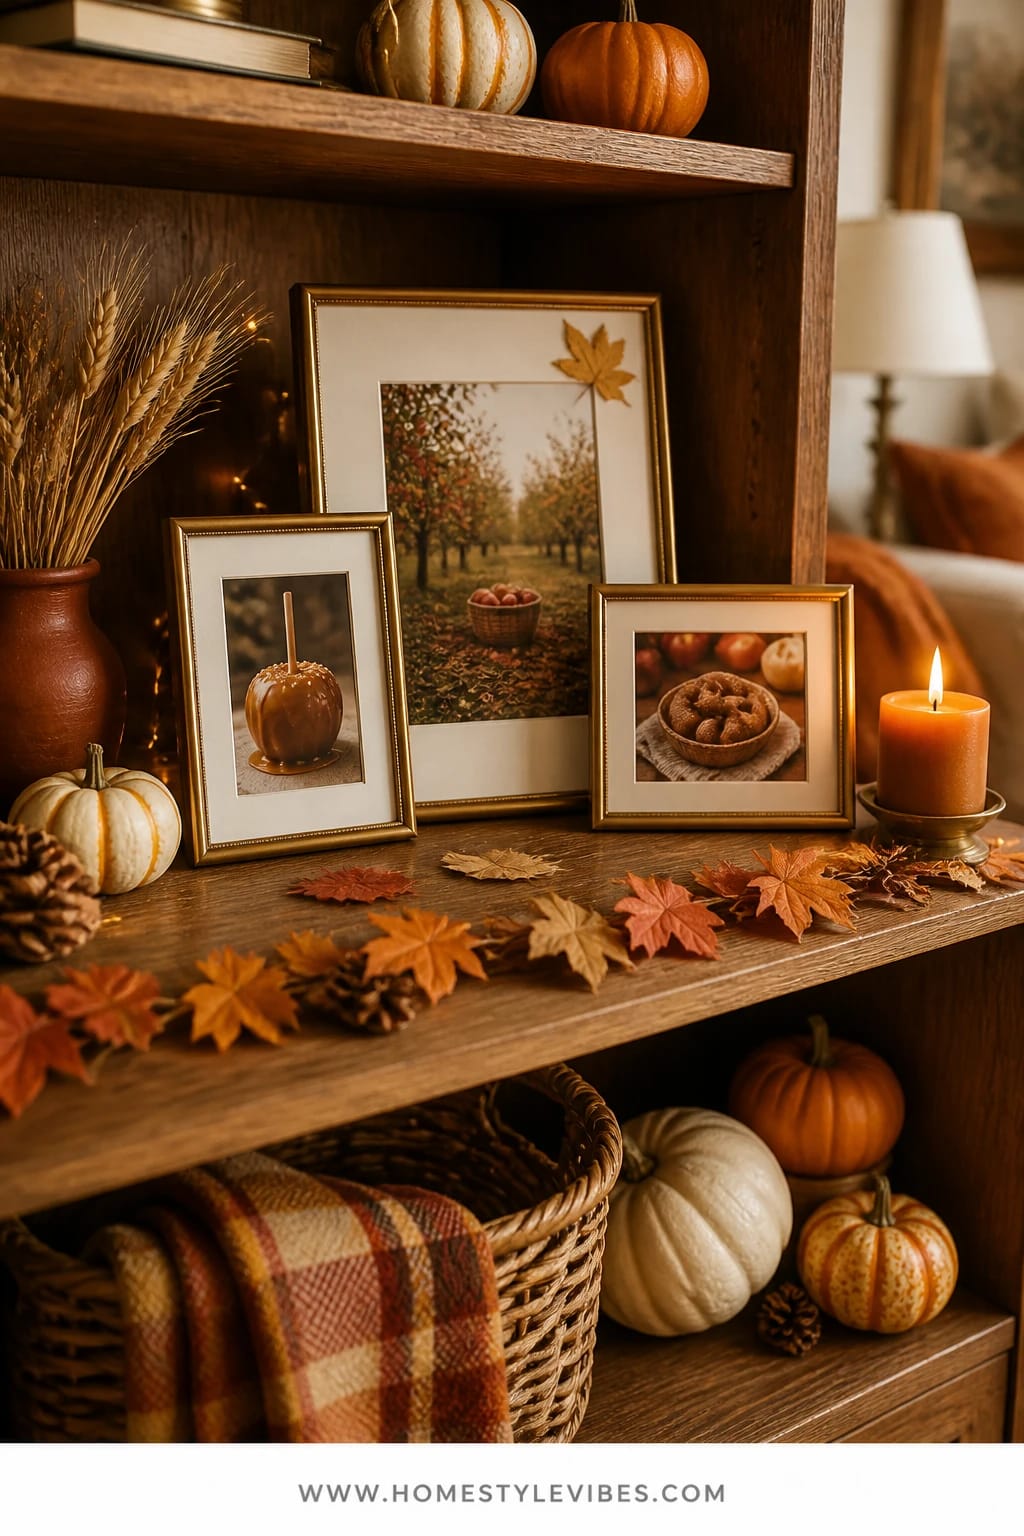
You have the photos—the orchard trip, the lopsided caramel apples, that one cider donut that changed your life—but they live in your phone. The shelf looks nice, but a little impersonal. A seasonal collage turns your living room bookshelf into a story you can see.
The mood is cozy bright and personal: brass frames, printed photos in warm tones, maybe a pressed leaf tucked into a corner of the mat. It works because you’re not adding clutter; you’re swapping what’s already on the shelf for a few weeks. The brass catches lamplight, and the mix of photo sizes creates layered depth that photographs like a magazine spread. Bonus: it’s unbelievably satisfying to watch guests pause and smile at the memories.
Go full tilt with a dedicated memory shelf—three frames, a small bowl of acorns, a plaid-covered book, and a mini gourd. Or keep it simple with a single 8×10 flanked by your usual objects. A friend of mine bought three different garlands before realizing the real problem was her lighting and lack of personal warmth; she did this collage, added one lamp, and finally got that fall feeling she wanted.
Budget Breakdown:
- Brass frames (2–3 mixed sizes): $24–$75
- Photo prints (matte finish): $3–$12
- Small decorative items (mini gourd, acorns): $2–$6
- Pla id fabric scrap for book wrap (optional): $0–$5
Total Estimated Cost: $29 – $98
Best For: Living room shelves that need warmth and personality; great mid-season when you’ve built up fall photos.
Key Design Elements:
- Main seasonal props: brass frames with fall photos, pressed leaves as accents
- Color palette: warm neutrals, rust, burgundy, soft greens
- Lighting strategy: place a warm lamp nearby to bounce off brass
- Textile layers: plaid book wrap or a small folded napkin under a frame
- Natural elements: acorns, tiny pinecones, a single leaf
- Accent details: one mini gourd for shape
How To Recreate This Look:
- Start by choosing 2–3 favorite fall photos and print them with a matte finish.
- Add them to brass frames; tuck a pressed leaf in the corner of one mat for texture.
- Layer frames on a single shelf with slight overlap for dimension.
- Place a small natural element (acorns, mini gourd) in front as a foreground moment.
- Style a nearby lamp or sconce to catch the brass edges with glow.
Why This Feels Designer: Repetition of brass plus a tight color story across photos creates a collected look that feels curated, not random.
One Thing To Avoid: Don’t use glossy prints. They glare under lamps and ruin photos—matte keeps everything soft and readable.
Pro Styling Tip: Stagger frame heights slightly and leave negative space around the grouping; it reads cleaner in pictures.
Small confession: trimming photo mats straight is a little tricky. Use a metal ruler and a fresh blade—or skip the DIY and buy pre-cut mats. Not every craft needs to test your patience on a Tuesday night.
7) Spiced Cranberry-Dyed Napkins With Candle Glow On The Dinner Table
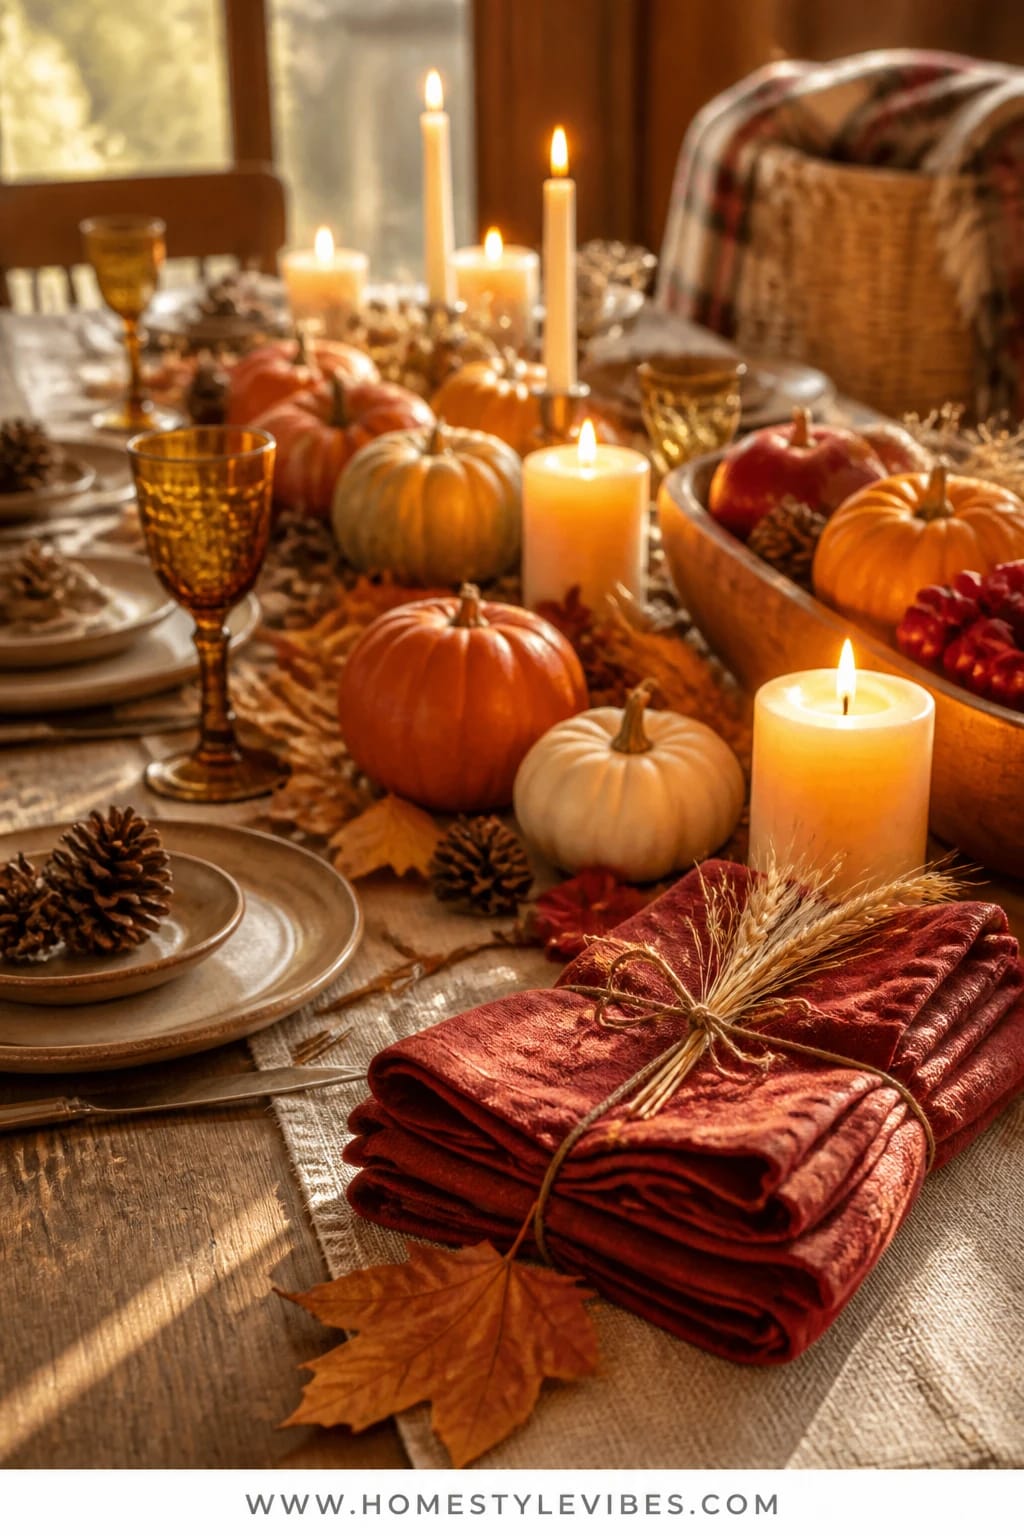
You want that big dinner to feel special, but store napkins can look flat, and the matchy-matchy set isn’t your vibe. Naturally dyed napkins—spiced cranberry tones with soft variations—bring rich color to your table and feel artisanal in the best way.
The mood is warm and abundant: candle glow on rippled cloth, berry tones that play beautifully with pumpkins and wheat. This craft works because it’s reusable, washable, and forgiving. The subtle imperfections are the point—you get depth and movement in the dye that looks hand-done and expensive. Plus, the napkins photograph like a dream, especially when you knot them and tuck in a tiny leaf or cinnamon stick as a napkin ring moment.
For a lighter palette, dilute the dye bath and do a quick dip. For deeper color, simmer longer and add black tea. Make-ahead version: dye on a Sunday, wash and dry, then press with a steam iron before a dinner party. FYI: your kitchen will smell like mulled wine, which is not a complaint.
Budget Breakdown:
- White cotton or linen napkins (set of 4–6): $12–$30
- Frozen cranberries (1–2 cups): $2–$6
- Cinnamon sticks, cloves (optional scent): $3–$6
- Large pot and strainer: already on hand
Total Estimated Cost: $17 – $42
Best For: Dining tables for small gatherings or Thanksgiving place settings; great anytime mid-October onward.
Key Design Elements:
- Main seasonal props: cranberry-dyed napkins, tiny leaf or cinnamon garnish
- Color palette: berry, rust undertones, creamy plates
- Lighting strategy: candle glow—votives and a couple of pillars
- Textile layers: dyed napkins, simple runner or placemats
- Natural elements: pressed leaf or herb sprig as a napkin tuck
- Accent details: simple ceramic plates, warm metallic flatware if you have it
How To Recreate This Look:
- Start by simmering cranberries in water for 20–30 minutes with optional spices.
- Add strained dye to a bowl; wet napkins first for even absorption.
- Layer napkins into the dye bath; stir gently for 10–20 minutes until the color lands where you like it.
- Place napkins on a drying rack; once dry, wash on cold separately and press.
- Style on the table with a loose knot and a tiny leaf or cinnamon stick tucked in.
Why This Reads High-End: Subtle tonal variations feel bespoke and pair with everything from pumpkins to brass, giving your table depth without more stuff.
The Most Common Mistake: Over-saturating to a flat maroon. Pull early, rinse, and layer color gradually; you can always dip again.
Pro Styling Tip: Place napkins so they catch candlelight on a diagonal—creases and folds show off the dye’s nuance in photos.
Quick Checklist
- Warm white micro-LED string lights
- Mini faux pumpkins in rust, orange, and cream
- Felt sheets for DIY leaves
- Linen fabric scraps or old napkins
- Plaid ribbon or trim
- Cinnamon sticks, cloves, star anise
- Glass hurricanes or large jars
- Mod Podge and foam brush
- Dried wheat bundles
- Velvet ribbon in rust or burgundy
- Brass frames with matte photo prints
- White cotton or linen napkins for dyeing
- Frozen cranberries for natural dye
- Tea lights and pillar candles (warm tone)
- Wood tray or board for kitchen island styling
Frequently Asked Questions
How can I keep costs down on these crafts without them looking cheap?
Pick one “glow” item and one “texture” item per space. For example, do the mantel garland with micro-LEDs and felt leaves, then skip buying new candlesticks. Reuse trays, jars, and frames you already own and put the budget toward items that create the biggest visual shift: warm lighting and saturated seasonal color.
Are real pumpkins and leaves better than faux for these projects?
IMO, real wins for scent and subtle color variation. Use real where it makes sense (simper pot oranges, a single mini gourd on a shelf) and faux for longevity (mantel garlands, leaf lanterns). If you do use real mini pumpkins, keep them away from heating vents—nothing says “sad fall” like a half-deflated pumpkin by week three.
I have a small living room. Which craft will make the biggest difference without crowding?
Go for the mantel garland or the linen pumpkins on a tray. Both use horizontal space you already have and bring in warm light or soft texture. Keep pieces grouped to avoid visual clutter and choose a tight color palette like rust, cream, and wheat.
How do I store these after the season so they don’t get wrecked?
Wrap delicate pieces (leaf lanterns, linen pumpkins) in tissue and stack labels by room: “Mantel,” “Coffee Table,” etc. Store cords and battery packs in zip bags taped to the main item. Keep wheat sheaves upright in a tall box so they don’t flatten, and place velvet ribbon spools in a sealed bag to avoid dust.
Is it safe to use candles around kids and pets?
Use LED pillars inside leaf lanterns and tea lights in enclosed holders. If you light real candles, place them in the center of the dining table and keep the rest LED. Always trim wicks for a clean burn and never leave a candle unattended—even during a quick “BRB” to grab more cider.
When should I start decorating for fall with these ideas?
Begin with the mantel garland and entry sheaf in early September to set the tone. Add simmer pots and leaf lanterns in October as the evenings get darker, then save the cranberry-dyed napkins for late-October dinners and Thanksgiving.
What if I rent and can’t use nails or command hooks on my mantel?
You actually don’t need them. Lay micro-LEDs on the ledge and anchor with mini pumpkins. If you need extra hold, use small removable putty dots under the twine at the very back edge—hidden and renter-friendly.
Final Thoughts
Pick one corner—mantel, coffee table, kitchen island—and start. These easy fall crafts for adults aren’t about crafting perfection; they’re about real life with rich color, warm light, and a sense of harvest abundance that changes how your home feels tonight.
The truth is, cozy bright autumn happens in layers: a strand of warm lights tucked under felt leaves, the papery rustle of wheat by the door, a simmer of orange and cinnamon while dinner bubbles. Build one layer, live with it, then add the next. That’s how rooms go from “almost” to “actually finished.”
You’ve got this. Light one candle, tie one velvet bow, press one leaf to glass—and watch your home glow back at you. Seriously, you’ll want to take pictures.

About the Author

Krisztina P.Rendes, Founder of Home Style Vibes
Founder of Home Style Vibes
Krisztina Puskásné Rendes created Home Style Vibes as a cozy-modern lifestyle space where homemaking meets inspiration. Her goal is to help women create beautiful, organized, and peaceful homes they truly love — without overwhelm. You’ll find here heart-driven content on home decor, cleaning tips, easy family recipes, organization and decluttering, DIY home projects, plants, and seasonal ideas — all designed to bring more calm, comfort, and style into everyday life.





