
5 Food Themed Pumpkin Decorating Ideas That Are Almost Too Cute To Display
You want fall decor that feels deliciously fun and wildly photogenic. You hate how quickly pumpkins can veer into the same-old, same-old — a pile on the hearth that looks flat by week two, or worse, the sad grocery-store sticker faces you peel off in regret. You’re craving cozy bright autumn energy — saturated rusts, amber candle glow, a whisper of cinnamon in the air — but you also want whimsy that still looks grown-up in your living room. These five food-themed pumpkin decorating ideas solve all of that in one dreamy, affordable weekend, with a max budget of $75 per idea and styling that holds from September through Thanksgiving.
Expect warm light, layered textures, and irresistibly charming details that look straight out of a kitchen bakery window — but designed for real homes. Each concept leans into cozy bright autumn color, plaid accents, harvest abundance, and tender candlelight that flatters skin and pumpkins alike. Bonus: they’re genuinely easy to pull off, even if your table is small or your weeknight energy is even smaller. If you love playful details, rich color, and that “I can’t stop taking photos of this” feeling, you’re in the right place.
1) Cinnamon-Sugar Donut Pumpkins With Amber Candle Glow On The Dining Table
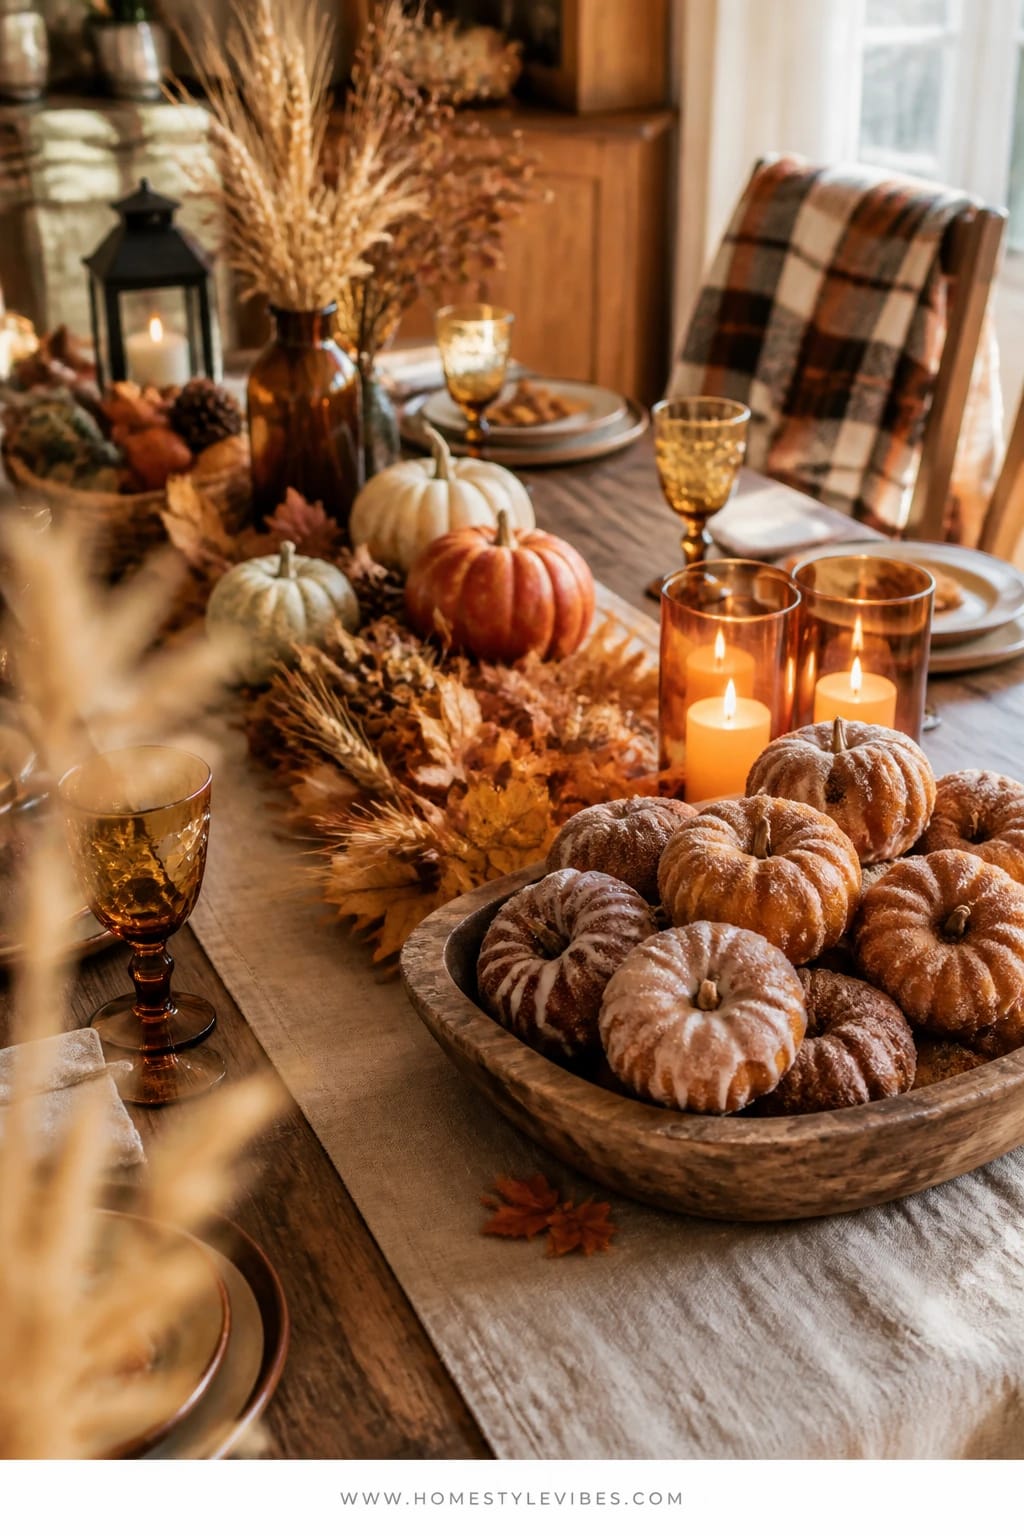
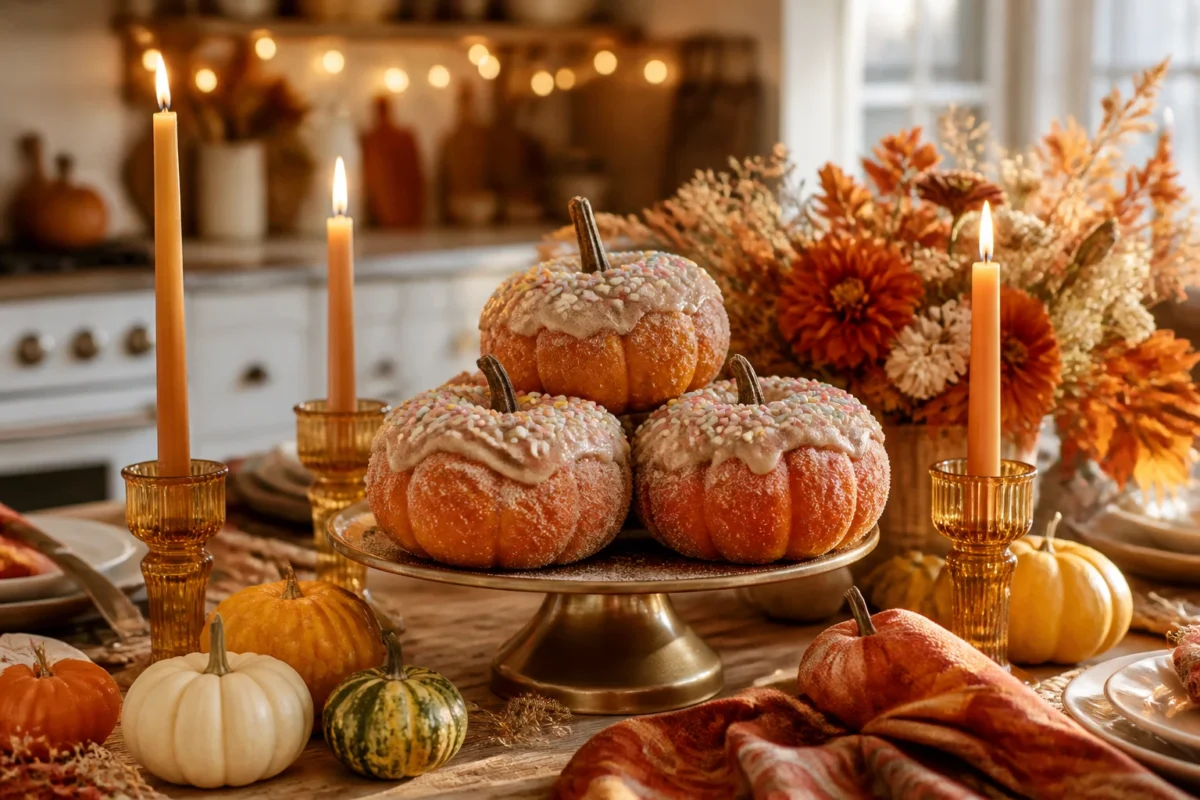
We’ve all been there: your dining table is technically “decorated,” but it still feels a little stiff, like it’s waiting for a photoshoot that never happens. You’ve tried a runner, a bowl of pumpkins, maybe a couple of candles — and yet nothing feels warm, inviting, or fun. Enter donut pumpkins. These are mini pumpkins transformed to look like cinnamon-sugar doughnuts dusted in faux “spice,” complete with tiny “glaze” details. The mood? A cozy bright autumn brunch scene that makes everyone smile before the coffee even brews.
This works in real homes because the scale is right: mini pumpkins don’t overwhelm the setting, and the cinnamon-sugar texture adds a believable bakery vibe that softens the whole table. Layer in amber candle glow — pillar candles or amber glass votives — and everything gets that flattering, golden warmth. The materials are simple: craft paint in bakery tones (caramel, rosy brown, cream), a soft brush, cinnamon-colored glitter or microbeads for “sugar,” and a matte sealer. It photographs beautifully because the sugar-texture catches light and the amber candles add glow and depth around the donuts. Plus, it’s family-friendly and easy to store; the “sugar” holds up surprisingly well with a quick clear topcoat.
Variations to try: For a budget-friendly version, paint only a handful of “donuts” and tuck them between simple white taper candles you already own. Small-space? Style three donut pumpkins on a wood cutting board with a plaid napkin folded underneath and one votive — it still reads. Want a more neutral look? Choose warm taupes and cream “frosting,” skip the glitter, and rely on light for the sparkle.
Budget Breakdown:
- Mini pumpkins (real or faux): $6–$18 for a set
- Acrylic craft paints (caramel, tan, cream): $6–$12
- Cinnamon-toned glitter or microbeads: $5–$10
- Matte clear sealer: $6–$10
- Amber glass votives or candles: $10–$20
- Simple wood board or runner (optional): $10–$25
Total Estimated Cost: $33 – $95
Best For: A dining table that needs warmth and personality from early September through late October; family homes that want cheer without clutter; brunch lovers and anyone who lives for Sunday cinnamon rolls.
Key Design Elements:
- Main seasonal props: mini pumpkins painted as donuts, amber votives, simple greenery (eucalyptus works)
- Color palette: caramel, warm tan, cream, soft rust, hits of burgundy in napkins
- Lighting strategy: low amber glow via votives; avoid overhead-only lighting — dim it a notch
- Textile layers: plaid napkins, a linen runner in wheat or oatmeal
- Natural elements: a sprig of rosemary or thyme near each “donut” to mimic bakery freshness
- Accent details: wood board or cake stand, small ceramic ramekins, a pinch pot of real cinnamon for scent
How To Recreate This Look:
- Start with clean mini pumpkins; wipe with a damp cloth and dry completely.
- Add a base coat of caramel or tan paint; let dry fully.
- Layer a lighter “glaze” ring around the top; dab cinnamon glitter or beads while slightly tacky.
- Place your donut pumpkins along a linen runner, alternating with amber votives.
- Style with folded plaid napkins and a couple sprigs of herbs for that fresh-baked vibe.
Why This Looks Expensive: The secret isn’t the paint — it’s tone-on-tone color mixing and warm lighting. The amber votives and bakery neutrals echo each other, so the table reads cohesive and intentional, not crafty.
Watch Out: Too much glitter can tip into kids’ craft territory. Use a light hand and lock it in with matte sealer so the finish stays velvety, not shiny.
Pro Styling Tip: Pull your votives slightly off-center from each “donut” so the sugar texture catches side-light and creates tiny, twinkly shadows in photos.
2) Caramel Apple Pumpkins With Golden Fairy Lights On The Kitchen Island
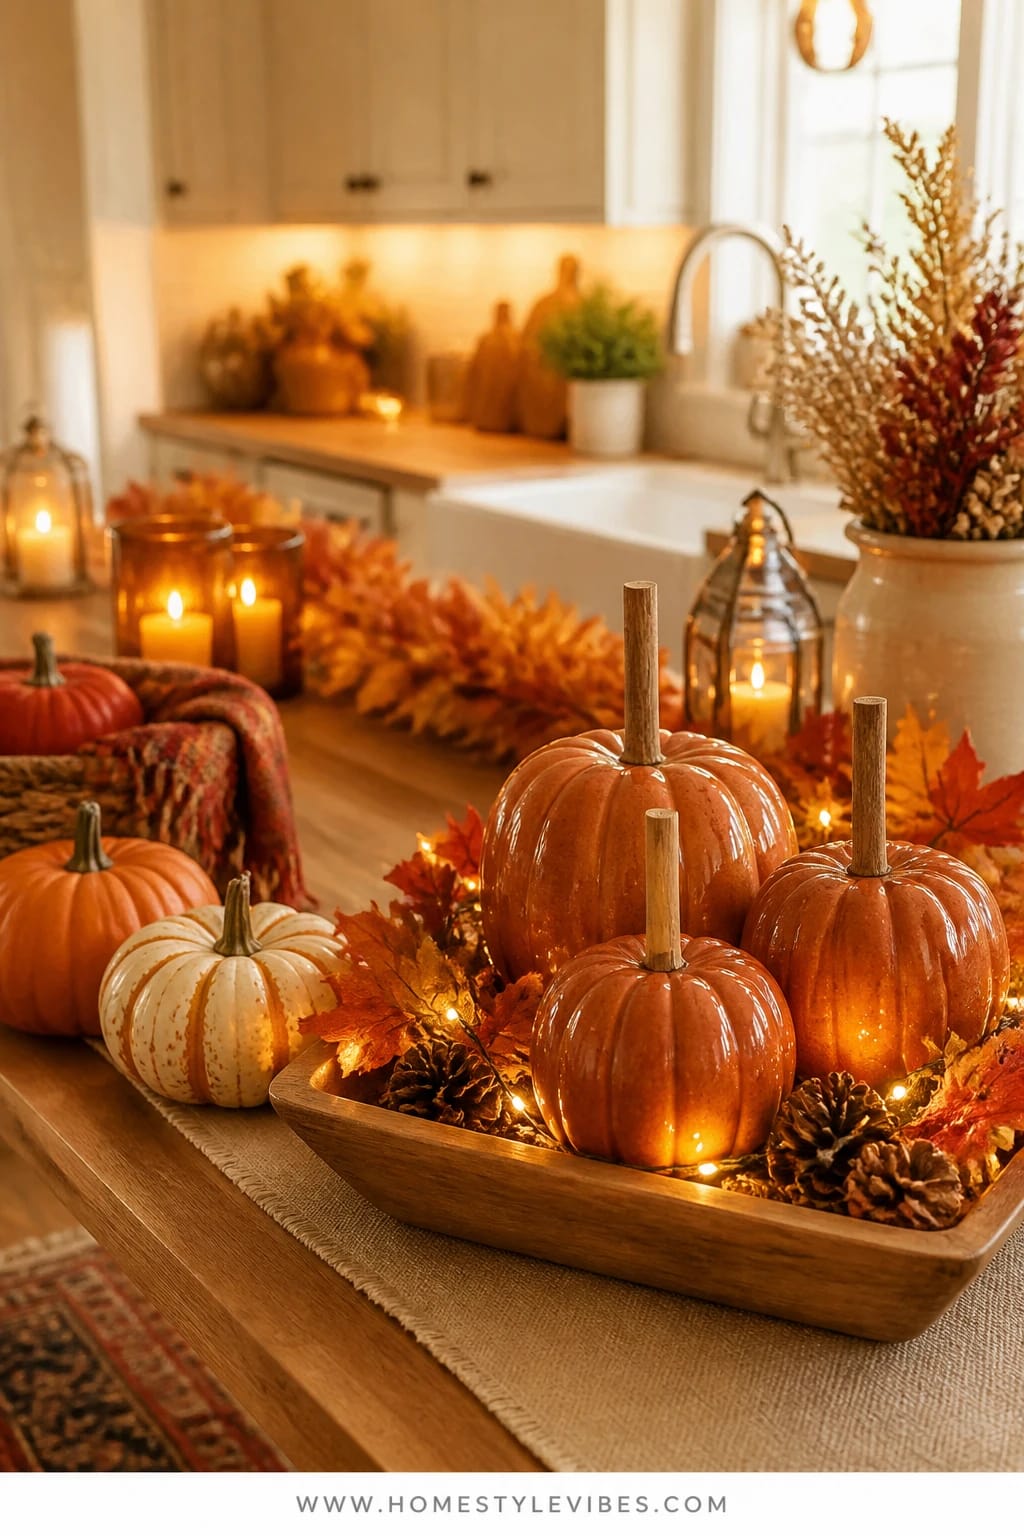
It’s that one kitchen island that always becomes a drop zone — keys, mail, the rogue lunchbox — so your fall vignette never survives the week. You’ve tried a bowl of apples, but it invites fruit flies and looks tired by mid-October. Here’s a playful, grown-up fix: caramel-apple pumpkins. Think medium pumpkins painted in glossy caramel tones with wooden “sticks” (short dowels) pressed into the top, nestled into a shallow tray with golden fairy lights and faux apple leaves.
The mood is harvest-sweet and cheerfully nostalgic, dialed to cozy bright autumn. It works because the tray acts as a visual boundary — the moment you dedicate a tray to decor, it stops becoming a clutter magnet. The glossy caramel finish bounces golden light from the fairy lights, creating soft highlights that feel almost edible. And it photographs like a dream because glossy textures love twinkle lights; the reflection adds depth without a lot of effort. For families, the sticks are the detail that wins: they’re adorable, unmistakably “caramel apple,” and they give a little height variation that reads styled, not messy.
Variations to try: For a budget route, paint just one statement pumpkin “caramel,” add two smaller “apple” pumpkins (painted deep red with a satin topcoat), and coil a single fairy-light strand around the trio. For a neutral-leaning kitchen, use muted caramel (think café au lait), sage leaves, and warm white lights under a clear glass cloche on a breadboard. If you’re hosting, add cinnamon sticks in a small tumbler nearby for scent and texture — easy win.
Budget Breakdown:
- Medium pumpkins (real or faux): $8–$20 each
- Acrylic gloss medium and caramel paint: $8–$16
- Short wood dowels or reusable skewers: $3–$6
- Golden micro fairy lights (battery): $10–$18
- Shallow tray or breadboard: $15–$35
- Faux leaves or apple picks (optional): $6–$12
Total Estimated Cost: $50 – $107
Key Design Elements:
- Main seasonal props: caramel-painted pumpkins with dowel “sticks,” golden fairy lights
- Color palette: caramel, deep red, warm golden light, hints of leaf green
- Lighting strategy: layer overhead pendants dimmed to 50% plus fairy-light glow for a candy-shop shimmer
- Textile layers: a folded plaid tea towel under the tray adds softness
- Natural elements: cinnamon sticks or dried apple slices in a small dish
- Accent details: a clear cloche, small brass bowl, or amber glass jar for matches
How To Recreate This Look:
- Start with a tray big enough to visually contain your vignette and line it with a folded tea towel.
- Add one or two medium pumpkins; paint in caramel tones with a glossy topcoat.
- Layer wood dowels into the pumpkin tops like apple sticks (secure with removable putty if needed).
- Place a battery pack under the towel and coil golden fairy lights around the pumpkins.
- Style with faux leaves, a small jar of cinnamon sticks, and, if space allows, a clear cloche over one pumpkin.
Why This Feels Designer: High/low pairing. The humble dowel “sticks” read playful while the restrained color palette and glossy finish add polish. The lights tucked under edges hide the “how,” so the glow feels magical, not mechanical.
One Thing To Avoid: Don’t scatter the lights randomly. Spiral them with intention and tuck the wire beneath the towel’s edge. Visible wires break the spell.
Pro Styling Tip: Angle one pumpkin so the “caramel” drip faces outward — it gives you a hero shot from the doorway and a close-up moment for your camera roll.
Remember, this isn’t about recreating a showroom. It’s about creating little pockets of delight that actually work with your everyday life. If one idea sings to you, that’s enough.
3) Pumpkin “Macarons” In Soft Rust On The Bookshelf Ledge
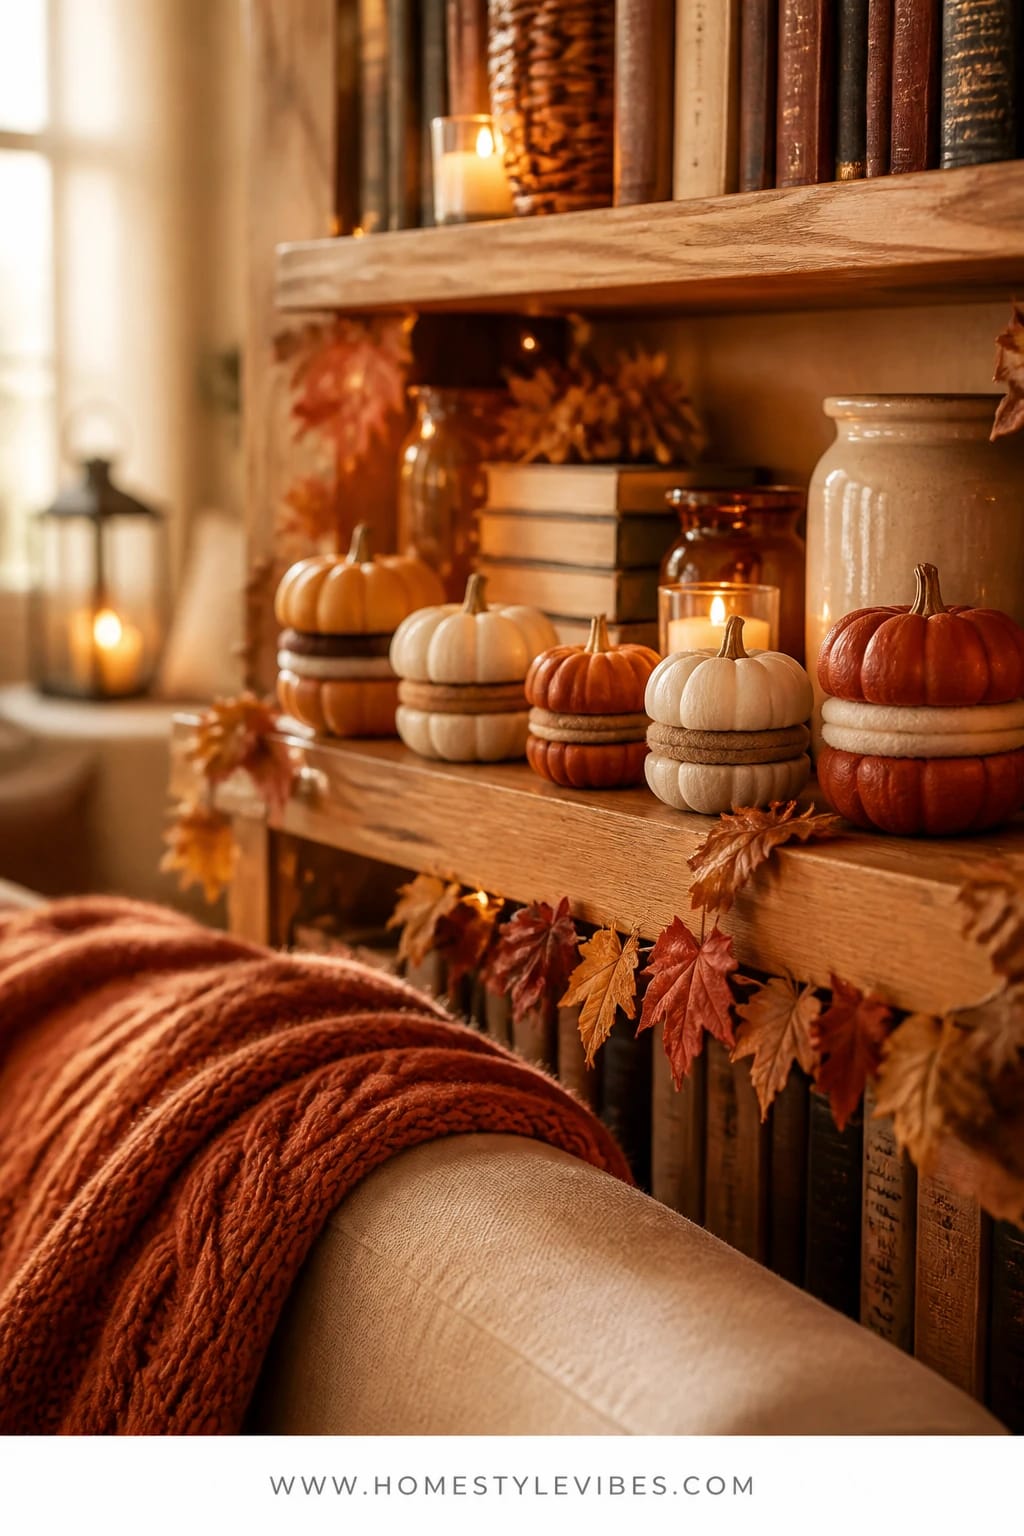
Your living room shelf looks fine… until you try adding pumpkins and it turns into a cluttered parade. Books, frames, plants — plus round objects? Chaos. The fix: pumpkin macarons. Use the flatter mini pumpkins (or slice foam pumpkins) and layer “filling” with felt or clay in soft rusts and creams. Then line them up like a Parisian pastry case across a single shelf ledge. Suddenly, it feels styled and intentional — and yes, absolutely adorable.
The mood here is cozy bright autumn meets patisserie: softened rusts and creams, a steady rhythm of shapes, and quiet warmth. Why it works? Symmetry and repetition. Aligning them in a neat row controls visual noise, so the bookshelf reads edited rather than stuffed. Lighting matters: bounce a warm table lamp off the shelf or add a small puck light to wash the ledge with a golden glow. This setup photographs beautifully because the “macarons” create a structured line against vertical book spines, delivering contrast and tidy depth.
Two variations I love: For a studio-like clean look, stick to creamy white pumpkins with tan “filling,” a wheat-colored felt strip sandwiched between halves. For color lovers, do a gradient — cream to blush to soft rust to burgundy — and keep the frames and objects on that shelf minimal so the “pastry line” steals the show. Small space hack: limit to three macarons grouped near a warm lamp for a tiny but mighty moment.
Budget Breakdown:
- Mini flat pumpkins or foam slices: $8–$20
- Felt sheets or air-dry clay (for “filling”): $4–$10
- Removable putty or low-temp glue: $3–$6
- Warm LED puck light or small lamp: $12–$25
- Neutral bookend or stand (optional): $10–$20
Total Estimated Cost: $37 – $81
Key Design Elements:
- Main seasonal props: pumpkin “macarons” (two halves with a felt or clay “filling”)
- Color palette: cream, blush, soft rust, a kiss of burgundy
- Lighting strategy: one focused warm light source along the ledge; avoid overhead glare
- Textile layers: narrow linen strip or runner under the row for softness
- Natural elements: a single dried wheat bundle at one end of the shelf
- Accent details: brass bookends, a tiny amber bud vase, a postcard-size art leaning
How To Recreate This Look:
- Start by selecting a single shelf and clearing 70% of it for negative space.
- Add a linen strip or narrow runner to define the macaron runway.
- Layer two pumpkin halves with a felt or clay “filling,” secure lightly with putty.
- Place the macarons in a neat, evenly spaced row — five or seven looks balanced.
- Style ends with a dried wheat bundle and one small amber vase to frame the lineup.
Why This Reads High-End: Repetition feels curated. Designers repeat shapes and keep a tight palette so your eye reads rhythm, not clutter. The macaron concept taps into that with playful restraint.
The Most Common Mistake: Mixing too many sizes. Keep the macarons relatively uniform; one slightly larger at the center works, but avoid a jumble.
Pro Styling Tip: Shoot the shelf at a slight angle so the macaron line recedes in perspective — it looks longer and more intentional in photos.
If one idea resonates more than the others, that’s your starting point. Try it, live with it a week, then tweak. Fall decor rewards tiny adjustments — move a candle two inches and suddenly it all clicks.
4) Pumpkin “Toast Bar” With Honey Butter Shades On The Coffee Table
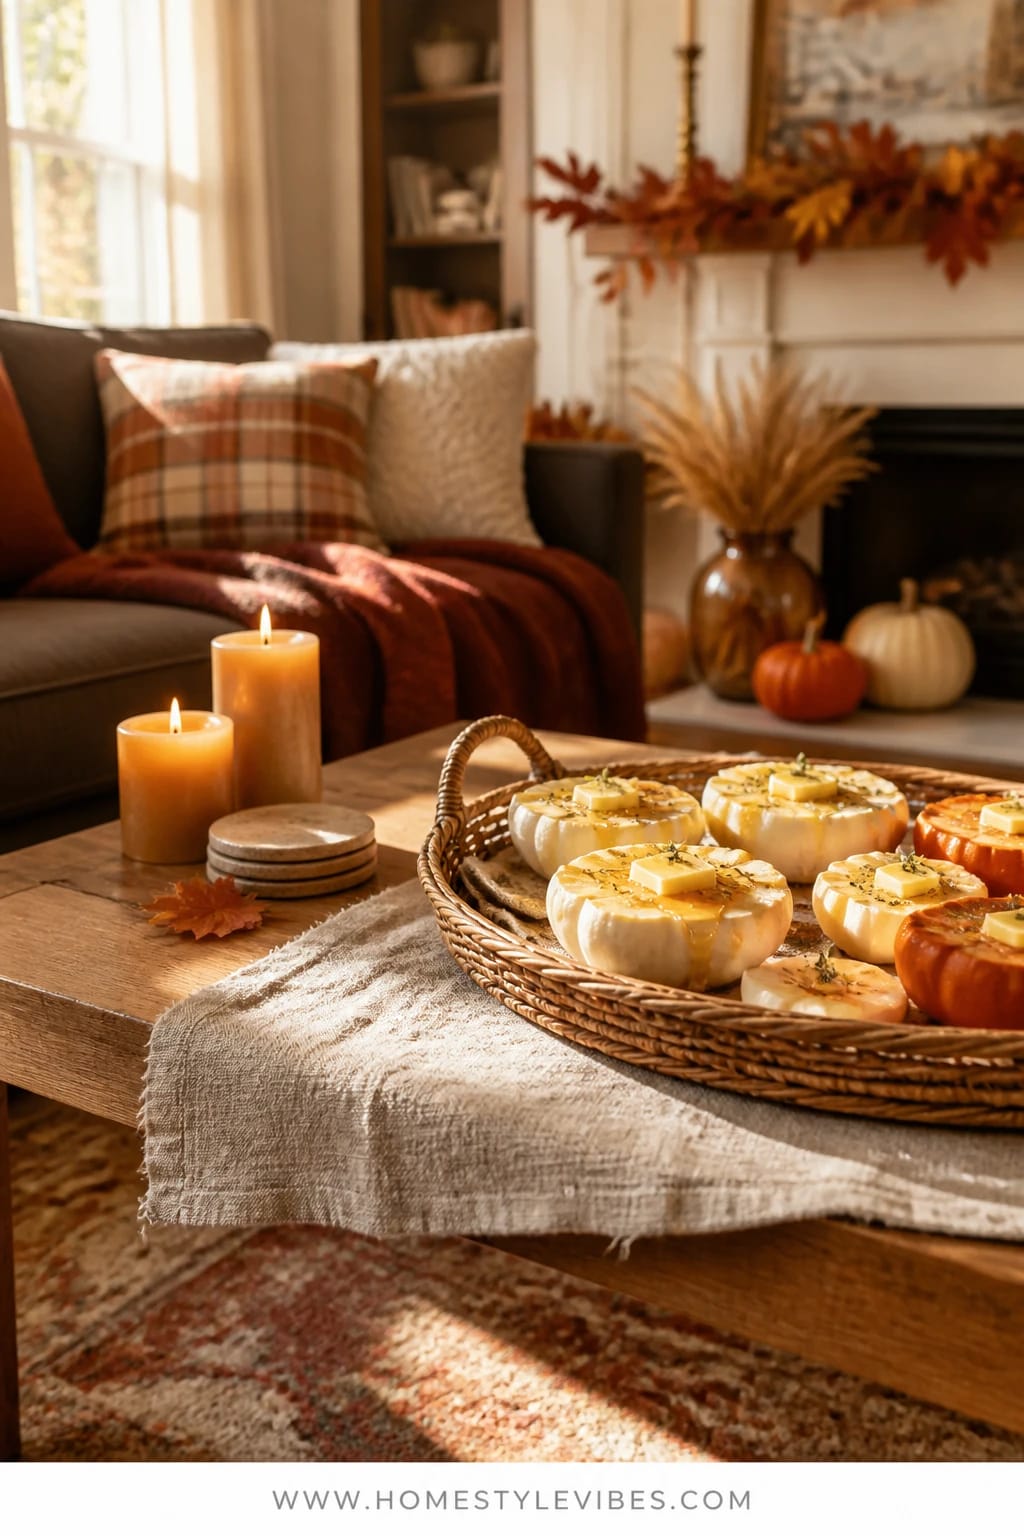
Here’s a truth I learned the hard way: coffee table styling gets tricky fast. You want a centerpiece, coasters, remotes, somewhere for a mug — and the second you add pumpkins, everything feels crowded. The pumpkin toast bar solves this with charm and function. Style a low rattan tray as a “toast board” with white and soft-rust mini pumpkins sliced in half to mimic toast, topped with felt “butter pats,” dripping “honey” made of glossy resin (or amber ribbon), and tiny herb “sprinkles.” Keep everything low and clustered so there’s still space for an actual plate and a book.
The vibe is cheerful harvest cafe: warm honey tones, cream, and soft rust layered with a bit of plaid. Why it works in real homes: it’s low-profile, kid-friendly, and surprisingly sturdy. Lighting-wise, a single amber glass candle or a pair of tea lights in short holders gives that cozy glow without blocking conversation. It photographs well because the toast motif creates flat shapes with readable details — the butter pat, the honey drip, the herb crumble — giving your camera lots to love without needing height.
I tried this on my own coffee table last October and honestly couldn’t believe the difference. My table finally felt playful but finished — and we still had room for snacks. For a budget version, skip resin and use a loop of amber ribbon tucked under one “toast” edge for the honey effect. For a pared-back look, do all-white “toast,” pale felt butter, and a soft wheat runner under the tray. Hosting movie night? Add a small ceramic bowl of real cinnamon sugar for scent and snack topping. It’s a little theatrical in the best way.
Budget Breakdown:
- Low rattan tray: $15–$35
- Mini pumpkins (varied white/soft rust): $8–$18
- Felt sheets for butter: $3–$6
- Glossy resin or amber ribbon: $5–$15
- Amber tea light holders and candles: $10–$18
- Small herb bundle (rosemary or thyme): $3–$6
Total Estimated Cost: $44 – $98
Key Design Elements:
- Main seasonal props: halved mini pumpkins as “toast,” felt butter squares, amber “honey” detail
- Color palette: buttercream, honey amber, soft rust, white
- Lighting strategy: low-profile amber candlelight; keep flames below eye level
- Textile layers: plaid coaster set, thin wheat-toned runner under tray
- Natural elements: rosemary sprigs, a single dried orange slice
- Accent details: small ceramic pinch bowls, a brass butter knife purely for show
How To Recreate This Look:
- Start with a low tray that’s at least 14 inches across to hold a compact “toast bar.”
- Add a slim runner or placemat under the tray for contrast and softness.
- Layer halved mini pumpkins flat side up; top with felt “butter” and a hint of amber resin/ribbon.
- Place two amber tea light holders to one side, not centered — asymmetry feels relaxed.
- Style with tiny herb sprigs and a ceramic bowl of cinnamon sugar for scent and texture.
Why This Looks Intentional: Everything sits inside the tray boundary, which reads tidy. Keeping details low and repeated — butter squares, honey drips — creates a visual theme that feels designed, not piled.
Don’t Do This: Avoid tall tapers or big florals in the center. The “toast bar” loses its charm if you can’t see the details from seated height.
Pro Styling Tip: For photos, slide the tray diagonally so the corner points toward the camera — the angles highlight layers and negative space around the pumpkins.
5) Harvest “Pie Sampler” Pumpkins With Warm Plaid On The Mantel
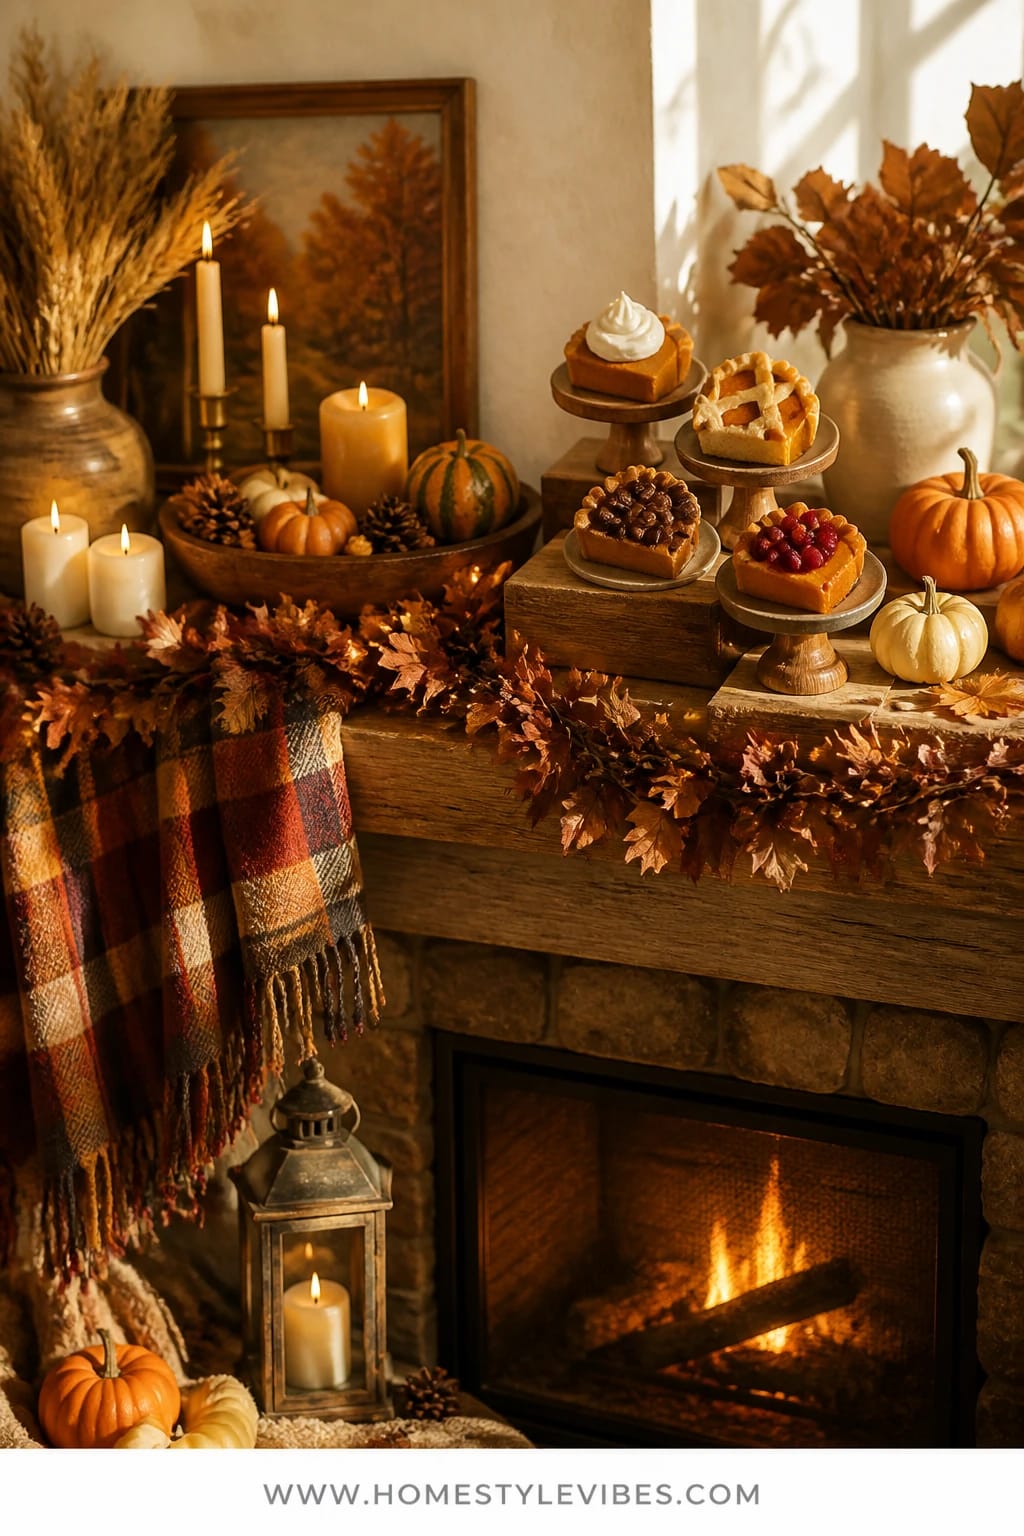
You love a styled mantel. You hate how quickly it becomes a crowded museum of “fall things.” This pie sampler method nails the balance: a tight, delicious theme with just enough variety. Craft mini pie “slices” from pumpkin wedges (real or foam) and give each a distinct topping: “pumpkin chiffon” with whipped cream (cotton tuft), “apple lattice” with thin felt strips, “pecan” with coffee beans sealed on top, and “cranberry” with tiny burgundy beads. Line these on low cake stands and wood risers, then weave in warm plaid and golden twinkle lights. Suddenly your mantel looks like a charming bakery window with that harvest glow we all crave.
The mood is festive, abundant, and photo-friendly. It works in real homes because the slices keep height low (mantels love that), layers read neatly, and the palette stays cohesive: wheat, warm wood, caramel, burgundy, and hints of cream. Lighting sets the tone: a thin strand of gold micro-lights tucked behind risers gives a halo without showing wires, while two squat amber pillars at either end help balance the line. The texture mix — plaid, wood, glass, creamy “whipped” details — reads cozy but not chaotic. Photographs pop because every “pie” has a different top texture, so the camera picks up micro-shadows and variation.
Two ways to adapt: For a minimal mantel, do one long “pie” by lining three pumpkin wedges together with a single white “whipped cream” tuft and one amber pillar. For a maximal, friends-are-coming vibe, add a garland of faux oak leaves in rust and burgundy beneath the risers and tuck a few cinnamon sticks and whole nutmegs in the folds. Hosting Thanksgiving? Keep this up through the big meal — it’s holiday-perfect without shouting.
Budget Breakdown:
- Mini pumpkins or foam wedges: $10–$24
- Cotton balls for “whipped cream”: $2–$4
- Felt strips for lattice: $3–$6
- Coffee beans or faux nuts for “pecan”: $3–$8
- Burgundy microbeads for “cranberry”: $4–$10
- Wood risers or low cake stands: $12–$35
- Warm plaid scarf/runner: $12–$25
- Micro-lights and two amber pillars: $18–$30
Total Estimated Cost: $64 – $138
Key Design Elements:
- Main seasonal props: pumpkin pie “slices,” wood risers, plaid runner, warm micro-lights
- Color palette: wheat, caramel, cream, burgundy, deep rust
- Lighting strategy: hidden micro-lights for a halo, two low pillars to anchor ends
- Textile layers: a plaid scarf or runner draped with soft folds
- Natural elements: cinnamon sticks, whole nutmeg, a single dried leaf cluster
- Accent details: small amber bud vases, a brass match striker, low glass cloches
How To Recreate This Look:
- Start with a plaid scarf along the mantel; let it drape in two gentle waves.
- Add two to three wood risers or low cake stands spaced evenly.
- Layer pumpkin wedges as “pie,” each with its own topping texture.
- Place micro-lights behind risers, hiding the wire and battery pack in the plaid fold.
- Style the edges with amber pillars, cinnamon sticks, and a tiny glass cloche over one slice.
Why This Looks Expensive: The commitment to a single theme — pies — makes every choice feel deliberate. Repeating wood tones and amber light ties random objects into one visual story.
Watch Out: Overcrowding the center. Leave a hand’s width of breathing room between stands so each “pie” reads clearly. Mantels need pauses like sentences do.
Pro Styling Tip: Angle one “slice” 20 degrees toward the room so the topping texture faces front — it becomes your focal point in every candid living room shot.
Real talk: not every idea fits every house. I’ve had years when the mantel was the star and years when the coffee table did all the heavy lifting. That’s fine. Choose the corner you see most and make it sing.
Quick Checklist
- Mini pumpkins in varied sizes and colors
- Acrylic paints in caramel, tan, cream, soft rust
- Matte and gloss sealers
- Cinnamon-toned glitter or microbeads
- Short wood dowels for “caramel apple” sticks
- Amber glass votives and low pillar candles
- Golden micro fairy lights (battery-powered)
- Felt sheets for “butter,” “lattice,” and macaron “filling”
- Rattan or wood trays and risers
- Plaid runner or scarf in warm fall tones
- Cotton balls for “whipped cream” details
- Coffee beans or faux nuts for “pecan” pie
- Burgundy beads for “cranberry” pie
- Linen napkins or narrow shelf runner
- Herb sprigs (rosemary, thyme) and cinnamon sticks
- Small amber bud vases or jars
- Removable putty and low-temp glue
- Warm 2700K bulbs for dining and living areas
Frequently Asked Questions
How much should I budget to try one of these food-themed pumpkin decorating ideas?
Most ideas land between $40–$110, depending on how many pumpkins and lights you buy. Start with one anchor element (like a tray or a couple of amber votives), then build slowly. You don’t need everything at once — one well-styled cluster beats a whole house of “almost.”
Are real or faux pumpkins better for these projects?
IMO, real pumpkins win for texture and color, but faux can be great for longevity. Mix them: use real minis for surface charm and one sturdy faux piece where you need paint-heavy effects (caramel gloss, macaron halves). If heat vents run nearby, lean faux — real ones soften fast in warm spots.
What if my space is small — can I still do these without crowding?
Absolutely. Scale down each concept: three donut pumpkins on a cutting board, one caramel-apple pumpkin under a cloche on the island, or a trio of macarons on a narrow shelf. Keep candles short and choose one light source per vignette to avoid visual chaos.
How do I store the pumpkins and accessories after the season?
Let painted pieces dry fully for 48 hours, then wrap individually in tissue or old pillowcases. Store in a lidded bin marked “Fall: Food-Themed” so you can find it fast next year. Keep lights and votives in a small labeled pouch inside the same bin — future you will send a thank-you text.
Are candles safe with kids and pets around these displays?
Use LED tea lights or battery pillars where small hands or tails roam. If you do real flame, choose low, heavy holders and keep any “paper” details (felt, ribbon) several inches away. Snuff candles before leaving the room, and never on a wobbly table.
When should I start decorating with these ideas?
Kick off in mid-September with donuts or macarons for a gentle start, add caramel apples in early October, and bring in the pie sampler by late October through Thanksgiving. The palette stays cohesive so you can layer as you go.
What if I rent and can’t use nails or permanent fixtures?
Good news: everything here sits on surfaces — trays, shelves, mantels. Use removable putty under pumpkins or risers to keep them steady. For lights, tuck battery packs into folds of fabric or small bowls. No hooks required.
The Cozy Wrap-Up
Pick one idea that makes you grin — the donut pumpkins for a sweet brunch moment, the caramel apples for that kitchen glow, the pie sampler for a showpiece mantel — and start there. Keep it small, keep it warm, and let the cozy bright autumn mood lead: amber light, soft rusts, wheat and cream, a bit of plaid, and that layered abundance that makes a room feel like home.
The truth is, you don’t need a hundred pumpkins to feel festive. You need a story. Food-themed pumpkin decorating tells that story with charm and color, photographed in pools of golden light, ready for family nights and long, lazy Saturdays. You’ve got this — and your home is about to smell faintly of cinnamon and look a whole lot like joy.

About the Author

Krisztina P.Rendes, Founder of Home Style Vibes
Founder of Home Style Vibes
Krisztina Puskásné Rendes created Home Style Vibes as a cozy-modern lifestyle space where homemaking meets inspiration. Her goal is to help women create beautiful, organized, and peaceful homes they truly love — without overwhelm. You’ll find here heart-driven content on home decor, cleaning tips, easy family recipes, organization and decluttering, DIY home projects, plants, and seasonal ideas — all designed to bring more calm, comfort, and style into everyday life.





