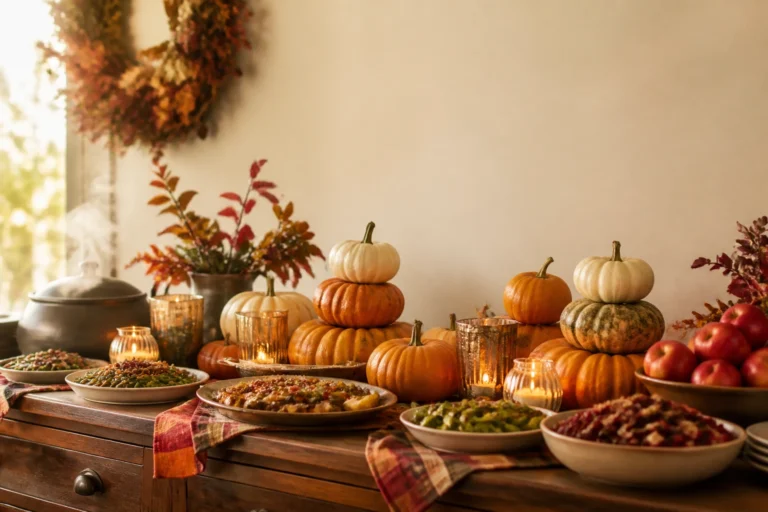
6 Autumn Garden Ideas That Make Your Yard Look Stunning In The Fall
You want your yard to glow in that rich autumn magic—scarlet leaves, candlelit warmth, and pumpkin clusters that stop neighbors mid-walk. But the truth? You hate how fast fall sneaks up, and somehow your yard ends up looking patchy and tired by October. You picture golden afternoon light pooling over mums, lanterns flickering at dusk, and layered textures that feel like a cozy sweater for your garden. These 6 autumn garden ideas fix that exact problem with clear steps, budget caps, and materials you can source this weekend—so your yard reads “gorgeous fall postcard” in less than two hours per zone.
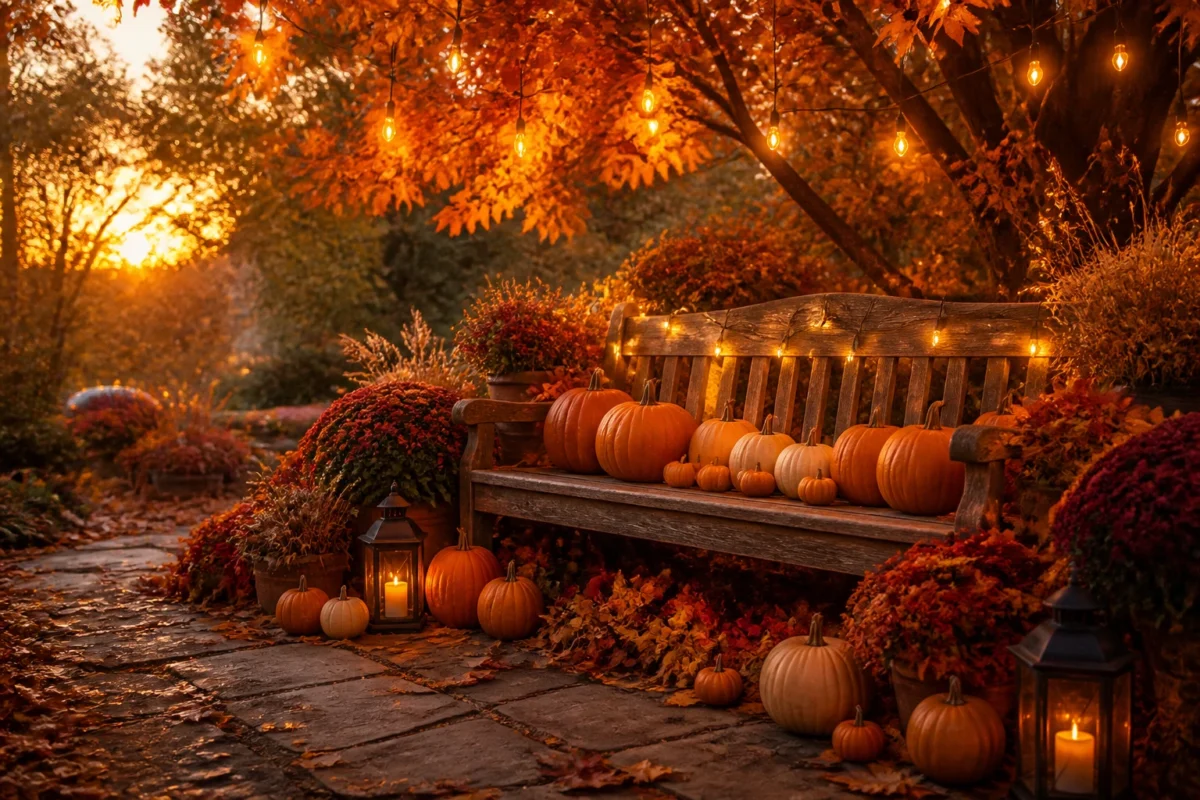
We’re talking rust, burgundy, and amber; dried florals; lanterns and string lights; fresh pumpkins with sculptural stems. Each outdoor idea is photogenic and Pinterest-worthy but still doable in a real yard with kids, dogs, and actual weather. If you love that generous, harvest-season abundance, this is your blueprint. Use it from late September through Thanksgiving, and let your garden do the showing off for you.
1. Pumpkin Rows With Golden String Lights Along The Garden Bench
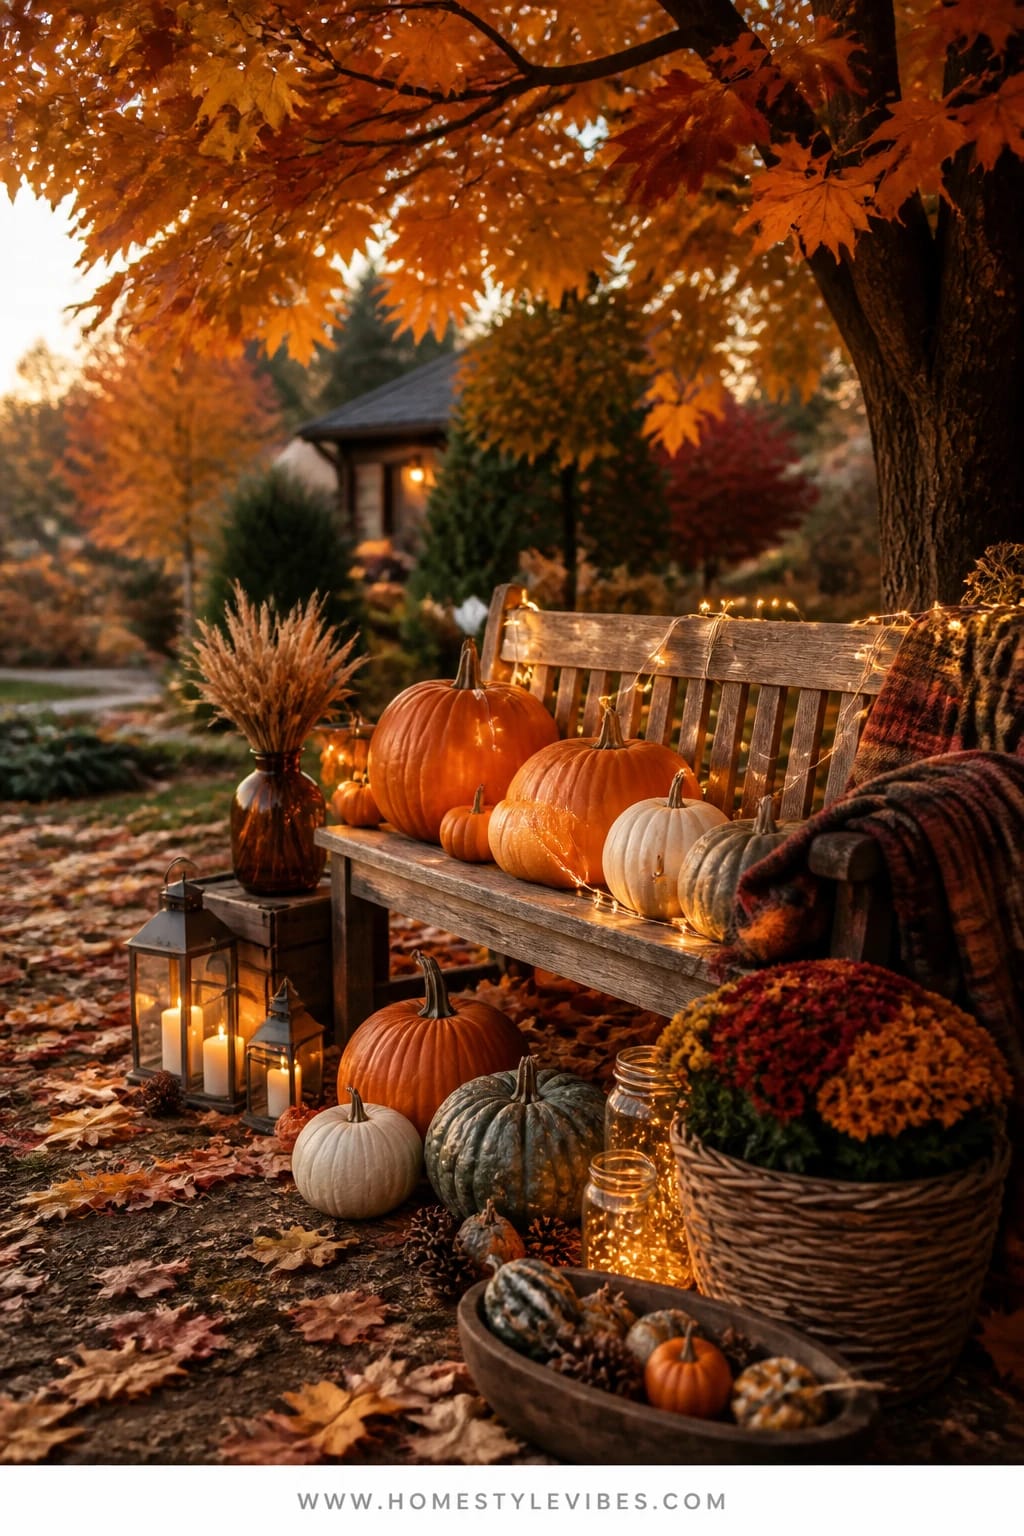
It’s that one corner that always feels off: the garden bench under the maple tree where leaves collect and everything looks a little forgotten. You’ve tried a single mum and a lantern, but it still reads “afterthought.” This idea creates a welcoming focal point with a simple move—line up pumpkins in graduated sizes along the bench and ground, then drape warm golden string lights across the backrest. Suddenly that corner becomes a quiet, radiant moment that feels like a storybook scene at dusk.
The mood here is golden-hour glow meets crisp-morning calm. It works in real homes because it leverages a piece you likely already own (the bench) and doubles down on abundance through repetition, not complexity. String lights add warmth and low-cost drama, and the pumpkins bring sculptural shape that photographs beautifully—especially when staggered in height. Materials are approachable: classic orange pumpkins, a few heirloom varieties for texture, cinnamon-colored throws, and a trailing string of micro LEDs on a timer so you don’t have to plug and unplug in the cold.
For a budget-friendly version, choose faux pumpkins in a cohesive palette and use a single strand of battery-operated lights. For a small-space garden or narrow walkway, create a half-row on one side of the bench and weave the lights through only half the backrest—optical trickery makes it look artful, not skimpy. Feeling more neutral? Stick to whites, pale greens, and soft gray pumpkins with warm-white lights and add eucalyptus for a tone-on-tone effect that still reads fall.
Budget Breakdown:
- Real pumpkins (6–10 mixed sizes): $30–$80
- String lights, warm white, outdoor-safe: $15–$35
- Throw blanket or outdoor cushion in rust/amber: $20–$40
- Heirloom gourds (optional for texture): $12–$25
- Battery timers or smart plugs (optional): $10–$20
Total Estimated Cost: $65 – $200
Best For: Yards with an existing bench, under a tree canopy, or near a garden path. Perfect for early October through Thanksgiving when evening glow makes all the difference.
Key Design Elements:
- Main seasonal props: real or faux pumpkins in mixed sizes, micro LED string lights
- Color palette: burnt orange, soft white, warm amber, with green/gray heirloom accents
- Lighting strategy: warm string lights draped across the bench backrest, optional lantern on the ground
- Textile layers: rust or camel outdoor throw, weather-friendly cushion
- Natural elements: fallen leaves left intentionally around the base for seasonal texture
- Accent details: a woven basket to corral mini pumpkins, brass lantern for added glow
How To Recreate This Look:
- Start with a clean bench; brush off leaves but leave a few around the feet for texture.
- Add a rust or camel throw over one side of the bench to soften the scene.
- Layer pumpkins along the bench top, largest at the ends, then cascade to the ground in staggered heights.
- Place warm string lights along the backrest; secure with discreet clips or twist ties.
- Style with a lantern at ground level and a small basket of mini pumpkins for depth.
Why This Looks Expensive: Repetition reads intentional. The orderly pumpkin line plus controlled warm lighting creates a scene that feels styled, not random—like a curated garden moment instead of a pile of produce.
Watch Out: Don’t use cool-white or blue-tinted lights. They flatten the pumpkins and kill that rich fall tone. Also, avoid overfilling the bench seat; leave a place to actually sit so it feels inviting, not staged-only.
Pro Styling Tip: Photograph at blue hour—five to ten minutes after sunset—so the warm lights pop and the pumpkins still hold their color and texture.
Ready for a bigger color hit and serious curb appeal? Keep scrolling.
2. Burgundy Mums And Lanterns Framing The Front Door With Candlelit Warmth
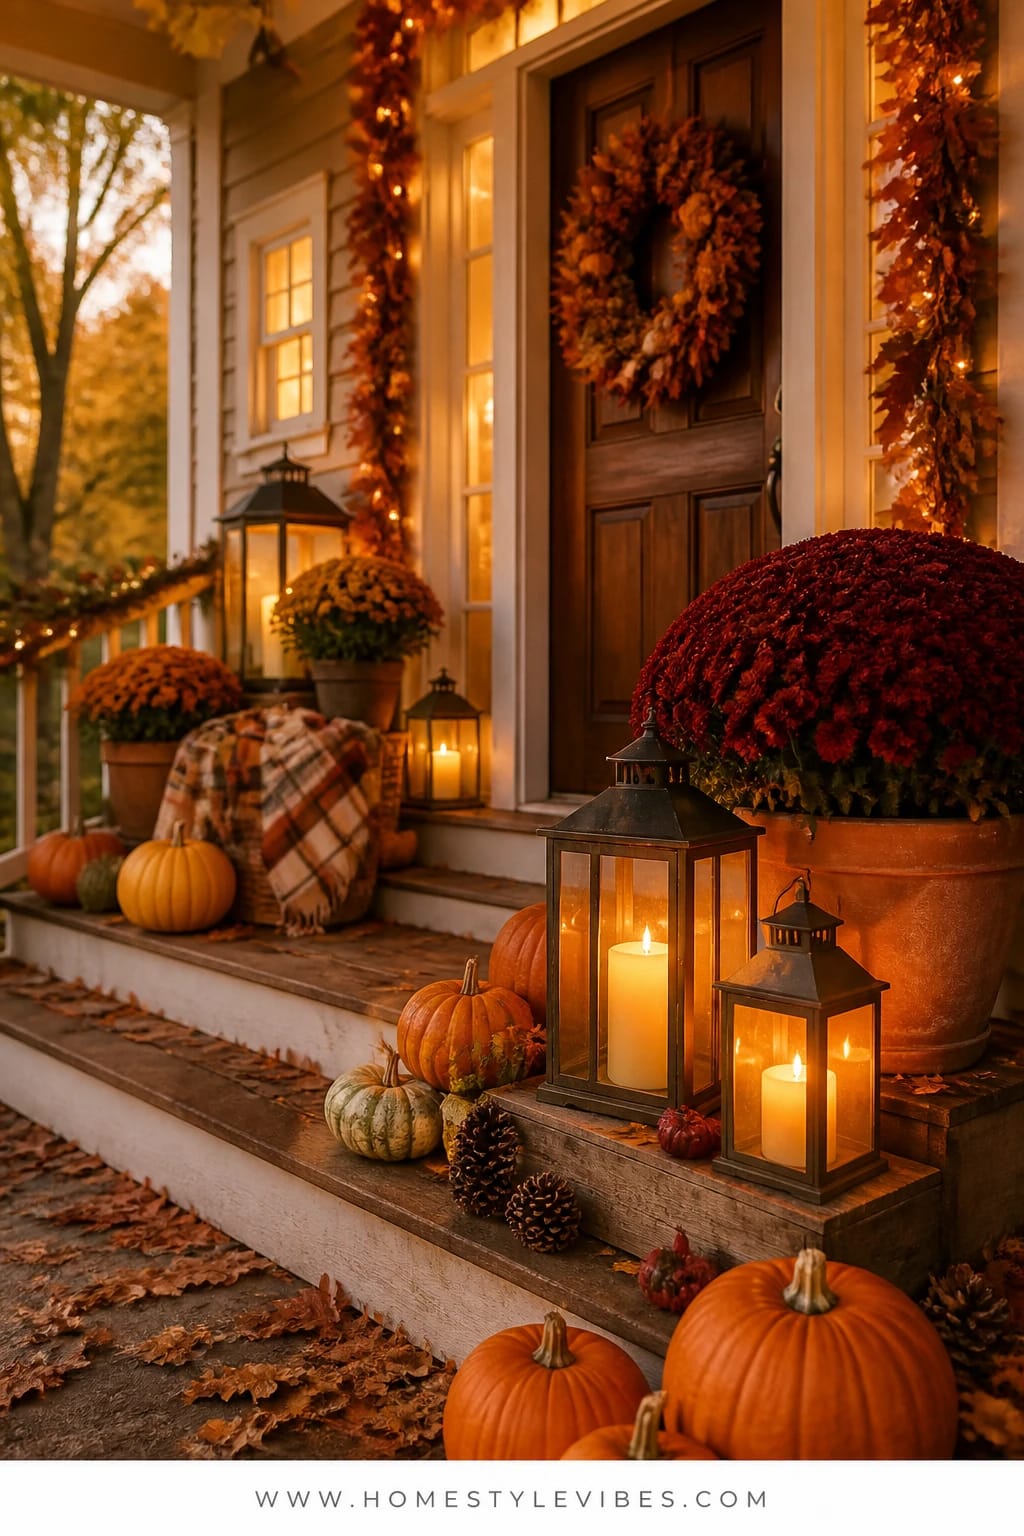
We’ve all been there—two small mums on either side of the door that look a little lonely, like they’re waiting for friends who never show. This setup layers generous burgundy mums, mix-and-match lanterns, and flickering candlelight at varying heights to make your front door feel dressed. The effect is dramatic yet steady—like a formal welcome that still feels neighborly.
It creates festive gathering energy, perfect for Halloween night and any weekend when friends drop by. It works because scale matters at the entry: larger pots and clusters look balanced with the vertical lines of a door. Warm lighting pulls the eye upward and outward, making your porch read larger and more intentional. Bonus: lanterns and pots store easily for next year. If you’re worried about real flames with kids, swap for battery pillars on timers that click on at dusk. I did this last fall after one too many “did I blow out the candles?” moments, and honestly, the steady glow was even better for photos.
Variations make it flexible. On a budget, choose two oversized mums in deep burgundy and one medium lantern; fill in with a couple of faux trailing greens to thicken the base. Prefer a more muted palette? Go for soft mauves and blush mums with aged copper lanterns, then add pale gray pumpkins for contrast. Small stoop? Do one side only—go asymmetrical with a tall lantern, a single large mum, and a mini pumpkin cluster.
Budget Breakdown:
- Burgundy mums (2–4 large): $30–$60
- Lanterns (2–3 sizes): $40–$120
- Pillar candles (real or battery): $15–$40
- Planter filler (moss, trailing ivy, or straw): $10–$20
- Pumpkins (optional accent): $10–$30
Total Estimated Cost: $65 – $250
Best For: Porches or stoops that need a bold entry moment. Ideal from late September through early November.
Key Design Elements:
- Main seasonal props: burgundy mums, lanterns with warm candles, pumpkins as accents
- Color palette: burgundy, rust, amber candlelight, black or aged brass lanterns
- Lighting strategy: tall lanterns flanking the door, smaller lanterns tucked near planters
- Textile layers: coir doormat atop a plaid outdoor rug for pattern
- Natural elements: moss or straw as planter top-dressing
- Accent details: copper or bronze finishes to echo the warm tones
How To Recreate This Look:
- Start with a layered doormat look: a plaid outdoor rug under a coir mat to ground the scene.
- Add two large mums in oversized planters on either side of the door.
- Layer in lanterns—one tall and one medium on the “heavier” visual side.
- Place a few pumpkins in odd numbers to soften the lantern bases.
- Style with moss on top of the soil for a finished, high-end look.
Why This Feels Designer: The height play matters—tall lanterns, mid-sized planters, and low pumpkins. That stacked silhouette mirrors professional styling and brings rhythm to the entry.
One Thing To Avoid: Tiny planters. Underscaled pots next to a full-sized door always look a bit sad. If all you have are small containers, cluster three together to create one “visual large.”
Pro Styling Tip: Use one lantern with seeded glass—the softly mottled panels diffuse the light like fog, which looks cinematic in photos.
If your front door is handled, let’s bring some movement and texture to your porch steps next.
3. Plaid Layered Pumpkins On Porch Steps With Amber Lantern Glow
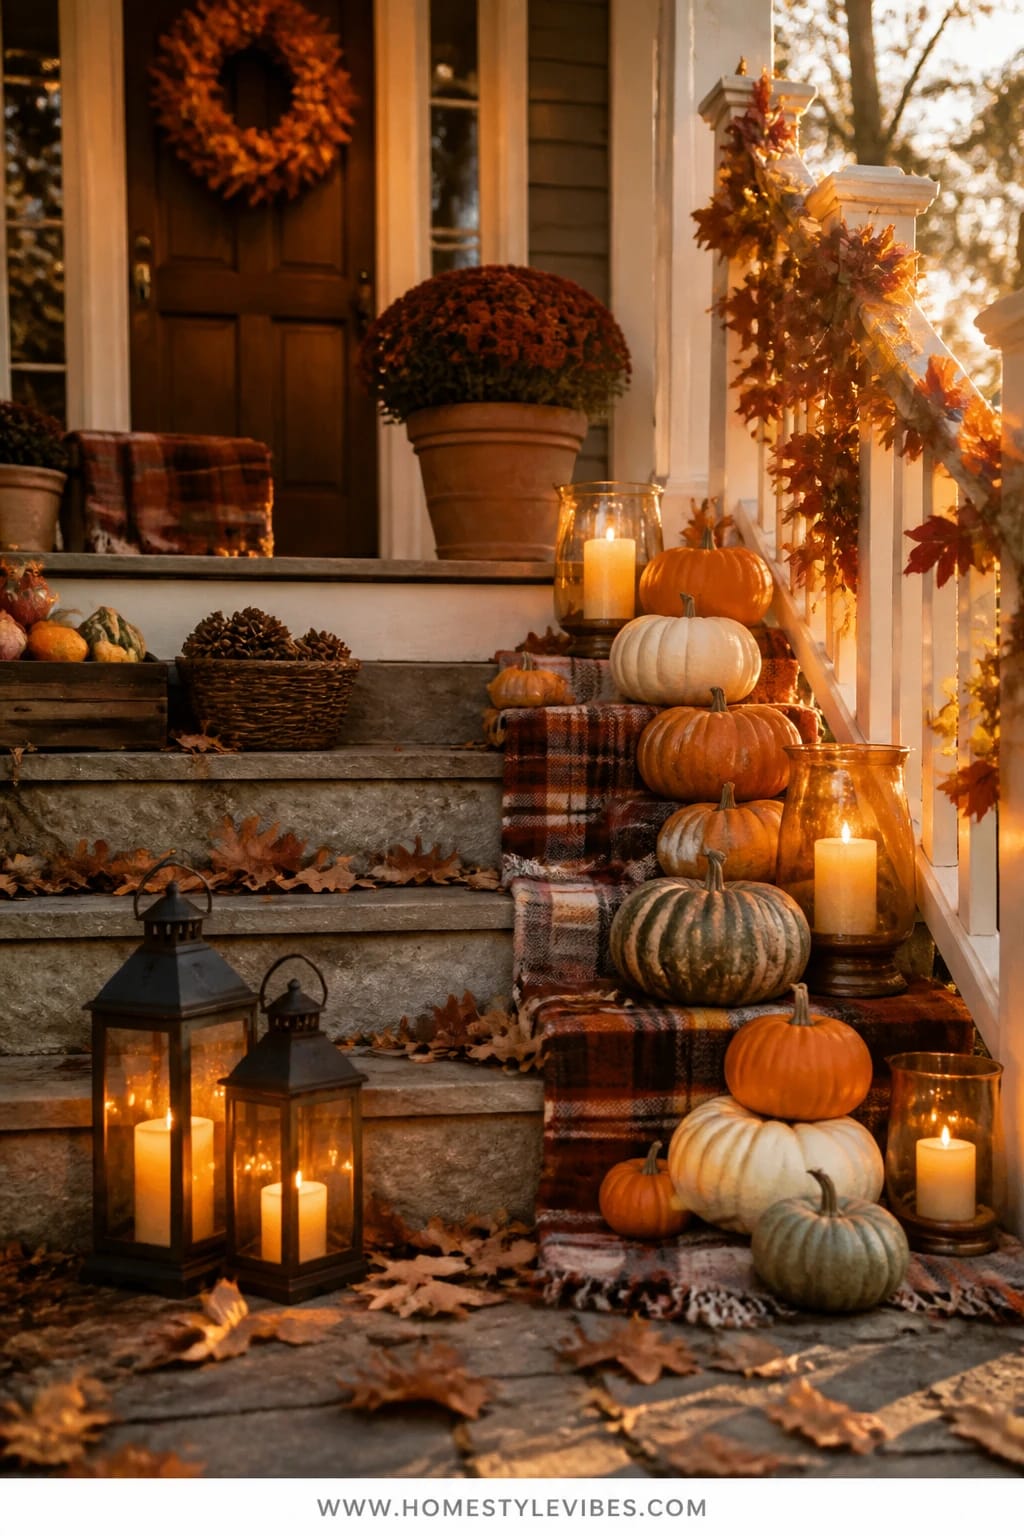
You love stacked pumpkins on Pinterest, but when you try it, the steps look messy and flat. The secret isn’t just more pumpkins—it’s layering plaid and amber lantern glow to build rhythm and warmth. Tucking plaid textiles on a few steps (like mini runners or folded scarves) adds softness that holds the eye. Amber lanterns or hurricane vases bring that candlelit warmth and make the whole staircase read like a glowing path.
This look creates harvest-table abundance outside. It works beautifully on real homes because steps give you built-in levels; you just need to amplify them with pattern and light. Use warm wood tones or faux-wood lanterns for a cozy cabin feel, and mix pumpkin colors so each step feels intentional: burnt orange, creamy white, and sage green. FYI, this setup photographs like a dream because the repeating diagonal lines of the steps pull the eye up to the door, while the amber light adds saturation and depth.
Go budget-friendly by reusing old scarves as step textiles and thrifted lanterns. For a smaller set of steps, style only the outer edges and keep the center clear for safe footing. Prefer a calm vibe? Choose all-white pumpkins, a mudcloth-style throw in beige and black, and aged brass lanterns with warm LED candles. I once tried to style every single step and nearly tripped carrying groceries—keep at least one step fully clear for daily life. Practical is pretty when you’re not face-planting.
Budget Breakdown:
- Pumpkins (8–12 mixed sizes): $40–$100
- Lanterns or hurricane vases (2–4): $40–$120
- Plaid textiles (scarves, mini runners): $0–$40
- LED candles: $20–$35
- Non-slip rug pad pieces (for safety): $8–$12
Total Estimated Cost: $108 – $307
Best For: Porches with 3–6 steps; families who want a warm welcome layered with safety and practical access.
Key Design Elements:
- Main seasonal props: mixed pumpkins, plaid textiles, amber lanterns
- Color palette: burnt orange, amber, cream, sage green
- Lighting strategy: staggered lanterns on alternating steps for a steady path of light
- Textile layers: plaid in rust and ochre, wool or flannel textures
- Natural elements: dried leaf clusters tucked near lantern bases
- Accent details: antique brass candle sleeves, aged wood finishes
How To Recreate This Look:
- Start by mapping safe pathways—leave a center or one side completely clear.
- Add plaid textiles to two or three steps, anchored with non-slip pads.
- Layer pumpkins in pairs on each textile step; vary heights and colors.
- Place lanterns on alternating steps; use amber-toned LEDs for warmth.
- Style with a few small gourds or pinecones for polish at the edges.
Why This Reads High-End: Textiles on the steps add that soft, editorial touch you usually see in styled shoots. Combined with focused amber lighting, it feels curated and rich, not random.
The Most Common Mistake: Overcrowding the steps. Visual fullness is not the same as physical clutter. If you can’t easily carry in a grocery bag, remove one pumpkin per step.
Pro Styling Tip: Shoot from a slight side angle so the layered steps create a zig-zag of color and light across your photo—instant depth.
Feeling bolder? Let’s paint the garden with foliage, not just props.
Remember, this isn’t about recreating a showroom. It’s about building a yard that actually feels like yours. If one idea resonates more than the others, that’s your starting point—you don’t need all of them.
4. Rust-Toned Dried Floral Wreath And Garland At The Front Door With Lantern Light
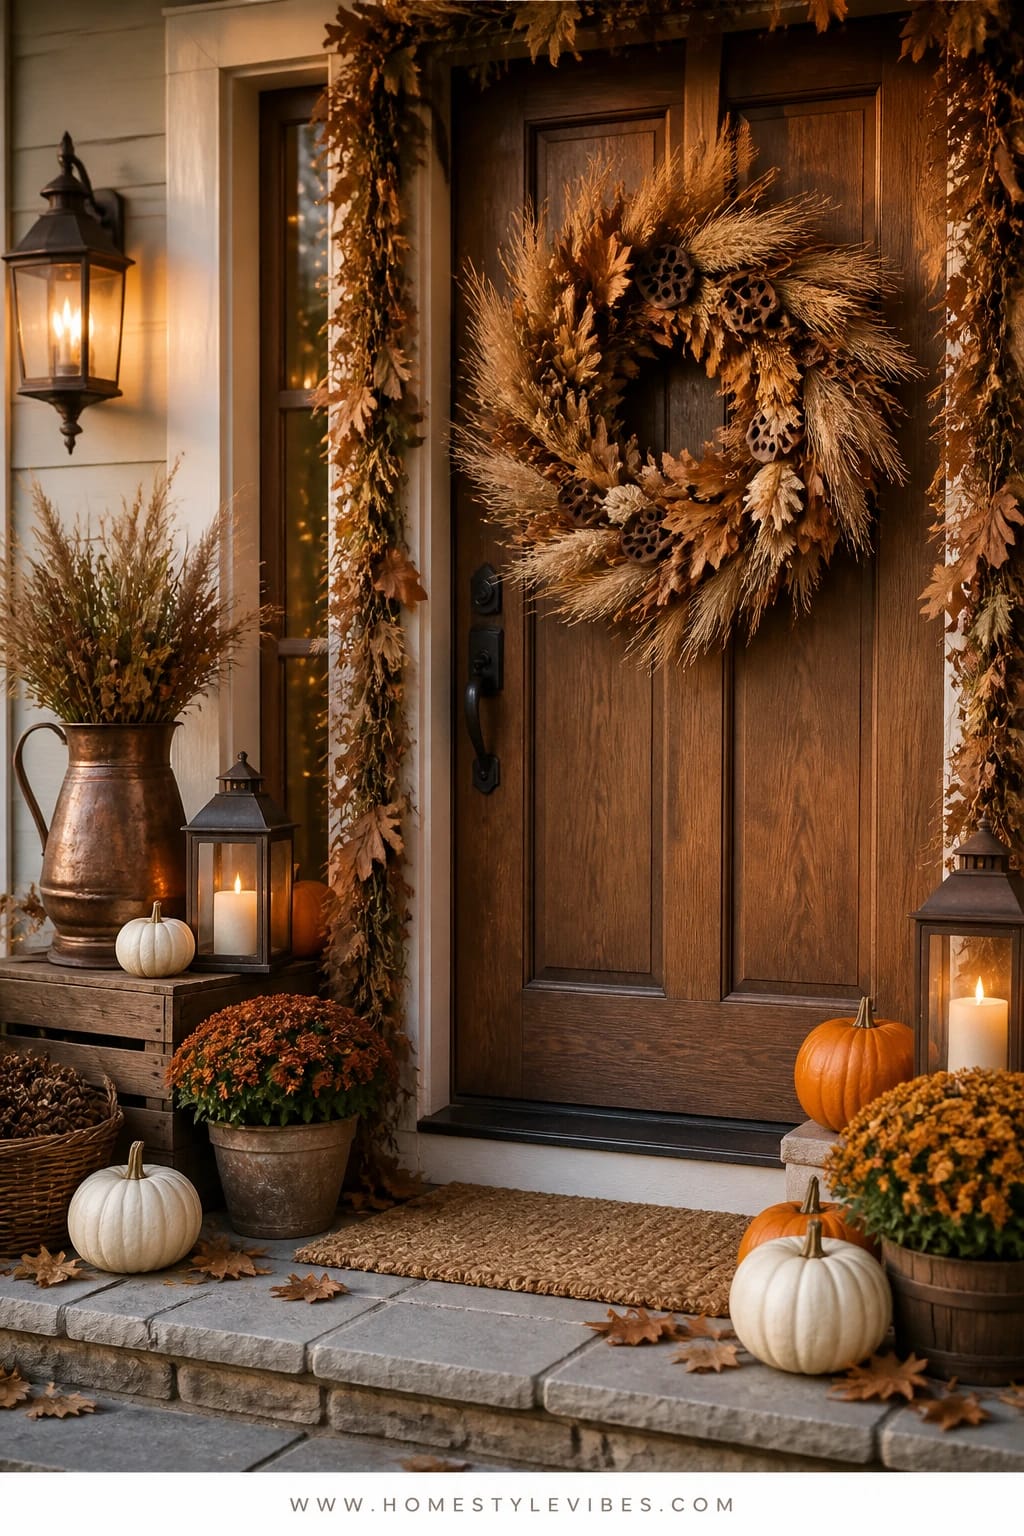
You’ve hung a wreath before, but somehow it vanished against the siding, or the color felt off by week two. Here’s why this works differently: lean into rust-toned dried florals and grasses that intensify with low autumn sun, then repeat the color in a slim, matching garland around the doorframe. Add one lantern to each side to echo the rust warmth, and the whole entry sings—even in overcast light.
The mood is sophisticated harvest—papery textures, sandy reeds, and that quiet swish when a breeze moves the dried stems. Real homes benefit because dried florals last from September through Thanksgiving without daily maintenance. Amber lanterns extend the palette into evening, and because the materials are lightweight, they store beautifully for next year. A friend of mine bought three different garlands before realizing her problem wasn’t the garland at all—it was cold, blue-toned porch lighting. Once she swapped to warm bulbs, the wreath finally looked lush and not dusty.
On a tighter budget, buy a ready-made dried wreath, then DIY a mini garland by wiring together affordable bunches of pampas, broomcorn, and preserved oak leaves. For a muted take, choose beige and taupe grasses with a single rust ribbon and black lanterns for contrast. Small front door? Hang the wreath lower (at eye level) and add just a half-garland along the hinge side for asymmetry that feels designed, not skimpy.
Key Design Elements:
- Main seasonal props: dried floral wreath, coordinating garland, lanterns
- Color palette: rust, taupe, camel, warm black accents
- Lighting strategy: lanterns on either side, plus warm porch light bulbs
- Textile layers: rust velvet ribbon tails, narrow plaid ribbon weave
- Natural elements: pampas, preserved oak leaves, wheat, broomcorn
- Accent details: matte black or aged brass lantern frames
Budget Breakdown:
- Dried wreath (store-bought or DIY): $35–$120
- Dried garland materials: $25–$70
- Lantern pair: $50–$140
- Warm LED bulbs for porch fixture: $6–$15
- Floral wire and command hooks: $10–$20
Total Estimated Cost: $126 – $365
Best For: Front doors that need color intensity and texture but minimal maintenance. Works beautifully through late fall and even early winter with the right ribbon swap.
How To Recreate This Look:
- Start by swapping in warm LED bulbs for your porch light (2700–3000K).
- Add the wreath at eye level, anchoring it with a rust ribbon and a secure hook.
- Layer a slim dried garland around the doorframe; secure lightly so it can move.
- Place lanterns on both sides of the door; keep the heights slightly uneven.
- Style with a few mini pumpkins in rust and cream at the lantern bases.
Why This Looks Intentional: The color repetition from wreath to garland to lantern accents creates a visual loop. Your eye reads it as a finished story, not separate pieces.
Don’t Do This: Avoid neon-orange ribbon or glossy faux leaves—they can cheapen the look fast in daylight. Choose matte or velvet textures in rust or camel for grown-up warmth.
Pro Styling Tip: Let ribbon tails hang 12–18 inches. That gentle movement catches light and adds life to still, dried materials in photos.
Now, let’s pull those tones deeper into the yard where you sit and sip something warm.
5. Pinecone And Leaf Garland On The Patio Table With Burnt Orange Accents
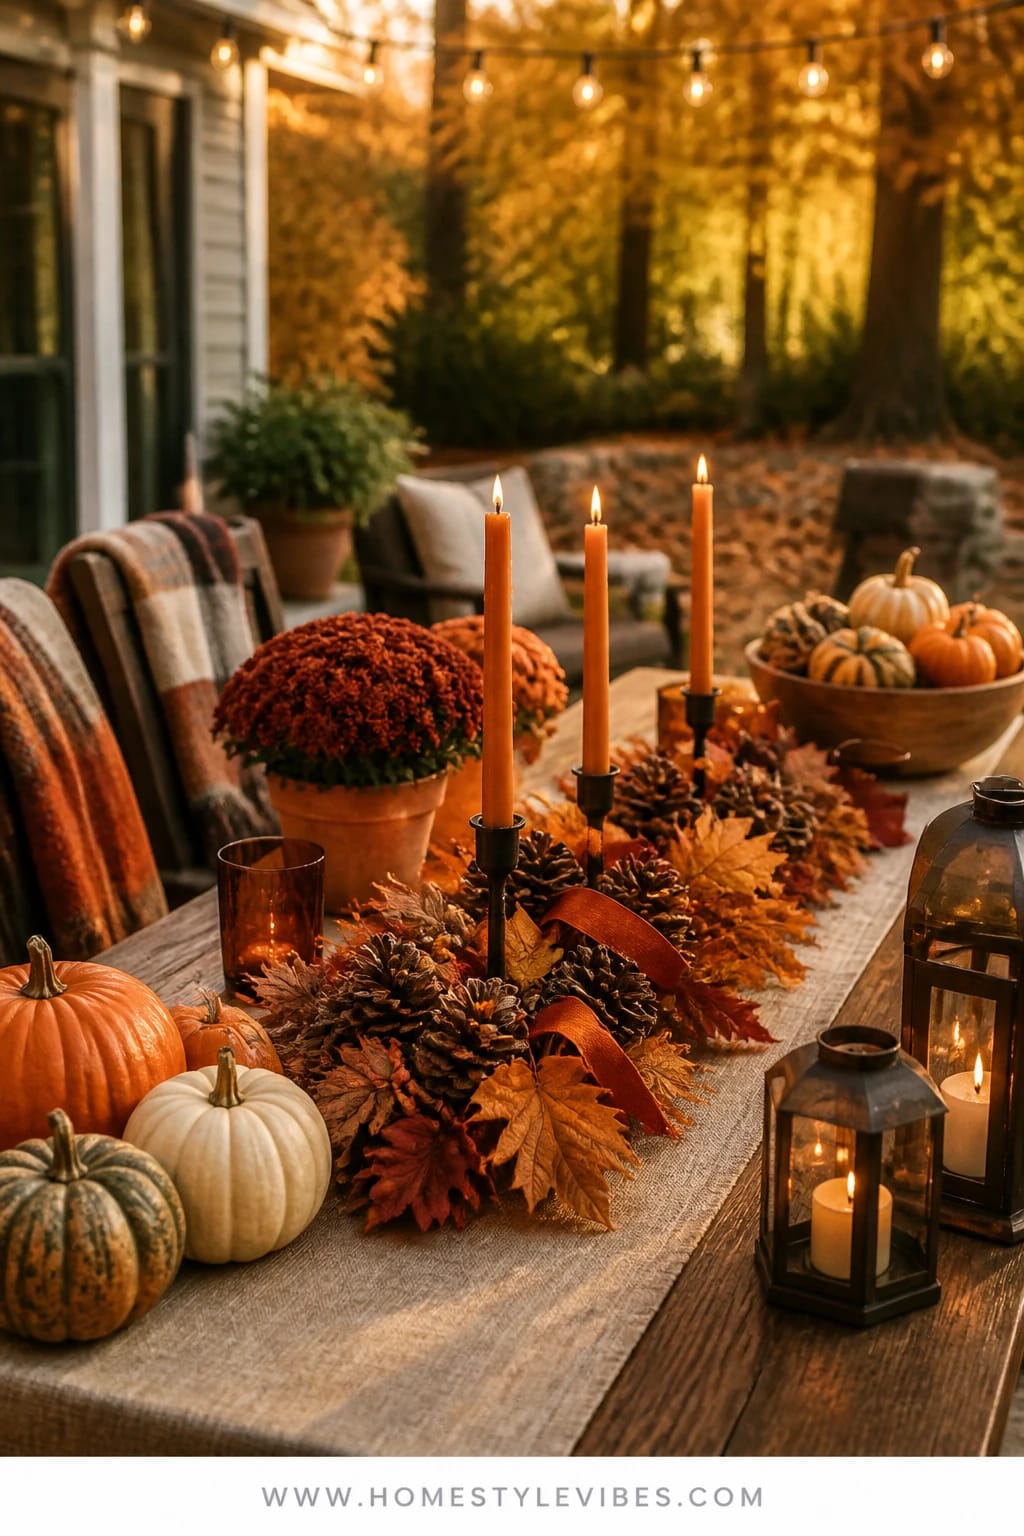
You host friends outside in October, but the patio table always ends up a dumping ground for mail, soccer shin guards, and that one rogue dog toy. This centerpiece turns the table into a seasonal anchor without needing a full dinner setup. A low pinecone and leaf garland, woven with burnt orange ribbon and a few slim taper candles in sturdy holders, adds warmth without blocking face-to-face conversation.
The vibe is intimate and relaxed—like a cabin supper under the trees. Real-life win: the garland stores easily in a bin, and you can run it across the table for gatherings or coil it into a bowl on quiet nights. Warm lighting matters here; soft tapers or enclosed lantern tapers make everyone’s skin look great in photos and keep the whole table feeling cozy rather than stark. I tried a version of this last October with cinnamon-tinted tapers and honestly couldn’t believe the difference in how the food looked—rich, golden, and way more appetizing than under cool patio lights.
Budget version? Forage pinecones and clip a few colorful branches (legal and safe, of course). Add dollar-store tapers in amber and a thrifted runner. Prefer neutral? Skip the ribbon and focus on tawny leaves, blonde wood chargers, and smoke-gray glassware. Small table? Halve the garland length and add a single lantern; resist the urge to cram in more elements—negative space reads luxe.
Budget Breakdown:
- Pinecone/leaf garland (store-bought or DIY): $15–$60
- Burnt orange ribbon or twine: $4–$12
- Taper candles (set of 6): $10–$24
- Candle holders (weighted, outdoor-friendly): $20–$60
- Runner or table throw: $15–$40
Total Estimated Cost: $64 – $196
Best For: Patio tables of any size; casual outdoor dinners and weekend coffee moments through November.
Key Design Elements:
- Main seasonal props: pinecone/leaf garland, burnt orange ribbon, tapers
- Color palette: burnt orange, tawny brown, olive green, cream
- Lighting strategy: low, warm flames at even intervals; swap to hurricane shades if it’s breezy
- Textile layers: woven or linen runner, plaid throw over one chair
- Natural elements: foraged cones, clipped branches, preserved oak leaves
- Accent details: matte black or brass candlesticks, wood chargers
How To Recreate This Look:
- Start with a runner to define the center line of the table.
- Add the pinecone/leaf garland, keeping it low and loose.
- Layer in burnt orange ribbon woven through the garland in relaxed loops.
- Place taper holders every 12–18 inches for even glow and safe spacing.
- Style with two stacks of plates and one plaid throw to hint at a gathering, even off-duty.
Why This Looks Expensive: Low, continuous centerpieces feel custom and editorial. The combination of natural textures and restrained color keeps it chic instead of crafty.
Watch Out: Don’t use scented candles right next to food—cinnamon and vanilla can fight with savory dishes. If you want scent, keep it to the surrounding lanterns, not the table tapers.
Pro Styling Tip: Place one candle slightly off-center toward the camera when photographing—it adds asymmetry and a natural focal point.
If you’ve got a shady corner in the yard that never quite shines, the next idea will give it a voice.
Give yourself permission to go slow. One gorgeous vignette in your autumn garden beats five rushed ones. Start with light and color, then add texture when you have capacity.
6. Heirloom Pumpkins With Amber Glass Jars Around The Garden Path And Golden Glow
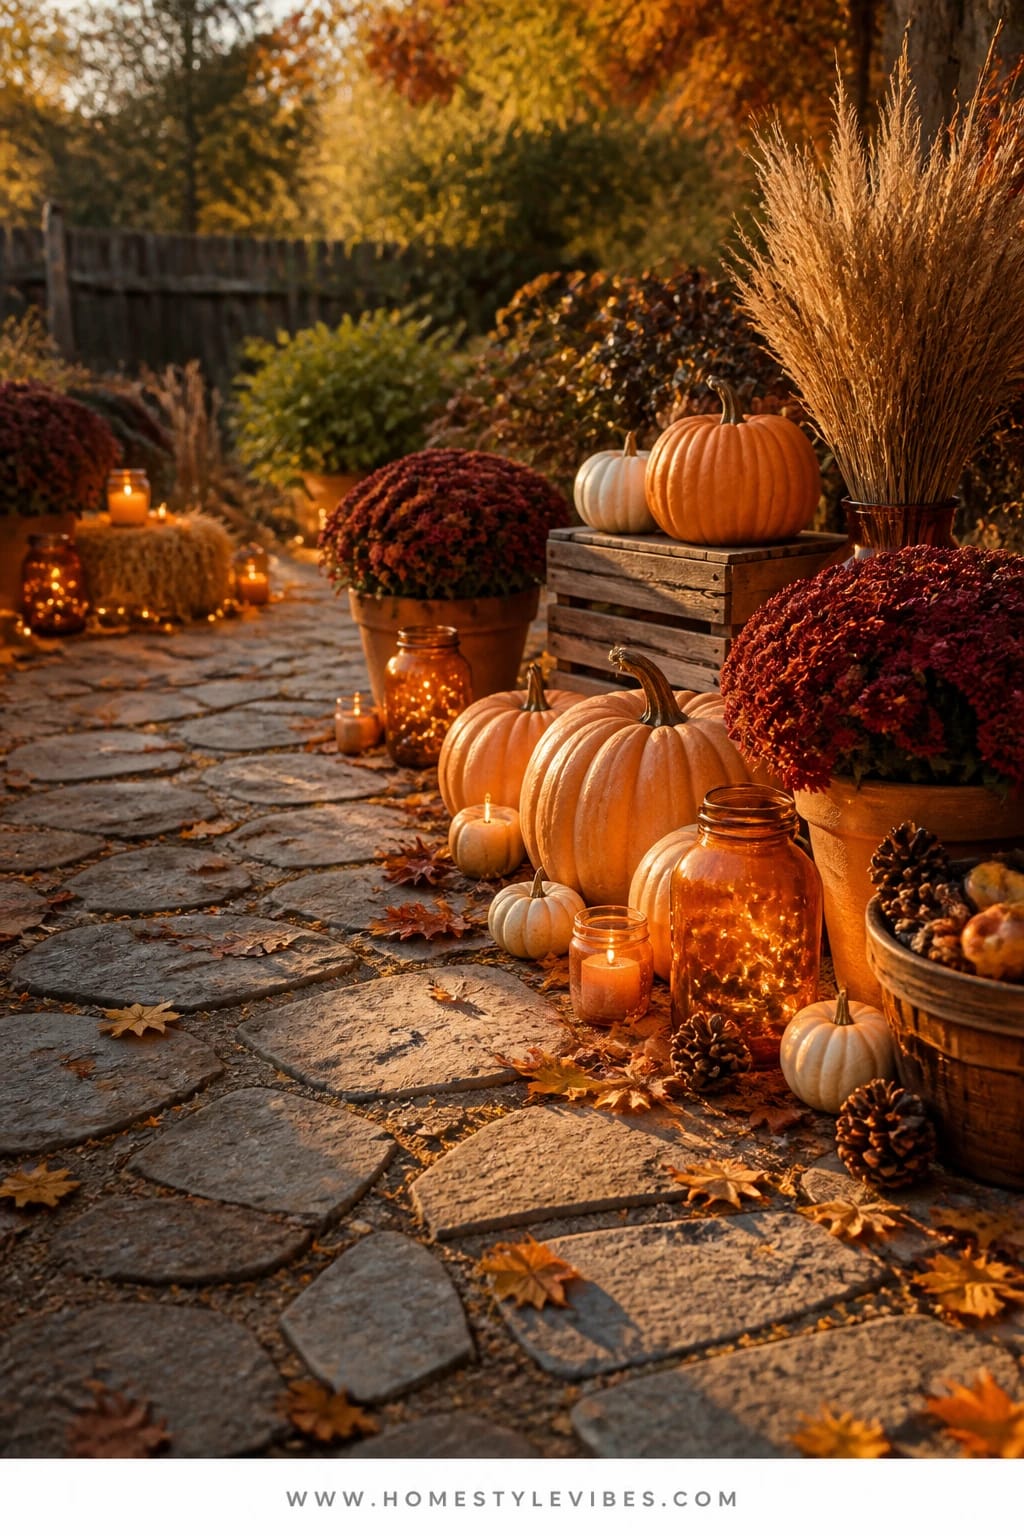
You want your garden path to feel like a little adventure, but right now it’s just… a path. A few heirloom pumpkins with their sculptural ribs, paired with amber glass jars holding string lights or tea lights, can turn that walkway into a golden ribbon that leads the eye and the feet. This works beautifully for Halloween night and beyond, making each evening walk to the garage feel a tiny bit magical.
The mood is softly enchanted—golden glow spilling onto flagstones, crisp leaves underfoot, old-world silhouettes of pumpkin stems. It’s practical for real yards because everything sits low and out of the way, and you control the number of pieces to fit your path length. Amber glass warms the light tone so the colors of the pumpkins look saturated (not washed out), and the repetition along the path photographs with storybook depth. Pro tip: if you’ve ever had the sad half-deflated pumpkin by week three, keep them off hot stones in direct sun and rotate your display pumpkins from the shade stash every weekend.
On a budget, use a mix of small-to-medium pumpkins and a handful of thrifted amber jars. Prefer an understated look? Stick to muted greens and whites with smoked amber jars for a moody, sophisticated tone. Narrow path? Style only one side, but keep intervals consistent—about every 2 to 2.5 feet—so it feels rhythmic, not random.
Budget Breakdown:
- Heirloom pumpkins (6–12): $36–$120
- Amber glass jars or votive holders (6–12): $24–$96
- LED tea lights or micro strings: $10–$30
- Garden-safe risers (flat stones or pavers): $0–$20
- Optional: stake lights for added safety: $20–$50
Total Estimated Cost: $90 – $316
Best For: Garden paths, driveway edges, or along a low hedge. Great from mid-October through Thanksgiving for evening glow and gentle wayfinding.
Key Design Elements:
- Main seasonal props: heirloom pumpkins, amber glass jars, LED tea lights
- Color palette: sage, cream, pale peach, amber glow
- Lighting strategy: consistent intervals for a dotted-line effect; timers for hands-free evenings
- Textile layers: none needed; keep it simple and sculptural
- Natural elements: scattered leaves, low grasses bordering the path
- Accent details: flat stone risers to level pumpkins and protect from damp soil
How To Recreate This Look:
- Start by clearing the path edges and lightly raking leaves into natural clusters.
- Add pumpkins at consistent intervals on one or both sides.
- Layer amber glass jars between pumpkins; alternate sizes for movement.
- Place LED tea lights or micro strings inside jars; set timers for dusk.
- Style with a few mini gourds near the start and end points to bookend the path.
Why This Feels Designer: Thoughtful spacing and repetition mimic professional landscape lighting—only cozier. The mix of sculptural pumpkins with warm translucent glass looks curated and intentional.
One Thing To Avoid: Random spacing. Uneven gaps look accidental. If you run out of materials, shorten the coverage area instead of spreading them thin.
Pro Styling Tip: When photographing, crouch low so the jar glow lines the frame and the pumpkins create foreground depth—instant fairytale path.
Quick Checklist
- Warm-white outdoor string lights
- Mixed real pumpkins (sizes and colors)
- Lanterns in varied heights
- Battery pillar candles and LED tea lights
- Burgundy or rust-toned mums
- Dried floral wreath and garland
- Plaid textiles for steps or benches
- Pinecone and leaf garland for table centerpieces
- Amber glass jars or votives
- UV-protectant spray for dried florals
- Non-slip pads for textiles on steps
- Smart plugs or timers for hassle-free glow
Frequently Asked Questions
How can I decorate my yard for fall on a tight budget?
Pick one focal zone—front door, bench, or path—and go all in. Use repetition (several small pumpkins or pinecones) and one warm light source. Forage leaves and cones, thrift lanterns, and stick to one color story so it looks cohesive even with fewer pieces.
Real or faux pumpkins—what’s better for an autumn garden?
IMO, real pumpkins win for texture and stems, especially outdoors. They’re heavier, more stable, and photograph beautifully. Use faux for high-sun spots or if you want to reuse each year. Mixing both is a smart strategy: real at eye level, faux as background fillers.
My porch is tiny. Which idea works best without clutter?
Go for the wreath-and-lantern combo (Section 4) or a single asymmetrical mum-and-lantern moment (Section 2). Keep the center clear, use vertical elements, and repeat one color so it reads full but not crowded.
What about storage after the season?
Choose collapsible lanterns, coilable garlands, and dried florals stored in garment bags or tall bins. Label each bin by zone (“Front Door,” “Porch Steps”) so next year is plug-and-play. Compost real pumpkins and preserve good stems for craft projects.
Are candles safe with kids and pets around?
Use battery pillars and LED tea lights outdoors. If you love real flame, keep it inside lanterns with latched doors and weighty bases. On steps or paths, LEDs on timers are the least-stress option and still look warm in photos.
When should I start decorating my yard for fall?
Start light in mid-September with dried florals and lanterns. Add mums and pumpkins when nights consistently dip below 60°F so they last longer. Layer in Halloween accents late October, then pull those and keep the warm, harvest palette through Thanksgiving.
Closing Thoughts
If one idea made your heart beat faster, start there tonight. A dozen pumpkins lined along a bench or a single rust wreath with candlelit lanterns can flip the whole mood of your outdoor space. You don’t need perfection—you need a warm color story, a few natural textures, and that golden glow that makes everything feel like a postcard.
The secret isn’t buying more stuff. It’s repeating a few elements, layering textures, and letting warm light do its quiet magic. This is the season for generous abundance—plaids, mums, pinecones, amber light—woven into simple structures that work in real homes. Breathe, choose your zone, and set a timer to click on at dusk.
And when you step outside with a mug of something cinnamon and hear the papery rustle of leaves? You’ll know you nailed it. Seriously—your autumn garden is about to look stunning in the fall, and you did that.

About the Author

Krisztina P.Rendes, Founder of Home Style Vibes
Founder of Home Style Vibes
Krisztina Puskásné Rendes created Home Style Vibes as a cozy-modern lifestyle space where homemaking meets inspiration. Her goal is to help women create beautiful, organized, and peaceful homes they truly love — without overwhelm. You’ll find here heart-driven content on home decor, cleaning tips, easy family recipes, organization and decluttering, DIY home projects, plants, and seasonal ideas — all designed to bring more calm, comfort, and style into everyday life.