5 Halloween Window Box And Planter Ideas That Are Spooky And Beautiful
You want a front-of-house that glows with moody magic. You hate that your window boxes and planters either read “August farmer’s market” or “hastily tossed plastic skeleton in a mum.” You crave that cozy fall aesthetic—glowing candlelight, soft amber tones, stacked pumpkins, and dried florals catching the golden-hour light—but your planters feel flat, repetitive, or worse… messy by week two. These 5 Halloween window box and planter ideas will turn your facade into a spooky-beautiful moment in under a weekend and under $200 per spot, depending on what you already own.
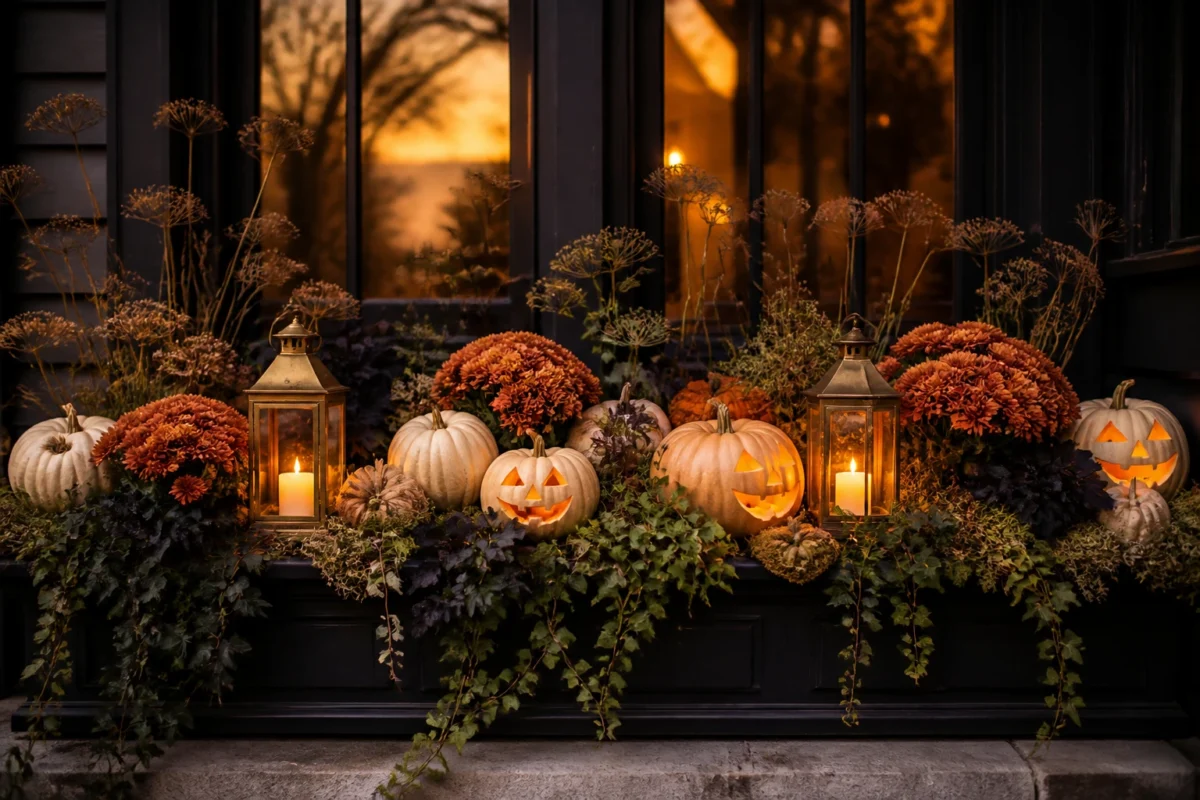
We’re going for layered abundance and warm, candlelit depth—no haunted-house kitsch required. Think rust mums nestled into moss, charcoaled foliage against white pumpkins, brass lanterns flickering like a storybook. These ideas photograph like a dream (Pinterest is calling) and hold up from late September through Halloween, with easy tweaks to carry you right into Thanksgiving if you want. If you love the fall mood but hate the waste, I’ve got re-usable swaps, budget versions, and a few honest “learned this the hard way” moments sprinkled in.
1. Jack-O’-Lantern Pumpkins with Golden Glow in a Front Window Box
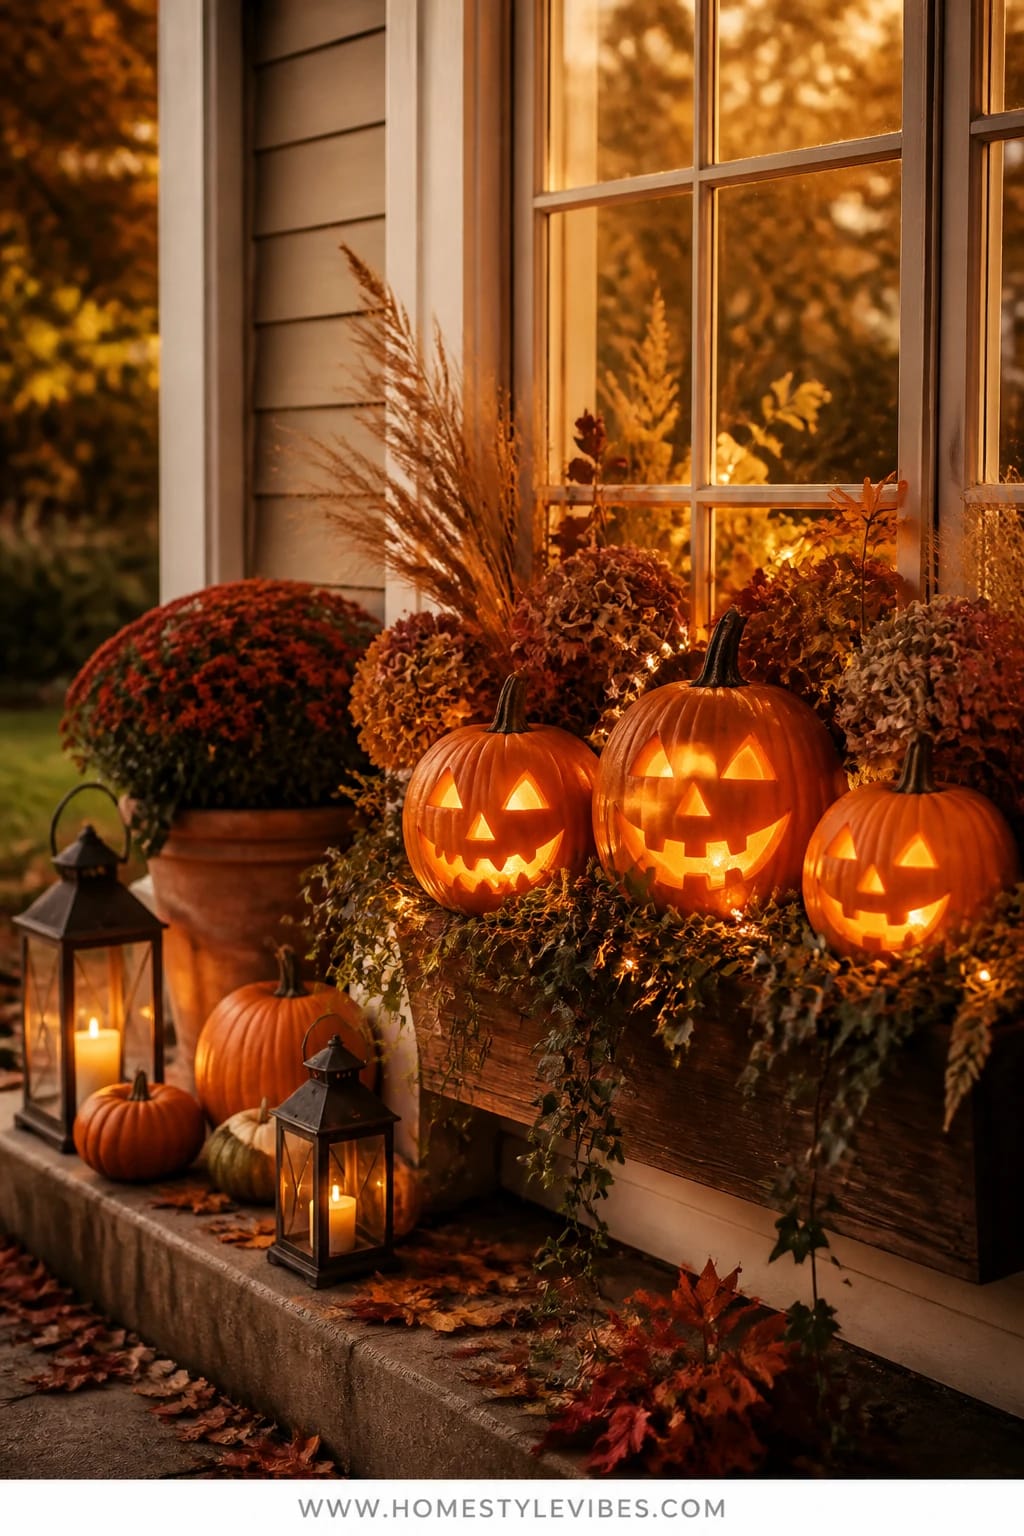
It’s that one spot that always feels off: your front window box. You’ve tried mums. You’ve tried ivy. It still reads “spring balcony” once the leaves start to fall. This jack-o’-lantern window box gets spooky and beautiful fast, using carved (or faux) pumpkins with soft votive light tucked into trailing greens and dried grasses. The mood? Warm, charming, slightly mischievous—like a friendly ghost peeking through golden mist.
Here’s why it works in real homes: the window box height naturally frames your glow at eye level from the sidewalk. Candles or warm LED votives add depth at dusk, while pumpkins and cascading elements (like trailing ivy or faux hops) make it feel abundant without requiring a horticulture degree. Keep the palette tight—burnt orange, creamy white, mossy green, and a hit of matte black for contrast—so your box looks styled, not stuffed. Photographically, the mixed heights and the candlelit core give you foreground and background layers. It’s the difference between “cute” and “I actually stopped and stared.”
Variations: For a budget-friendly version, skip carved pumpkins and tuck in mini sugar pumpkins with simple vinyl face stickers (peel off after Halloween to transition to November). Small-space tweak: use just three pumpkins across the span, each with a different face, and pad with moss and dried wheat. A muted version replaces orange with heirloom greys and creams, then adds amber glass votives for that warm glow without color saturation.
Budget Breakdown:
- Mini or medium pumpkins (real or faux): $2–$20 each
- LED tea lights or battery votives (remote-timer highly recommended): $12–$30 per set
- Sheet moss or Spanish moss: $6–$15
- Trailing greens (ivy, faux garland, or hops): $10–$35
- Dried wheat or grasses: $8–$20
- Vinyl jack-o’-lantern face stickers (optional): $5–$10
Total Estimated Cost: $45 – $120
Best For: Classic or cottage-style homes with visible front-facing window boxes; perfect from mid-October through Halloween and easily softened for November by removing the faces and keeping the glow and grasses.
Key Design Elements:
- Main seasonal props: Jack-o’-lantern pumpkins, trailing ivy, moss, dried wheat
- Color palette: Burnt orange, cream, moss green, matte black
- Lighting strategy: Battery votives at pumpkin cores and sprinkled through moss
- Textile layers: None needed; texture comes from moss and carved pumpkin edges
- Natural elements: Fresh or dried pumpkins, wheat, ivy
- Accent details: Amber glass votives, matte black mini lantern picks
How To Recreate This Look:
- Start with a cleaned-out window box and line the base with a layer of moss for softness.
- Add 3–5 pumpkins across the length, mixing sizes. If carving, cut from the bottom so the shell sits flush and clean up the edges for a tidy look.
- Layer LED tea lights inside carved pumpkins, then add 2–3 more lights hidden in the moss to warm the whole box.
- Place trailing greens at both ends and drape forward to soften edges and add movement.
- Style with clusters of dried wheat tucked behind pumpkins to create height and silhouette against the window glass.
Why This Looks Expensive: Repetition of similar pumpkins with controlled color reads intentional. The glow inside and around the pumpkins creates depth like a boutique storefront display.
Watch Out: Don’t jam in too many colors or mixed holiday pieces. If you toss in purple faux flowers, neon lights, and a spiderweb, it starts to feel chaotic instead of moody.
Pro Styling Tip: Angle one pumpkin slightly toward the sidewalk and hide a votive in the moss at that corner—your photos capture that magnetic, golden spill of light.
2. Dried Floral Wreaths with Rust Accents on a Bay Window Planter
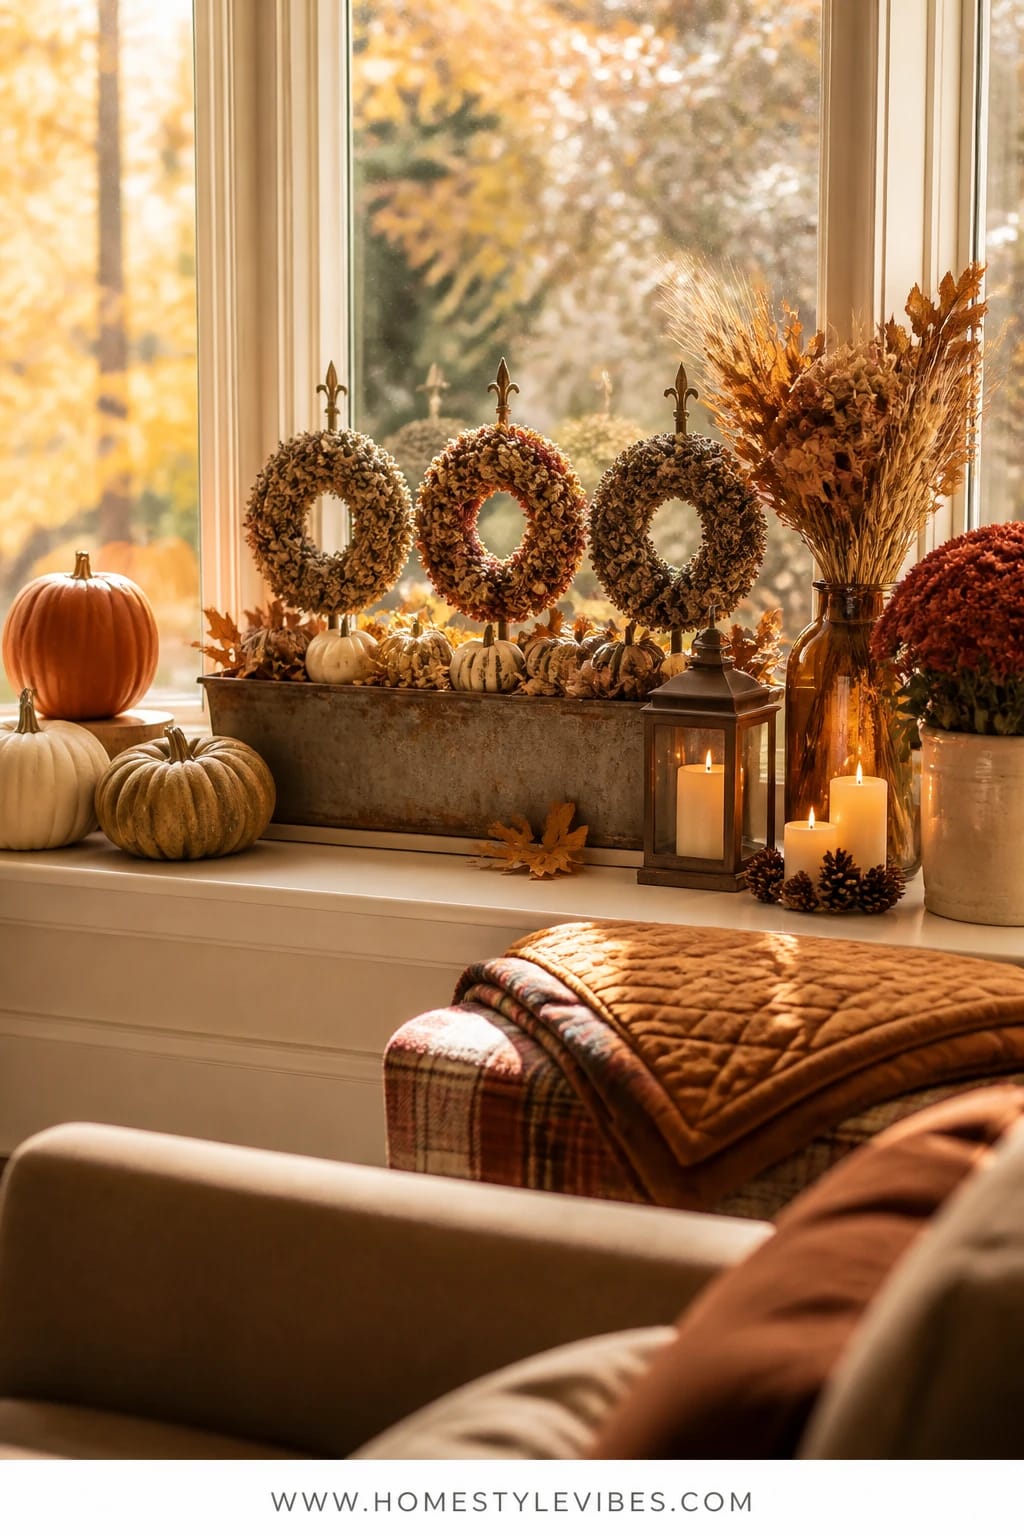
We’ve all been there: your big bay window planter turns into a grab-bag of colors every fall. Too many mums, not enough shape. This idea borrows from interior styling—start with form, then add texture. Lean a trio of small dried floral wreaths against rust-painted stakes or mini trellises inside your planter, then layer in creamy gourds and coppery leaves around the base. The vibe lands somewhere between cozy harvest and old-world apothecary: warm, textural, deeply autumnal.
Why it works: the wreaths give you vertical structure and a focal point at eye level, which you almost never get in planters. Dried florals hold up for weeks without drooping. The rust accents (spray-painted bamboo stakes or salvaged metal) frame the arrangement like an outdoor vignette. For lighting, weave a strand of micro string lights through the wreaths for soft, golden twinkle at sunset—no big bulbs necessary. It photographs beautifully because you’ve got a defined center (wreaths), a mid-layer (gourds and leaves), and ground cover (moss or soil), plus a warm color story that saturates nicely at dusk.
Variations: For a small-space or minimal style, use a single wreath centered and flanked by two clusters of tiny white pumpkins. Want a more neutral read? Choose wheat, bleached ruscus, and tan pampas in the wreaths with muted caramel ribbon tails. Planning for November? Remove any Halloween-specific picks (bats, black ribbon), keep the wreaths and lights, and add a few pinecones to bridge into Thanksgiving.
Key Design Elements:
- Main seasonal props: Dried floral wreaths, mini trellises/stakes, gourds, copper leaves
- Color palette: Rust, cream, copper, tan
- Lighting strategy: Warm micro string lights woven through wreaths
- Textile layers: Velvet ribbon tails in rust or copper
- Natural elements: Dried grasses, gourds, seed pods
- Accent details: Copper spray-painted stakes, petite brass bells on ribbon ends
Budget Breakdown:
- Dried floral wreaths (8–12 inches): $12–$35 each
- Bamboo stakes or mini trellises: $6–$18
- Spray paint (rust or copper): $6–$12
- Mini gourds and pumpkins: $1–$4 each
- Micro LED string lights with timer: $8–$16
- Velvet ribbon: $6–$12
Total Estimated Cost: $55 – $150
Best For: Larger planters or a continuous bay window box; homeowners who like a refined, curated look that transitions well past Halloween.
How To Recreate This Look:
- Start by painting or selecting rust-toned stakes/trellises; anchor them firmly into the soil along the back edge.
- Add dried floral wreaths by securing with floral wire at two points so they don’t flap in the wind.
- Layer micro lights through the wreaths and hide the battery packs behind the stakes.
- Place clusters of mini gourds at the base, alternating white and muted orange for rhythm.
- Style with velvet ribbon tails and a few copper-leaf picks to draw the color downward.
Why This Feels Designer: Using wreaths horizontally within a planter is unexpected. The rust accent repeats from top to bottom, tying the palette together in a very “someone thought this through” way.
One Thing To Avoid: Don’t choose wreaths too large for your planter height. If they cover your entire window, you lose that delicate negative space and it starts to feel like a fence.
Pro Styling Tip: Tie ribbon tails so they just kiss the tops of your gourds; movement reads well in photos on breezy afternoons.
Remember, this isn’t about copying a catalog. It’s about creating a tiny outdoor story that matches your house’s face and your everyday rhythm. If one idea is calling your name louder than the others, that’s your green light.
3. Lanterns and Leaf Garland with Amber Candlelight on Porch Steps
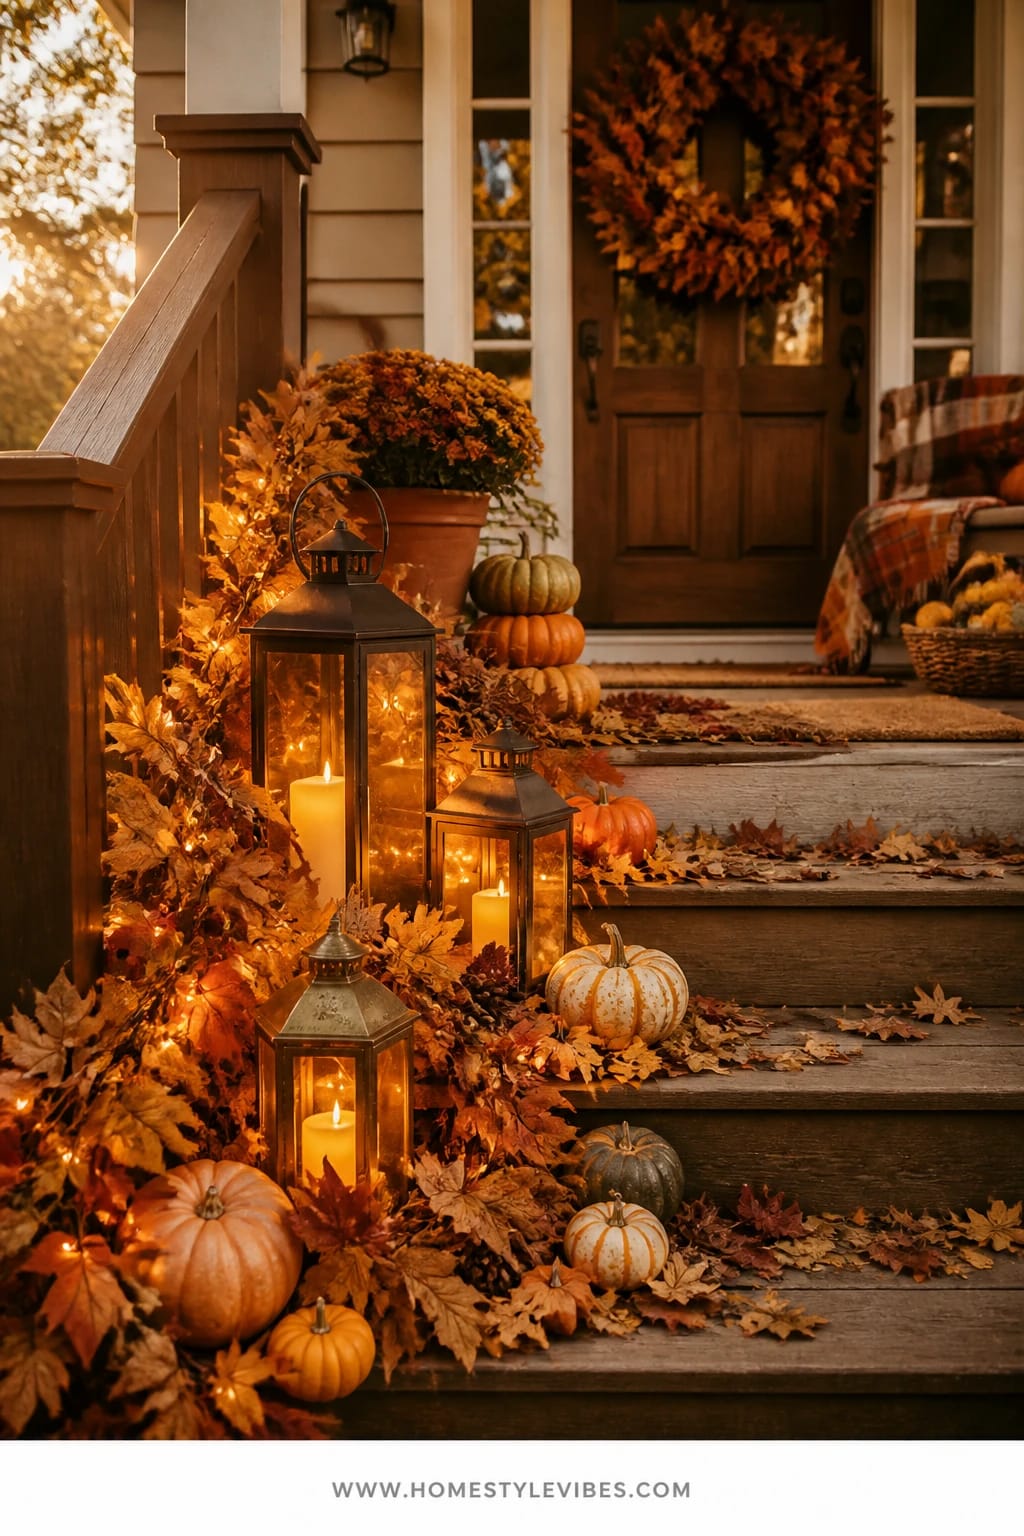
You want dramatic, cozy, witchy energy… but your porch steps make everything look scattered. I hear you. I used to pile pumpkins directly on the steps and wondered why it just read “produce sale.” The fix: structure with lanterns, then soften with a leaf garland that spills like a slow-burning sunset. This setup hits warm, movie-night-on-Halloween levels of mood while staying family-friendly and reusable.
Here’s why it lands: lanterns are your anchors. Choose a mix of heights and finishes (black metal, aged brass, or wood) and place them in an A-B rhythm up the steps—left, right, left. Add LED pillar candles on a timer to build that amber glow that kisses the risers. Then drape a leaf garland that connects each lantern, like a golden rope stitching your vignette together. Tuck in a few medium pumpkins, but fewer than you think—let the lanterns do the heavy lifting. In photos, you’ll see saturated color from the leaves, depth from the lantern glass, and gleam from warm candles. It’s cinematic at dusk.
Variations: For a modern porch, use matte black lanterns with a single cognac-toned garland and white pumpkins only. On a budget, buy two oversized lanterns and supplement with amber mason jars holding tea lights. For a long season, remove any bats or spooky picks after Halloween and add pinecones or eucalyptus seed pods through Thanksgiving.
Budget Breakdown:
- Lantern set (3–5 mixed heights): $40–$120
- LED pillar candles (set of 5–8 with timer): $20–$60
- Leaf garland (2–3 strands): $12–$45
- Pumpkins (3–7, mixed sizes): $2–$12 each
Total Estimated Cost: $74 – $220
Best For: Visible porch steps or stoops; households with kids or pets because LEDs eliminate open flames but still deliver that candlelit warmth.
Key Design Elements:
- Main seasonal props: Lanterns, leaf garland, pumpkins
- Color palette: Amber, cognac, black, cream
- Lighting strategy: LED pillars on staggered timers for layered glow
- Textile layers: Optional plaid throw over the railing or bench nearby
- Natural elements: Real pumpkins, dried leaves tucked into faux garland for realism
- Accent details: Brass or black metal finishes for a tailored look
How To Recreate This Look:
- Start by spacing lanterns up your steps in an alternating pattern so they feel purposeful.
- Add LED pillar candles and check sight lines from the sidewalk—tallest toward the top, medium at mid-steps, smallest closest to the door.
- Layer a leaf garland to connect the lantern bases; secure with discreet command hooks or floral wire for wind resistance.
- Place a few pumpkins tucked near lanterns, leaving at least half the step clear for safe footing.
- Style with one punchy accent (tiny brass bell charms or a handful of faux crows) to dial up Halloween without tipping into clutter.
Why This Reads High-End: The repeating lantern shape and controlled garland color create rhythm. It looks like a storefront installation—thoughtful spacing, warm light, no random extras.
The Most Common Mistake: Overfilling the steps. If you can’t comfortably walk up with a grocery bag, you’ve added too much. Pull back and let the glow lead.
Pro Styling Tip: For photos, turn on the lanterns right at golden hour and shoot from a slight angle so you catch reflections in the glass and the layered garland tones.
Perfection isn’t the goal. Atmosphere is. If your lanterns aren’t identical or your pumpkins have a wonky stem, that’s the charm working for you.
4. Plaid and Mums with a Burgundy Glow on a Garden Bench Planter
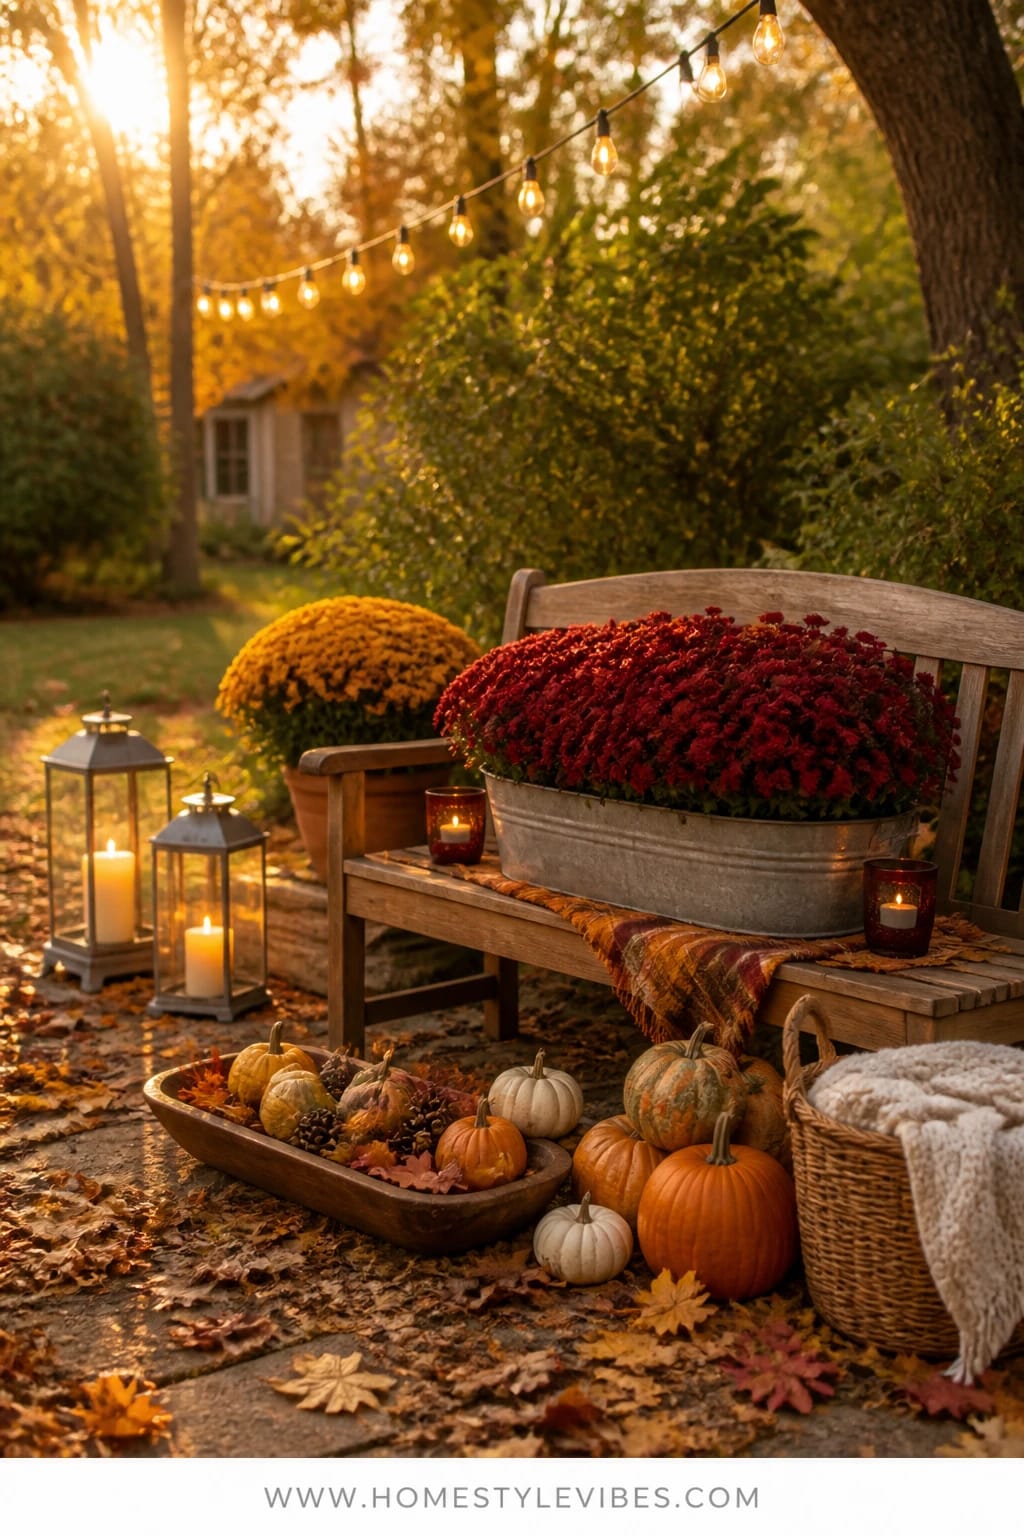
Sometimes the front yard has that lonely garden bench or low planter that never feels like part of the story. You’ve tried a single mum. It looked like an orphaned cupcake. The solution? Treat the bench and planter as one composition. Layer a folded plaid blanket on the bench seat, place a galvanized or matte-black trough filled with burgundy mums, then echo that color with a couple of burgundy-glass votives on either end. The effect is “harvest picnic meets moody Victorian.” Coziness, but with a little bite.
Why this works in the real world: mums love cooler weather and give you dense, saturated color with very little maintenance. The plaid brings texture and a homey, soft note that looks great in photos and reads welcoming from the street. Warm burgundy glass or amber votives add that candlelit warmth even when unlit (glass catches daylight and glows). It’s also easy to store—fold the blanket, rinse the trough, done. Pet-friendly bonus: no dangling cords, easy to keep candles flameless.
Variations: Prefer neutrals? Choose white mums and a grey plaid, then add copper mugs as votive holders for warmth. For a budget route, thrift the blanket and use mason jars with burgundy tissue paper liners to mimic colored glass. Tiny porch or short bench? Use a smaller oval planter and one votive per side; the symmetry still reads.
Budget Breakdown:
- Galvanized or matte-black planter trough: $20–$45
- Burgundy mums (2–3 plants): $12–$30 total
- Plaid throw or blanket: $12–$40
- Colored glass votives (2–4): $8–$24
- LED tea lights: $8–$15
Total Estimated Cost: $60 – $140
Best For: A front garden bench or low planter near the walkway; ideal for late September through early November with minimal tweaks.
Key Design Elements:
- Main seasonal props: Mums, plaid blanket, colored glass votives
- Color palette: Burgundy, charcoal, cream, galvanized silver
- Lighting strategy: Tea lights inside colored glass for a wine-hued glow
- Textile layers: Cozy plaid, maybe a small cable-knit pillow if covered
- Natural elements: Mums, a few clipped branches or seed pods
- Accent details: Galvanized/black metal trough, vintage-style votive cups
How To Recreate This Look:
- Start by folding your plaid neatly across the bench to act as a soft base; keep edges aligned for a tailored finish.
- Add the planter trough centered on the bench and pot your mums tightly for that full, overflowing look.
- Layer burgundy-glass votives on both ends of the bench; add LED tea lights on a timer.
- Place two or three mini pumpkins on the ground near the bench legs to pull color downward.
- Style with a few clipped branches tucked into the planter for height variation and movement.
Why This Looks Intentional: Treating bench and planter as one scene solves the “random bench” problem. Repeating the burgundy in florals and glass creates a color echo that feels finished.
Don’t Do This: Avoid busy plaids with five colors fighting your mums. Two to three tones tops, or the whole thing goes visual-static.
Pro Styling Tip: Angle the blanket so one corner points forward; that diagonal leads the eye right to the flowers in photos.
True story: last October I used a thrifted tartan throw for a bench planter, and neighbors started leaving little compliments in our mailbox. No fancy setup—just color discipline and warm light.
5. White Pumpkins and Pinecones with a Candlelit Wreath at the Front Door Planter
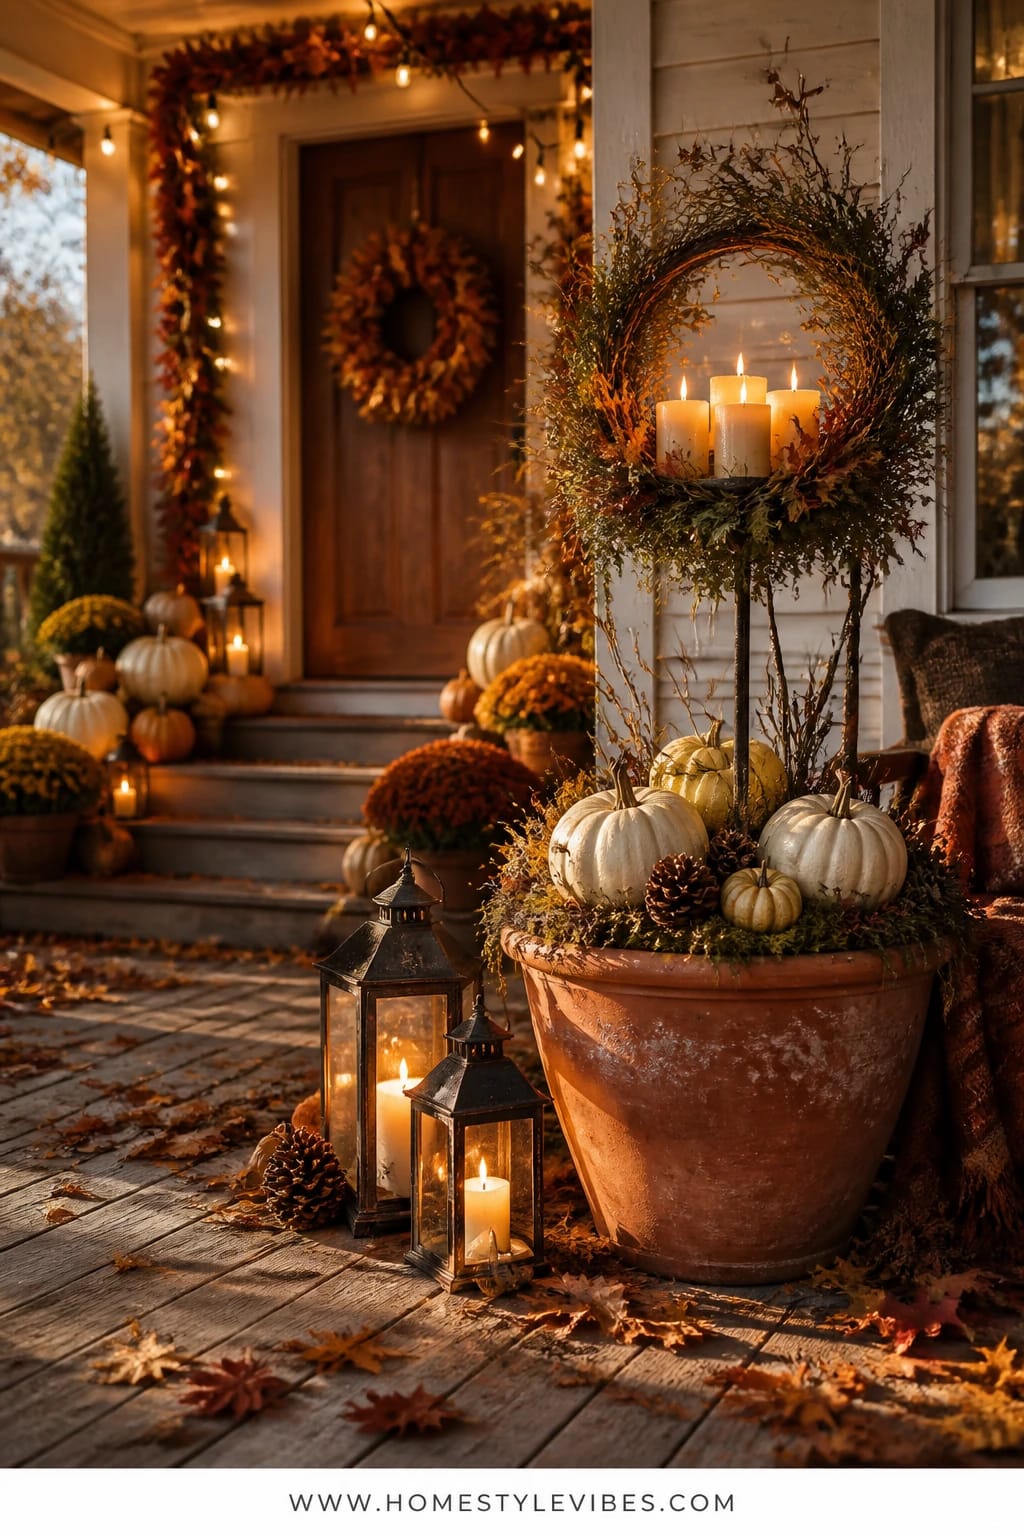
Front door planters are high-pressure. They frame every hello and goodbye. You want them classic for the long haul, but you also want Halloween to feel present. This look leans sophisticated-spooky: white pumpkins and chunky pinecones nestled into soil and moss, plus a candlelit wreath stand tucked at the planter’s back for height and glow. Add a few slender black branches and you get just enough edge without the jump scares.
Why it works: white pumpkins reflect candlelight, so even a single LED pillar behind them bounces warmth forward. Pinecones bring that dry, woody texture that photographs beautifully in low light. A simple wreath stand (or a tall shepherd’s hook) holding an evergreen or dried wreath becomes your vertical moment. If your door color is dark, this setup pops; if your door is light, it goes dreamy and soft. Either way, it’s low-maintenance and transitions straight into Thanksgiving—pull the black branches after Halloween and add a velvet ribbon in caramel.
Variations: Small entry? Use slimmer planters and stack mini white pumpkins vertically on skewers for height. Budget-friendly? Gather pinecones from a park (shake out the stowaway bugs outside—ask me how I know) and use a single pillar candle per planter. For a moodier look, swap white pumpkins for pale grey-green heirlooms and use smoky glass hurricanes.
Budget Breakdown:
- White pumpkins (5–9 mixed sizes per planter): $1–$12 each
- Pinecones (bagged or foraged): $0–$15
- LED pillar candles or lanterns: $12–$40
- Wreath stand or shepherd’s hook: $15–$35
- Wreath (dried or evergreen base): $15–$45
- Moss for ground cover: $6–$15
Total Estimated Cost: $60 – $180
Best For: Traditional or modern front entries where you want subtle Halloween vibes with easy November longevity.
Key Design Elements:
- Main seasonal props: White pumpkins, pinecones, candlelit wreath
- Color palette: Cream, caramel, charcoal, soft green
- Lighting strategy: Single pillar or lantern behind pumpkins to backlight the scene
- Textile layers: Velvet ribbon added to wreath post-Halloween
- Natural elements: Pinecones, moss, bare black branches
- Accent details: Smoky or clear glass hurricanes, matte black metal stand
How To Recreate This Look:
- Start by placing the wreath stand at the back of the planter; secure it deep for wind stability.
- Add moss as a soft base layer, then nestle your LED pillar or lantern near the stand’s base.
- Layer white pumpkins from largest at the back to smallest at the front to create a gentle slope.
- Place pinecones in clusters, tucking them partly into moss for a natural, grounded feel.
- Style with two or three slender black branches for that Halloween whisper; remove them after the 31st and add ribbon for November.
Why This Looks Expensive: Monochrome pumpkins plus natural textures feel restrained and confident. The candlelight behind the arrangement gives a designer “lit-from-within” effect.
Watch Out: Avoid packing pumpkins too tightly to the rim—leave a finger’s width of moss or soil showing so the composition can breathe.
Pro Styling Tip: For photos at dusk, turn the candle slightly toward the door frame so the light bounces off it and back onto the pumpkins—instant glow-up.
If one section felt like a “yes” and the rest like “maybe,” that’s normal. Pick your favorite vibe and start there. You can always layer more later. The truth is, one strong, warm-lit moment at the front of your home beats a dozen scattered bits every single time.
Quick Checklist
- LED candles with timers (pillar and tea lights)
- Mini and medium pumpkins (mix sizes and shapes)
- Sheet moss or Spanish moss
- Trailing greens or realistic faux garlands
- Dried wheat, grasses, or seed pods
- Lanterns in mixed heights
- Dried floral wreaths and rust-toned stakes
- Plaid throw for bench or planter accent
- Colored glass votives (amber or burgundy)
- Pinecones and thin black branches
- Velvet ribbon in rust, copper, or caramel
- UV protectant spray for dried florals
Frequently Asked Questions
How much should I budget to refresh multiple window boxes and planters for Halloween?
Plan on $60–$150 per planter or window box, depending on lanterns and lights. Reusing items (lanterns, faux garlands, wreaths) drops that dramatically in year two. Prioritize lighting and one strong focal item—those make the biggest visual impact.
Are real or faux pumpkins and florals better for these ideas?
Real pumpkins photograph beautifully and feel authentic, IMO. Use faux for elements that need structure (garlands, wreath bases) and add a few real touches—mini pumpkins, clipped branches—to sell the look. If sun hits your setup all day, choose heirloom faux for longevity and tuck in a couple of real minis for texture.
My porch is tiny. Can these Halloween window box and planter ideas work in a small space?
Yes. Scale the components: one lantern, three pumpkins, a single garland strand, or one centered wreath. The small-space rule is one hero, two supporting acts. It reads calm, not cramped.
What about storage after the season? I don’t have much space.
Choose collapsible items: nesting lanterns, garlands stored in labeled zipper bags, and wreaths in flat garment bags hung on a closet rod. Keep a clear bin just for batteries, timers, and remotes so you’re not rebuying next year.
Are candles safe around pets and kids on the porch?
Stick with flameless. Remote and timer LEDs give you the same glow without risk. If you crave flicker, pick moving-flame styles and keep anything glass in a protected lantern or hurricane.
When should I start decorating my planters and window boxes for Halloween?
Late September is perfect for foundational layers like garlands, lanterns, and wreaths. Add pumpkins and any spooky accents the first or second week of October so they look fresh through the 31st.
Closing Thoughts
Cozy, spooky, and beautiful isn’t about buying more—it’s about a clear focal point, warm light, and layers that feel generous. Pick one of these Halloween window box and planter ideas, gather your pieces, and spend an hour styling at golden hour. You’ll see the difference immediately: depth, glow, and that easy autumn abundance that makes strangers smile as they walk by.
Light is your friend, texture is your co-star, and repetition is the quiet hero that makes everything feel finished. Start with one box or planter this weekend. When that first candle clicks on at dusk and your pumpkins catch the glow, you’ll know you nailed it. You’ve got this—seriously.

About the Author

Krisztina P.Rendes, Founder of Home Style Vibes
Founder of Home Style Vibes
Krisztina Puskásné Rendes created Home Style Vibes as a cozy-modern lifestyle space where homemaking meets inspiration. Her goal is to help women create beautiful, organized, and peaceful homes they truly love — without overwhelm. You’ll find here heart-driven content on home decor, cleaning tips, easy family recipes, organization and decluttering, DIY home projects, plants, and seasonal ideas — all designed to bring more calm, comfort, and style into everyday life.