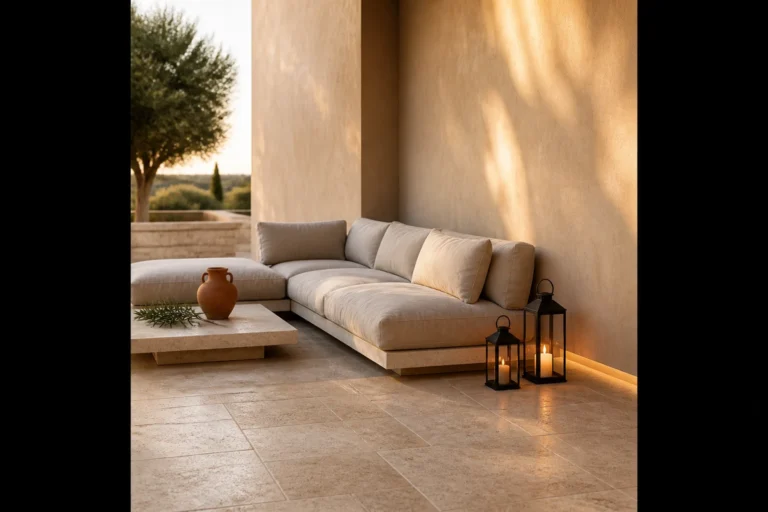
7 Cute Garden Ideas That Turn Your Backyard Into A Magical Outdoor Space
You want a backyard that glows like a summer evening in Tuscany, where the breeze smells like rosemary and time slows down. But right now? You’ve got patchy grass, clunky furniture, and lighting that makes everything look colder than it is. This guide fixes that. These 7 cute garden ideas are designed to make your outdoor space feel intentionally layered, wildly photogenic, and genuinely livable—on a realistic budget and in a couple of weekends.
Think dappled light, soft textures, tactile stone, and plantings that look lush even when you forget to water for a day. Every idea here targets a specific frustration: awkward corners, flat yards, ugly fences, “no vibe” patios. Choose one to start, cap your spend under $800–$3,500 per zone, and watch your backyard become a magical outdoor space you can’t stop photographing. If you love low-maintenance charm with a sophisticated twist, these are your people. Let’s get you outside.
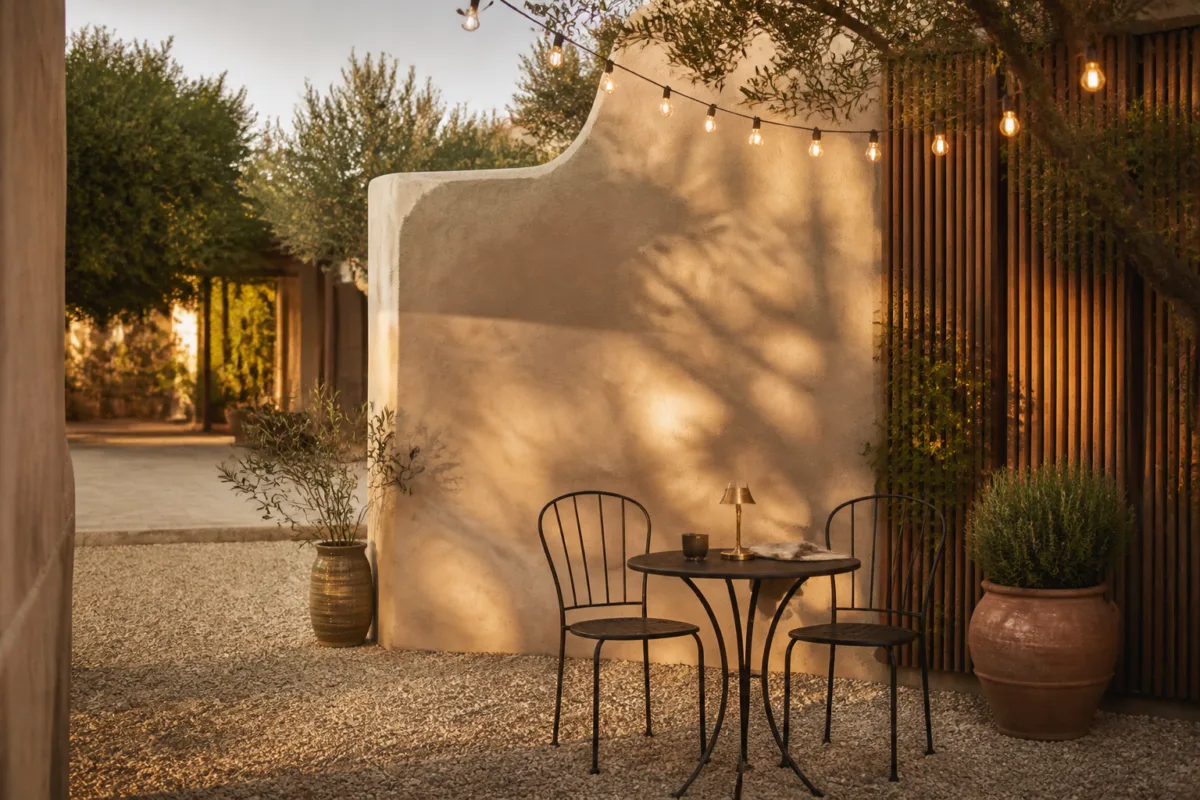
1. Crushed Gravel Courtyard With Golden Hour String Lights and a Bistro-Style Round Table
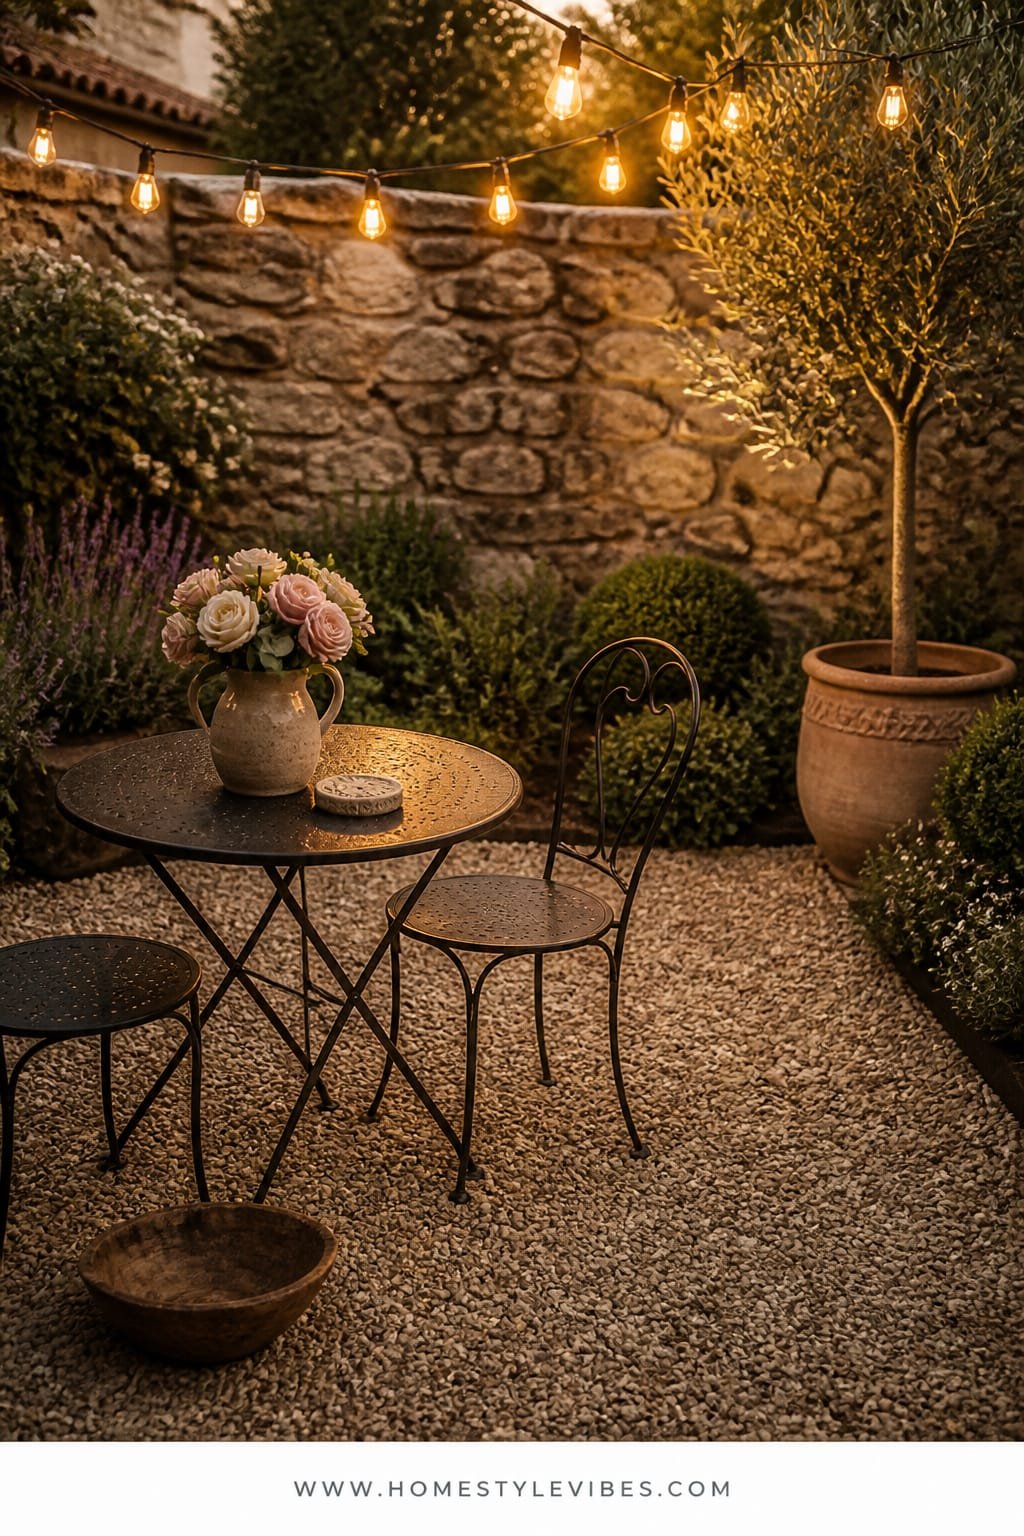
We’ve all been there: a concrete slab that feels more “parking lot” than patio. You’ve tried a rug, a few potted plants, even a candle hurricane, but it still looks flat and unfinished. This design builds a European-style pocket courtyard with crushed gravel underfoot, warm twinkle from café lights, and one photogenic hero: a classic metal bistro table that says “sip here.”
Instantly, the mood shifts to cozy Paris-meets-Provence. Gravel brings texture and that satisfying crunch, while the string lights soften everything at dusk. It works beautifully in small yards and rental-friendly spaces because you can lay landscape fabric and gravel without heavy construction. The round table creates better flow in tight quarters and pulls the eye to a single organized focal point—perfect for photos with creamy bokeh from all that layered sparkle.
Lighting does the heavy lifting. Hang warm white lights at varying heights so they skim foliage and highlight plant silhouettes. Crushed granite or pea gravel adds tone-on-tone variation that photographs like a dream: matte texture below, soft glow above, and leafy shadows in between.
Variations to try: For a budget version, use compacted decomposed granite and thrift a metal bistro set; paint it matte black for instant polish. In tiny spaces, choose a 24–28 inch table with foldable chairs. Renter-friendly swap: define the zone with interlocking deck tiles on top of the gravel so you can take it with you.
Budget Breakdown:
- Crushed gravel or decomposed granite: $120–$350 (for 100–150 sq ft)
- Landscape fabric + edging: $60–$180
- Warm string lights (commercial-grade): $80–$200
- Metal bistro table + 2 chairs: $120–$500
- Planters + hardy herbs (rosemary, thyme, lavender): $80–$250
- Ground staples + hooks/poles for lights: $30–$90
Total Estimated Cost: $490 – $1,570
Best For: Small patios, rental yards, narrow side yards; ideal for sunset entertaining or morning coffee rituals with minimal upkeep.
Key Design Elements:
- Main materials: crushed gravel, powder-coated metal, terracotta
- Color palette: warm neutrals, olive green, matte black, sun-washed terracotta
- Lighting strategy: string lights at staggered heights; one candle cluster at table center
- Furniture silhouettes: petite round table, slim chairs
- Texture layers: matte gravel, glossy leaves, porous terracotta, woven seat cushions
- Accent details: citronella votives, linen napkins, small herb snips hanging from a hook
How To Recreate This Look:
- Clear and level your chosen zone; lay landscape fabric and secure with staples.
- Add metal or composite edging to define a clean border.
- Pour and rake gravel to 2–3 inches deep, then tamp for firmness.
- Install two tall poles or use existing structures to hang warm white string lights in soft drapes.
- Place the bistro table center stage; flank with planters of rosemary and lavender and a low candle cluster.
Why This Looks Expensive: Controlled repetition—matching planters and a tight palette—makes even affordable materials look deliberate. Gravel adds old-world texture, while the round table and tidy lighting lines read like a boutique cafe.
Watch Out: Don’t mix cool-white bulbs with warm white. That clash kills the mood. Also, avoid skimping on light support; sagging cords look sloppy and unsafe.
Pro Styling Tip: For photos, mist the gravel lightly so it darkens; the subtle sheen increases contrast with foliage and makes candlelight pop.
2. Weathered Cedar Raised Beds With Dappled Shade Lanterns and a Slatted Potting Bench
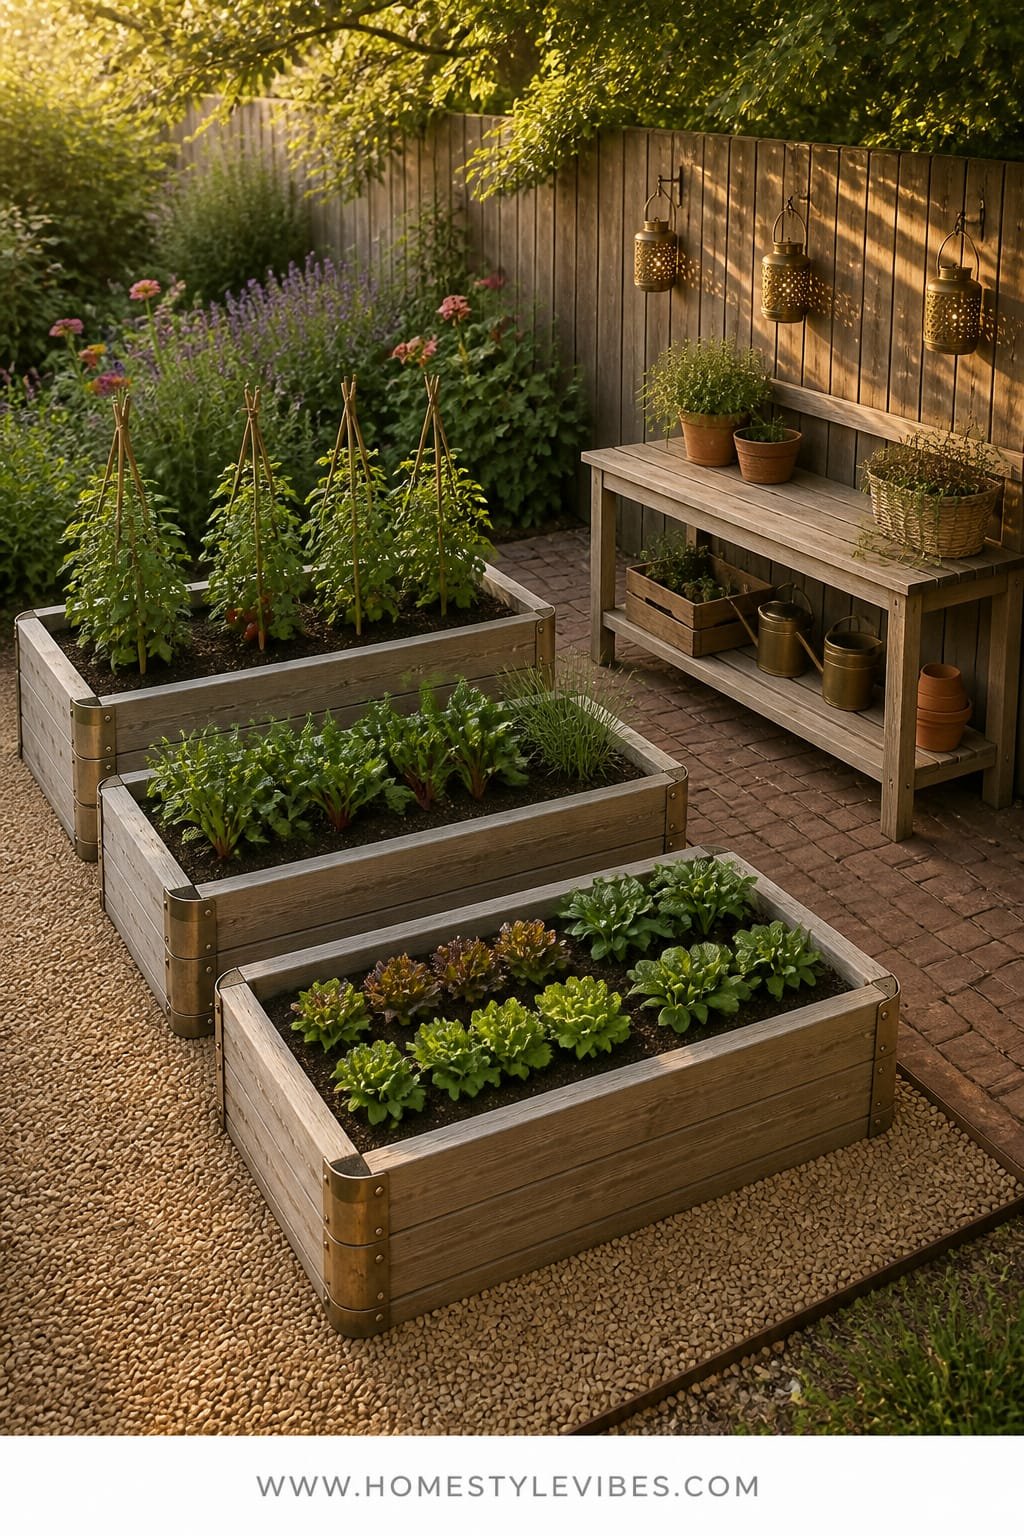
It’s that one corner that always feels off—too many random pots, nowhere to work, and a fence that brings exactly zero charm. You’ve bought seeds with optimism, yet planting day looks like chaos on the patio. This planboxes your ambition: a small grid of cedar raised beds, staggered in height, with a slatted potting bench and hanging lanterns that make shade feel intentional, not gloomy.
The vibe lands somewhere between modern farmhouse and kitchen garden chic. Raised beds frame space and hide mess, while a bench gives you a real work zone. Cedar weathers into a silvery patina that photographs beautifully against leafy greens and candlelight. Dappled lanterns overhead bring romance—and help you see those late-afternoon snips of basil.
It works in real backyards because cedar resists rot, and raised beds control soil quality even if your ground is a disaster. Good lighting cuts harsh contrasts and flat midday glare, adding depth when you shoot from bed corners toward the bench.
Variations: On a budget, build 2 beds instead of 4 and use simple screw-together corner brackets. Small-space version: a single 2×6 ft bed with a narrow wall-mounted shelf works. Renter-friendly: use trough planters on casters and a freestanding potting console.
Key Design Elements:
- Main materials: weathered cedar, galvanized steel brackets, woven rattan lanterns
- Color palette: silvered wood, deep green, matte black accents, soft flax linen
- Lighting strategy: solar or battery lanterns at varying heights for dapple and glow
- Furniture silhouettes: simple slatted bench, rectangular beds
- Texture layers: ribbed leaves, rough cedar grain, smooth trowels, soft linen apron
- Accent details: copper plant labels, twine spools, enamel watering can
Budget Breakdown:
- Cedar boards for 2–4 raised beds: $180–$520
- Soil + compost: $120–$300
- Slatted potting bench: $150–$450
- Lanterns (solar or LED) + hooks: $60–$180
- Plant starts + seeds: $40–$120
- Hardware + liner: $25–$70
Total Estimated Cost: $575 – $1,640
Best For: Sun to partial shade zones; families who want edible plants; suburban yards where privacy fences need softening.
How To Recreate This Look:
- Map out 2–4 raised beds with at least 18 inches between for walkways.
- Assemble cedar boxes with galvanized screws; line with landscape fabric if desired.
- Fill with a 60/40 soil-compost blend; plant herbs, lettuces, and pollinator-friendly flowers.
- Set a slatted bench nearby for tools; mount a rail with S-hooks for shears and gloves.
- Hang lanterns at different heights over the walkway to create patterned light at dusk.
Why This Feels Designer: The bench and beds share a consistent wood tone, the lanterns repeat shapes, and the plant palette sticks to greens with pockets of white and purple blooms—restraint makes it feel curated, not busy.
One Thing To Avoid: Overfilling beds with tall plants at the front. Stagger heights—low herbs at edges, taller tomatoes at back—so the view isn’t blocked.
Pro Styling Tip: Photograph just after watering; beads on leaves catch light and give your images that fresh, editorial sheen.
Pause here and breathe. Remember, this isn’t about recreating a showroom. It’s about building a backyard that fits your rhythms: a place where you can drop the day, clip some mint, and watch shadows move. If one idea resonates most, start there. The rest can wait.
3. Limewashed Plaster Wall With Soft Amber Uplighting and a Curved Stone Bench
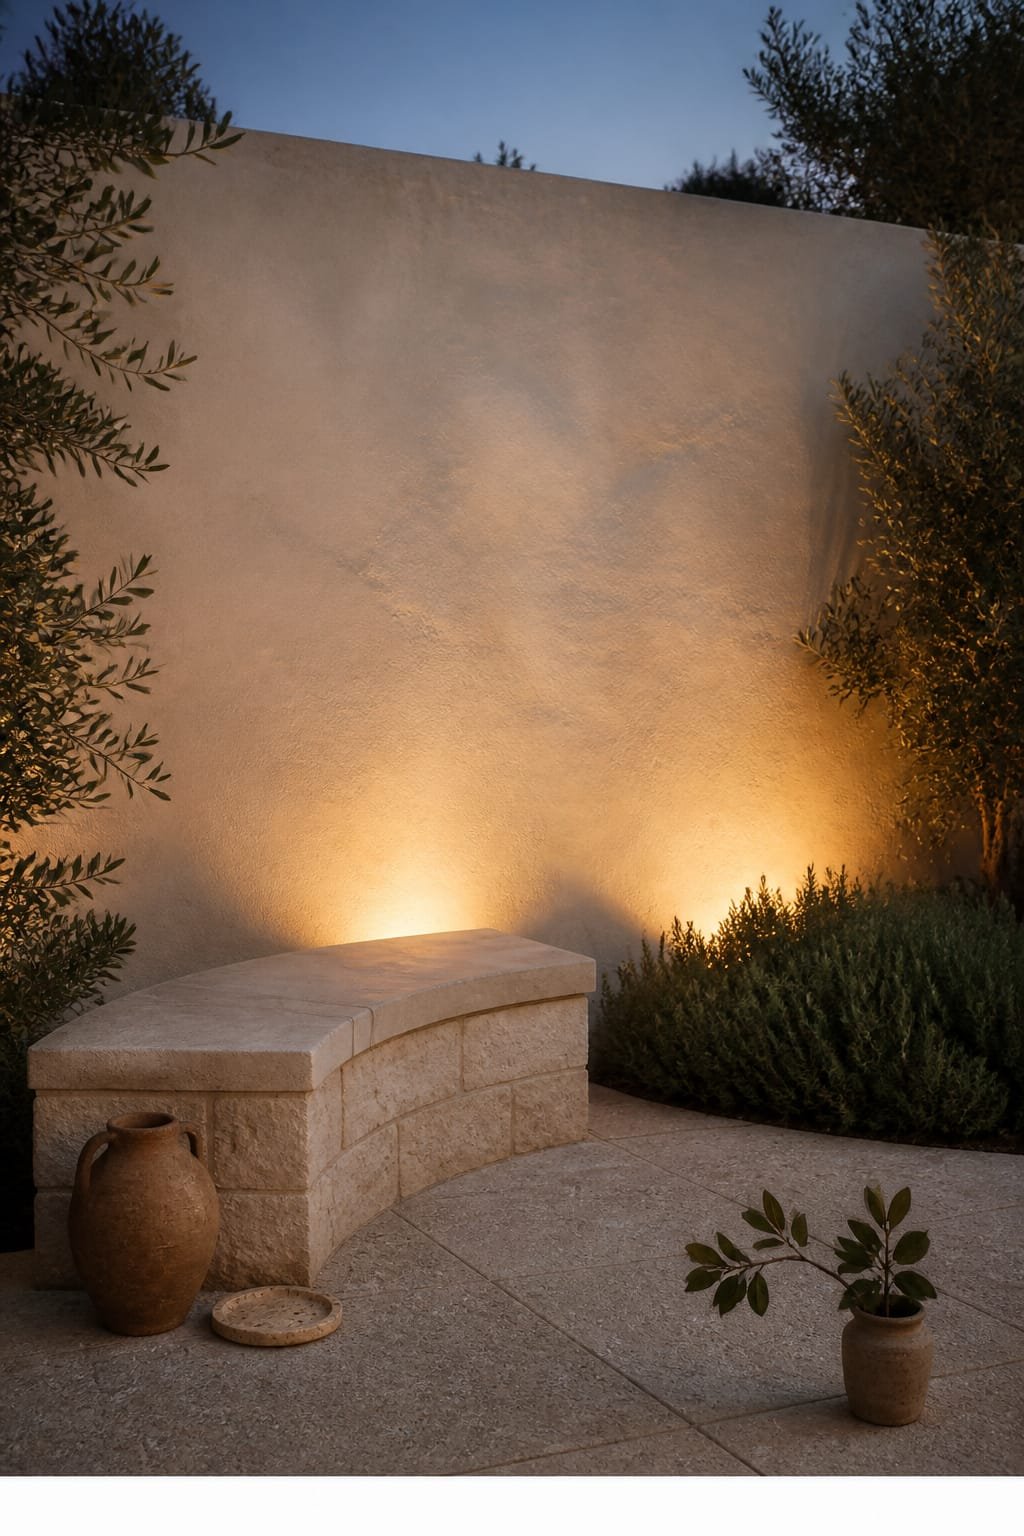
You want a true focal moment but feel stuck with a long, blank fence line that eats furniture and still looks boring. You’ve leaned art against it, planted shrubs, tried fairy lights. Still flat. This creates drama: a low, curved stone bench hugging a limewashed backdrop with hidden amber uplights that graze the wall and make every night feel cinematic.
Moody Mediterranean meets sculptural minimal—calm, grounded, and textural. Limewash diffuses light and creates depth even in daylight. Come evening, concealed uplighting turns the wall into a gentle glow, while the stone bench anchors the scene. It works in real homes because the bench doubles as seating and a heat sink on cool nights, and the subtle curve naturally organizes a conversation zone.
Two variations: For budget constraints, build the curve with concrete blocks faced with stone veneer. For renters, freestanding curved modular benches in terrazzo-look fiberstone with a foldable screen painted in limewash tones can mimic the structure.
Budget Breakdown:
- Limewash paint + primer (or masonry-safe): $80–$220
- Curved stone or veneer bench build: $600–$2,000
- Low-voltage uplights + transformer: $180–$450
- Outdoor cushions in canvas or linen blend: $120–$350
- Olive or bay laurel in planters: $100–$280
Total Estimated Cost: $1,080 – $3,300
Best For: Medium to large patios; evening entertainers; homes wanting one major “wow” zone without clutter.
Key Design Elements:
- Main materials: limewash plaster, natural stone, canvas
- Color palette: chalky white, sand, soft charcoal, olive green
- Lighting strategy: hidden uplights grazing the wall in warm 2700K–3000K
- Furniture silhouettes: curved bench, low round side tables
- Texture layers: chalky wall, rough stone, nubby cushions, glossy plant leaves
- Accent details: iron candle lanterns, aged terracotta bowls, rosemary topiary
How To Recreate This Look:
- Prep the fence or wall; apply mineral-friendly primer if needed.
- Apply limewash in cross-hatched strokes; let natural variations show.
- Construct or place a gently curved stone bench about 14–18 inches high.
- Install uplights at 12–18 inches from wall, angled to graze, not spotlight.
- Layer cushions, side tables, and two structural planters to frame the curve.
Why This Reads High-End: Curves look custom. Limewash gives that artisanal, non-uniform finish. And lighting that grazes rather than blasts says “architect designed,” even if you DIYed the whole thing.
The Most Common Mistake: Placing lights too close so you get hot spots and harsh scallops. Step them back and test angles at dusk before final placement.
Pro Styling Tip: Shoot from a low angle to accentuate the curve and catch the gradient on the wall; it adds depth lines your eye will follow.
4. Herringbone Brick Path With Cool Twilight Path Lights and a Sculptural Birdbath
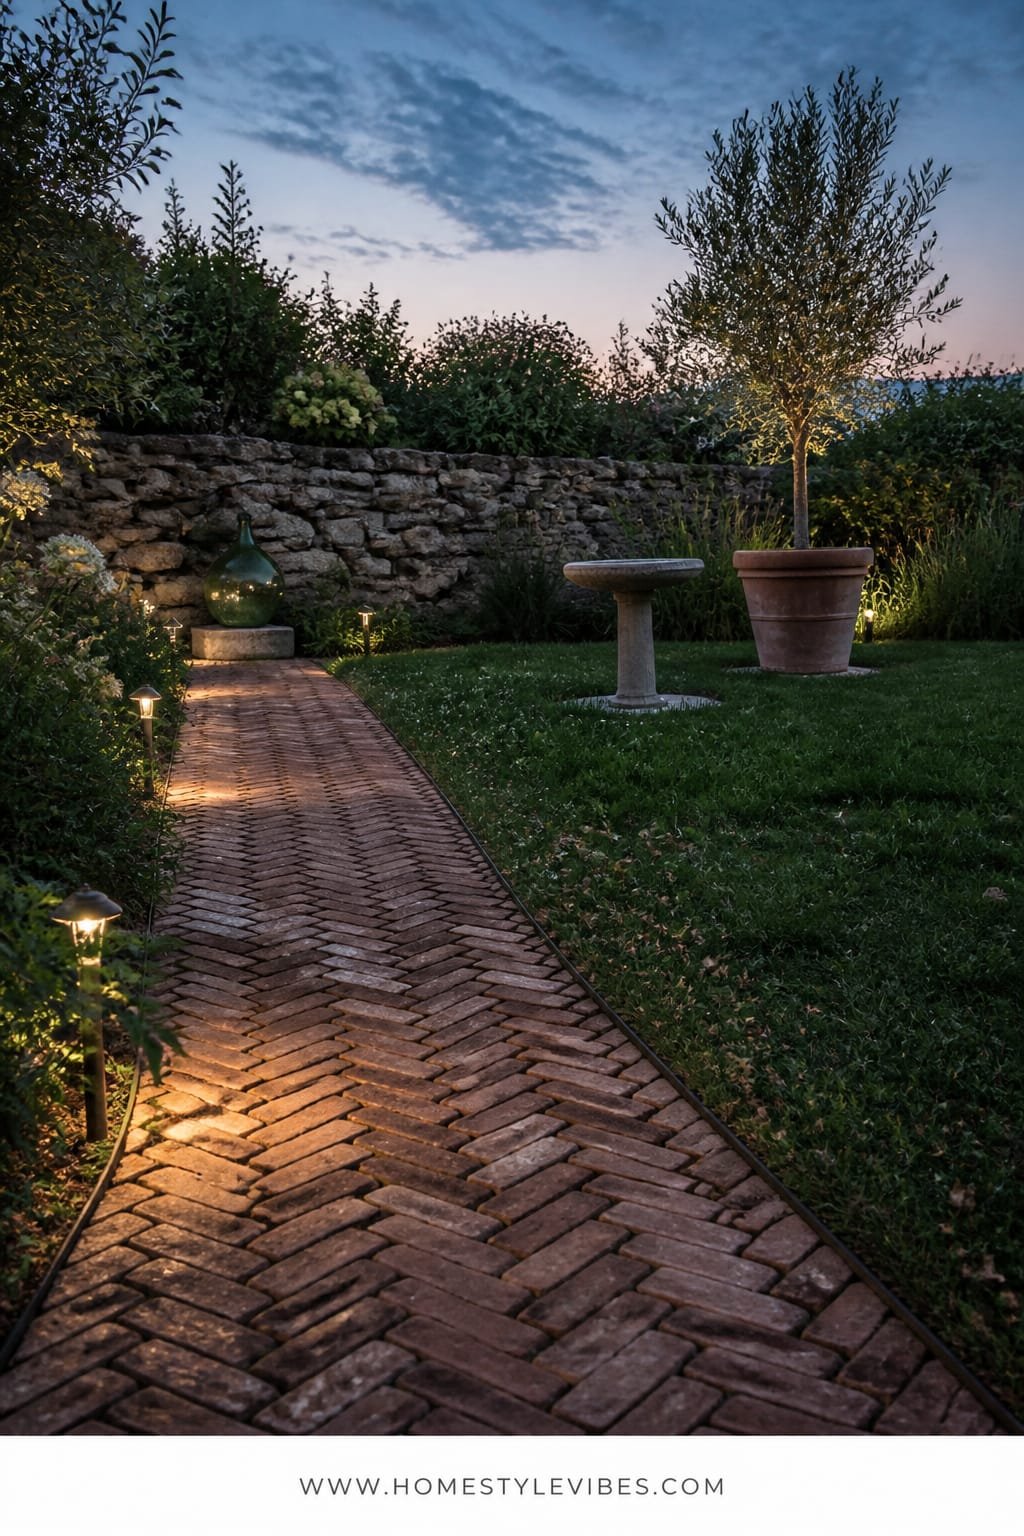
You’ve got a flat lawn that feels like a field. It’s fine, but there’s no journey—nowhere to walk, nowhere to land. You installed a stepping-stone trail once and it just looked like scattered coasters. This design adds intention: a herringbone brick path that actually leads somewhere, low path lights tuned for twilight, and a sculptural birdbath as the quiet finale.
The mood: traditional with editorial presence. Bricks in herringbone add movement and make smartphones snap crisp lines. A birdbath brings life—finches at dawn, ripples at dusk—and the path lighting guides the eye without glare. It’s practical, too: you’re less likely to trample beds, and the defined route makes the yard read larger.
Why it works: herringbone visually tightens space, and cool twilight lights balance the brick’s warmth, creating a neutralized palette your plants can play against. For small yards, shorten the path but keep the pattern. For a budget version, use clay pavers on a sand base; add steel edging for clean lines. Renter-friendly twist: build a short modular path that connects patio to planters; place a freestanding bowl-style birdbath at the end.
Budget Breakdown:
- Clay pavers (100–200 sq ft): $300–$1,000
- Base materials (gravel, sand), edging: $180–$420
- Low-voltage path lights (4–8 fixtures): $160–$360
- Birdbath (stone or cast resin): $120–$400
- Planting along edges: $80–$250
Total Estimated Cost: $840 – $2,430
Best For: Long, narrow yards; families with pets; gardeners who want a defined maintenance path.
Key Design Elements:
- Main materials: clay brick, steel edging, stone birdbath
- Color palette: russet, charcoal, evergreen, soft gray
- Lighting strategy: low, shielded, 3000K path lights every 6–8 feet
- Furniture silhouettes: none required; let the birdbath star
- Texture layers: rough brick, glossy wet water surface, fine foliage
- Accent details: thyme or woolly yarrow tucked between pavers
Why This Looks Intentional: Paths with a destination beat random paving every time. The birdbath is a simple sculptural object that centers the composition and invites wildlife—always a win on camera and in life.
How To Recreate This Look:
- Sketch a gentle S-curve or straight line based on your yard’s layout; avoid awkward jogs.
- Excavate 6–8 inches; add compacted gravel, then sand.
- Lay steel edging; install bricks in herringbone; tap level with a rubber mallet.
- Install path lights at alternating sides for rhythm, not runway vibes.
- Set the birdbath on a compacted pad; surround with low, silvery plants for contrast.
Don’t Do This: Don’t plant tall grasses along both sides. You’ll create a claustrophobic corridor. Keep at least one side low and open for breadth.
Pro Styling Tip: Take photos just after dusk with lights on and the birdbath filled; water reflects the sky for a built-in gradient filter.
Quick reset. If your brain is spinning with options, zoom out. Gardens grow over seasons. Start with one project that will change your behavior—like a defined path you’ll actually walk, or a seat you’ll use nightly. Function first, then prettiness.
5. Slatted Teak Daybed Nook With Soft Moonlight Pendants and a Sheer Canopy
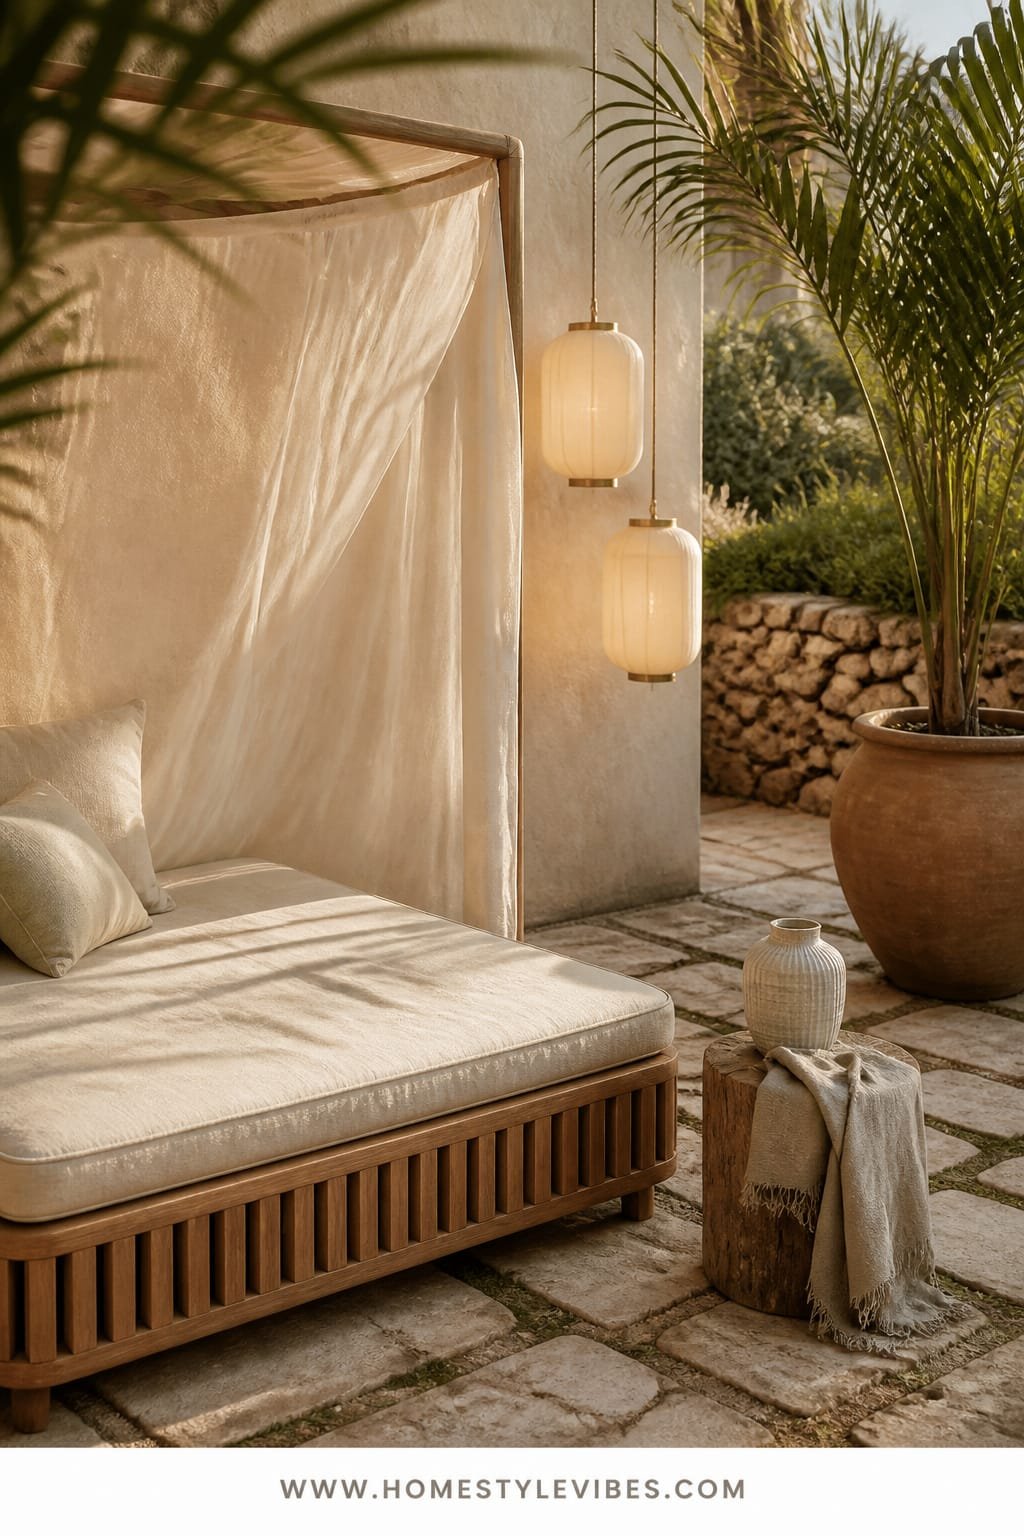
You crave a lounge zone that feels like a boutique hotel, but every outdoor sofa you try reads clunky and heavy. Cushions mildew, the area looks messy, and you end up back inside. This design builds a low-profile teak daybed framed by a gauzy canopy and two soft-glow pendants—your private moonlight corner.
It’s hotel-spa meets coastal sanctuary. Teak slats look refined and dry quickly. A sheer canopy softens harsh sun and adds motion; even a light breeze brings life to the fabric. The pendants act like moons: diffuse, warm, and height-setting for the scene. It works because the daybed invites lounging without a million pillows, and canopy fabric hides the visual clutter of neighboring yards.
Variations: Budget-friendly option uses an acacia daybed and outdoor voile curtains. Small-space version: a twin-sized bench with a single pendant and narrow side ledge. Renter-friendly: freestanding pergola frame with clip-on sheers; battery-powered pendant or solar orb lights.
Budget Breakdown:
- Teak daybed or acacia alternative: $450–$1,400
- Outdoor mattress + covers: $180–$420
- Sheer canopy fabric + hardware: $80–$240
- Pendant lights (solar/battery or low-voltage): $120–$360
- Side table + lanterns: $80–$220
- Plants (ferns, palms, jasmine): $80–$250
Total Estimated Cost: $990 – $2,890
Best For: Afternoon readers, evening wind-down rituals, small patios that need a destination.
Key Design Elements:
- Main materials: teak, sheer polyester voile, woven rattan/acrylic pendants
- Color palette: honey teak, soft white, warm gold, deep green
- Lighting strategy: two pendants hung at different heights at 2700K
- Furniture silhouettes: low, linear daybed with slim legs
- Texture layers: slatted wood, floaty sheers, matte ceramic, glossy leaves
- Accent details: a striped throw, small mint pot, curved tray for tea
How To Recreate This Look:
- Place the daybed along a fence or under a pergola, leaving 24 inches clearance on one side.
- Hang a simple canopy frame or secure sheers with outdoor curtain rods.
- Install pendants at offset heights to avoid symmetry stiffness.
- Add one low side table and a woven floor lantern for secondary glow.
- Cluster tall plants behind to create a soft green “headboard.”
Why This Looks Expensive: Negative space. The open area around the daybed and simple fabric volume feel resort-like. No clutter, just edited comfort and a warm light story.
Watch Out: Too many pillows. Limit to two euros and one lumbar. Outdoors, excess cushions read sloppy fast and become a maintenance headache.
Pro Styling Tip: Smooth the daybed mattress cover, then pinch the front corners slightly for crisp lines that photograph cleanly.
6. Charcoal Steel Planter Row With Sunrise Backlighting and a Modern Water Spout
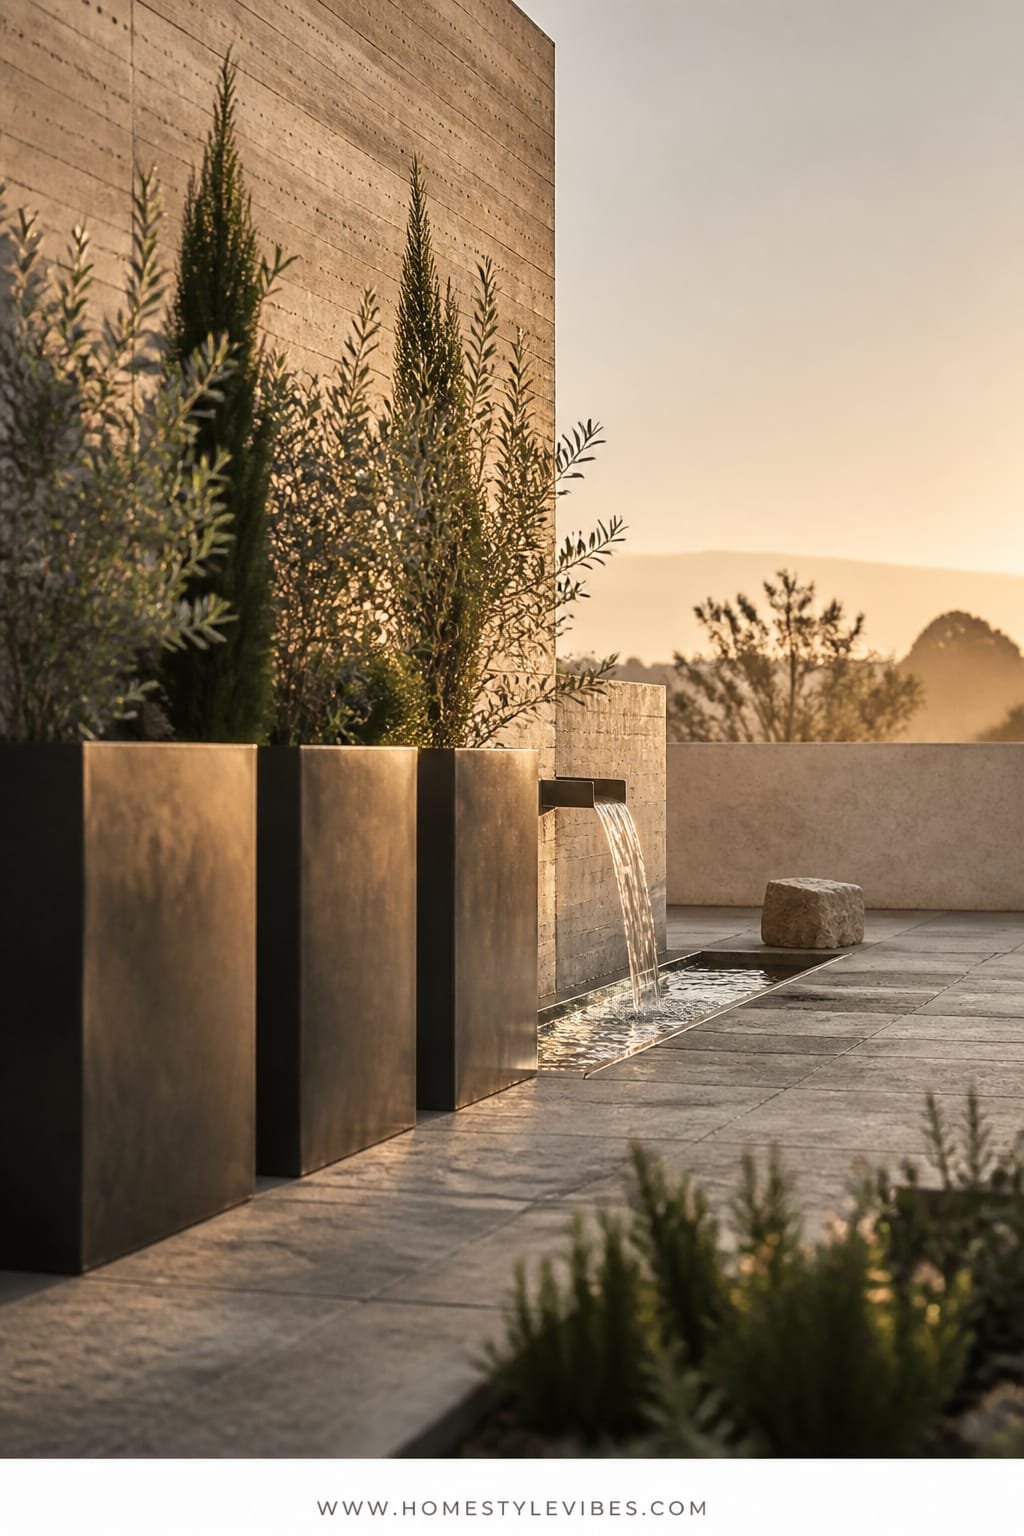
You’ve collected mismatched pots for years, and now your patio looks like a yard sale. You want sleek and modern but don’t want it to feel cold. This crisp lineup—tall charcoal steel planters in a row, lit by warm sunrise backlighting, anchored by a single modern wall spout into a slim trough—delivers calm geometry and subtle movement.
Think modern Mediterranean meets city terrace. The steel planters create a strong horizon line that organizes the view. Upright evergreens or olive standards bring sculptural height. Backlighting at dawn (or low-voltage lights set on timers) catch the edges of leaves for that pearl-like outline. The quiet trickle from the spout softens traffic noise and sparks instant Zen.
Real-world win: powder-coated planters handle weather, and a recirculating pump keeps water features low-maintenance. Small-space? Use three planters instead of five. Budget version: fiberstone planters painted charcoal plus a compact self-contained fountain.
Key Design Elements:
- Main materials: powder-coated steel, black pebbles, brushed stainless spout
- Color palette: charcoal, soft black, sage green, brushed metal
- Lighting strategy: LED backlighting at base or along wall for edge glow
- Furniture silhouettes: minimal; a single low bench if needed
- Texture layers: sleek metal, matte foliage, rippling water, smooth river rock
- Accent details: narrow gravel strip, discreet timer box, one sculptural lantern
Budget Breakdown:
- Steel or fiberstone planters (3–5): $300–$1,200
- Plants (olives, bamboo, or podocarpus): $150–$600
- LED strip or puck lights + transformer: $120–$380
- Modern spout + trough + pump: $250–$900
- Black pebbles or gravel: $60–$160
Total Estimated Cost: $880 – $3,240
Best For: Contemporary homes, apartment patios with noise; anyone craving a clean-lined, low-clutter look.
Why This Reads High-End: Consistency and restraint. All planters match; plants repeat. The single water element says confidence—you didn’t need ten statues to make a point.
How To Recreate This Look:
- Measure your wall length and choose 3–5 matching tall planters spaced evenly.
- Set lights behind or at the base to outline foliage when they’re on.
- Install a simple spout into a narrow trough with a submersible pump; hide cords cleanly.
- Top planters with black pebbles; plant upright evergreens for graphic forms.
- Test lighting at dawn/dusk; set timers for consistent glow.
One Thing To Avoid: Mixing too many plant types. Stick to one or two species for a gallery-like rhythm. Chaos will break the sleek spell.
Pro Styling Tip: Leave a 2–3 inch air gap from planter rim to soil top; this shadow line makes the planters look custom and photographs crisply.
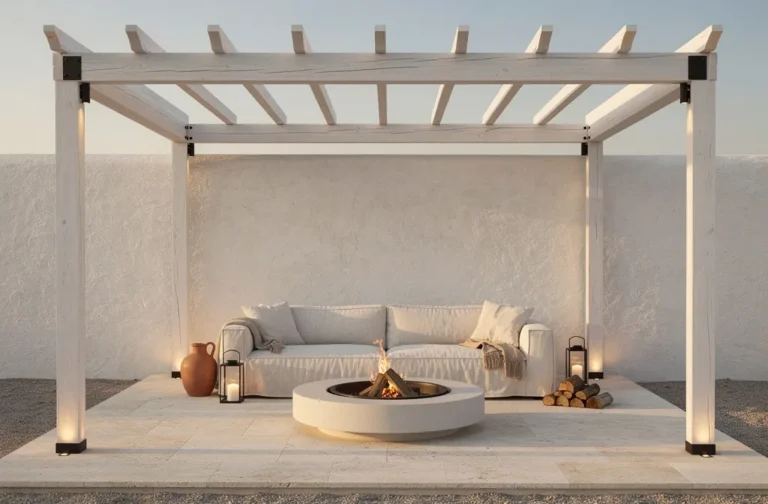
7. Whitewashed Pergola With Sunset Lantern Glow and a Built-In Banquette
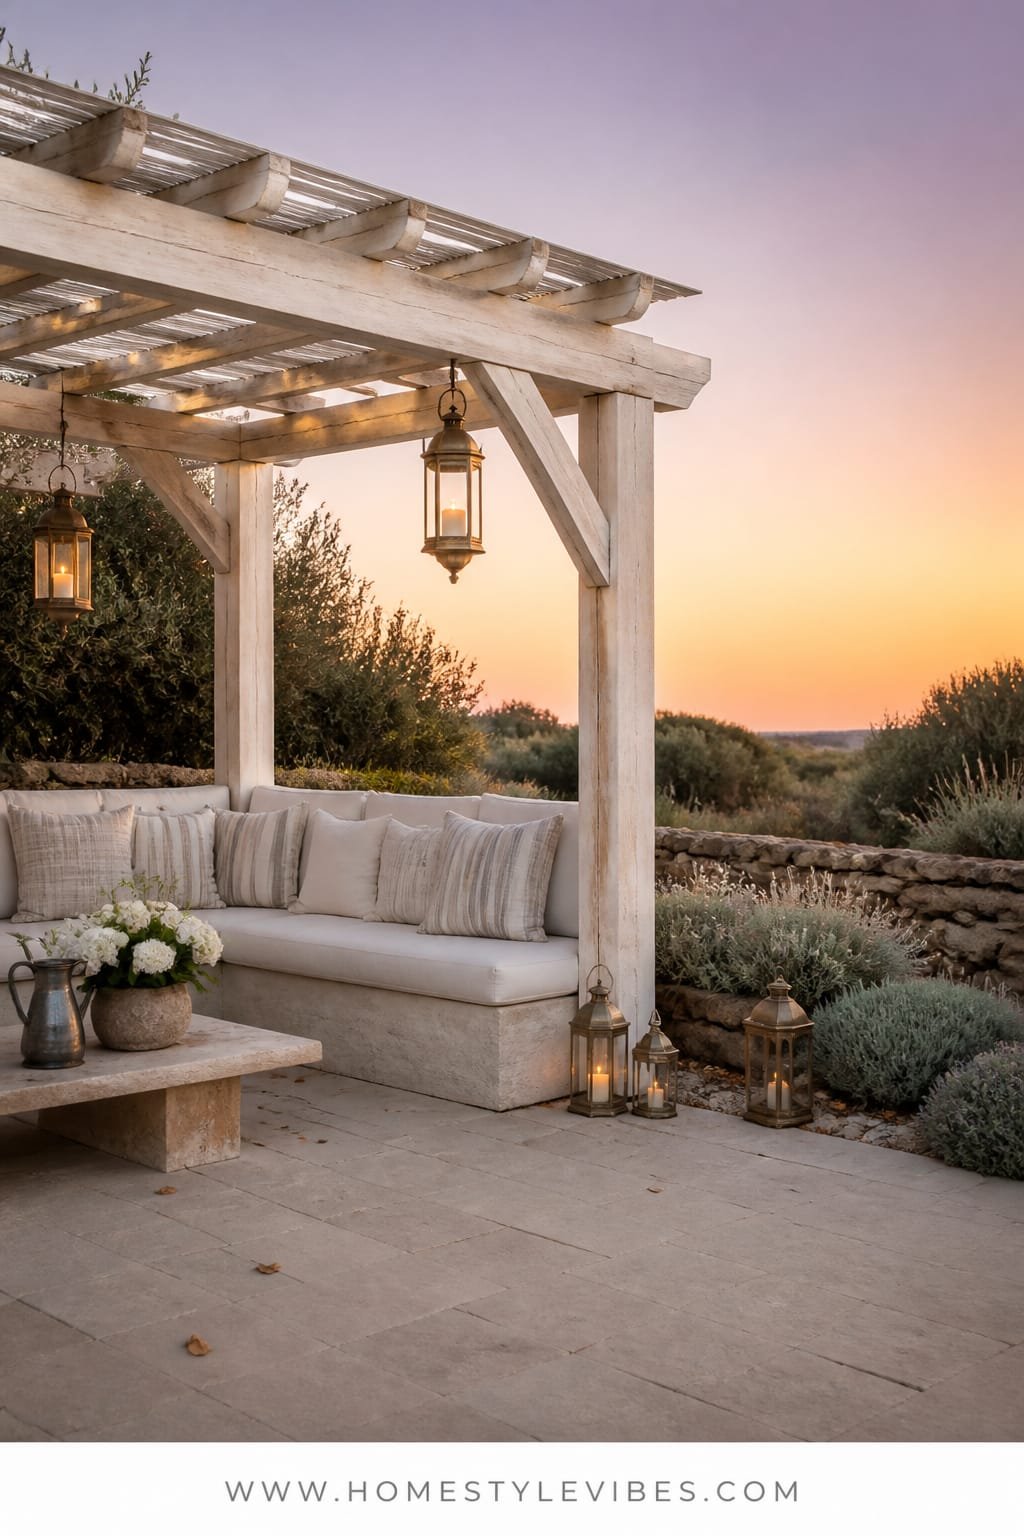
You host friends, but the seating turns into a folding-chair circus. Everyone ends up in the kitchen instead. You’ve priced outdoor sofas (spit-take), and none fit your patio. Enter the anchor: a whitewashed pergola casting filtered light, lanterns warming the scene, and a built-in banquette that hugs one or two sides so every seat is “the good seat.”
The mood hits casual coastal bistro. Whitewash reacts to sunset in the prettiest way: it softens and glitters without glare. A banquette multiplies seating in a small footprint and solves the annoying “too many legs” look that loose chairs create. Lanterns at mixed heights give layered glow that flatters faces and food—key for those Instagram dinner shots.
Why it works for real life: it’s durable, easy to sweep under, and kid-friendly. Cushions can be boxed and stored. If you’re a chronic rearranger, add a lightweight café table you can pull out or tuck in based on the guest list.
Variations: Budget build with pressure-treated lumber and exterior paint; add a simple slat backrest. Small space? A corner banquette with storage drawers. Renter-friendly? Freestanding pergola kit and a modular bench you can re-home later.
Budget Breakdown:
- Pergola materials or kit: $600–$2,200
- Whitewash stain/paint + brushes: $60–$160
- Built-in banquette (materials or carpenter): $350–$1,400
- Outdoor cushions + fabric: $180–$520
- Lanterns (floor + hanging) + dimmable bulbs: $120–$360
- Side tables or café table: $80–$240
Total Estimated Cost: $1,390 – $4,880
Best For: Entertainers, families, and anyone who wants a flexible dining-lounge hybrid under soft shade.
Key Design Elements:
- Main materials: painted wood, performance fabric, jute or sisal-look rug
- Color palette: chalky white, sandy beige, eucalyptus green, charcoal accents
- Lighting strategy: lanterns at multiple heights; dimmable bulbs for dinner-to-late-night
- Furniture silhouettes: built-in L-shaped bench, round or square café table
- Texture layers: painted grain, woven rug, stoneware tableware, linen throws
- Accent details: olive branches in a vase, striped cushions, simple black hooks for hats
How To Recreate This Look:
- Mark your pergola footprint; confirm post anchors and local codes if needed.
- Assemble and whitewash; let brushstrokes show for dimension.
- Build a banquette 16–18 inches high, 18–22 inches deep; cap with hinged lids for storage.
- Add cushions in performance fabric; layer lanterns on beams and floor.
- Finish with a washable outdoor rug and a flexible café table.
Why This Looks Expensive: Built-ins signal custom work. Repeating white across the structure and cushions keeps it cohesive, while wood grain peeking through reads artisanal, not off-the-shelf.
The Most Common Mistake: Hanging lanterns all at the same height. Stagger them. Flat lighting flattens faces and food—nobody wants that.
Pro Styling Tip: At sunset, turn off harsh overheads and rely on the lantern glow; your photos will catch that dreamy golden rim light through the pergola slats.
Confession time: I once built a banquette too deep. Looked luxe; sat like a dentist chair. Don’t repeat my mistake—test seat depth with a stack of cushions before you commit. Comfort beats Pinterest every single time.
Quick Checklist
- Choose one focal material for each zone (gravel, cedar, limewash, brick, teak, steel, painted wood)
- Commit to a warm lighting temperature (2700K–3000K) for evening glow
- Define a destination (table, bench, birdbath, banquette)
- Repeat plant types for cohesion (2–3 varieties per zone)
- Add one sculptural element (curved bench, water spout, lantern cluster)
- Use edging or borders to keep lines crisp
- Hide cords and transformers for a clean look
- Mix matte and gloss textures for depth in photos
- Limit cushions and decor to avoid outdoor clutter
- Test lighting angles at dusk before final install
Frequently Asked Questions
How do I keep costs under control if I want more than one of these cute garden ideas?
Prioritize by function. Pick the one zone you’ll use daily—a path you’ll walk or a seat you’ll lounge in—and finish it fully. Then phase the next project in a new season. Buying matching materials (like the same gravel or planters) over time keeps the yard cohesive without a big one-time spend.
My yard is tiny. Which idea works best without making it feel crowded?
Start with the crushed gravel courtyard and a round bistro table. Circles flow better in tight spaces, and gravel creates visual expansion. Keep plantings in two matching planters and hang lights to draw the eye up instead of out.
I’m a renter. Can I do any of this without losing my deposit?
Yes: lay landscape fabric and gravel without adhesives, use freestanding pergola frames, pick modular benches, and rely on battery or solar lighting. Keep walls untouched; use portable screens or fabric backdrops to simulate a limewashed look.
How do I handle maintenance so the backyard still feels magical in three months?
Choose hardy, drought-tolerant plants; set irrigation on a simple timer; and use materials that wear well—cedar, powder-coated metal, and gravel. Schedule one 30-minute weekly reset: sweep, water, replace batteries, and wipe table surfaces. It’s bite-sized but keeps the vibe alive.
What’s the most common design mistake in small backyards?
Too many ideas at once. Visual noise kills calm. Pick one statement move—like a limewashed wall or a clean planter row—and let the rest stay quiet. Repetition looks intentional; randomness reads messy.
Conclusion
Your backyard doesn’t need a total overhaul to feel magical. It needs one strong idea, a few honest materials, and lighting that flatters. Start with the zone that solves your biggest frustration—no path, no seat, no focal point—and make that area fully resolved. Then enjoy it this week, not “someday.”
The truth is, luxury outside comes from texture, light, and restraint. Gravel underfoot, cedar that silvers with time, a single curved bench catching a warm glow—these are the moves that make a garden feel finished. Pick one of these seven cute garden ideas, set a weekend, and go for it. You’ve got this, and your backyard is ready to become that slow, golden place you keep daydreaming about. Seriously, I can already picture your first sunset there.
About the Author

Krisztina P.Rendes, Founder of Home Style Vibes
Founder of Home Style Vibes
Krisztina Puskásné Rendes created Home Style Vibes as a cozy-modern lifestyle space where homemaking meets inspiration. Her goal is to help women create beautiful, organized, and peaceful homes they truly love — without overwhelm. You’ll find here heart-driven content on home decor, cleaning tips, easy family recipes, organization and decluttering, DIY home projects, plants, and seasonal ideas — all designed to bring more calm, comfort, and style into everyday life.