8 Summer Garden Aesthetic Ideas For A Beautiful Food And Flower Garden
You want lazy golden evenings, tomatoes that taste like July, and flowers that look like a painting… but weeds, mismatched pots, and that one sad corner keep ruining the vibe. You crave a summer garden that feels intentional—sunny edges, layered texture, and a place to actually sit with iced tea—but clutter and guesswork keep sneaking in. These 8 summer garden aesthetic ideas solve that exact frustration with practical layouts, photogenic finishes, and clever swaps you can finish in a weekend or two. Set a firm budget cap, choose one or two concepts, and watch your yard shift from “work in progress” to “this actually looks curated.” Pinterest will be jealous, but your neighbors will forgive you.
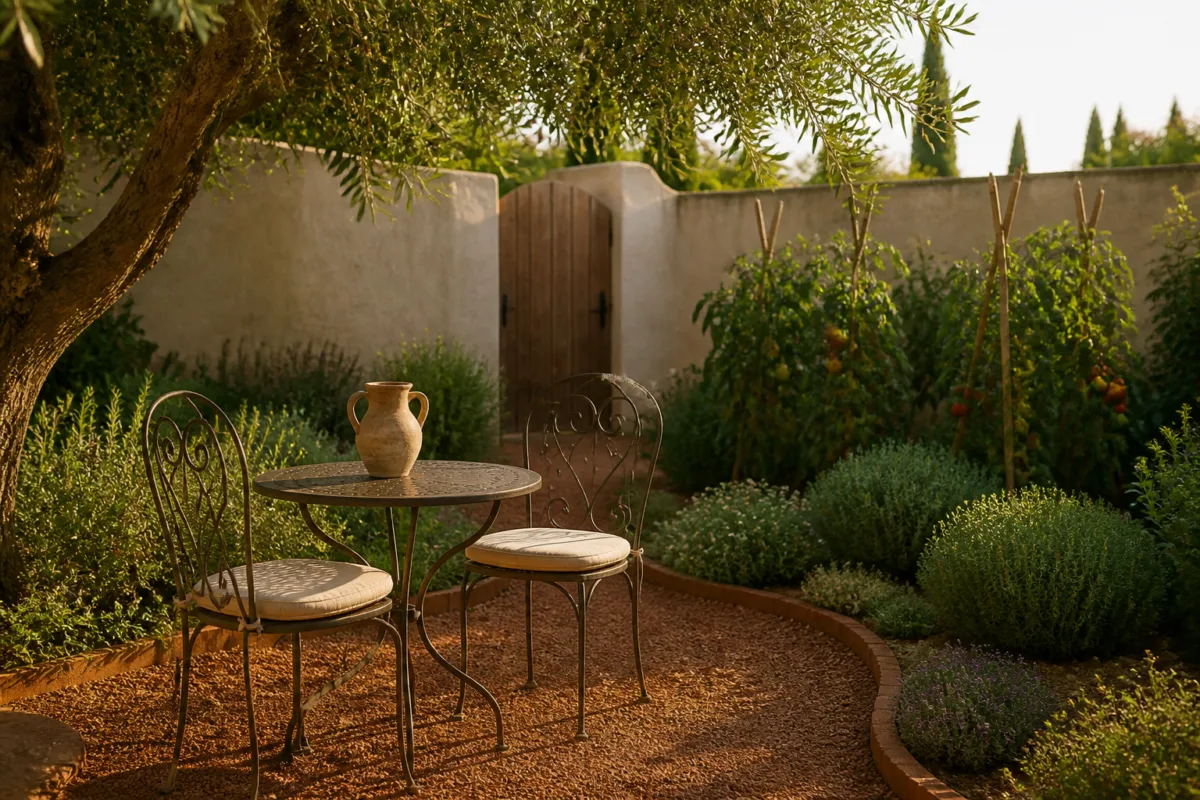
Think weathered stone, linen cushions, herb-scented breezes, and light that skims across petals and produce. These ideas are dialed-in and deeply livable—small-space friendly, family-proof, and wildly pretty in photos. If your style leans cozy, European, modern cottage, or clean and minimal, you’ll find a fresh way in here.
1. Terracotta Gravel Parterre With Dappled Light and a Wrought-Iron Bistro Set
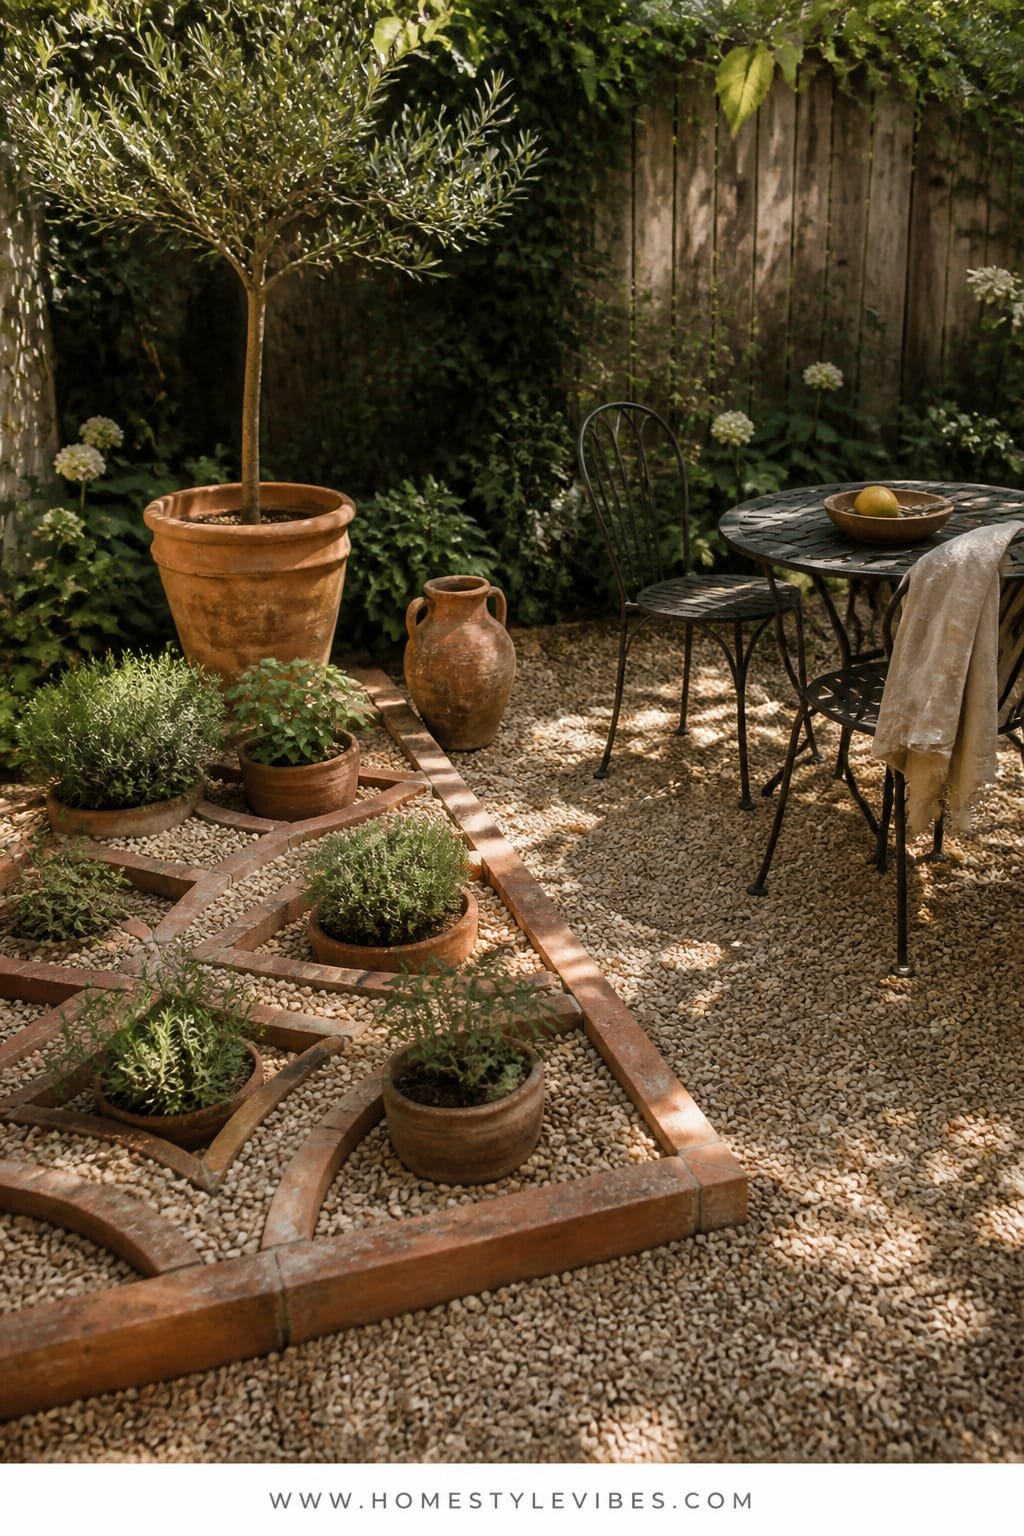
We’ve all been there: the path never looks “finished,” your herb pots feel random, and chairs get swallowed by grass. This parterre concept corrals chaos with symmetrical gravel beds edged in terracotta and a petite wrought-iron bistro set for morning coffee or quick garden breaks. The mood? Effortless French courtyard meets practical kitchen garden—romantic, tidy, and friendly to small spaces.
Why it works in real homes: gravel suppresses weeds, terracotta ages beautifully, and iron furniture stands up to weather. Dappled light—through a small tree or pergola slats—keeps everything comfortable while giving your photos that soft, cinematic quality. Terracotta and lime-washed tones create a warm color anchor; the iron bistro set adds crisp silhouette contrast. It photographs like a dream because of the granular texture of gravel against smooth leaves, and the clear geometry adds instant “designed” structure.
Variations: For a budget-friendly version, use decomposed granite instead of pea gravel and fiber-clay pots instead of antique terracotta. Small-space? Scale down to two symmetrical beds flanking a single chair. Renter-friendly swap: build freestanding edged frames with flexible metal edging and fill with gravel; you can remove them later with minimal mess.
Budget Breakdown:
- Gravel or decomposed granite: $120–$400 (depending on area)
- Terracotta pots/edging tiles: $80–$250
- Wrought-iron bistro set: $130–$350
- Herbs and compact veg (basil, thyme, cherry tomatoes): $40–$120
- Solar stake lights: $25–$60
Total Estimated Cost: $395 – $1,180
Best For: Courtyards, side yards, or front gardens that need a fast glow-up; anyone who wants a beautiful food and flower garden that stays photogenic with low maintenance.
Key Design Elements:
- Main materials: terracotta, gravel, wrought iron
- Color palette: sun-warmed clay, olive greens, soft creams, black iron
- Lighting strategy: dappled shade from a small tree or pergola slats; soft solar stakes
- Furniture silhouettes: round bistro table, slender iron chairs with curved backs
- Texture layers: gritty gravel, smooth terracotta, glossy herb leaves
- Accent details: linen napkins, small terracotta saucers, a copper watering can
How To Recreate This Look:
- Map a simple grid or “X” pattern on the ground and outline beds with terracotta tiles or metal edging.
- Lay landscape fabric and fill paths with 2–3 inches of gravel; tamp lightly.
- Place a small ornamental tree or tall pot to cast dappled light, then center your bistro set.
- Plant compact herbs and edible flowers along the edges for quick color and scent.
- Style with linen cushions, a small tray, and solar stakes for soft evening light.
Why This Looks Expensive: The tight geometry, restrained color palette, and honest materials (clay, iron, stone) read European and curated. Texture contrast—gravel with glossy leaves—adds depth in photos and in person.
Watch Out: Don’t skimp on leveling the gravel; uneven surfaces look messy and feel awkward underfoot. Keep the furniture scaled to the space—oversized pieces break the visual rhythm.
Pro Styling Tip: Water the gravel lightly before photos; it deepens color, reduces dust, and makes terracotta glow.
Quick Tip: Cluster 3–5 pots at staggered heights instead of lining them up. Trios beat rows in photos every time.
2. Limewashed Raised Beds With Golden Hour Fairy Lights and a Slatted Cedar Potting Bench
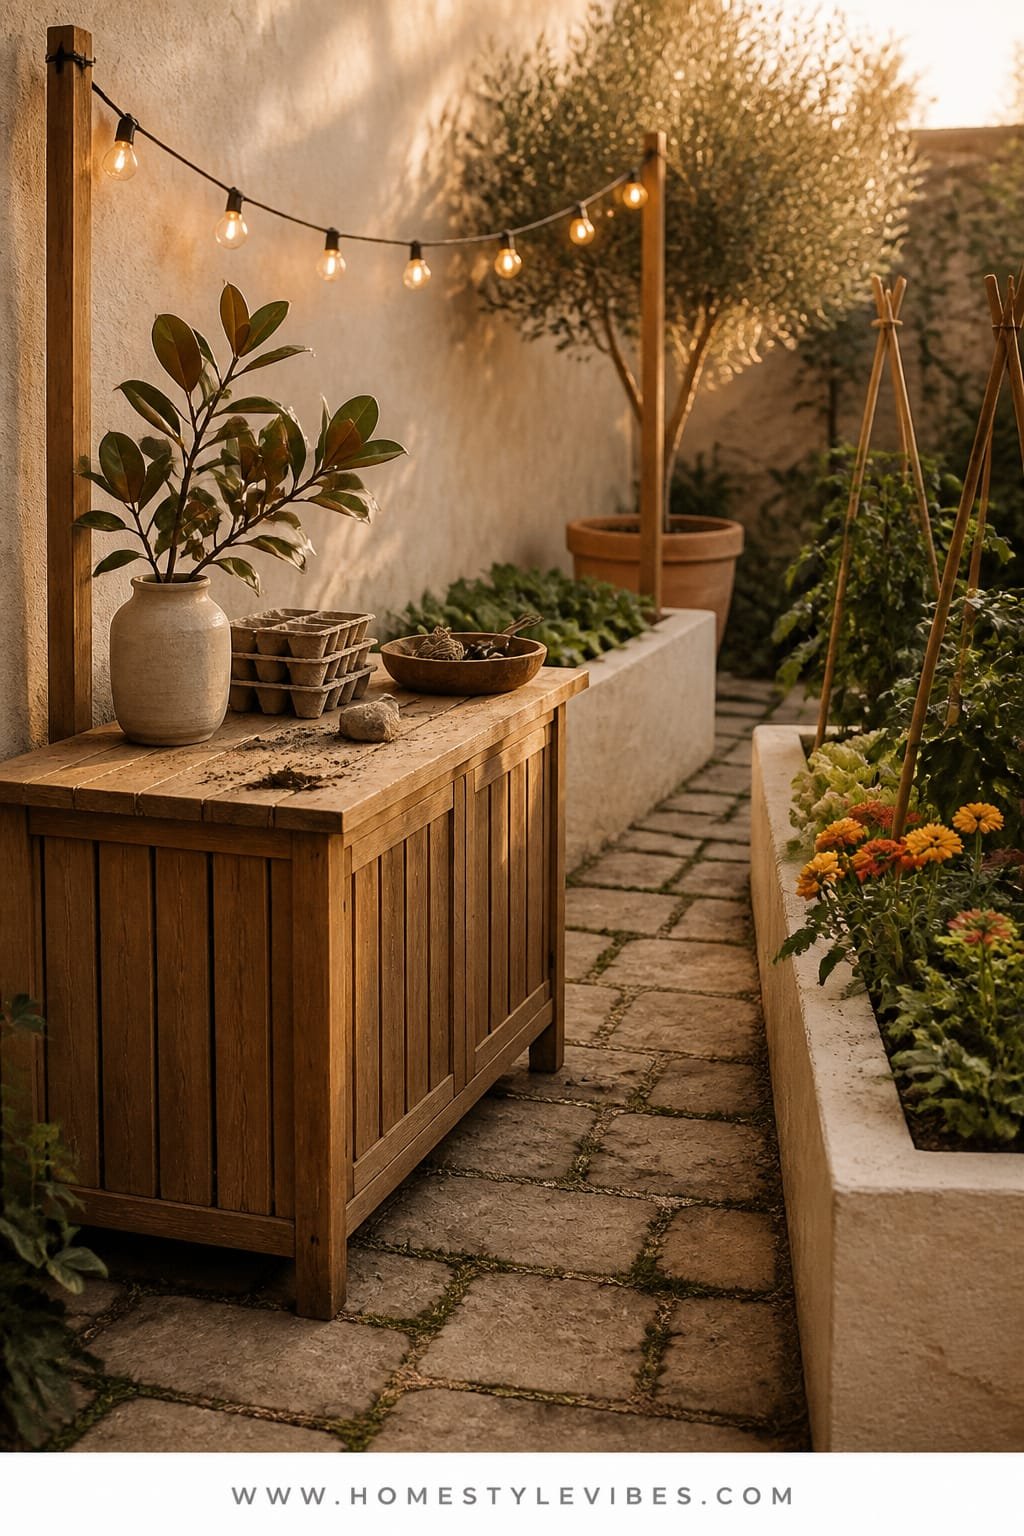
It’s that one corner that always feels off: muddy tools, leggy seedlings, and nowhere to actually set things down. This setup centers a simple slatted cedar potting bench beneath soft strings of fairy lights, framed by limewashed raised beds. The vibe leans modern Mediterranean meets homestead—calm, tactile, and wildly practical for a beautiful food and flower garden you’ll actually use nightly.
Why it works: limewashing raw wood or brick instantly adds a diffused, sun-kissed softness. Cedar gives you durability and that gentle buttery grain; fairy lights warm the whole composition at dusk. Small footprints benefit from vertical trellises and sheet mulch to keep weeds at bay. Photos look especially good at golden hour because the limewash bounces warm light onto leaves, flattening harsh shadows.
Variations: On a tighter budget, paint your existing bench a clay-white exterior paint and use pine raised-bed kits. For renters, assemble lightweight standing planters and hang battery-operated lights with removable hooks. Darker version? Use black-stained cedar for the bench and keep the limewash soft for contrast.
Key Design Elements:
- Main materials: cedar, limewash, galvanized hardware
- Color palette: mineral white, soft clay, chlorophyll greens, honey wood
- Lighting strategy: warm fairy lights at eye level; one solar spotlight washing the bench
- Furniture silhouettes: shallow, slatted bench with open shelf
- Texture layers: chalky lime, smooth leaves, ribbed cedar, metal glint
- Accent details: terracotta seed trays, labeled jars, a hanging twine spool
Budget Breakdown:
- Cedar bench or DIY lumber: $120–$350
- Raised-bed kits or boards: $150–$400
- Limewash or mineral paint: $25–$60
- Fairy lights and solar spotlight: $35–$120
- Hooks, jars, and potting tools: $30–$100
Total Estimated Cost: $360 – $1,030
Best For: Narrow side yards, patios, or anywhere you want a tidy grow-and-go station that looks great during evening hangs.
How To Recreate This Look:
- Place the bench against a fence or wall; install 2–3 simple hooks for tools and twine.
- Build or set raised beds to flank the bench; line with cardboard for weed suppression.
- Apply limewash to the outer faces of the beds and any adjacent masonry.
- String fairy lights overhead, then add one focused solar spotlight aimed at the bench.
- Style with terracotta trays, labeled jars, and a bowl for harvested cherry tomatoes.
Why This Feels Designer: The bench creates a purposeful “work zone” that photographs like a vignette; limewash softens the whole palette, while consistent hardware finishes tie it together.
One Thing To Avoid: Avoid mixing too many wood tones. Limit yourself to two max (bench and bed) so the look stays intentional.
Pro Styling Tip: Coil twine loosely over a dowel and let a few strands drape—effortless texture reads beautifully on camera.
Remember, this isn’t about recreating a showroom. It’s about building a space that actually feels like yours—tools where you reach for them, light where you linger, and materials that get better with age.
3. Weathered Brick Border Paths With Soft Shadow Light and a Vintage Zinc Trough Fountain
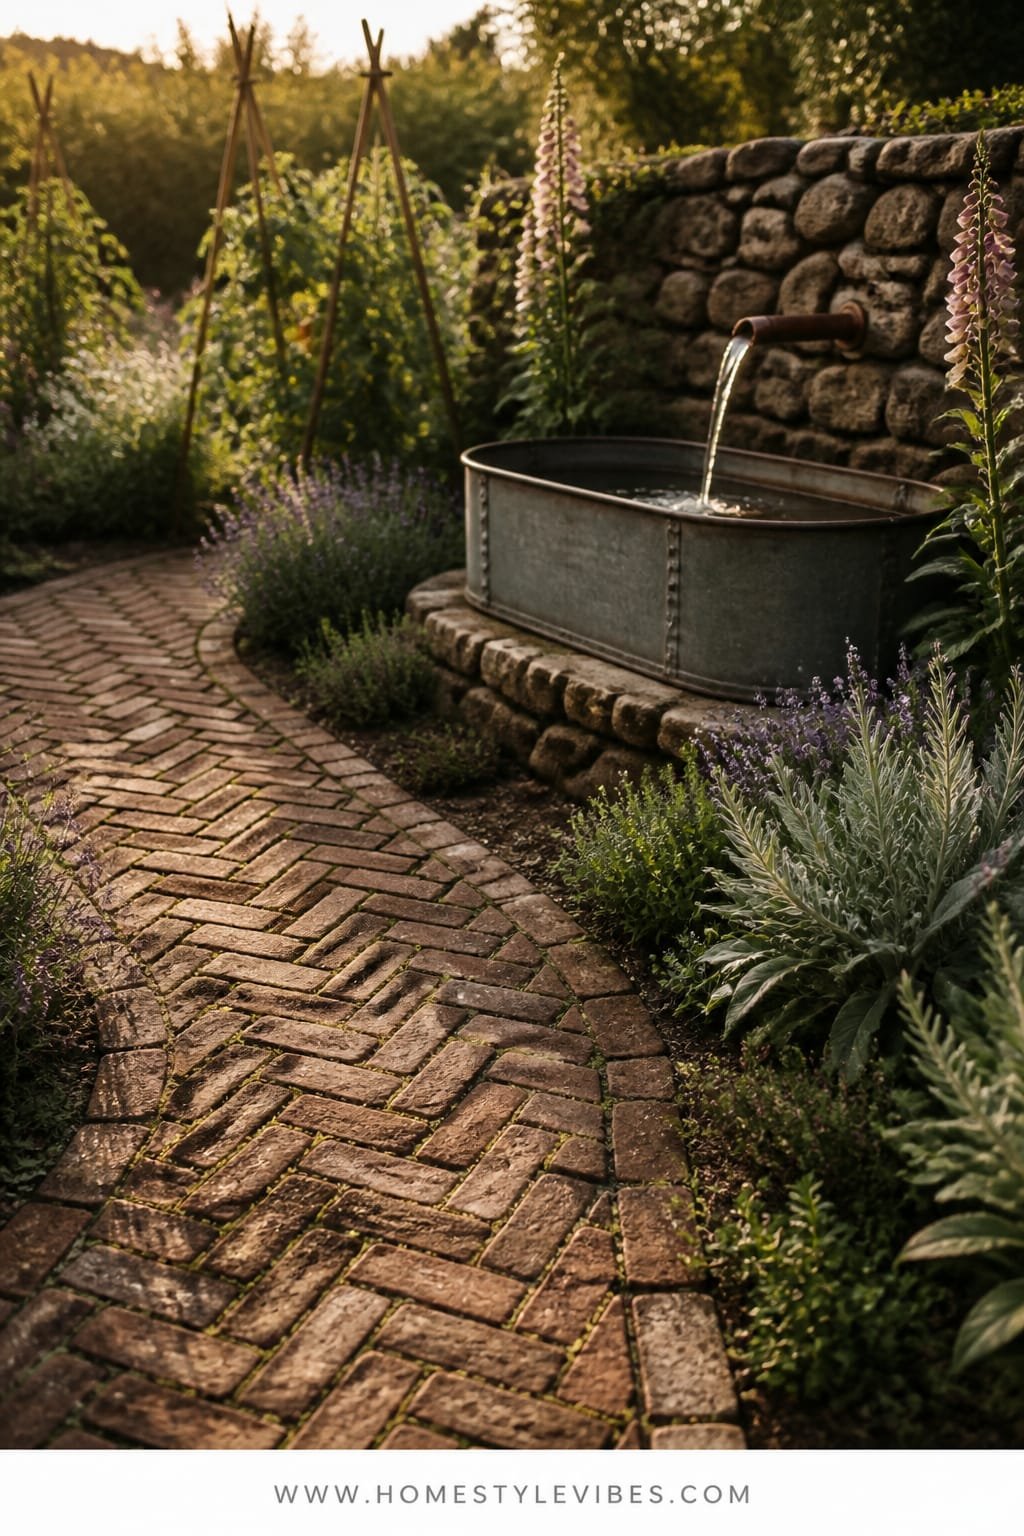
You’ve tried mulched paths, but they scatter, compact, and never feel special. Brick borders solve it with permanence and charm, guiding you through flower and veg beds while a simple zinc trough fountain adds cool sound and a reflective shimmer. The mood leans cottage heritage meets practical grower—timeless and grounded.
Why it works: brick edges define paths and protect plantings, and their warm red undertones look incredible next to green foliage and lavender blooms. Soft shadow light—think afternoon sun filtered by shrubs or a fence—keeps contrast gentle for photos, which makes colors feel richer. Zinc balances the warmth with a cool, industrial note, and moving water disguises neighborhood sounds.
Variations: For a lower cost, use reclaimed brick or mixed leftovers in a subtle pattern. Small-space version? One simple loop path with a tabletop bowl fountain. Renter-friendly: lay bricks on sand without mortar; assemble a pump-fed stock tank that’s easy to drain and move.
Budget Breakdown:
- Reclaimed or new brick (for edges): $150–$500
- Decomposed granite or compactable base: $80–$220
- Zinc or galvanized trough + pump: $120–$350
- Plants for borders (catmint, lavender, chives): $60–$180
- Landscape fabric and stakes: $30–$70
Total Estimated Cost: $440 – $1,320
Best For: Medium to large gardens needing defined circulation; anyone who wants that “old garden” feeling with clean edges.
Key Design Elements:
- Main materials: brick, crushed stone, zinc
- Color palette: russet brick, silver-blue zinc, sage to emerald greens, violet accents
- Lighting strategy: soft shade with highlights; place the fountain where light kisses the surface
- Furniture silhouettes: simple wood bench near the fountain
- Texture layers: rough brick, velvety petals, glinting water, matte foliage
- Accent details: iron hose guides, copper labels, a woven trug
How To Recreate This Look:
- Sketch paths, then trench edges 3–4 inches deep to seat bricks vertically.
- Lay landscape fabric for the path base; add and compact decomposed granite.
- Set bricks snugly along edges; tap in with a rubber mallet for a level top course.
- Place the trough fountain at a gentle focal point; run power safely to the pump or use solar.
- Plant border-friendly perennials that gently spill over brick to soften lines.
Why This Reads High-End: Durable materials with patina signal long-term investment. The fountain’s cool metal and brick’s warmth create deliberate tension—very editorial.
The Most Common Mistake: Crooked edges. Take time to string a straight line and level your bricks. Wobbly borders scream DIY in photos.
Pro Styling Tip: Dampen the bricks before a shoot—the color deepens and the water’s surface captures sparkling highlights.
Did You Know? Even a small water feature lowers perceived temperature by a few degrees and makes summer evenings feel more comfortable—your brain hears “cool.”
4. Whitewashed Pergola Over Crushed Oyster Shell With Lantern-Glow Sconces and a Teak Farm Table
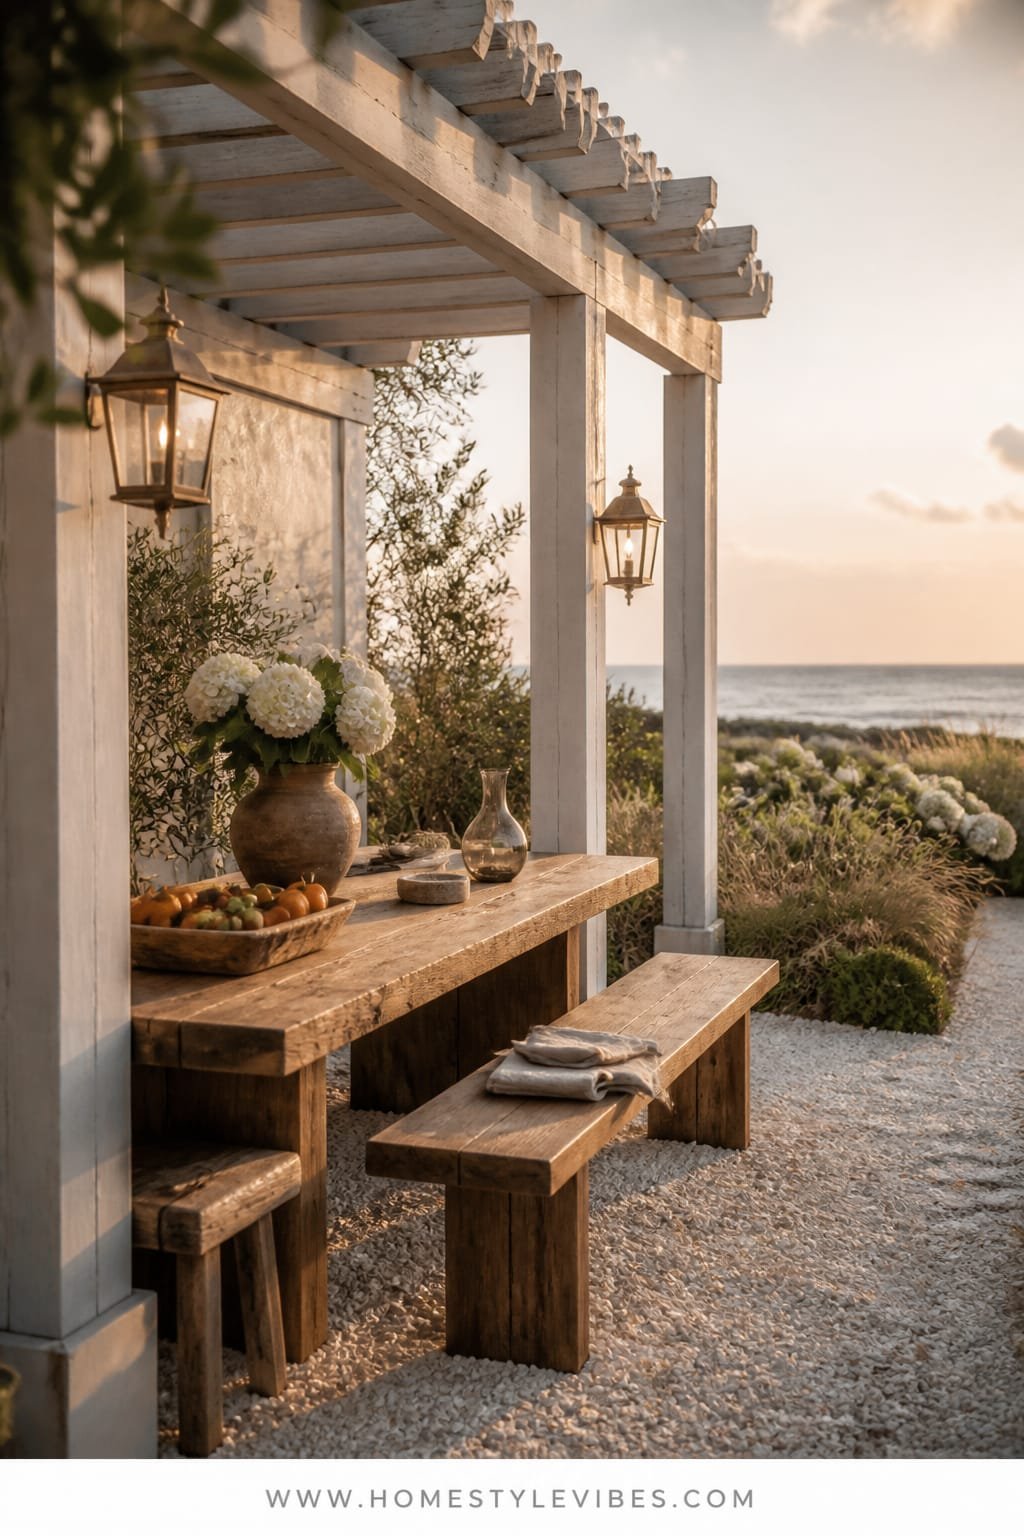
Some dining corners feel sterile or too exposed. You set a table, but the area lacks intimacy and texture. A whitewashed pergola over crushed oyster shell sets a breezy coastal tone that’s still grounded enough for a vegetable-heavy dinner spread. The star fixture—sturdy teak table—brings warmth and hospitality, while lantern-glow sconces create even nighttime light that flatters skin and food.
The mood is coastal Hamptons meets produce-forward supper club. The oyster shell base reflects a gentle cool light, bouncing brightness upward to brighten faces and leaves. Teak weathers beautifully, and the white pergola provides visual height and soft shade. This setup photographs beautifully because of the stark light/dark edges: white structure, warm teak, and green herbs laid out family-style.
Variations: Budget version uses gravel instead of shell and a stained pine table sealed for weather. For small patios, go with a 2-post wall-attached pergola and a drop-leaf bistro table. Renter-friendly: freestanding shade sail, outdoor plug-in lanterns, and a folding acacia table.
Budget Breakdown:
- Pergola kit or DIY lumber: $300–$1,200
- Crushed oyster shell or pale gravel: $150–$450
- Teak or acacia farm table: $250–$900
- Outdoor lantern sconces and wiring/solar: $120–$400
- Bench seating or stackable chairs: $150–$500
Total Estimated Cost: $970 – $3,450
Best For: Entertainers who love al fresco dinners; coastal climates; larger patios with adjacent kitchen beds for snipping herbs as you plate.
Key Design Elements:
- Main materials: painted wood, oyster shell, teak
- Color palette: mineral white, soft greys, sun-gold teak, herb greens
- Lighting strategy: symmetrical wall sconces at eye level; candles down the table for depth
- Furniture silhouettes: long rectangular table with simple block legs
- Texture layers: chalky shell, smooth wood grain, linen runners
- Accent details: striped cushions, hurricane lanterns, ceramic platters
How To Recreate This Look:
- Prep a level patio area; edge it and lay compacted base before spreading shell or pale gravel.
- Assemble and whitewash the pergola; leave the brushstrokes for character.
- Center the teak table; add a low bench on one side and mixed chairs on the other.
- Install lantern sconces; aim for warm 2700K bulbs for flattering glow.
- Style with a linen runner, a big bowl of lemons, and clipped herbs in water.
Why This Looks Intentional: Vertical structure frames the scene, material repetition (white + teak) keeps the story tight, and the shell floor bounces light to even out shadows—like a built-in reflector.
Don’t Do This: Don’t pile too many small chairs around a long table. Give each setting at least 24 inches; cramped seating kills the relaxed mood.
Pro Styling Tip: For photos, mist the table lightly and polish with a dry cloth—subtle sheen, zero glare.
I’ll be real: pergolas take a weekend and at least one “we measured wrong” moment. Measure twice, pre-drill, and accept that perfection isn’t the goal. The slightly uneven brushstroke on whitewash is the charm.
5. Corten Steel Planters With Late-Afternoon Amber Light and a Curved Rattan Lounge Chair
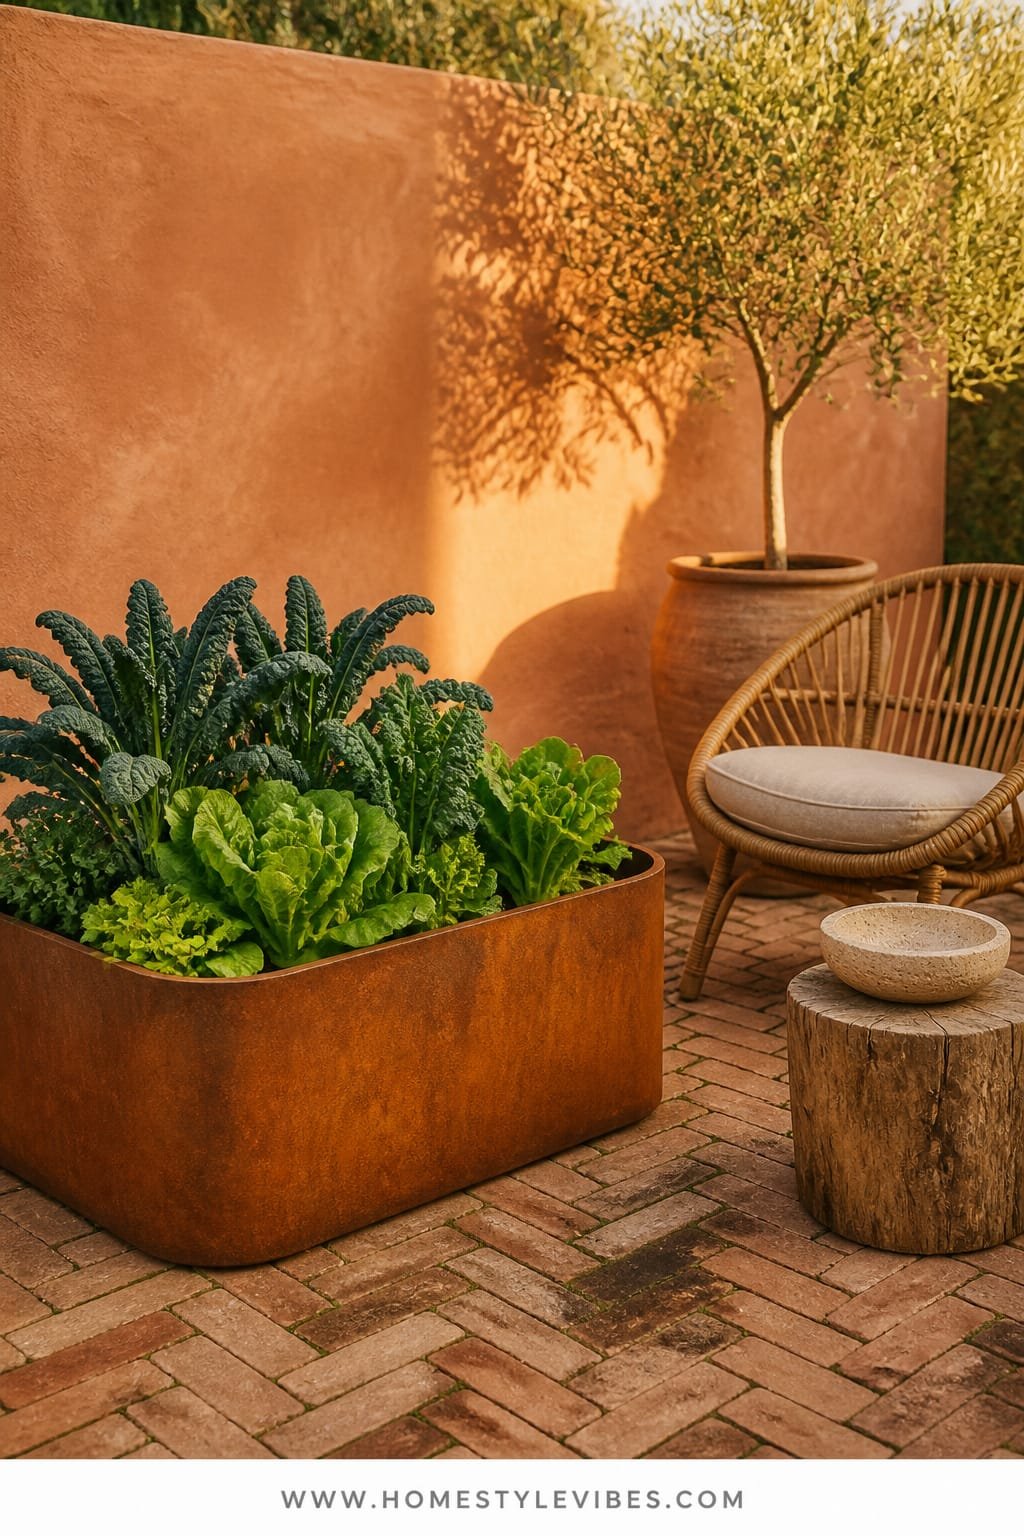
Some yards feel boxy and cold, especially with lots of hardscape. You add plants, but it still reads flat. Enter corten steel planters—those rust-toned beauties that frame edible greens like artwork. Pair them with a curved rattan lounge chair and lean hard into late-afternoon amber light that ignites both the steel and your salad greens.
The mood: urban courtyard meets Mediterranean terrace—warm, sculptural, and low maintenance. Corten’s orange-brown patina looks stunning near blue-green vegetables and purple basil. It’s tough, ages gracefully, and makes even simple plantings look bespoke. Photos pop thanks to bold geometry and the hue contrast: rusty orange with cool leaf tones equals instant drama.
Variations: For a smaller budget, use rust-effect paint on galvanized planters. Small-space? Two large rectangles with a single lounge chair and footstool. Renter-friendly: go with fiber-clay in a warm terracotta tone and a removable rattan lounger.
Budget Breakdown:
- Corten planters (2–4): $200–$900
- Rattan lounge chair + cushion: $180–$600
- Soil and compost: $60–$180
- Plants (kale, chard, herbs, dwarf dahlias): $50–$160
- Outdoor side table: $40–$120
Total Estimated Cost: $530 – $1,960
Best For: Patios and rooftops where weight and durability matter; design lovers who want bold lines with minimal fuss.
Key Design Elements:
- Main materials: corten steel, rattan, linen-texture cushions
- Color palette: rust, umber, sage, midnight green, soft neutrals
- Lighting strategy: stage seating for that 4–7 pm golden window; add two ground-level up-lights for evening
- Furniture silhouettes: low-slung, curved lounge; simple cylinder side table
- Texture layers: metal patina, woven rattan, matte foliage, stone coasters
- Accent details: striped lumbar cushion, ceramic ashtray-style catchall, woven throw
How To Recreate This Look:
- Pick two planter sizes for variation; set them offset to create depth.
- Mix soil with compost for lush growth; plant in blocks for graphic impact.
- Angle your rattan lounge to face the planters at a 30–45 degree turn—more dynamic in photos.
- Add a compact side table and a small ground spotlight aimed at the planters.
- Finish with a linen cushion and striped lumbar; keep the palette tight.
Why This Looks Expensive: Big, simple forms look custom, not cluttered. Corten reads architectural, and the curved lounge balances the steel with softness—designer tension done right.
Watch Out: Don’t scatter too many small planters. Fewer, larger pieces feel sophisticated and help plants thrive with consistent moisture.
Pro Styling Tip: Photograph at a low angle so the planter tops align with foliage behind—layers look lush and magazine-ready.
Quick Tip: Plant edible flowers—nasturtiums, violas—near lounge areas. They look adorable in cocktails and make impromptu garnishes a breeze.
6. Stone-Edged Cutting Beds With Cool Morning Light and a Black-Painted Potting Cabinet
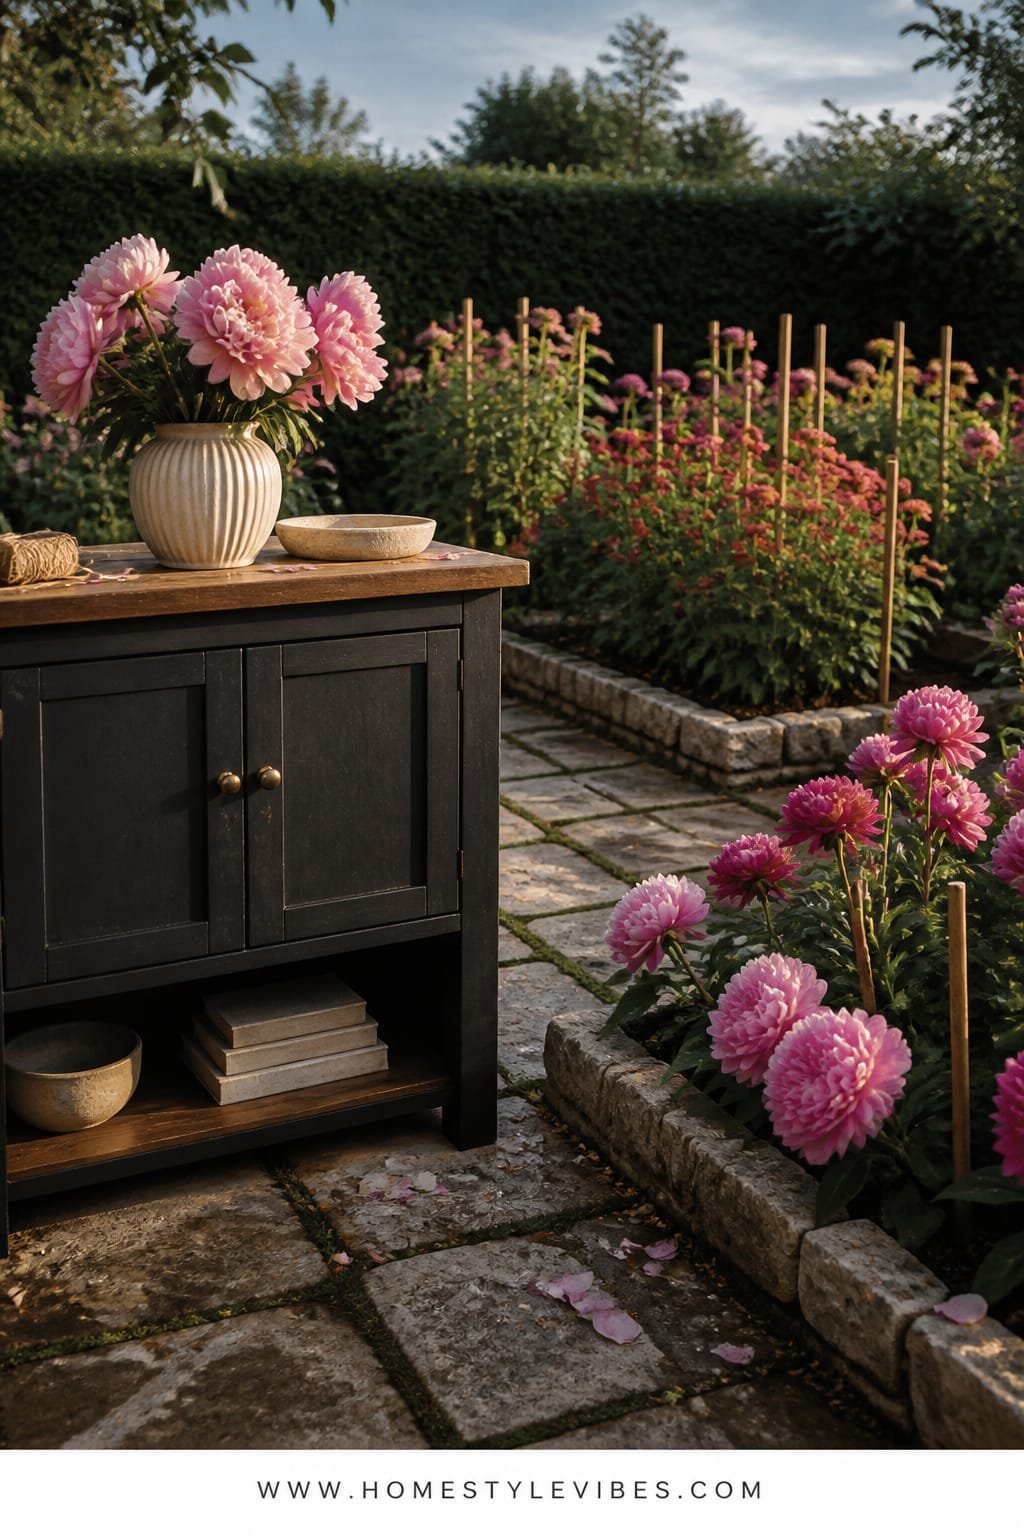
Cutting gardens go from dreamy to chaotic quickly. Buckets, snips, and string pile up, and blooms slump without structure. Stone-edged beds rein it in, and a black-painted potting cabinet becomes your anchor: a moody, chic backdrop that hides mess and makes petals glow in cool morning light.
The mood is modern cottage with a hint of editorial drama. Black paint behind flowers intensifies color saturation—pink peonies and zinnias look doubly lush. Stone edges stabilize soil and give you crisp lines for photos and mowing. It works for family yards too: stone handles bumps, and the cabinet corrals all the tools you constantly misplace (just me?).
Variations: Smaller yard? One U-shaped bed around a slim cabinet. Budget-friendly: use salvaged stone and a thrifted cabinet with exterior paint. Renter-friendly: freestanding cabinet on pavers and flexible plastic edging that mimics stone.
Budget Breakdown:
- Stone edging or salvaged rock: $120–$500
- Potting cabinet (new or thrifted) + exterior paint: $100–$350
- Soil, compost, mulch: $80–$220
- Flower starts or seeds (zinnia, cosmos, snaps, basil): $40–$140
- Buckets, snips, frog pins, and twine: $35–$90
Total Estimated Cost: $375 – $1,300
Best For: Flower lovers who want vase-ready stems; suburban backyards or side yards with decent morning light.
Key Design Elements:
- Main materials: natural stone, painted wood, crisp mulch
- Color palette: charcoal black, mineral greys, saturated florals, leafy greens
- Lighting strategy: early morning shoots for dew sparkle; one discreet backlight for rim highlights
- Furniture silhouettes: tall, simple cabinet with Shaker-style doors
- Texture layers: rough stone, satiny petals, matte paint, glossy leaves
- Accent details: vintage shears, enamel buckets, brass hooks
How To Recreate This Look:
- Lay out bed edges with a hose; dig and set stones slightly below grade for stability.
- Prep soil with compost; add drip lines if you can—it’s worth it.
- Position your cabinet where it faces morning light; paint it a rich black (satin finish).
- Plant flowers in height tiers; mulch generously to lock in moisture.
- Hang snips on brass hooks; keep buckets stacked and ready by the cabinet.
Why This Feels Designer: The black backdrop creates theater for color. Stone edges add heritage, and restrained hardware reads intentional—not accidental.
One Thing To Avoid: Don’t mix too many flower colors in one bed. Pick 3–4 hues max for bouquets that look cohesive.
Pro Styling Tip: Snip a few stems just before shooting; lay them casually on the cabinet for lived-in magic.
A quick story: a friend of mine spent weeks agonizing over which pink zinnia to grow. She finally realized the “wrong pink” wasn’t the problem—her background was. Once she painted her fence black, every petal sang. Lighting and backdrop matter more than we think.
7. Reclaimed Wood Potager Grid With Sun-Ripened Light and a Copper Gooseneck Spigot
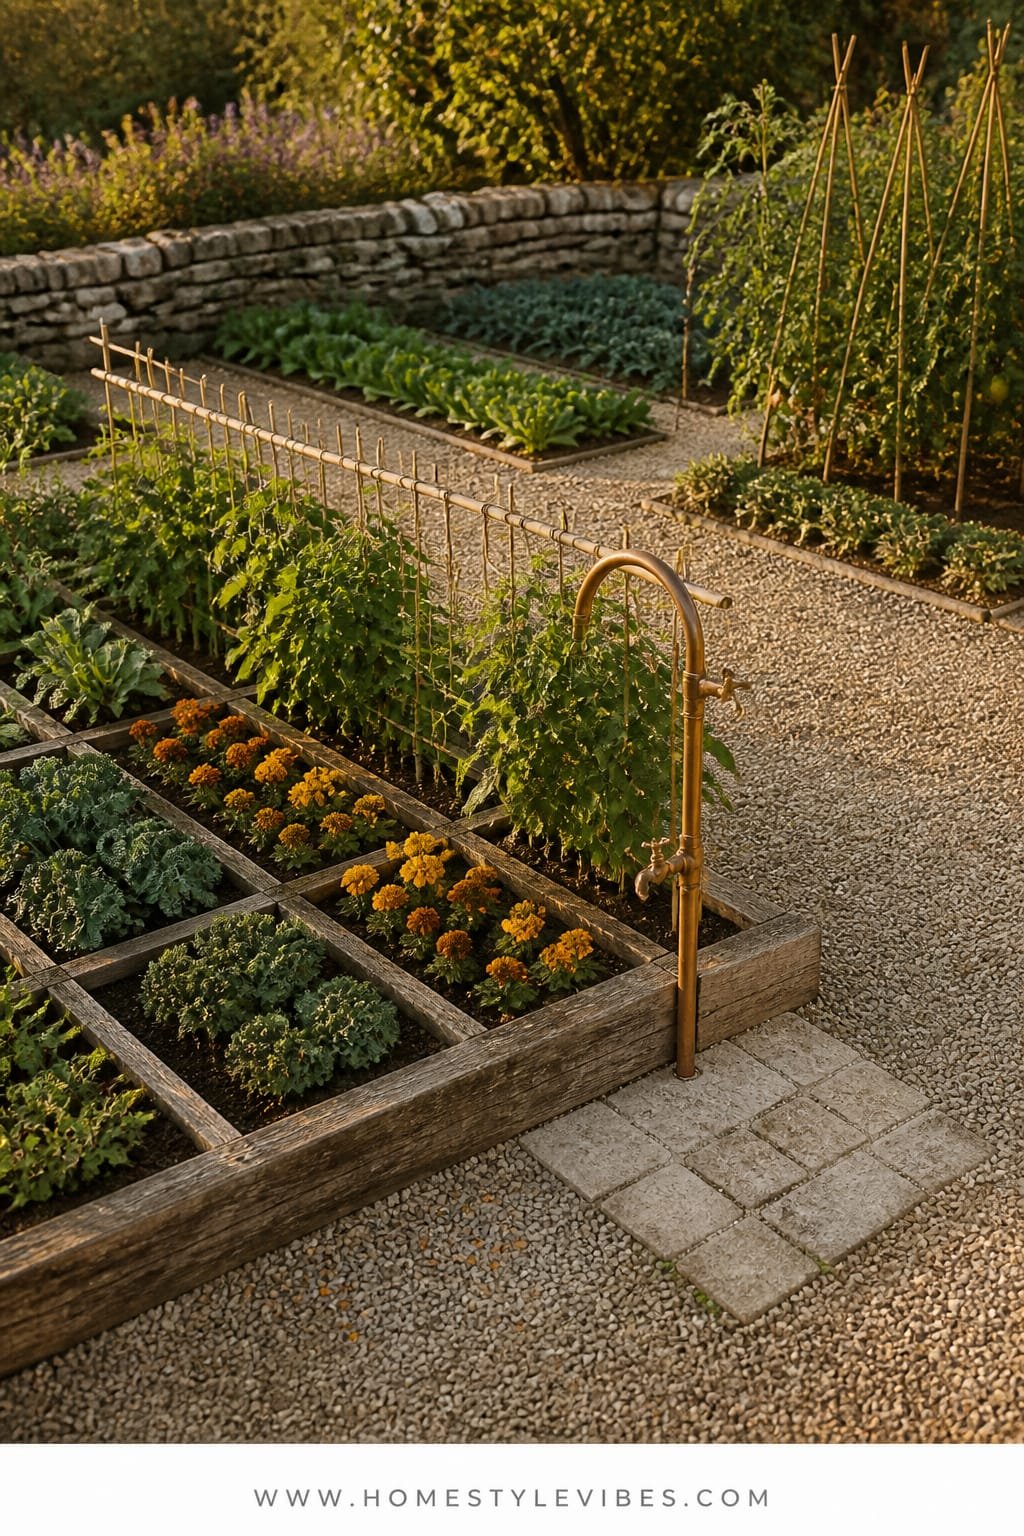
If your veggies sprawled everywhere last summer, this is your fix. A potager grid uses simple reclaimed wood to form an organized plan: squares of kale, stripes of marigolds, trellised beans—all anchored by a charming copper gooseneck spigot for watering and visual punctuation. The overall feel is traditional French kitchen garden with a rustic-contemporary twist.
Why it works: grids teach discipline and harvest rhythm. Reclaimed wood keeps costs manageable and adds soul, while copper patinas over time and loves sunlight. Sun-ripened light late morning/early afternoon shows off texture—the ribbing in kale leaves, the velour of marigolds, the pale sheen on tomatoes. In photos, gridded geometry adds visual order so even lush chaos feels composed.
Variations: Budget version swaps copper for a brass-colored hose head. Small-space? Two grid boxes with a tiny center spigot on a simple post. Renter-friendly: raised planters with a portable hose reel and a faux copper spray wand.
Budget Breakdown:
- Reclaimed boards or 2x6s: $120–$300
- Soil and compost: $100–$280
- Copper gooseneck or stylish hose end: $70–$250
- Trellis hardware and jute netting: $30–$80
- Seeds and starts: $40–$120
Total Estimated Cost: $360 – $1,030
Best For: Food-forward gardeners who want easy crop rotation; sunny backyards with at least 6 hours of light.
Key Design Elements:
- Main materials: reclaimed wood, copper, jute
- Color palette: warm wood, verdant greens, marigold oranges, tomato reds
- Lighting strategy: plan beds east–west so plants share light evenly; low-angle afternoon for photos
- Furniture silhouettes: simple bench at the end of the grid for coffee and seed sorting
- Texture layers: knotted jute, matte soil, glossy tomatoes, brushed copper
- Accent details: slate plant markers, woven baskets, clay ollas
How To Recreate This Look:
- Build rectangular frames and cross-divide into squares with thinner battens.
- Fill with soil/compost; mark crop families to rotate seasonally.
- Install a copper spigot on a sturdy post; run a hose discreetly along a path.
- Trellis vining crops on jute netting; border with pest-deterring marigolds and basil.
- Keep a slim bench nearby and a basket ready for quick harvests.
Why This Looks Expensive: Copper details plus reclaimed wood read heirloom and intentional. The grid creates rhythm—the difference between a yard and a designed potager.
The Most Common Mistake: Overcrowding. Plants need airflow; give tomatoes and beans legit space so the grid doesn’t become a tangle.
Pro Styling Tip: After watering, brush soil crumbs off the wood with your hand—clean lines shoot beautifully.
Did You Know? Basil and marigolds can reduce pest pressure on tomatoes and peppers. Companion planting isn’t just folklore; it also looks gorgeous in a grid.
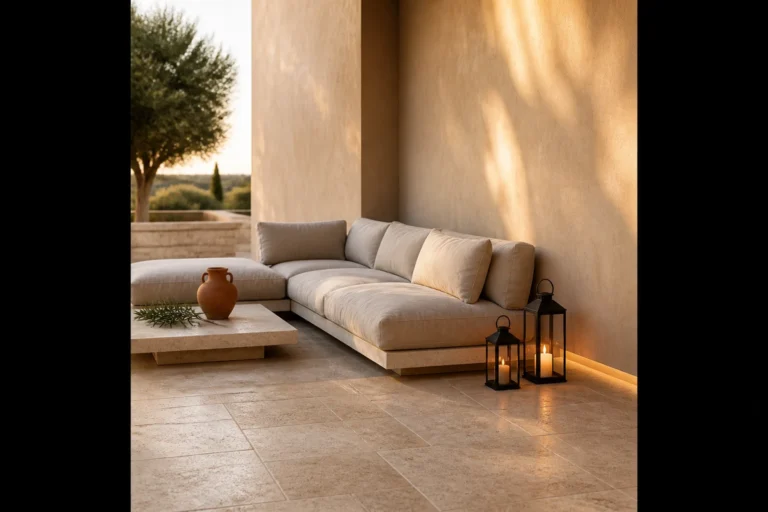
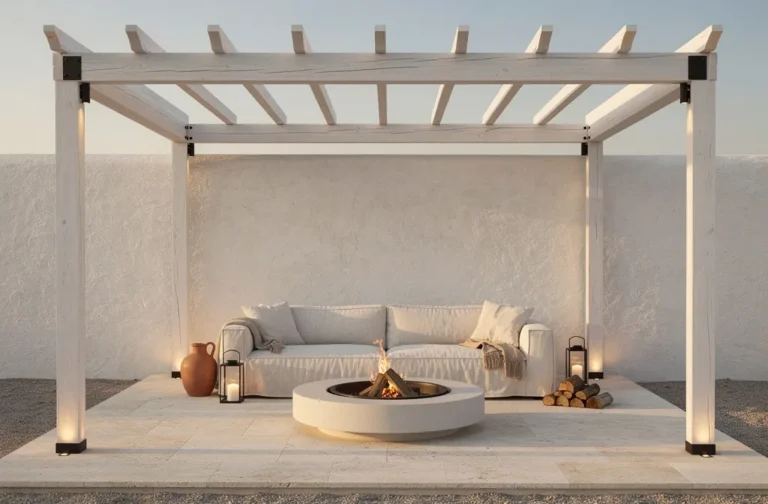
8. Pale Limestone Seating Nook With Soft Twilight Uplighting and a Curved Concrete Fire Bowl
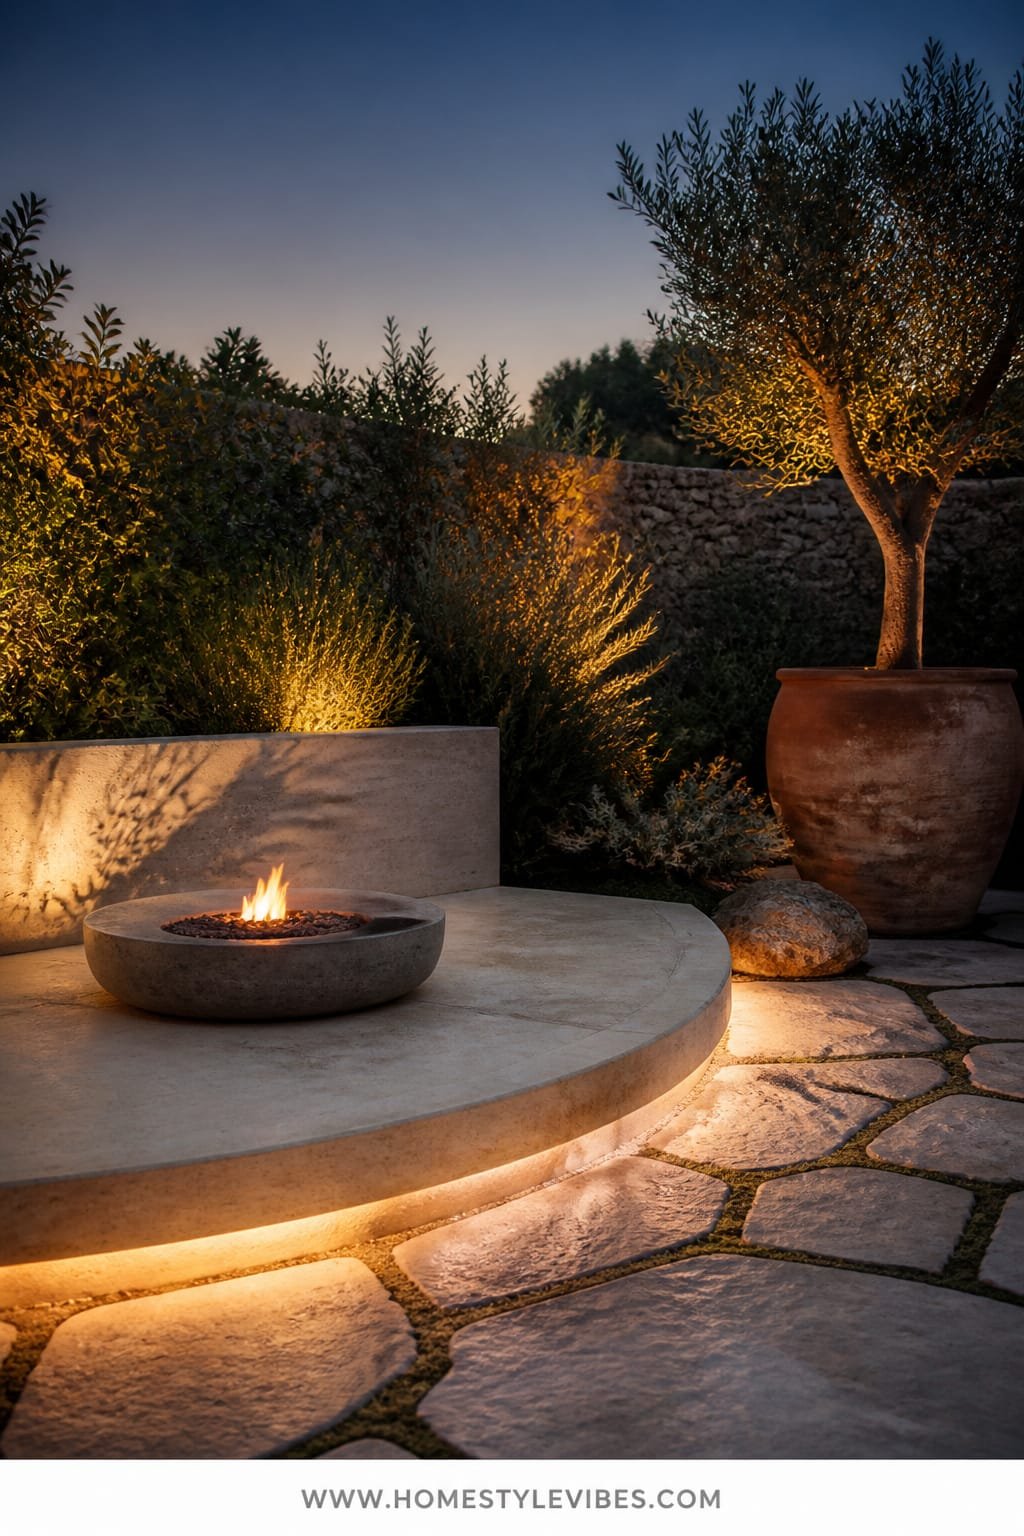
Even the prettiest gardens can feel unusable after dark. You want to sit among the blooms, but it’s pitch black or blindingly floodlit. A pale limestone seating pad paired with low, soft uplighting and a curved concrete fire bowl turns evenings into your favorite time outside. Think modern Mediterranean lounge with cozy romance.
Why it works: limestone reflects twilight softly, creating a halo around seat edges, while targeted up-lights graze plant leaves and cast theatrical shadows. The curved fire bowl adds a sculptural focal point and subtle warmth without roaring flames. This setup photographs with delicious contrast—cream stone, inky sky, candle-flame highlights on leaves.
Variations: Budget-friendly uses pale pavers and a tabletop fire feature. Small-space? A 6-foot circle pad with two low sling chairs. Renter-friendly: interlocking patio tiles and a portable propane fire bowl with a handsome cover.
Budget Breakdown:
- Limestone or pale pavers: $300–$1,000
- Concrete fire bowl: $180–$700
- Low-voltage up-lights (2–4): $120–$300
- Two lounge chairs and cushions: $250–$900
- Planters with night-scented flowers (jasmine, nicotiana): $40–$120
Total Estimated Cost: $890 – $3,020
Best For: Night owls, hosts who love post-dinner hangs, and anyone craving a grown-up corner away from the daytime hustle.
Key Design Elements:
- Main materials: limestone, concrete, powder-coated metal
- Color palette: pale cream, charcoal, olive green, ember orange
- Lighting strategy: two up-lights per focal plant; keep beam narrow to avoid glare
- Furniture silhouettes: low lounge chairs with sweeping arms
- Texture layers: honed stone, smooth concrete, slubby cushions
- Accent details: match striker, wool throw, ceramic side stool
How To Recreate This Look:
- Define a circular or square pad with pavers; keep joints tight for a clean look.
- Center the fire bowl, then place chairs at a slight angle for conversational flow.
- Install low-voltage up-lights at the base of a shrub or small tree; hide the transformer.
- Add night-scented flowers in planters around the edge for perfume and softness.
- Stash a throw and matches in a weatherproof box so the space stays ready.
Why This Feels Designer: Layered light, restrained palette, and one sculptural focal point. You’re curating ambience, not blasting brightness.
One Thing To Avoid: Avoid cool 5000K bulbs. Use warm 2700–3000K so skin tones look candlelit, not clinical.
Pro Styling Tip: Shoot right after sunset—the “blue hour” makes limestone read luminous and foliage inkier for high-contrast drama.
If one idea resonates more than the others, that’s your starting point. You don’t need all eight. Pick the single move that solves your biggest annoyance, and let the rest evolve naturally over time.
Quick Tip: Keep a small “garden tray” ready: pruners, gloves, a soft brush, and plant ties. When tools are 10 steps away, you actually keep things neat.
Quick Checklist
- Choose one dominant material per zone (terracotta, cedar, corten, or limestone)
- Define pathways with gravel, shell, or brick borders
- Add one sculptural focal piece (bistro set, fountain, spigot, fire bowl)
- Set color temperature to warm (2700–3000K) for evening lighting
- Group planters in odd numbers with staggered heights
- Limit your palette to 3–4 flower colors per bed
- Use vertical elements (pergola, trellis, small tree) to frame scenes
- Hide clutter in a dedicated potting cabinet or bench
- Water or mist surfaces lightly before photographing
- Prioritize larger planters over many small ones
- Plan seating where the best light naturally falls
- Build edges first—structure makes everything else easier
Frequently Asked Questions
How much should I budget to make a noticeable difference in my garden this summer?
Set aside $400–$1,000 to tackle one strong idea: a gravel parterre, a potting bench zone, or a pair of corten planters with a lounge chair. One focused project feels complete and visually upgrades your entire yard.
I have a tiny patio. Which idea works best without crowding?
Go for the small-scale versions of the terracotta parterre (two beds and a slim bistro set) or the corten-and-rattan combo (two large planters plus one lounge). Keep pieces big and simple; tiny items make small spaces feel cluttered.
What’s the easiest lighting approach if I’m nervous about electrical work?
Use solar stakes and plug-in outdoor lanterns with warm bulbs. For targeted highlights, try solar up-lights on plants or features—no wiring stress, and you’ll still get beautiful evening ambience.
How do I keep these designs low maintenance during peak summer heat?
Install drip irrigation or soaker hoses under mulch, choose durable materials (corten, teak, stone), and group thirsty plants together. Schedule a 10-minute evening tidy—sweep gravel, deadhead a few blooms, coil hoses. It adds up fast.
I rent. What can I do that won’t leave a trace?
Use freestanding planters, portable benches, interlocking patio tiles, removable hooks for lights, and sand-set bricks for temporary edges. Everything lifts out when you move, and your deposit stays safe.
Conclusion
Pick one idea from this collection and start there. Maybe it’s a whitewashed pergola over crushed shell for breezy dinners, or a black potting cabinet that turns flower chaos into a cinematic vignette. You’re not chasing perfection; you’re setting a clear intention and letting summer fill in the rest.
The truth is, luxury outside isn’t about price tags—it’s texture, lighting, and restraint. Honest materials, warm bulbs, and a kept palette make a beautiful food and flower garden feel cohesive and serene. That’s the difference between “pretty plants” and a place you can’t wait to inhabit.
Lay one path, light one corner, choose one statement piece. By next weekend, you’ll be sipping something cold, listening to leaves rustle, and thinking, “Okay—this finally feels like us.” And it will. Seriously.
About the Author

Krisztina P.Rendes, Founder of Home Style Vibes
Founder of Home Style Vibes
Krisztina Puskásné Rendes created Home Style Vibes as a cozy-modern lifestyle space where homemaking meets inspiration. Her goal is to help women create beautiful, organized, and peaceful homes they truly love — without overwhelm. You’ll find here heart-driven content on home decor, cleaning tips, easy family recipes, organization and decluttering, DIY home projects, plants, and seasonal ideas — all designed to bring more calm, comfort, and style into everyday life.